

Free Crochet Hat Pattern – Phaseolus Slouch Hat
The Free Crochet Hat Pattern – Phaseolus Slouch Hat is copyrighted by I Need It Crochet. You may not copy, share, change, or sell the pattern itself. Also, you may not claim this pattern as your own. All pictures contained in this pattern fall under the copyright and may not be used.
Finished items made from the Free Crochet Hat Pattern – Phaseolus Slouch Hat belong to you, and you may do what you wish with them. If you choose to sell them on Etsy, I would very much appreciate it if you credited me as the pattern designer.


Or… Just scroll down to see it for free!
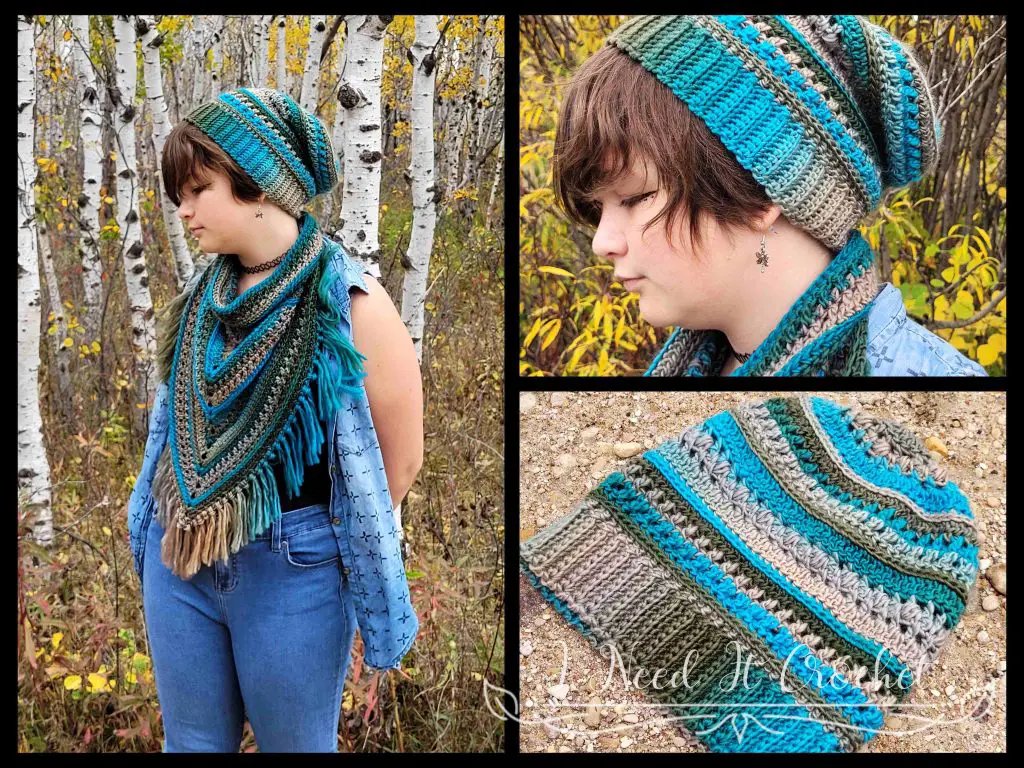
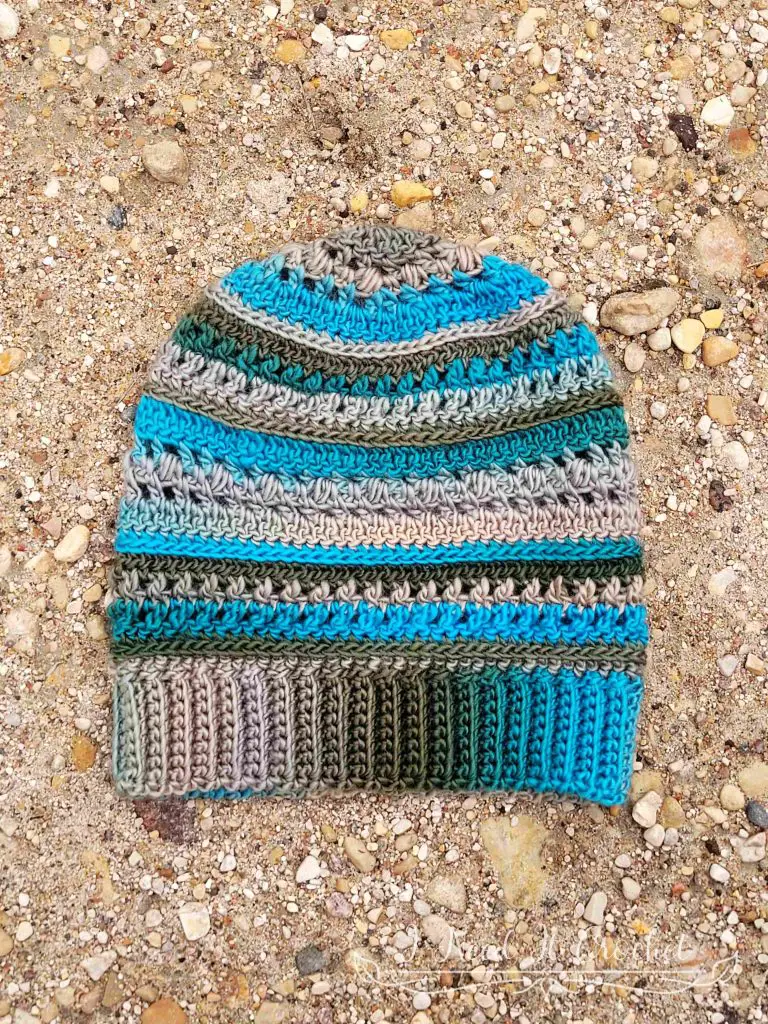
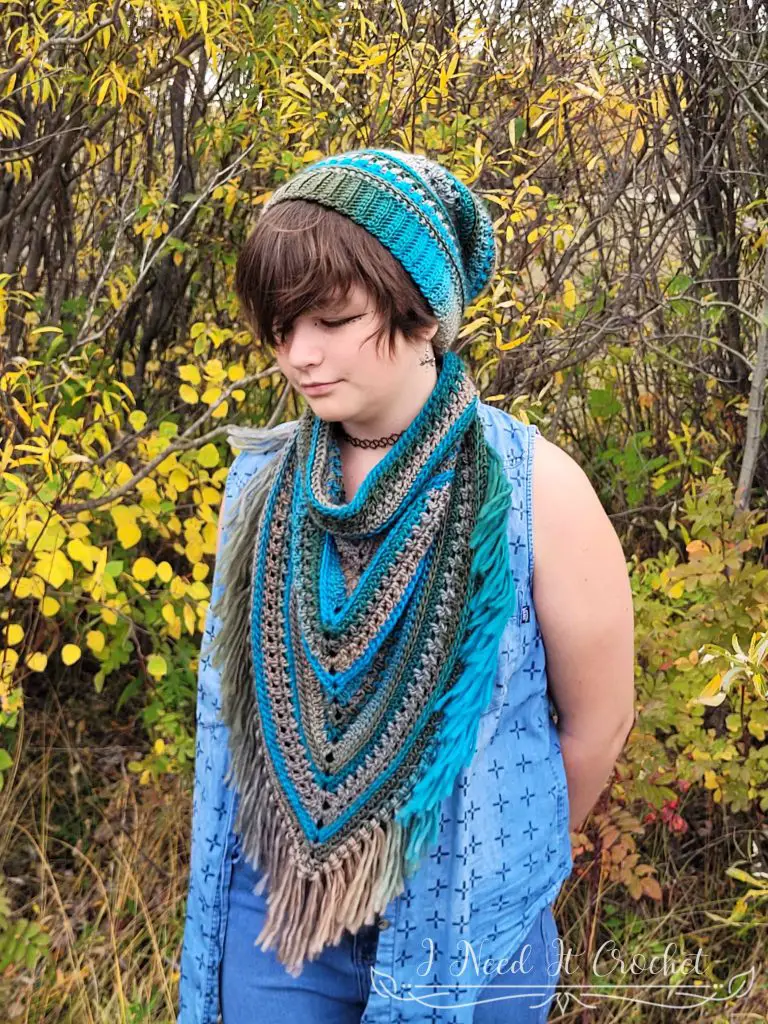
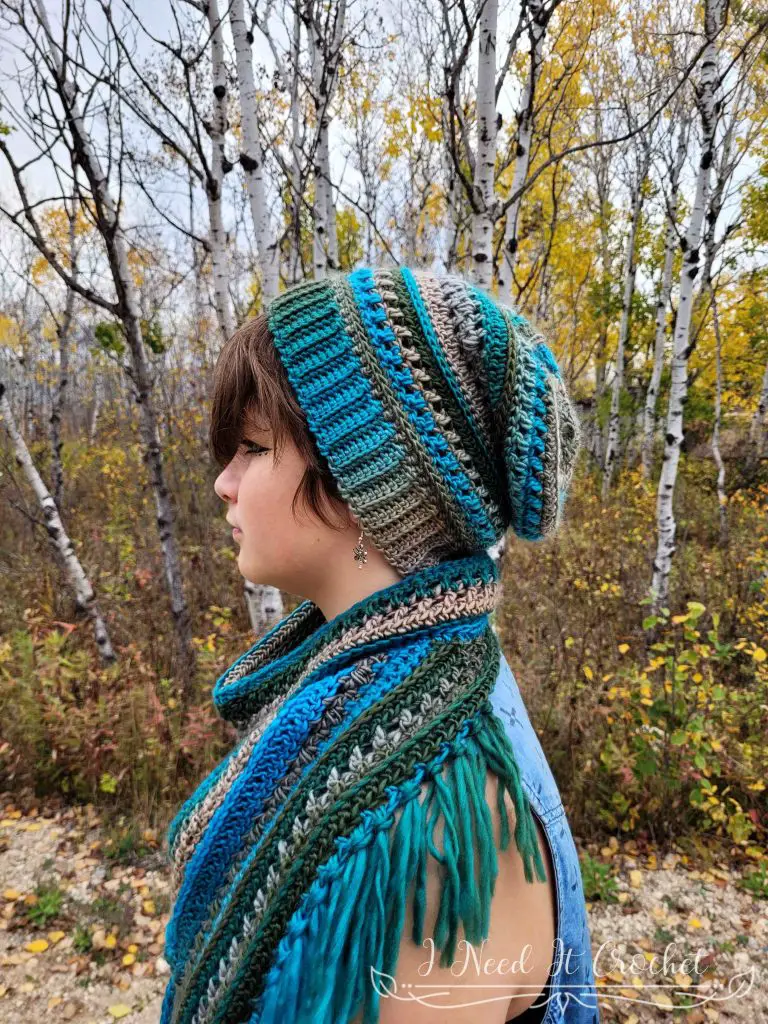
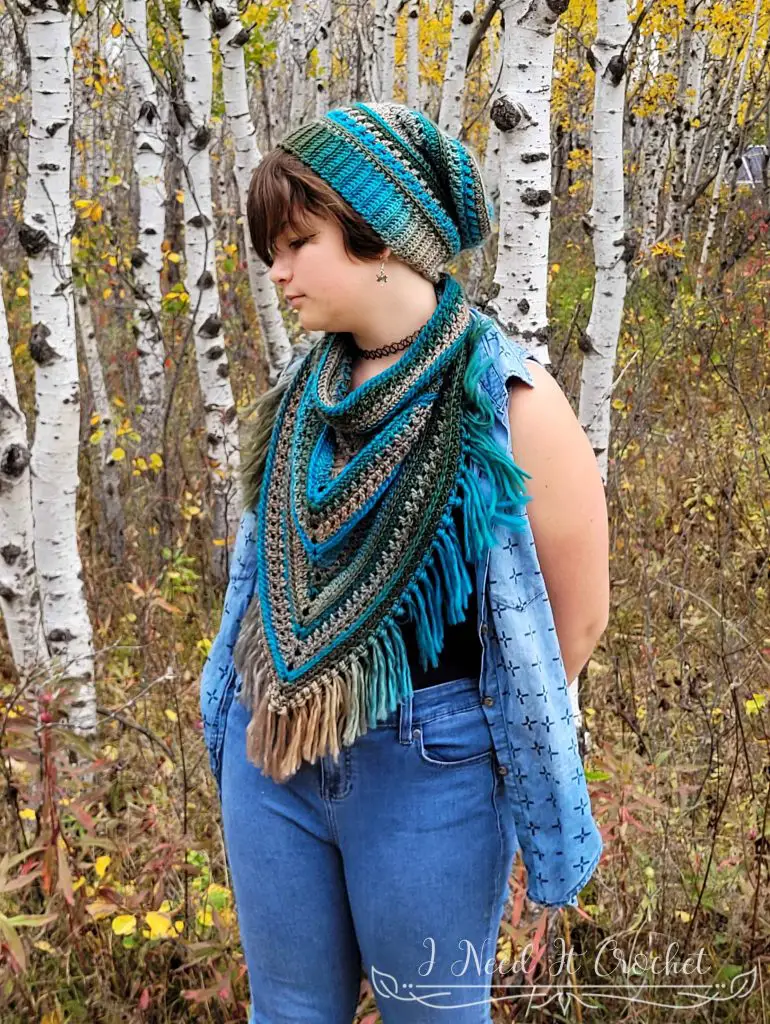
The Phaseolus Crochet Slouch Hat Pattern features a fun combination of Bean Stitches and criss-crossed double crochets. It pairs beautifully with the matching cowl but also makes for a beautiful accessory all on its own.
Free Crochet Hat Pattern – Phaseolus Slouch Hat
Finished Sizes:
Instructions given to fit size Small; changes for Medium & Large are in ()
S (M, L)
To Fit Head Circumference: 21” (22”, 23”)
Finished Circumference: 20” (21”, 22”)
Finished Length: 10”
Materials:
I used Loops & Threads Facets, which is 100% Acrylic, #4 Worsted weight yarn.
Any yarn of similar weight would work.
Approximately 190 (200, 210) yds.
5mm Hook
Stitch Markers
Yarn Needle
Scissors
Measuring Tape
Abbreviations:
Sk = Skip
Sp = Space
St = Stitch
Ss = Slip Stitch
Ch = Chain
Sc = Single Crochet
Hdc = Half Double Crochet
Dc = Double Crochet
Bn = Bean Stitch (See Notes and Tutorial Here)
3rd Lo = 3rd Loop Only (See Tutorial Here)
Blo = Back Loop Only
Alt Jn = Alternative Join (See Tutorial Here)
Gauge Swatch:
16 hdc x 10 rows = 4” H x 4” W
Notes:
Ch1 at the beginning of a row is never considered a stitch.
Ch1 between sts is always considered a stitch.
Ch3 at the beginning of a row is always considered a Dc.
A Bean Stitch counts as 2 stitches.
Free Crochet Hat Pattern – Phaseolus Slouch Hat
Instructions
This hat is made by working in the round from the top down. We will join to the first stitch and turn at the end of each round.
With 5mm hook (or the hook used to obtain gauge)
Crown
Form a magic ring.
- (RS) Ch1. Work 10hdc into the ring. Pull tightly to close. Ss (or alt jn) to join to 1st st. Turn. – 10 st
- (WS) Working in 3rd lo: (Ch3, dc) in 1st st (counts as 2dc in 1st st). 2dc in each st around. Ss to join to 1st st. Turn. – 20 st
- Ch1, hdc in 1st st. Ch1, hdc in next st. [Ch1, sk1 st, hdc in next st. *Ch1, hdc in next st.** Repeat from * to ** once (see Figure 1). ] Repeat from [ to ] until 2 sts left. Ch1, sk1 st, hdc in next st. Ch1, ss to join to 1st st. Turn. – 30 st
- Ch1, sk 1st st. *Sc in next ch1 sp. Ch1, sk1 st, bn in next ch1 sp. Sk1 st, (sc, ch1, bn) in next ch1 sp. Sk1 st (see Figure 2).** Repeat from * to ** around (ending by skipping the ch1 & 1st st skipped at the beginning). Ss to join to 1st st. Turn. – 40 st
- Ch1, sk 1st st. [*Hdc in next ch1 sp. Ch1, sk1 st.** Repeat from * to ** 2 more times. (Hdc, ch1, hdc) in next ch1 sp. Ch1, sk1 st (see Figure 3).] Repeat from [ to ] around. Ss to join to 1st st. Turn. – 50 st
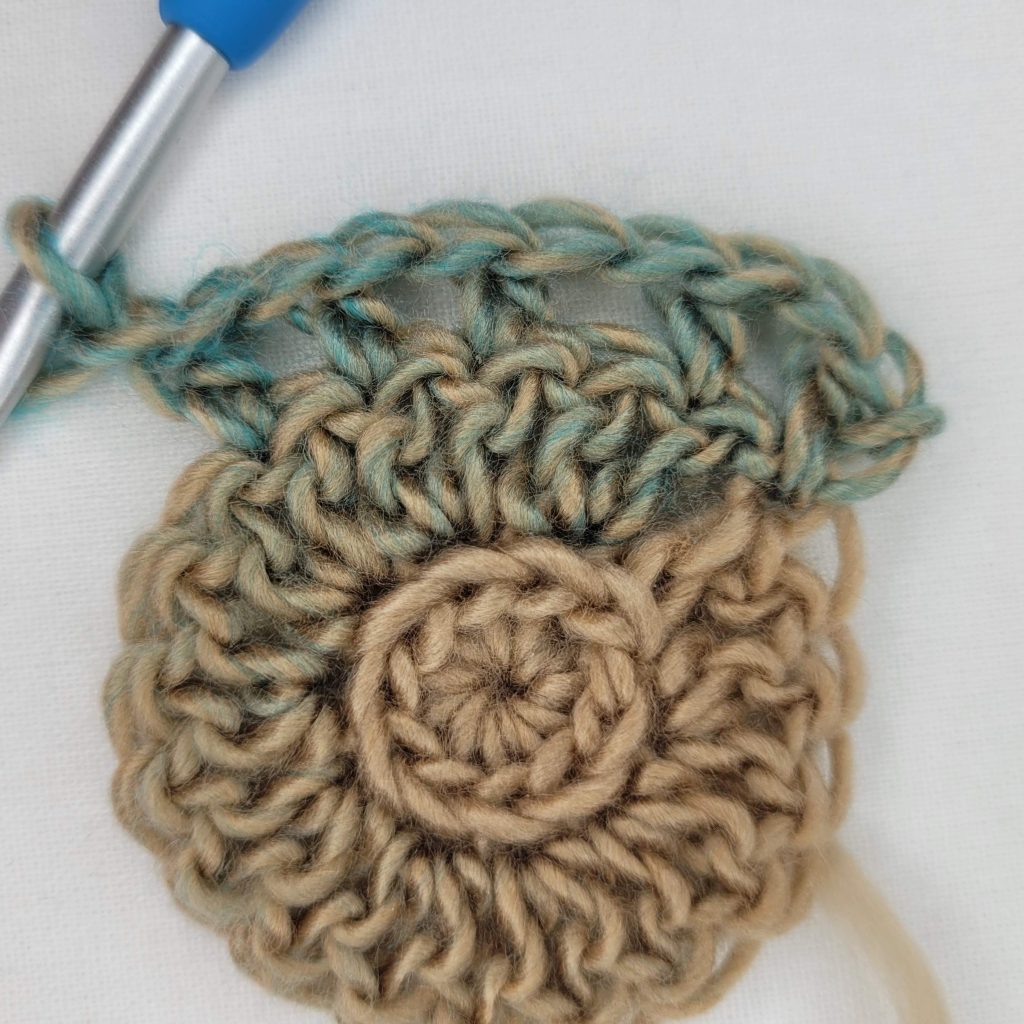
Figure 1
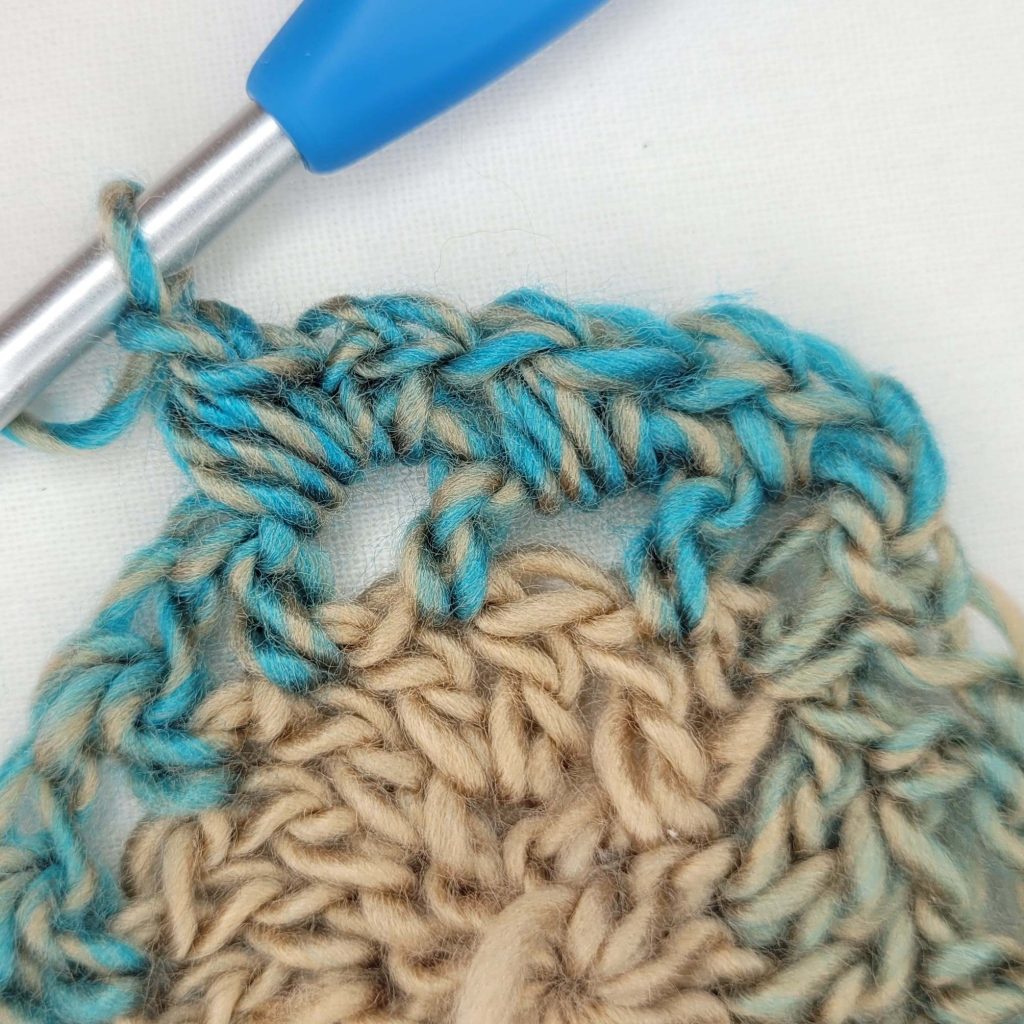
Figure 2

Figure 3
- Ch3. Dc in next 3 st/ch sp. 2dc in next st. *Dc in next 4 st/chsp. 2dc in next st/ch sp.** Repeat from * to ** around. Ss to join to 1st st. Turn. – 60 st
- Ch1, hdc in 1st st. Hdc in next 4 sts. 2hdc in next st. *Hdc in next 5 sts. 2hdc in next st.** Repeat from * to * around. Ss (or alt jn) to join to 1st st. Turn. – 70 st
- Working in 3rd lo: Ch1, hdc in 1st st. Hdc in next 5 sts. 2hdc in next st. *Hdc in next 6 sts. 2hdc in next st.** Repeat from * to ** around. Ss to join to 1st st. Turn. – 80 st
- Work this round according to your size:
Size Small: Ch3 (see Figure 4). Working behind st just made, dc in previous st (see Figure 5). *Sk1 st, dc in next st. Working behind st just made, dc in skipped st.** Repeat from * to ** around. Ss to join to 1st st (see Figure 6). Turn. – 80 (n/a, n/a) st
Sizes Medium & Large: Ch3 (see Figure 4). Working behind st just made, dc in previous st (see Figure 5). *Sk1 st, dc in next st. Working behind st just made, dc in skipped st.** Repeat from * to ** 17 more times. Sk1 st, dc in next st. Working behind st just made, dc in skipped st. Add 2 more dc to previous st (see Figure 7). Repeat from * to ** 19 more times. Sk1 st, dc in next st. Working behind st just made, dc in skipped st. Add 2 more dc to previous st. Ss to join to 1st st (see Figure 6). Turn. – n/a (84, 84) st
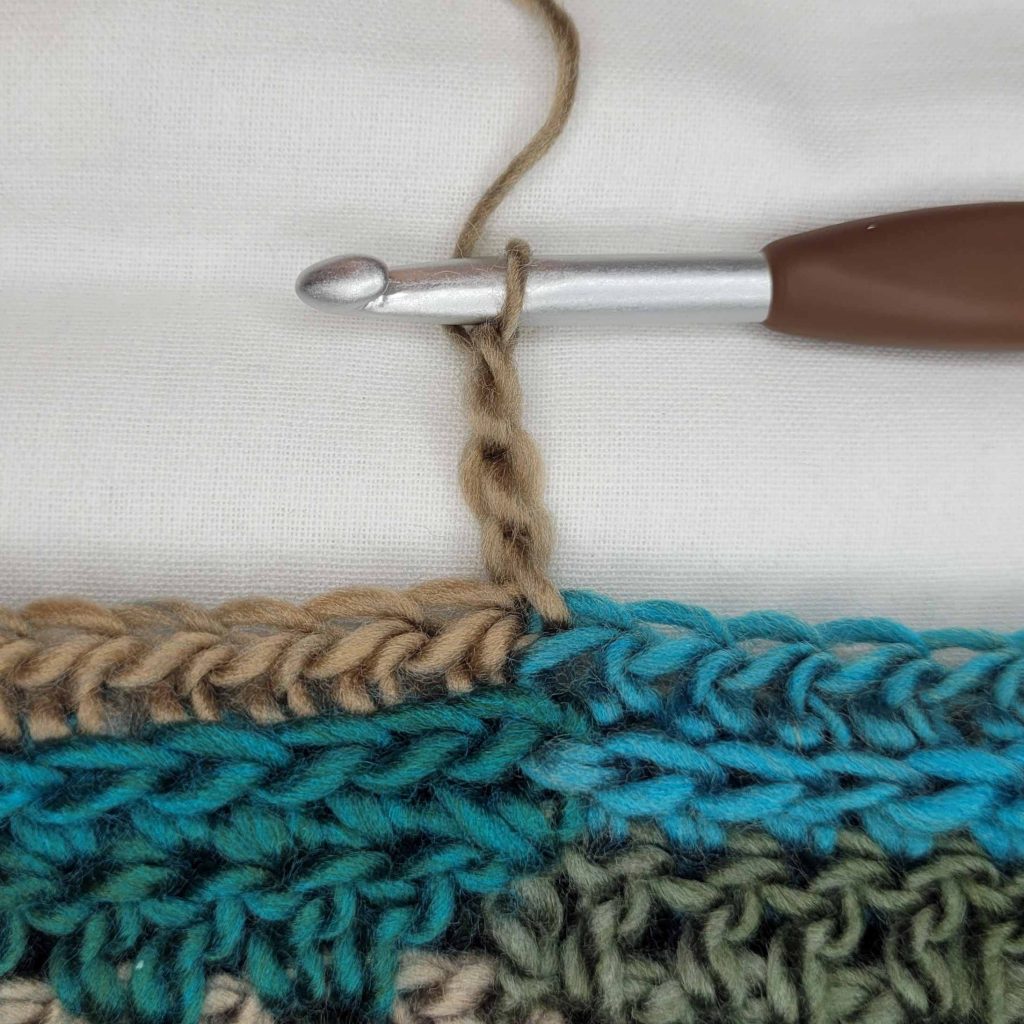
Figure 4
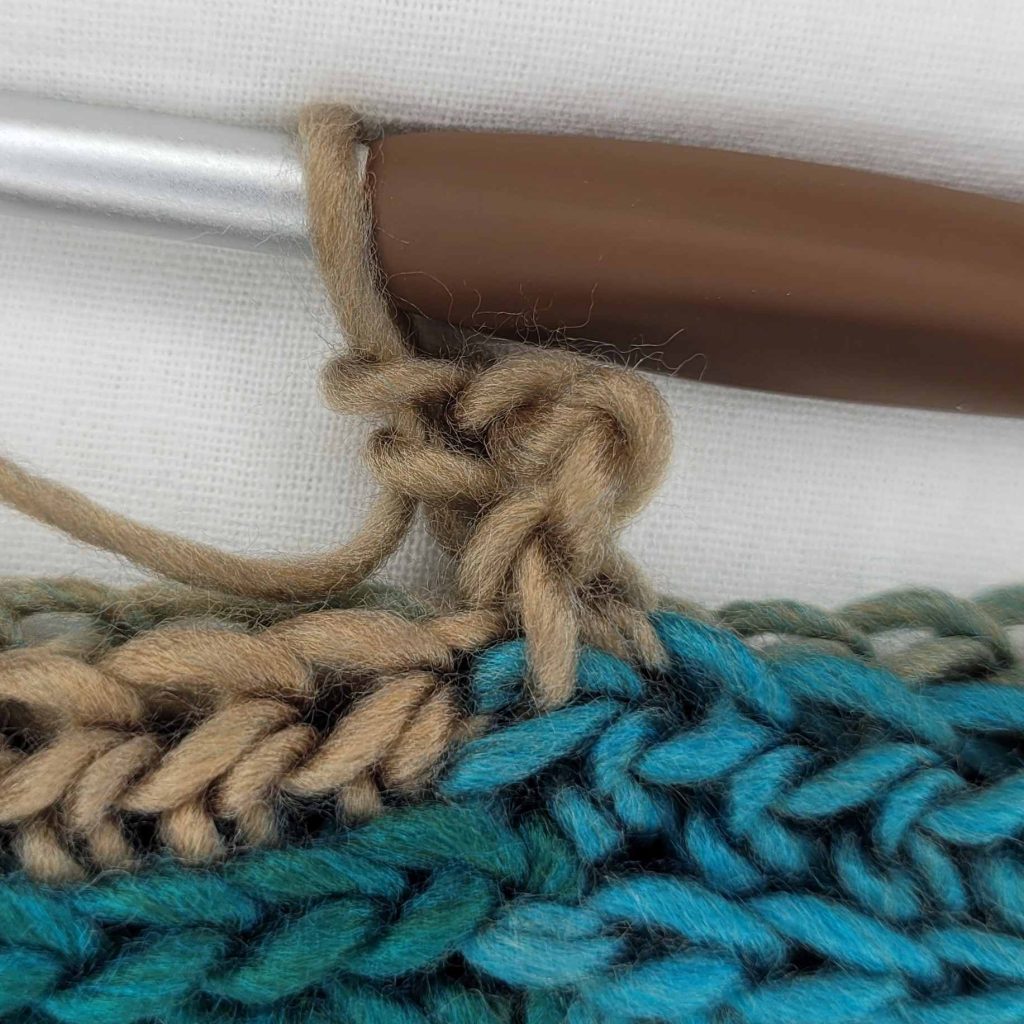
Figure 5
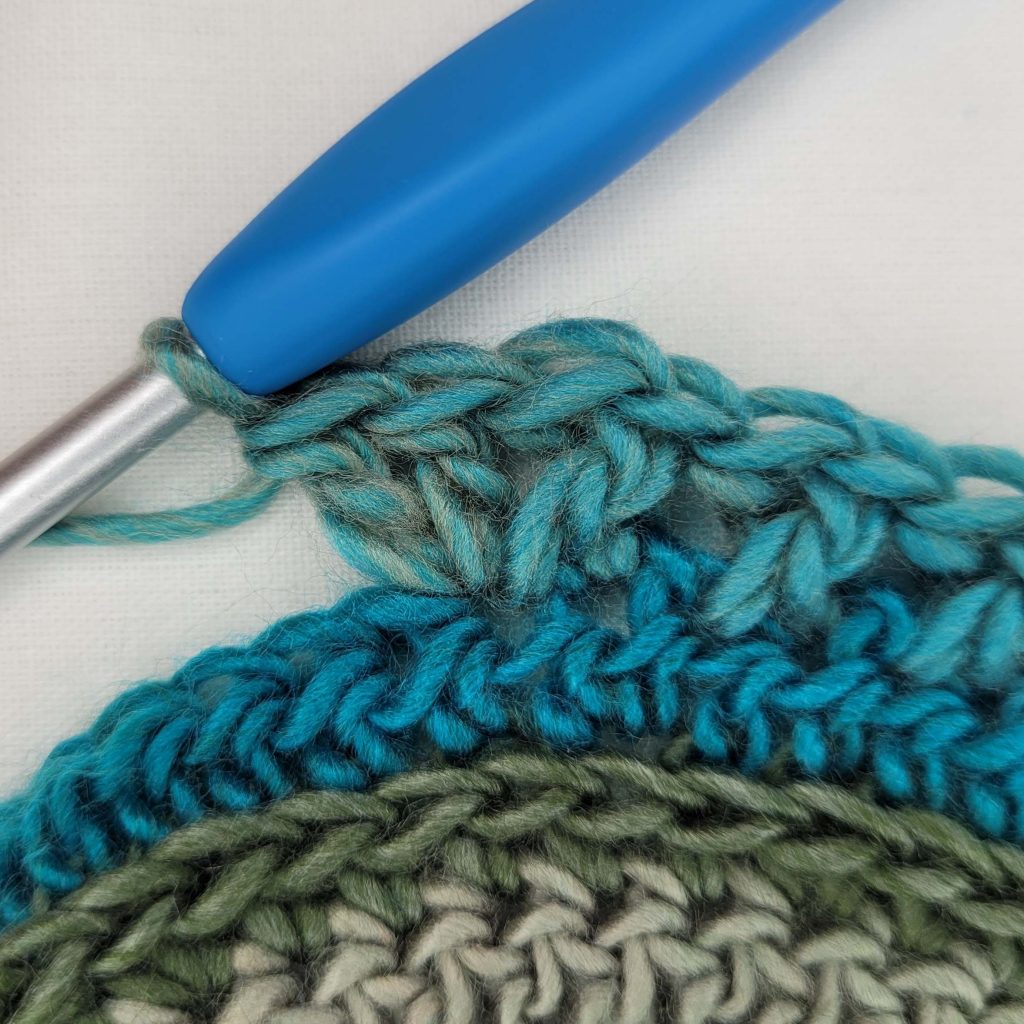
Figure 7
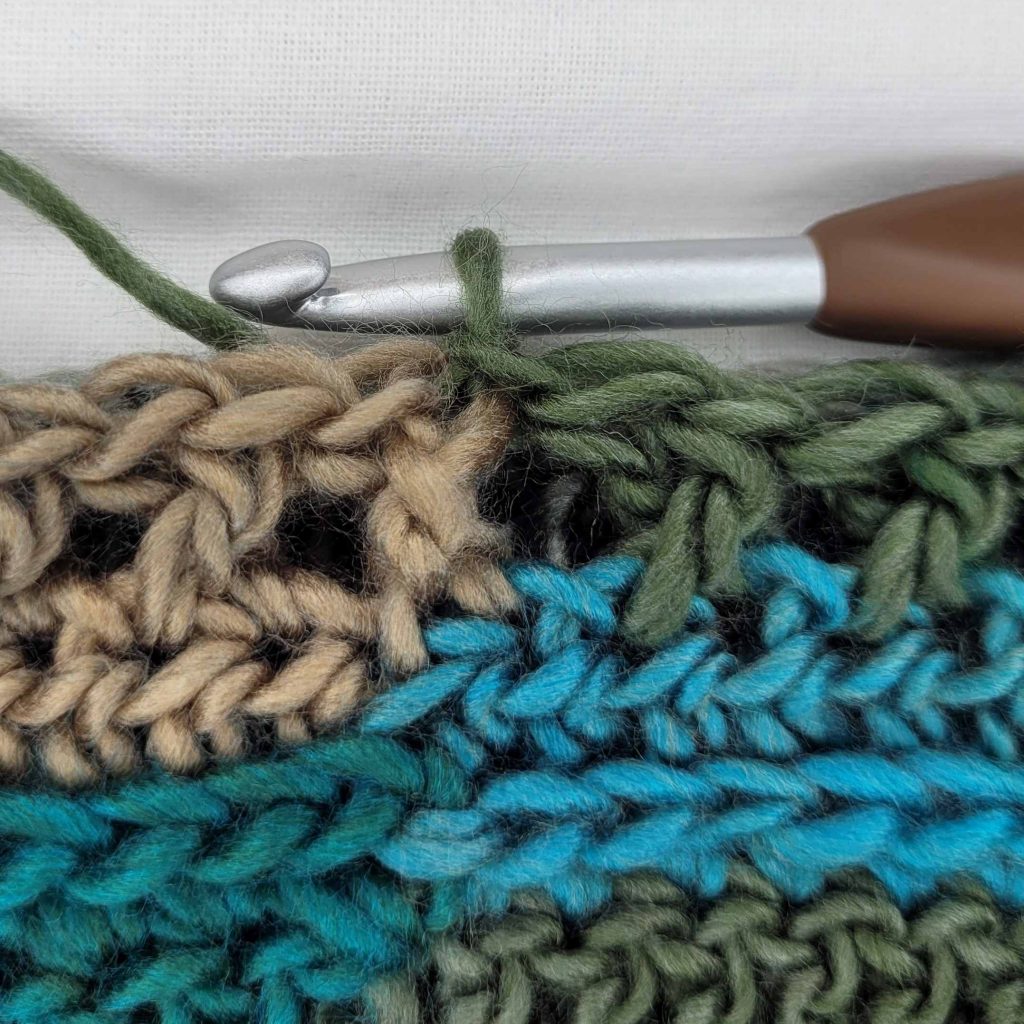
Figure 6
- Work this round according to your size:
Sizes Small & Medium: Ch3. Working behind st just made, dc in previous st. *Sk1 st, dc in next st. Working behind st just made, dc in skipped st.** Repeat from * to ** around. Ss to join to 1st st. Turn. – 80 (84, n/a) st
Size Large: Ch3. Working behind st just made, dc in previous st. *Sk1 st, dc in next st. Working behind st just made, dc in skipped st.** Repeat from * to ** 18 more times. Sk1 st, dc in next st. Working behind st just made, dc in skipped st. Add 2 more dc to previous st. Repeat from * to ** 20 more times. Sk1 st, dc in next st. Working behind st just made, dc in skipped st. Add 2 more dc to previous st. Ss to join to 1st st. Turn. – n/a (n/a, 88) st
Free Crochet Hat Pattern – Phaseolus Crochet Slouch Hat Pattern
Hat Body
- Ch1, hdc in 1st st. Hdc in next st and each st around. Ss (or alt jn) to join to 1st st. Turn. – 80 (84, 88) st
- Working in 3rd lo: Ch3. Dc in next st and each st around. Ss to join to 1st st. Turn. – 80 (84, 88) st
- Ch1, hdc in 1st st. *Ch1, sk1 st, hdc in next st.** Repeat from * to ** until 1 st left. Ch1, ss to join to 1st st. Turn. – 80 (84, 88) st
- Ch1, sk 1st st. *Sc in next ch1 sp. Ch1, sk1 st, bn in next ch1 sp. Sk1 st.** Repeat from * to ** around. Ss to join to 1st st. Turn. – 80 (84, 88) st
- Ch1, sk 1st st. Hdc in next ch1 sp. *Ch1, sk1 st, hdc in next ch1 sp.** Repeat from * to ** until 1 st left. Ch1, sk last st, ss to join to 1st st. Turn. – 80 (84, 88) st
- Ch3. Dc in next ch sp and each st/ch sp around. Ss to join to 1st st. Turn. – 80 (84, 88) st
- Ch1, hdc in 1st st. Hdc in next st and each st around. Ss (or alt jn) to join to 1st st. Turn. – 80 (84, 88) st
- Working in 3rd lo: Ch1, hdc in 1st st. Hdc in next st and each st around. Ss to join to 1st st. Turn. – 80 (84, 88) st
- Ch3. Working behind st just made, dc in previous st. *Sk1 st, dc in next st. Working behind st just made, dc in skipped st.** Repeat from * to ** around. Ss to join to 1st st. Turn. – 80 (84, 88) st
- Repeat round 19.
- Ch1, hdc in 1st st. Hdc in next st and each st around. Ss (or alt jn) to join to 1st st. Turn. – 80 (84, 88) st
- Working in 3rd lo: Ch1, sc in 1st st. Sc in next st and each st around. Ss to join to 1st st. Turn. – 80 (84, 88) st
Hat Band
To make the band, we will be working short rows off of the last round worked on the body of the hat. Turn your work so that the right side is facing you.
- Ch10 (see Figure 8). Sc in 2nd ch from hook and each ch across (see Figure 9). Ss into same st you chained from on hat body. Ss into next unworked st (see Figure 10). Turn. – 9 st
- Sk2 ss. Sc in BLO of 1st st 8 sts. Sc in both loops of last st (see Figure 11). Turn. – 9 st
- Ch1. Sc in 1st st. Sc in BLO of next 8 sts (see Figure 12). Ss into next 2 unworked sts on hat body (see Figure 13). Turn. – 9 st
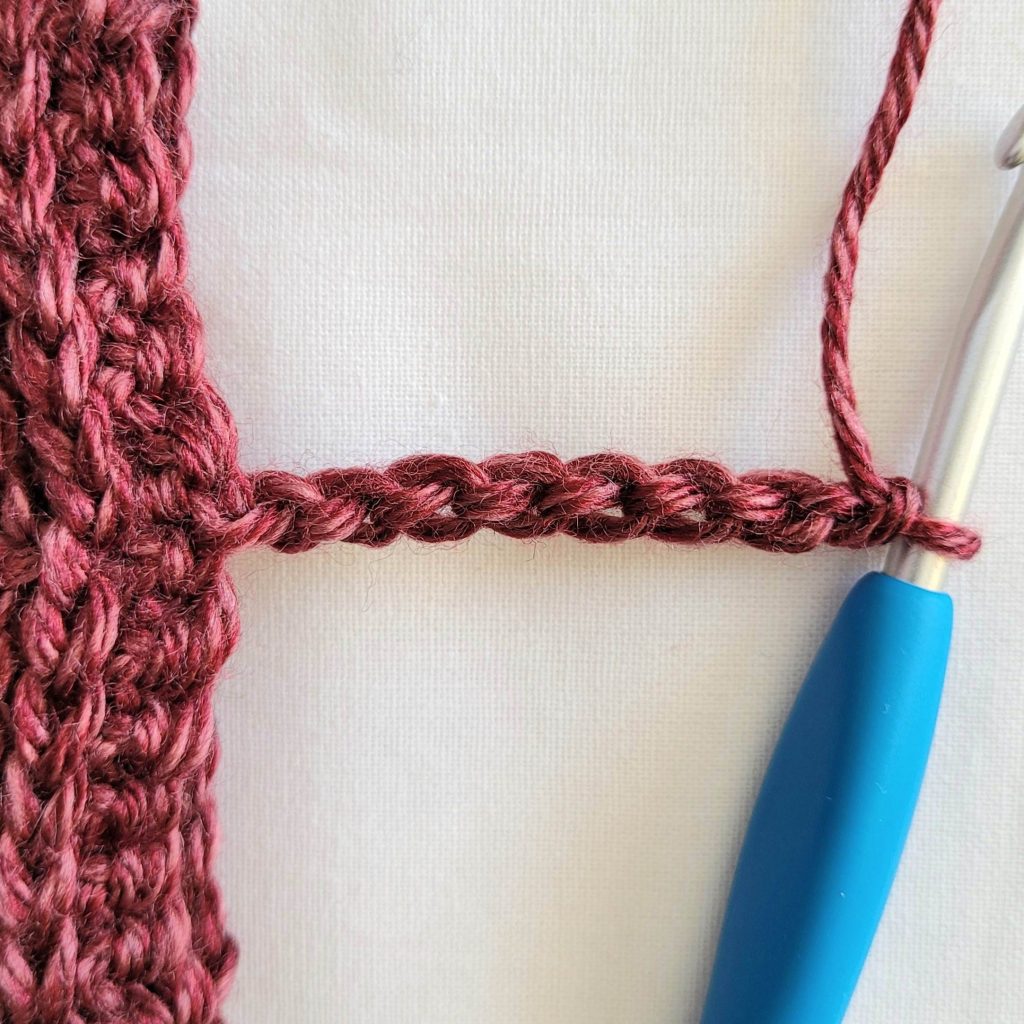
Figure 8
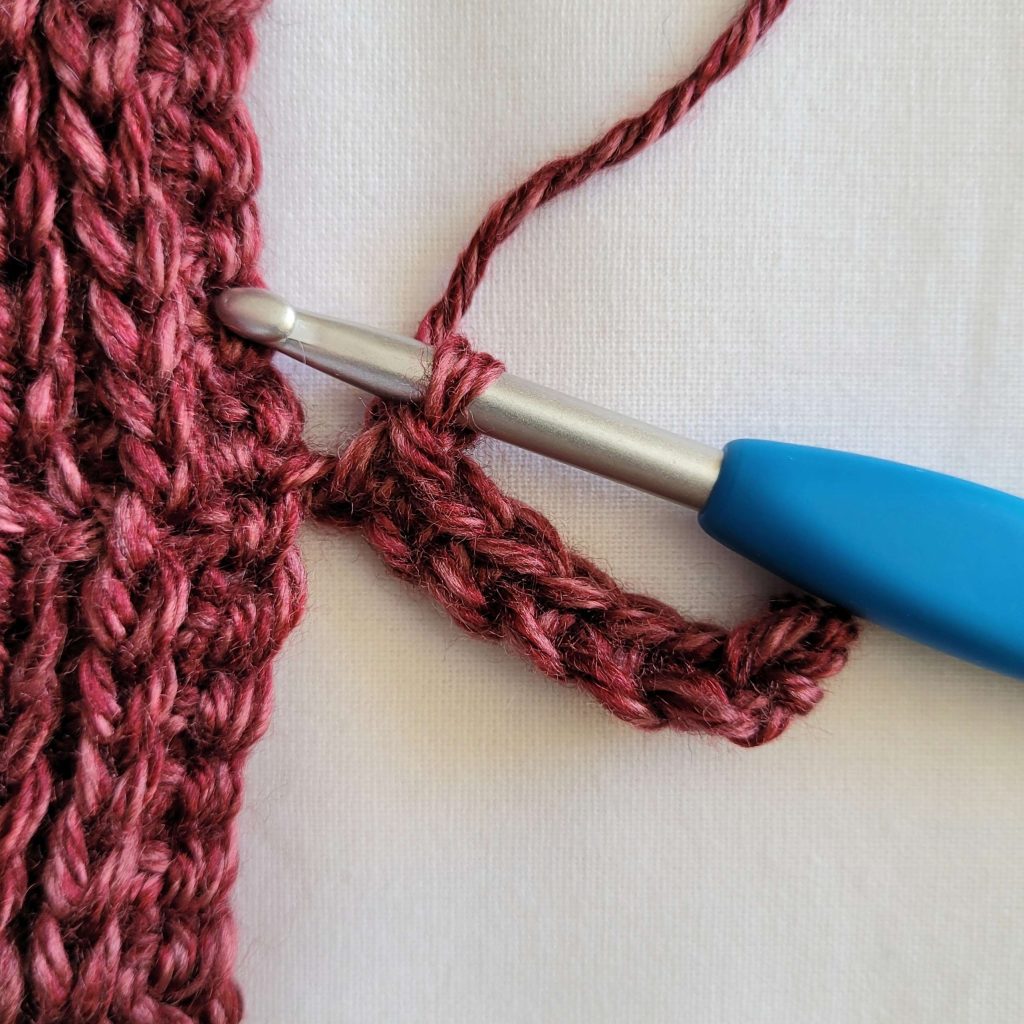
Figure 9
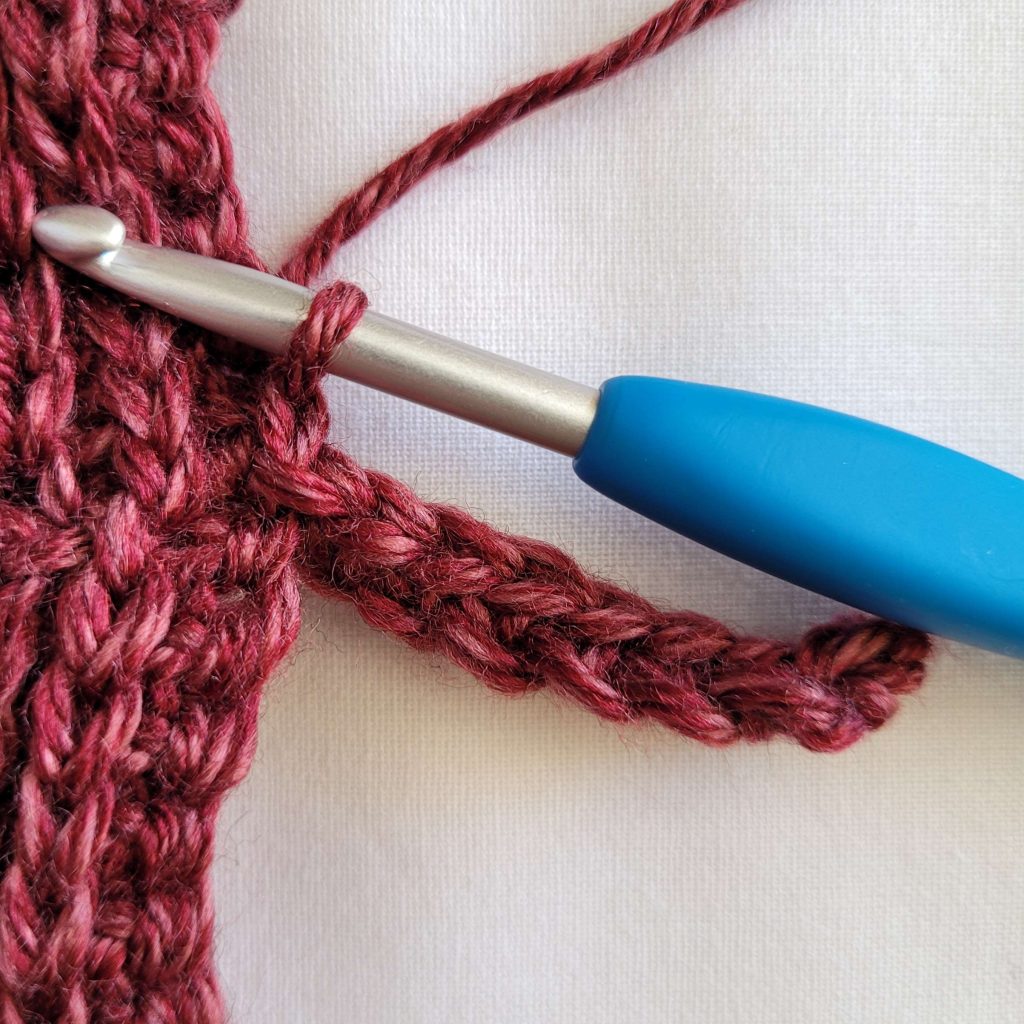
Figure 10
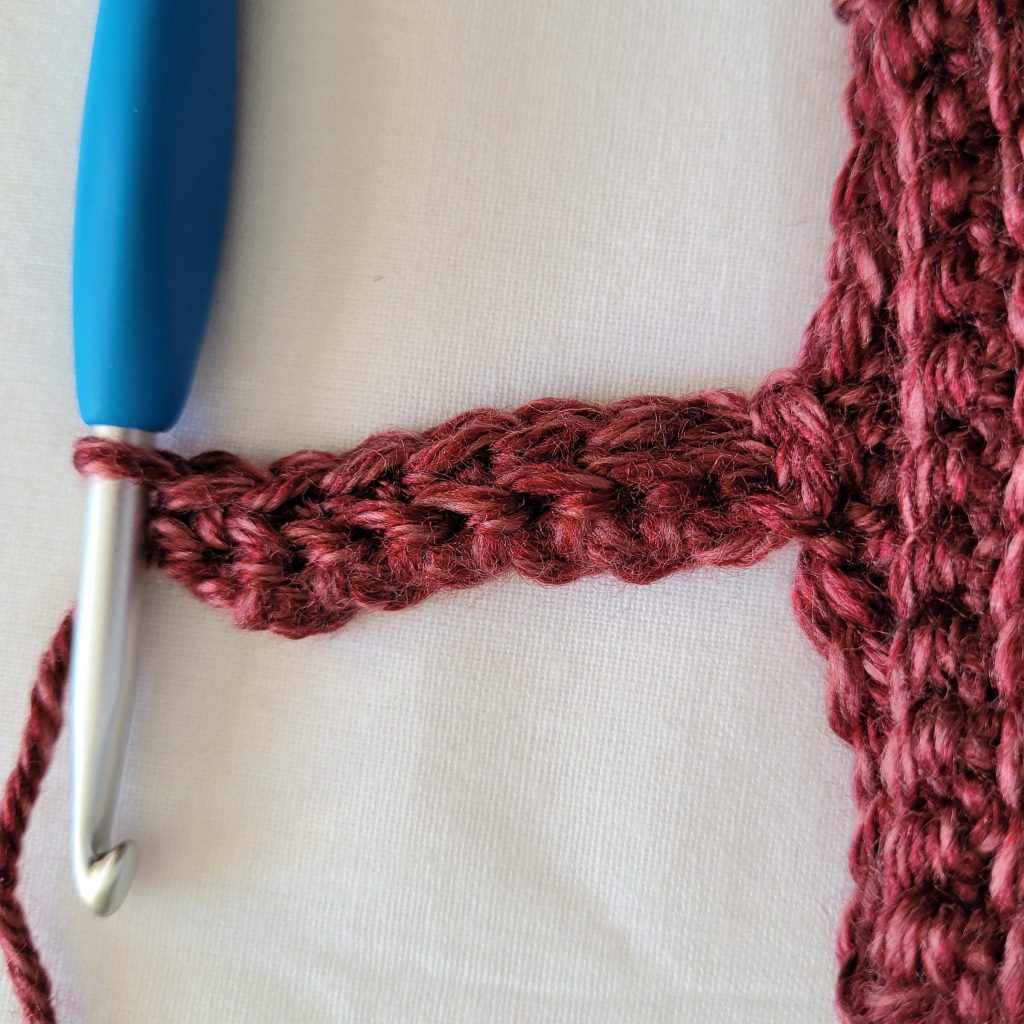
Figure 11
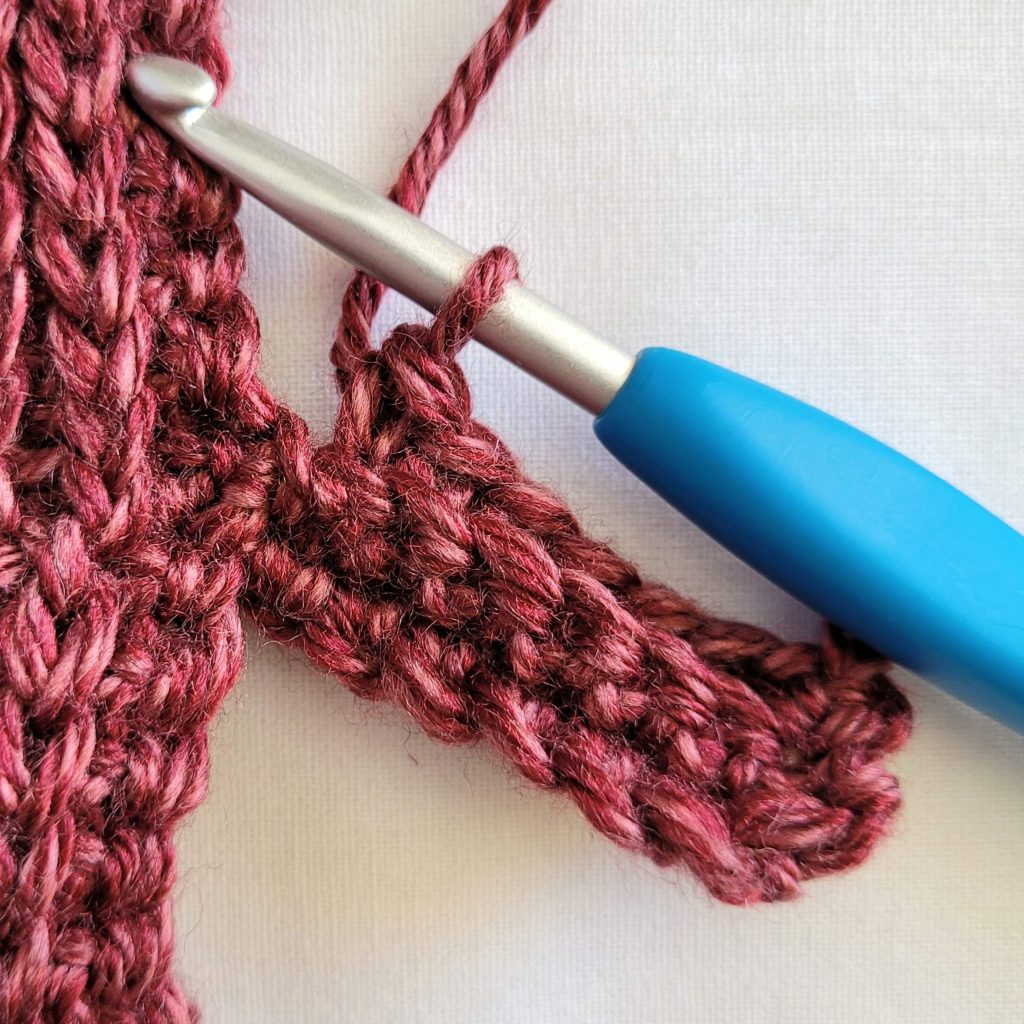
Figure 12
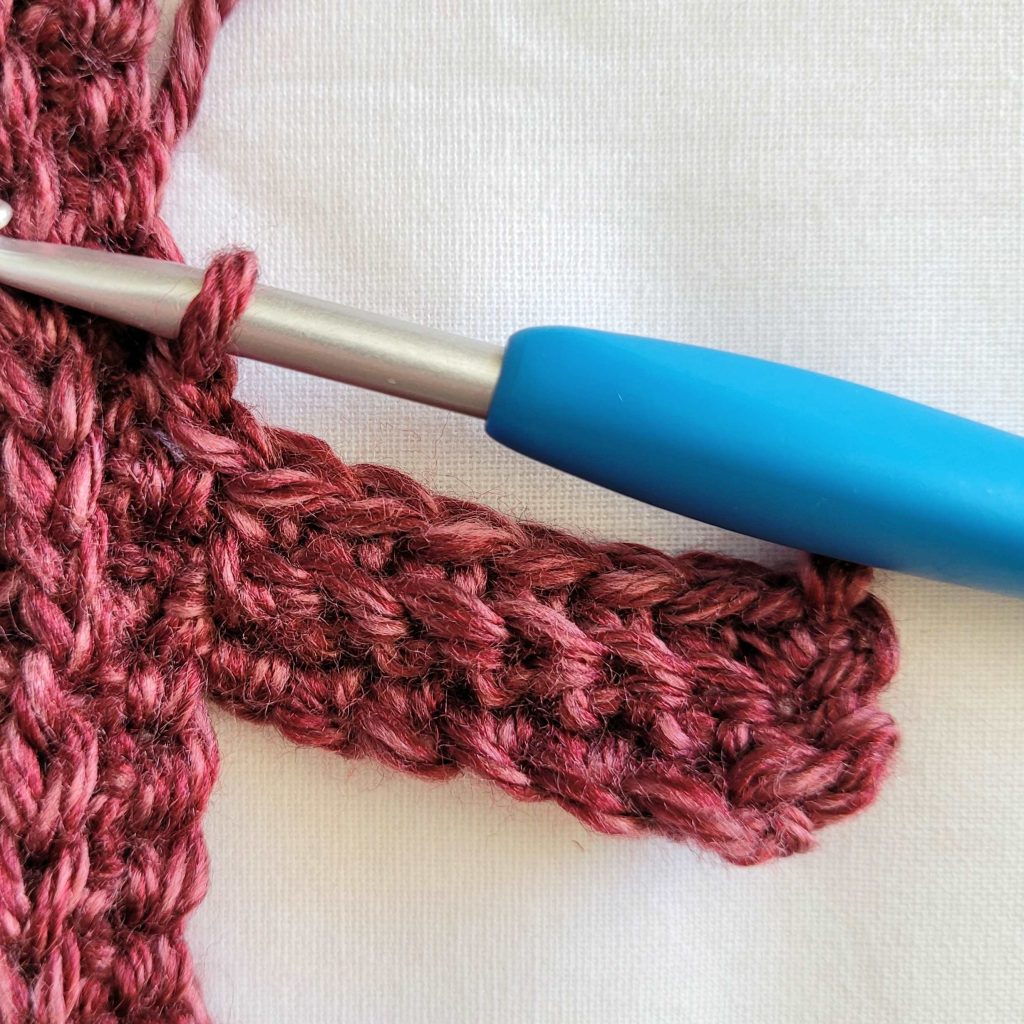
Figure 13
Repeat rows 2 & 3 all the way around the hat body. You will end with a row 2 repeat. Turn your work so the wrong side is facing you. Ss the ends of the hat band closed , working in the bottom bar of the 1st row and the BLO of the last row. Note: If you find that your hat brim is on the loose side, try decreasing your hook size.
Weave in your ends, and you’re done!
I hope you love your new crochet slouch hat, and I look forward to seeing all of your beautiful pictures on Ravelry!
If you’d like to know when I post new patterns and tutorials like the Free Crochet Hat Pattern – Phaseolus Slouch Hat, head on over to my Facebook and Instagram and give me a like and a follow!
If you enjoyed The Free Crochet Hat Pattern – Phaseolus Slouch Hat, you may want to check out my other designs!
Free Crochet Hat Pattern – Phaseolus Crochet Slouch Hat Pattern
And until next time… Happy Hooking! 😉
I need help with your pattern…
Row 14 has a repeated sequence of *sc in next ch1 sp, Ch1, sk1 st, bn in next ch1 sp, sk1 st**
This consists of 3 stitches (sc, ch1 & bn)
Then Row 15 has a repeated sequence of *Ch1, sk1 st, hdc in next ch1 sp**
This consists of 2 stitches (ch1 & hdc)
Looking at the Row 15 in the hat photograph, it appears that the hdc is being placed in ch1 st, then the sc is being skipped and then the next hdc is being placed between the sc and the bean stitch where there isn’t a ch1 sp.
Should there be a ch1 sp after each bean st in row 14?
Thanks for any help you can provide.
Hi Lisa,
Each bean stitch is finished with a ch1. So there already is a ch1 after each bean stitch. However, it can be difficult to see where that ch1 space is, so it is totally acceptable to place your hdc in the chain itself. Hope that helps!