
The Spring Blooms Bandana Cowl – Free Crochet Pattern is copyrighted by I Need It Crochet. You may not copy, share, change, or sell the pattern itself. Also, you may not claim this pattern as your own. All pictures contained in this pattern fall under the copyright and may not be used.
Finished items made from the Spring Blooms Bandana Cowl – Free Crochet Pattern belong to you, and you may do what you wish with them. If you choose to sell them on Etsy, I would very much appreciate it if you credited me as the pattern designer.

Or… Just scroll down to see it for free!
It’s spring once again. To me, spring is a symbol of resilience. Winter can be harsh, mean, and sometimes, downright nasty. But no matter what winter has thrown at us, I always see life in the spring.
Often that first sign of life is the tulip. The ground will still be cold, nearly frozen. There will still be piles of snow in the garden, but the tulips will still make their debut. I admire their resilience, which is why I created this pattern for them. Perhaps one day, I will be as resilient as the tulip.
Finished Size:
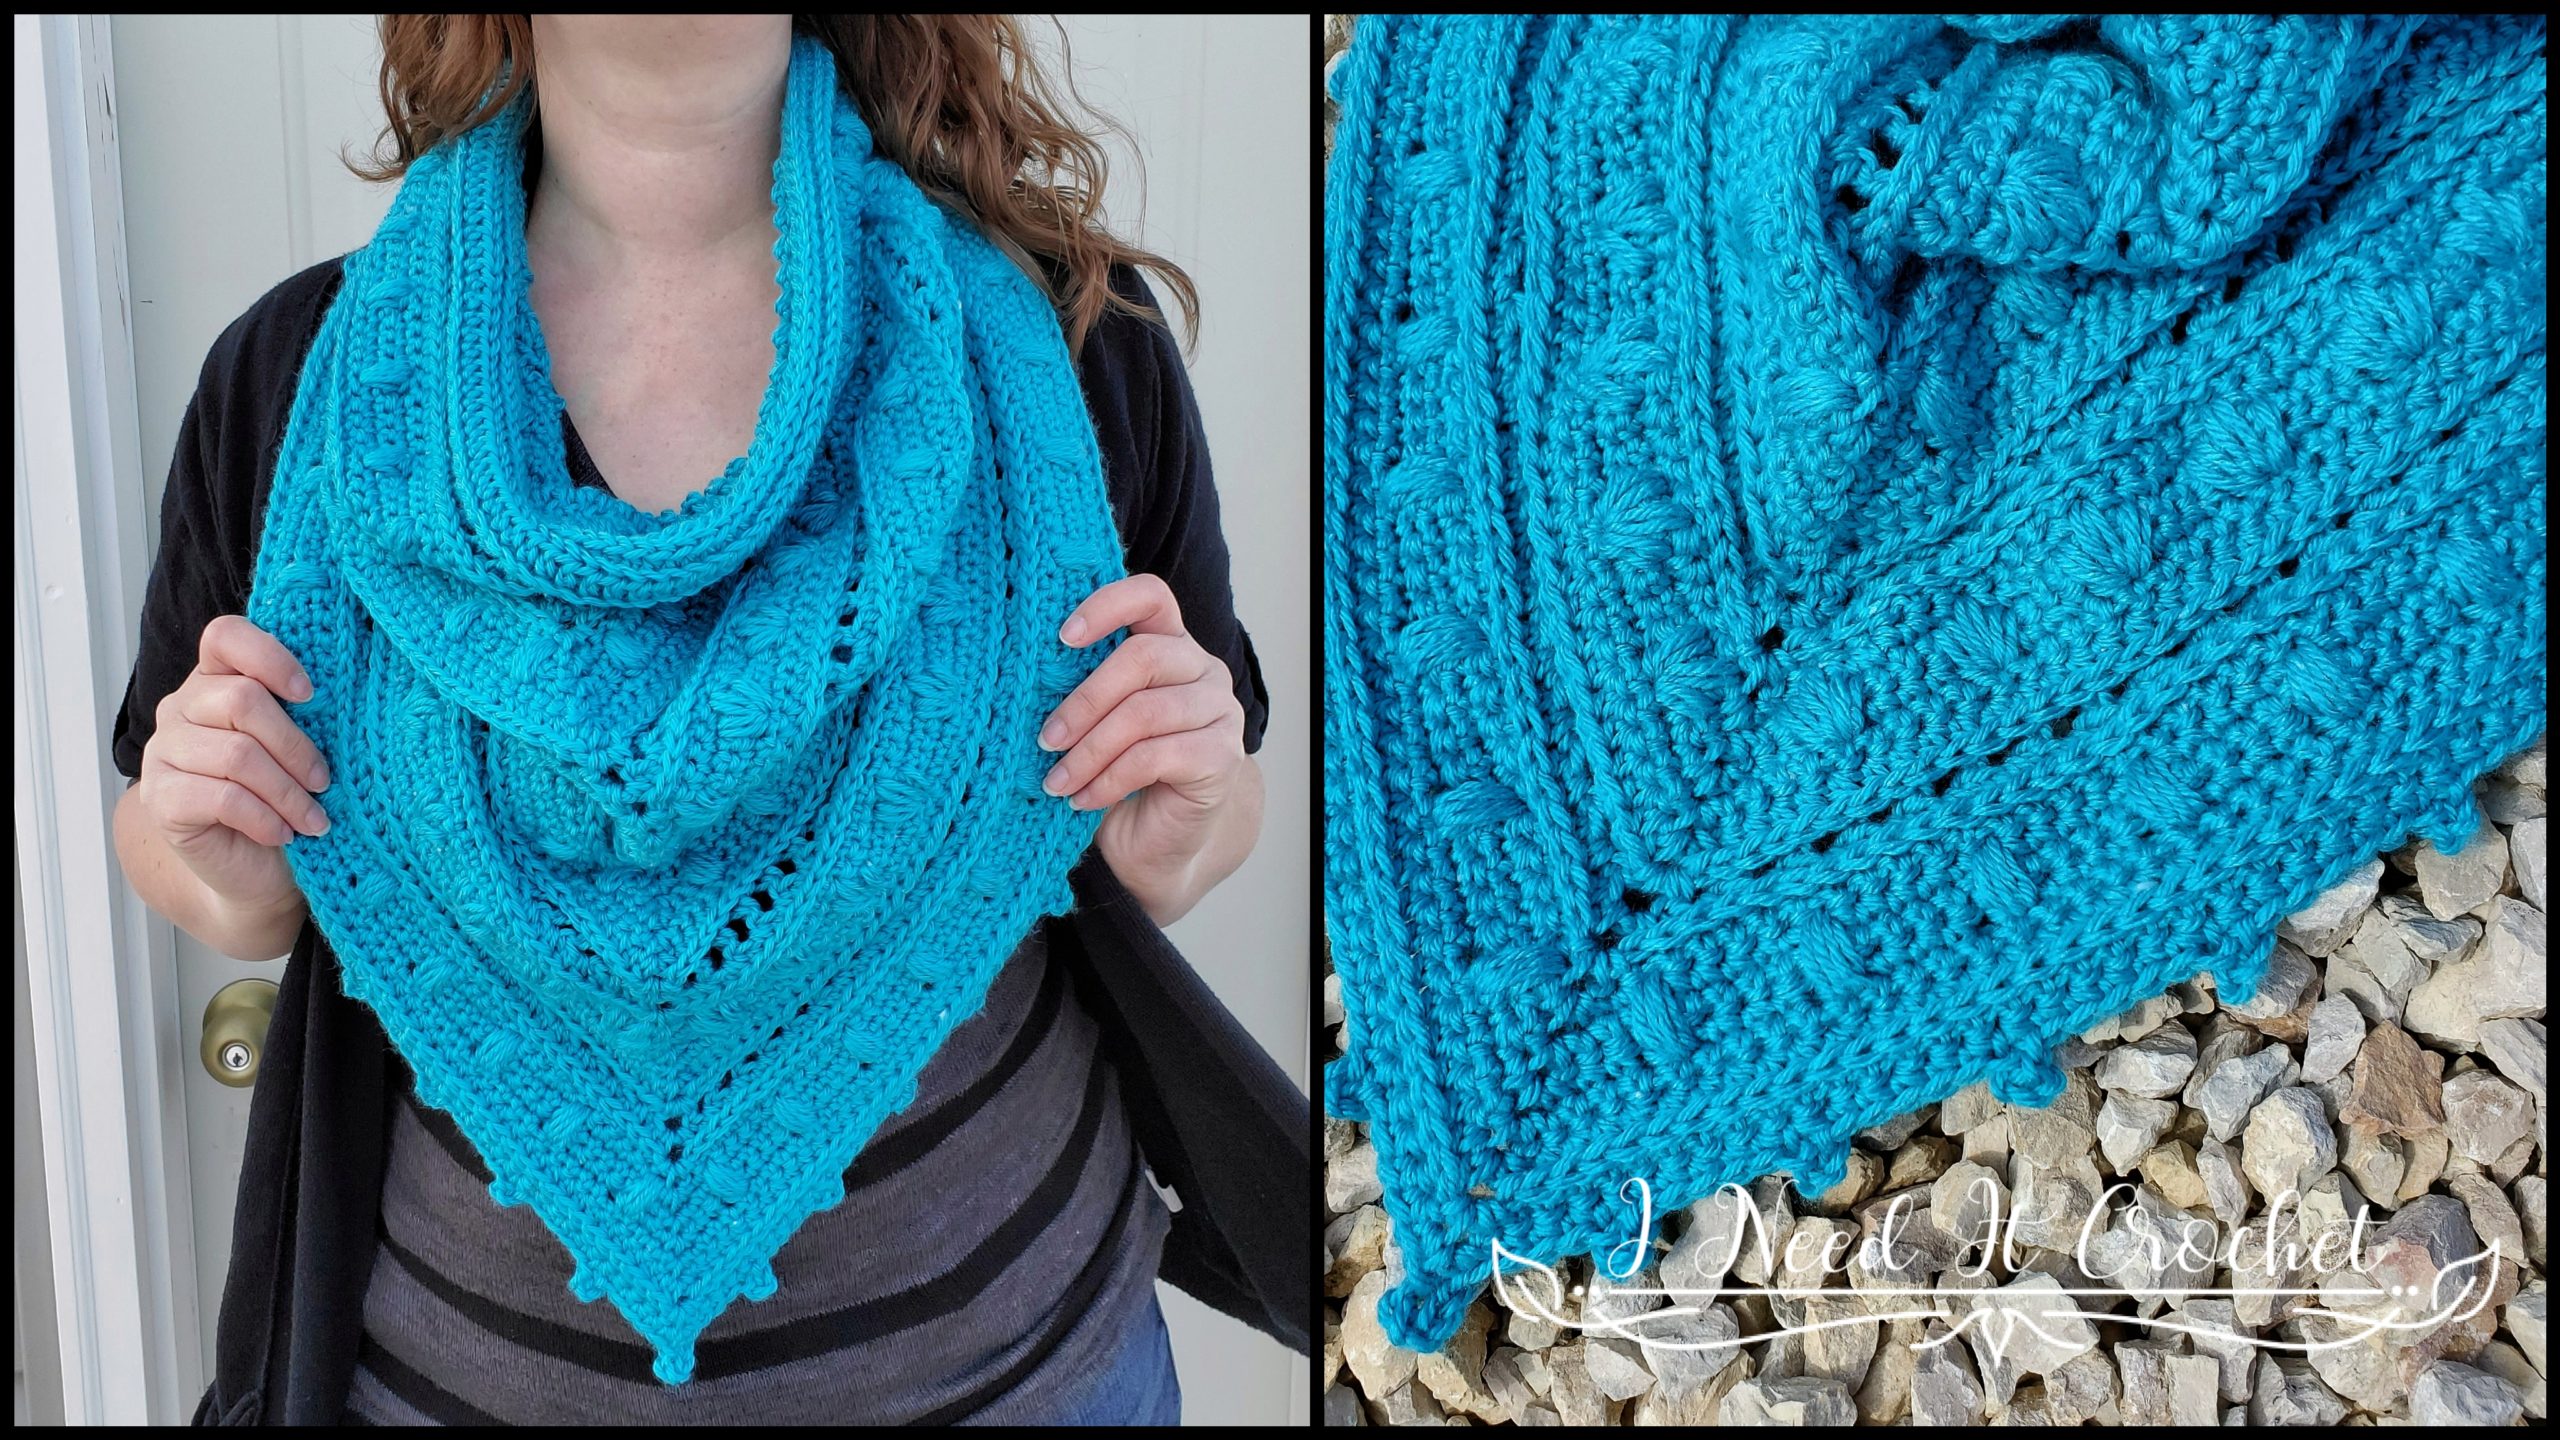
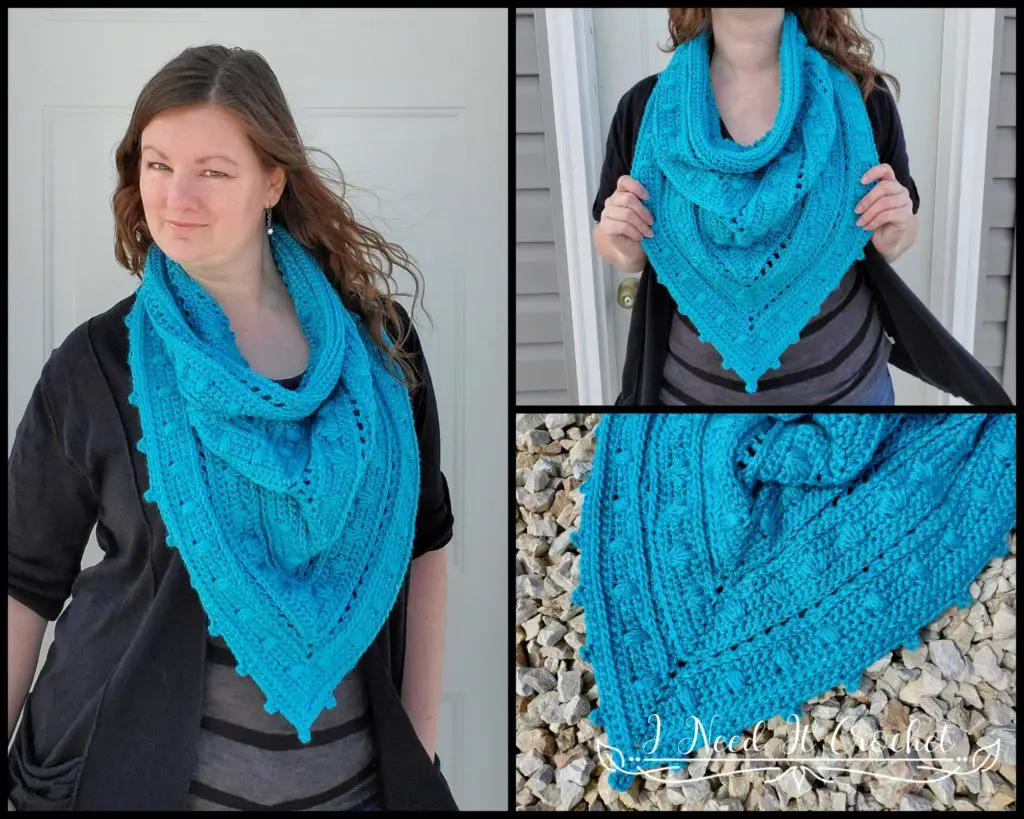
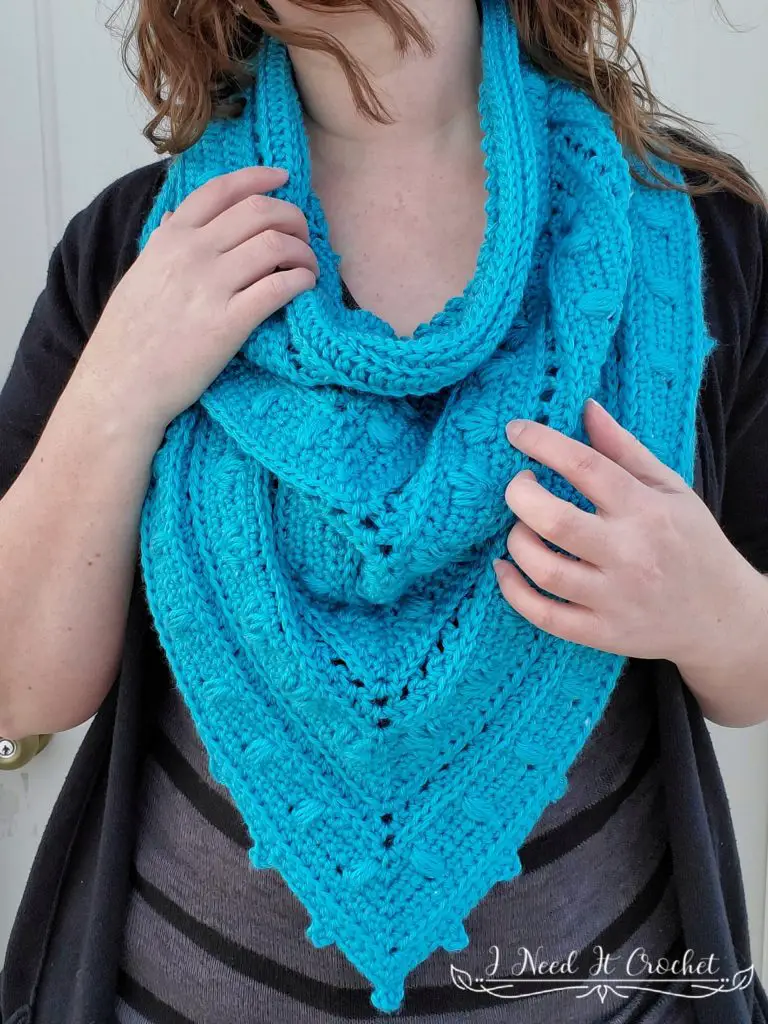
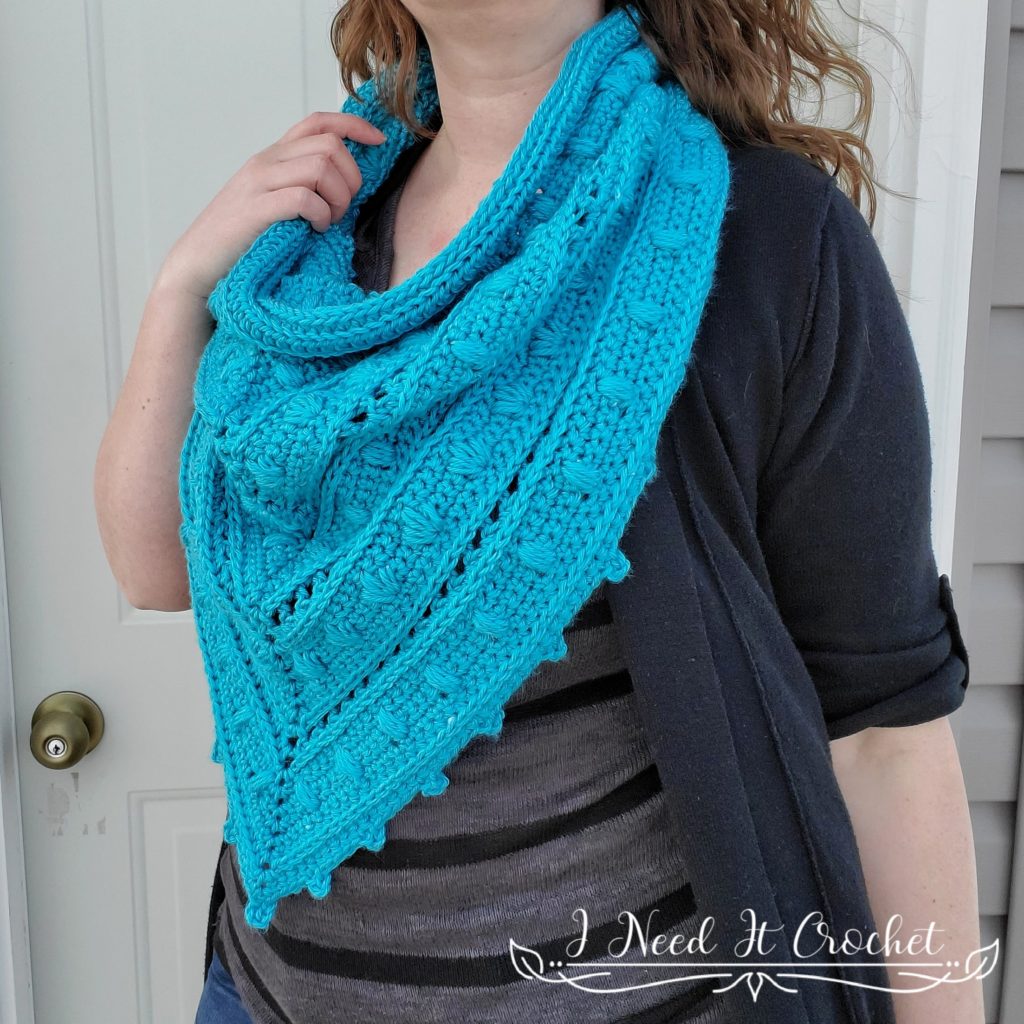
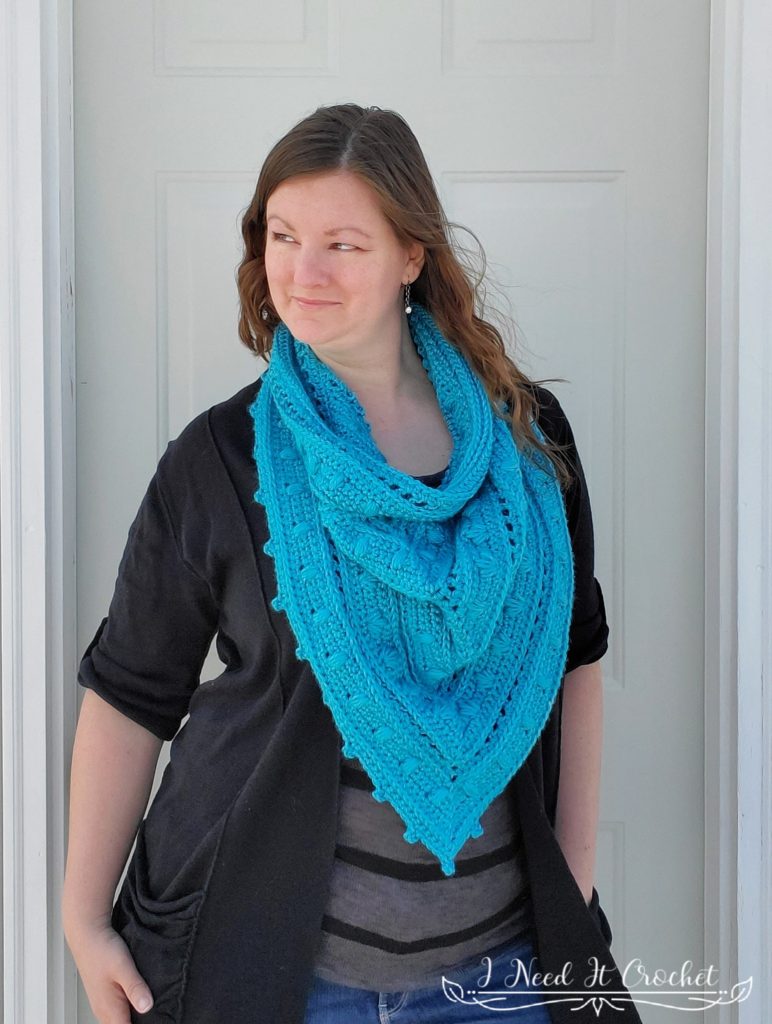
Cowl measures approximately 30” in circumference and 25” long from the neck down to the point.
Materials:
I used Caron Simply Soft, which is 100% Acrylic, #4 Worsted weight yarn.
Any yarn of similar weight would work.
Approximately 420 yds.
6.5mm Hook
Stitch Markers
Yarn Needle
Scissors
Measuring Tape
Gauge:
There will be instructions to measure your project for gauge at two separate points in the pattern.
Be sure to check your gauge. It will save you time and heartache.
Abbreviations:
Sk = Skip
Sp = Space
St = Stitch
Ss = Slip Stitch
Ch = Chain
Sc = Single Crochet
Hdc = Half Double Crochet
Dc= Double Crochet
Ps =Puff Stitch (See the Tutorial Here)
Fp = Flower Puff Stitch (See the Tutorial Here)
3rd LO = 3rd Loop Only (See the Tutorial Here)
BLO = Back Loop Only
Notes:
Ch1 at the beginning of a row is never considered a stitch.
Ch1 between sts is always considered a stitch.
I have provided tutorials on the blog for the puff stitch, flower puff stitch, the picot stitch, and working into the 3rd LO.
A puff stitch and a flower puff stitch each count as 2 sts.
If a row/round begins with “Working into the 3rd LO/BLO” that means the entire row/round is worked in the 3rd LO/BLO. If this instruction is found in the middle of a row/round, it means that you work into the 3rd LO/BLO until instructed otherwise.
I have added many pictures to help you along the way.
Instructions
This cowl is constructed by first making a large triangle and joining 2 of the points to make a circle. Then, the neck portion will be worked upwards in the round.
Lower Cowl
With 6.5mm Hook
Ch4, ss to 1st ch to form a ring. Work row 1 into this ring.
1. Ch1, 4hdc, ch2, 4hdc. Turn. – 8 st + ch2
2. Ch1. Hdc in 1st st, ch1. Working in the 3rd LO: Hdc in next st, ch1, sk1 st. Hdc in next st, ch1. (Hdc, ch2, hdc) in ch2 sp, ch1. Working in the 3rd LO: Hdc in next st, ch1, sk1 st. Hdc in next st, ch1. Hdc in the top 2 loops of the last st. Turn. – 14 st + ch2
3. Ch1. 2hdc in 1st st. Hdc in each st and ch1 sp up to the ch2. (Hdc, ch2, hdc) in ch2 sp. Hdc in each st until there is only 1 st left unworked. 2hdc in last st. Turn. – 18 st + ch2
Note: If you haven’t worked with the back side of a hdc/ch1 row before, it can be difficult to tell which is hdc and which is ch, especially when you get to the ch2 sp. To help with this, I have illustrated figure 1. The hdc sts are marked with green, and the ch sts are marked with red. Notice that the hdc st just before the ch2 looks a lot like a ch st? Don’t be fooled. Figure 2 shows what row 3 looks like properly completed. Be sure to come back and use this figure again if you are unsure or if you’re getting incorrect stitch counts.
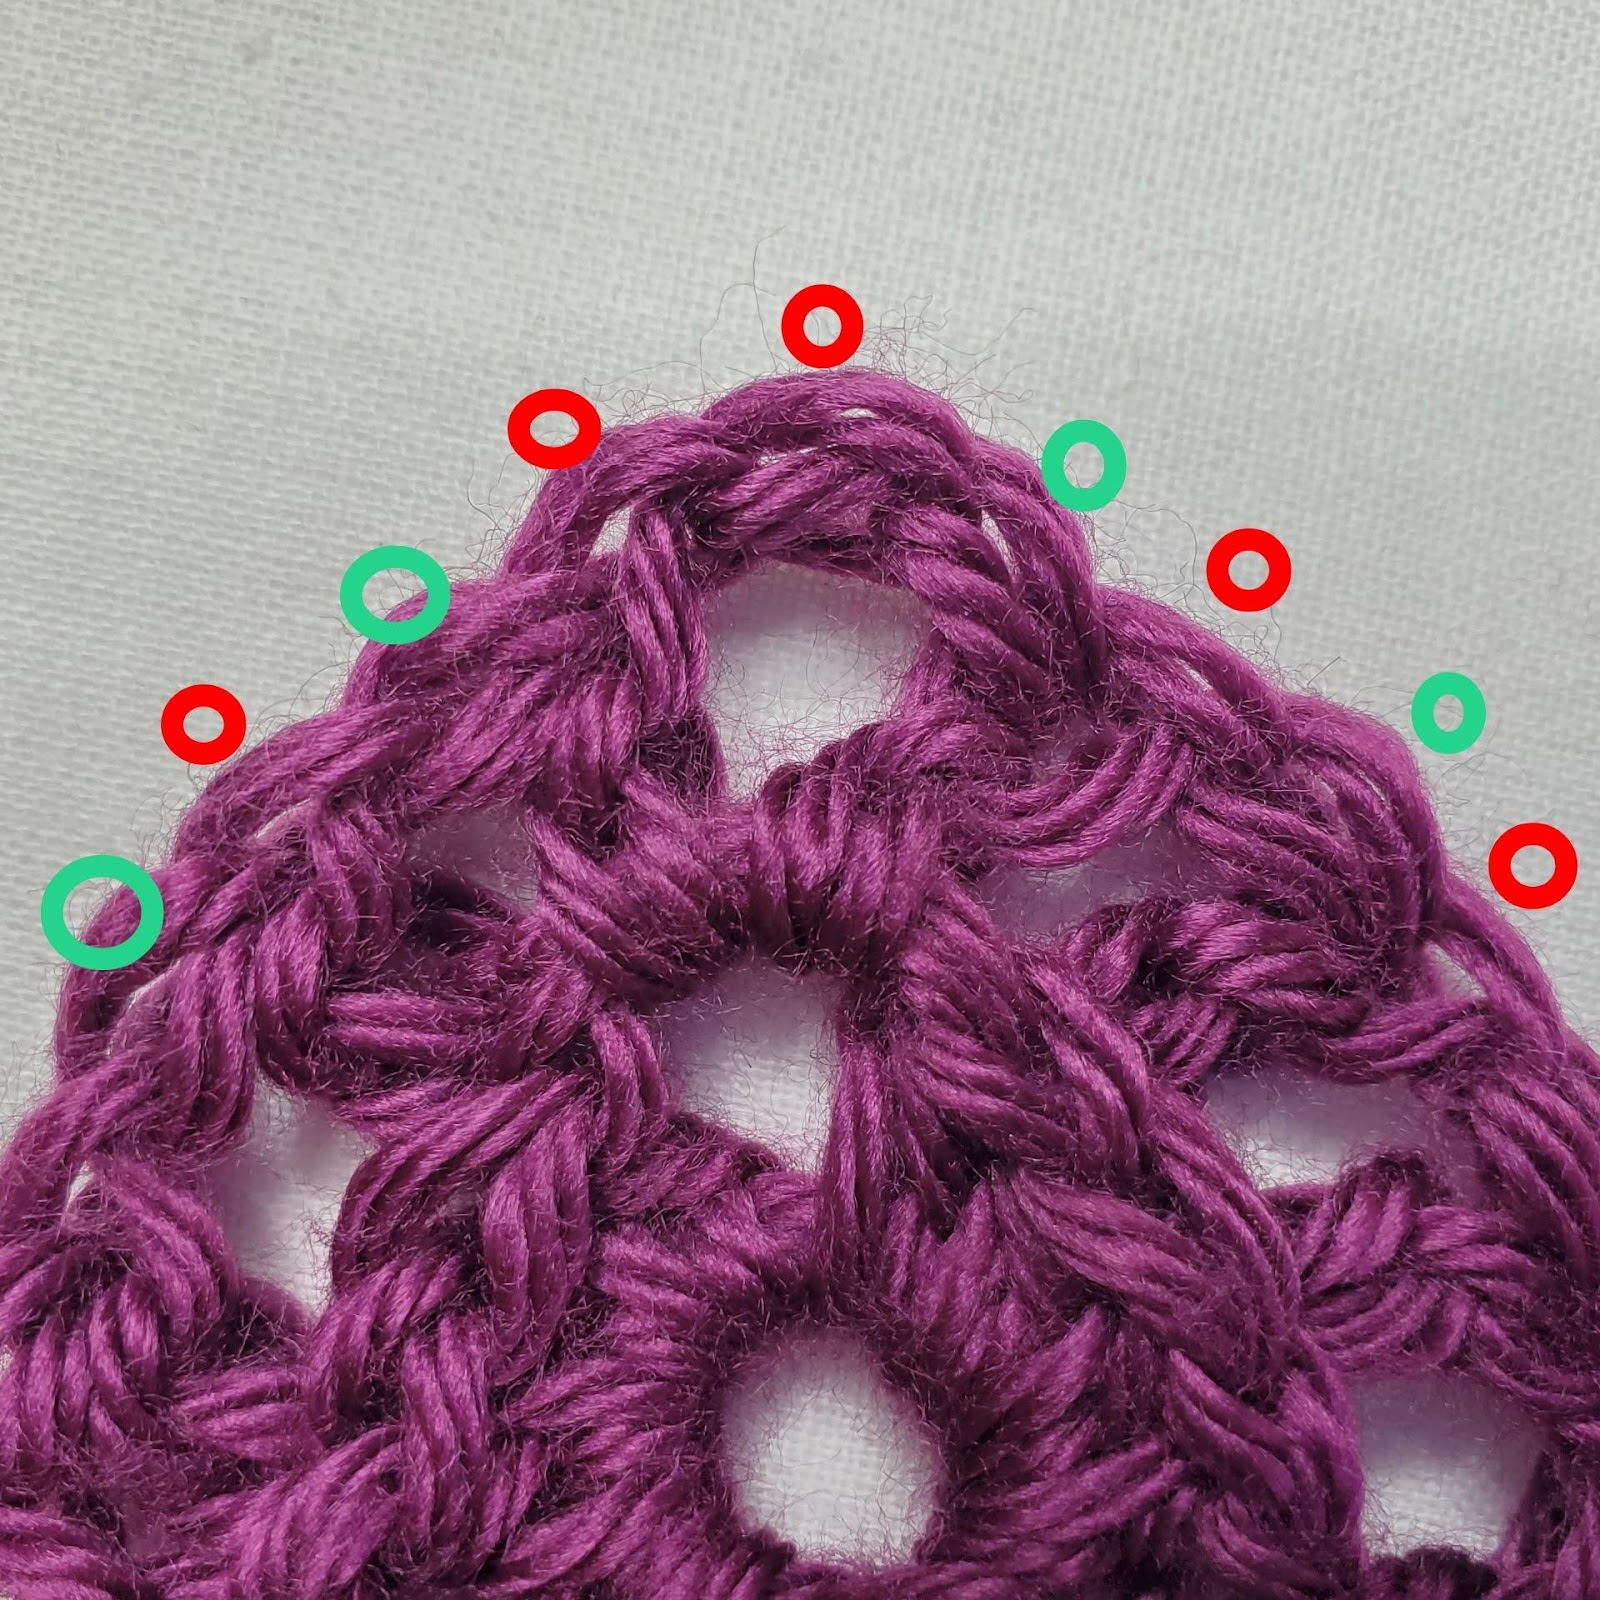
Figure 1
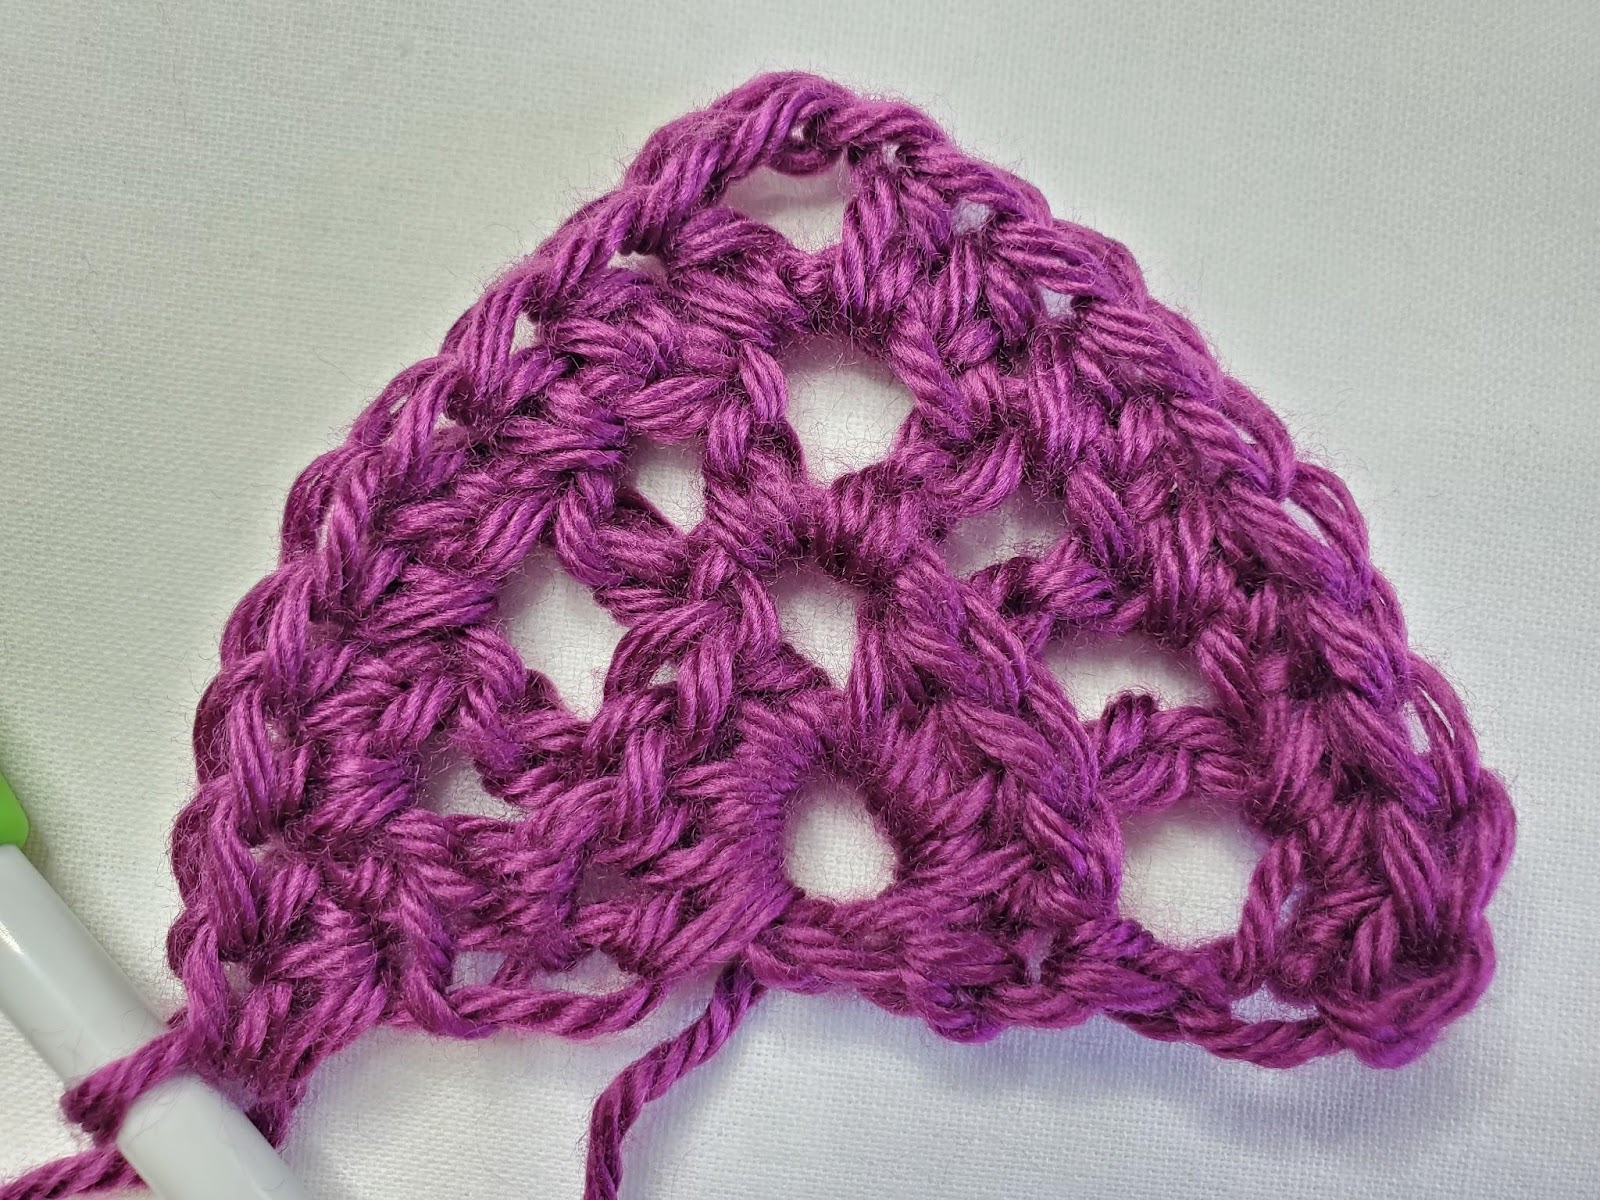
Figure 2
4. Ch1. 2sc in 1st st. Working in the 3rd LO: Sc in each st up to the ch2. (Pay attention and make sure you work into every hdc. Remember that the hdc just before the ch2 will look a lot like a ch st.) (Sc, ch2, sc) in ch2 sp. Working in the 3rd LO: Sc in each st until there is only 1 st left unworked. 2sc in last st. Turn. – 22 st + ch2
5. Ch1. Sc in 1st st and each st up to ch2. (Sc, ch2, sc) in ch2 sp. Sc in each st to end. Turn. – 24 st + ch2
6. Ch1. 2sc in 1st st. Sc in each st up to the ch2. (Sc, ch2, sc) in ch2 sp. Sc in each st until there is only 1 st left unworked. 2sc in last st. Turn. – 28 st + ch2
7. Ch1. Sc in 1st st and next 4 sts. *Work ps as marked in red in figure 3. Sk 2 sts (which will be covered by ps),** sc in next st (marked with M in figure 3) and next 2 sts (see figure 4). Repeat from * to ** 1 more time. Sc in next 2 sts, (sc, ch2, sc) in ch2 sp. Sc in next 2 sts, repeat from * to **, Sc in next 3 sts, repeat from * to **, Sc in each st to end. Turn. – 30 st (including 4 ps) + ch2
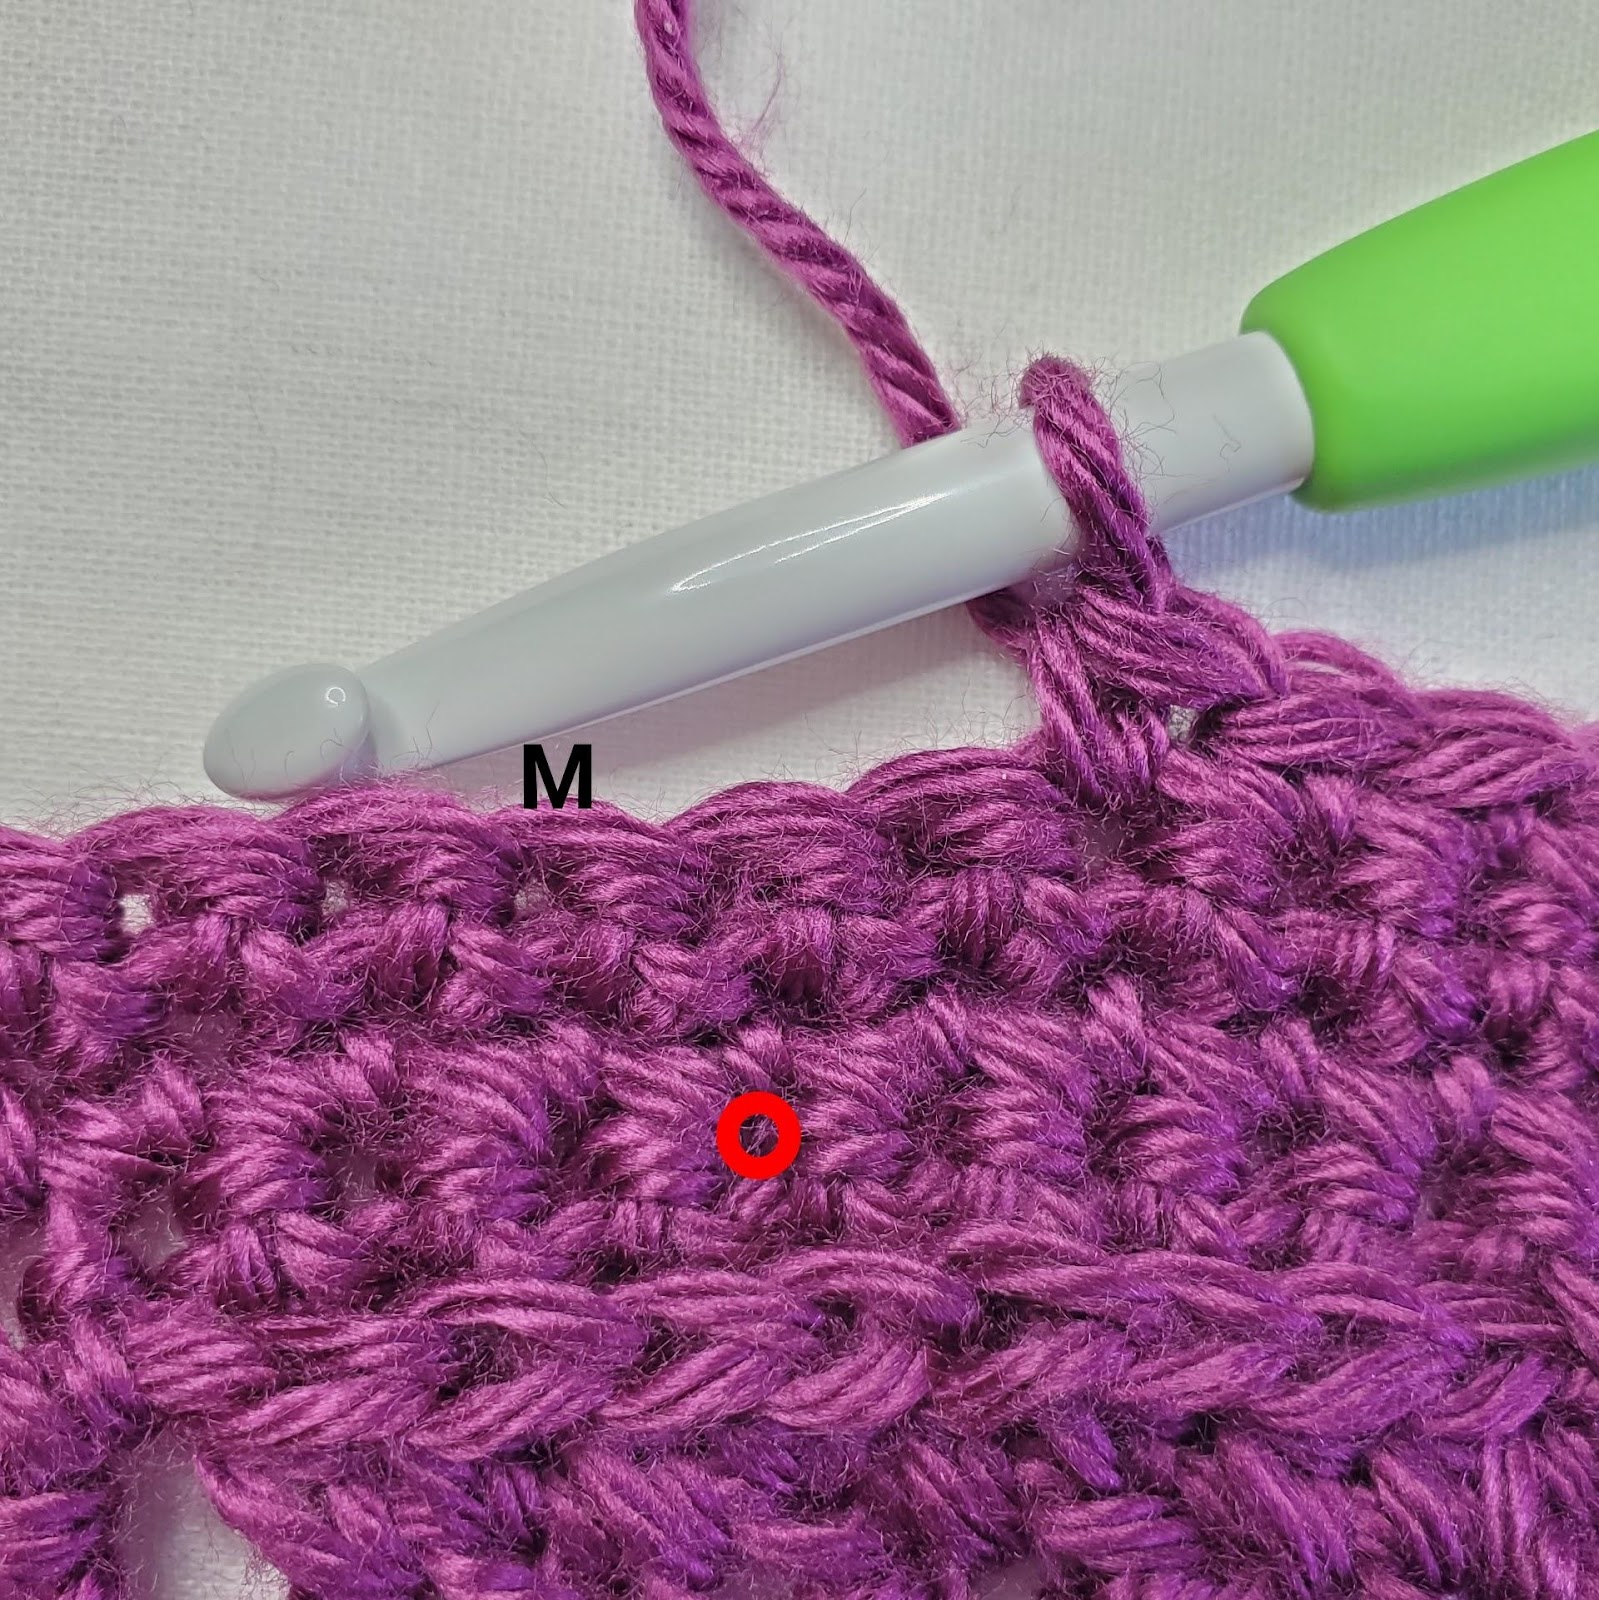
Figure 3

Figure 4
8. Ch1. 2sc in 1st st. Sc in each st up to the ch2. (Sc, ch2, sc) in ch2 sp. Sc in each st until there is only 1 st left unworked. 2sc in last st. Turn. – 34 st + ch2
9. Ch1. 2hdc in 1st st. Hdc in each st sp up to the ch2. (Hdc, ch2, hdc) in ch2 sp. Hdc in each st until there is only 1 st left unworked. 2hdc in last st. Turn. – 38 st + ch2
Gauge check: Your triangle should be approximately 7” across the bottom edge and 4” from the center ring to the peak.
10. Ch1, hdc in 1st st, ch1. *Working into the 3rd LO: Hdc in next st, ch1, sk1 st. ** Repeat from * to ** until you reach the ch2. (Hdc, ch2, hdc) in ch2 sp. *Working into the 3rd LO: Ch1, sk1 st, hdc in next st. ** Repeat from * to ** until there is only 1 st left unworked. Ch1, hdc in both top loops of last st. Turn. – 42 st + ch2
11. Ch1. 2hdc in 1st st. Hdc in each st and ch1 sp up to the ch2. (Hdc, ch2, hdc) in ch2 sp. Hdc in each st until there is only 1 st left unworked. 2hdc in last st. Turn. – 46 st + ch2
12. Ch1. 2sc in 1st st. Working in the 3rd LO: Sc in each st up to the ch2. (Pay attention and make sure you work into every hdc. Remember that the hdc just before the ch2 will look a lot like a ch st.) (Sc, ch2, sc) in ch2 sp. Working in the 3rd LO: Sc in each st until there is only 1 st left unworked. 2sc in last st. Turn. – 50 st + ch2
13. Ch1. Sc in 1st st and each st up to ch2. (Sc, ch2, sc) in ch2 sp. Sc in each st to end. Turn. – 52 st + ch2
14. Ch1. 2sc in 1st st. Sc in each st up to the ch2. (Sc, ch2, sc) in ch2 sp. Sc in each st until there is only 1 st left unworked. 2sc in last st. Turn. – 56 st + ch2
15. Ch1. Sc in 1st st. *Sc in next 3 sts. Work fp over 3 sts as marked in figure 5. Sk 2sts (which will be covered by fp)** Repeat until there are only 2 sts left unworked before the ch2. Sc in next 2 sts, (sc, ch2, sc) in ch2 sp, sc in next 2 sts. Work fp over 3 sts as marked in figure 5. Sk 2sts (which will be covered by fp). *Sc in next 3 sts. Work fp over 3 sts as marked in figure 5. Sk 2sts (which will be covered by fp)** Repeat until there are only 4 sts left unworked. Sc in last 4 sts. Turn. – 58 st (including 10 fp) + ch2
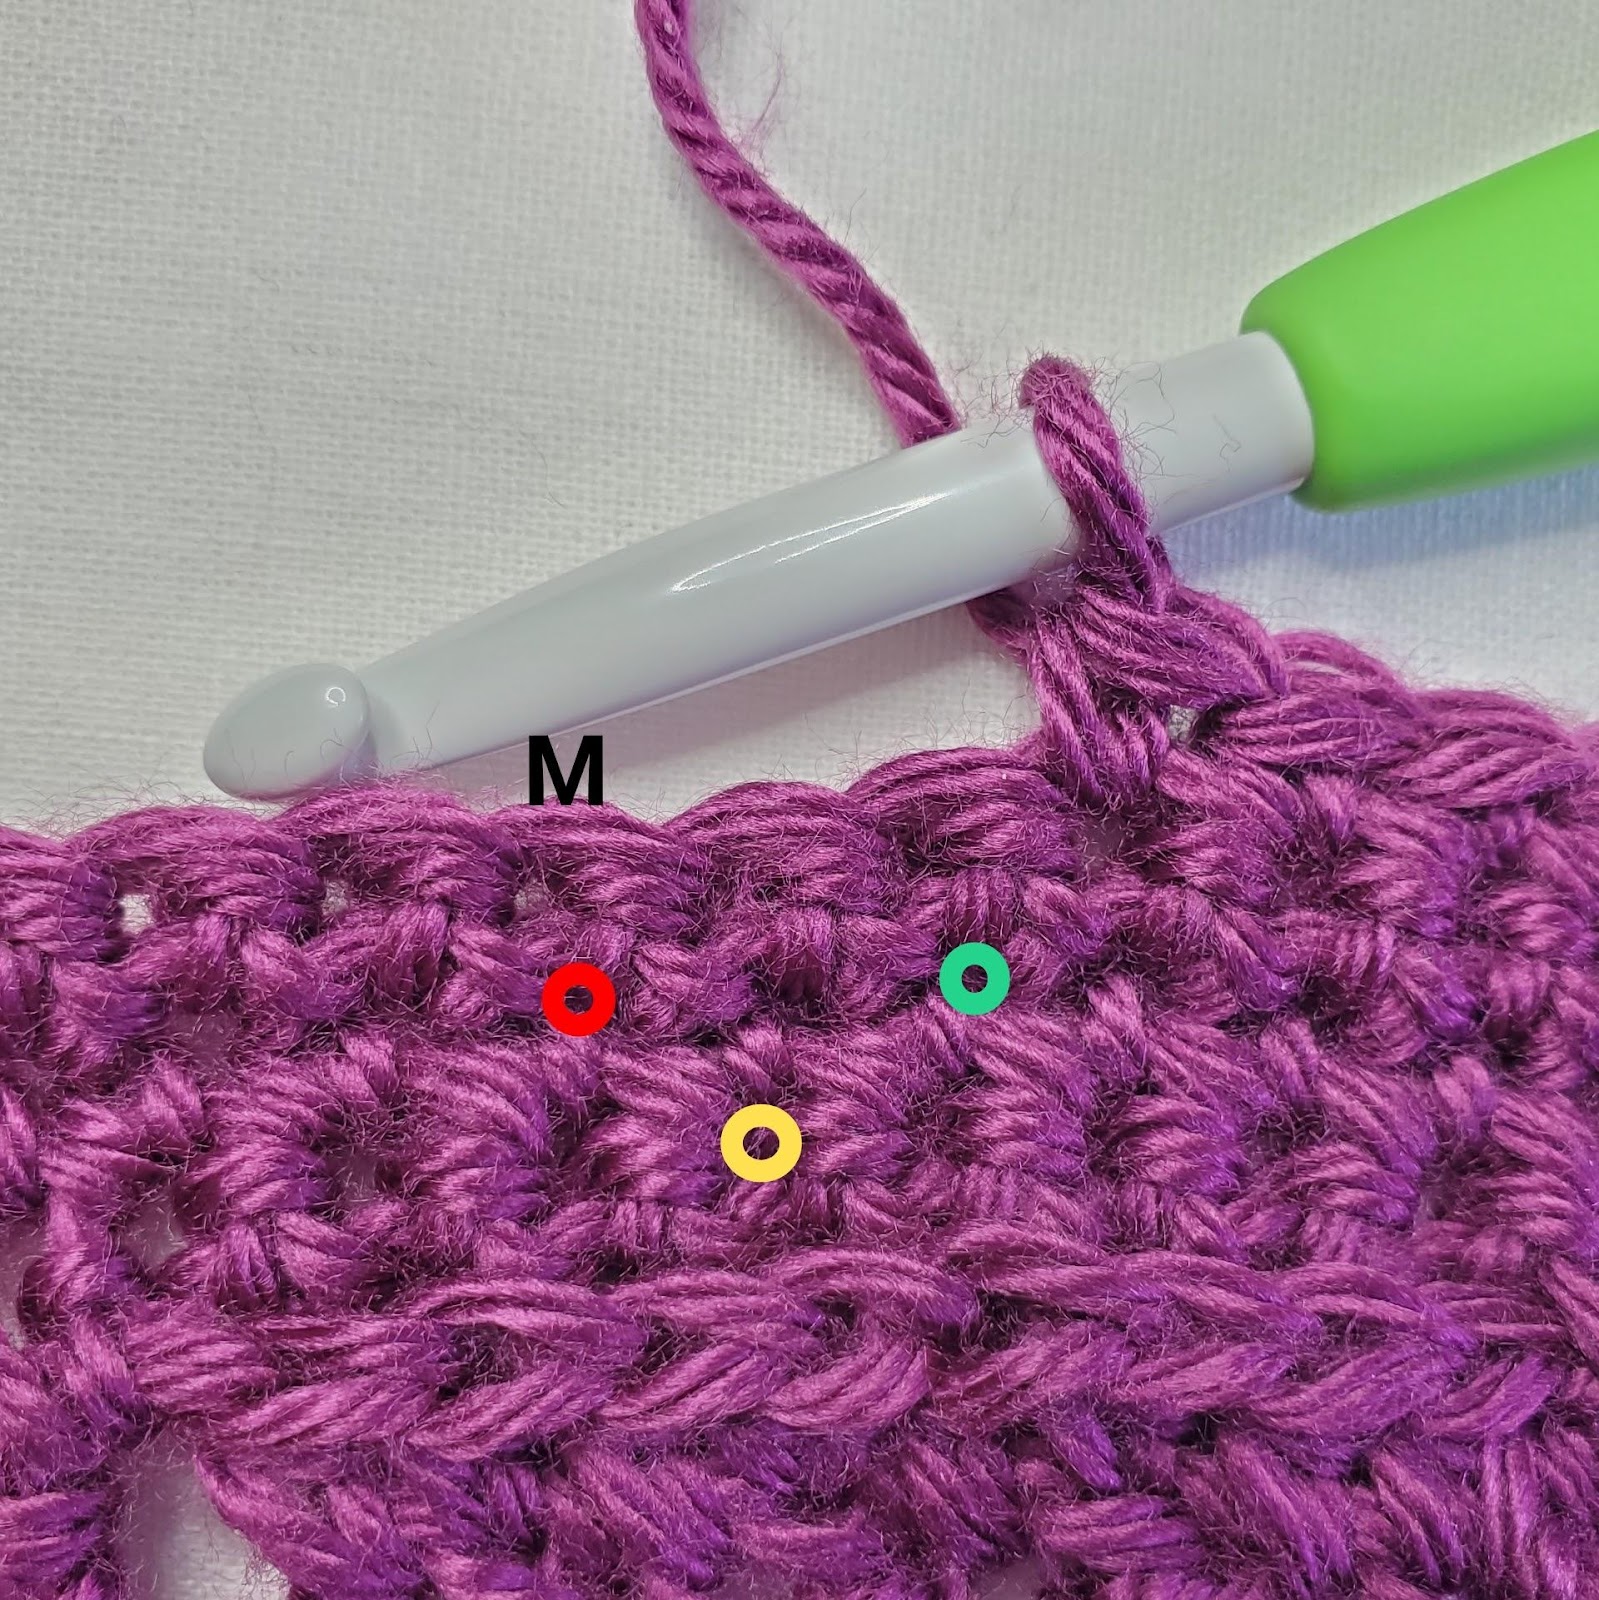
Figure 5

Figure 6
Gauge check: Your triangle should be approximately 11 ½” across the bottom edge and 6 ½” from the center ring to the peak.
16. – 22. Repeat rows 8 – 14.
Stitch counts:
16. 62 st + ch2 17. 66 st + ch2 18. 70 st + ch2 19. 74 st + ch2
20. 78 st + ch2 21. 80 st + ch2 22. 84 st + ch2
23. Ch1. Sc in 1st st and next 2 sts. *Work ps into st as marked in figure 7. Sk 2 st (which will be covered by ps), sc in next st (marked with M in figure 7) and next 2 sts (see figure 8).** Repeat from * to ** until there are only 4 sts left unworked before the ch2. Work ps into st as marked in figure 13. Sk 2 st (which will be covered by ps). Sc in next 2 sts, (sc, ch2, sc) in ch2 sp. Sc in next 2 sts, repeat from * to ** until all sts have been worked. Turn. – 86 st (including 16 ps) + ch2
Figure 7
Figure 8
24. – 30. Repeat rows 8 – 14.
Stitch counts:
24. 90 st + ch2 25. 94 st + ch2 26. 98 st + ch2 27. 102 st + ch2
28. 106 st + ch2 29. 108 + ch2 30. 112 st + ch2
31. Ch1. Sc in 1st st and next st. *Work fp over 3 sts as marked in figure 9. Sk 2sts (which will be covered by fp), sc in next 3 sts (see figure 10). ** Repeat until there are only 4 sts left unworked before the ch2. Work fp over 3 sts as marked in figure 9. Sk 2sts (which will be covered by fp). Sc in next 2 sts, (sc, ch2, sc) in ch2 sp, sc in next 2 sts. Work fp over 3 sts as marked in figure 9. Sk 2sts (which will be covered by fp). *Sc in next 3 sts. Work fp over 3 sts as marked in figure 9. Sk 2sts (which will be covered by fp)** Repeat until there are only 2 sts left unworked. Sc in last 2 sts. Turn. – 114 st (including 22 fp) + ch2
Figure 9
Figure 10
32. – 38. Repeat rows 8 – 14.
Stitch counts:
32. 118 st + ch2 33. 122 st + ch2 34. 126 st + ch2 35. 130 st + ch2
36. 134 st + ch2 37. 136 st + ch2 38. 140 st + ch2
39. Ch1. Sc in 1st st. *Work ps into st as marked in figure 11. Sk 2 st (which will be covered by ps), sc in next st (marked with M in figure 11) and next 2 sts (see figure 12).** Repeat from * to ** until there are only 4 sts left unworked before the ch2. Work ps into st as marked in figure 11. Sk 2 st (which will be covered by ps). Sc in next 2 sts, (sc, ch2, sc) in ch2 sp. Sc in next 2 sts, repeat from * to ** until there are only 3 sts left unworked. Work ps into st as marked in figure 11, sk 2 st, sc in last st. Turn. – 142 st (including 28 ps) + ch2
Figure 11
Figure 12
40. Ch1. 2sc in 1st st. Sc in each st up to the ch2. (Sc, ch2, sc) in ch2 sp. Sc in each st until there is only 1 st left unworked. 2sc in last st. Turn. – 146 st + ch2
41. Ch1. 2hdc in 1st st. Hdc in each st and ch1 sp up to the ch2. (Hdc, ch2, hdc) in ch2 sp. Hdc in each st until there is only 1 st left unworked. 2hdc in last st. Turn. – 150 st + ch2
42. Ch1. 2sc in 1st st. Working in the 3rd LO: Sc in each st up to the ch2. (Pay attention and make sure you work into every hdc. Remember that the hdc just before the ch2 will look a lot like a ch st.) (Sc, ch2, sc) in ch2 sp. Working in the 3rd LO: Sc in each st until there is only 1 st left unworked. 2sc in last st. Turn. – 154 st + ch2
43. (Right side) Ch1. Sc in 1st st and next 5 sts, picot. *Sc in next 6 sts, picot. ** Repeat until there are only 5 sts left before the ch2. Sc in next 5 sts. (Sc, picot using 5 ch instead of 3, sc) in ch2 sp. Sc in next 5 sts. *Picot, sc in next 6 sts. ** Repeat from * to ** until all sts are worked. Turn. – 156 st + 25 picot
The triangle portion of your cowl is complete, but do not bind off. Turn so that the wrong side is facing you and the point of the triangle is hanging down. Ss to join to the 1st st of row 43. We will now build up the neck portion of the cowl. 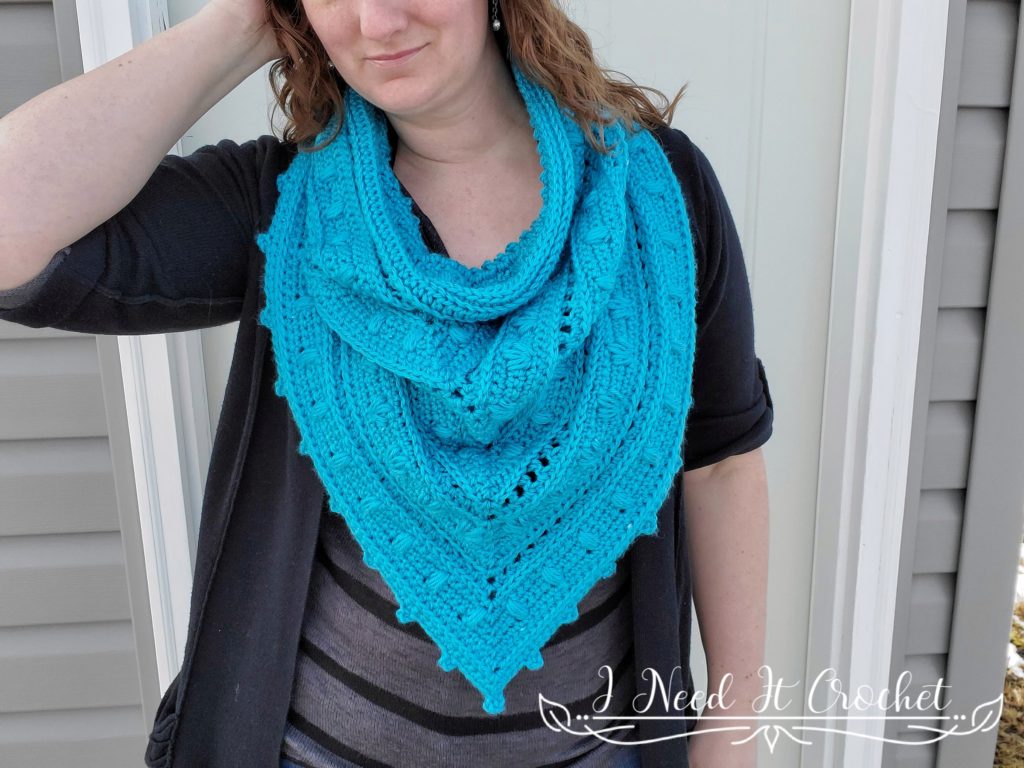
Upper Cowl
This part of the pattern is worked in the round, but you will still be turning after each round is completed. To make this pattern easier to work, you will be starting each round in the 2nd stitch. This is the stitch immediately to the left of where you placed your slip stitch in the previous row. If you look at figure 13 below, you will see that I have ch1 and worked my 1st hdc into the next st. When you do this, you must remember that the stitch where you placed your slip stitch in the previous row is where you will place your last stitch. (See figure 14)

Figure 13
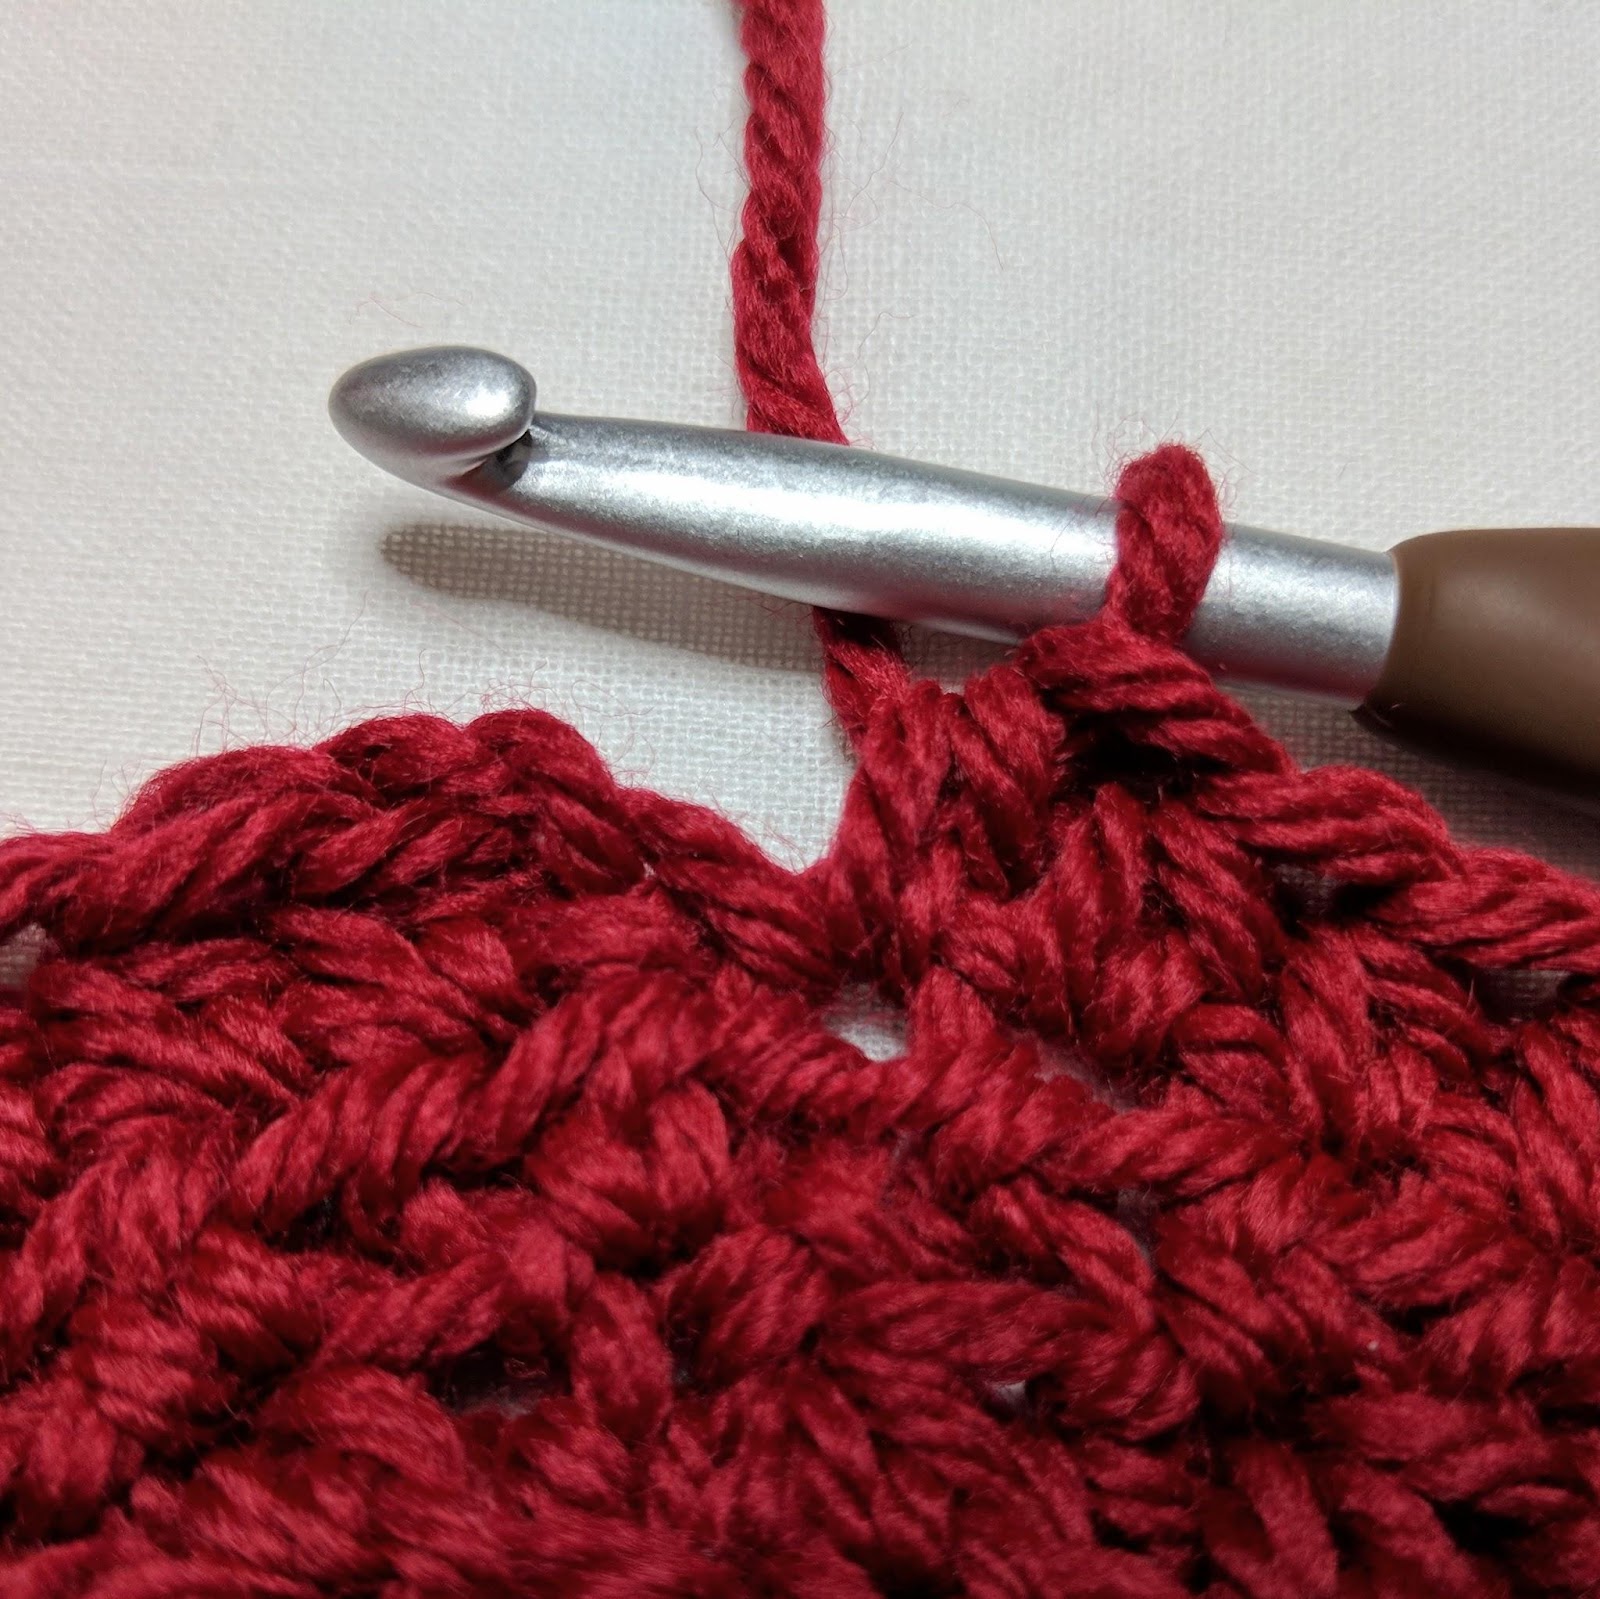
Figure 14
With wrong side facing you:
1. Ch1. Sc around the entire neck in the following manner:
– 1 sc in the end of each sc row.
– 1 sc in the end of each hdc row
– 1 sc in the end of each hdc, ch1 row.
– 2 sc in the middle ring.
– Continue around the entire neck in this manner. Ss to join to 1st sc. Turn. – 98 st
2. Ch1. Hdc in next st and each st around. Ss to join to 1st hdc. Turn. – 98 st
3. Working in the 3rd LO: Ch1. *Hdc in next st, ch1, sk1 st. ** Repeat from * to ** around. Ss to join to 1st hdc. Turn. – 98 st.
4. Ch1. Hdc in next st and each st around (you will be working into every st and every ch1 sp). Ss to join to 1st hdc. Turn. – 98 st
5. Working in the 3rd LO: Ch1. Sc in next st and each st around. Ss to join to 1st sc. Turn. – 98 st
6. Ch1. Sc in next st and each st around. Ss to join to 1st sc. Turn. – 98 st
7. Ch1. Sc in next st and each st around. Ss to join to 1st sc. Turn. – 98 st
8. Ch1. Sc in next 3 sts. Work ps into st as marked in figure 15. Sk 2 st (which will be covered by ps), sc in next st (marked with M in figure 15) and next 2 sts (see figure 16).** Repeat from * to ** until there are only 3 sts left unworked. Sc in last 3 sts. Ss to join to 1st sc. Turn. – 98 st
Figure 15
Figure 16
9. Ch1. Sc in next st and each st around. Ss to join to 1st sc. Turn. – 98 st
10. Ch1. Hdc in next st and each st around. Ss to join to 1st hdc. Turn. – 98 st
11. Working in the 3rd LO: Ch1. *Hdc in next st, ch1, sk1 st. ** Repeat from * to ** around. Ss to join to 1st hdc. Turn. – 98 st.
12. Ch1. Hdc in next st and each st around (you will be working into every st and every ch1 sp). Ss to join to 1st hdc. Turn. – 98 st
13. Working in the 3rd LO: Ch1. Hdc in next st and each st around. Ss to join to 1st hdc. Turn. – 98 st
14. Working in the BLO: Ch1. Hdc in next st and each st around. Ss to join to 1st hdc. Turn. – 98 st
15. Working in the 3rd LO: Ss into next st and each st around. Ss to join to 1st ss. Bind off. – 98 st
Weave in your ends, and you’re done!
I hope you love your new cowl, and I look forward to seeing all of your beautiful pictures on Ravelry!
If you’d like to know when I post new patterns and tutorials, head on over to my Facebook and Instagram and give me a like and a follow!
If you enjoyed The Spring Blooms Bandana Cowl – Free Crochet Pattern, you may want to check out my other designs!
And until next time… Happy Hooking! 😉