
Transitions Poncho – Free Crochet Poncho Pattern
The Transitions Poncho – Free Crochet Poncho Pattern is copyrighted by I Need It Crochet. You may not copy, share, change, or sell the pattern itself. Also, you may not claim this pattern as your own. All pictures contained in this pattern fall under the copyright and may not be used.
Finished items made from the Transitions Poncho – Free Crochet Poncho Pattern belong to you, and you may do what you wish with them. If you choose to sell them on Etsy, I would very much appreciate it if you credited me as the pattern designer.


Or… Just scroll down to see it for free!
Summer is winding down in my neck of the woods which means the days are getting shorter and the weather is getting colder. What better transitional piece for this time of year than a poncho?
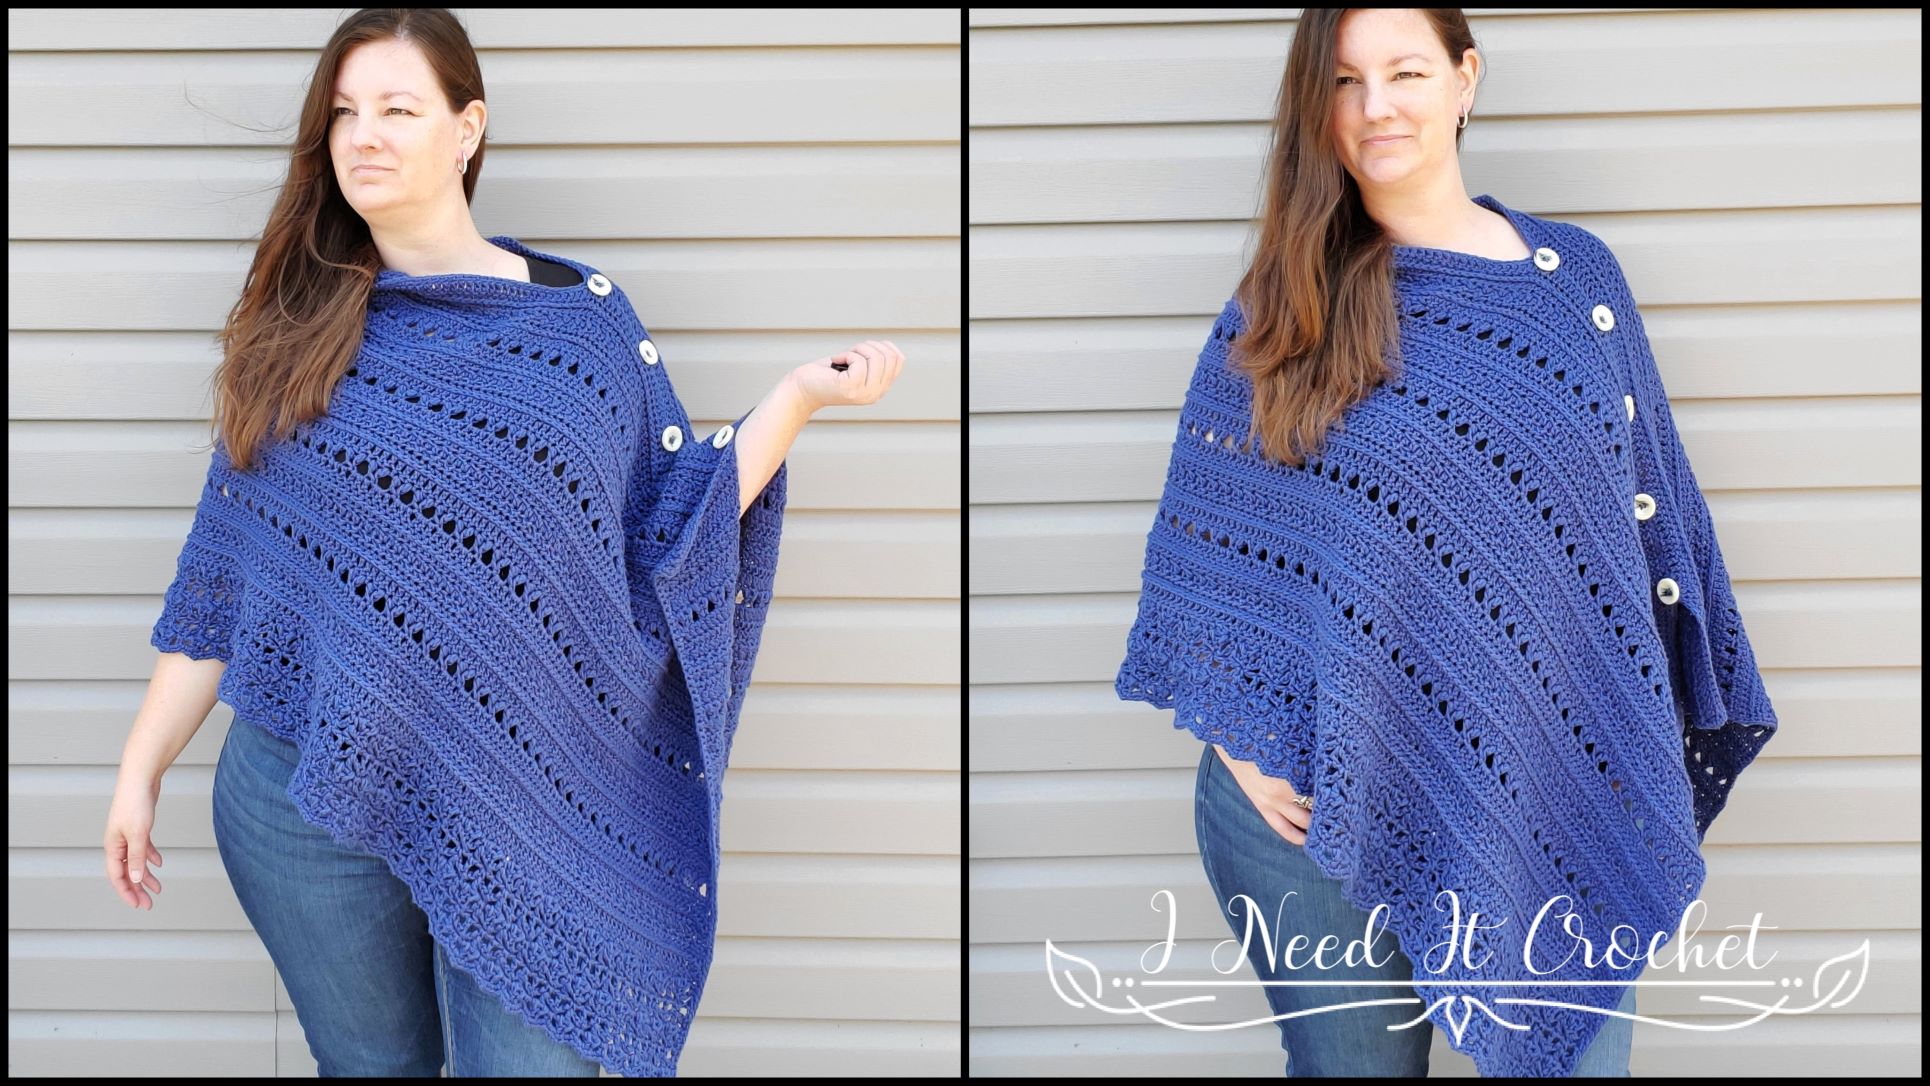
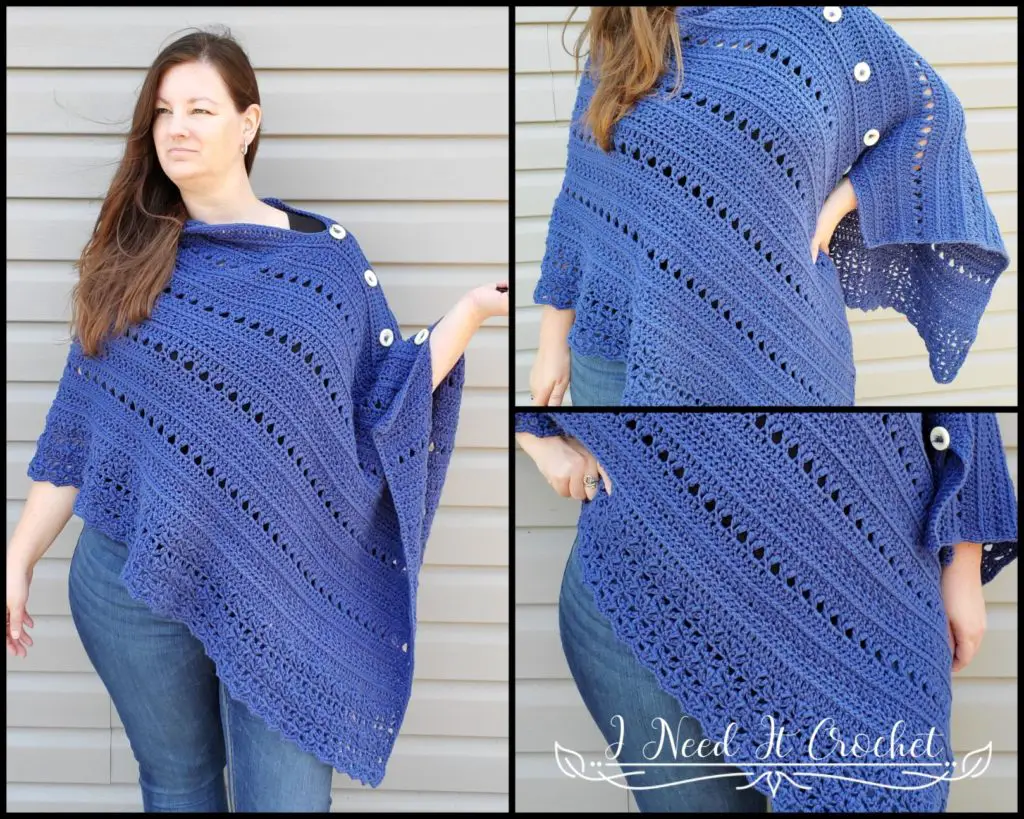
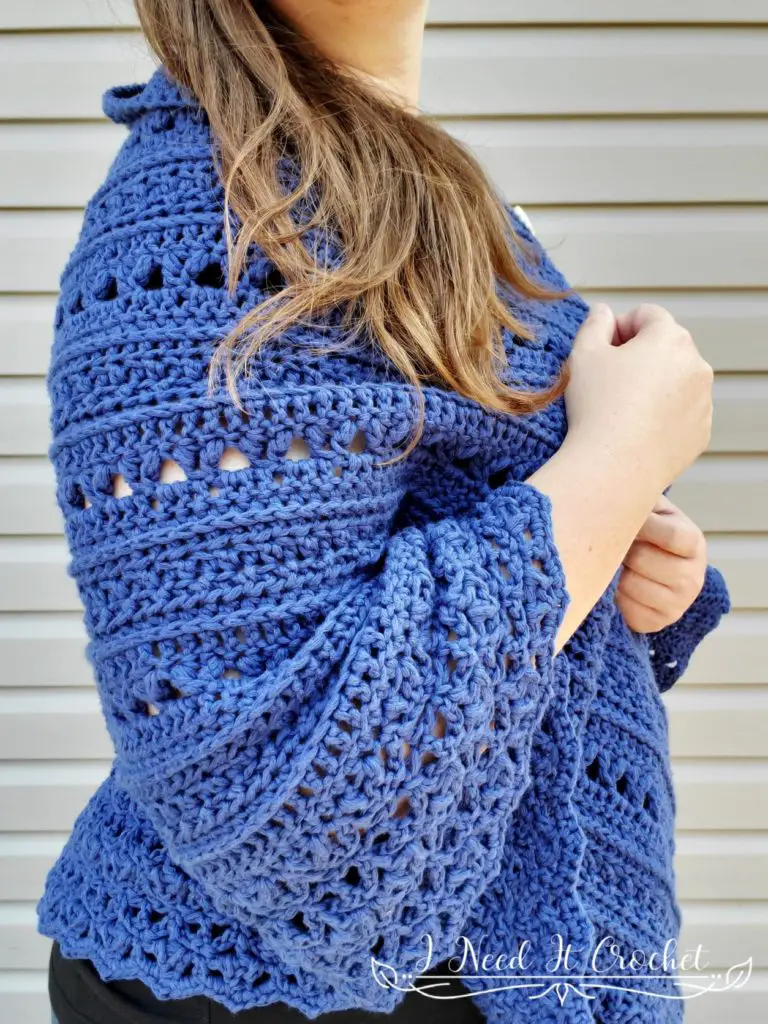
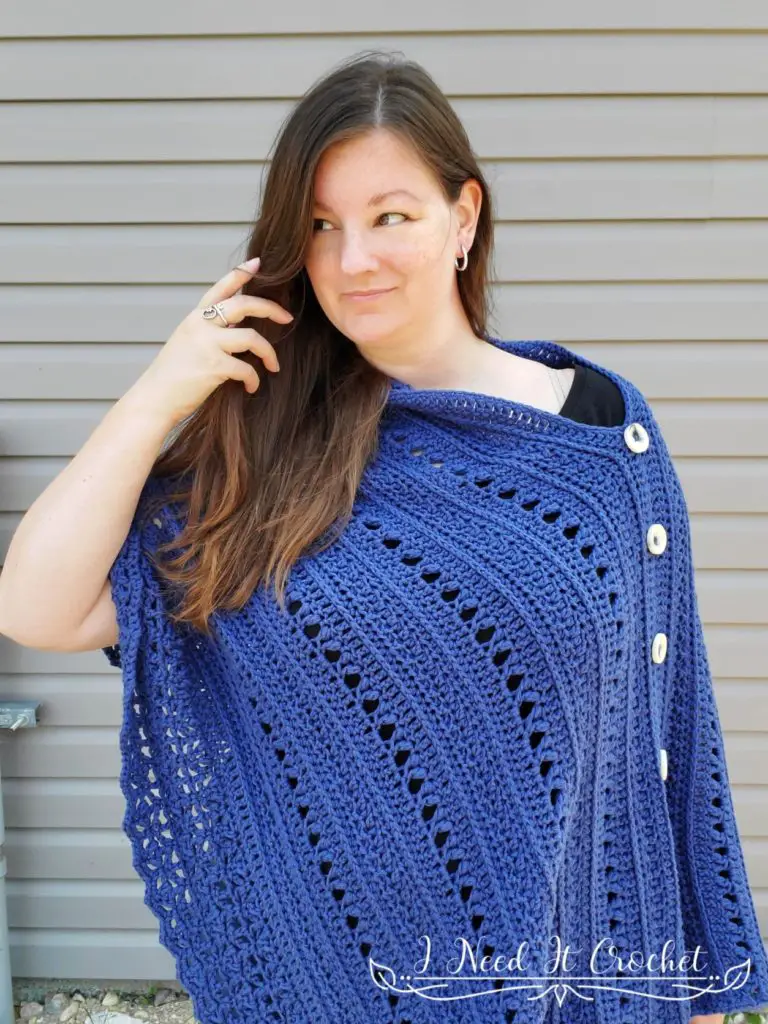
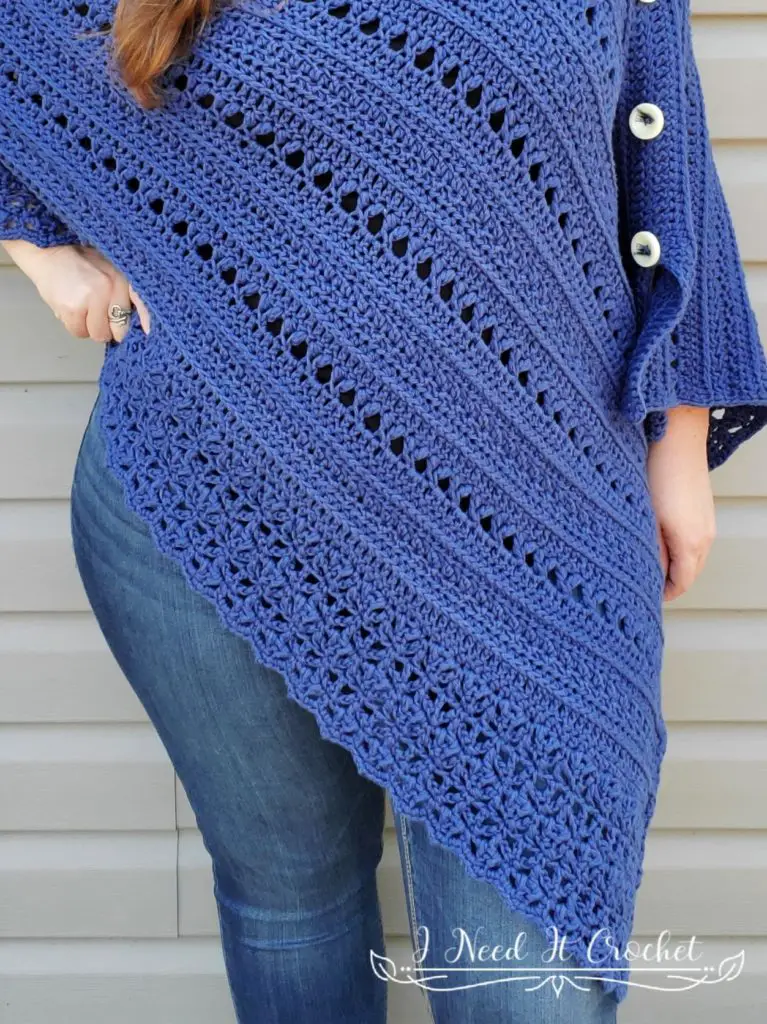
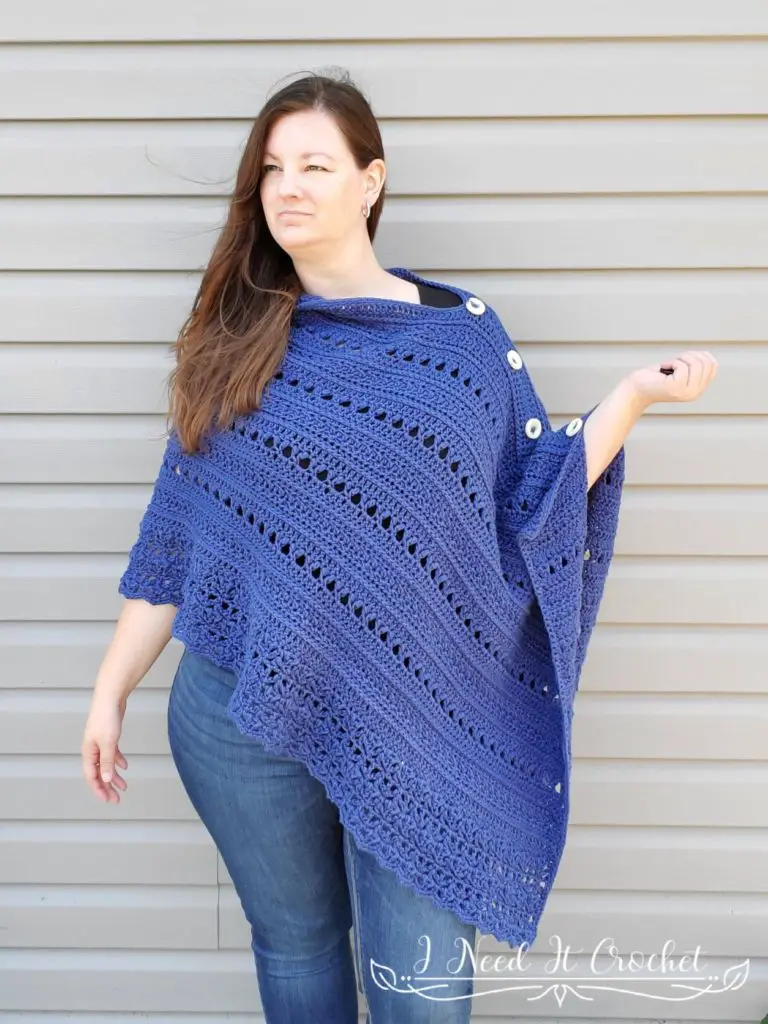
This poncho is super simple to make. It is one large rectangle that is sewn together along the shoulder. The striking combination of solid and lacy stitches make this piece warm but not stifling. It pairs beautifully with your favourite outfit while adding a cozy fall vibe.
Scroll down to view this free crochet poncho pattern. This is an easy crochet poncho pattern that is super quick to work up. You can wear it with your favourite pair of jeans or leggings.
How to crochet the Transitions Poncho – Free Crochet Poncho Pattern
Finished Sizes:
Instructions given to fit size X-small/small; changes for medium/large, X-large/2X-large, 3X-large/4X-large and 5X-large/6X-large are in ()
XS/S (M/L, XL/2XL, 3XL/4XL, 5XL/6XL)
To Fit Bust Circumference: 28” – 32” (36” – 40”, 44” – 48”, 52” – 56”, 60” – 64”)
Finished Circumference: 60” (63 ½”, 67”, 70 ½”, 74 ½”)
Finished Length: 20” (22”, 24”, 26”, 28”) with instructions to make a longer poncho if desired.
Gauge:
See gauge swatch instructions below. Be sure to always check your gauge. It will save you much time and heartache.
Materials:
I used Loops & Threads Creme Cotton, which is a 87% Cotton, 13% Nylon, #4 Worsted weight yarn.
Any yarn of similar weight would work.
Approximately 1000 (1100, 1220, 1300, 1400) yds.
6mm Hook
Stitch Markers
Yarn Needle
Scissors
Measuring Tape
Optional: 5 1” buttons
Abbreviations:
RS = Right Side
WS = Wrong Side
Sk = Skip
St = Stitch
BLO = Back Loop Only
FLO = Front Loop Only
Ss = Slip Stitch
Ch = Chain
Sc = Single Crochet
Dc = Double Crochet
Notes:
Ch1 at the beginning of a row is never considered a stitch.
Ch3 at the beginning of a row is considered a dc.
The model above (that’s me) has a 41” bust and is wearing a size M/L.
Transitions Poncho – Free Crochet Poncho Pattern
Gauge Swatch
Ch 16
- Dc in 4th ch from hook and each ch across. Turn. – 14 st
- Ch1. Hdc in 1st st and each st across. Turn. – 14 st
- Ch1. Hdc in 1st st. Working in 3rd LO: Hdc in next st and each st across until there is only 1 st left unworked. Hdc in 2 top loops of last st. Turn. – 14st
- Ch1. Hdc in 1st st. *Hdc in BLO of next st. Hdc in FLO of next st.** Repeat from * to ** across until there is only 1 st left unworked. Hdc in last st. Turn. – 14 st
- Ch1. Hdc in 1st st. *Hdc in FLO of next st. Hdc in BLO of next st.** Repeat from * to ** across until there is only 1 st left unworked. Hdc in last st. Turn. – 14 st
- Ch1. Hdc in 1st st and each st across. Turn. – 14 st
- Ch3. Working in 3rd LO: Dc in next st and each st across until there is only 1 st left unworked. Dc in 2 top loops of last st. Turn. – 14 st
- Ch4 (counts as dc + ch1). Fc over next 3 sts. *Ch2. Fc over next 3 sts.** Repeat from * to ** across until there is only 1 st left unworked. Ch1. Dc in last st. Turn. – 14 st
Your gauge swatch should measure 4 ¼” x 4 ¼”.
Instructions
Body
With 6mm hook (or hook used to obtain gauge):
Ch 199 (211, 223, 235, 247)
- Working into the back hump of the chain: Dc in 4th ch from hook and each ch across. Turn. – 197 (209, 221, 233, 245) st
- Ch1. Hdc in 1st st and each st across. Turn. – 197 (209, 221, 233, 245) st
- Ch1. Hdc in 1st st. Working in 3rd LO: Hdc in next st and each st across until there is only 1 st left unworked. Hdc in 2 top loops of last st. Turn. – 197 (209, 221, 233, 245) st
- Ch1. Hdc in 1st st. Hdc in BLO of next st. *Hdc in FLO of next st. Hdc in BLO of next st** Repeat from * to ** across until there is only 1 st left unworked. Hdc in last st. Turn. – 197 (209, 221, 233, 245) st
- Repeat row 4. – 197 (209, 221, 233, 245) st
- Ch1. Hdc in 1st st and each st across. Turn. – 197 (209, 221, 233, 245) st
- Ch3. Working in 3rd LO: Dc in next st and each st across until there is only 1 st left unworked. Dc in 2 top loops of last st. Turn. – 197 (209, 221, 233, 245) st
- (RS) Ch4 (counts as dc + ch1). Fc over next 3 sts. *Ch2. Fc over next 3 sts.** Repeat from * to ** across until there is only 1 st left unworked. Ch1. Dc in last st. Turn. – 197 (209, 221, 233, 245) st
- (WS) Ch3. Dc in next ch sp and each st and ch sp across. Turn. – 197 (209, 221, 233, 245) st
Measurement check: At this point your project should be approximately 5” high x 60” (63 ½”, 67”, 70 ½”, 74 ½”) wide.
Repeat rows 2 – 9 until you have a total of 35 (37, 39, 41, 43) rows. Then, proceed to the Lace section.
Transitions Poncho – Free Crochet Poncho Pattern
Lace
- Ch1. Hdc in 1st st and each st across. Turn. – 197 (209, 221, 233, 245) st
- Ch1. Sc in 1st st. *Ch2, Fc over next 3 sts. Ch2, sc in next st.** Repeat from * to ** across. Turn. – 295 (313, 331, 349, 367) st including 49 (52, 55, 58, 61) fc st
- Ch4 (counts as dc + ch1). Sk 2 sts, sc in next st. Ch1, sk 2 sts, dc in next st. *Ch1, sk 2 sts, sc in next st. Ch1, sk 2 sts, dc in next st.** Repeat from * to ** across. Turn. – 197 (209, 221, 233, 245) st
- Ch5 (counts as dc + ch2). Sk 1 st, sc in next st. Ch2, sk 1 st, dc in next st. *Ch2, sk 1 st, sc in next st. Ch2, sk 1 st, dc in next st. ** Repeat from * to ** across. Turn. – 295 (313, 331, 349, 367) st
- Ch1. Sc in 1st st. Ch1, sk 2 sts, dc in next st. *Ch1, sk 2 sts, sc in next st. Ch1, sk 2 sts, dc in next st.** Repeat from * to ** across. Turn. – 197 (209, 221, 233, 245) st
- Ch1. Sc in 1st st. *Ch2, Fc over next 3 sts. Ch2, sc in next st.** Repeat from * to ** across. Turn. – 295 (313, 331, 349, 367) st including 49 (52, 55, 58, 61) fc st
- Ch4 (counts as dc + ch1). Sk 2 sts, sc in next st. Ch1, sk 2 sts, dc in next st. *Ch1, sk 2 sts, sc in next st. Ch1, sk 2 sts, dc in next st.** Repeat from * to ** across. Turn. – 197 (209, 221, 233, 245) st
- Ch5 (counts as dc + ch2). Sk 1 st, sc in next st. Ch2, sk 1 st, dc in next st. *Ch2, sk 1 st, sc in next st. Ch2, sk 1 st, dc in next st. ** Repeat from * to ** across. Turn. – 295 (313, 331, 349, 367) st
- (RS) Ch1. Sc in 1st st. Ch1, sk 2 sts, dc in next st. *Ch1, sk 2 sts, sc in next st. Ch1, sk 2 sts, dc in next st.** Repeat from * to ** across. Turn. – 197 (209, 221, 233, 245) st
- (WS) Ch1. Sc in 1st st. *Ch2, Fc over next 3 sts. Ch2, sc in next st.** Repeat from * to ** across. Bind off. – 295 (313, 331, 349, 367) st including 49 (52, 55, 58, 61) fc st
Transitions Poncho – Free Crochet Poncho Pattern
Seaming
- Fold your project in half with the right sides facing each other (as seen in Figure 1).
- Decide how long you would like your seam to be. Make sure to leave enough space for your head to get through the neck hole. I left a slit open at the end where my arm is, but that is totally optional. I found it helpful to use locking stitch markers for this part.
- Sew up your marked off seam. I found the whip stitch worked well for this, but you can use whichever method suits you best.
- Turn your poncho right side out.
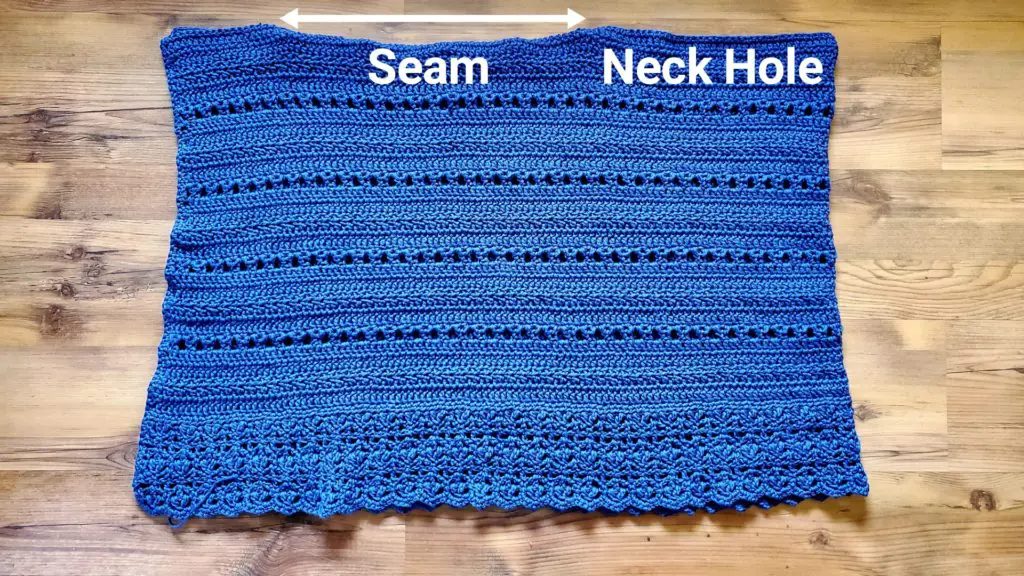
Figure 1
Edging
We will now finish all of the edges with a simple sc border.
Neck: Join your yarn anywhere on the neck.
- Ch1. Sc in 1st st and each st around. Ss to join to 1st st. Bind off.
Body: Join your yarn anywhere on the edge of the body.
- Ch1. Sc around the entire edge of the body in the following manner:
- In each corner: Work 3 sc.
- Along the sides:
- Work 1 sc into the side of each sc.
- Work 1 or 2 sc into the side of each hdc (alternate between 1 and 2)
- Work 2 sc into the side of each dc.
- In the slit: Work 1 sc per stitch.
- Along the bottom:
- Work 2 sc into each ch2 sp.
- Work (sc, ch1, sc) into the top of each fc
- Sk each sc between 2 fc.
- Once you have worked all the way around the body edge, ss to join to 1st st. Bind off.
I added some pretty buttons to the seam on my poncho, but that is totally up to you.
Weave in your ends, and you’re done!
I hope you love your new crochet poncho, and I look forward to seeing all of your beautiful pictures on Ravelry!
If you’d like to know when I post new patterns and tutorials, head on over to my Facebook and Instagram and give me a like and a follow!
If you enjoyed The Transitions Poncho – Free Crochet Poncho Pattern, you may want to check out my other designs!
Transitions Poncho – Free Crochet Poncho Pattern
And until next time… Happy Hooking! 😉