
Birdsfoot Stitch (BfSt) Crochet Tutorial
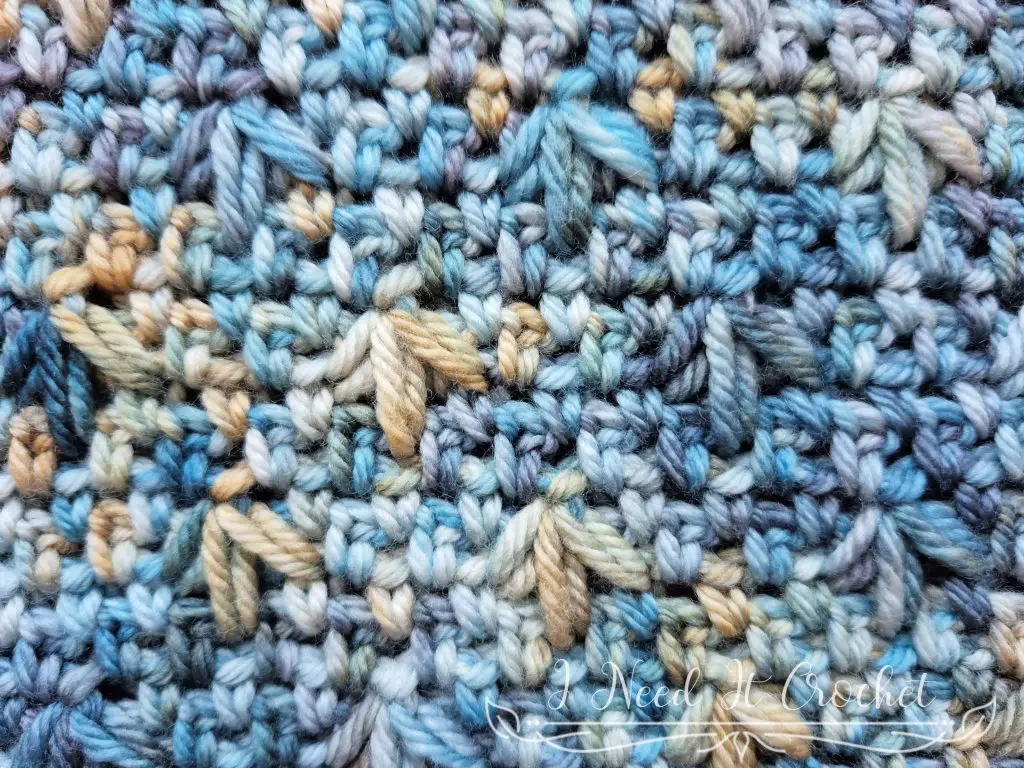
This Birdsfoot Stitch Crochet Tutorial walks you step by step through a textured crochet stitch that looks intricate but is surprisingly approachable. The birdsfoot stitch combines spike stitches with a simple decrease to create a distinctive, decorative pattern that adds depth and interest to your crochet fabric.
Despite its detailed appearance, the birdsfoot stitch is built from familiar techniques, making it accessible to confident beginners and intermediate crocheters who want to explore textured stitch patterns.bles a bird’s footprint, giving the birdsfoot stitch its name and its eye-catching texture.
What Is the Birdsfoot Stitch in Crochet?
In crochet, the birdsfoot stitch is a decorative stitch made by working three spike stitches into different rows and positions, then joining them together into a single stitch. The result is a textured motif that adds interest and depth without adding a lot of bulk.
Because it builds on basic skills, the birdsfoot stitch is well suited to confident beginners and intermediate crocheters who want to explore textured stitch patterns.
About This Tutorial
For the photos shown in this tutorial, the Birdsfoot Stitch is worked over a base of moss stitch (single crochet, chain 1, skip 1). However, this stitch can also be worked over solid single crochet stitches with equally lovely results.
Figure 1 shows your current working stitch (indicated by a black arrow), as well as the stitches where the spikes will be worked (indicated in red).
How to Crochet the Birdsfoot Stitch
Step 1:
Insert your hook one row down and two stitches to the right of your current stitch.
Yarn over and draw up a loop, pulling it up to the height of a regular single crochet.
(See Figure 2)
Step 2:
Insert your hook two rows down from your current stitch. In this example, the hook is inserted into a chain-1 space.
Yarn over and draw up a loop to the same height as your first loop.
(See Figure 3)
Step 3:
Insert your hook one row down and two stitches to the left of your current stitch.
Yarn over and draw up a loop to the same height as the previous loops.
(See Figure 4)
Step 4:
You should now have four loops on your hook.
Yarn over and draw through all four loops to complete the Birdsfoot Stitch.
(See Figure 5)
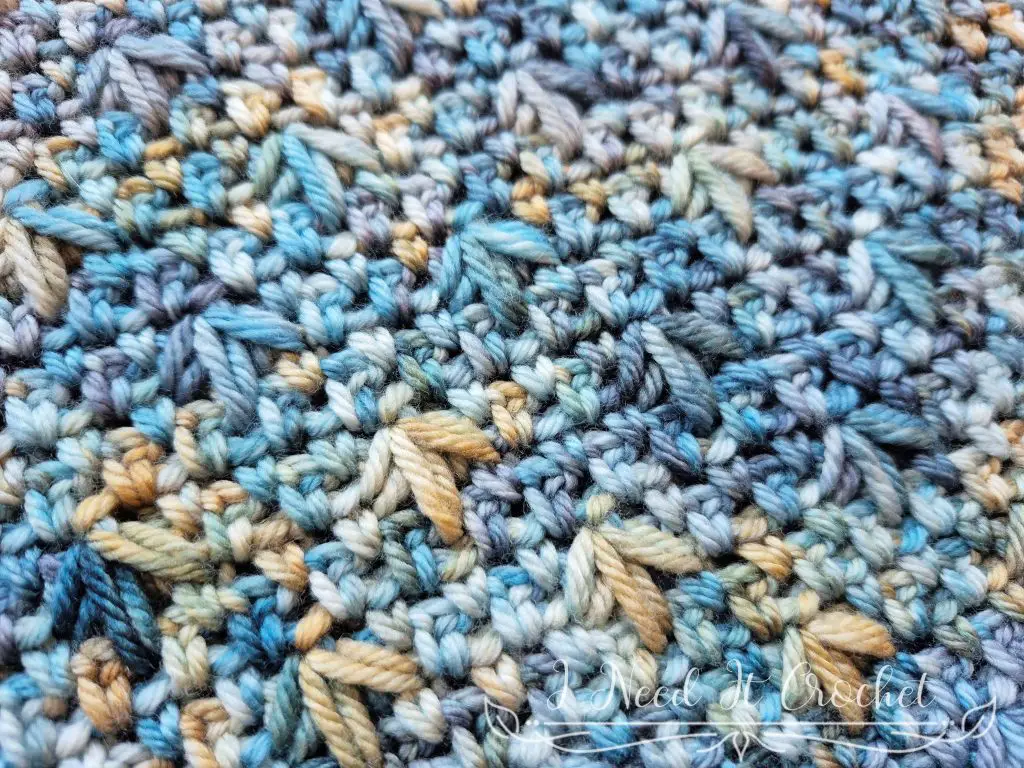
Step 5:
Check your tension, then continue working the remaining stitches in your pattern as instructed.
(See Figure 6)

Figure 1
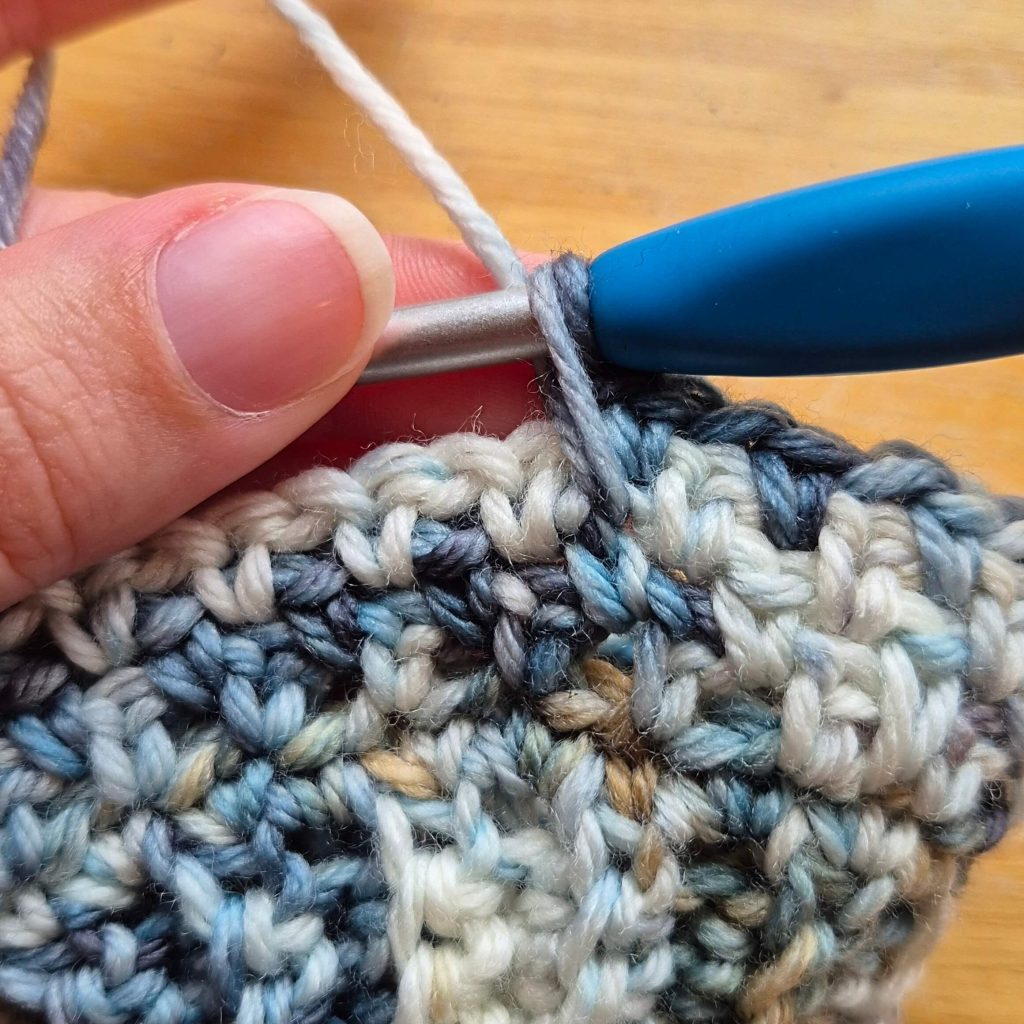
Figure 2
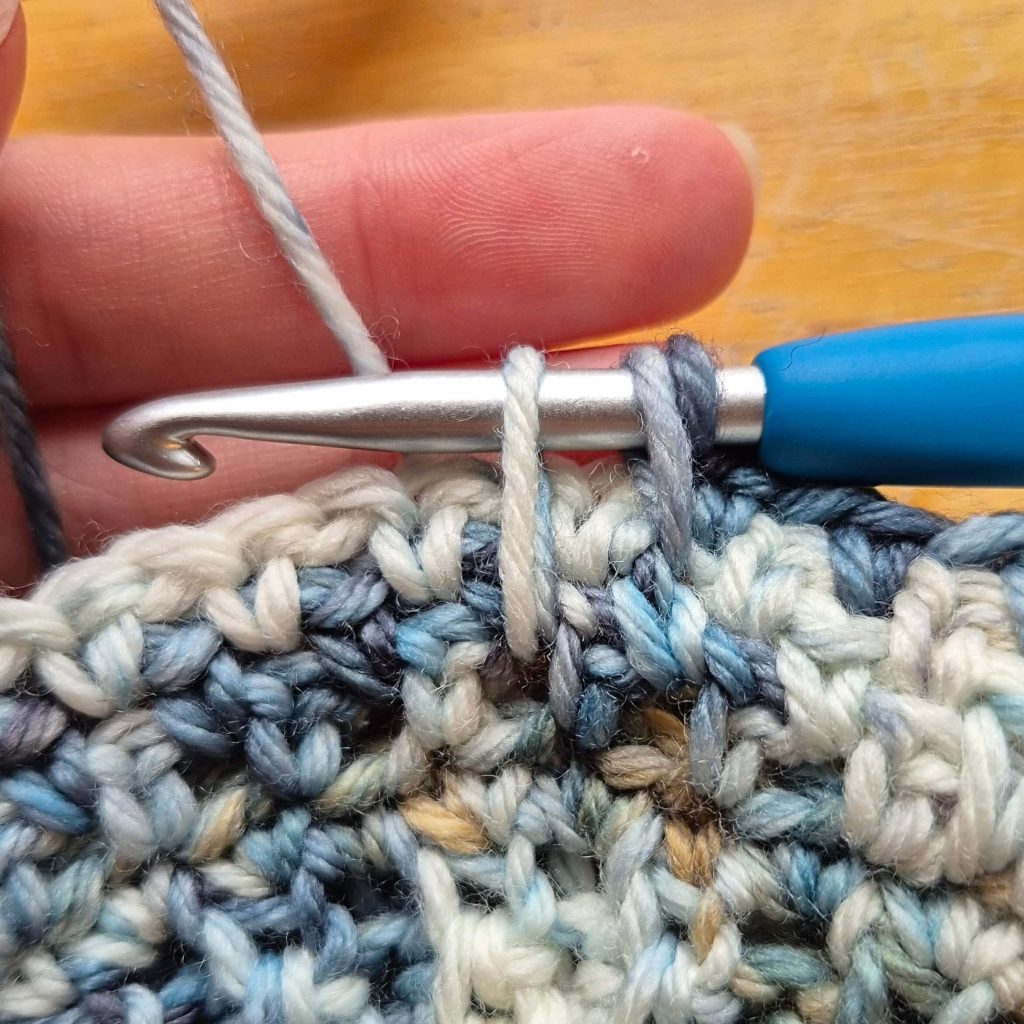
Figure 3
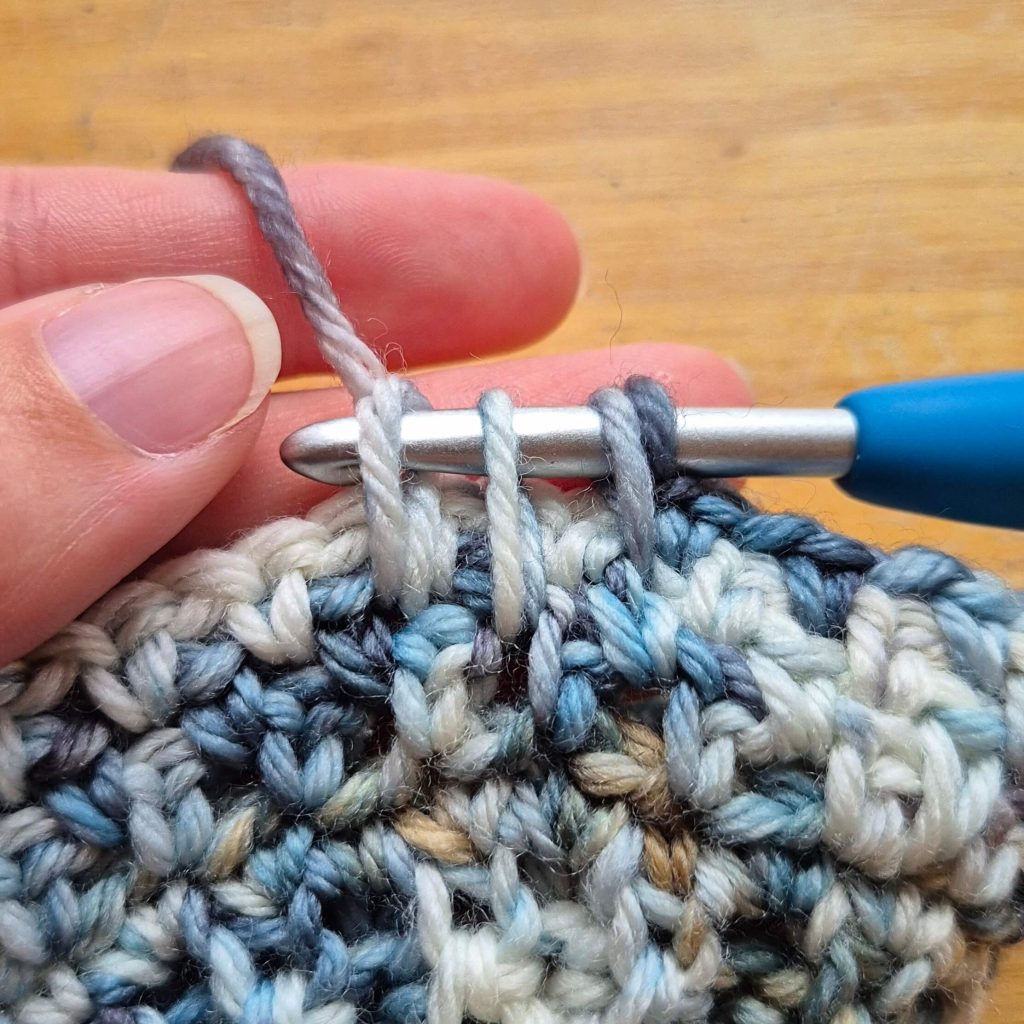
Figure 4

Figure 5
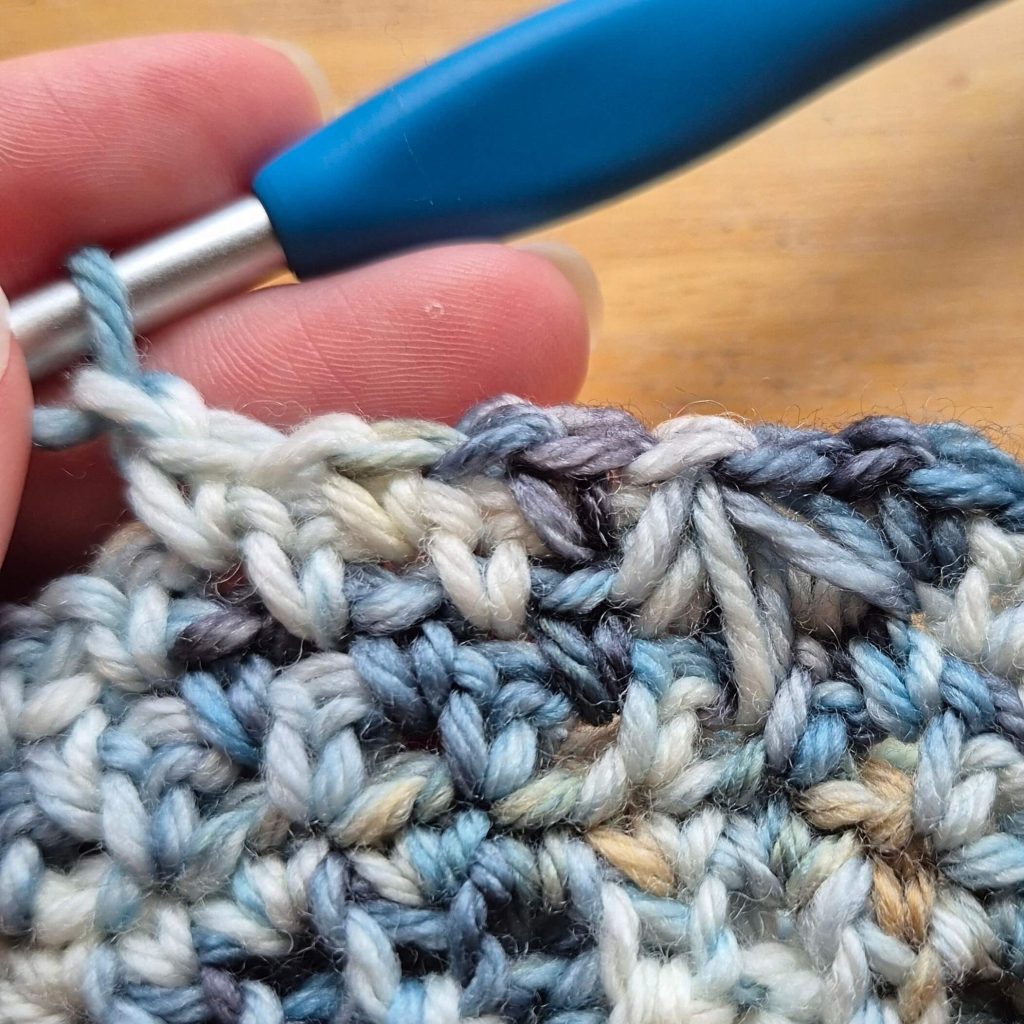
Figure 6
Tips for Crocheting the Birdsfoot Stitch
- Balance your tension.
The “toes” of the birdsfoot stitch should be neat and defined, not loose and floppy. - Avoid over-tightening.
Pulling the spikes too tightly can cause the fabric to pucker and may throw off your gauge. - Pull loops evenly.
Make sure all spike loops are pulled to the same height for the cleanest result.
Where to Use the Birdsfoot Stitch
The Birdsfoot Stitch works beautifully in projects where you want:
- Eye-catching texture
- A stitch pattern that looks complex but isn’t
- Subtle structure without extra thickness
This stitch is featured in the Blessed Bluebird Sweater Scarf, where it adds visual interest and texture while still allowing the fabric to drape comfortably.
FAQ: Birdsfoot Stitch Crochet
The birdsfoot stitch is best suited for confident beginners or intermediate crocheters. If you’re comfortable with spike stitches and basic decreases like single crochet three together, you’ll be able to master this stitch with a little practice.
The birdsfoot stitch combines spike single crochet stitches and a single crochet three together (sc3tog). These elements are worked together to form the distinctive birdsfoot shape.
Uneven tension is the most common issue. Make sure all spike loops are pulled up to the same height and avoid tightening one “toe” more than the others.
Yes. In this tutorial, the birdsfoot stitch is worked over moss stitch, but it can also be worked over solid single crochet stitches or other simple stitch patterns.
Absolutely. When worked with consistent tension, the birdsfoot stitch adds texture without excessive bulk, making it a great choice for garments like the Blessed Bluebird Sweater Scarf.
The Birdsfoot Stitch is a beautiful way to add texture and interest to crochet projects while still using approachable techniques. Once you find your rhythm and dial in your tension, this stitch becomes an enjoyable and eye-catching addition to scarves, garments, and textured panels. You can see the birdsfoot stitch used in the Blessed Bluebird Sweater Scarf, where it adds detail and structure without overwhelming the design.