
Free Crochet Top Pattern – Slightly Slanted Blouse
Slightly Slanted Blouse – Free Crochet Top Pattern
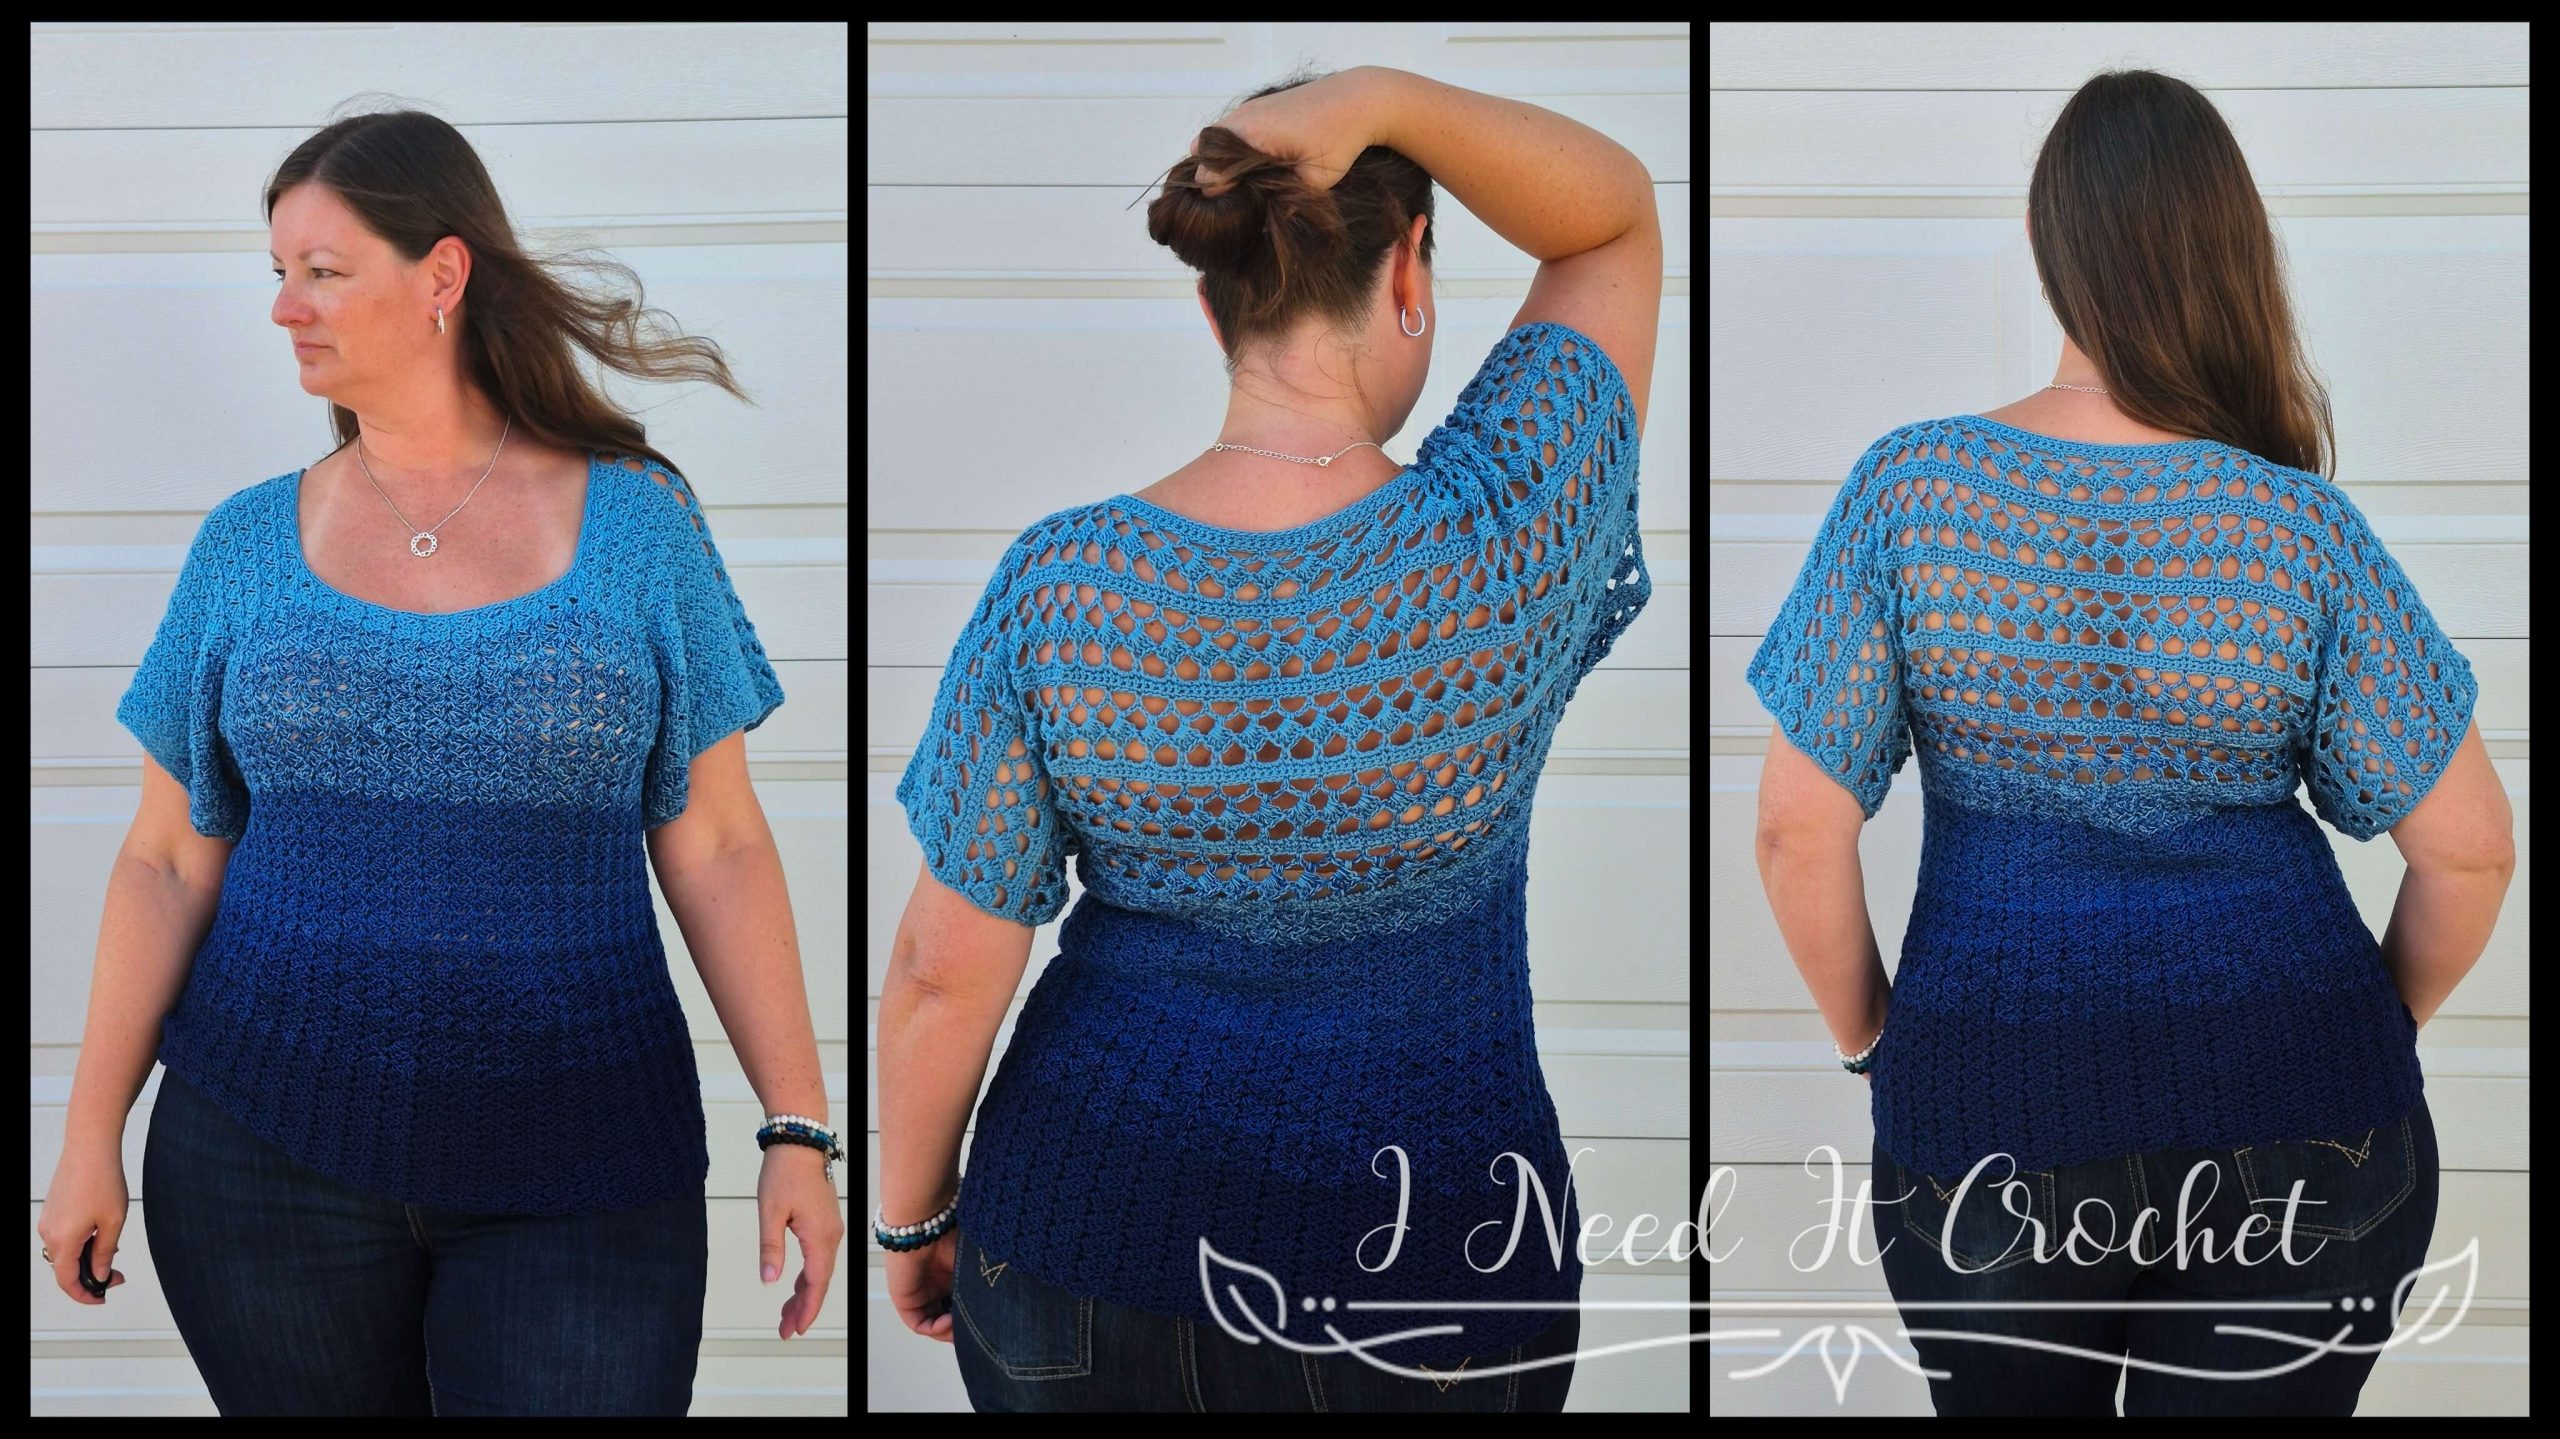
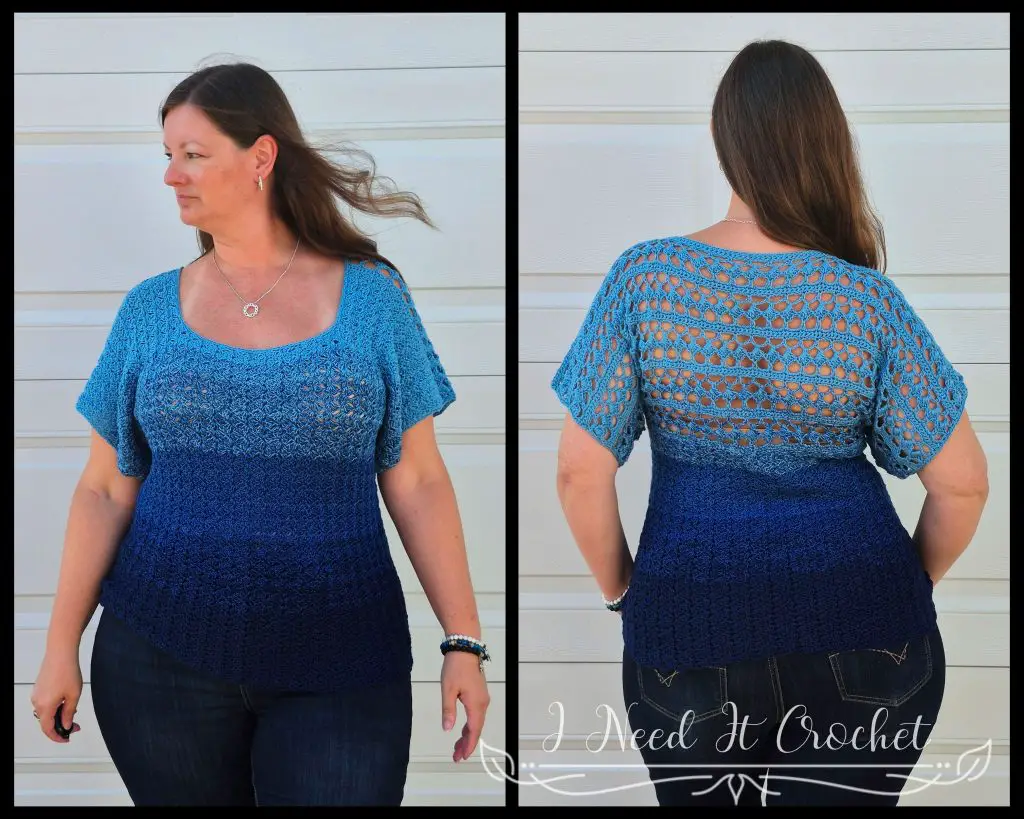
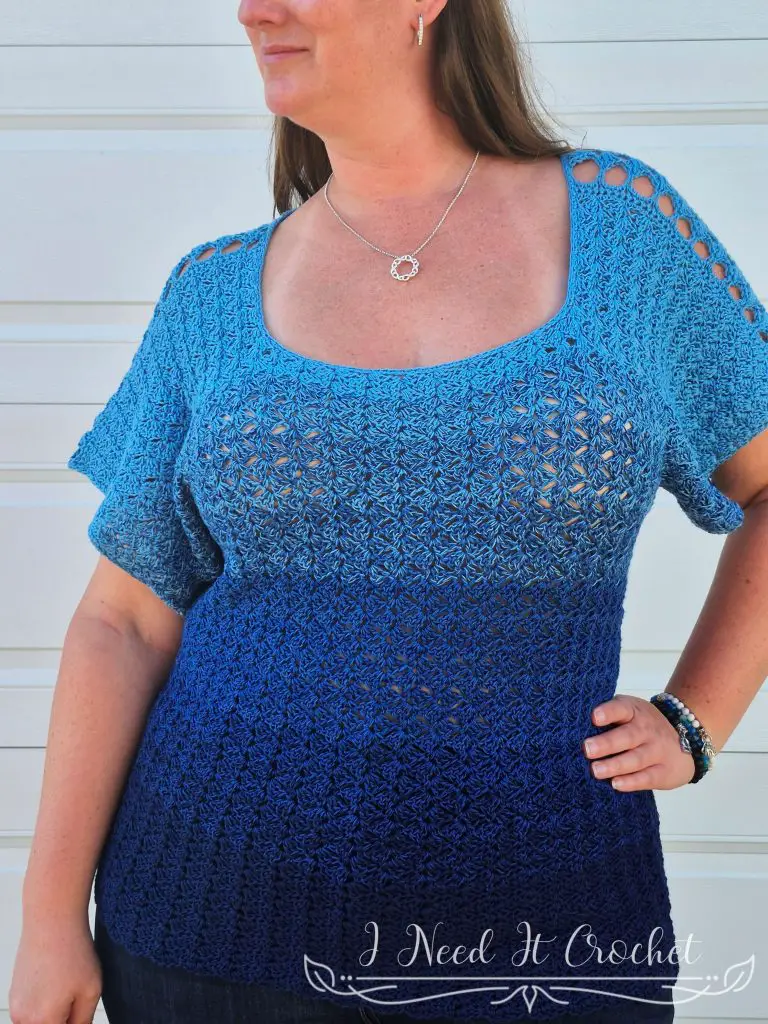
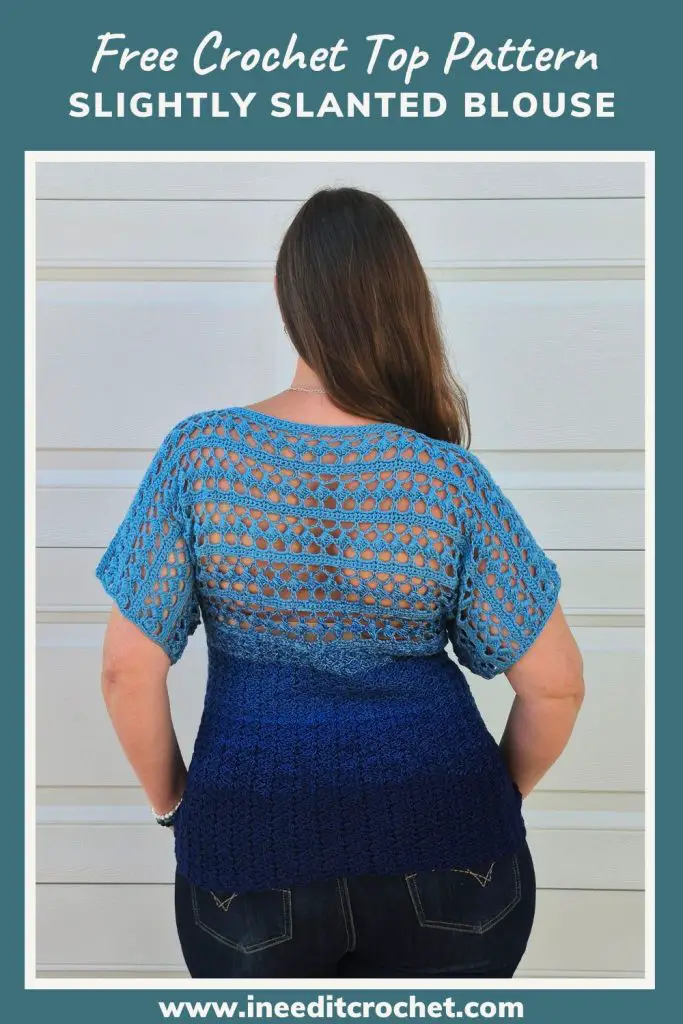
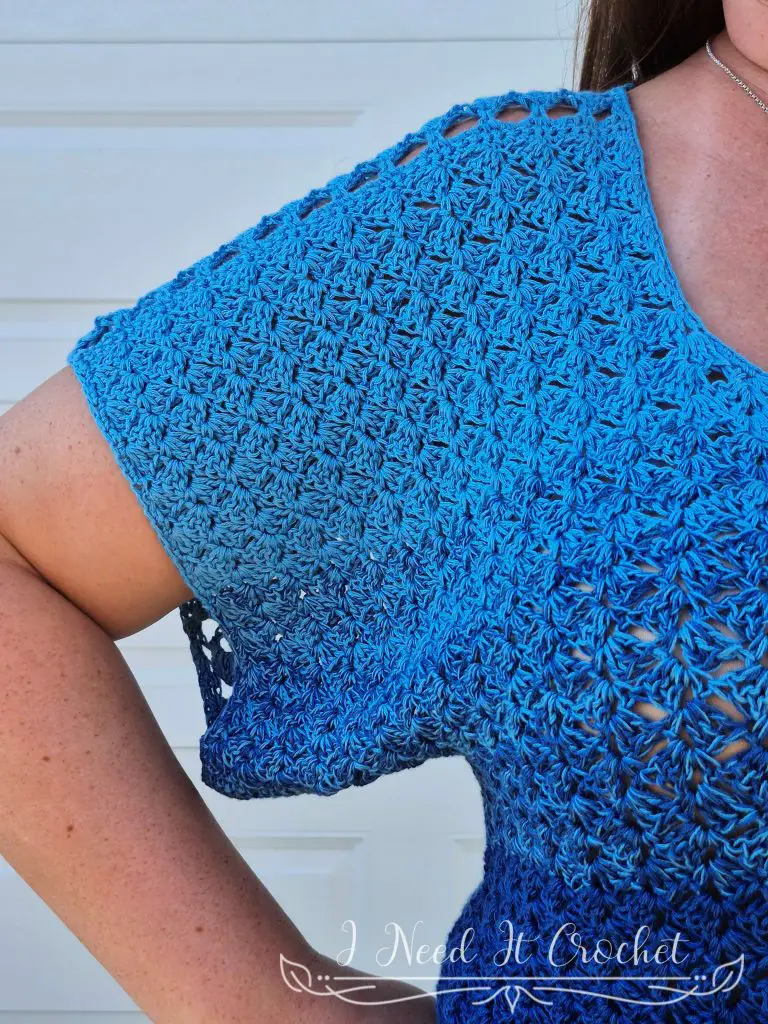
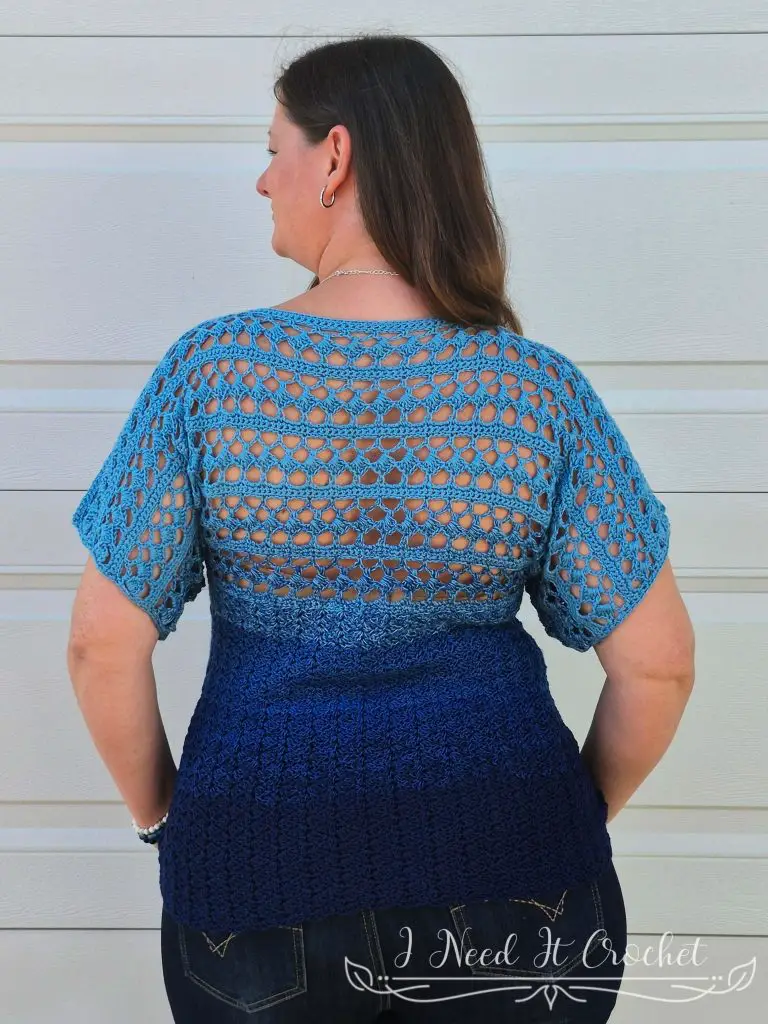
If you’ve been searching for a crochet top pattern that feels fresh and fun to make, you’re in the right place. The Free Crochet Top Pattern – Slightly Slanted Blouse combines lacy openness with solid texture, all brought to life by stitches that lean just a little to the side. The result is a lightweight, customizable blouse that’s as fun to make as it is to wear.
A Fresh Perspective on Crochet Design
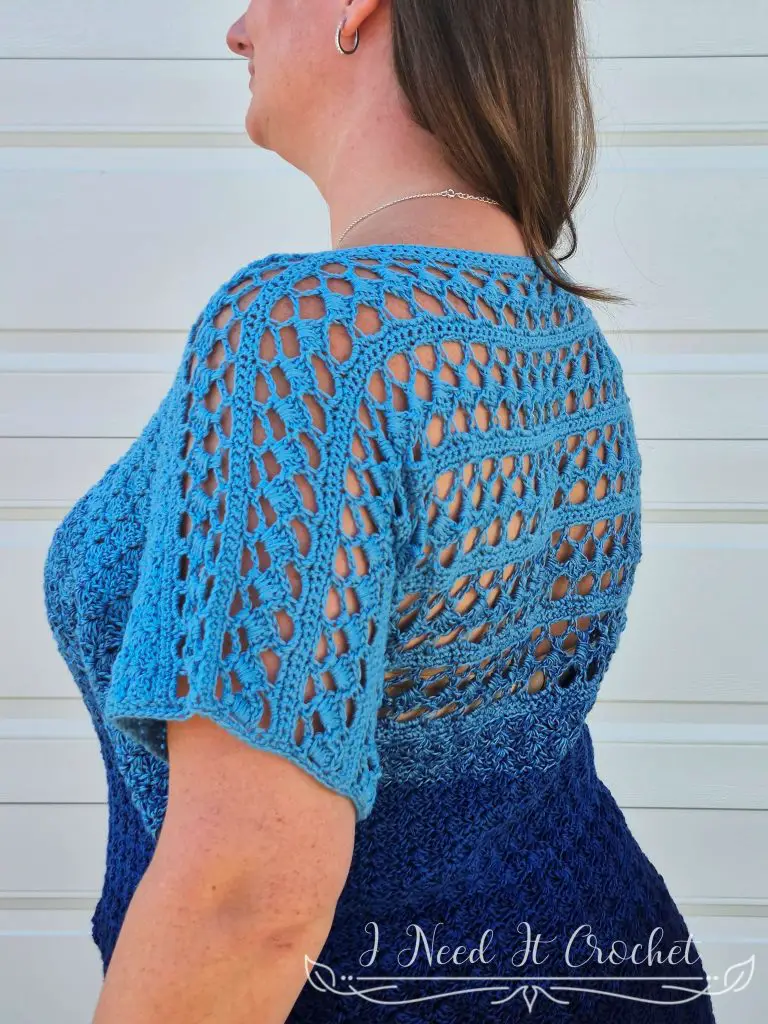
When I design, I’m always looking for little ways to see crochet differently, to put a new twist on familiar stitches. That’s exactly what inspired the Slightly Slanted Blouse. By working the stitches on a tilt, the fabric takes on unexpected depth—lace panels shimmer with movement, solid sections feel more textured, and the whole blouse comes together with a playful, fresh perspective. Sometimes, all it takes is a small change in angle to create something beautifully different.
Free Crochet Top Pattern – Slightly Slanted Blouse
Customizable Crochet Top Pattern
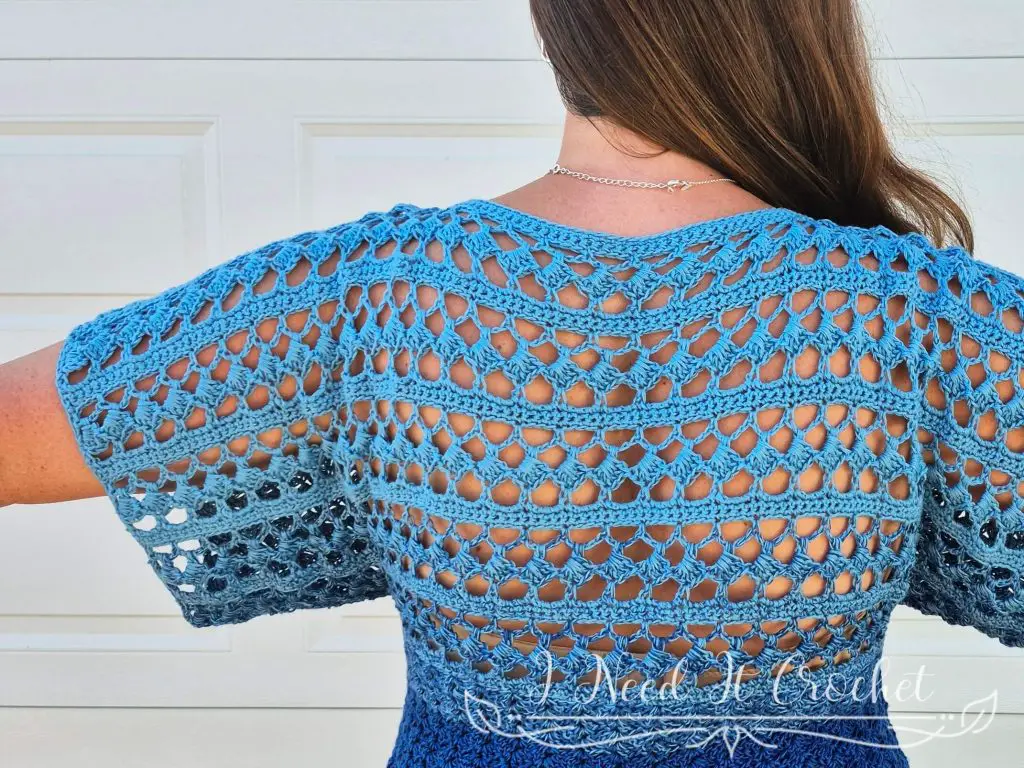
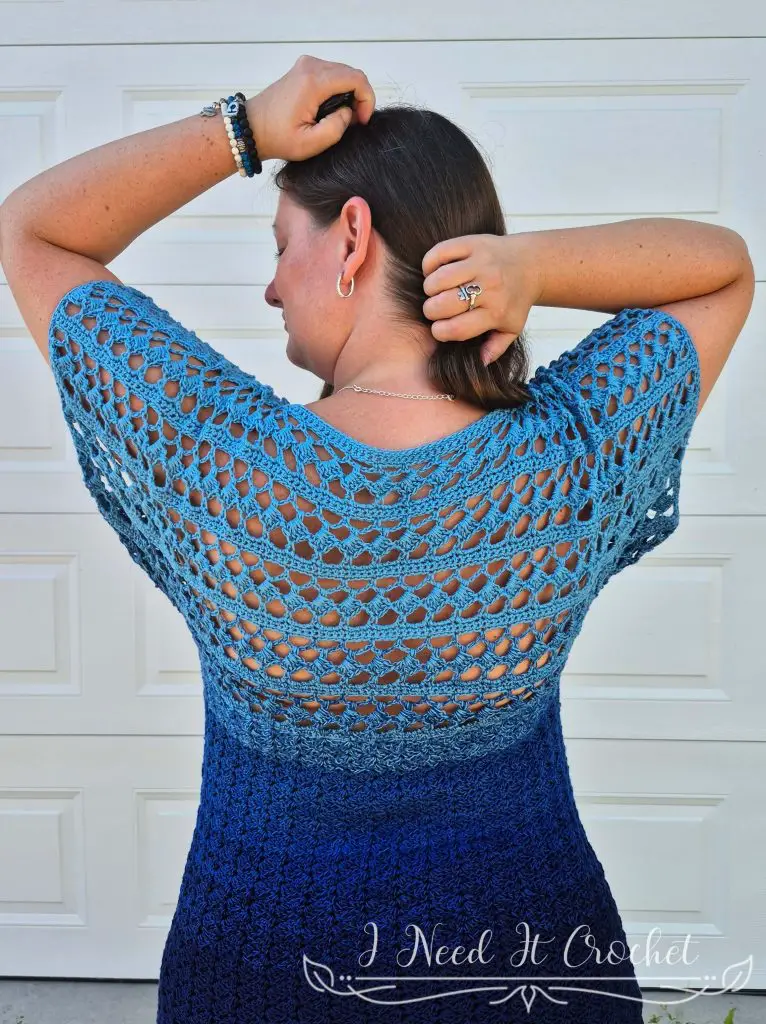
Ready to make your own? The Slightly Slanted Blouse is designed to be as versatile as it is stylish. With a customizable neckline and sleeves, you can easily adjust the fit to suit your comfort and style. Whether you keep the neckline wide and breezy or make it higher for extra coverage, this top is all about making it your own. Below, you’ll find everything you need to get started on this free crochet top pattern—from yarn and sizing to stitches and full instructions.
The Free Crochet Top Pattern – Slightly Slanted Blouse is copyrighted by I Need It Crochet. You may not copy, share, change, or sell the pattern itself. Also, you may not claim this pattern as your own. All pictures contained in this pattern fall under the copyright and may not be used.
Finished items made from the Free Crochet Top Pattern – Slightly Slanted Blouse belong to you, and you may do what you wish with them. If you choose to sell them on Etsy, I would very much appreciate it if you credited me as the pattern designer.
Where Can I Buy The Pdf?
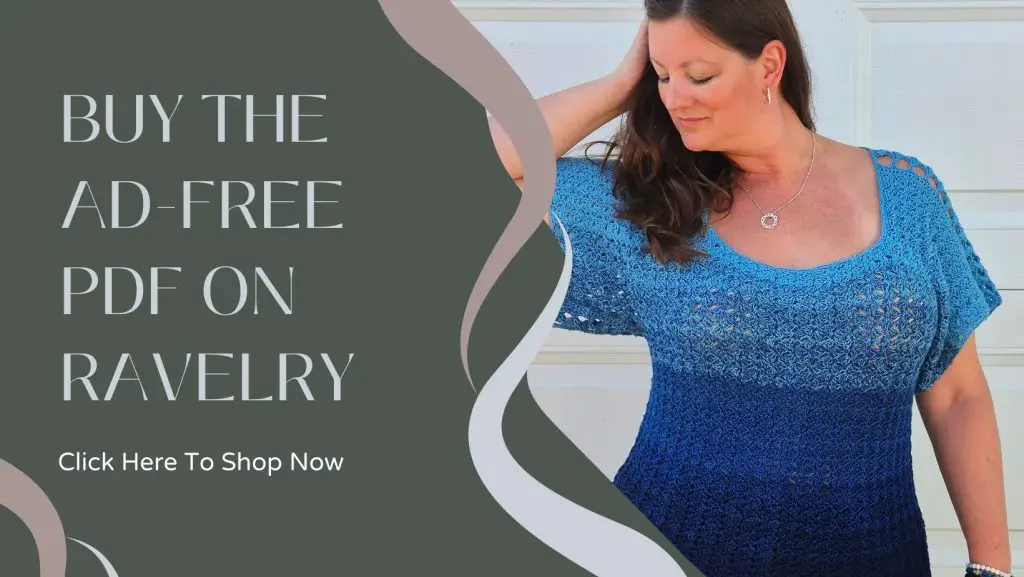
The entire pattern is available to view for free on this page (you just have to scroll down to see it). But if you would prefer to have a printable pdf copy of the pattern, you can purchase it for a small fee from my Ravelry and Etsy stores. Just click the graphics below.
This pattern is 12 pages long and contains 10 pictures and detailed instructions of how to complete your crochet top. A printable pdf will be easier to follow, and you can make notes on it as you go. I find it to be the easier option. But if you like to use the online version, it is here 24/7 for you to view. Enjoy!
Free Crochet Top Pattern – Slightly Slanted Blouse
Free Crochet Top Pattern – Slightly Slanted Blouse
Want to Pin it for later?
Click the image below and save the pin to your favourite crochet pattern boards!
Free Crochet Top Pattern – Slightly Slanted Blouse
Finished Sizes:
Instructions given to fit size X-small; changes for small, medium, large, X-large, 2X-large, 3X-large, 4X-large and 5X-large are in ()
XS (S, M, L, XL, 2XL, 3XL, 4XL, 5XL)
Body Circumference: 28” (33”, 36 ½”, 40”, 45 ¼”, 48 ½”, 52”, 57”, 60 ¾”)
Body Length: Customizable.
Sleeve Circumference: Each size may choose whichever sleeve circumference they like from the following options: 12”, 15 ½”, 19”, & 22 ½”.
Gauge:
I have provided instructions for a gauge swatch below.
Difficulty:
Intermediate – Advanced
Materials:
I used Hobbii Yarns Azalea, which is a 52% Cotton/48% Acrylic #2 Fine weight yarn.
Any yarn of similar weight would work.
Approximately 1000 (1100, 1200, 1300, 1400, 1500, 1600, 1700, 1800) yds.
4mm Hook
4.5mm Hook
Stitch Markers
Yarn Needle
Scissors
Measuring Tape
Abbreviations:
RS = Right Side
WS = Wrong Side
Sk = Skip
St = Stitch
Ss = Slip Stitch
Ch = Chain
Sc = Single Crochet
Dc = Double Crochet
Tr = Treble Crochet
Notes:
This pattern has a difficulty level of Intermediate to Advanced.
Ch1 and ch2 at the beginning of a row/round is never considered a stitch.
Ch3 at the beginning of a row is considered a dc.
Each ch between stitches is considered a stitch.
The model above (that’s me) has a 40” bust and is wearing a size L.
Choose your size according to your bust measurement. For a look like mine, choose the size closest to your measurement.
Free Crochet Top Pattern – Slightly Slanted Blouse
Gauge Swatch
There is a slight difference in gauge between the lacy and solid stitch patterns featured in this design. To mitigate this we are using 2 different sized hooks.
The instructions below will create a gauge swatch that is 4 ½” (9”) wide by 4 ½” (9 ”) high. If you are making a larger size and/or you sometimes find your tension is off, I recommend making the larger swatch. But, of course, that is completely up to you.
Also, the width of your swatch is much more important than the overall height. So if your width is on point, but your height is off, I recommend using the hook that gives you the correct width.
Part 1
With 4mm hook
- Ch 22 (42). Sc in 2nd ch from hook and each ch across. Turn. – 21 (41) st
- Ch1. Sc in 1st st and each st across. Turn. – 21 (41) st
- Ch1, sc in 1st st. *Ch4, sk 3 sts, sc in next st.** Repeat from * to ** to end. Turn. – 26 (51) st
- Ch2, sk 1st sc. *2tr in next ch4 sp. Work 4dc around posts of 2tr just made. Sk next sc.** Repeat from * to ** until 1 sc left. Dc in last sc. Turn. – 31 (61) st
- Ch1, hdc in 1st st. Ch3, sk next 3 sts, sc in next st. *Ch3, sk 5 sts, sc in next st.** Repeat from * to ** until 8 sts left. Ch3, sk 6 sts, hdc in next st. Leave last st unworked. Turn. – 21 (41) st
- Ch1, sc in 1st st. *3sc in next ch3 sp. Sc in next st.* Repeat from * to ** across. Turn. – 21 (41) st
- Ch1. Sc in 1st st and each st across. Turn. – 21 (41) st
- Ch1. Sc in 1st st and each st across. Turn. – 21 (41) st
Small Swatch: Carry on to Part 2
Large Swatch: Repeat rows 3-8 one more time.
Part 2
With 4.5mm hook
- Ch2, 3dc in 1st st. *Sk 3 sts, (sc, ch1, 3dc) in next st.** Repeat from * to ** until 4 sts left. Sk 3 sts, sc in last st. Turn. – 24 (49) st
- Ch2, 3dc in 1st st. Sk 3 sts, (sc, ch1, 3dc) in next ch1 sp. *Sk 4 sts, (sc, ch1, 3dc) in next ch1 sp.** Repeat from * to ** until 4 sts left. Sk 4 sts, sc in 1st ch2 sp. Turn. – 24 (49) st
Repeat row 2 until Part 2 has a total of 5 (10) rows
Your swatch should measure 4 ½” (9”) W by 4 ½” (9 ”) H.
Free Crochet Top Pattern – Slightly Slanted Blouse
Instructions
This blouse is constructed from the top down. The sleeves and upper body are made in one piece. We will begin by working the upper back lace panel, followed by the upper front panel. There is a small amount of seaming at the bottoms of the sleeves. Next, we will work the lower body in the round, joining and turning at the end of each round. Finally, we will finish the edges with a simple round of single crochet.
With 4mm hook (or the smaller of the two hooks used to obtain gauge)
Upper Back
- (WS) Ch 114 (126, 134, 142, 154, 162, 170, 182, 190). Sc in back hump of 2nd ch and each ch across. Turn. – 113 (125, 133, 141, 153, 161, 169, 181, 189) st
- (RS) Ch1. Sc in 1st st and each st across. Turn. – 113 (125, 133, 141, 153, 161, 169, 181, 189) st
- Ch1, sc in 1st st. *Ch4, sk 3 sts, sc in next st.** Repeat from * to ** across. Turn. – 28 (31, 33, 35, 38, 40, 42, 45, 47) ch4 + 29 (32, 34, 36, 39, 41, 43, 46, 48) sc = 141 (156, 166, 176, 191, 201, 211, 226, 236) st
- Ch2, sk 1st st, 2tr in next ch4 sp. Work 4dc around posts of 2 tr sts you just made. *Sk 1 sc, 2tr in next ch4 sp. 4dc around posts of 2 tr sts.** *Repeat from * to ** until 1 sc left. Dc in last sc. Turn. – 28 (31, 33, 35, 38, 40, 42, 45, 47) 6st boxes + 1dc = 169 (187, 199, 211, 229, 241, 253, 271, 283) st
- Ch1, sc in 1st st. Ch3, sk 3 sts, sc in next st. *Ch3, sk 5 sts, sc in next st.** Repeat from * to ** until 8 sts left. Ch3, sk 6 sts, hdc in next st. Leave last st unworked. Turn. – 28 (31, 33, 35, 38, 40, 42, 45, 47) ch3 + 28 (31, 33, 35, 38, 40, 42, 45, 47) sc + 1hdc = 113 (125, 133, 141, 153, 161, 169, 181, 189) st
- Ch1, sc in 1st st. *3sc in next ch3 sp. Sc in next st.* Repeat from * to ** across. Turn. – 113 (125, 133, 141, 153, 161, 169, 181, 189) st
- (WS) Ch1. Sc in 1st st and each st across. Turn. – 113 (125, 133, 141, 153, 161, 169, 181, 189) st
- (RS) Ch1. Sc in 1st st and each st across. Turn. – 113 (125, 133, 141, 153, 161, 169, 181, 189) st
Measurement Check: At this point your project should be approximately 24 ¼” (26 ¾”, 28 ½”, 30 ¼”, 32 ¾”, 34 ½”, 36 ¼”, 38 ½”, 40 ½”) wide and 2 ½” high. If your project width is off by more than 1 inch, I recommend frogging it and restarting with a different sized hook.
Repeat rows 3-8 according to your chosen sleeve (circumference) size. Then bind off with a 12” long tail for sewing the underarm. Your project should look similar to Figure 1 below.
- For 12” sleeves: Repeat rows 3-8, 2 more times (20 rows total). Your project should be 6” in height.
- For 15 ½” sleeves: Repeat rows 3-8, 3 more times (26 rows total). Your project should be 7 ¾” in height.
- For 19” sleeves: Repeat rows 3-8, 4 more times (32 rows total). Your project should be 9 ½” in height.
- For 22 ½” sleeves: Repeat rows 3-8, 5 more times (38 rows total). Your project should be 11 ¼” in height.
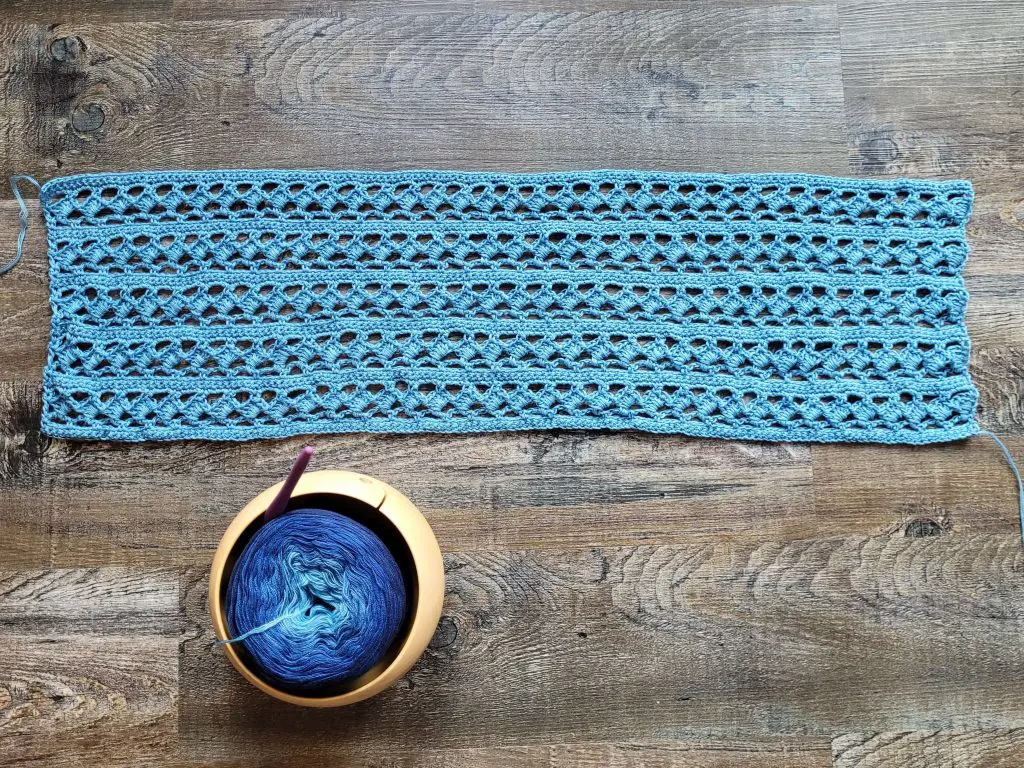
Figure 1
Upper Front
This design features a wide, low square neckline, but if you prefer a more modest look, I’ve got you covered. I have added notes in the necessary parts of the pattern to adjust the neck width and depth.
Free Crochet Top Pattern – Slightly Slanted Blouse
Left Shoulder
Turn your project so the starting chain is facing up and the wrong side is facing you. Join your yarn in the bottom of the first starting chain.
Count 41 (45, 49, 49, 53, 57, 61, 65, 69) sts from the right and place a st marker in the last st counted.
Neck adjustment: The following instructions will give you a neckline that is 6 ½” (7 ½”, 7 ½”, 9 ¼”, 10”, 10”, 10”, 11”, 11”) wide. If you would like to make the neckline narrower, then you will have to move the stitch marker any multiple of 4 stitches to the left. Each 4 stitches will subtract approximately 1 ¾” from the final neck width. If you do this, please keep in mind that your stitch counts will be different from the instructions below.
- (WS) Ch1, sc in 1st st. *Ch4, sk 3 sts, sc in next st.** Repeat from * to ** until you come to the st marker (your last sc should fall in the same st as the st marker). Leave the rest of the sts unworked. Turn. – 10 (11, 12, 12, 13, 14, 15, 16, 17) ch4 + 11 (12, 13, 13, 14, 15, 16, 17, 18) sc = 51 (56, 61, 61, 66, 71, 76, 81, 86) st
- (RS) Ch2, sk 1st st, 2tr in next ch4 sp. Work 4dc around posts of 2 tr sts you just made. *Sk 1 sc, 2tr in next ch4 sp. 4dc around posts of 2 tr sts.** *Repeat from * to ** until 1 sc left. Dc in last sc. Turn. – 10 (11, 12, 12, 13, 14, 15, 16, 17) 6st boxes + 1dc = 61 (67, 73, 73, 79, 85, 91, 97, 103) st
- Ch1, sc in 1st st. Ch3, sk 3 sts, sc in next st. *Ch3, sk 5 sts, sc in next st.** Repeat from * to ** until 8 sts left. Ch3, sk 6 sts, hdc in next st. Leave last st unworked. Turn. – 10 (11, 12, 12, 13, 14, 15, 16, 17) ch3 + 10 (11, 12, 12, 13, 14, 15, 16, 17) sc + 1 hdc = 41 (45, 49, 49, 53, 57, 61, 65, 69) st
- Ch1, sc in 1st st. *3sc in next ch3 sp. Sc in next st.* Repeat from * to ** across. Turn. – 41 (45, 49, 49, 53, 57, 61, 65, 69) st
- Ch1. Sc in 1st st and each st across. Turn. – 41 (45, 49, 49, 53, 57, 61, 65, 69) st
- Ch1. Sc in 1st st and each st across. Turn. – 41 (45, 49, 49, 53, 57, 61, 65, 69) st
Your project should now look similar to Figures 2 & 3 below.
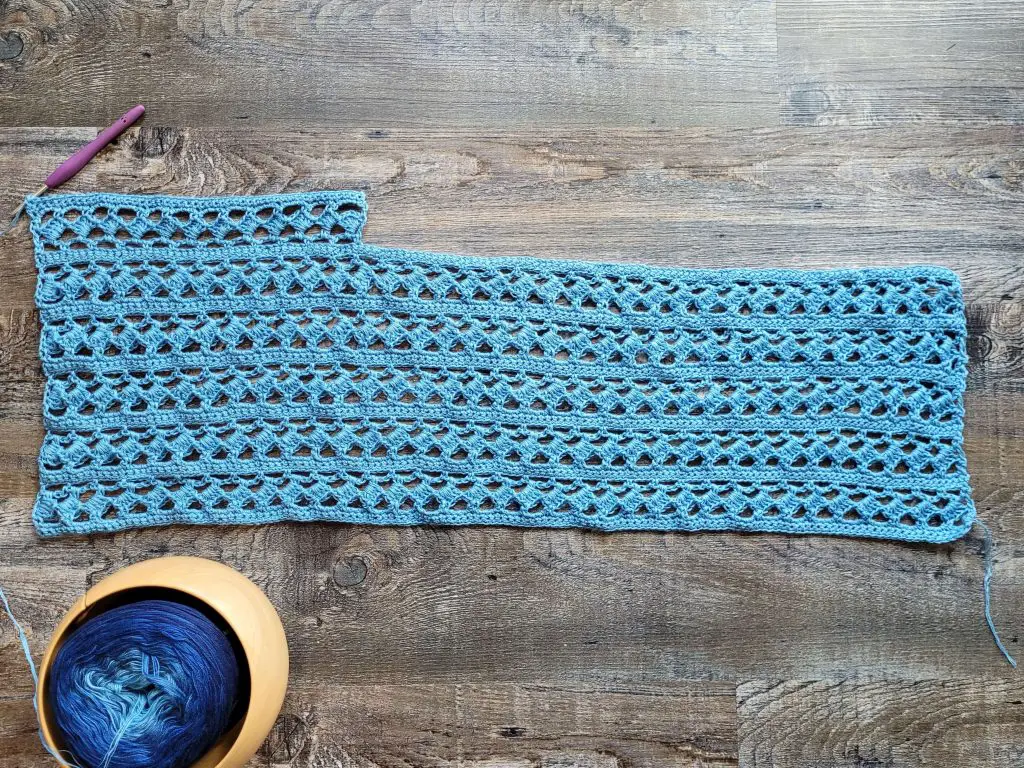
Figure 2
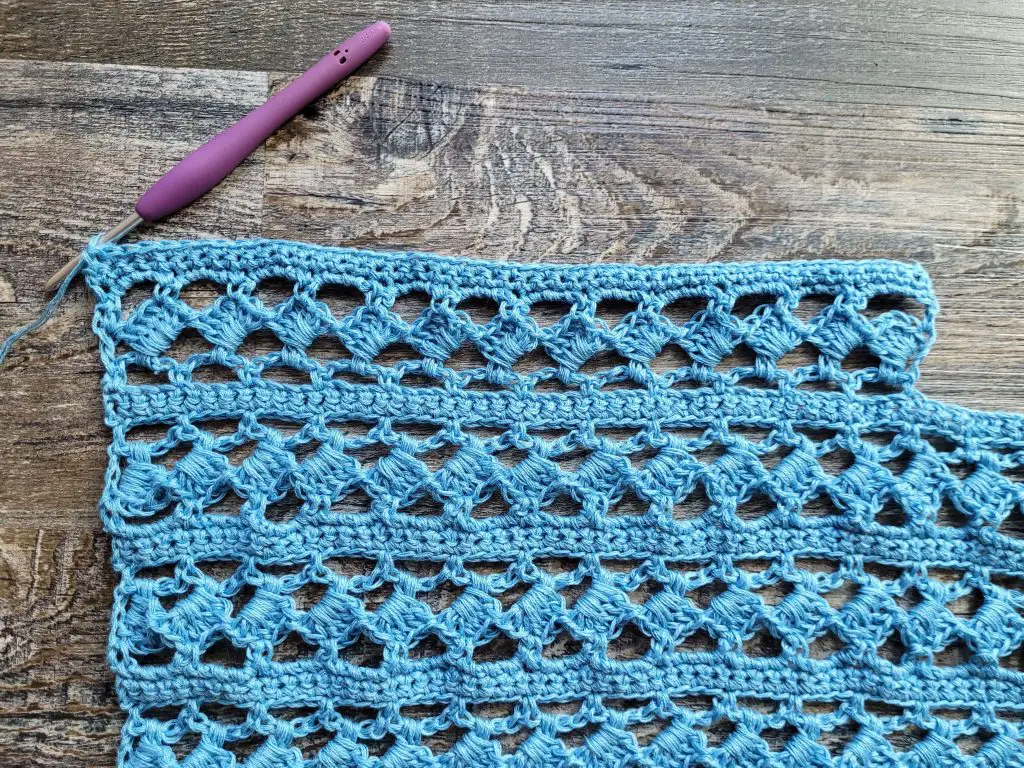
Figure 3
Change to 4.5mm hook (or the larger of the two hooks used to obtain gauge)
- Ch2, 3dc in 1st st. *Sk 3 sts, (sc, ch1, 3dc) in next st.** Repeat from * to ** until 4 sts left. Sk 3 sts, sc in last st. Turn. – 49 (54, 59, 59, 64, 69, 74, 79, 84) st
- Ch2, 3dc in 1st st. Sk 3 sts, (sc, ch1, 3dc) in next ch1 sp *Sk 4 sts, (sc, ch1, 3dc) in next ch1 sp.** Repeat from * to ** until 4 sts left. Sk 4 sts, sc in 1st ch2 sp. Turn. – 49 (54, 59, 59, 64, 69, 74, 79, 84) st
Neck adjustment: The following instructions will give you a neckline that is approximately 5 ½” deep. If you prefer a higher neckline, simply do less repeats of row 8. But, make sure your total row count is an odd number. Your final row should be a WS row. Each 2 row repeats equals approximately ¾”.
Repeat row 8 until you have a total of 17 rows (counting from row 1 of the Left Shoulder). Ch 31 (35, 35, 43, 47, 47, 47, 51, 51). Bind off. Your project should now look similar to Figure 4 below.
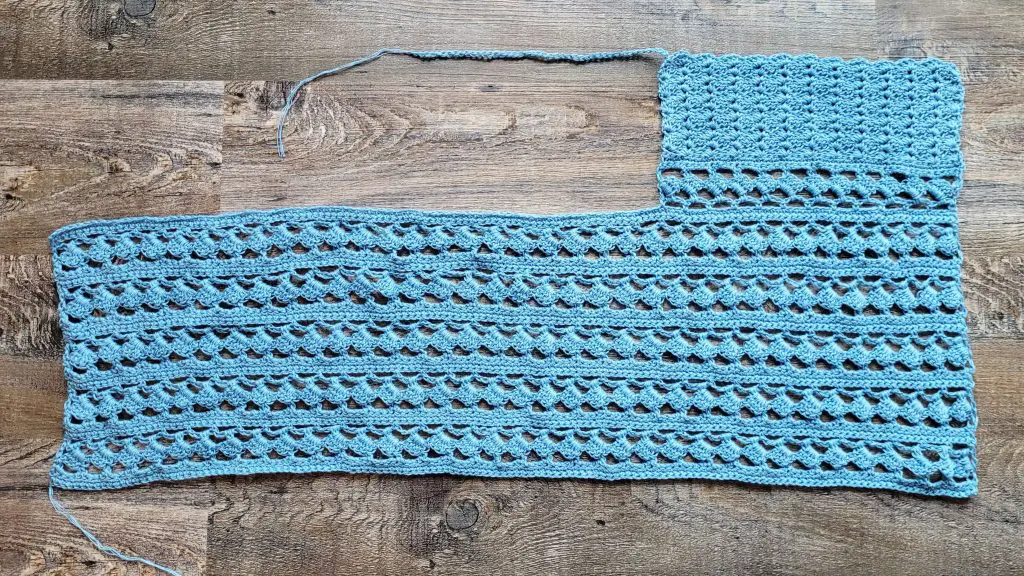
Figure 4
Right Shoulder
With 4mm hook (or the smaller of the two hooks used to obtain gauge)
The right shoulder begins on the same starting chain that the left shoulder did. With the WS facing you, count 41 (45, 49, 49, 53, 57, 61, 65, 69) sts from the left side, then join in the last st you counted.
Note: Keep in mind that if you made adjustments to the neckline width or depth for the left shoulder, you will have to make the same adjustments to the right shoulder.
- (WS) Ch1, sc in 1st st. *Ch4, sk 3 sts, sc in next st.** Repeat from * to ** to the end. Turn. – 10 (11, 12, 12, 13, 14, 15, 16, 17) ch3 + 11 (12, 13, 13, 14, 15, 16, 17, 18) sc = 51 (56, 61, 61, 66, 71, 76, 81, 86) st
- (RS) Ch2, sk 1st st, 2tr in next ch4 sp. Work 4dc around posts of 2 tr sts you just made. *Sk 1 sc, 2tr in next ch4 sp. 4dc around posts of 2 tr sts.** *Repeat from * to ** until 1 sc left. Dc in last sc. Turn. – 10 (11, 12, 12, 13, 14, 15, 16, 17) 6st boxes + 1dc = 61 (67, 73, 73, 79, 85, 91, 97, 103) st
- Ch1, sc in 1st st. Ch3, sk 3 sts, sc in next st. *Ch3, sk 5 sts, sc in next st.** Repeat from * to ** until 8 sts left. Ch3, sk 6 sts, hdc in next st. Leave last st unworked. Turn. – 10 (11, 12, 12, 13, 14, 15, 16, 17) ch3 + 10 (11, 12, 12, 13, 14, 15, 16, 17) sc + 1 hdc = 41 (45, 49, 49, 53, 57, 61, 65, 69) st
- Ch1, sc in 1st st. *3sc in next ch3 sp. Sc in next st.* Repeat from * to ** across. Turn. – 41 (45, 49, 49, 53, 57, 61, 65, 69) st st
- Ch1. Sc in 1st st and each st across. Turn. – 41 (45, 49, 49, 53, 57, 61, 65, 69) st
- Ch1. Sc in 1st st and each st across. Turn. – 41 (45, 49, 49, 53, 57, 61, 65, 69) st
Change to 4.5mm hook (or the larger of the two hooks used to obtain gauge)
- Ch2, 3dc in 1st st. *Sk 3 sts, (sc, ch1, 3dc) in next st.** Repeat from * to ** until 4 sts left. Sk 3 sts, sc in last st. Turn. – 49 (54, 59, 59, 64, 69, 74, 79, 84) st
- Ch2, 3dc in 1st st. Sk 3 sts, (sc, ch1, 3dc) in next st. *Sk 4 sts, (sc, ch1, 3dc) in next ch1 sp.** Repeat from * to ** until 4 sts left. Sk 4 sts, sc in 1st ch2 sp. Turn. – 49 (54, 59, 59, 64, 69, 74, 79, 84) st
Repeat row 8 until your right shoulder has the same number of rows as your left shoulder. Do not bind off. Your project should now look similar to Figure 5 below.

Figure 5
Join the end of the long chain on the left shoulder to the first stitch of the last row of the right shoulder. To do this, I just wove the end through the top loops of the stitch and made a knot (see Figure 6 & 7 below). Now we will continue working the upper front.
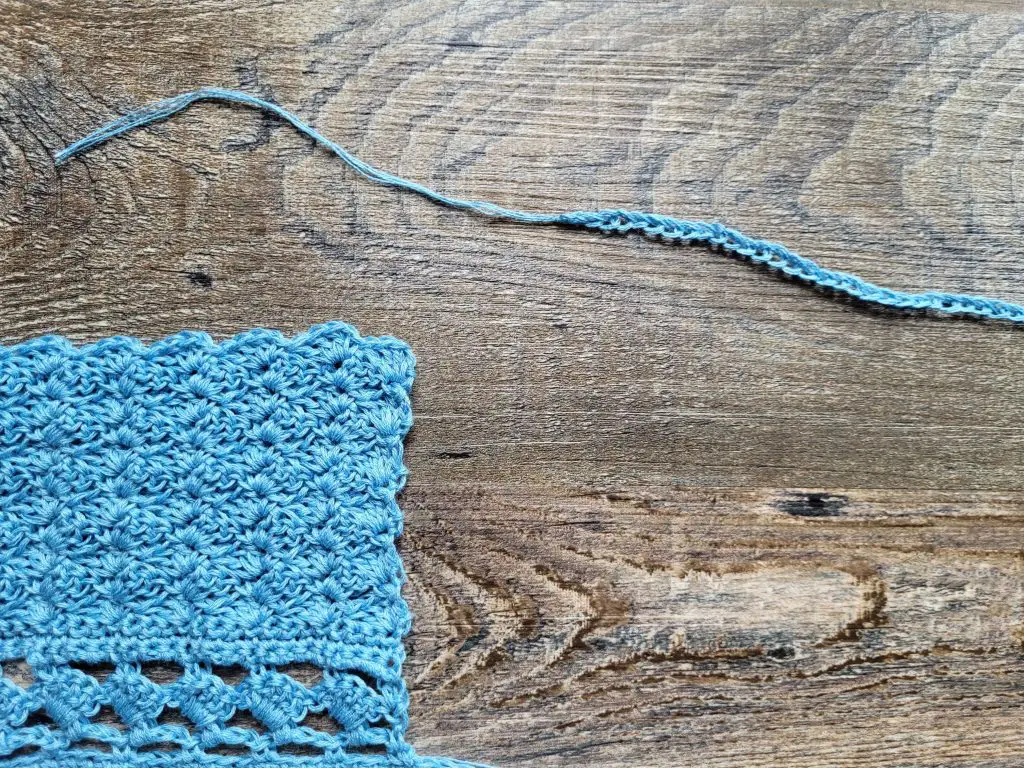
Figure 6
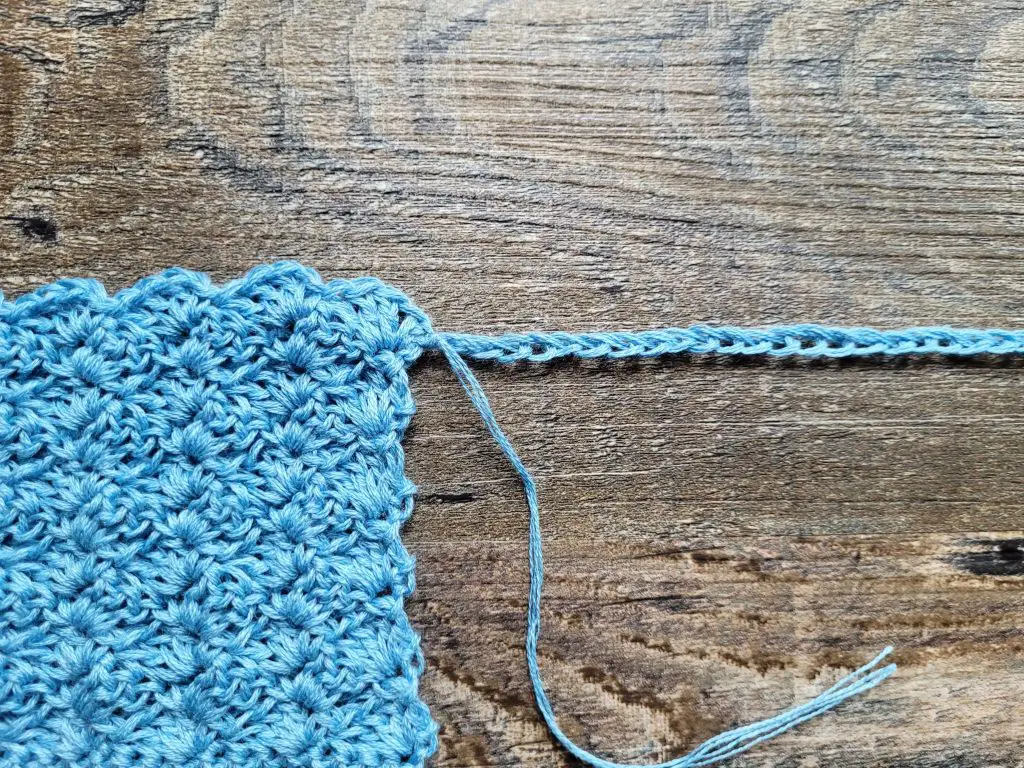
Figure 7
- Ch2, 3dc in 1st st. Sk 3 sts, (sc, ch1, 3dc) in next ch1 sp. *Sk 4 sts, (sc, ch1, 3dc) in next ch1 sp.** Repeat from * to ** until 4 sts left before the long chain. Sk 4 sts, (sc, ch1, 3dc) in ch2 sp. [Sk 3 ch, (sc, ch1, 3dc) in next ch.] Repeat from [ to ] until 0 chains left. Repeat from * to ** until 4 sts left. Sk 4 sts, sc in 1st ch2 sp. Turn. – 139 (154, 164, 174, 189, 199, 209, 224, 234) st
- Ch2, 3dc in 1st st. Sk 3 sts, (sc, ch1, 3dc) in next st. *Sk 4 sts, (sc, ch1, 3dc) in next ch1 sp.** Repeat from * to ** until 4 sts left. Sk 4 sts, sc in 1st ch2 sp. Turn. – 139 (154, 164, 174, 189, 199, 209, 224, 234) st
Repeat row 19 until your upper front is the same height as your upper back. Be sure to end on a RS row. Bind off, leaving enough yarn tail to sew up the underarm. Your project should now look similar to Figure 8 below.
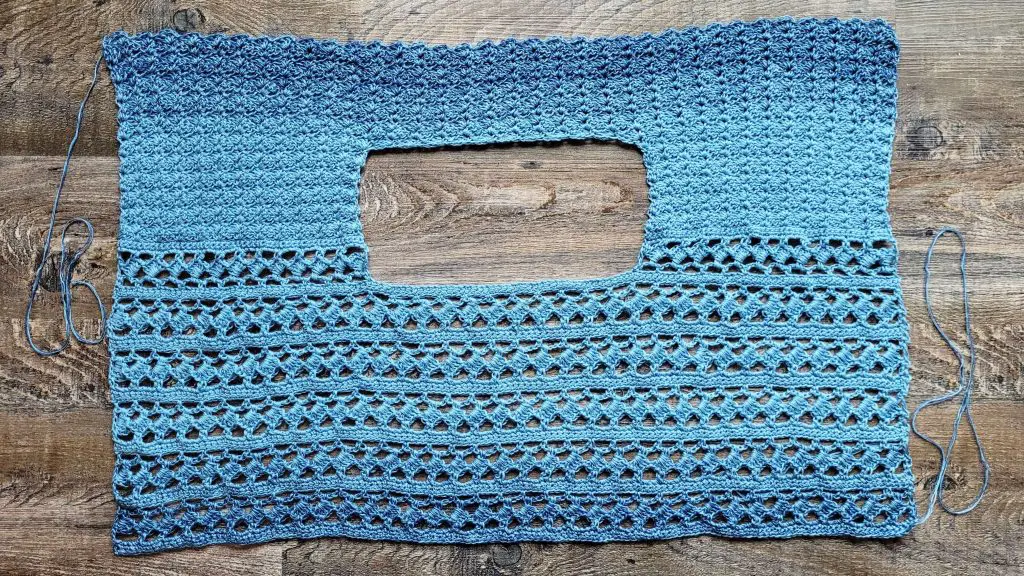
Figure 8
Sewing The Underarms
The upper back and upper front have different stitch counts, which makes sewing the underarms a little complicated. But if you follow these steps, you will be fine. Fold the project in half with the RS together.
For the left arm, counting from the end of the last row:
- Place a st marker through the 25th st of the upper back and through the 30th st of the upper front (you can use 2 different st markers or the same one through both).
- Whip stitch the front and back together in the following manner:
- Whip stitch the first sc of the front and the first sc of the back together.
- Whip stitch across, working through each sc st of the back and only the dc and ch1 sts of the front.
- You will be skipping each of the sc sts of the front.
- Work in this manner until you reach the st marker(s), then bind off.
For the right arm, counting from the beginning of the last row:
- Place a st marker through the 24th st of the upper back and through the 28th st of the upper front.
- Whip stitch the front and back together in the following manner:
- Whip stitch the top of the beginning ch2 of the front and the first sc of the back together.
- Whip stitch across, working through each sc st of the back and only the dc and ch1 sts of the front.
- You will be skipping each of the sc sts of the front.
- Work in this manner until you reach the st marker(s), then bind off.
Free Crochet Top Pattern – Slightly Slanted Blouse
Lower Body
With 4.5mm hook (or the larger of the two hooks used to obtain gauge)
With the WS facing you, join your yarn in the 1st unworked ch1 sp of upper front (as indicated by the hook in Figure 9 below).
- (WS) Ch1, (sc, ch1, 3dc) in 1st ch1 sp. *Sk 4 sts, (sc, ch1, 3dc) in next ch1 sp.** Repeat from * to ** until all ch1 sp of the front panel have been worked. Sk last st of front panel and 1st 3 sts of back panel. (Sc, ch1, 3dc) in next st. [Sk 3 sts, (sc, ch1, 3dc) in next st.] Repeat from [ to ] until all back panel sts are worked and only 4 sts of front panel left. Sk the 4 sts of the front panel and ss to join to 1st st. Ss into next ch1 sp. Turn. – 160 (190, 210, 230, 260, 280, 300, 330, 350) st
Note: As you can see in Figure 10, there will be a hole between your first and last sts of the first row of the lower body. You can use the yarn end to whip stitch this closed.
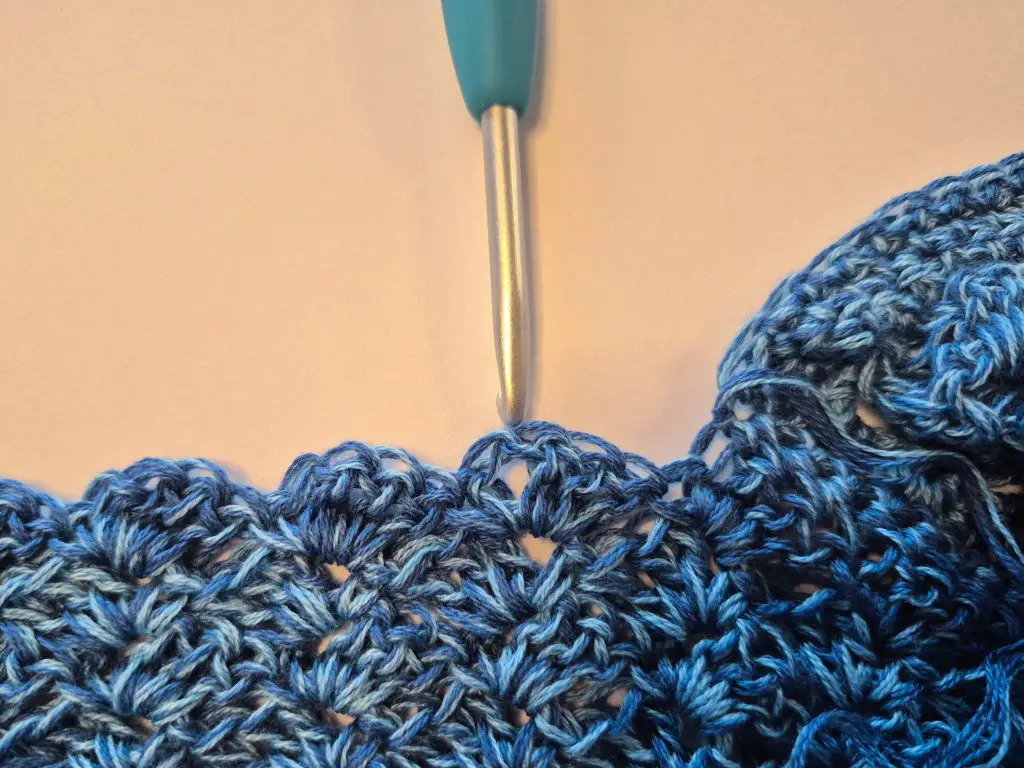
Figure 9
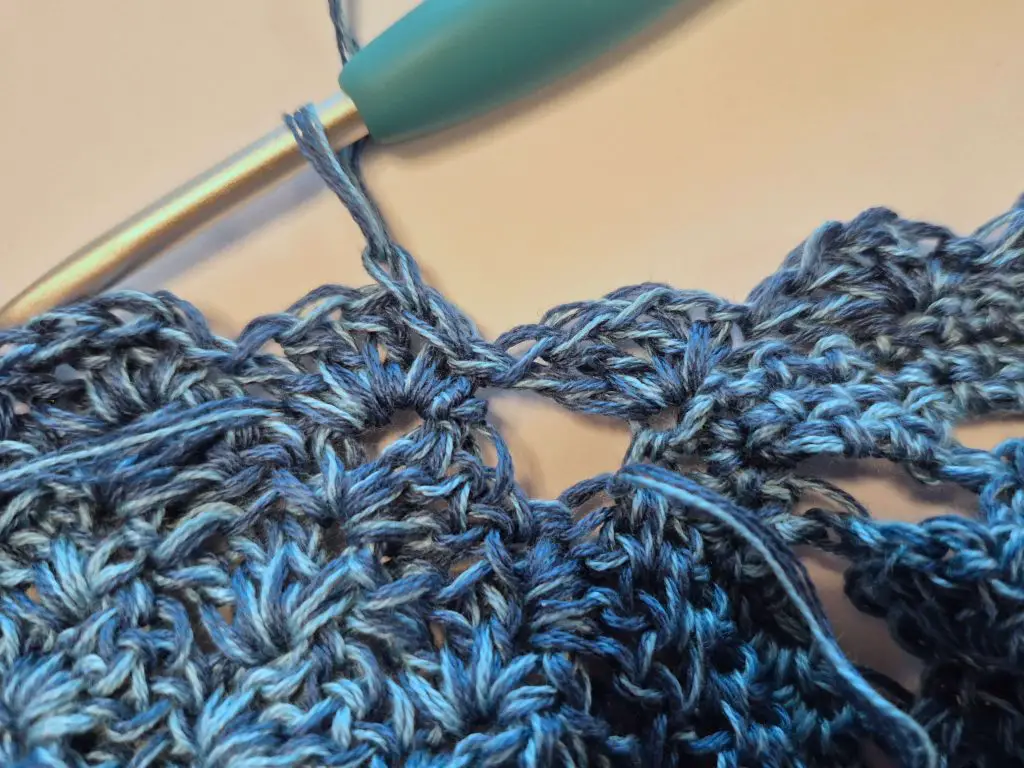
Figure 10
- (RS/WS) Ch1, (sc, ch1, 3dc) in 1st ch1 sp. *Sk 4 sts, (sc, ch1, 3dc) in next ch1 sp.** Repeat from * to ** until 4 sts left. Sk last 4 sts, ss to 1st st. Ss to next ch1 sp. Turn. – 160 (190, 210, 230, 260, 280, 300, 330, 350) st
Repeat round 2 until you have achieved your desired length. Bind off.
Finishing The Edges
The neck and sleeve edges are finished with a simple sc border. Use the 4.5mm hook (or the larger of the two hooks used to obtain gauge). With the RS facing you, join your yarn anywhere you like (I did the back of the neck for the neckline and the underarm area for the sleeves), and sc evenly around, working 1 sc into each ch, 1 sc into the side of each sc, and 2sc into the side of each ch2. Ss to join to 1st st. Bind off.
Weave in your ends, and you’re done!
I can’t wait to see your take on this crochet summer top. Be sure to share your photos over on Ravelry so we can all admire your gorgeous makes! 💕
Want a little heads-up whenever I release new patterns and tutorials like the Free Crochet Top Pattern – Slightly Slanted Blouse? Come hang out with me on Facebook and Instagram for the latest updates.
And if you loved making this blouse, you’ll definitely want to check out my other designs for even more crochet inspiration!
Free Crochet Top Pattern – Slightly Slanted Blouse
And until next time… Happy Hooking! 😉
Thank you for yet again another fantastic piece! I wish I had more time to make all your tops!
You’re so welcome! If only we have unlimited time (and yarn)! 😉