

Free Crochet Bucket Hat Pattern – Trailhead
The Free Crochet Bucket Hat Pattern – Trailhead is copyrighted by I Need It Crochet. You may not copy, share, change, or sell the pattern itself. Also, you may not claim this pattern as your own. All pictures contained in this pattern fall under the copyright and may not be used.
Finished items made from the Free Crochet Bucket Hat Pattern – Trailhead belong to you, and you may do what you wish with them. If you choose to sell them on Etsy, I would very much appreciate it if you credited me as the pattern designer.
Where Can I Buy The Pdf?
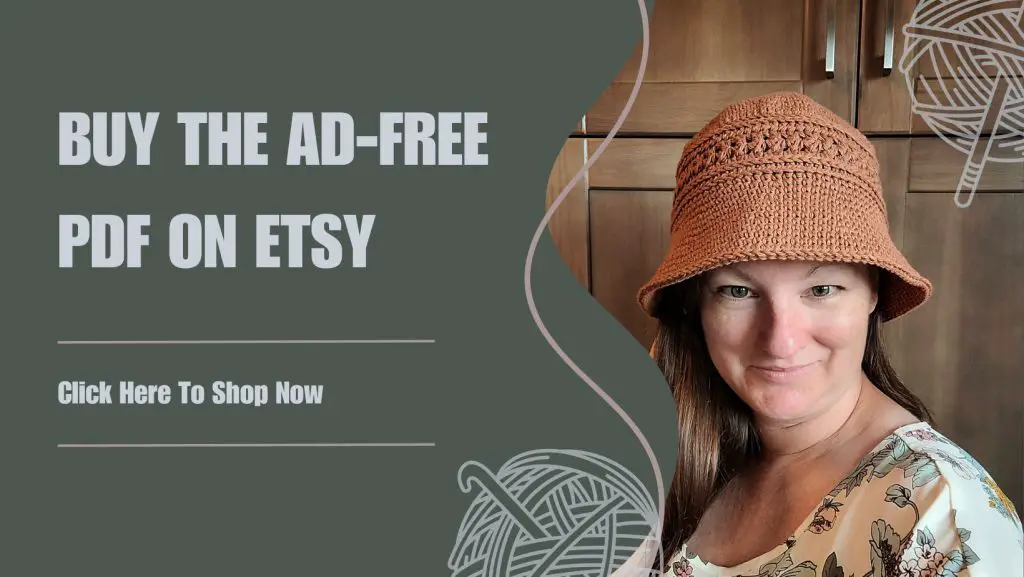
The entire pattern is available to view for free on this page (you just have to scroll down to see it). But if you would prefer to have a printable pdf copy of the pattern, you can purchase it for a small fee from my Ravelry and Etsy stores. Just click the graphics below.
This pattern is 5 pages long and contains detailed instructions of how to complete your crochet bucket hat. A printable pdf will be easier to follow, and you can make notes on it as you go. I find it to be the easier option. But if you like to use the online version, it is here 24/7 for you to view. Enjoy!

Free Crochet Bucket Hat Pattern – Trailhead
Free Crochet Bucket Hat Pattern – Trailhead
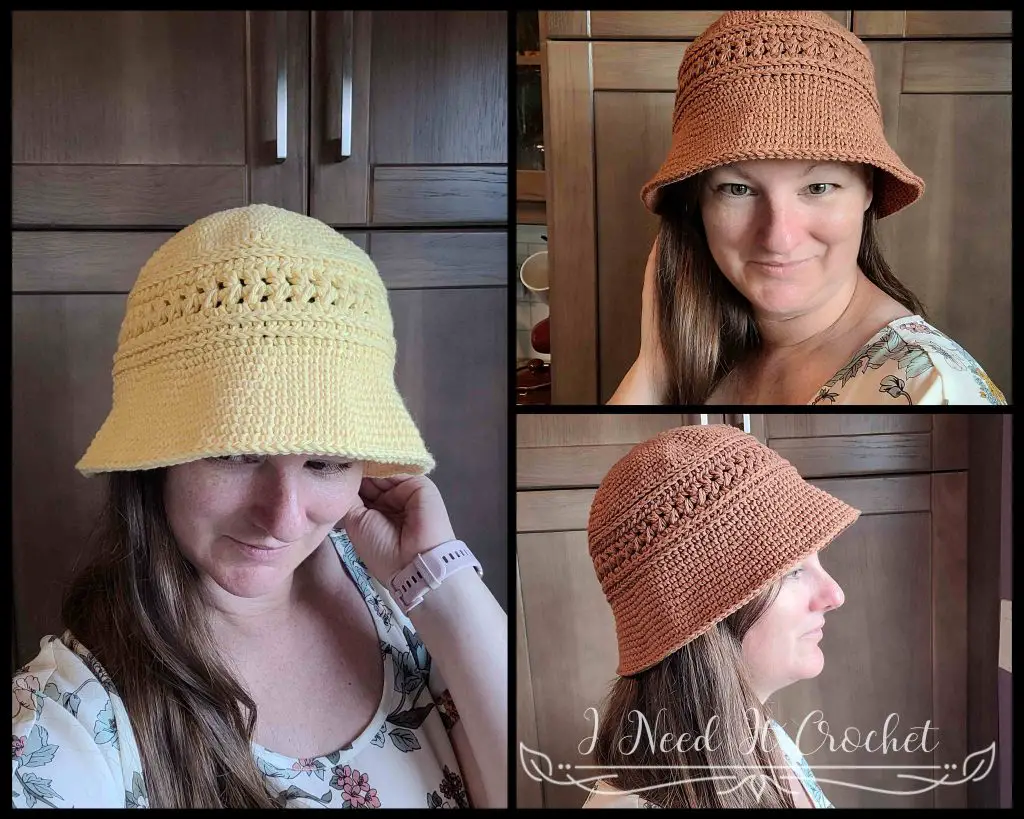
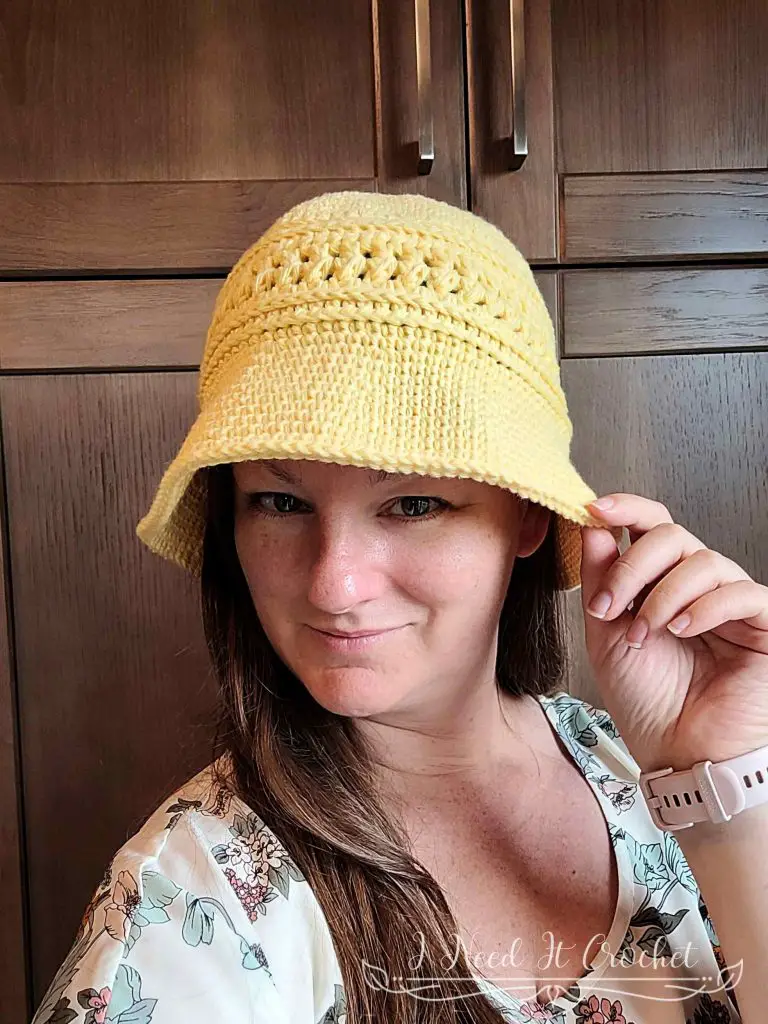
Why You’ll Love This Free Crochet Bucket Hat Pattern
When you get away with your family, what goes on your packing list? Hats are at the top of our packing list for our annual family camping trip. We never know when we’ll need them and would hate to be caught without one.
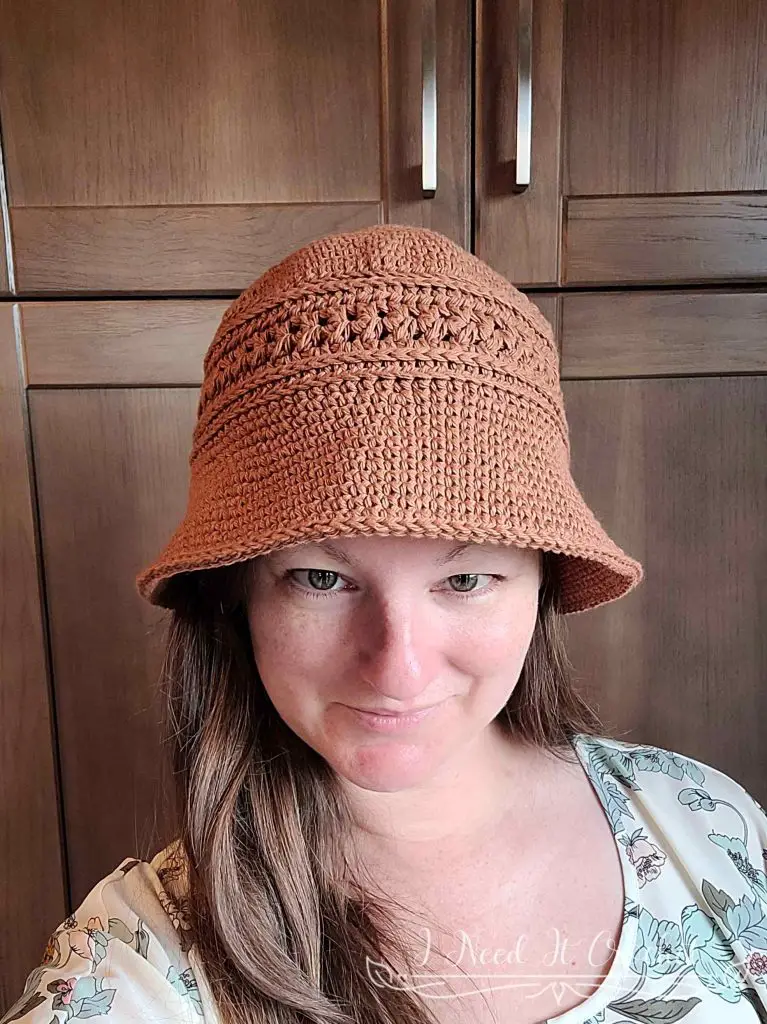
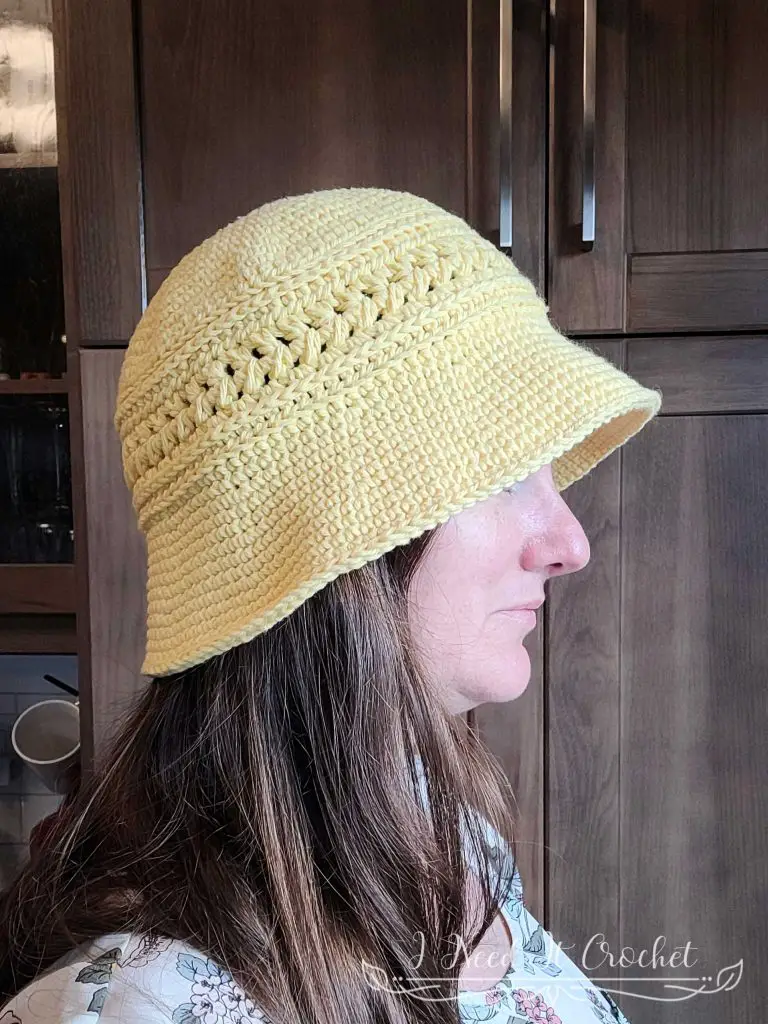
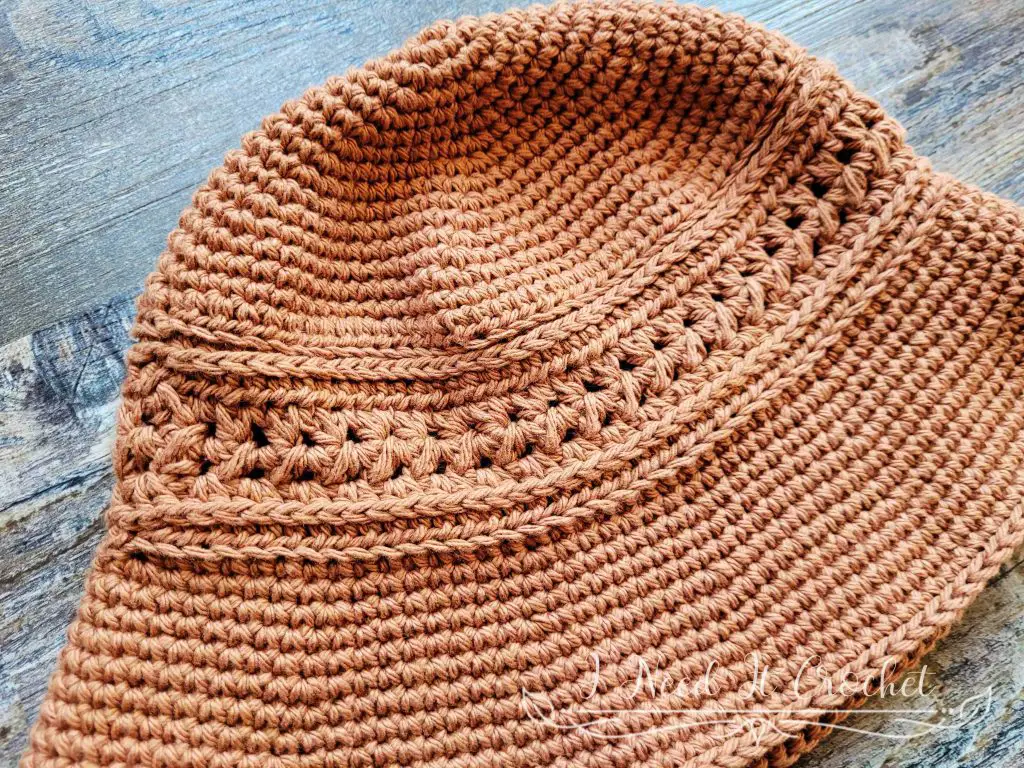
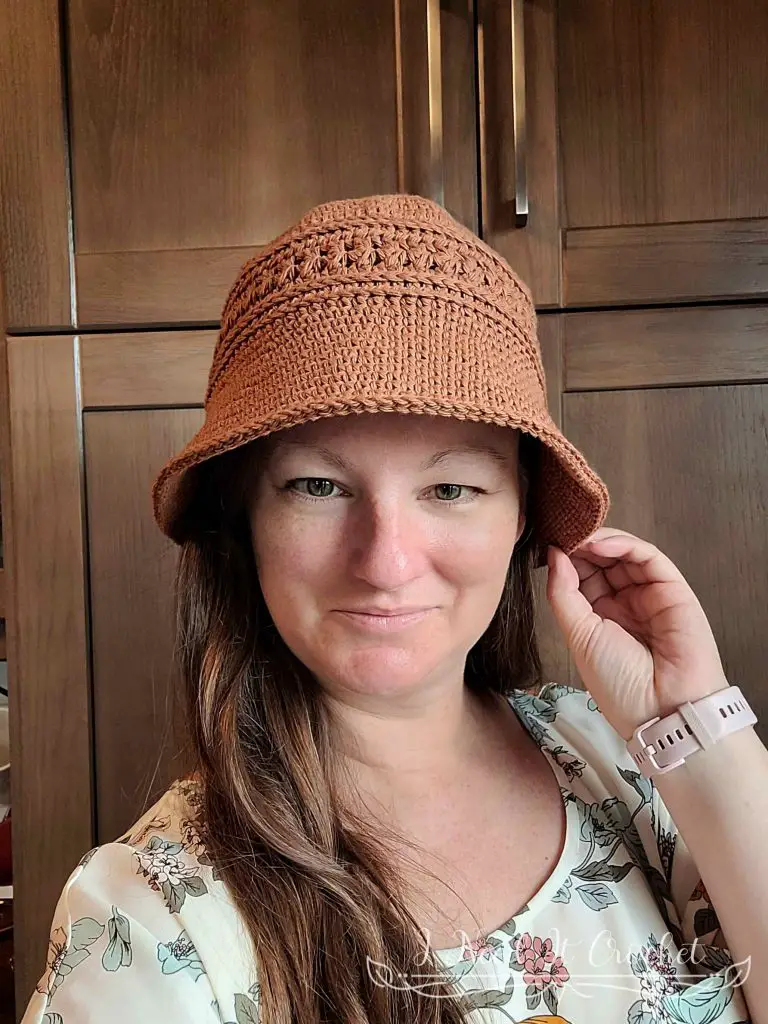
That’s why when I finished designing the Trailhead Cardigan, I decided to create a fun bucket hat to take with us on this year’s trip. This pattern features a decorative band with the same stitch pattern as the cardigan paired with a single crochet crown and brim to keep the hat moldable.
Want to Pin it for later?
Click the image below and save the pin to your favourite crochet pattern boards!

Materials & Sizes For The Free Crochet Bucket Hat Pattern – Trailhead
| Size | Circumference | Brim |
| XS | 17 1/2″ | 2 1/4″ |
| S | 19″ | 2 1/4″ |
| M | 20 1/2″ | 2 3/4″ |
| L | 22″ | 2 3/4″ |
| XL | 23 1/2″ | 2 3/4″ |
Finished Sizes:
Instructions given to fit size X-small (toddler); changes for small (child), medium (tween), large (adult), and X-large (adult large) are in ()
XS (S, M, L, XL)
Hat Circumference: 17 ½” (19”, 20 ½”, 22”, 23 ½”)
Brim: 2 ¼” (2 ¼”, 2 ¾”, 2 ¾”, 2 ¾”)
Materials:
I used Bernat Handicrafter Cotton, which is a 100% Cotton, #4 Worsted weight yarn.
Any yarn of similar weight would work.
Approximately 140 (155, 170, 185, 200) yds.
4.5mm Hook
Stitch Markers
Yarn Needle
Scissors
Measuring Tape
Abbreviations:
RS = Right Side
WS = Wrong Side
Sk = Skip
St = Stitch
Ss = Slip Stitch
Ch = Chain
Sc = Single Crochet
Hdc = Half Double Crochet
Dc = Double Crochet
Hdc2tog = Half Double Crochet 2 Together
Blo = Back Loop Only
3rd Lo = 3rd Loop Only
Gauge:
Gauge is worked into the pattern. Be sure to always check your gauge. It will save you much time and heartache.
Skill Level:
Easy
Notes:
Choose the size closest to your head circumference.
Ch1 at the beginning of a round is never considered a stitch.
Each ch between stitches counts as a stitch.
Pay close attention to the instructions as some rounds are finished with a turn and others are not.
Complete Step-By-Step Instructions For The Free Crochet Bucket Hat Pattern – Trailhead
Instructions
This hat is worked from the top down in the round. We will begin with the crown, working in a spiral with the right side facing us at all times. Then, when we get to the body of the hat, we will join and turn at the end of each round. Finally, when working the brim, we will again work in a spiral with the right side facing us.
We will be placing a st marker in the last st of each round to make it easier to keep track of where the round begins and ends. Work each round up to and including the marked stitch, then move your stitch marker to your current last stitch.
Crown
Worked continuously in the round without turning. RS facing you at all times. Note: Your finished crown will look a little bit like a hexagon. This is normal and it will smooth out later in the project.
With 4.5mm hook, form a magic ring.
- Work 6 sc into the ring and pull tight. Place a st marker in your last st. – 6 st
- Work 2sc in each st around. Move st marker to last st. – 12 st
- *2sc in next st. Sc in next st.** Repeat from * to ** around. Move st marker to last st. – 18 st
- *2sc in next st. Sc in next 2 sts.** Repeat from * to ** around. Move st marker to last st. – 24 st
- *2sc in next st. Sc in next 3 sts.** Repeat from * to ** around. Move st marker to last st. – 30 st
- *2sc in next st. Sc in next 4 sts.** Repeat from * to ** around. Move st marker to last st. – 36 st
- *2sc in next st. Sc in next 5 sts.** Repeat from * to ** around. Move st marker to last st. – 42 st
- *2sc in next st. Sc in next 6 sts.** Repeat from * to ** around. Move st marker to last st. – 48 st
- *2sc in next st. Sc in next 7 sts.** Repeat from * to ** around. Move st marker to last st. – 54 st
- *2sc in next st. Sc in next 8 sts.** Repeat from * to ** around. Move st marker to last st. – 60 st
- *2sc in next st. Sc in next 9 sts.** Repeat from * to ** around. Move st marker to last st. – 66 st
- *2sc in next st. Sc in next 10 sts.** Repeat from * to ** around. Move st marker to last st. – 72 st
Size XS (toddler): Your project should measure 5 ½” across at the widest point. Skip rounds 13-16 and carry on to Hat Body. - *2sc in next st. Sc in next 11 sts.** Repeat from * to ** around. Move st marker to last st. – 78 st
Size S (child): Your project should measure 6” across at the widest point. Skip rounds 14-16 and carry on to Hat Body. - *2sc in next st. Sc in next 12 sts.** Repeat from * to ** around. Move st marker to last st. – 84 st
Size M (tween): Your project should measure 6 ½” across at the widest point. Skip rounds 15-16 and carry on to Hat Body. - *2sc in next st. Sc in next 13 sts.** Repeat from * to ** around. Move st marker to last st. – 90 st
Size L (adult): Your project should measure 7” across at the widest point. Skip round 16 and carry on to Hat Body. - *2sc in next st. Sc in next 14 sts.** Repeat from * to ** around. Move st marker to last st. – 96 st
Size XL (adult large): Your project should measure 7 ½” across at the widest point. Carry on to Hat Body.
How To Work The Body Of The Free Crochet Bucket Hat Pattern – Trailhead
Hat Body
Worked in the round and turning at the end of each round. Alternating between RS and WS facing you. At the beginning of each round, your first stitch is always the stitch you slip stitched to at the end of the previous round.
- (RS) Sc in each st around. Ss to join to 1st st. Turn. – 72 (78, 84, 90, 96) st
- (WS) Ch1. Hdc in 1st st and each st around. Ss to join to 1st st. Turn. – 72 (78, 84, 90, 96) st
- (RS) Ch1. Hdc in blo of 1st st and each st around. Ss to join to 1st st. Turn. – 72 (78, 84, 90, 96) st
- (WS) Ch1. Hdc in 3rd lo of 1st st and each st around. Ss to join to 1st st. Turn. – 72 (78, 84, 90, 96) st
- (RS) Ch1. Hdc2tog over 1st 2 sts, ch1. *Hdc2tog over next 2 sts, ch1.** Repeat from * to ** around. Ss to join to 1st st. Ss into next ch1 sp. Turn. – 72 (78, 84, 90, 96) st
- (WS) Ch1. Hdc2tog over 1st ch1 sp and next ch1 sp (skipping over the top of the hdc2tog). Ch1. *Hdc2tog over same ch1 sp just worked and next ch1 sp. Ch1.** Repeat from * to ** around. Ss to join to 1st st. Ss into next ch1 sp. Turn. – 72 (78, 84, 90, 96) st
- (RS) Ch1. 2hdc in 1st ch1 sp. *Sk 1 st, 2hdc in next ch1 sp.** Repeat from * to ** around. Sk last st, ss to join to 1st st. Turn. – 72 (78, 84, 90, 96) st
- (WS) Ch1. Hdc in 3rd lo of 1st st and each st around. Ss to join to 1st st. Turn. – 72 (78, 84, 90, 96) st
How To Work The Brim – Free Crochet Bucket Hat Pattern – Trailhead
Brim
Worked continuously in the round without turning. RS facing you at all times. The increases for these rounds are staggered to give the brim a smoother look.
- Sc in blo of 1st st and each st around. Place a st marker in the last st. – 72 (78, 84, 90, 96) st
- *2sc in next st. Sc in next 11 (12, 13, 14, 15) sts.** Repeat from * to ** around. Move st marker to last st. – 78 (84, 90, 96, 102) st
- Sc in next 6 (7, 7, 8, 8) sts. 2sc in next st. *Sc in next 12 (13, 14, 15, 16) sts. 2sc in next st** Repeat from * to ** until 6 (6, 7, 7, 8) sts left. Sc in last 6 (6, 7, 7, 8) sts. Move st marker to last st. – 84 (90, 96, 102, 108) st
- Sc in each st around. Move st marker to last st. – 84 (90, 96, 102, 108) st
- *2sc in next st. Sc in next 13 (14, 15, 16, 17) sts.** Repeat from * to ** around. Move st marker to last st. – 90 (96, 102, 108, 114) st
- Sc in next 7 (8, 8, 9, 9) sts. 2sc in next st. *Sc in next 14 (15, 16, 17, 18) sts. 2sc in next st** Repeat from * to ** until 7 (7, 8, 8, 9) sts left. Sc in last 7 (7, 8, 8, 9) sts. Move st marker to last st. – 96 (102, 108, 114, 120) st
- Sc in each st around. Move st marker to last st. – 96 (102, 108, 114, 120) st
- *2sc in next st. Sc in next 15 (16, 17, 18, 19) sts.** Repeat from * to ** around. Move st marker to last st. – 102 (108, 114, 120, 126) st
- Sc in next 8 (9, 9, 10, 10) sts. 2sc in next st. *Sc in next 16 (17, 18, 19, 20) sts. 2sc in next st.** Repeat from * to ** until 8 (8, 9, 9, 10) sts left. Sc in last 8 (8, 9, 9, 10) sts. Move st marker to last st. – 108 (114, 120, 126, 132) st
- Sc in each st around. Move st marker to last st. – 108 (114, 120, 126, 132) st
Sizes XS (toddler) & S (child): Skip rounds 11-12 and carry on to round 13. - Sc in each st around. Move st marker to last st. – n/a (n/a, 120, 126, 132) st
- Sc in each st around. Move st marker to last st. – n/a (n/a, 120, 126, 132) st
- Ss in each st around. Bind off. – 108 (114, 120, 126, 132) st
Weave in your ends, and you’re done!
I hope you love your new crochet bucket hat, and I look forward to seeing all of your beautiful pictures on Ravelry!
If you’d like to know when I post new patterns and tutorials like the Free Crochet Bucket Hat Pattern – Trailhead, head on over to my Facebook and Instagram and give me a like and a follow!
If you enjoyed the Free Crochet Bucket Hat Pattern – Trailhead, you may want to check out my other designs!
You might also like my free Trailhead Top and Trailhead Cardigan patterns. Click the images below to check out these beautiful free patterns!
Free Crochet Bucket Hat Pattern – Trailhead
And until next time… Happy Hooking! 😉
Thank you for the fun pattern. I used a different yarn and hook and after a few minor adjustments, the hat came out perfect. Nice, easy pattern.
I’m so glad you enjoyed it! Thank you for the lovely comment! <3