
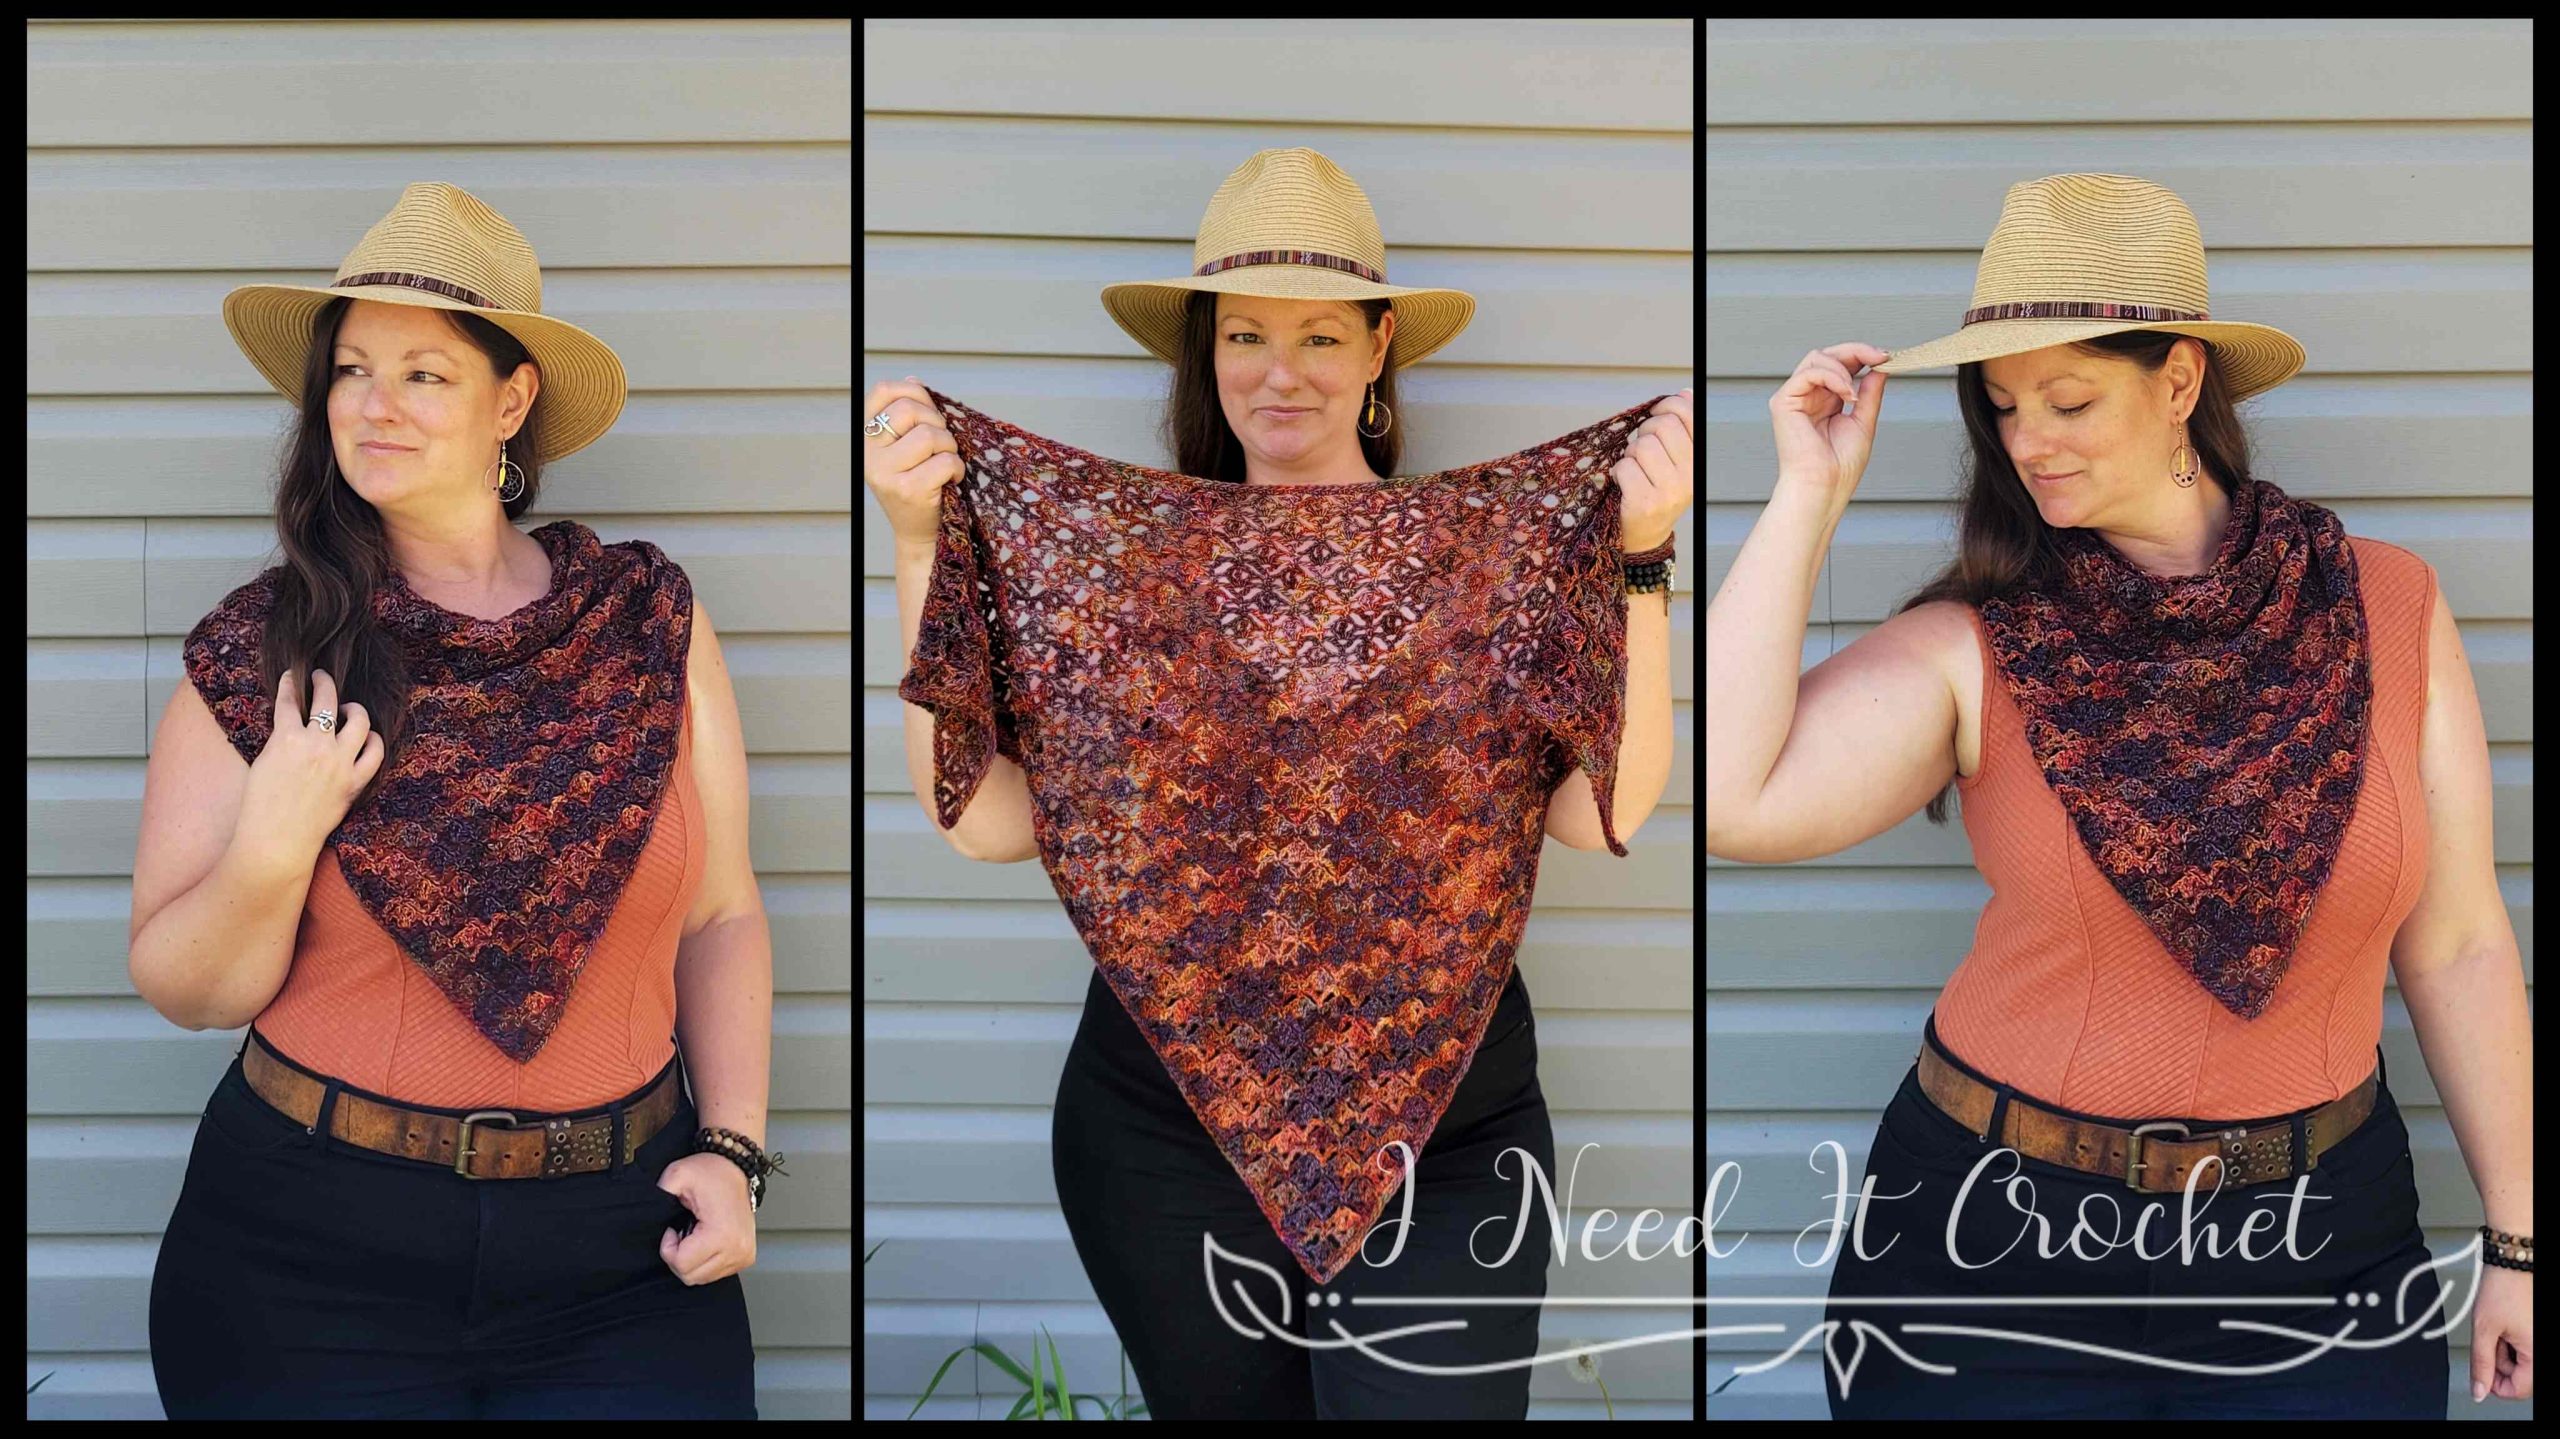
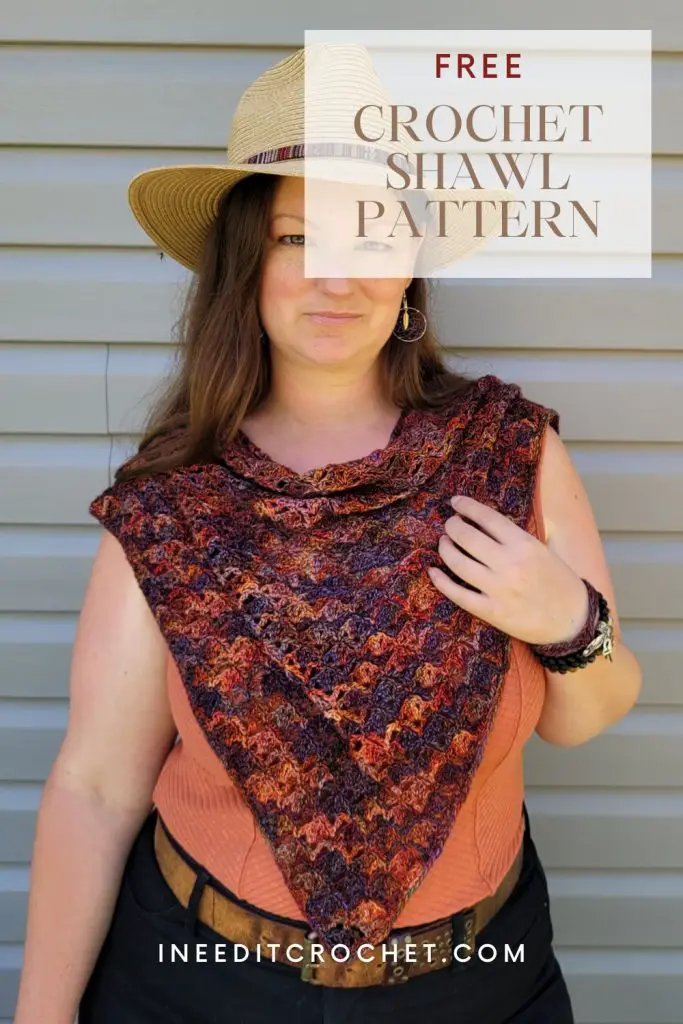
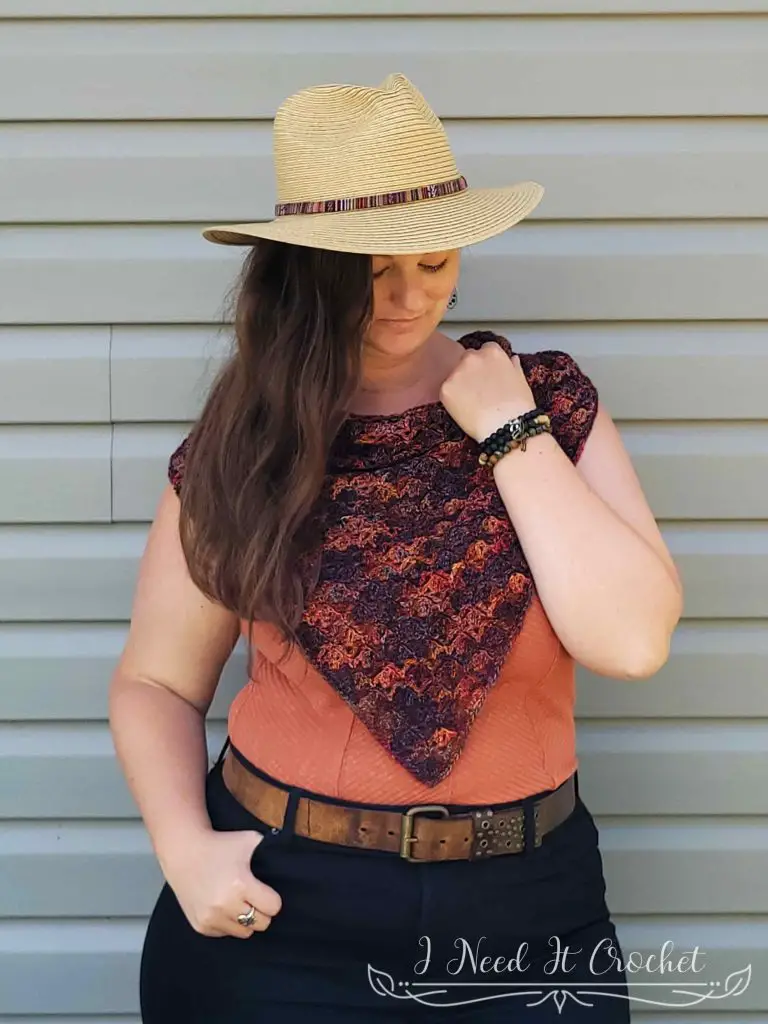
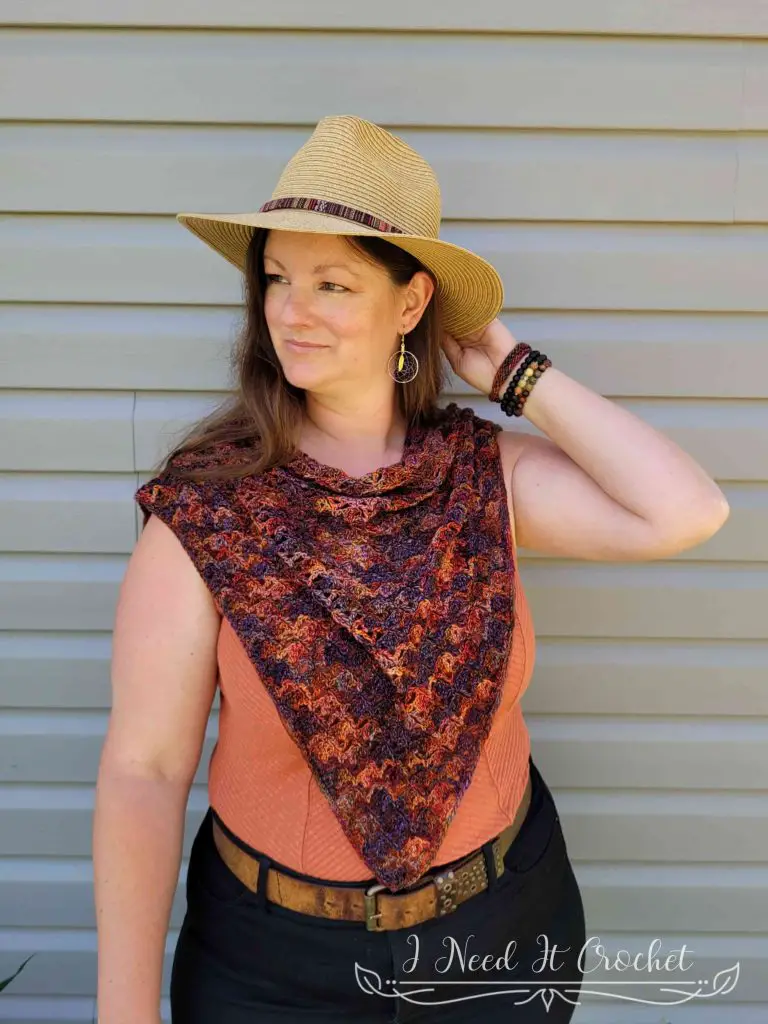
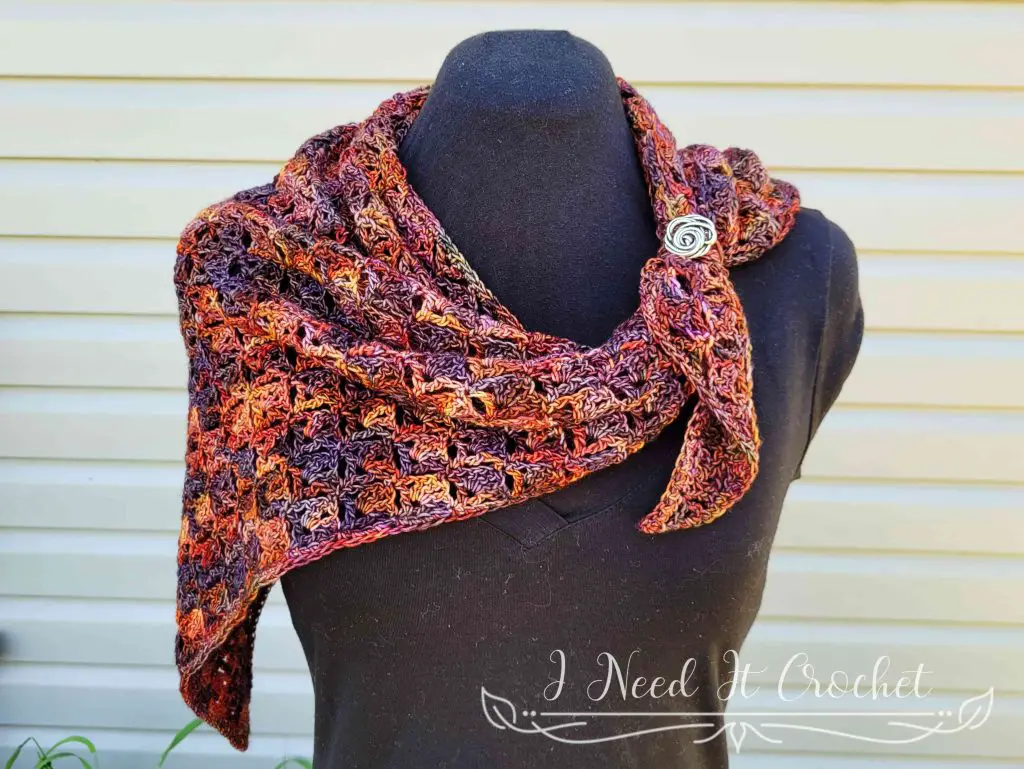
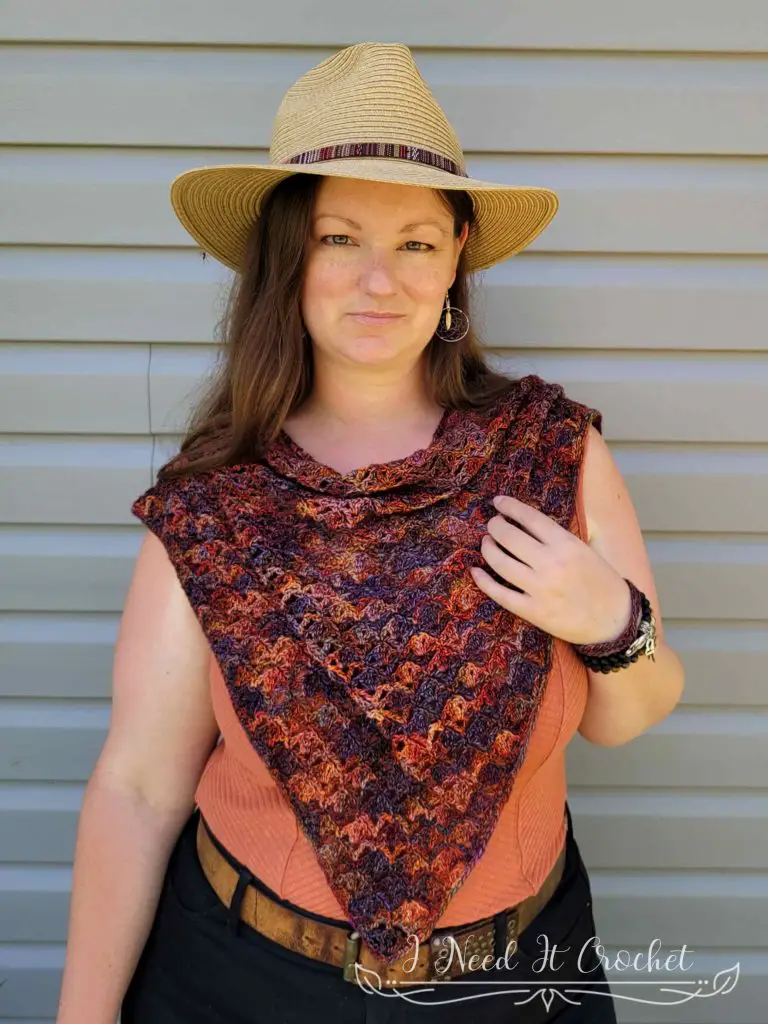
Free Crochet Shawl Pattern – Corvus Bandana Shawl
The Free Crochet Shawl Pattern – Corvus Bandana Shawl is copyrighted by I Need It Crochet. You may not copy, share, change, or sell the pattern itself. Also, you may not claim this pattern as your own. All pictures contained in this pattern fall under the copyright and may not be used.
Finished items made from the Free Crochet Shawl Pattern – Corvus Bandana Shawl belong to you, and you may do what you wish with them. If you choose to sell them on Etsy, I would very much appreciate it if you credited me as the pattern designer.
Where Can I Buy The Pdf?
The entire pattern is available to view for free on this page (you just have to scroll down to see it). But if you would prefer to have a printable pdf copy of the pattern, you can purchase it for a small fee from my Ravelry and Etsy stores. Just click the graphics below.
This pattern is 6 pages long and contains a full picture tutorial for the double slip stitch, as well as 6 additional pictures to help you through the crow’s foot lattice. A printable pdf will be easier to follow, and you can make notes on it as you go. I find it to be the easier option. But if you like to use the online version, it is here 24/7 for you to view. Enjoy!
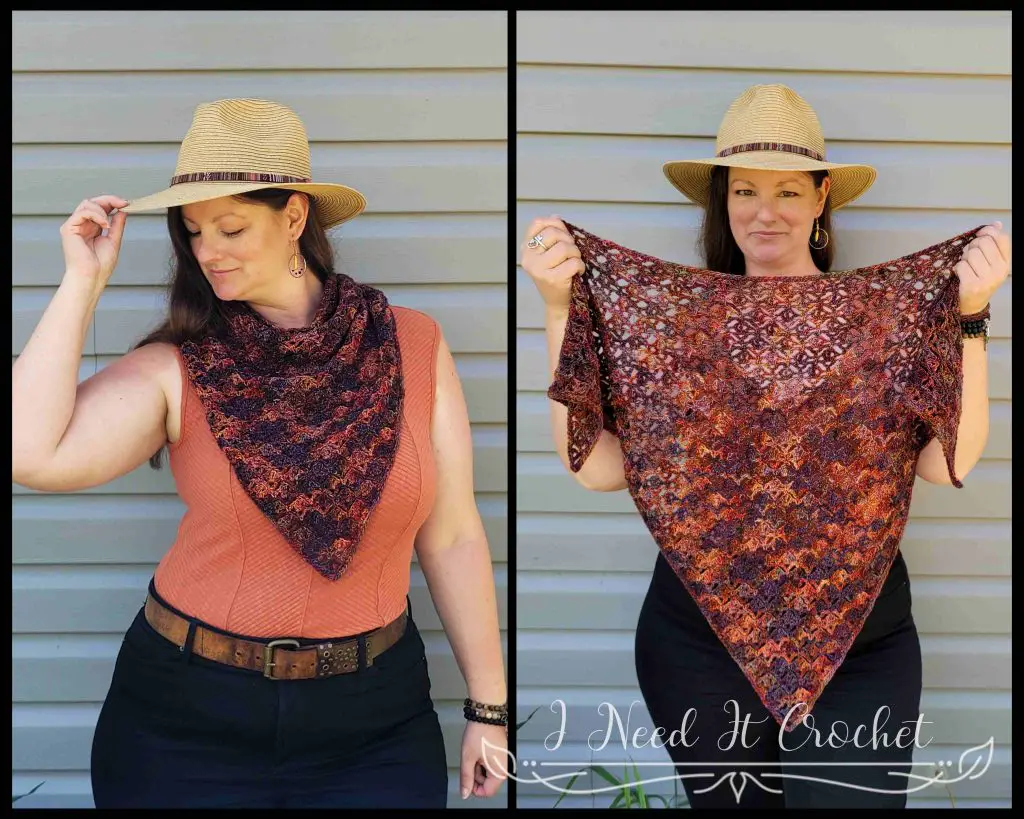
Free Crochet Shawl Pattern – Corvus Bandana Shawl
Free Crochet Shawl Pattern – Corvus Bandana Shawl
How many of us have had that one lonely hank (leftover from a project, or bought because it was oh-so-pretty) just patiently waiting for that perfect pattern? Not too long ago, a reader requested a pattern that uses only one hank of fingering weight yarn, and I instantly latched onto the idea.
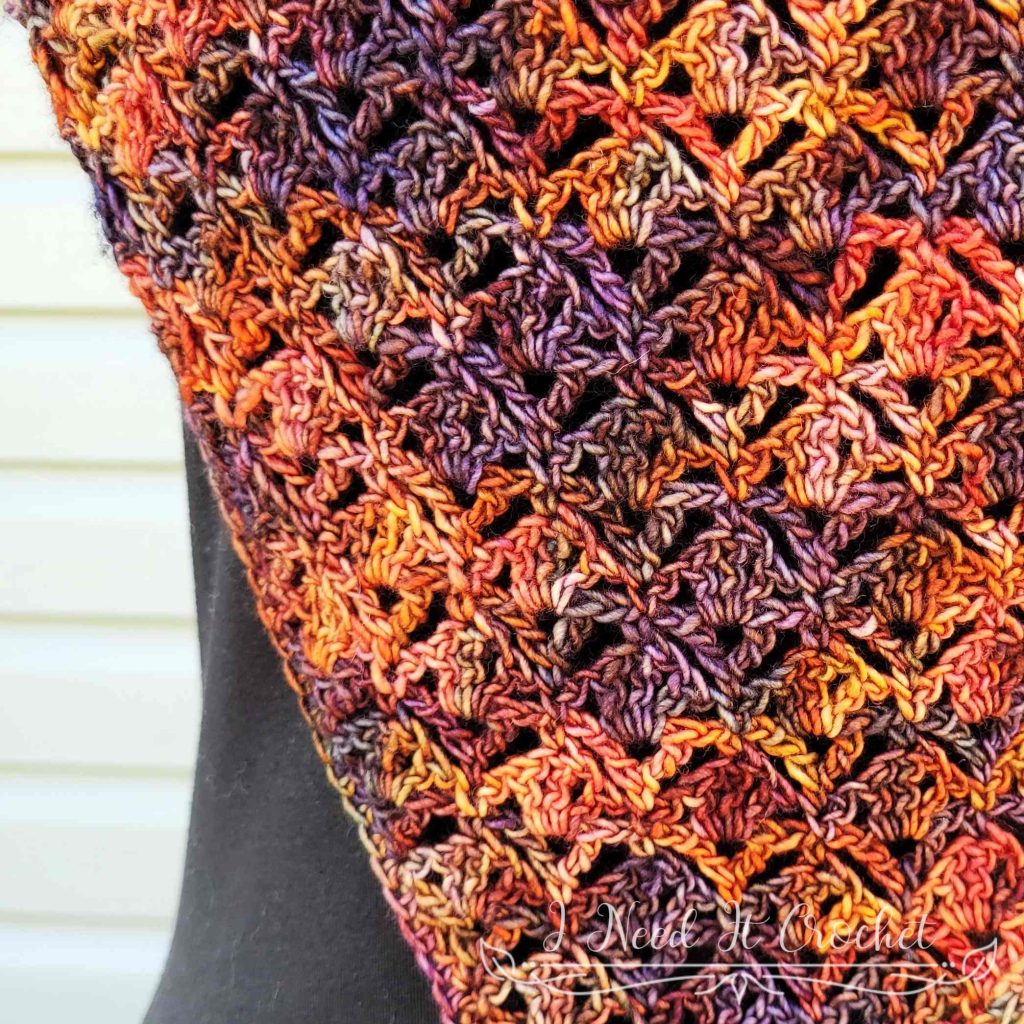
I happened to have one such hank of Malabrigo Yarns Mechita that was begging to be made into something. After much trial and error, I found that the crowfoot lattice stitch matched perfectly with the beautiful randomness that embodies so many hand-dyed yarns. I hope you love it as much as I do.
Want to Pin it for later?
Click the image below and save the pin to your favourite crochet pattern boards!
Free Crochet Shawl Pattern – Corvus Bandana Shawl
Finished Size:
Instructions given to make a 22 ½” H x 44” W shawl (after blocking) with added notes for making a smaller or larger shawl.
Abbreviations:
RS = Right Side
WS = Wrong Side
Beg = Beginning
Sk = Skip
St = Stitch
Sp = Space
Ss = Slip Stitch
Ch = Chain
Sc = Single Crochet
Dc = Double Crochet
Tr = Treble Crochet
Materials:
I used Malabrigo yarns Mechita, which is a 100% Superwash Merino Wool, #1 Fingering weight yarn.
Any yarn of similar weight would work.
Approximately 420 yds to make the size shown.
4mm Hook
Stitch Markers
Yarn Needle
Scissors
Measuring Tape
1 Button, ⅝” or larger (if making the tie)
Gauge:
If you are using a different yarn, gauge is not very important with this shawl. Use a hook that suits your yarn and gives it a good drape.
If you are using the same yarn I used and you would like to achieve the same drape, you may want to get close to the gauge I achieved.
I have noted in the pattern at which points you should measure for gauge.
Notes:
Ch1 at the beginning of a row is never considered a stitch.
Ch1 between sts does count as a stitch.
Ch3 at the beginning of a row is considered a dc.
Ch4 at the beginning of a row is considered a tr.
Instructions
This shawl is created in one piece, working in rows from the bottom up. It is finished with a simple single crochet border.
Body
With 4 mm hook:
- Ch10. Sc in 2nd ch from hook. Ch1, sk 3 ch, (dc, ch1, tr, ch1, dc) in next ch. Ch1, sk 3 ch, sc in last ch. Your project should look like Figure 1 below. Turn.
Note: You may have noticed that I don’t specify a stitch count on the odd numbered rows. Due to the nature of the pattern, the stitch count will appear inflated on these rows, so I chose to leave them off to reduce confusion. If you are inclined to count your stitches, It is best to do so on the even numbered rows.
- Ch5 (counts as tr + ch1), tr in 1st st. Ch1, dc in the side of the tr just made (note that this dc does not go into the same st as the tr. It goes into the bottom 2 loops of the tr you just made (see Figures 2 & 3 for example). Ch1, sk 3 sts, sc in next st. Ch1, sk 3 sts, tr in last st. Ch1, dc in the side of the tr just made. Ch1, tr in last st (same st as previous tr). Your project should look like Figure 4 below. Turn. – 13 st
- (WS) Ch1, sc in 1st st. *Ch1, sk 2 sts, (dc, ch1, tr, ch1, dc) in next ch1 sp. Ch1, sk 2 sts, sc in next st.** Repeat from * to ** across. Your project should now look like Figure 5 below. Turn.
- (RS) Ch5 (counts as tr + ch1), tr in 1st st. Ch1, dc in the side of the tr just made. *Ch1, sk 3 sts, sc in next st. Ch1, sk 3 sts, tr in next st. Ch1, dc in the side of the tr just made.** Repeat from * to ** to last st. Ch1, tr in last st (same st as previous tr). Your project should now look like Figure 6 below. Turn. – 19 st
Gauge check: At this point my triangle measured 2” H x 3 ½” W.
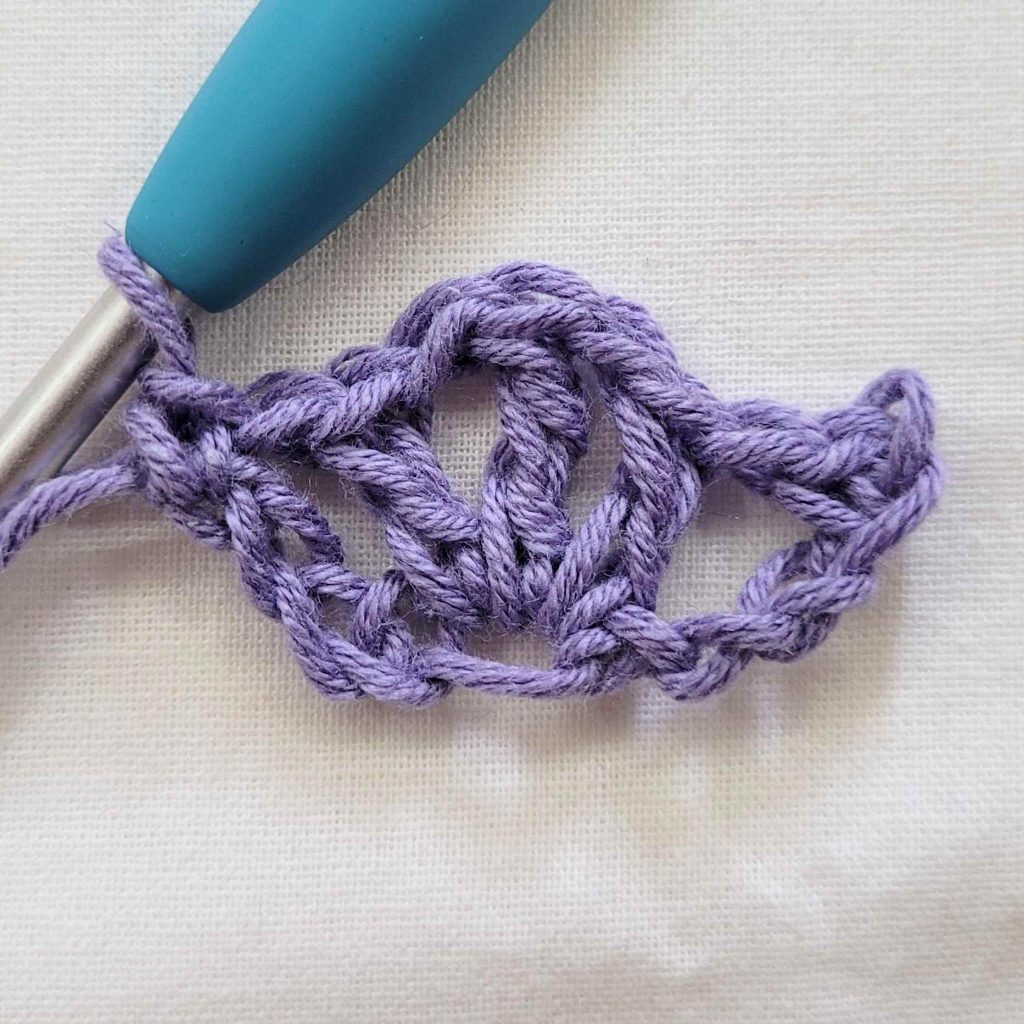
Figure 1

Figure 2
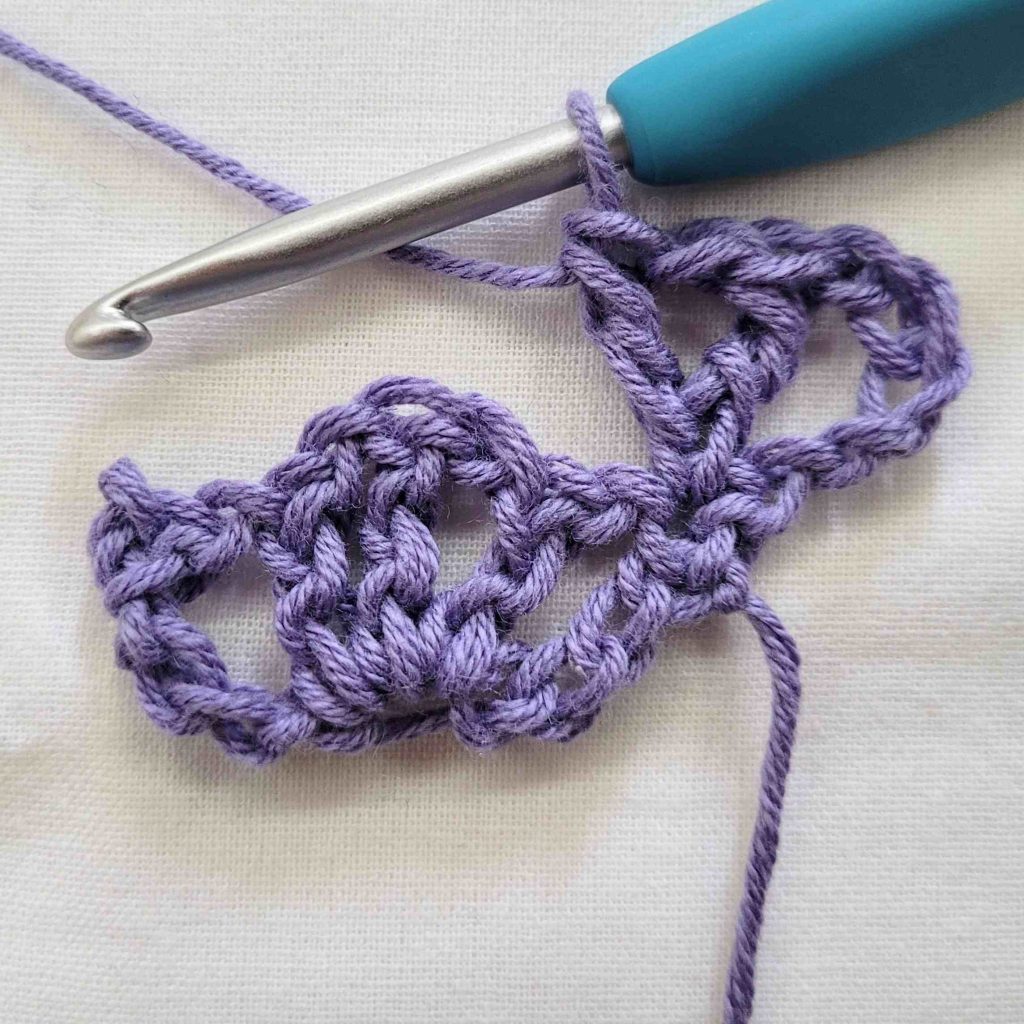
Figure 3
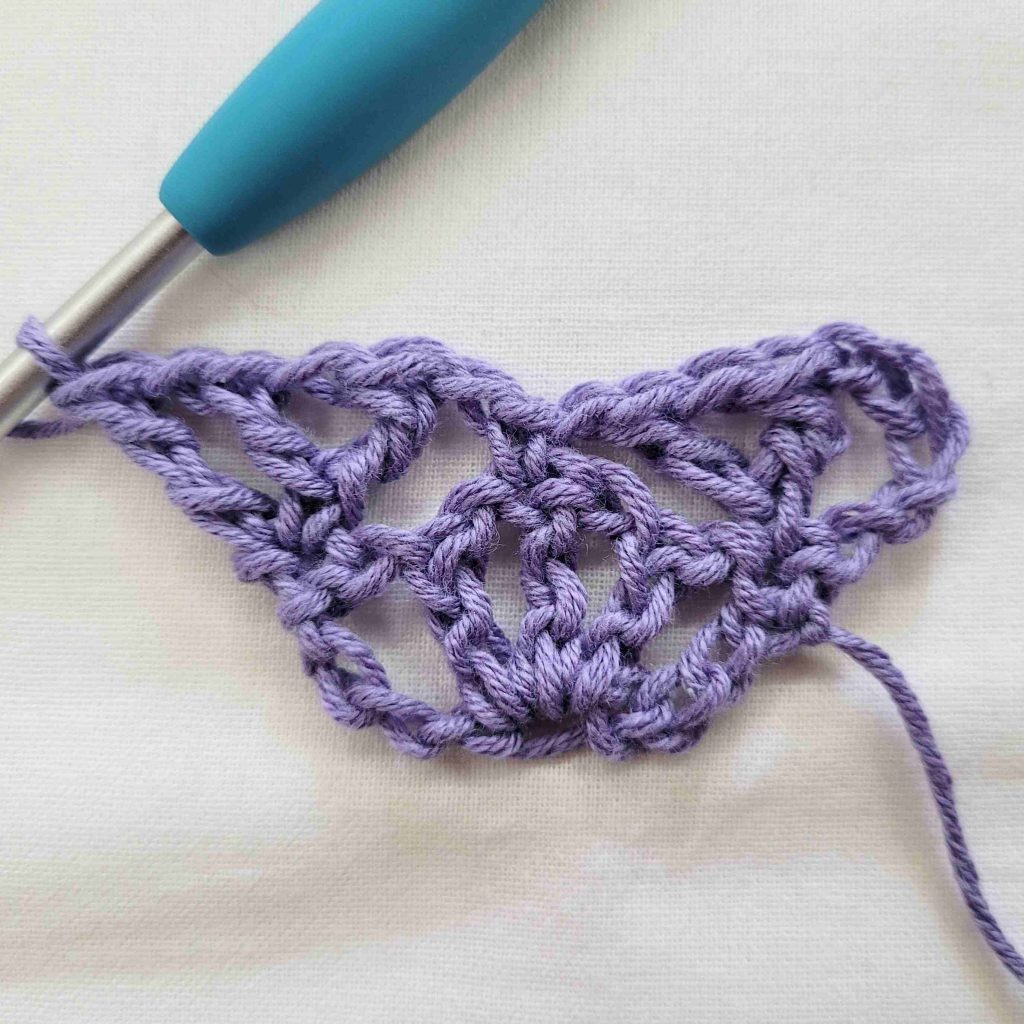
Figure 4

Figure 5
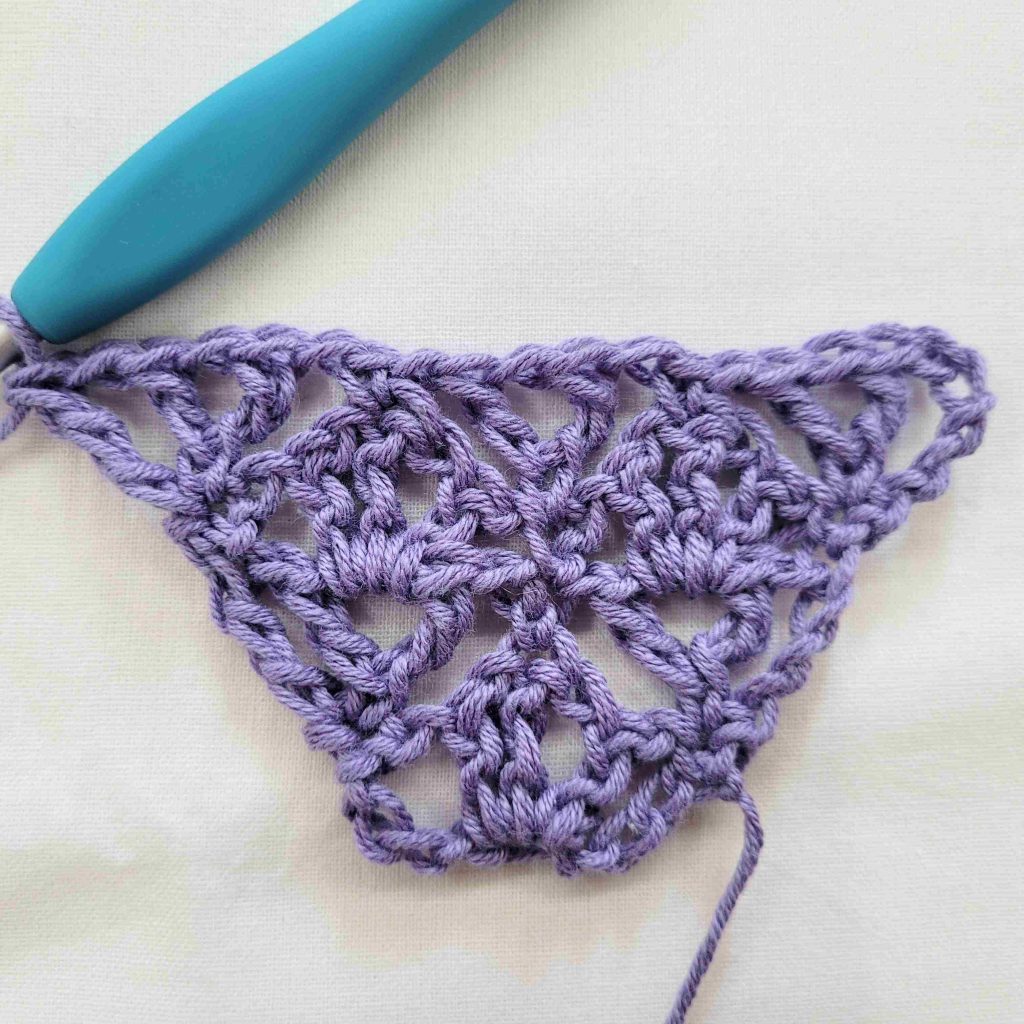
Figure 6
Repeat rows 3 & 4 until your shawl is the desired size (note: each 2 row repeat adds a total of 6 sts), ending with a repeat of row 4. Be sure to leave enough yarn for you to add the sc border in the next part. For my shawl, I worked a total of 58 rows. This left me enough yarn for the sc border and the simple shawl tie, which I explain how to make in the last part of the pattern.
Gauge check: At row 8 my triangle measured 3 ¾” H x 5 ¾” W.
When you have finished your last row, do not turn and do not bind off.
Free Crochet Shawl Pattern – Corvus Bandana Shawl
Border
We will work a sc edging around the whole shawl, beginning by working down the side to the bottom corner, then continuing up the other side, and finally working the top edge.
- Ch1. Working down the side of the shawl: Place 4 sc in the side of the last row. *Place 1 sc in the side of the next sc. Place 3sc in the side of the next tr.** Repeat from * to ** until you have reached the bottom corner. Work (2sc, ch1, 2sc) into the bottom corner ch (see Figure 7). Working up the other side of the shawl: Place 3sc in the side of the next tr. Repeat from * to ** until you have reached the top edge. Place 1 more sc in the last tr. Working along the top edge: Ch1, sc in each st across. Ch1, ss to join to 1st sc. Bind off.
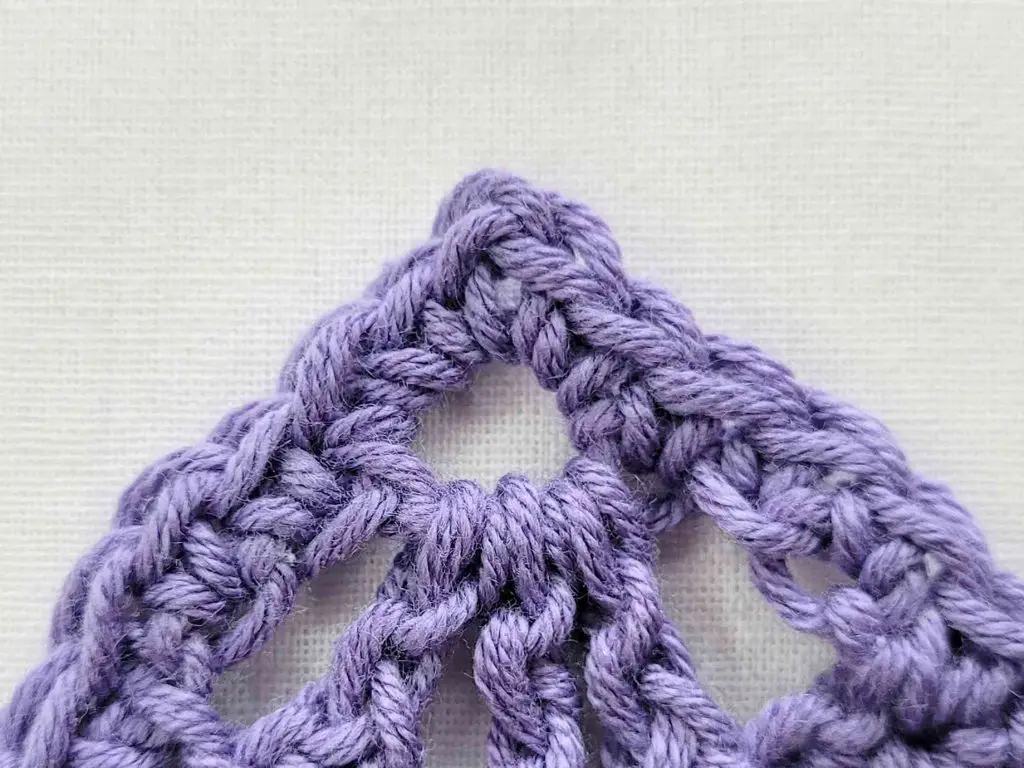
Figure 7
Shawl Tie
If you have enough yarn leftover, or if you have scraps of a coordinating colour, you can make a simple shawl tie. You will need less than a yard of yarn and a button. Any size will do. The one I used is ⅞”.
To make the tie:
- Chain to the length you want your tie to be, then add 10 more chains. For example, I chained to 12”, then added 10 chains.
- Skip the 1st 10 ch and ss into the 11th ch from the hook (to make a loop).
- Dss (see tutorial here) in each ch across. Bind off, leaving a tail to sew on the button.
- Attach your button to the end with the yarn tails, opposite the end with the loop.
To use the tie, simply wrap it around the shawl and slip the loop over the button to hold it in place. I made mine long, so I could wrap it multiple times.
Free Crochet Shawl Pattern – Corvus Bandana Shawl
Weave in your ends, and you’re done! I highly recommend blocking your shawl. It will spread out the stitches and really show off the lacy pattern.
I hope you love your new crochet shawl, and I look forward to seeing all of your beautiful pictures on Ravelry!
If you’d like to know when I post new patterns and tutorials like the Free Crochet Shawl Pattern – Corvus Bandana Shawl, head on over to my Facebook and Instagram and give me a like and a follow!
If you enjoyed the Free Crochet Shawl Pattern – Corvus Bandana Shawl, you may want to check out my other designs!
Free Crochet Shawl Pattern – Corvus Bandana Shawl
And until next time… Happy Hooking! 😉
This is gorgeous! I’m definitely going through my yarn stash to find the right yarn to make it. I would be helpful if you added a couple of pictures of the shawl tie construction. It’s a brilliant idea! I’ve never heard of it before. But it would be nice to see a picture of it, and how it’s used, for those who need visuals. 😀
That is a fantastic suggestion, Lynn! And I’m so glad you love the pattern! Thanks so much for commenting! <3