

Free Crochet Top Pattern – Sweet Iris
Why You’ll Love The Sweet Iris Free Crochet Top Pattern
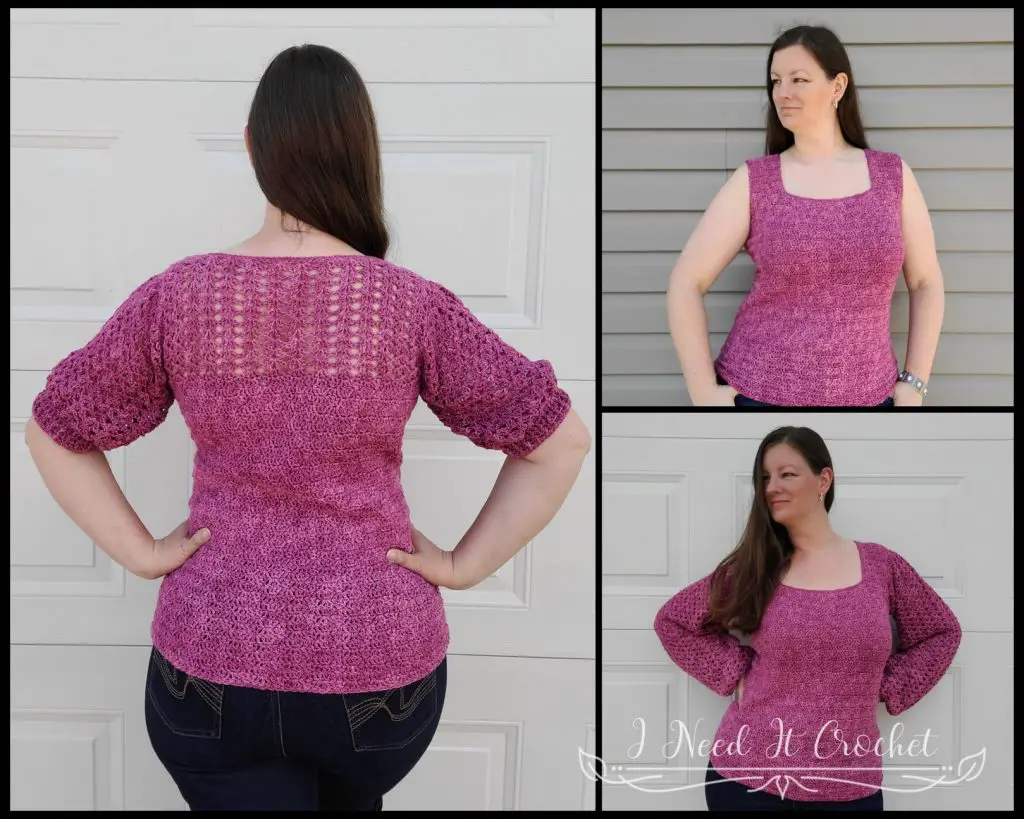
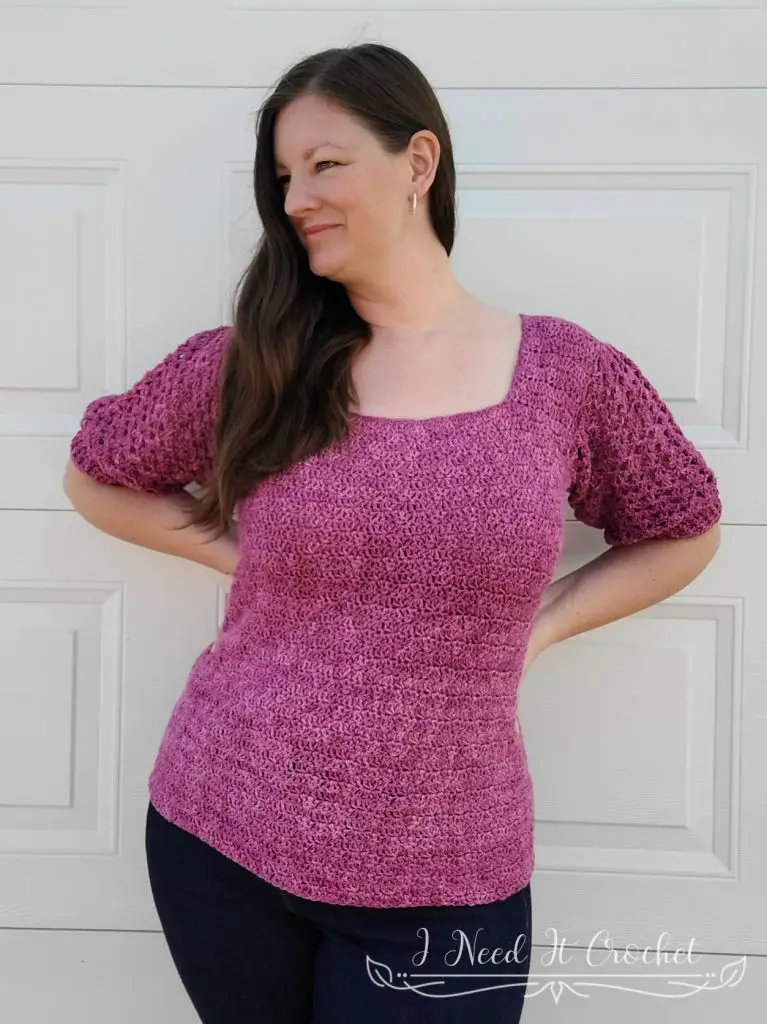
I have long admired the Iris stitch, so I went about designing this top with it as the focal point. Deciding on the solid stitch for the main body took a little more thought. After some experimentation, I found stacking 3dc in one stitch over a dc3tog created a pretty texture that complimented the Iris stitch perfectly. My husband pointed out that it looked a bit like honeycomb, thus inspiring me to name it Sweet Iris.
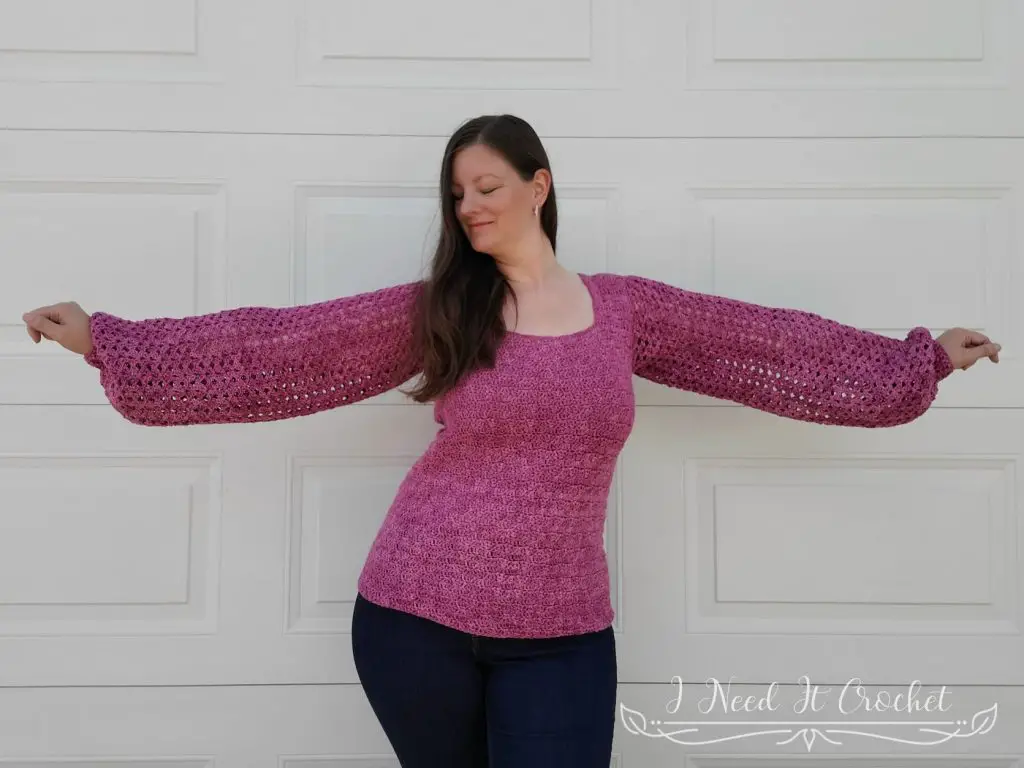
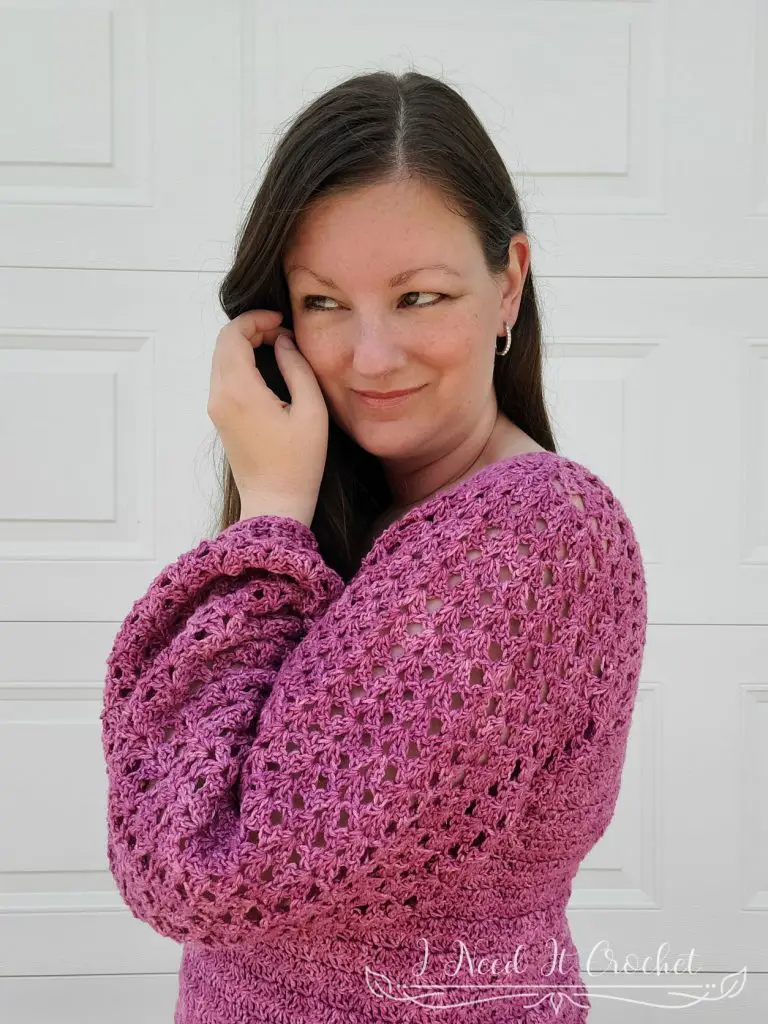
I love having options, so writing this pattern with the option of long, short, or no sleeves (and taking pictures of all three) was a must!
The Free Crochet Top Pattern – Sweet Iris is copyrighted by I Need It Crochet. You may not copy, share, change, or sell the pattern itself. Also, you may not claim this pattern as your own. All pictures contained in this pattern fall under the copyright and may not be used.
Finished items made from the Free Crochet Top Pattern – Sweet Iris belong to you, and you may do what you wish with them. If you choose to sell them on Etsy, I would very much appreciate it if you credited me as the pattern designer.
Where Can I Buy The Pdf?
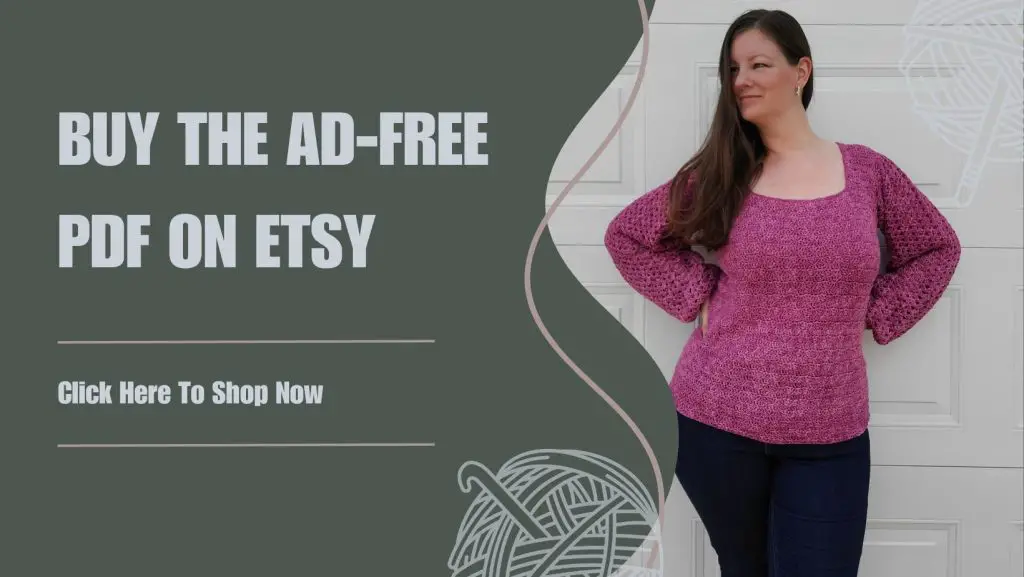
The entire pattern is available to view for free on this page (you just have to scroll down to see it). But if you would prefer to have a printable pdf copy of the pattern, you can purchase it for a small fee from my Ravelry and Etsy stores. Just click the graphics below.
This pattern is 9 pages long and contains multiple pictures and detailed instructions of how to complete your crochet top. Plus 2 photo tutorials for the Bead stitch and 3rd loop only stitch. A printable pdf will be easier to follow, and you can make notes on it as you go. I find it to be the easier option. But if you like to use the online version, it is here 24/7 for you to view. Enjoy!

Free Crochet Top Pattern – Sweet Iris
Free Crochet Top Pattern – Sweet Iris
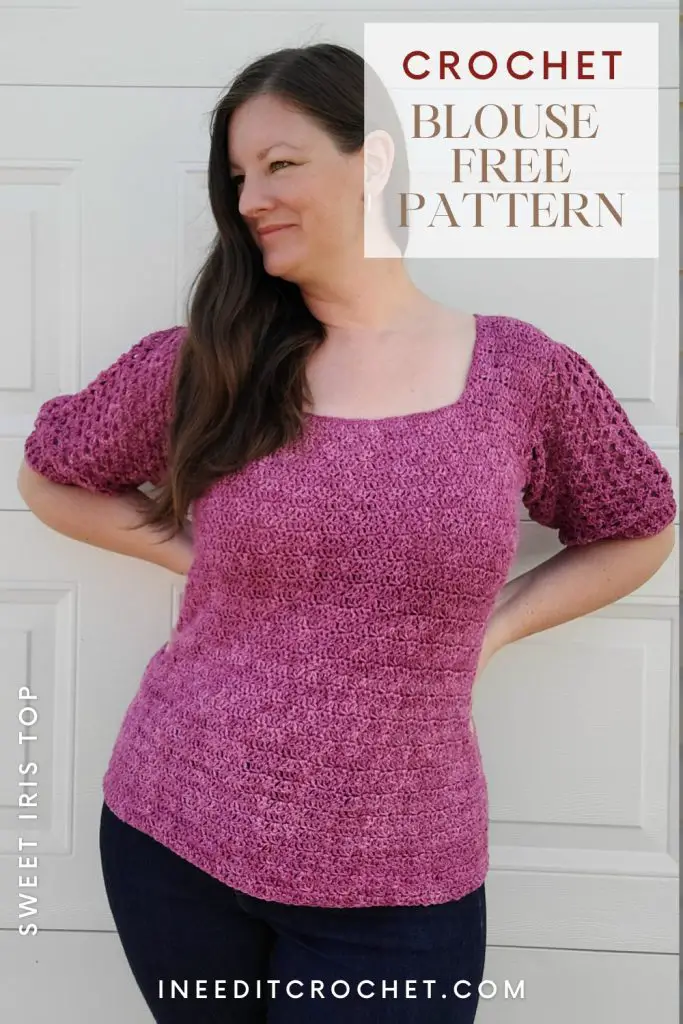
Want to Pin it for later?
Click the image below and save the pin to your favourite crochet pattern boards!
Free Crochet Top Pattern – Sweet Iris
The Yarn
The yarn I used for this project was Vera by Anzula Yarns. When I read in the description that it had 35% linen, I was somewhat surprised, as linen yarns – in my experience – tend to be a bit stiff and rough. However, the high silk content (65% tussah silk) makes this one of the softest, most luxurious yarns I’ve ever worked with.
Vera glides over my hook, without being too slippery. It has a very light halo, and a little bit of sheen. And the colours are to dye for (ha)! The shade I chose was Orchid. It is a lovely tonal pink that rings true to my favourite flower. It is a wonderful yarn to work with, and I highly recommend it for any wearable project.
You can find Anzula Yarns Vera at their website here.
Size and Materials Info for the The Free Crochet Top Pattern – Sweet Iris
Finished Sizes:
Instructions given to fit size X-small; changes for small, medium, large, X-large, 2X-large, 3X-large, 4X-large and 5X-large are in ()
XS (S, M, L, XL, 2XL, 3XL, 4XL, 5XL)
Body Circumference: 28” (32”, 36”, 40”, 44”, 48”, 52”, 56”, 60”)
Body Length: Customizable.
Shoulder Width: 12” (13”, 14 ¼”, 15 ¼”, 16 ¼”, 17 ¼”, 18 ¼”, 19 ½”, 20 ½”)
Arm Hole Circumference: 12 ¾” (14”, 15”, 16”, 17”, 20”,21 ¼”, 22 ¼”, 23 ½”)
Gauge:
See gauge swatch instructions below. Be sure to always check your gauge. It will save you much time and heartache.
Materials:
I used Anzula Yarns Vera, which is a 65% Silk, 35% Linen, #2 Fine weight yarn.
Any yarn of similar weight would work.
Approximately 1300 (1400, 1500, 1600, 1800, 2000, 2200, 2400, 2600) yds for the long sleeve version, and 700 (800, 900, 1000, 1100, 1200, 1300, 1400, 1500) yds for the sleeveless version.
4.5mm Hook
5mm HookStitch Markers
Yarn Needle
Scissors
Measuring Tape
Abbreviations:
RS = Right Side
WS = Wrong Side
Sk = Skip
St = Stitch
Ss = Slip Stitch
Ch = Chain
Sc = Single Crochet
Dc = Double Crochet
Dc3tog = Double Crochet 3 Together
Fpdc = Front Post Double Crochet
Bpdc = Back Post Double Crochet
Notes:
Ch1 and ch2 at the beginning of a row is never considered a stitch.
Ch3 at the beginning of a row is considered a dc. Each ch between sts counts as a st.
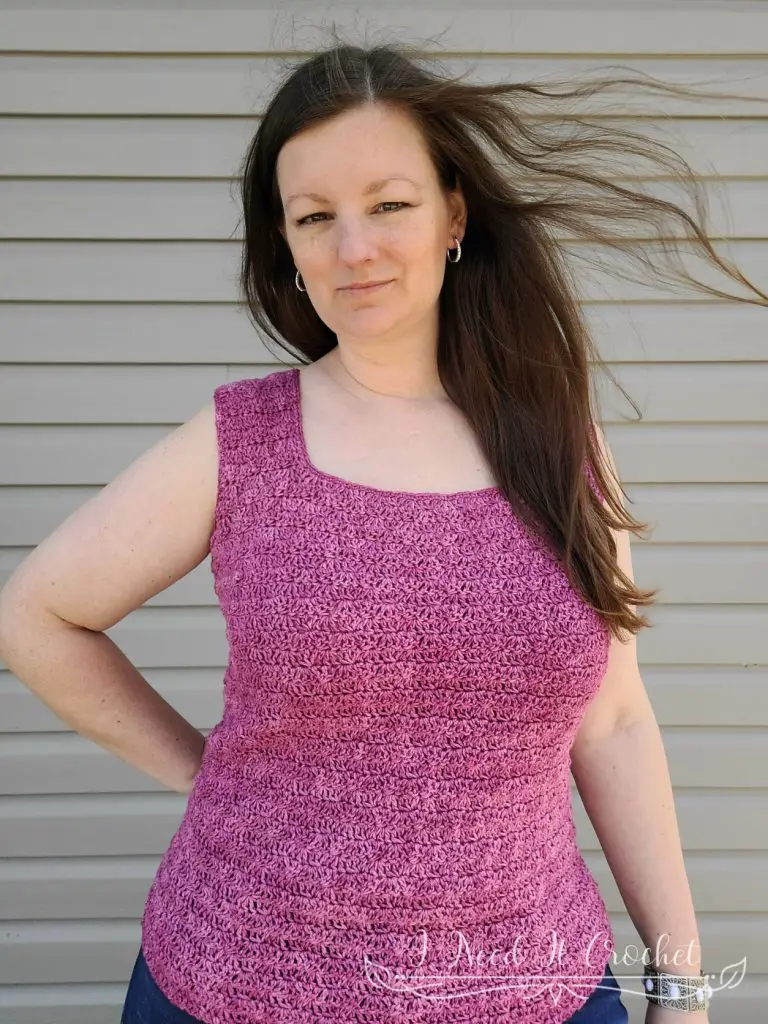
The model above (that’s me) has a 38” bust and is wearing a size M.
Choose your size according to your largest measurement (bust/waist) and how you would like the top to fit. For a close-fitting top, choose the size closest to your largest measurement. For a loose top, choose a size 2-3” larger.
Free Crochet Top Pattern – Sweet Iris
Gauge Swatch
While designing this top, I experienced something that’s never happened to me before. When I worked the two different stitch patterns for this top, I was getting two different gauges. No matter how many times I tried, I could not achieve the same gauge with the same hook for both stitches, so I ended up using two different hook sizes. When you test your gauge, I recommend you make both of the swatches below to check your sizing in both stitches.
Lacy Stitch
With 5mm hook
- Ch22. Sc in 2nd ch from hook and each ch across. Turn. – 21 st
- Ch3. Sk next st, (2dc, ch1, 2dc) in next st. *Sk 3 sts, (2dc, ch1, 2dc) in next st.** Repeat from * to ** until there are only 2 sts left. Sk 1 st, dc in last st. Turn. – 27 st
- Ch3. Sk 2 sts, (2dc, ch1, 2dc) in next ch1 sp. *Sk 4 sts, (2dc, ch1, 2dc) in next ch1 sp.** Repeat from * to ** until there are only 3 sts left. Sk 2 sts, dc in last st. Turn. – 27 st
Repeat row 3 until you have a total of 10 rows. Your swatch should measure 5 ¾” W x 5 ½” H.
Solid Stitch
With 4.5mm hook
- Ch22. Sc in 2nd ch from hook and each ch across. Turn. – 21 st
- Ch3, dc in 1st st. Dc3tog. *3dc in next st. Dc3tog.** Repeat from * to ** until there is only 1 st left. 2dc in last st. Turn. – 21 st
- Ch2, dc in next st (counts as dc2tog). 3dc in next st. *Dc3tog. 3dc in next st.** Repeat from * to ** until there are only 2 sts left. Dc2tog. – 21 st
Repeat rows 2 & 3 until you have a total of 11 rows. Your swatch should measure 5 ½” W x 5 ¼” H.
Free Crochet Top Pattern – Sweet Iris
Instructions
This top design is completely seamless. The upper back and upper front will be created first, working in rows. Then, the lower body will be worked in the round. Lastly, the sleeves are added and the neckline finished.
Upper Back
With 5mm hook (or the hook used to obtain gauge in the lacy stitch pattern):
Ch 46 (50, 54, 58, 62, 66, 70, 74, 78).
- (RS) Sc in back bump of 2nd ch from hook and each ch across. Turn. – 45 (49, 53, 57, 61, 65, 69, 73, 77) st
- (WS) Ch3. Sk next st, (2dc, ch1, 2dc) in next st. *Sk 3 sts, (2dc, ch1, 2dc) in next st.** Repeat from * to ** until there are only 2 sts left. Sk 1 st, dc in last st. Turn. – 57 (62, 67, 72, 77, 82, 87, 92, 97) st
- Ch3. Sk 2 sts, (2dc, ch1, 2dc) in next ch1 sp. *Sk 4 sts, (2dc, ch1, 2dc) in next ch1 sp.** Repeat from * to ** until there are only 3 sts left. Sk 2 sts, dc in last st. Turn. – 57 (62, 67, 72, 77, 82, 87, 92, 97) st
Repeat row 3 until you have a total of 10 (10, 10, 10, 10, 12, 12, 12, 12) rows.
- / 13. Ch3. Sk 2 sts, (4dc) in next ch1 sp. *Sk 4 sts, 4dc in next ch1 sp.** Repeat from * to ** until there are only 3 sts left. Sk 2 sts, dc in last st. Ch 7 (11, 15, 19, 23, 27, 31, 35, 39). Bind off. – 46 (50, 54, 58, 62, 66, 70, 74, 78) st + 7 (11, 15, 19, 23, 27, 31, 35, 39) ch
Measurement Check: Your project should be approximately 12” (13”, 14 ¼”, 15 ¼”, 16 ¼”, 17 ¼”, 18 ¼”, 19 ½”, 20 ½”) W x 5 ½” (5 ½”, 5 ½”, 5 ½”, 5 ½”, 6 ¾”, 6 ¾”, 6 ¾”,6 ¾”, 6 ¾”) H and look similar to Figure 1.
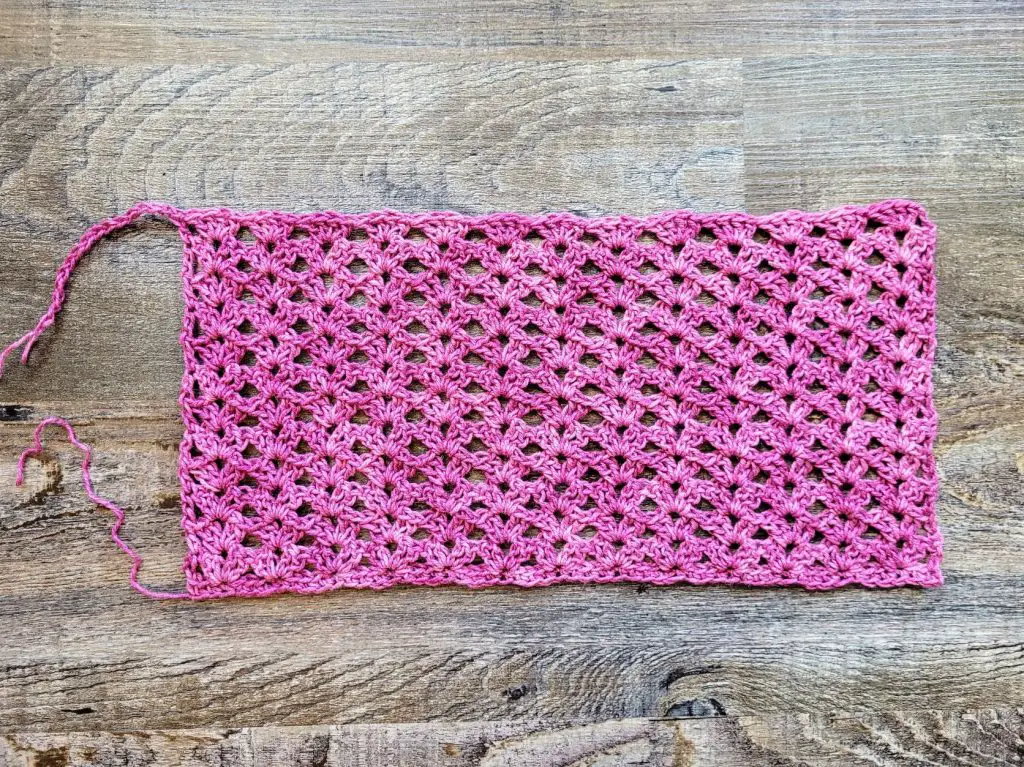
Figure 1
Upper Front Neckline
We will first work the front of the shoulders and sides of the neckline, then make a long chain to join at the bottom at the neckline. Turn your work so that the right side is facing you and the starting chain is at the top. We will work row 1 of the Left and Right Shoulders into the bottom of the starting chain.
Left Neckline
Count 9 (9, 13, 13, 13, 17, 17, 21, 21) sts from the left and join your yarn in the last counted st.
With 4.5mm hook (or the hook used to obtain gauge in the solid stitch pattern):
- (RS) Ch1. Sc in 1st 9 (9, 13, 13, 13, 17, 17, 21, 21) sts. Turn. – 9 (9, 13, 13, 13, 17, 17, 21, 21) st
- (WS) Ch3, dc in 1st st. Dc3tog. *3dc in next st. Dc3tog.** Repeat from * to ** until there is only 1 st left. 2dc in last st. Turn. – 9 (9, 13, 13, 13, 17, 17, 21, 21) st
- Ch2, dc in next st (counts as dc2tog). 3dc in next st. *Dc3tog. 3dc in next st.** Repeat from * to ** until there are only 2 sts left. Dc2tog. – 9 (9, 13, 13, 13, 17, 17, 21, 21) st
Repeat rows 2 & 3 until you have a total of 8 (8, 8, 10, 10, 10, 12, 12, 12) rows. Ch 27 (31, 27, 31, 35, 31, 35, 31, 35). Bind off. Note: If you would like a higher neckline, just subtract an even number of rows. Ex: you could have a total of 4 or 6 rows.
Right Neckline
Turn your work so that it is once again right side facing you with the starting chain at the top. Join your yarn in the 1st st of the upper back. Work the Right Neckline using the same instructions as the Left Neckline above, but do not ch at the end of the last row. Do not bind off. Note: If you changed the amount of rows completed for the Left Neckline, be sure to work the same amount of rows for the Right Neckline.
Upper Bust
Now we are going to work the Upper Bust until it contains the same amount of rows as the Upper Back. Note: If you worked fewer rows than called for in the Right and Left Necklines, you will have to work more rows in this section to compensate. The end goal is to have the same amount of rows on the front (this includes the neckline and upper bust rows) as you do on the back.
Take the long chain you made at the end of the Left Neckline and join it to the 1st st of the last row of the Right Neckline. To do this, I just run the yarn end through the stitch and tie a knot. Your project should now look similar to Figure 2. Place your hook back in the loop of your last stitch and turn.
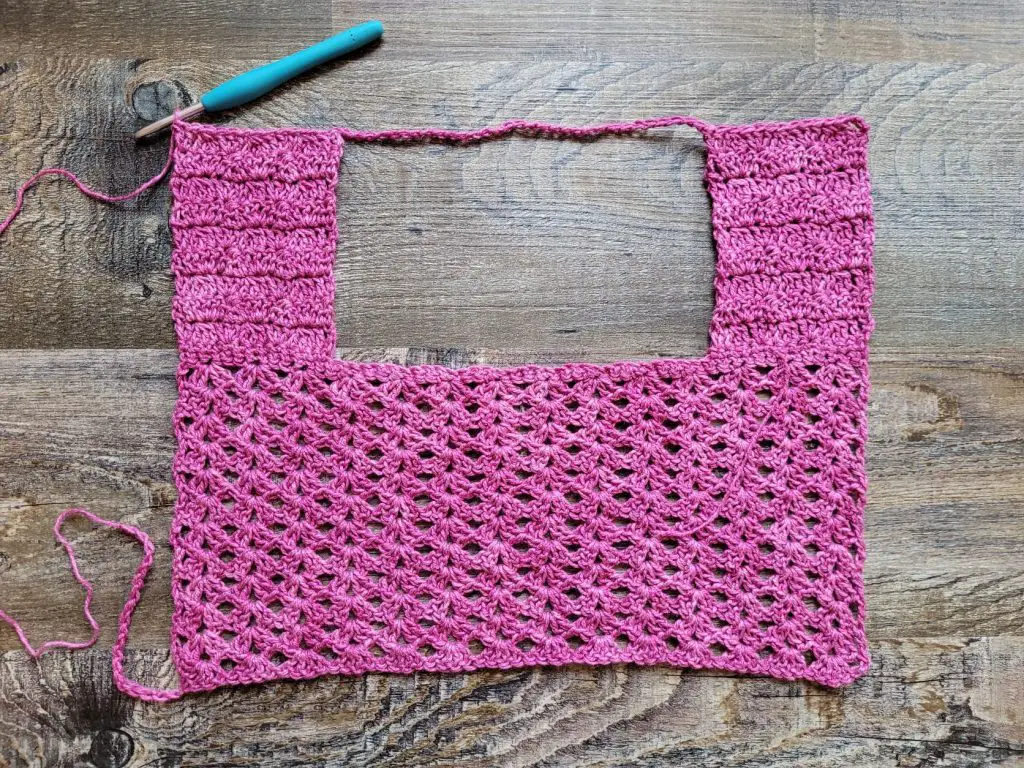
Figure 2
- (RS) Ch2, dc in next st (counts as dc2tog). 3dc in next st. *Dc3tog. 3dc in next st.** Repeat from * to ** until there are only 2 sts left. Dc2tog. Turn – 45 (49, 53, 57, 61, 65, 69, 73, 77) st
Sizes L, XL, 3X, 4X, & 5X only: Skip the next row(s), ch n/a (n/a, n/a, 19, 23, n/a, 31, 35, 39) and continue on to the paragraph labeled All Sizes below. Do not bind off.
- (WS) Ch3, dc in 1st st. Dc3tog. *3dc in next st. Dc3tog.** Repeat from * to ** until there is only 1 st left. 2dc in last st. Turn. – 45 (49, 53, 57, 61, 65, 69, 73, 77) st
Sizes XS, S, M, & 2X only: Repeat row 1. Ch 7 (11, 15, n/a, n/a, 27, n/a, n/a, n/a). Do not bind off.
All Sizes: You should now have a total of 8 (8, 8, 10, 10, 10, 12, 12, 12) Shoulder Rows and 3 (3, 3, 1, 1, 3, 1, 1, 1) Upper Bust rows. Your project should now look similar to Figure 3. Note that your upper front should be the same width as your upper back and the total of your neckline and upper bust rows should be equal to the number of upper back rows.
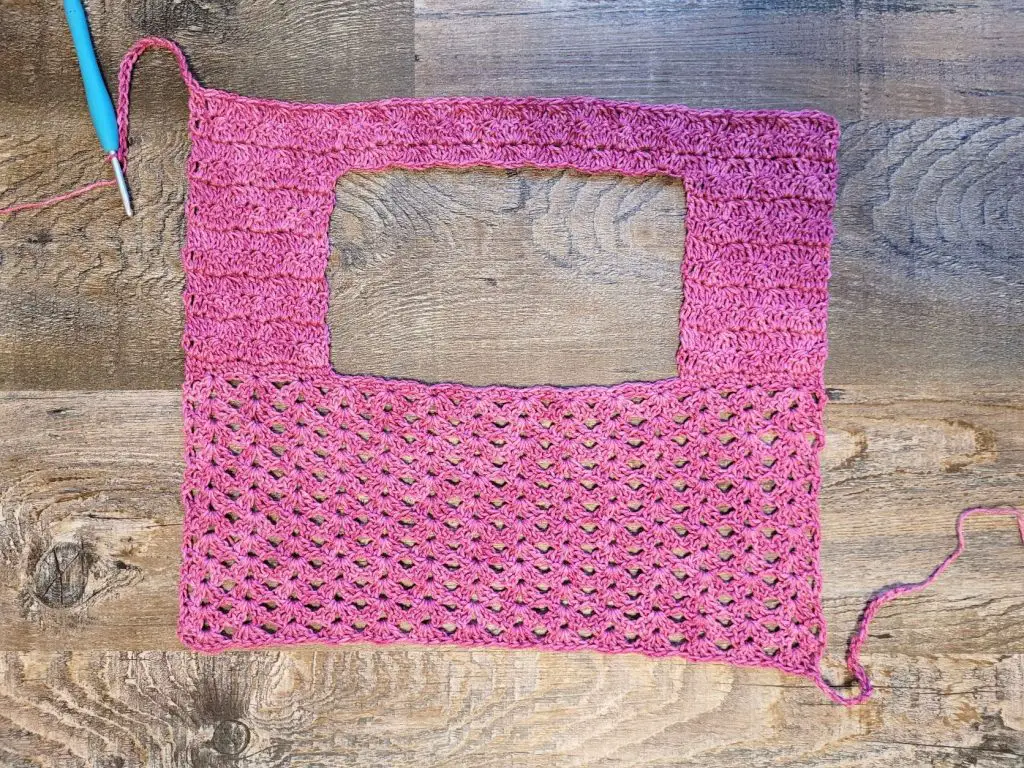
Figure 3
Lower Body
Fold your project in half with the wrong sides facing each other. Join the end of the chain from the Upper Back to the 1st st of the last row of the Upper Front. Then, with your hook in the loop of the chain you just worked at the end of the Upper Front, ss into the 1st st of the last row of the Upper Back. Your project should now look like Figure 4.
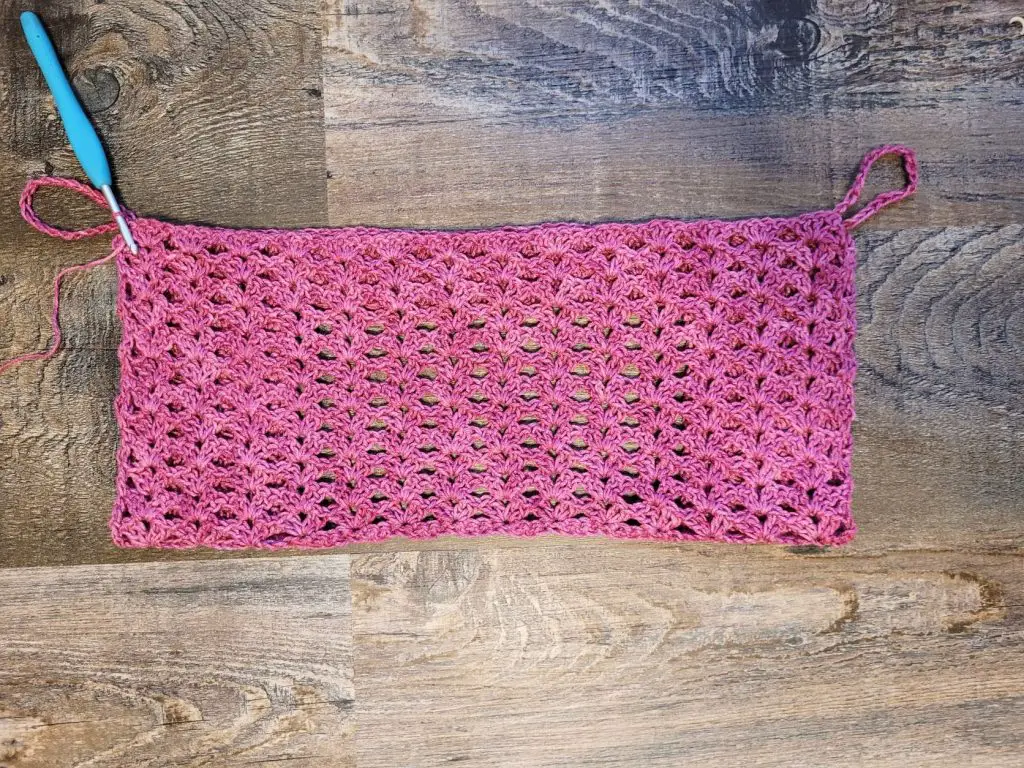
Figure 4
We will now be working the lower body in the round, but still turning at the end of each round. After you have slip stitched into the upper back, turn so you are working in the opposite direction. Your first sts will be worked into the same st you just slip stitched into, then into the ch of the underarm.
- (WS) (Ch3, 2dc) in 1st st. *Dc3tog. 3dc in next st.** Repeat from * to ** around until there are only 4 sts left. Dc4tog. Ss to join to 1st st. Turn. – 104 (120, 136, 152, 168, 184, 200, 216, 232) st
- Ch2, sk 1st st. 3dc in next st. *Dc3tog. 3dc in next st.** Repeat from * to ** around until you only have 2 sts left before the beginning ch2. Dc2tog. Ss to join to 1st st. Turn. – 104 (120, 136, 152, 168, 184, 200, 216, 232) st
Repeat round 2 until you have achieved the desired length, ending with a repeat of row 1. Once you have worked a few rounds of the lower body, stop and check that you are getting the proper measurement. The width of the body should measure at half the bust circumference. For example, if you are making a size medium with a 36” bust, your project should be 18” wide.
Bottom Finishing
- (RS) Ch1. Sc in 1st st and each st around. Ss to join to 1st st. Bind off. – 104 (120, 136, 152, 168, 184, 200, 216, 232) st
Neck Finishing
With the right side facing you, join your yarn anywhere on the neck. Somewhere at the back would be least noticeable.
- Ch1. Sc around the entire neck as follows:
- Place 1 sc in each st or ch.
- Place 1 sc in the end of each sc row.
- Place 2 sc in the end of each dc row.
- When you have worked all the way around, ss to join to 1st st. Bind off.
Free Crochet Top Pattern – Sweet Iris
Sleeves
With 5mm hook (or the hook used to obtain gauge in the lacy stitch pattern):
With the right side facing you, join your yarn in the right bottom corner of the armhole.
- Ch1. Sc in 1st ch and each ch across. Then sc around the rest of the armhole, placing 2 sc in the end of each dc row and 1 sc in the end of each sc row. Ss to join to 1st st. Turn. – 49 (53, 57, 61, 65, 77, 81, 85, 89) st
For the sleeveless version only: Bind off, weave in your ends, and you’re done!
- Work only the instructions marked with your size.
Size XS: (Ch3, dc, ch1, 2dc) in 1st st. *Sk 3 sts, (2dc, ch1, 2dc) in next st.** Repeat from * to ** 2 (2, 2, 2, 2, 3, 3, 3, 3) more times. Sk 2 sts, (2dc, ch1, 2dc) in next st. *Sk 1 st, (2dc, ch1, 2dc) in next st.** Repat from * to ** 6 more times. Sk 2 sts, (2dc, ch1, 2dc) in next st. *Sk 3 sts, (2dc, ch1, 2dc) in next st.** Repeat from * to ** 2 (2, 2, 2, 2, 3, 3, 3, 3) more times. Sk 2 sts, (2dc, ch1, 2dc) in next st. Sk last 2 sts, ss to join to 1st st. Ss into next st. Ss loosely into ch1 sp. Turn.
Size S: (Ch3, dc, ch1, 2dc) in 1st st. *Sk 3 sts, (2dc, ch1, 2dc) in next st.** Repeat from * to ** n/a (2, 2, 2, 2, 3, 3, 3, 3) more times. Sk 2 sts, (2dc, ch1, 2dc) in next st. *Sk 1 st, (2dc, ch1, 2dc) in next st.** Repat from * to ** 6 more times. Sk 2 sts, (2dc, ch1, 2dc) in next st. *Sk 3 sts, (2dc, ch1, 2dc) in next st.** Repeat from * to ** n/a (2, 2, 2, 2, 3, 3, 3, 3) more times. Sk 2 sts, (2dc, ch1, 2dc) in next st. Sk 3 sts, (2dc, ch1, 2dc) in next st. Sk last 2 sts, ss to join to 1st st. Ss into next st. Ss loosely into ch1 sp. Turn.
Sizes M, L, XL, 2X, 3X, 4X, & 5X: (Ch3, dc, ch1, 2dc) in 1st st. *Sk 3 sts, (2dc, ch1, 2dc) in next st.** Repeat from * to ** n/a (n/a, 2, 2, 2, 3, 3, 3, 3) more times. Sk 2 sts, (2dc, ch1, 2dc) in next st. *Sk 1 st, (2dc, ch1, 2dc) in next st.** Repeat from * to ** 6 more times. Sk 2 sts, (2dc, ch1, 2dc) in next st. *Sk 3 sts, (2dc, ch1, 2dc) in next st.** Repeat from * to ** n/a (n/a, 2, 2, 2, 3, 3, 3, 3) more times. Sk 2 sts, (2dc, ch1, 2dc) in next st. *Sk 3 sts, (2dc, ch1, 2dc) in next st.** Repeat from * to ** n/a (n/a, 1, 2, 3, 4, 5, 6, 7) more times. Sk last 2 sts, ss to join to 1st st. Ss into next st. Ss loosely into ch1 sp. Turn.
- 85 (90, 95, 100, 105, 120, 125, 130, 135) st
- (Ch3, dc, ch1, 2dc) in 1st ch1 sp. *Sk 4 sts, (2dc, ch1, 2dc) in next ch1 sp.** Repeat from * to ** until there are only 4 sts left. Sk 4 sts, ss to join to 1st st, ss into next st, ss loosely into ch1 sp. Turn. – 85 (90, 95, 100, 105, 120, 125, 130, 135) st
Repeat round 3 until you have achieved your desired length. For my top, I worked a total of 16 rounds for the short sleeves and 38 rounds for the long sleeves. Be sure to end on an even number of rounds (including the 1st sc round).
Free Crochet Top Pattern – Sweet Iris
Sleeve Cuff
This part of the pattern requires a touch of improvisation, since there are a wide range of cuff options. Begin by turning so that the right side of your project is facing you.
- Ch1. Working only into the ch1 spaces and skipping the dc sts, sc around the opening of the sleeve. For the number of sts, see below. If you want to choose a size between what I have written, just make sure you have an even number of sts. Try to spread the sts out evenly among the ch 1 spaces, working 1 sc in some, and 2 or 3 in others. Ss to join to 1st st. Turn.
Long sleeve cuffs: 6” = 24 sc / 7” = 28 sc / 8” = 32 sc / 9” = 36 sc
Short sleeve cuffs: 10” = 40 sc / 11” = 44 sc / 12” = 48 sc / 13” = 52 sc / 14” = 56 sc / 15” = 60 sc / 16” = 64 sc / 17” = 68 sc / 18” = 72 sc / 19” = 76 sc / 20” = 80 sc / 21” = 84 sc / 22” = 88 sc
- Ch3. Dc in next st and each st around. Ss to join to 1st st. Turn.
- Ch2. Fpdc around 1st st. Bpdc around next st. *Fpdc around next st. Bpdc around next st.** Repeat from * to ** until all sts worked. Ss to join to 1st st. Turn.
- Ch2. Bpdc around 1st st. Fpdc around next st. *Bpdc around next st, fpdc around next st.** Repeat from * to ** until all sts worked. Ss to join to 1st st. Turn.
- Ch1. Sc in 1st st and each st around. Ss to join to 1st st. Bind off.
Weave in your ends, and you’re done!
I hope you love your new crochet top, and I look forward to seeing all of your beautiful pictures on Ravelry!
If you’d like to know when I post new patterns and tutorials like the Free Crochet Top Pattern – Sweet Iris, head on over to my Facebook and Instagram and give me a like and a follow!
If you enjoyed The Free Crochet Tunic Pattern – Summer Beauty, you may want to check out my other designs!
Free Crochet Top Pattern – Sweet Iris
And until next time… Happy Hooking! 😉