
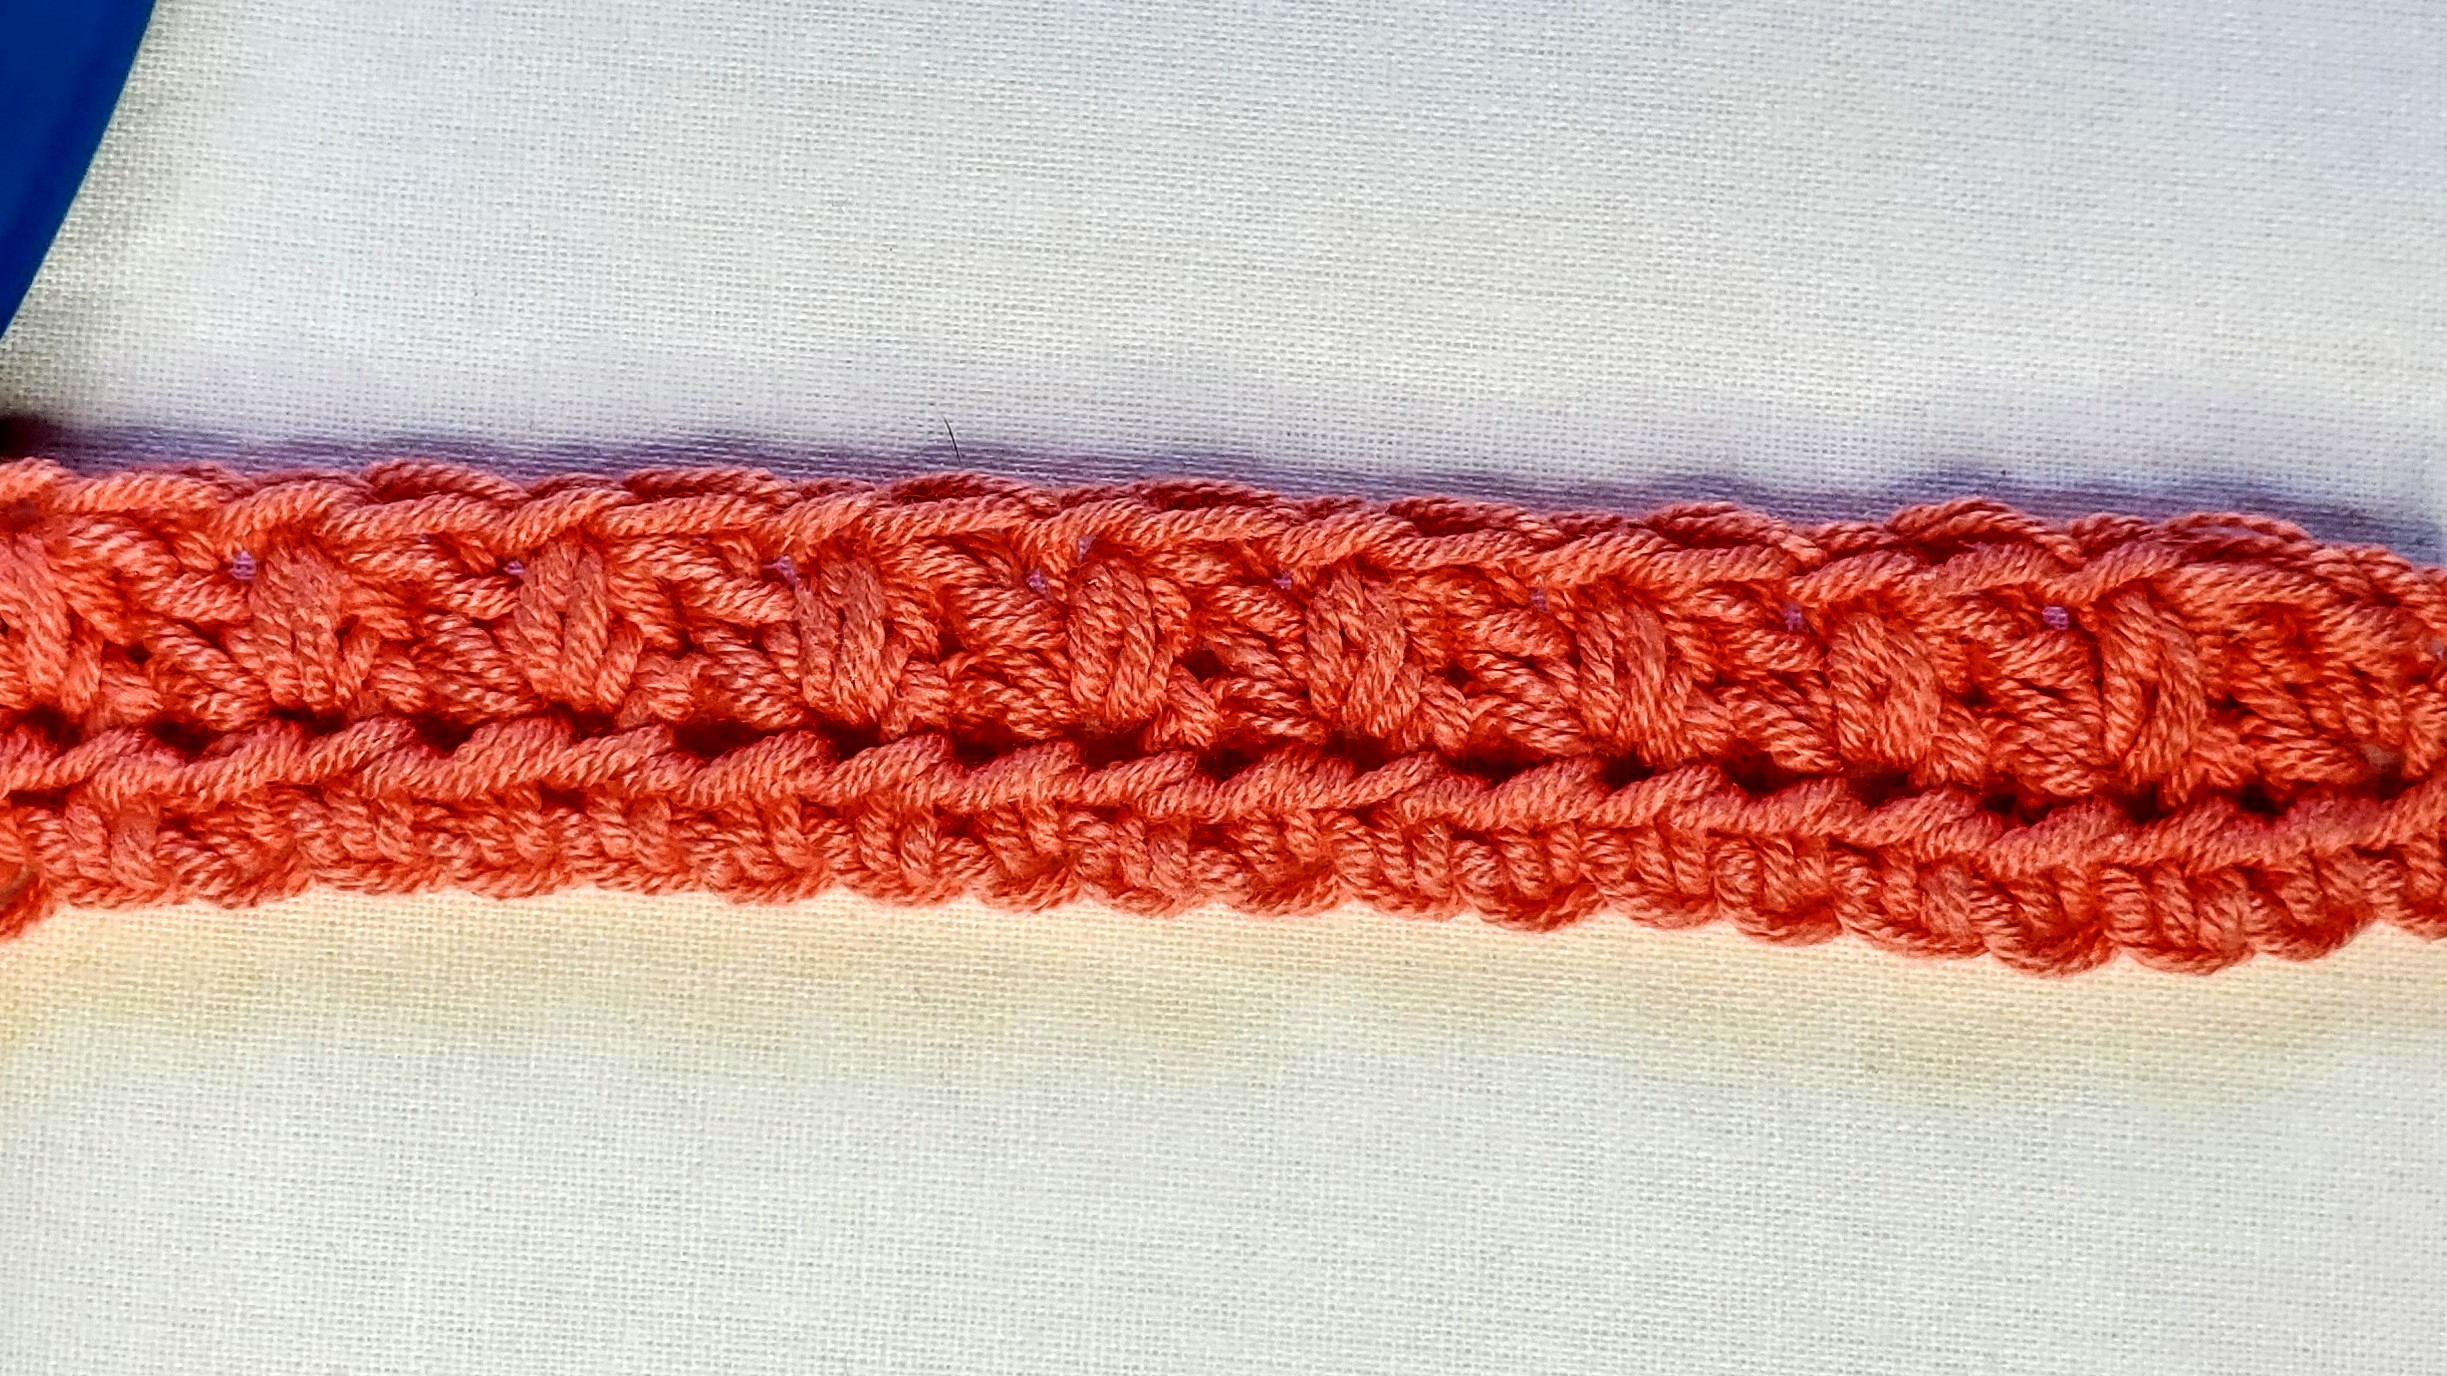

Mixed Cluster Stitch Tutorial
This Mixed Cluster Stitch Tutorial is copyrighted by I Need It Crochet. You may not copy, share, change, or sell the tutorial itself. Also, you may not claim this tutorial as your own. All pictures contained in this tutorial fall under the copyright and may not be used.
The Mixed Cluster Stitch Tutorial covers the Mixed Cluster Stitch in a few different forms. First we will learn the classic form of Mixed Cluster Stitch, then we’ll go through how to work this stitch in the round, work increases, and decreases.
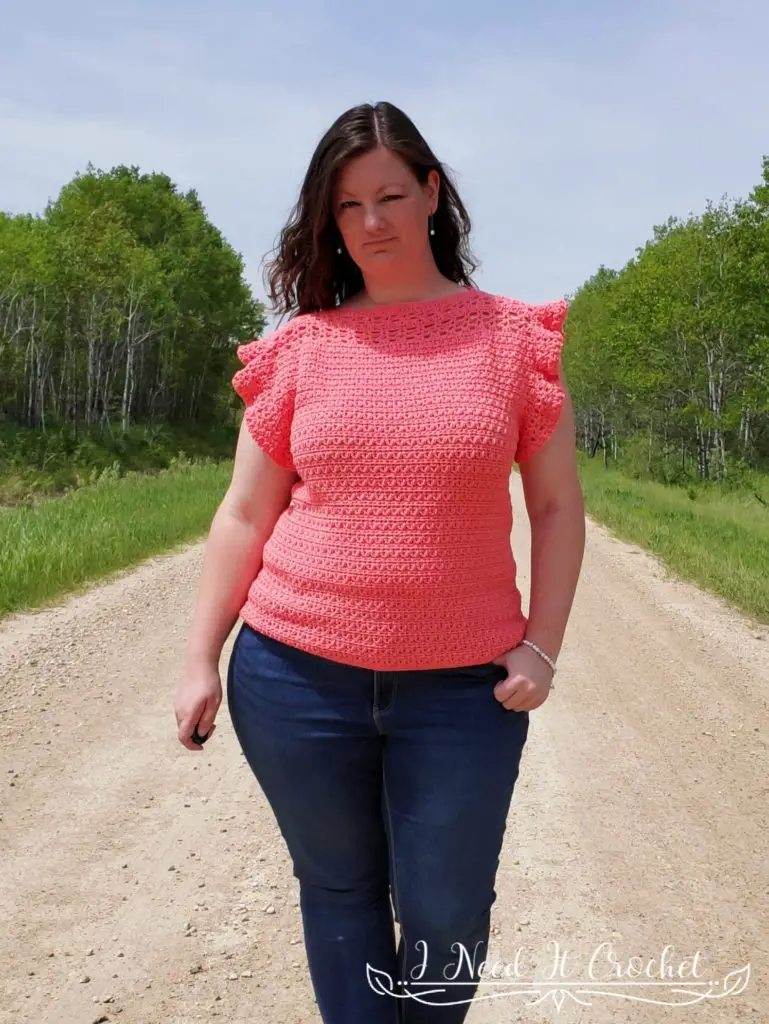
I came across this beautiful stitch when I was designing All A Flutter. I wanted something with beautiful texture and solid structure. When I opened my trusty Crochet Stitch Dictionary by Sarah Hazell, the Mixed Cluster instantly jumped out at me.
A Mixed Cluster Stitch (mc) can be a little confusing at first because the beginning of the stitch is placed in the same stitch as the end of the last stitch. However with practice, you will get the hang of this beautiful stitch.
Classic Mixed Cluster Stitch
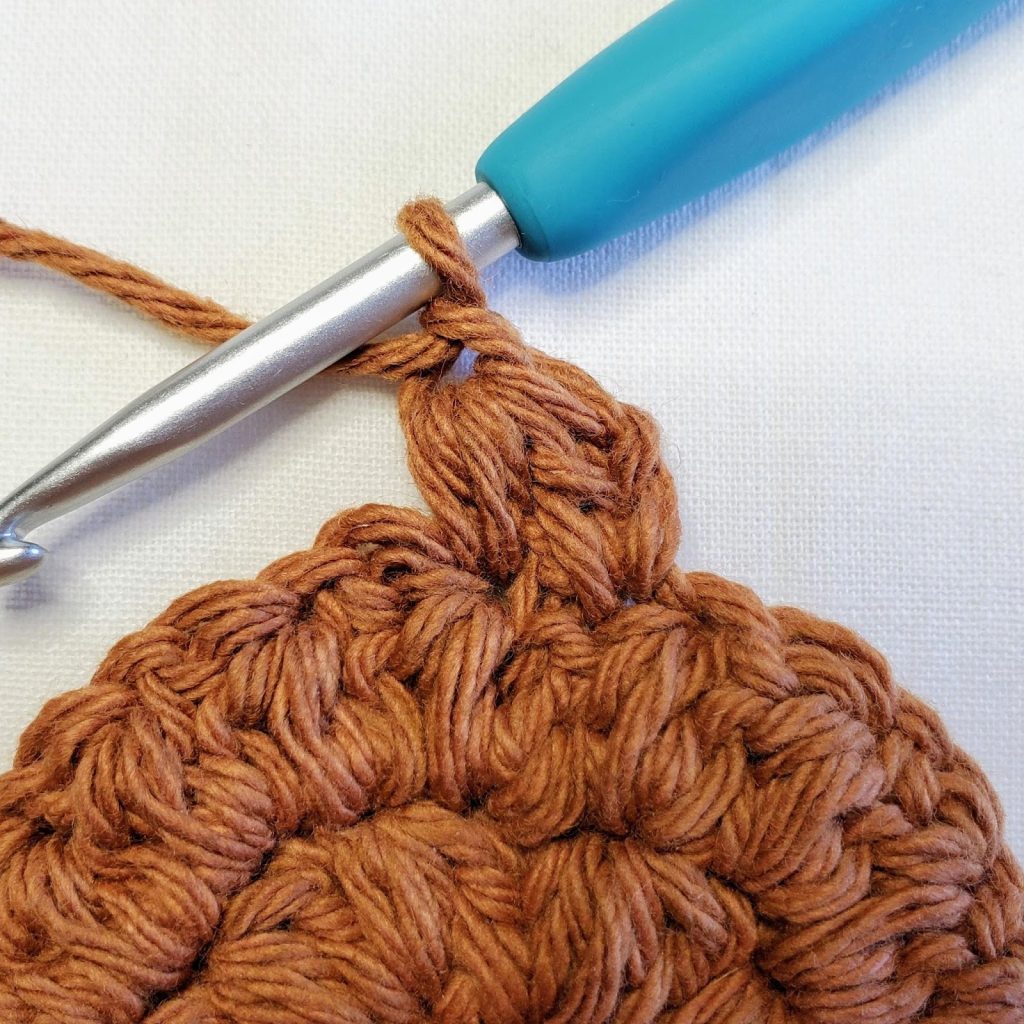
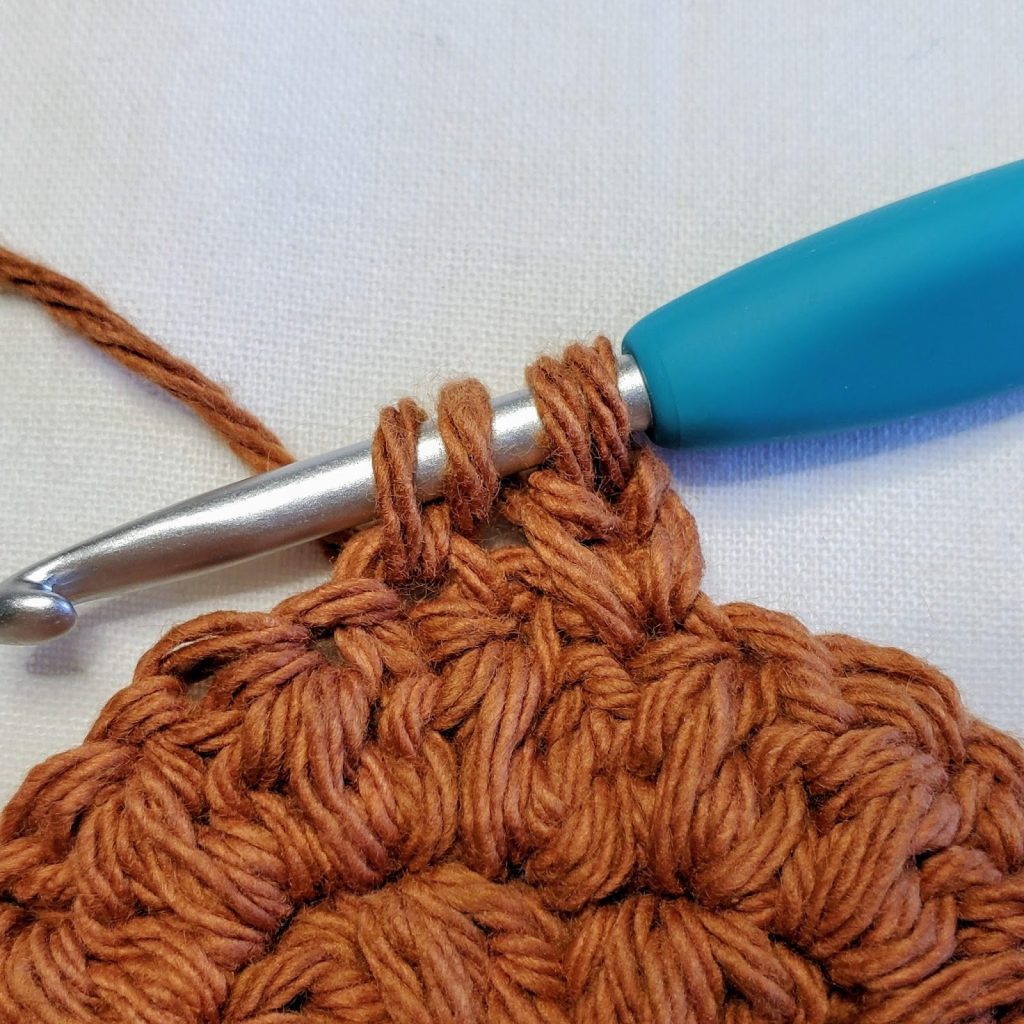
– First, you will be starting off with a stitch already completed. This is not part of the mixed cluster stitch, just a place to start. For this example, I have begun with a hdc stitch. (See Figure 1.)
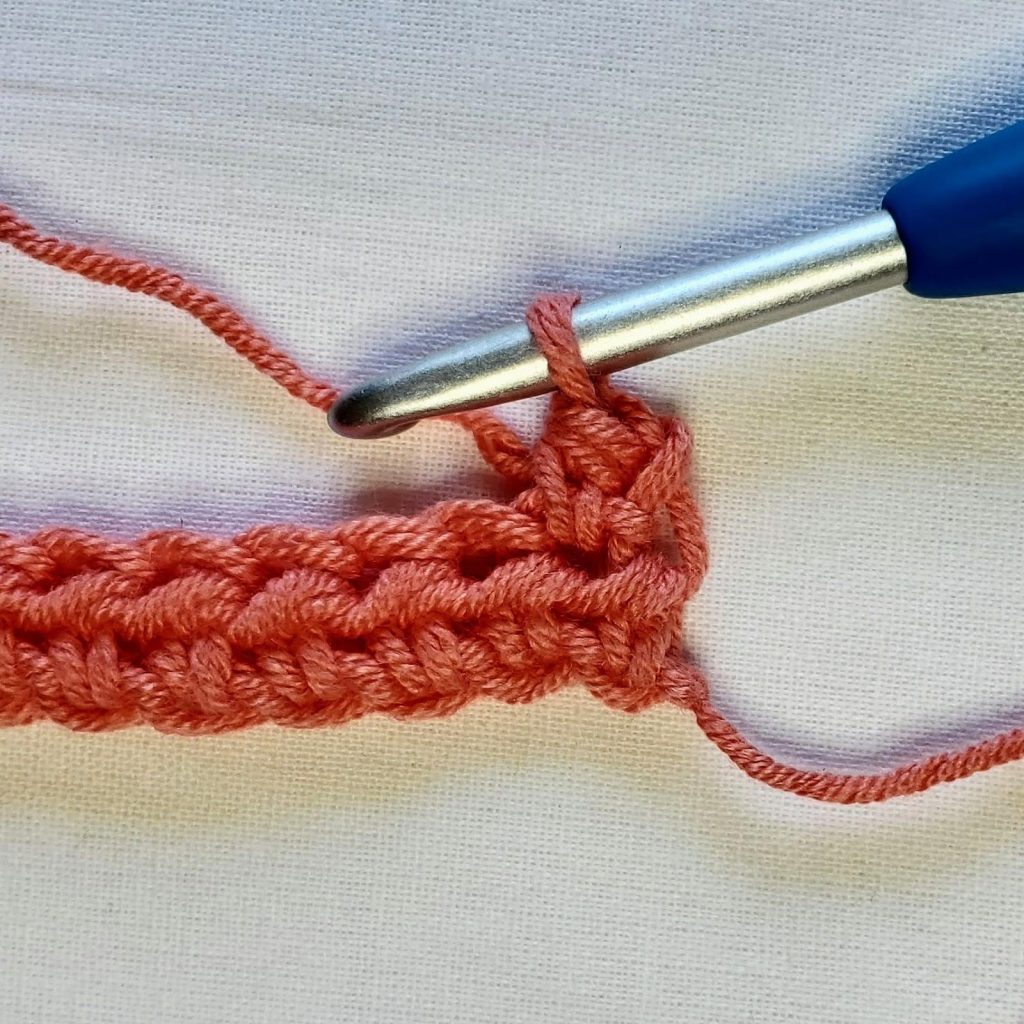
– * Next, you yo, insert your hook into the same st as your hdc, pull up a loop, yo, and pull through 2 loops. (See Figure 2.)

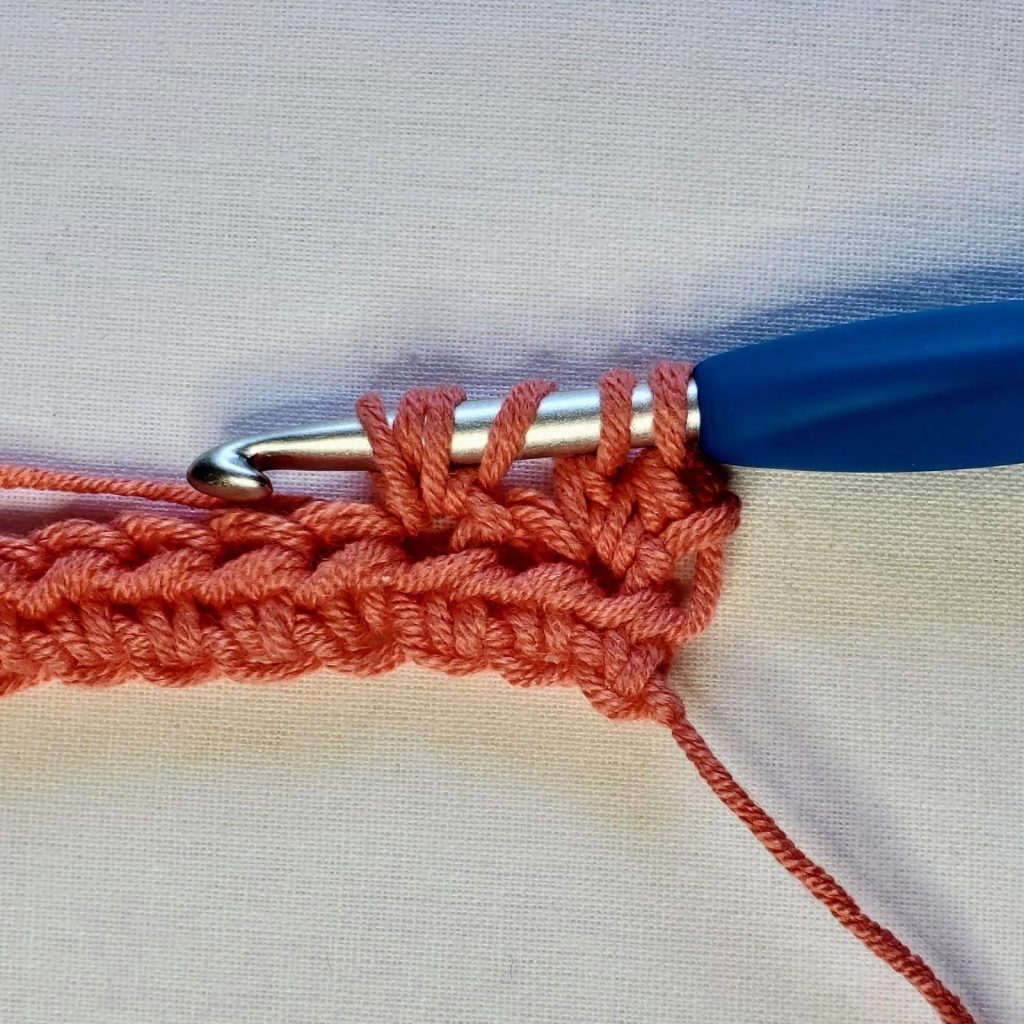
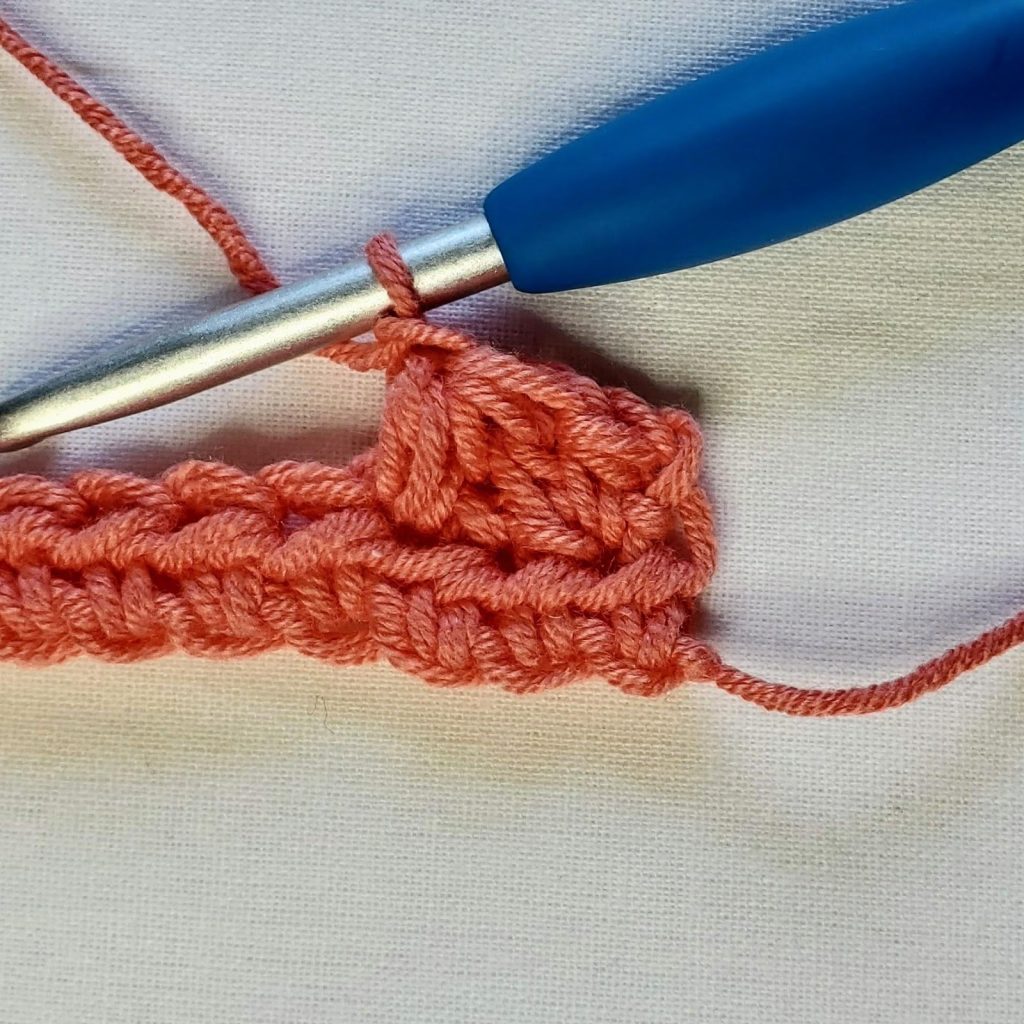
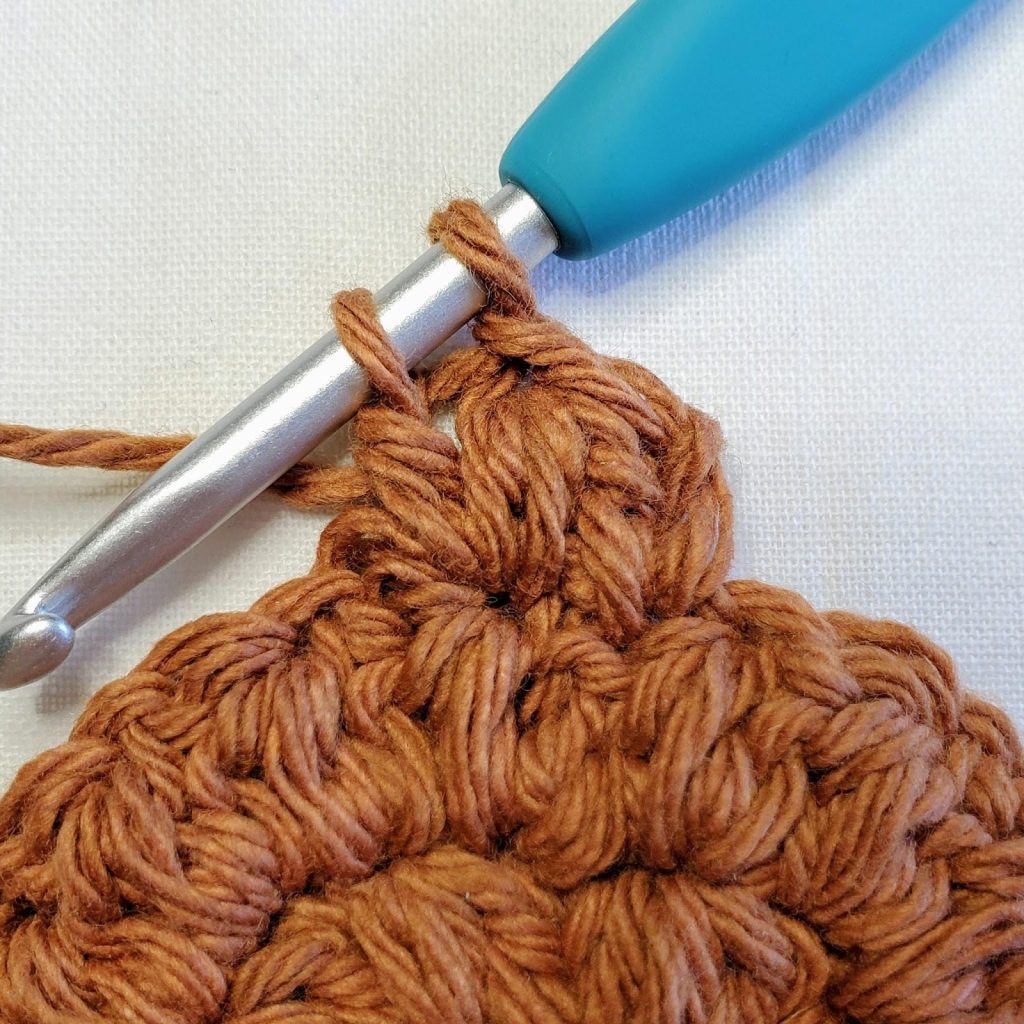
– Now you sk the next st, yo, insert your hook in the next st, yo, and pull up a loop. Yo, insert your hook in the same st and pull up a loop. You will have 6 loops on your hook. Be sure not to make these loops too tight or too loose. (See Figure 3.)
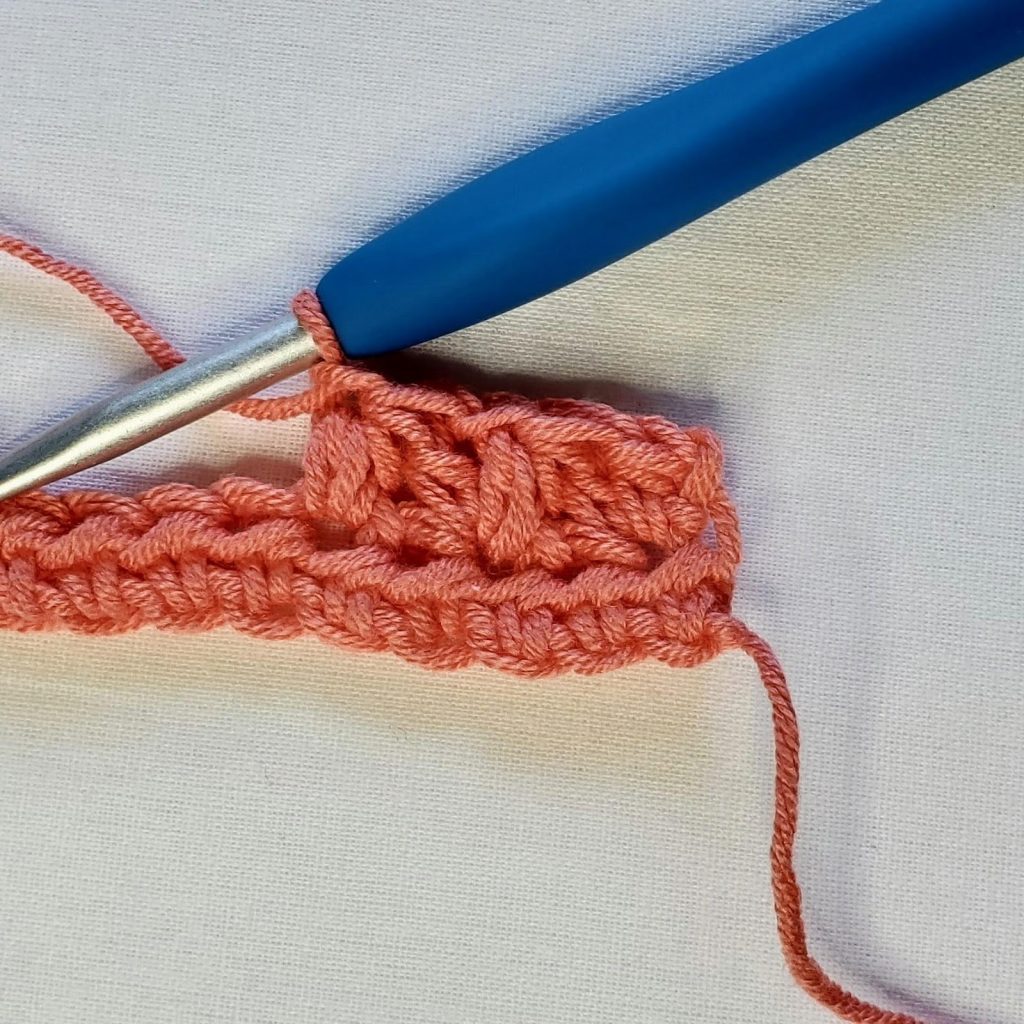
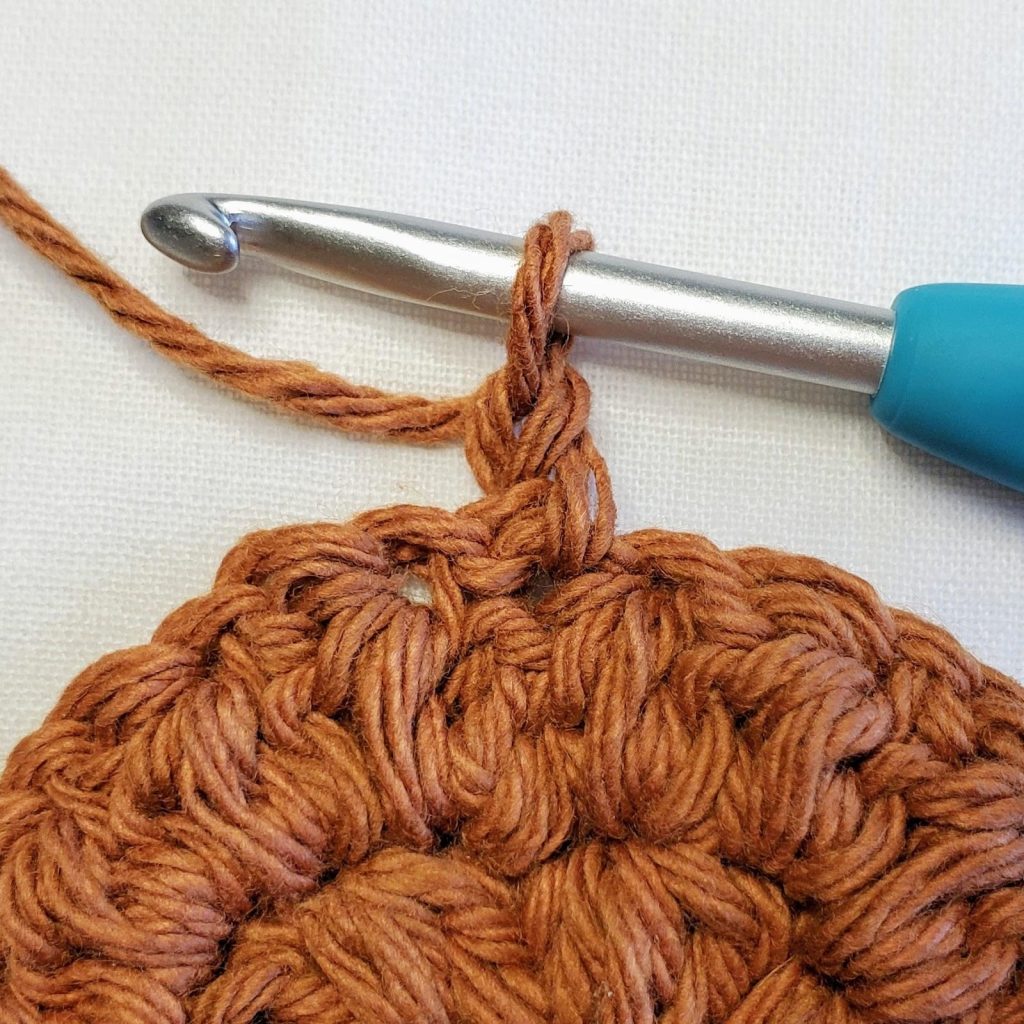
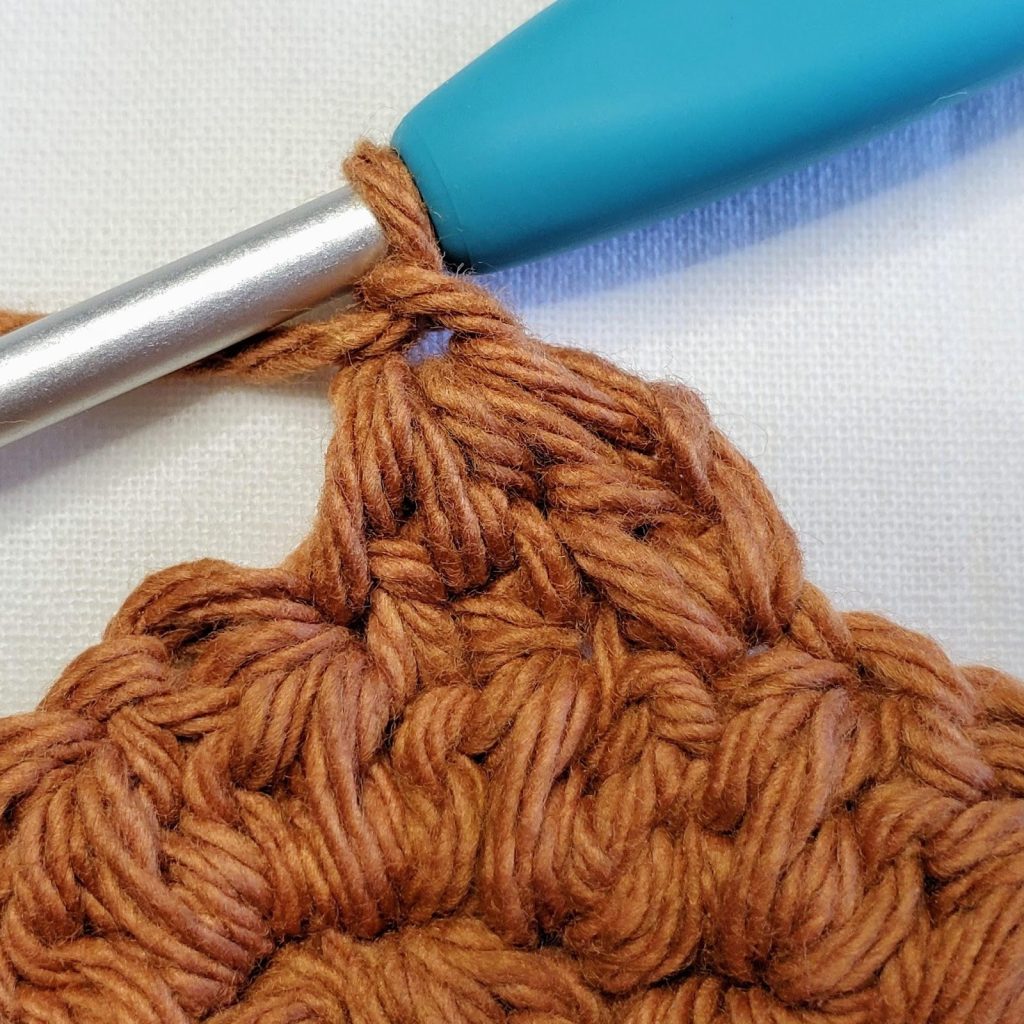
– Finally, you yo and draw through all 6 loops (see Figure 4) and then ch1. (See Figure 5)**
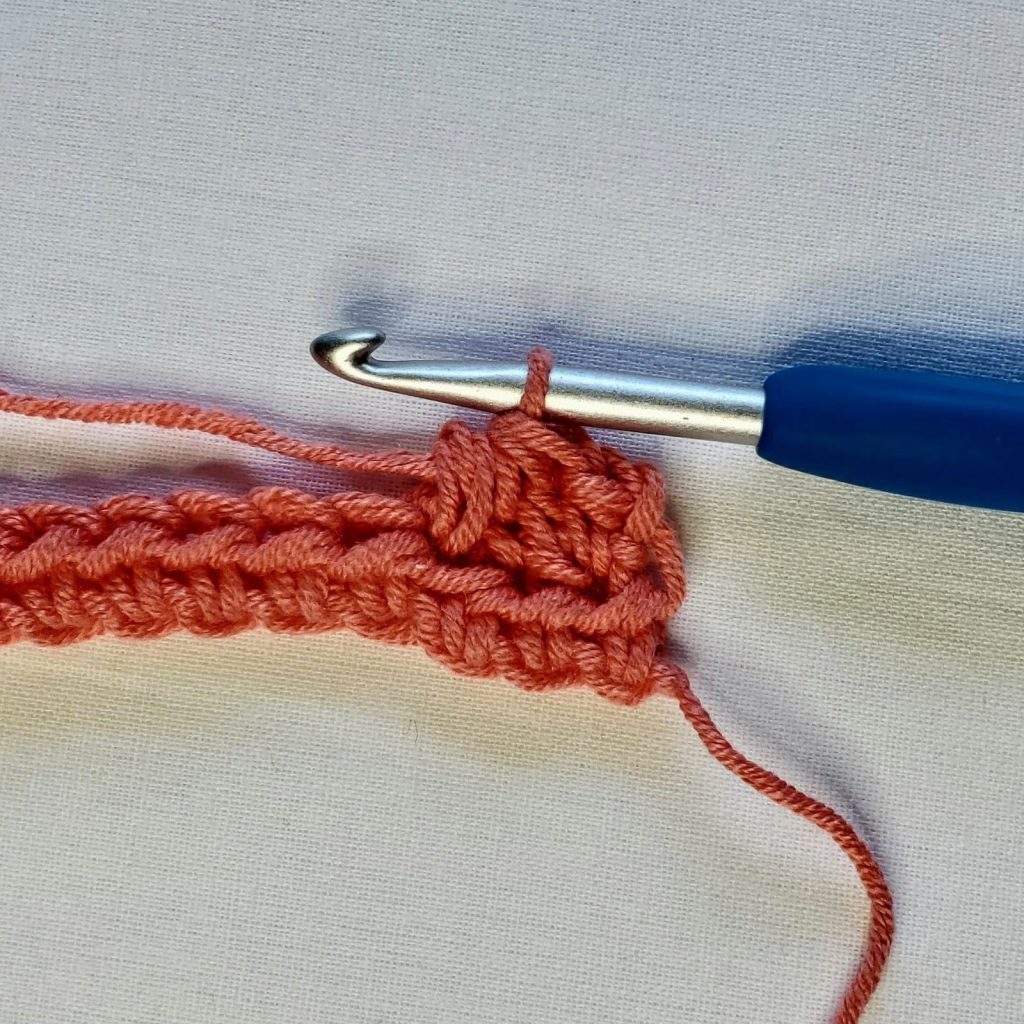
You have completed a mixed cluster stitch! As you can see, the mixed cluster consists of the main body of the stitch and a chain 1. This means that each mc is counted as 2 sts.
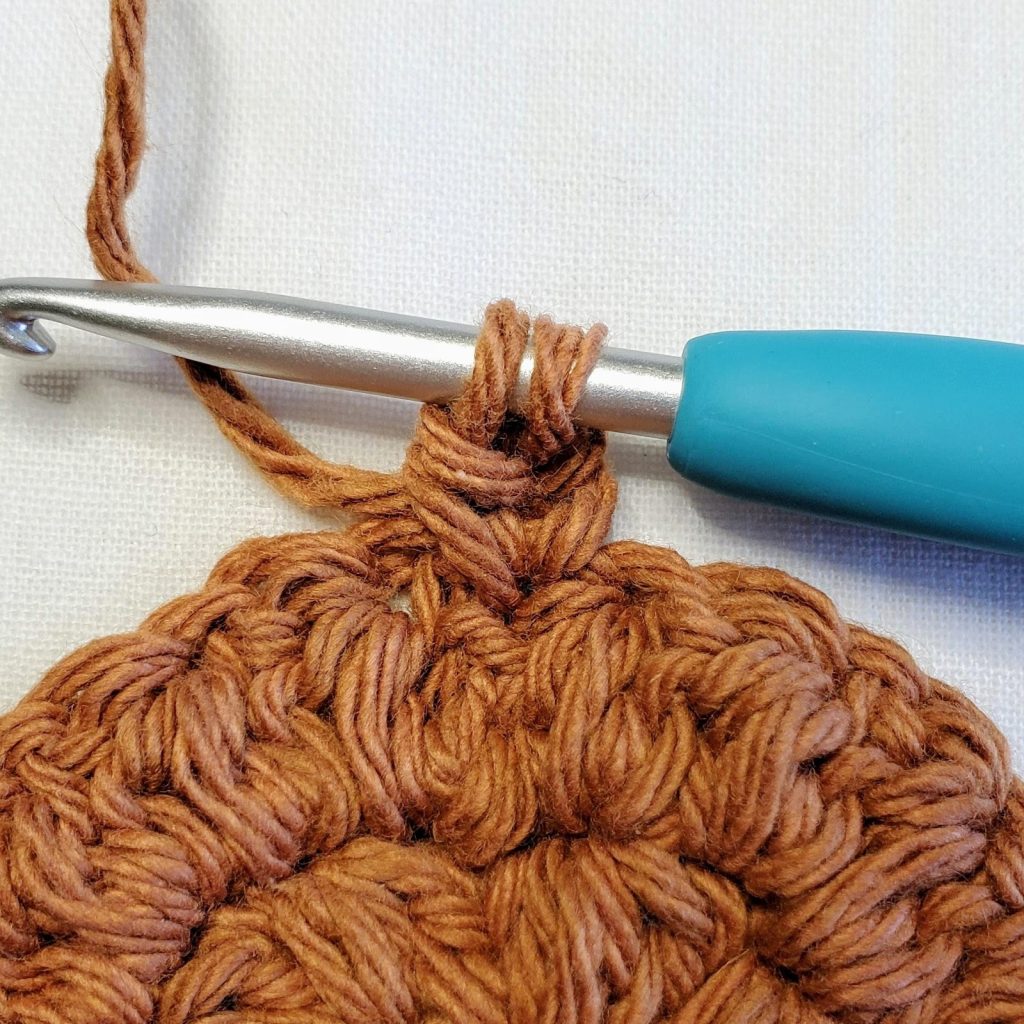
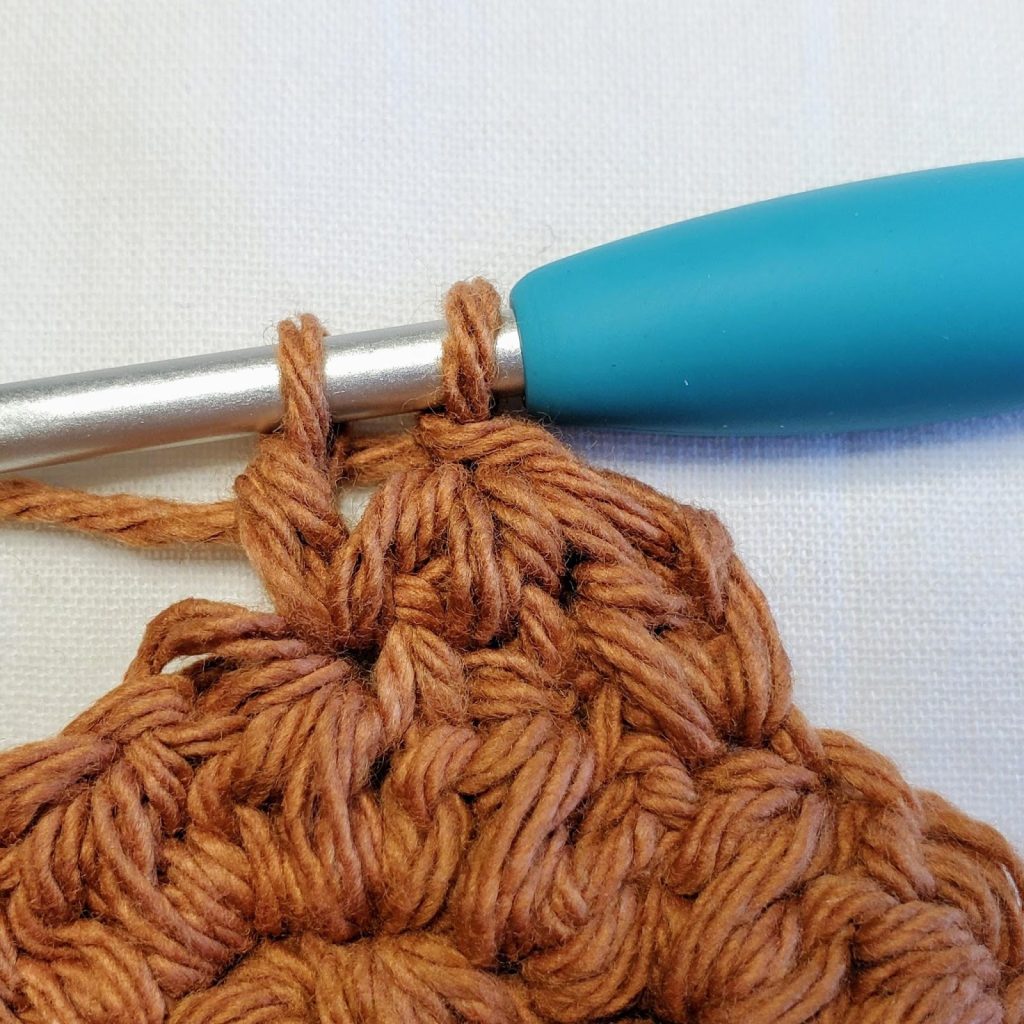
When you work your next mc, you will begin in the same stitch you ended with and repeat the above instructions from * to **. (See Figure 6)
If you are working on the All A Flutter pattern, then the above information is all you need to get started. If you’re working on the Mixed Cluster Newsboy, then read on!
Mixed Cluster In The Round
Now that you know how to create the mixed cluster, I’m going to show you how to work this stitch in the round. The stitch itself is the same, you just have to remember a few rules.
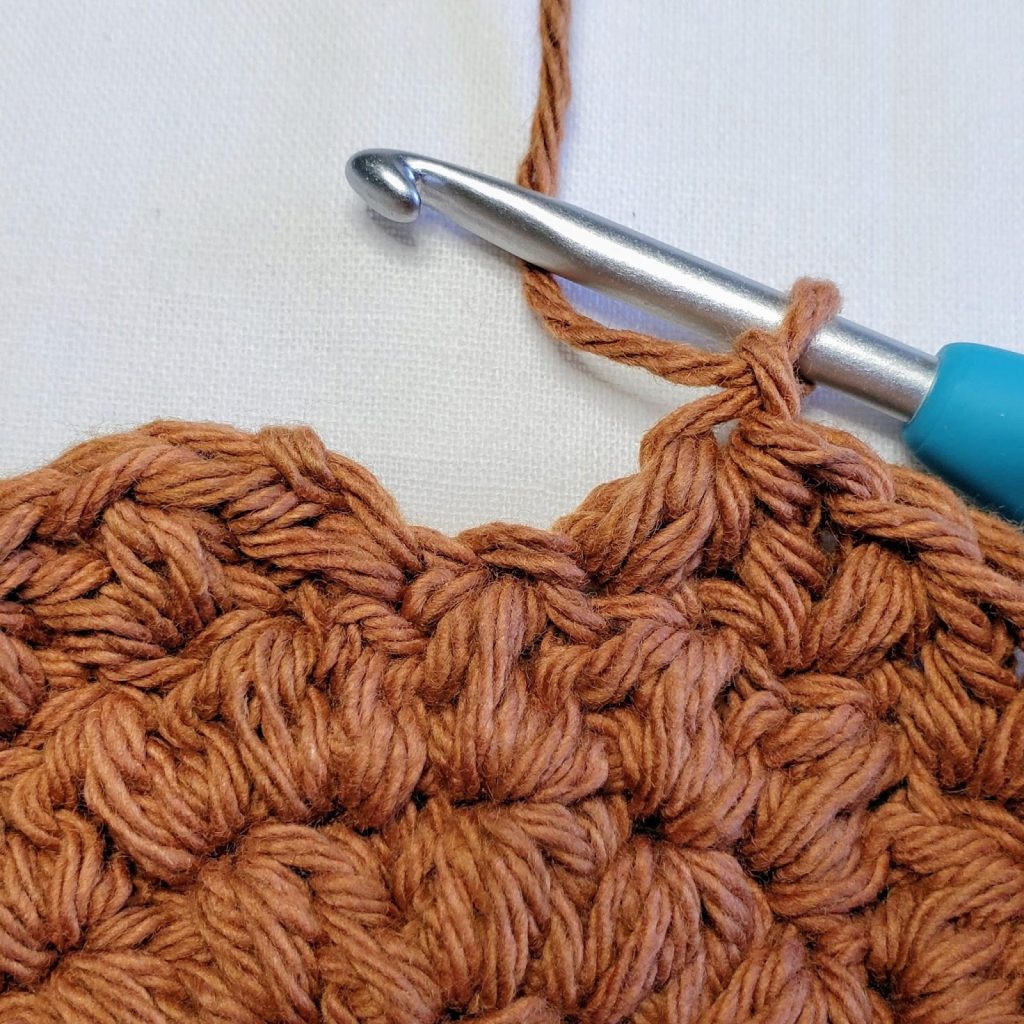
– To begin, you will ch1. This ch1 does not count as a stitch (see Figure 1).

– When you create your first mc, you will begin in the same st you just chained from (see Figure 2). Then, complete your mc as instructed in the above tutorial (see Figure 3).


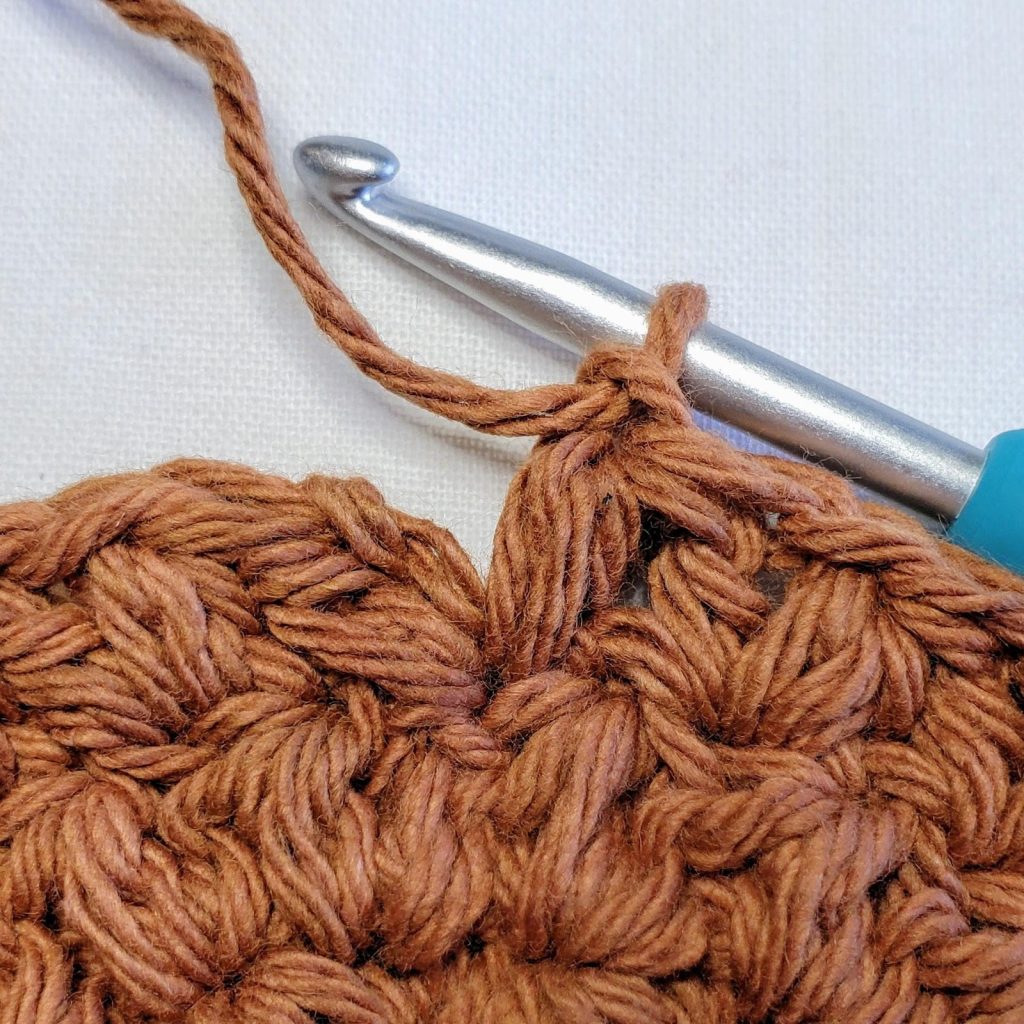
– Continue working your mc as normal all the way around until you have only 1 st left unworked (see Figure 4)
– Then, you will work your final mc. The 2nd half of your final mc will be worked into the first st of the round (see Figure 5). This is the same st you began your first mc with.
– To finish the round, simply ss into the 1st st to join.
Mixed Cluster Increase
This is how you will work a mixed cluster increase.
– Since we are working in the round, we will begin with a ch1. This is not part of the mc inc, just a place to start off from (see Figure 1).

– When you create your first mc inc, you will begin in the same st you just chained from. Yo, insert your hook in the same st you just chained from, and pull up a loop. Yo and pull through 2 loops (see Figure 2).

– Now you yo, insert your hook in the next st, and draw up a loop. Yo, insert your hook in the same st, and draw up a loop. You will have 6 loops on your hook.
– Finally, you yo, draw through all 6 loops, and then ch1 (see Figure 3).
– As you may have noticed, the instructions are mostly the same as the standard mc, except you don’t skip a stitch in the middle.
– When you work your next mc/mc inc/mc dec, you will begin in the same stitch you ended with (see Figure 4).
Mixed Cluster Decrease
This is how you will work a mixed cluster decrease.
– Since we are working in the round, we will begin with a ch1. This is not part of the mc dec, just a place to start off from (see Figure 1).
– When you create your first mc dec, you will begin in the same st you just chained from. Yo, insert your hook in the same st you just chained from, and pull up a loop. Yo and pull through 2 loops (see Figure 2).
– Now you will skip the next st. Then you’ll yo, insert your hook in the next st, and draw up a loop (see Figure 3).
– Yo, insert your hook in the next st, and draw up a loop (see Figure 4). You will have 6 loops on your hook.

– Finally, you yo, draw through all 6 loops, and then ch1 (see Figure 5).
– When you work your next mc/mc inc/mc dec, you will begin in the same stitch you ended with (see Figure 6).
And those are all the ways you can do the Mixed Cluster Stitch! Now that you know how, you can scoot on over to the All A Flutter – Free Crochet Top Pattern or the Mixed Cluster Newsboy – Free Crochet Pattern and try it out!
If you enjoyed this Mixed Cluster Stitch Tutorial, you might want to check out my other Tips, Tricks, and Tutorials.
If you’d like to know when I post new patterns and tutorials, head on over to my Facebook and Instagram and give me a like and a follow!
Mixed Cluster Stitch Tutorial
Happy Hooking! 😉
Comments are closed.