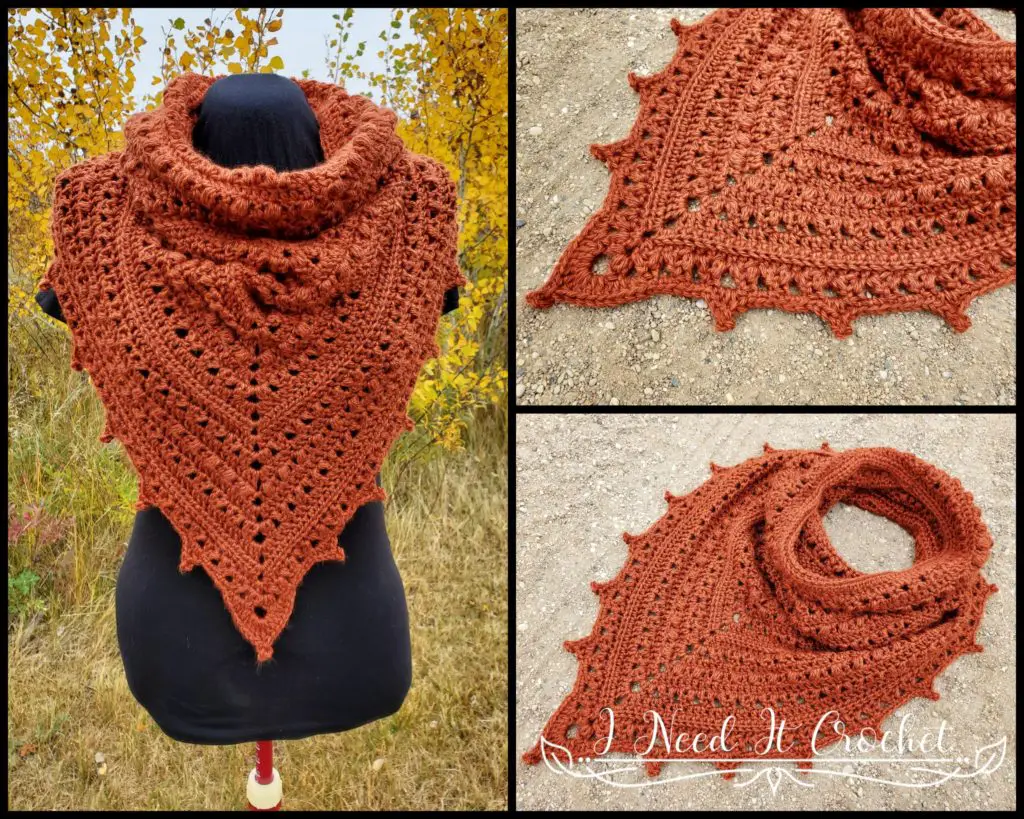
The Puffs N Picots Bandana Cowl – Free Crochet Pattern is copyrighted by I Need It Crochet. You may not copy, share, change, or sell the pattern itself. Also, you may not claim this pattern as your own. All pictures contained in this pattern fall under the copyright and may not be used.
Finished items made from the Puffs N Picots Bandana Cowl – Free Crochet Pattern belong to you, and you may do what you wish with them. If you choose to sell them on Etsy, I would very much appreciate it if you credit me as the pattern designer.


Or… Just scroll down to see it for free!
I’ll admit it. I have fallen in love with the Forked Cluster Stitch. Since using it in the Crossroads Sweater pattern, I knew I needed to create another design with it, so I paired it with the Puff Stitch to make this beautiful cowl.
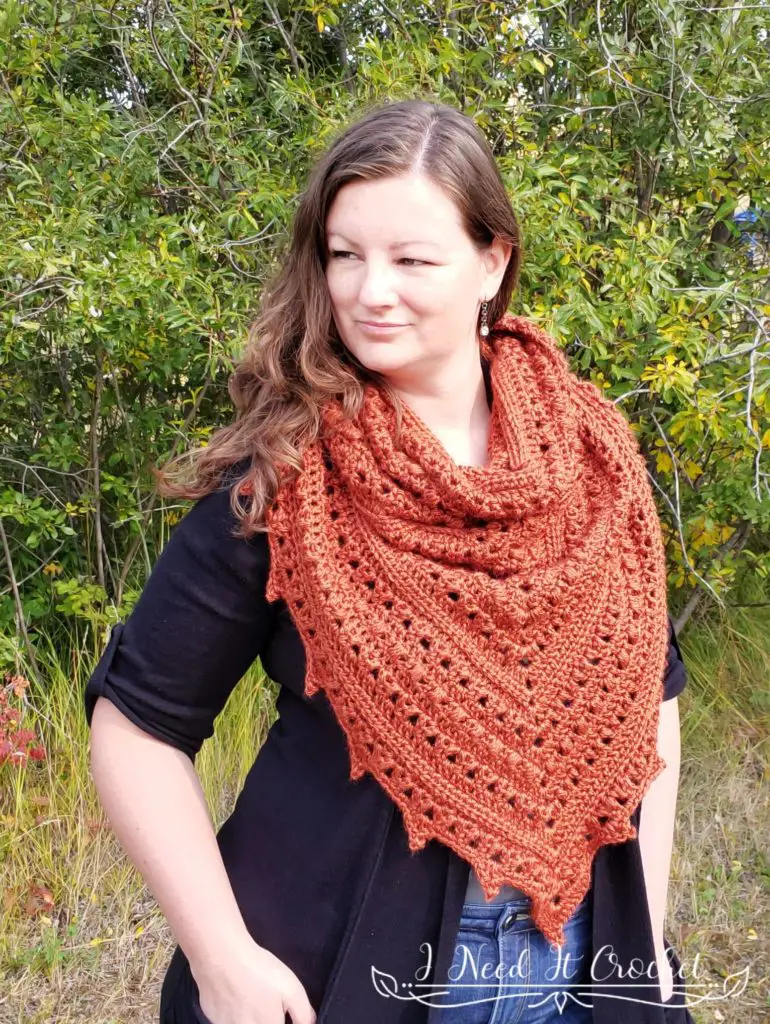
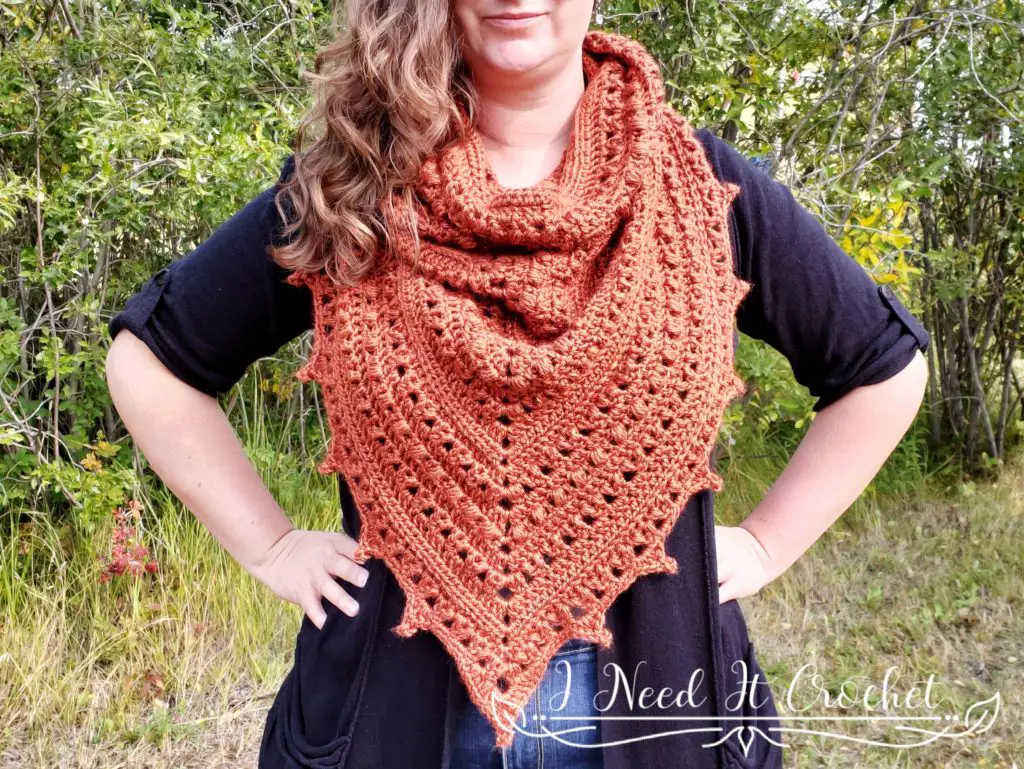
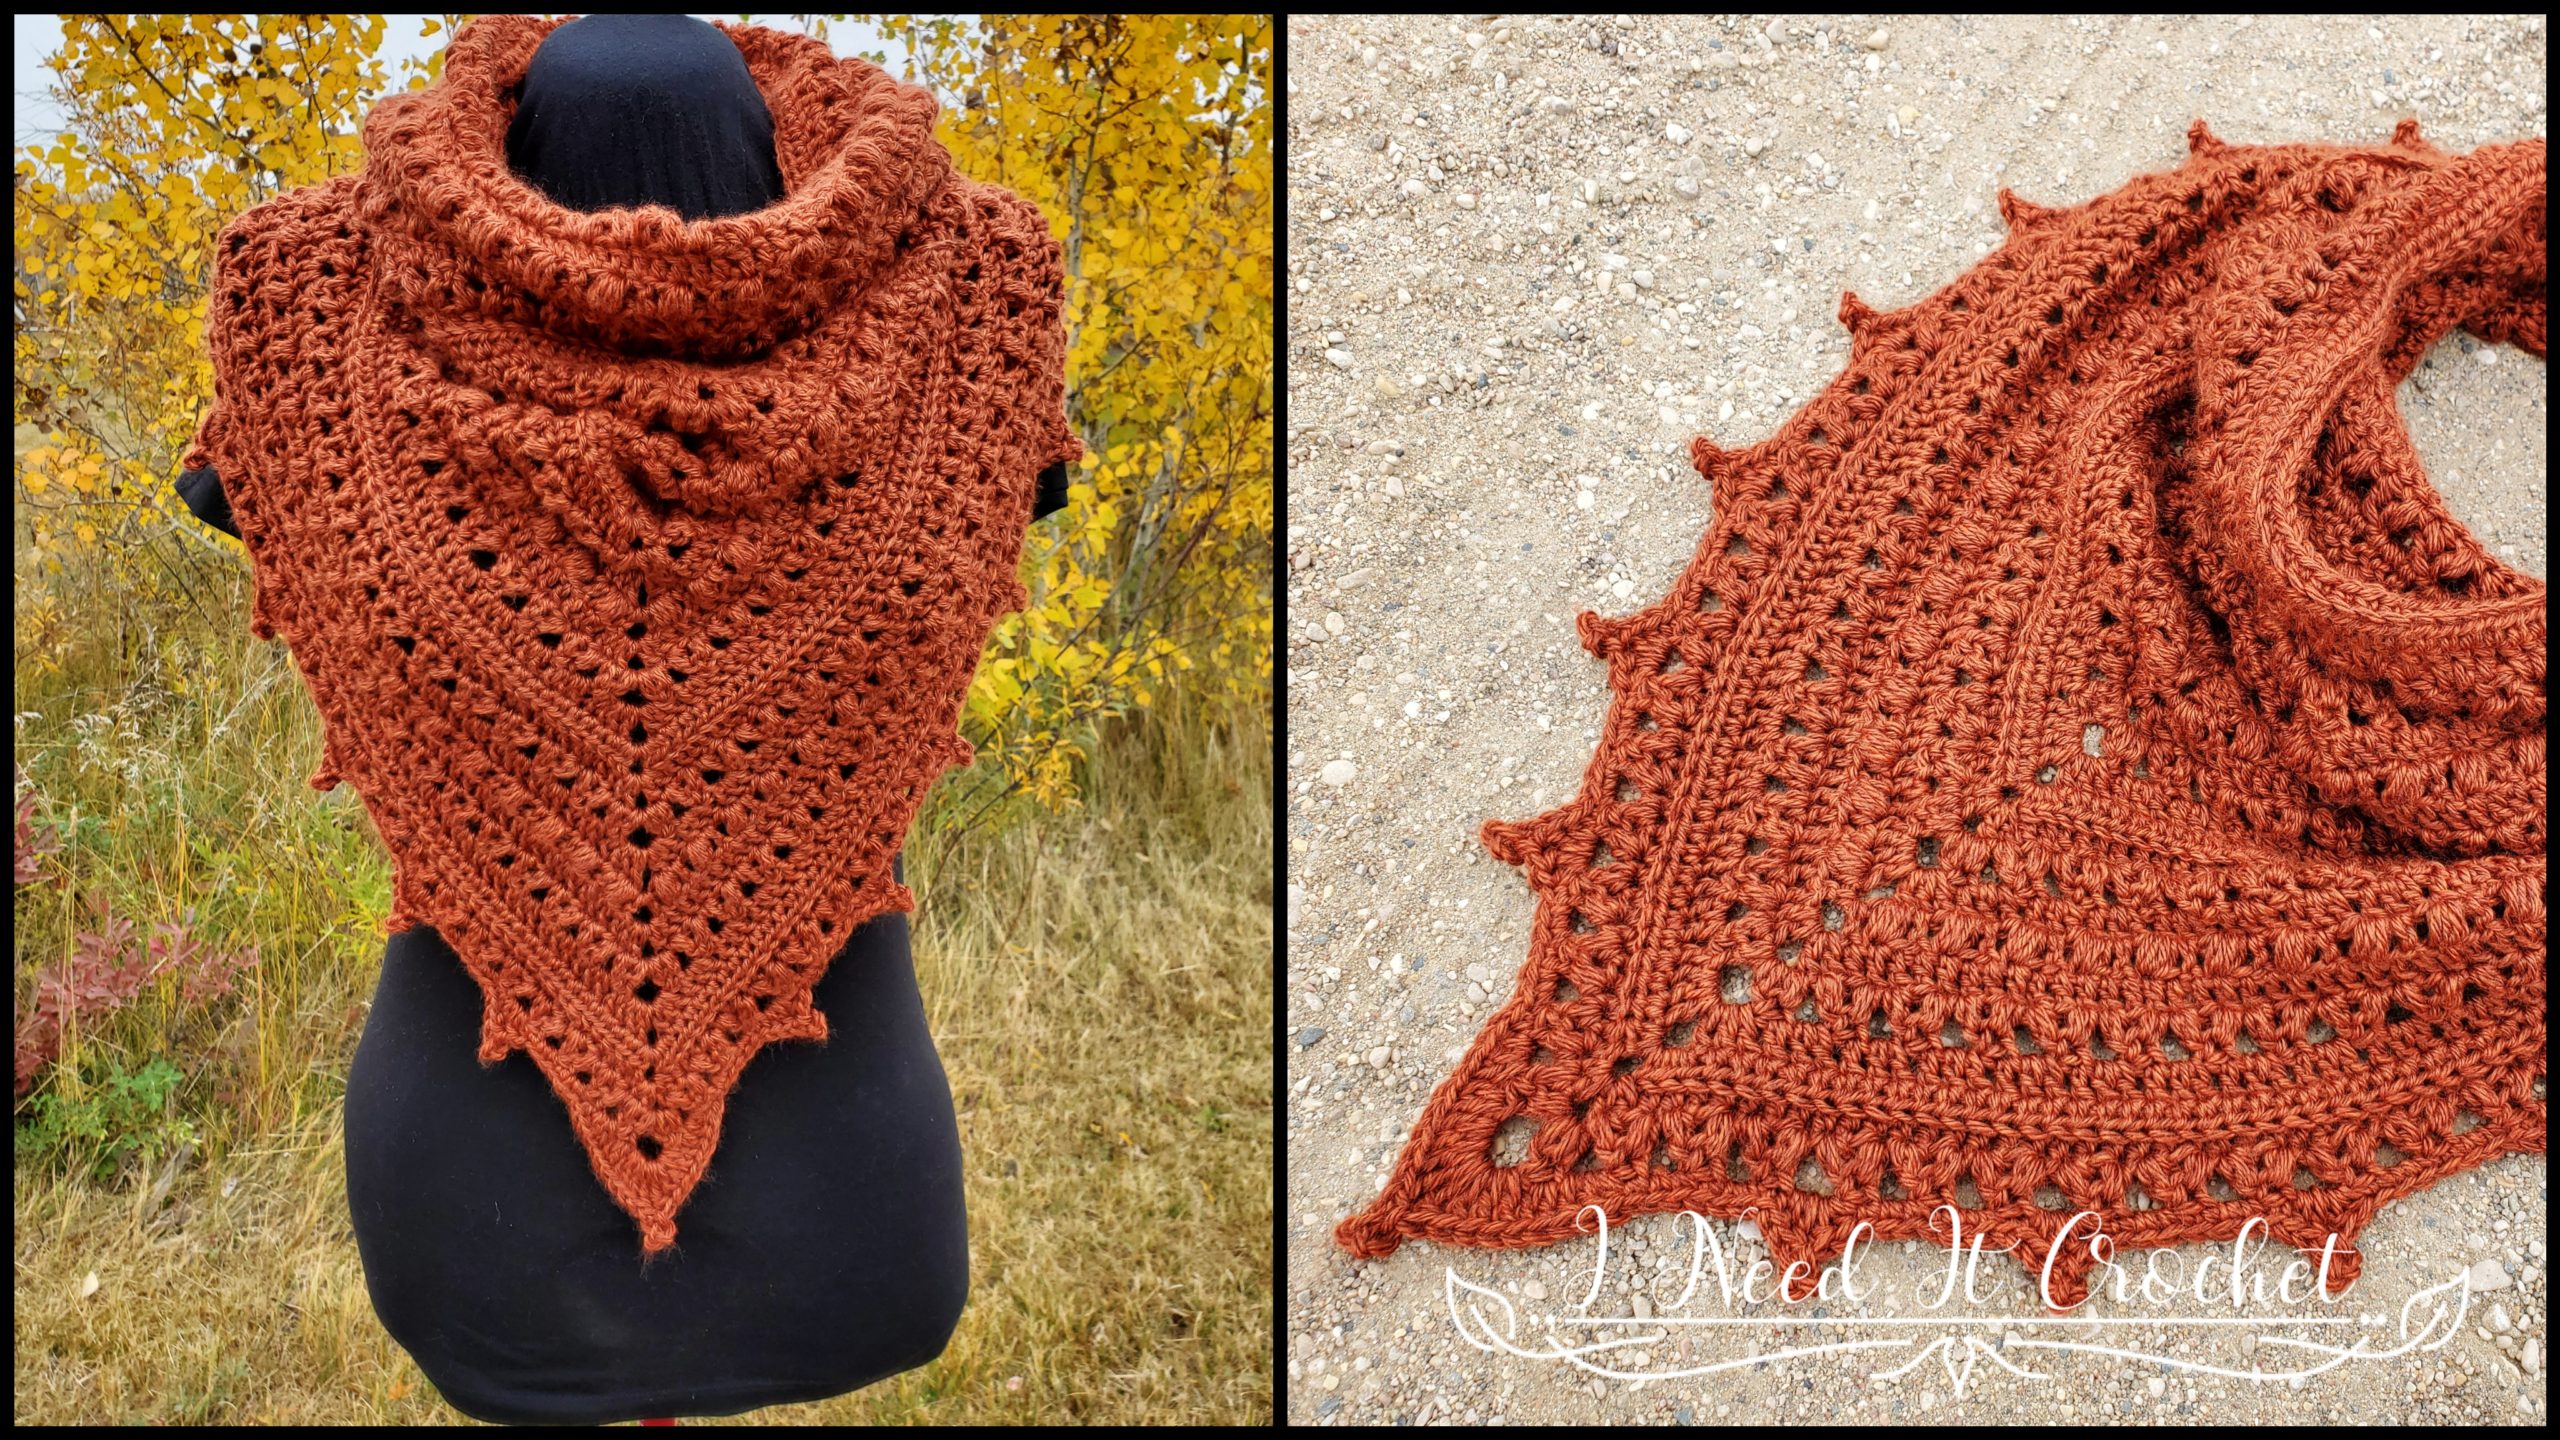
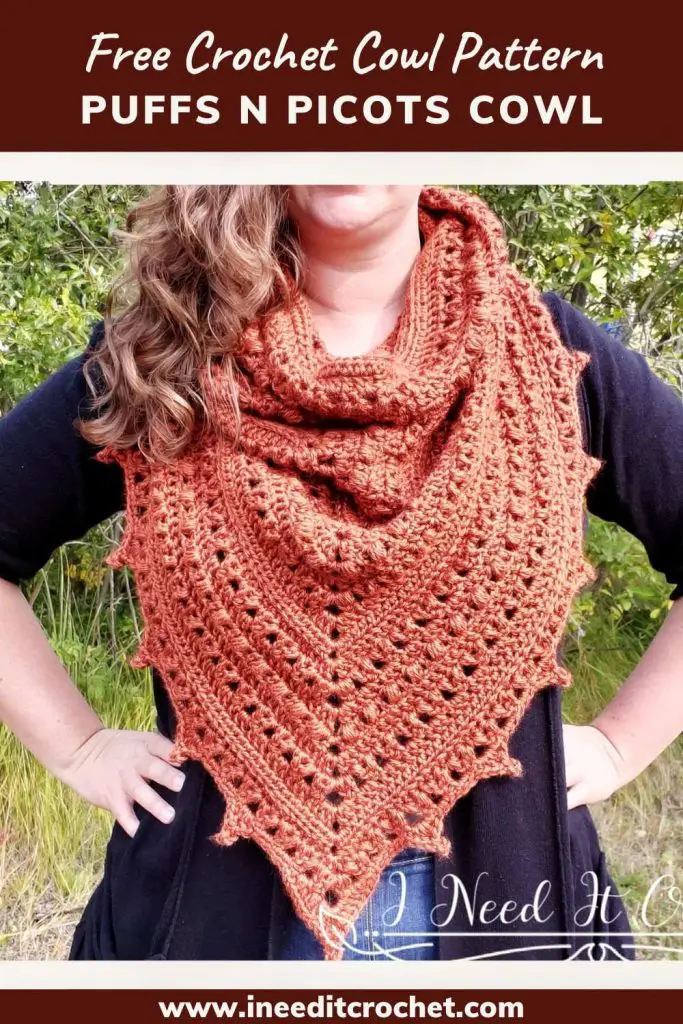
This is the Puffs N Picots Bandana Cowl. I love the dimension and texture that the Forked Cluster and Puff stitches lend to this piece. The Puffs N Picots Bandana Cowl is so easy to make and comfortable to wear. Additionally,the thick, fluffy stitches make it warm without being too hot for the cool fall months.
This pattern also happens to be my very first crochet video tutorial on YouTube! If you’re a visual learner, or you just like crocheting along with a buddy (I can be your buddy 😉 ), then feel free to check out my YouTube channel! Don’t forget to like and subscribe while you’re there!

Want to Pin it for later?
Click the image below and save the pin to your favourite crochet pattern boards!
Finished Size:
Bandana Cowl: Neck is 28” in circumference and 9” tall. Bandana is 23” long from the bottom of the neck down to the point.
Hooded Bandana Cowl: Neck is 28” in circumference and 22” tall. Bandana is 23” long from the bottom of the neck down to the point.
Materials:
I used Lion Brand Heartland, which is 100% Acrylic, #4 Worsted weight yarn.
Any yarn of similar weight would work.
Approximately 440 yds for the Bandana Cowl and 650 yds for the Hooded Bandana Cowl.
5.5mm Hook
6mm Hook
Stitch Markers
Yarn Needle
Scissors
Measuring Tape
Abbreviations:
Sk = Skip
Sp = Space
St = Stitch
Ss = Slip Stitch
Ch = Chain
Sc = Single Crochet
Hdc = Half Double Crochet
Dc = Double Crochet
Fc = Forked Cluster (See Notes and find a Tutorial Here)
Ps = Puff Stitch (See Notes and find a Tutorial Here)
BLO = Back Loop Only
Gauge:
There will be instructions to measure your project for gauge at two separate points in the pattern.
Be sure to check your gauge. It will save you time and heartache.
Notes:
Ch1 at the beginning of a row is never considered a stitch.
Ch1 between sts is always considered a stitch.
Ch3 at the beginning of a row is always considered a Dc.
Ch4 at the beginning of a row is counted as 2 sts (dc + ch1).
A Forked Cluster counts as 1 stitch.
Find a written tutorial for the Forked Cluster Stitch here.
Find a video tutorial for the Forked Cluster Stitch here.
A Puff Stitch counts as 2 stitches.
Find a written tutorial for the Puff Stitch here.
Find a video tutorial for the Puff Stitch here.
I have added many pictures to help you along the way.
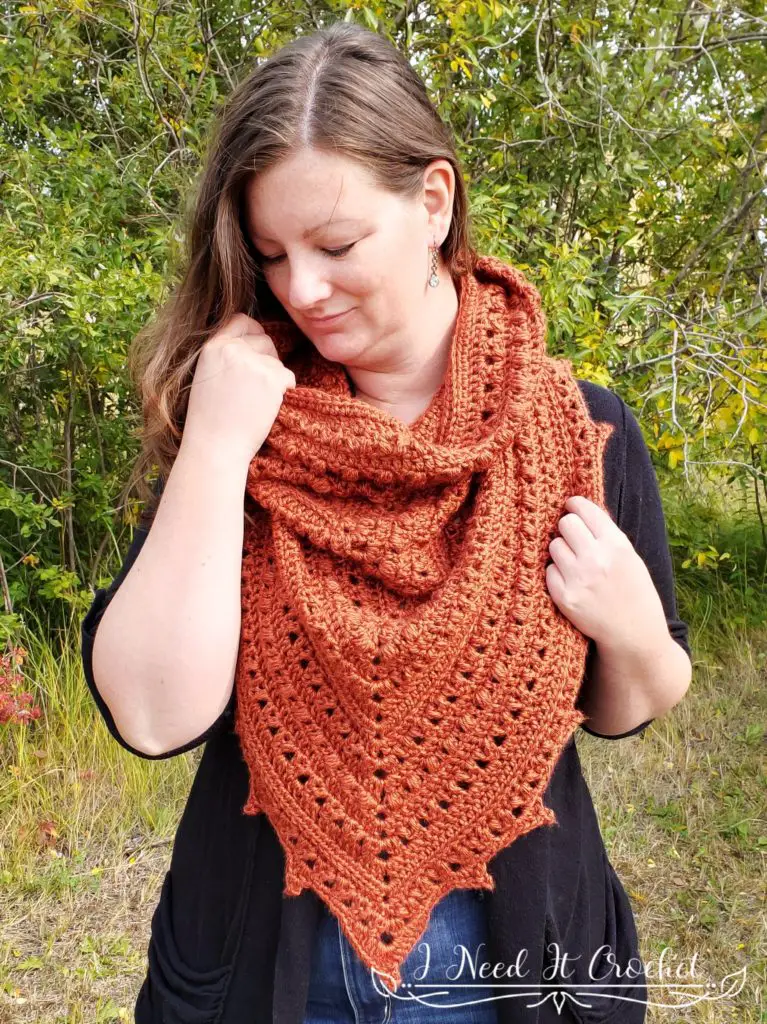
Free Crochet Cowl Pattern
Instructions
To make this cowl, we will first create a large triangle. Then, we will join the top two corners of the triangle, adding a few more rows for length. Next, we will build up the neck portion, working in the round.
With 5.5mm Hook
Ch4, ss to 1st ch to form a ring.
1. Ch3. Working into the ring, 3dc, ch2, 4dc (see Figure 1). Turn. – 8 st + ch2
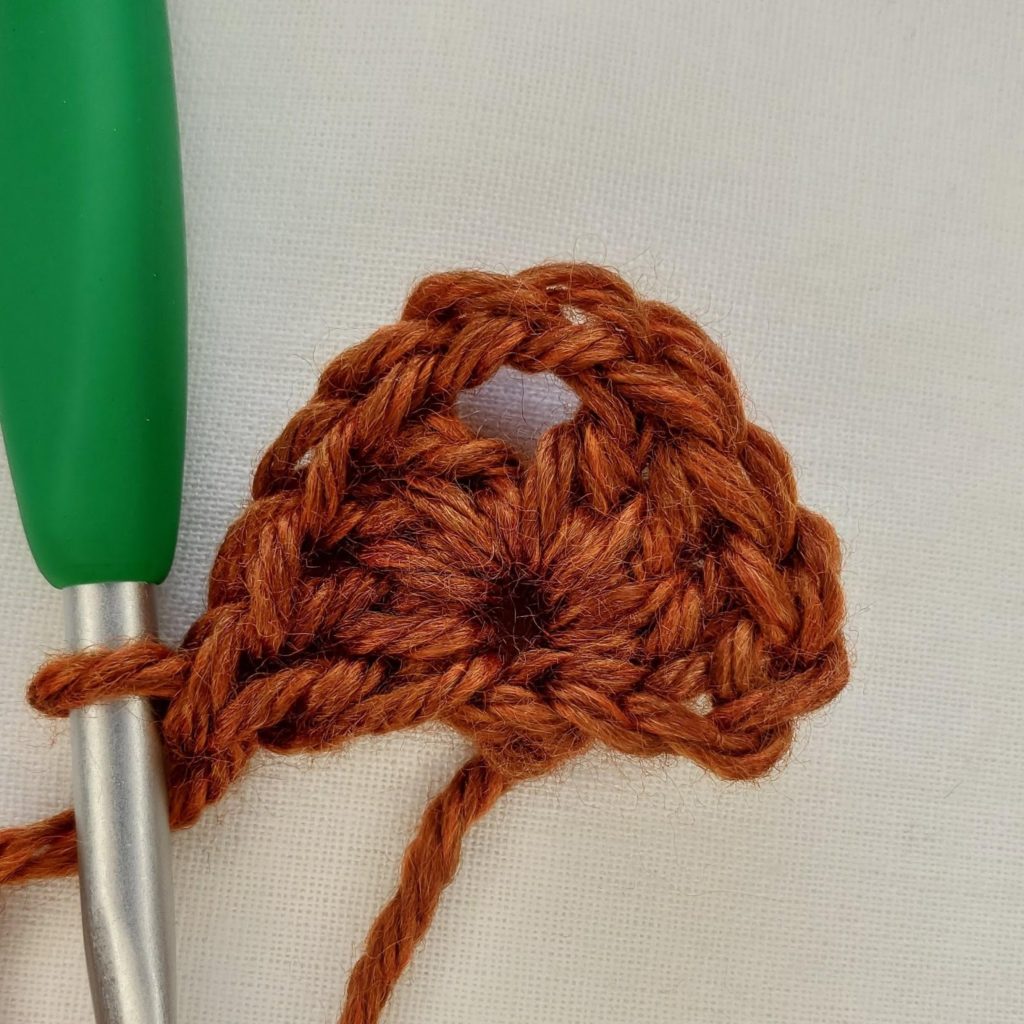
2. Ch1, 2hdc in 1st st. Hdc in each st across until you come to the ch2. (2hdc, ch2, 2hdc) in ch2 sp. Hdc in each st across until you have only 1 st left unworked. 2hdc in last st (see Figure 2). Turn. – 14 st + ch2
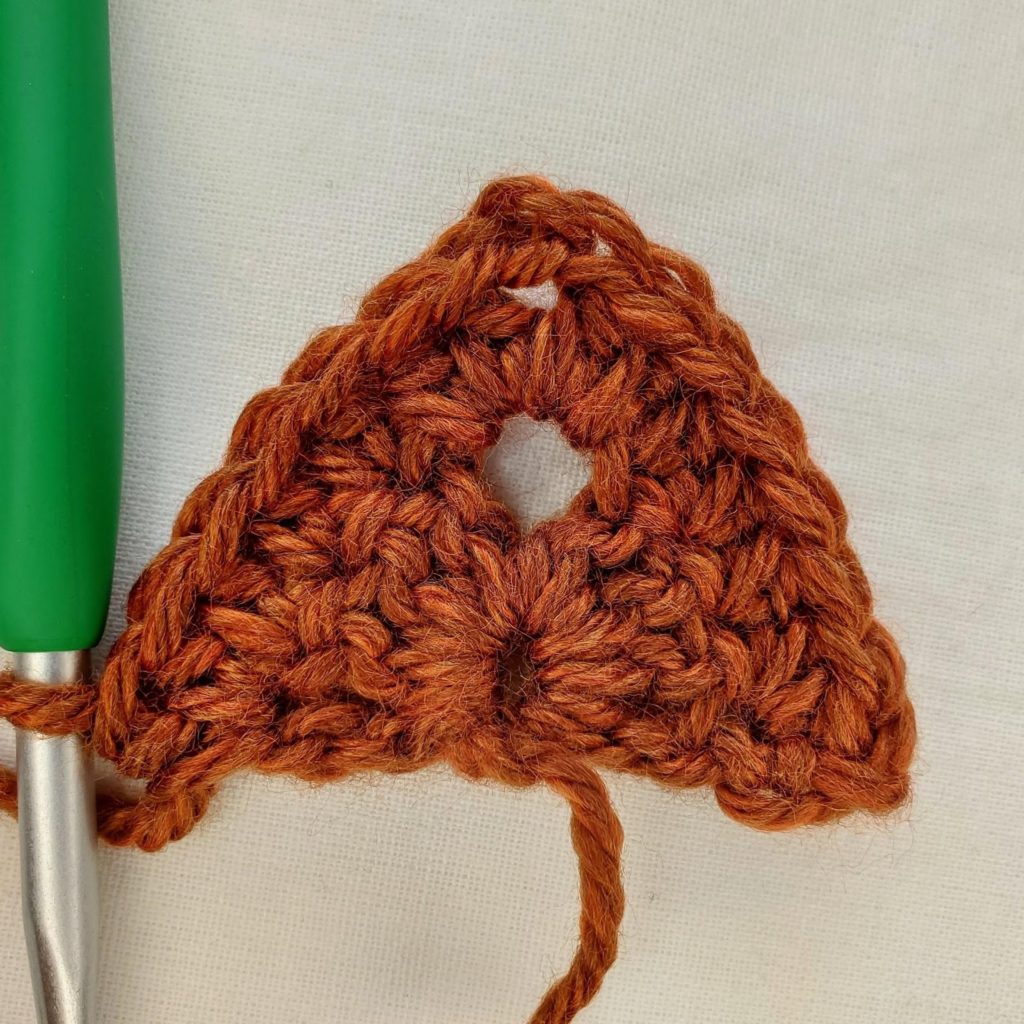
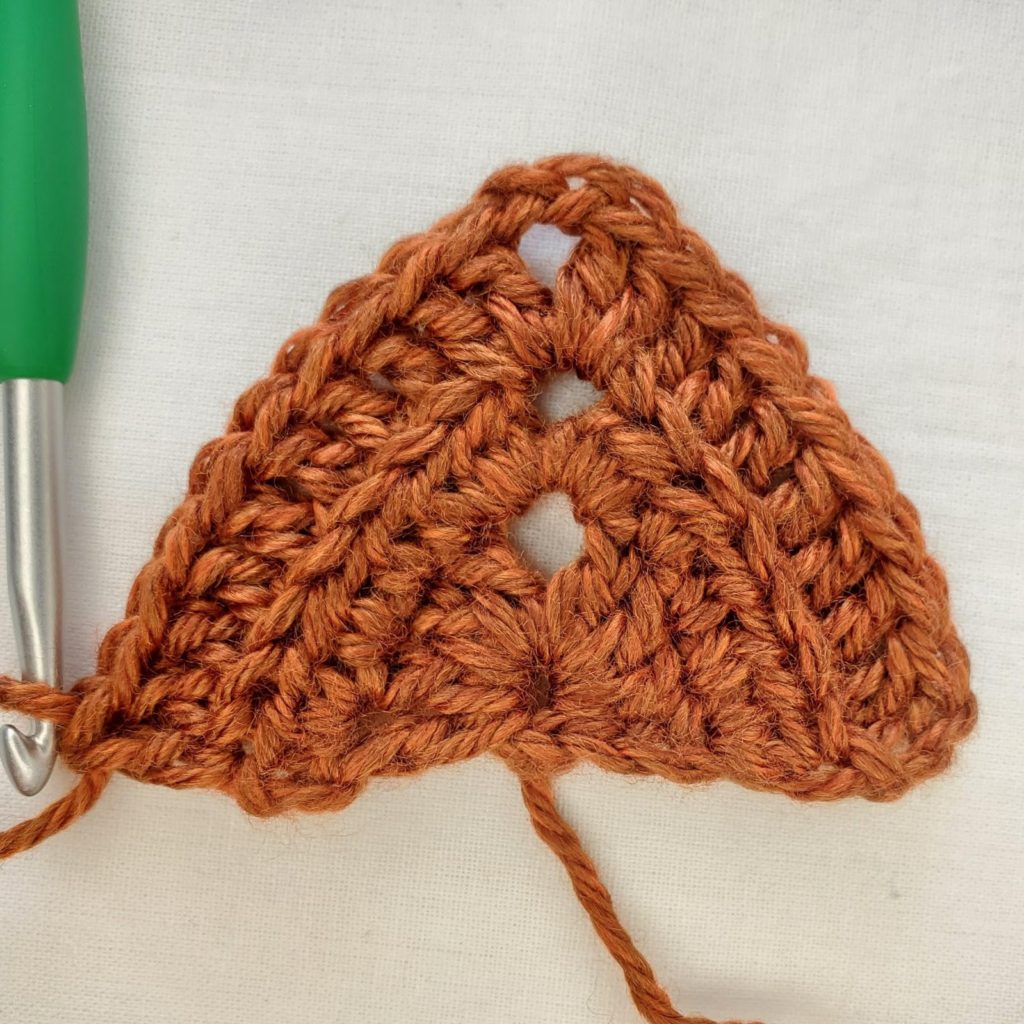
3. Working this row in the BLO: Ch3, dc in 1st st (inc made). Dc in each st across until you come to the ch2. (2dc, ch2, 2dc) in ch2 sp. Dc in each st across until you have only 1 st left unworked. 2dc in last st (see Figure 3). Turn. – 20 st + ch2
Switch to 6mm Hook
4. Ch4 (counts as dc + ch1). Beginning in same st as ch4, Fc over 1st 3 sts, ch2. *Beginning in next st, Fc over next 3 sts, ch2. ** Repeat frm * to ** until there is only 1 st left before the ch2. Fc over next st and into ch2 sp. Ch3. Fc into ch2 sp and over next st. *Beginning in next st, ch2, Fc over next 3 sts. ** Repeat from * to ** until all sts have been worked. Ch1, dc in last st (see Figure 4). Turn. – 24 st (inc 8 Fc) + ch3
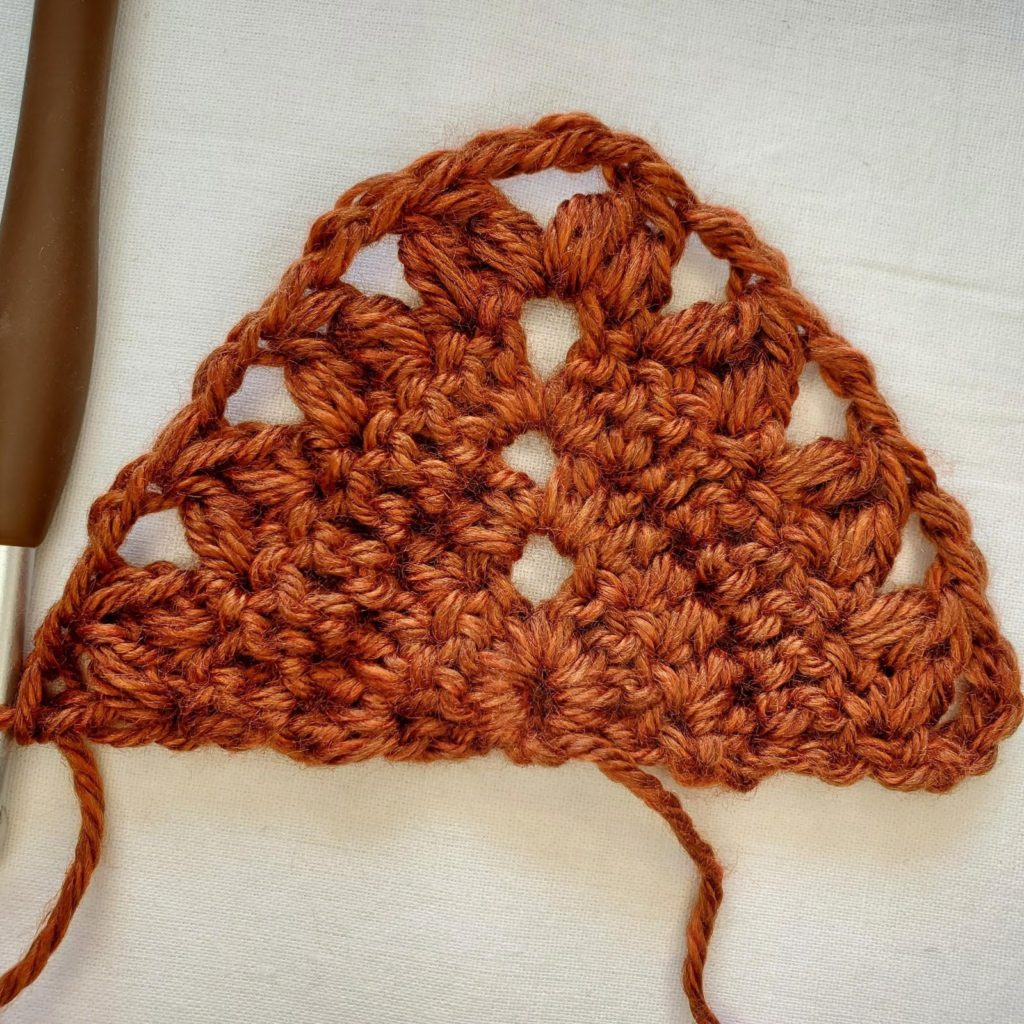
5. Ch3, dc in 1st st (inc made). Dc in each st and ch sp across until you come to the ch3. (3dc, ch2, 3dc) in ch3 sp. Dc in each st and ch sp until you have only 1 st left unworked. 2dc in last st (see Figure 5). Turn. – 32 st + ch2
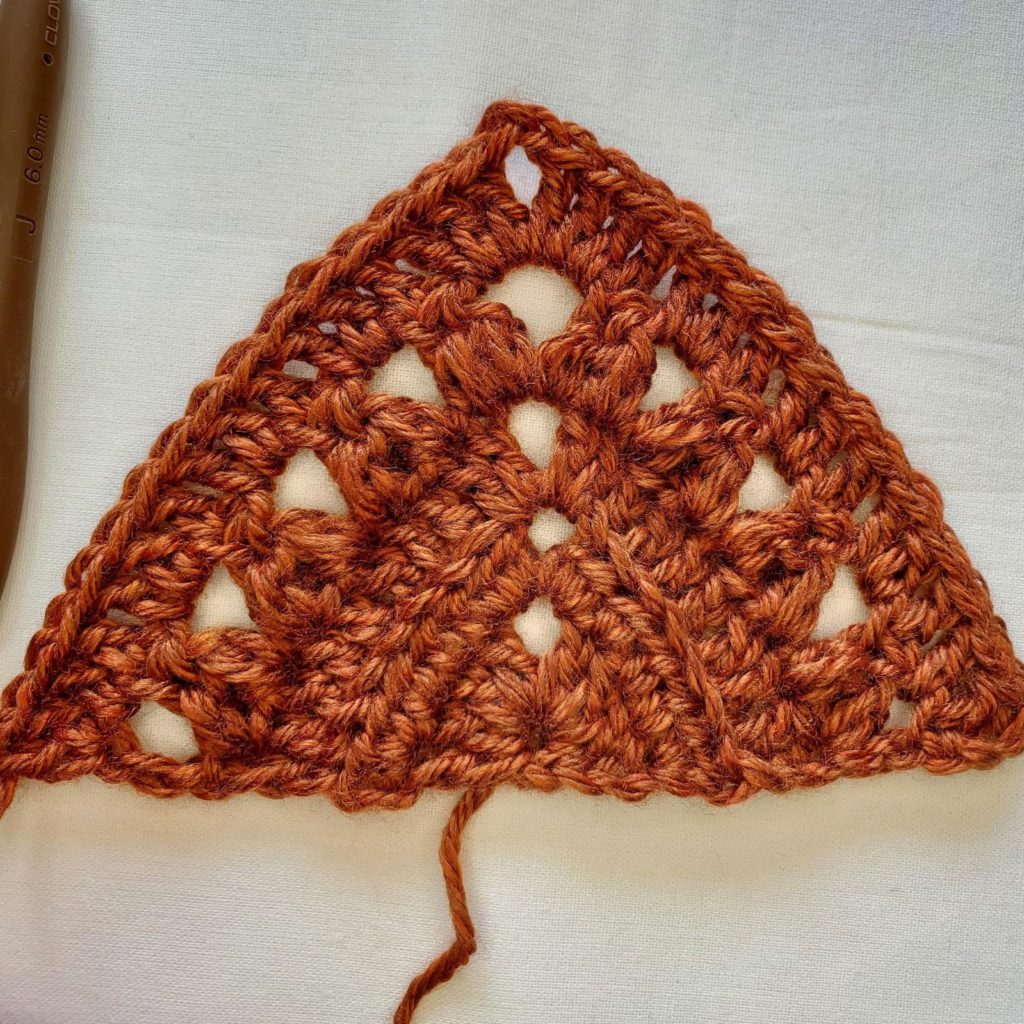
Gauge check: Your triangle should be 6 ¼” across and 4” high.
6. Ch3, Ps in 1st st (inc made). *Sk 1 st, dc in next st, Ps in next st. ** Repeat from * to ** until you come to the ch2. (Dc, ch2, dc) in ch2 sp. Ps in next st. *Dc in next st, sk1 st, Ps in next st. ** Repeat from * to ** until all sts have been worked. Dc in last st (see Figure 6). Turn. – 38 st (inc 12 Ps) + ch2
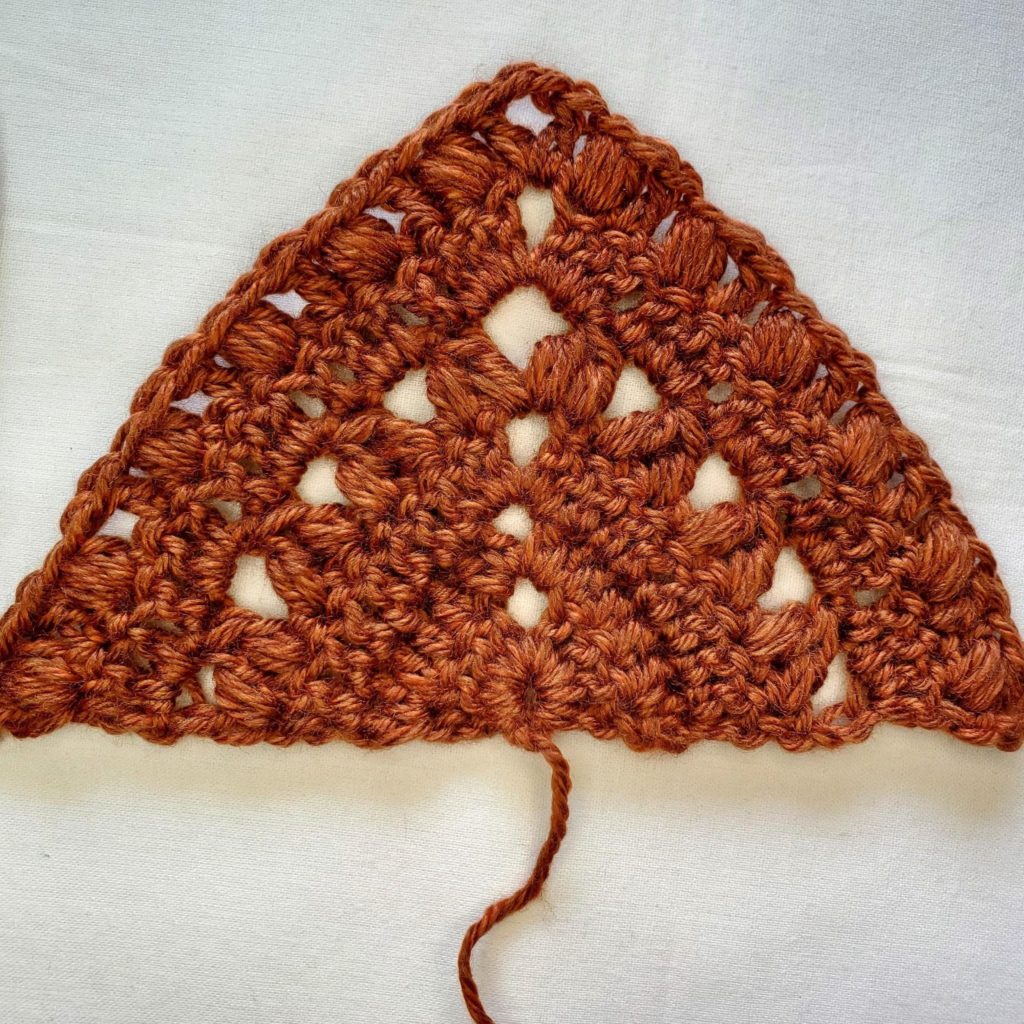
7. Ch3, dc in 1st st (inc made). Dc in each st across until you come to the ch2. (2dc, ch2, 2dc) in ch2 sp. Dc in each st across until you have only 1 st left unworked. 2dc in last st (see Figure 7). Turn. – 44 st + ch2
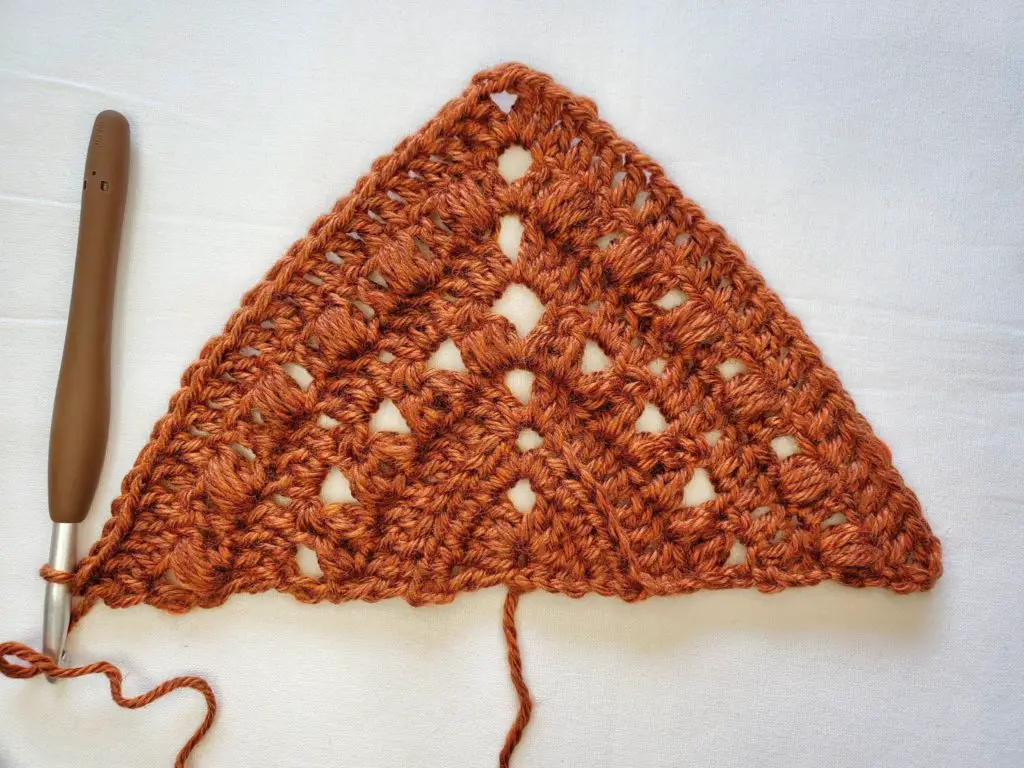
8. Ch4 (counts as dc + ch1). Beginning in same st as ch4, Fc over 1st 3 sts, ch2. *Beginning in next st, Fc over next 3 sts, ch2. ** Repeat frm * to ** until there is only 1 st left before the ch2. Fc over next st and into ch2 sp. Ch3. Fc into ch2 sp and over next st. *Beginning in next st, ch2, Fc over next 3 sts. ** Repeat from * to ** until all sts have been worked. Ch1, dc in last st (see Figure 8). Turn. – 48 st (inc 16 Fc) + ch3
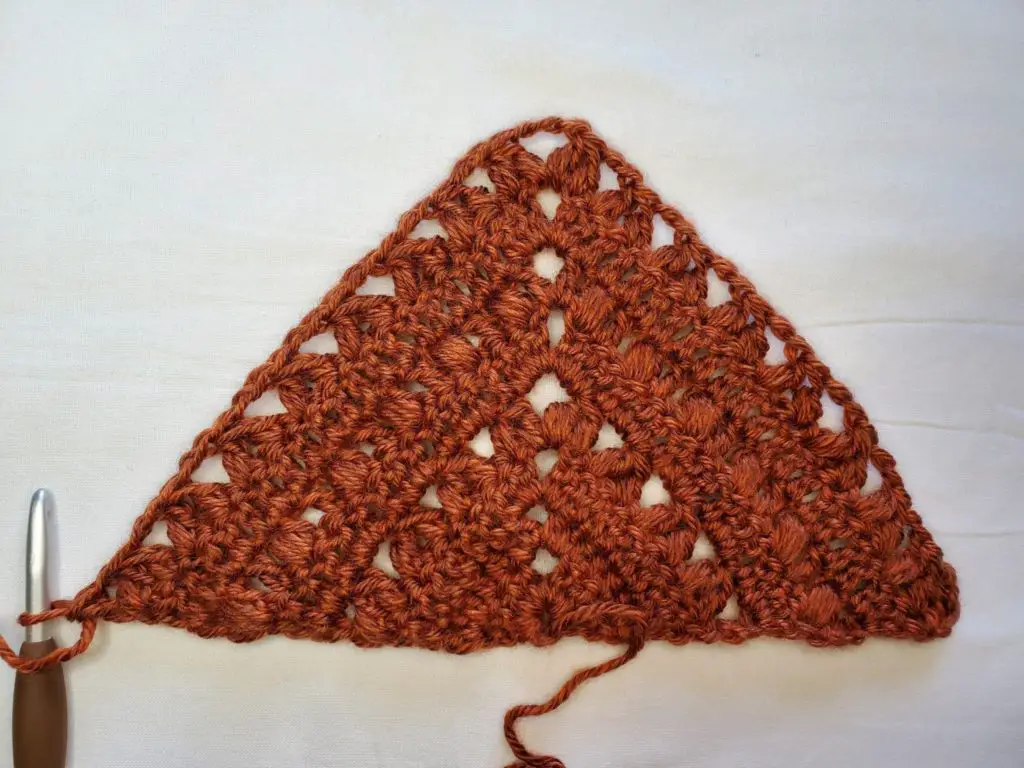
9. Ch3, dc in 1st st (inc made). Dc in each st and ch sp across until you come to the ch3. (3dc, ch2, 3dc) in ch3 sp. Dc in each st and ch sp until you have only 1 st left unworked. 2dc in last st (see Figure 9). Turn. – 56 st + ch2
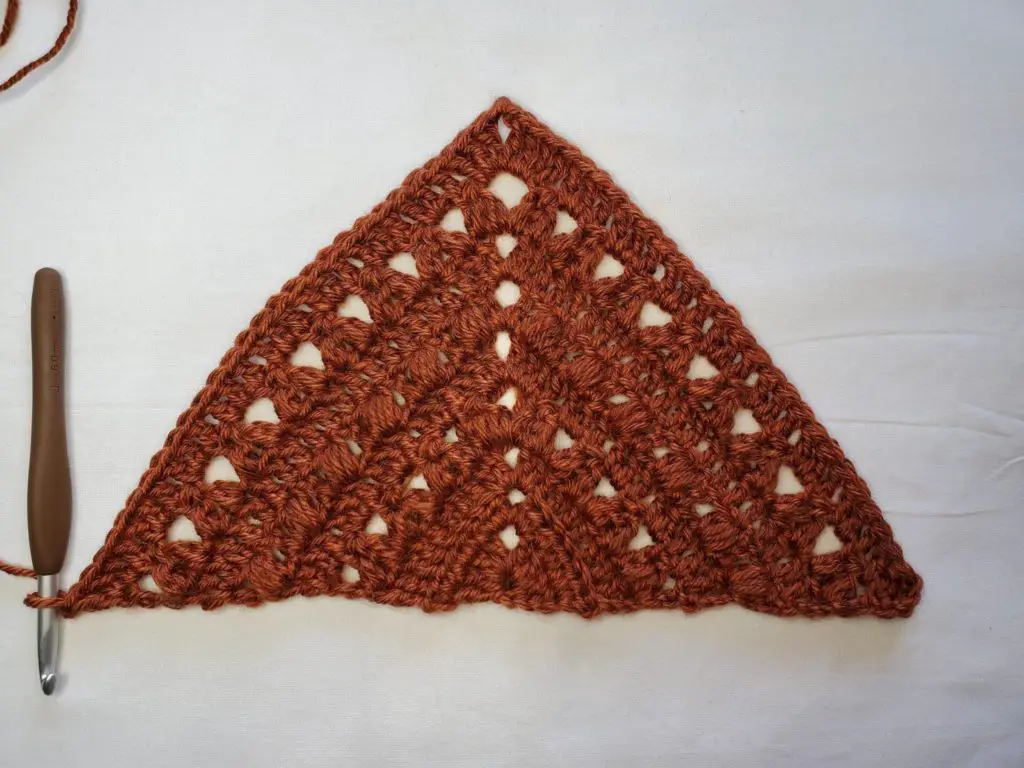
Gauge check: Your triangle should be 11 ½” across and 6 ¾” high.
10. Repeat row 2. – 62 st + ch2
11. Repeat row 3. – 68 st + ch2
12. Repeat row 4. – 72 st (inc 24 Fc) + ch3
13. Repeat row 5. – 80 st + ch2
14. Repeat row 6. – 86 st (inc 28 Ps) + ch2
15. Repeat row 7. – 92 st + ch2
16. Repeat row 8. – 96 st (inc 32 Fc) + ch3 st
17. Repeat row 9. – 104 st + ch2
18. Repeat row 2. – 110 st + ch2
19. Repeat row 3. – 116 st + ch2
20. Repeat row 4. – 120 st (inc 40 Fc) + ch3
21. (Right Side) Repeat row 5. – 128 st + ch2
22. (Wrong Side) Repeat row 6. – 134 st (inc 44 Ps) + ch2
Now you will make your triangle into a cowl by joining the two upper corners with a ss (see Figures 10 & 11). Do not bind off. We are going to continue working for a few more rows. We will also be working in the round, joining the ends of each round with a ss, and turning. Pay close attention as some rounds will instruct you to ss into the next st before turning. You may also notice that we are still increasing at the back of the cowl. This will cause the back to bloom outward, which may look funny as you work. But, rest assured, it will lay flat when worn. It also causes less bunching at the back of the neck.
Turn your work so that the right side is facing you.
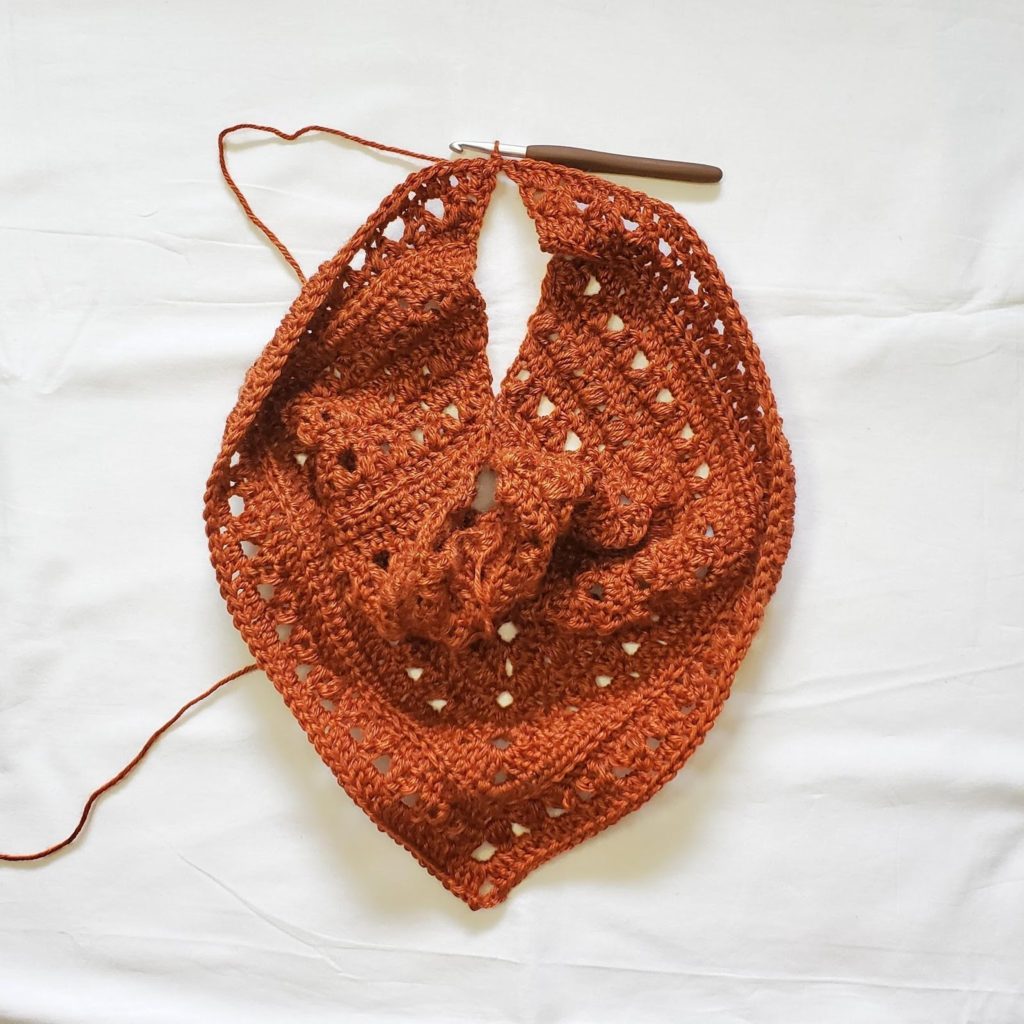
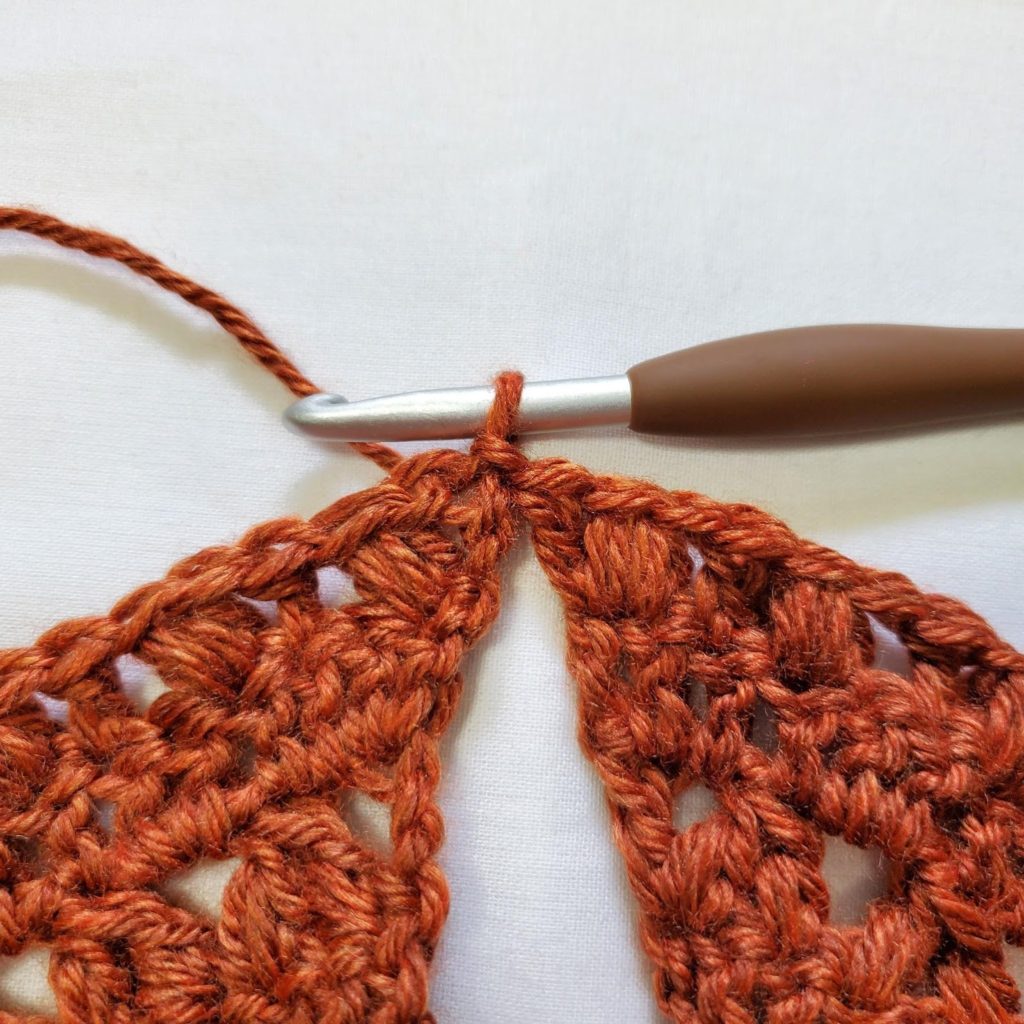
23. Ch3, dc in 1st st (inc made). 2dc in next st (see Figure 12). Dc in each st until you come to the ch2. (2dc, ch2, 2dc) in ch2 sp. Dc in each st to the end. Ss to join to 1st st. Ss into the next st. Turn. – 140 st + ch2
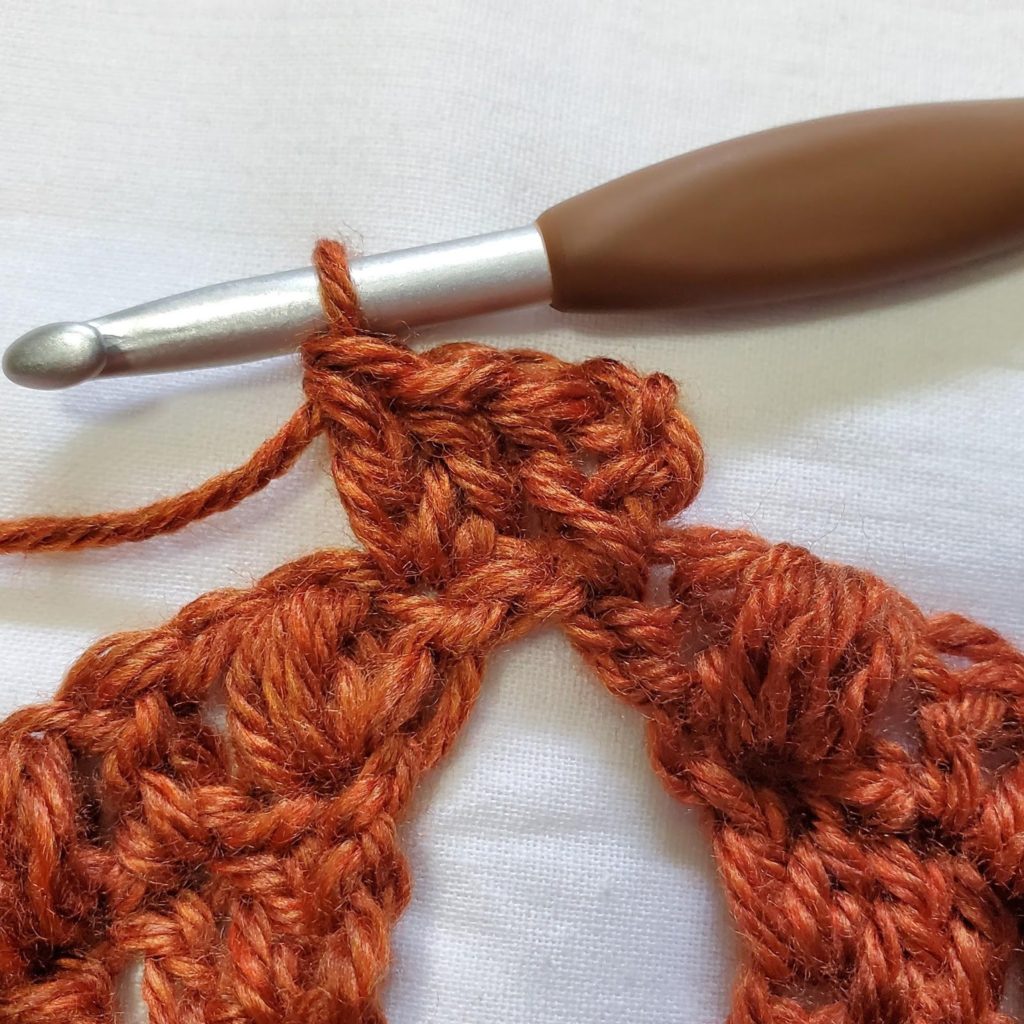
24. Ch4 (counts as dc + ch1). Starting in 1st st, Fc over 1st 3 sts, ch2. *Starting in next st, Fc over next 3 sts, ch2. ** Repeat from * to ** until there is only 1 st left before the ch2. Fc over next st and into ch2 sp. Ch3. Fc into ch2 sp and next st. *Beginning in next st, ch2, Fc over next 3 sts. ** Repeat from * to ** until all sts have been worked. Ch1, dc in last st (see Figure 13). Ss to join to 1st st. Turn. – 144 st (inc 48 Fc) + ch3
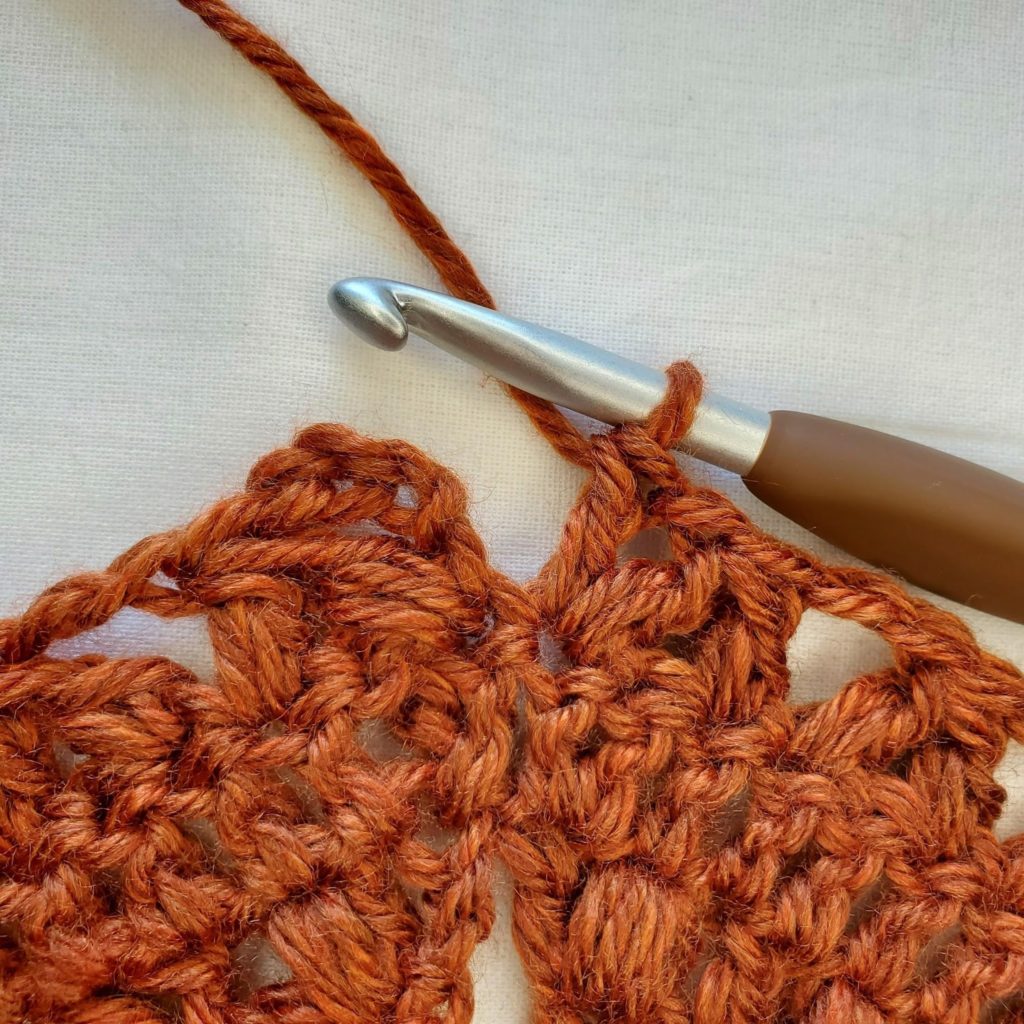
25. Ch3, dc in 1st st (inc made). 2dc in next st. Dc in each st until you come to the ch3. (3dc, ch2, 3dc) in ch3 sp. Dc in each st to the end. Ss to join to 1st st. Ss into the next st. Turn. – 152 st + ch2
26. Ch1, 2hdc in 1st st. Hdc in each st across until you come to the ch2. (2hdc, ch2, 2hdc) in ch2 sp. Hdc in each st across until you have only 1 st left unworked. 2hdc in last st. Ss to join to 1st st. Turn. – 158 st + ch2
27. Working this round into the BLO: Ch1, 2hdc in 1st st, 2hdc in next st. Hdc in each st across until you come to the ch2. (2hdc, ch2, 2hdc) in ch2 sp. Hdc in each st across. Ss to join to 1st st. Ss into next st. Turn. – 164 st + ch2
28. Ch4 (counts as dc + ch1). Starting in 1st st, Fc over 1st 3 sts, ch2. *Starting in next st, Fc over next 3 sts, ch2. ** Repeat from * to ** until there is only 1 st left before the ch2. Fc over next st and into ch2 sp. Ch3. Fc into ch2 sp and next st. *Beginning in next st, ch2, Fc over next 3 sts. ** Repeat from * to ** until all sts have been worked. Ch1, dc in last st. Ss to join to 3rd ch of ch4. Turn. – 168 st (inc 56 Fc) + ch3
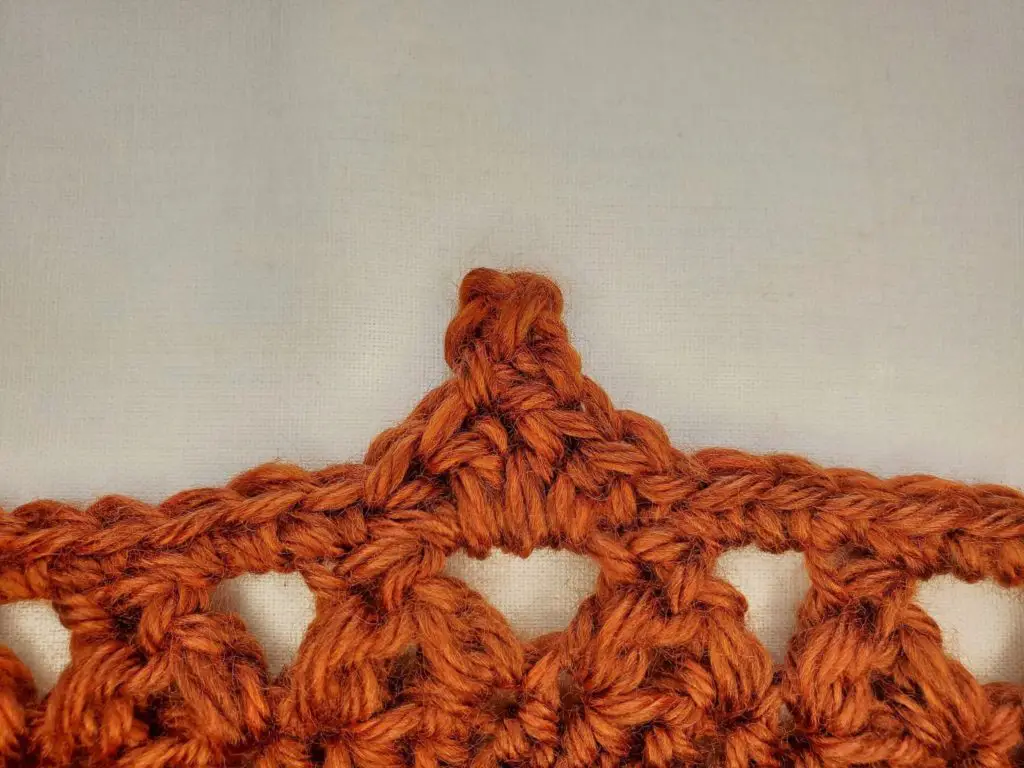
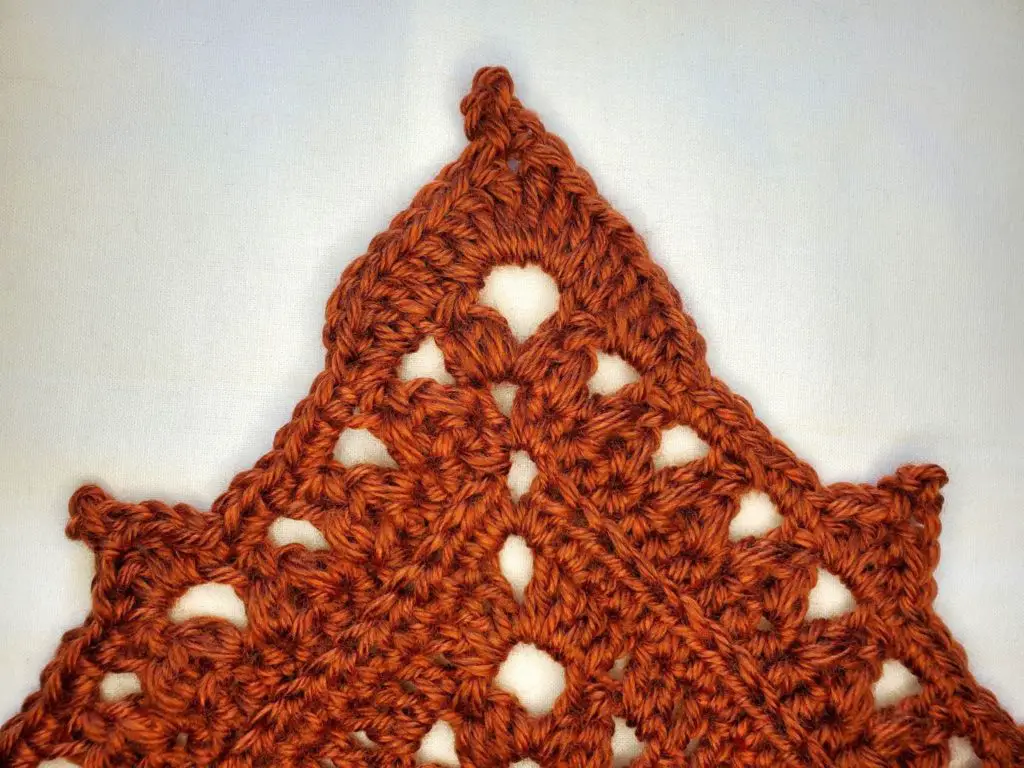
Note: In the next round, you will be instructed to do a chain 4 picot (ch4p). To do this, you simply ch4, then ss into the 4th ch from your hook.
29. Ch1. Sc in 1st st and next 9 sts. *(Hdc, dc, ch4p, dc, hdc) in next ch2 sp (see Figure 14). Sc in next 7 st and ch sp. ** Repeat from * to ** until there are only 3 sts (ch2 sp and Fc) left before the ch3. (2hdc, dc) in next ch2 sp. 2dc in next st. (3dc, tr, ch4p, tr, 3dc) in ch3 sp (see Figure 15). 2dc in next st. (Dc, 2hdc) in next ch2 sp. Sc in next 7 st and ch sp. Repeat from * to ** until there are only 2 sts left unworked. Sc in last 2 sts. Ss to join to 1st st. Bind off. – 212 st + 17 ch4p
We will now build up the neck portion of the cowl. Again, we will be working in the round, joining at the end of each round, and turning.
With the right side facing you, join your yarn in the center back of the neck.
1. Ch1. Sc around the entire neck, placing 2 sc in the end of each row and 2 sc in the center ring. Continue in that manner all the way around until all rows have been worked. Ss to join to 1st st. Turn. – 90 st
2. Ch1. Hdc in 1st st and each st around. Ss to join to 1st st. Turn. – 90 st
3. Working this round in the BLO: Ch3. Dc in next st and each st around. Ss to join to 1st st. Turn. – 90 st
4. Ch1. Starting in the same st, Fc over the 1st 3 sts, ch2. *Starting in next st, Fc over next 3 sts, ch2. ** Repeat from * to ** around. Ss to join to 1st st. – 90 st (inc 30 Fc)
5. Ch3. Dc in next st and each st and ch sp around. Ss to join to 1st st. Turn. – 90 st
6. Ch3, Ps in next st, sk 1 st. *Dc in next st, Ps in next st, sk1 st. ** Repeat from * to ** around. Ss to join to 1st st. Turn. – 90 st (inc 30 Ps)
7. Ch3. Dc in next st and each st around. Ss to join to 1st st. Turn. – 90 st
8. Ch1. Starting in the same st, Fc over the 1st 3 sts, ch2. *Starting in next st, Fc over next 3 sts, ch2. ** Repeat from * to ** around. Ss to join to 1st st. Turn. – 90 st
9. Ch3. Dc in next st and each st and ch sp around. Ss to join to 1st st. Turn. – 90 st
If you are making a standard Bandana Cowl, repeat rounds 2 – 9 one more time. You should now have 17 rounds.
If you are making a Hooded Bandana Cowl, repeat rounds 2 – 9 three more times. You should now have 33 rounds.
18. (or 34.) Ch1. Hdc in 1st st and each st around. Ss to join to 1st st. Turn. – 90 st
19. (or 35.) Working this round in the BLO: Ch1. Sc in 1st st and each st around. Ss to join to 1st st. Bind off. – 90 st
Weave in your ends, and you’re done!
I hope you love your new cowl, and I look forward to seeing all of your beautiful pictures on Ravelry!
If you’d like to know when I post new patterns and tutorials, head on over to my Facebook and Instagram and give me a like and a follow!
If you enjoyed The Puffs N Picots Bandana Cowl – Free Crochet Pattern, you may want to check out my other designs!
And until next time… Happy Hooking! 😉

Sarah, This is so beautiful. I am so happy I stumbled upon your blog. Your designs are amazing. Thank you so much for sharing them for free. People, like myself, that are disabled and on a very tight fixed income really appreciate that you do this. Thank you again. God Bless.
Emma
Wow, Emma!
Thank you so much for taking the time to leave a sweet comment on my blog. You have truly made my day! 😀
Sarah