
The Feather Stitch – Crochet Stitch Tutorial is copyrighted by I Need It Crochet. You may not copy, share, change, or sell the pattern itself. Also, you may not claim this pattern as your own. All pictures contained in this pattern fall under the copyright and may not be used.
Finished items made from The Feather Stitch – Crochet Stitch Tutorial belong to you, and you may do what you wish with them. If you choose to sell them on Etsy, I would very much appreciate it if you credited me as the pattern designer.
Feather Stitch Tutorial (Working in the Round)
The feather stitch looks a bit complicated at first glance, but once you know how it is done, it isn’t difficult at all. You will notice that we have started with a round of hdc followed by a round of hdc, ch1, sk 1 st (see Figure 1). These are the base rows for the feather stitch. Once you have worked your base rows, you will turn and work your first feather stitch as follows:
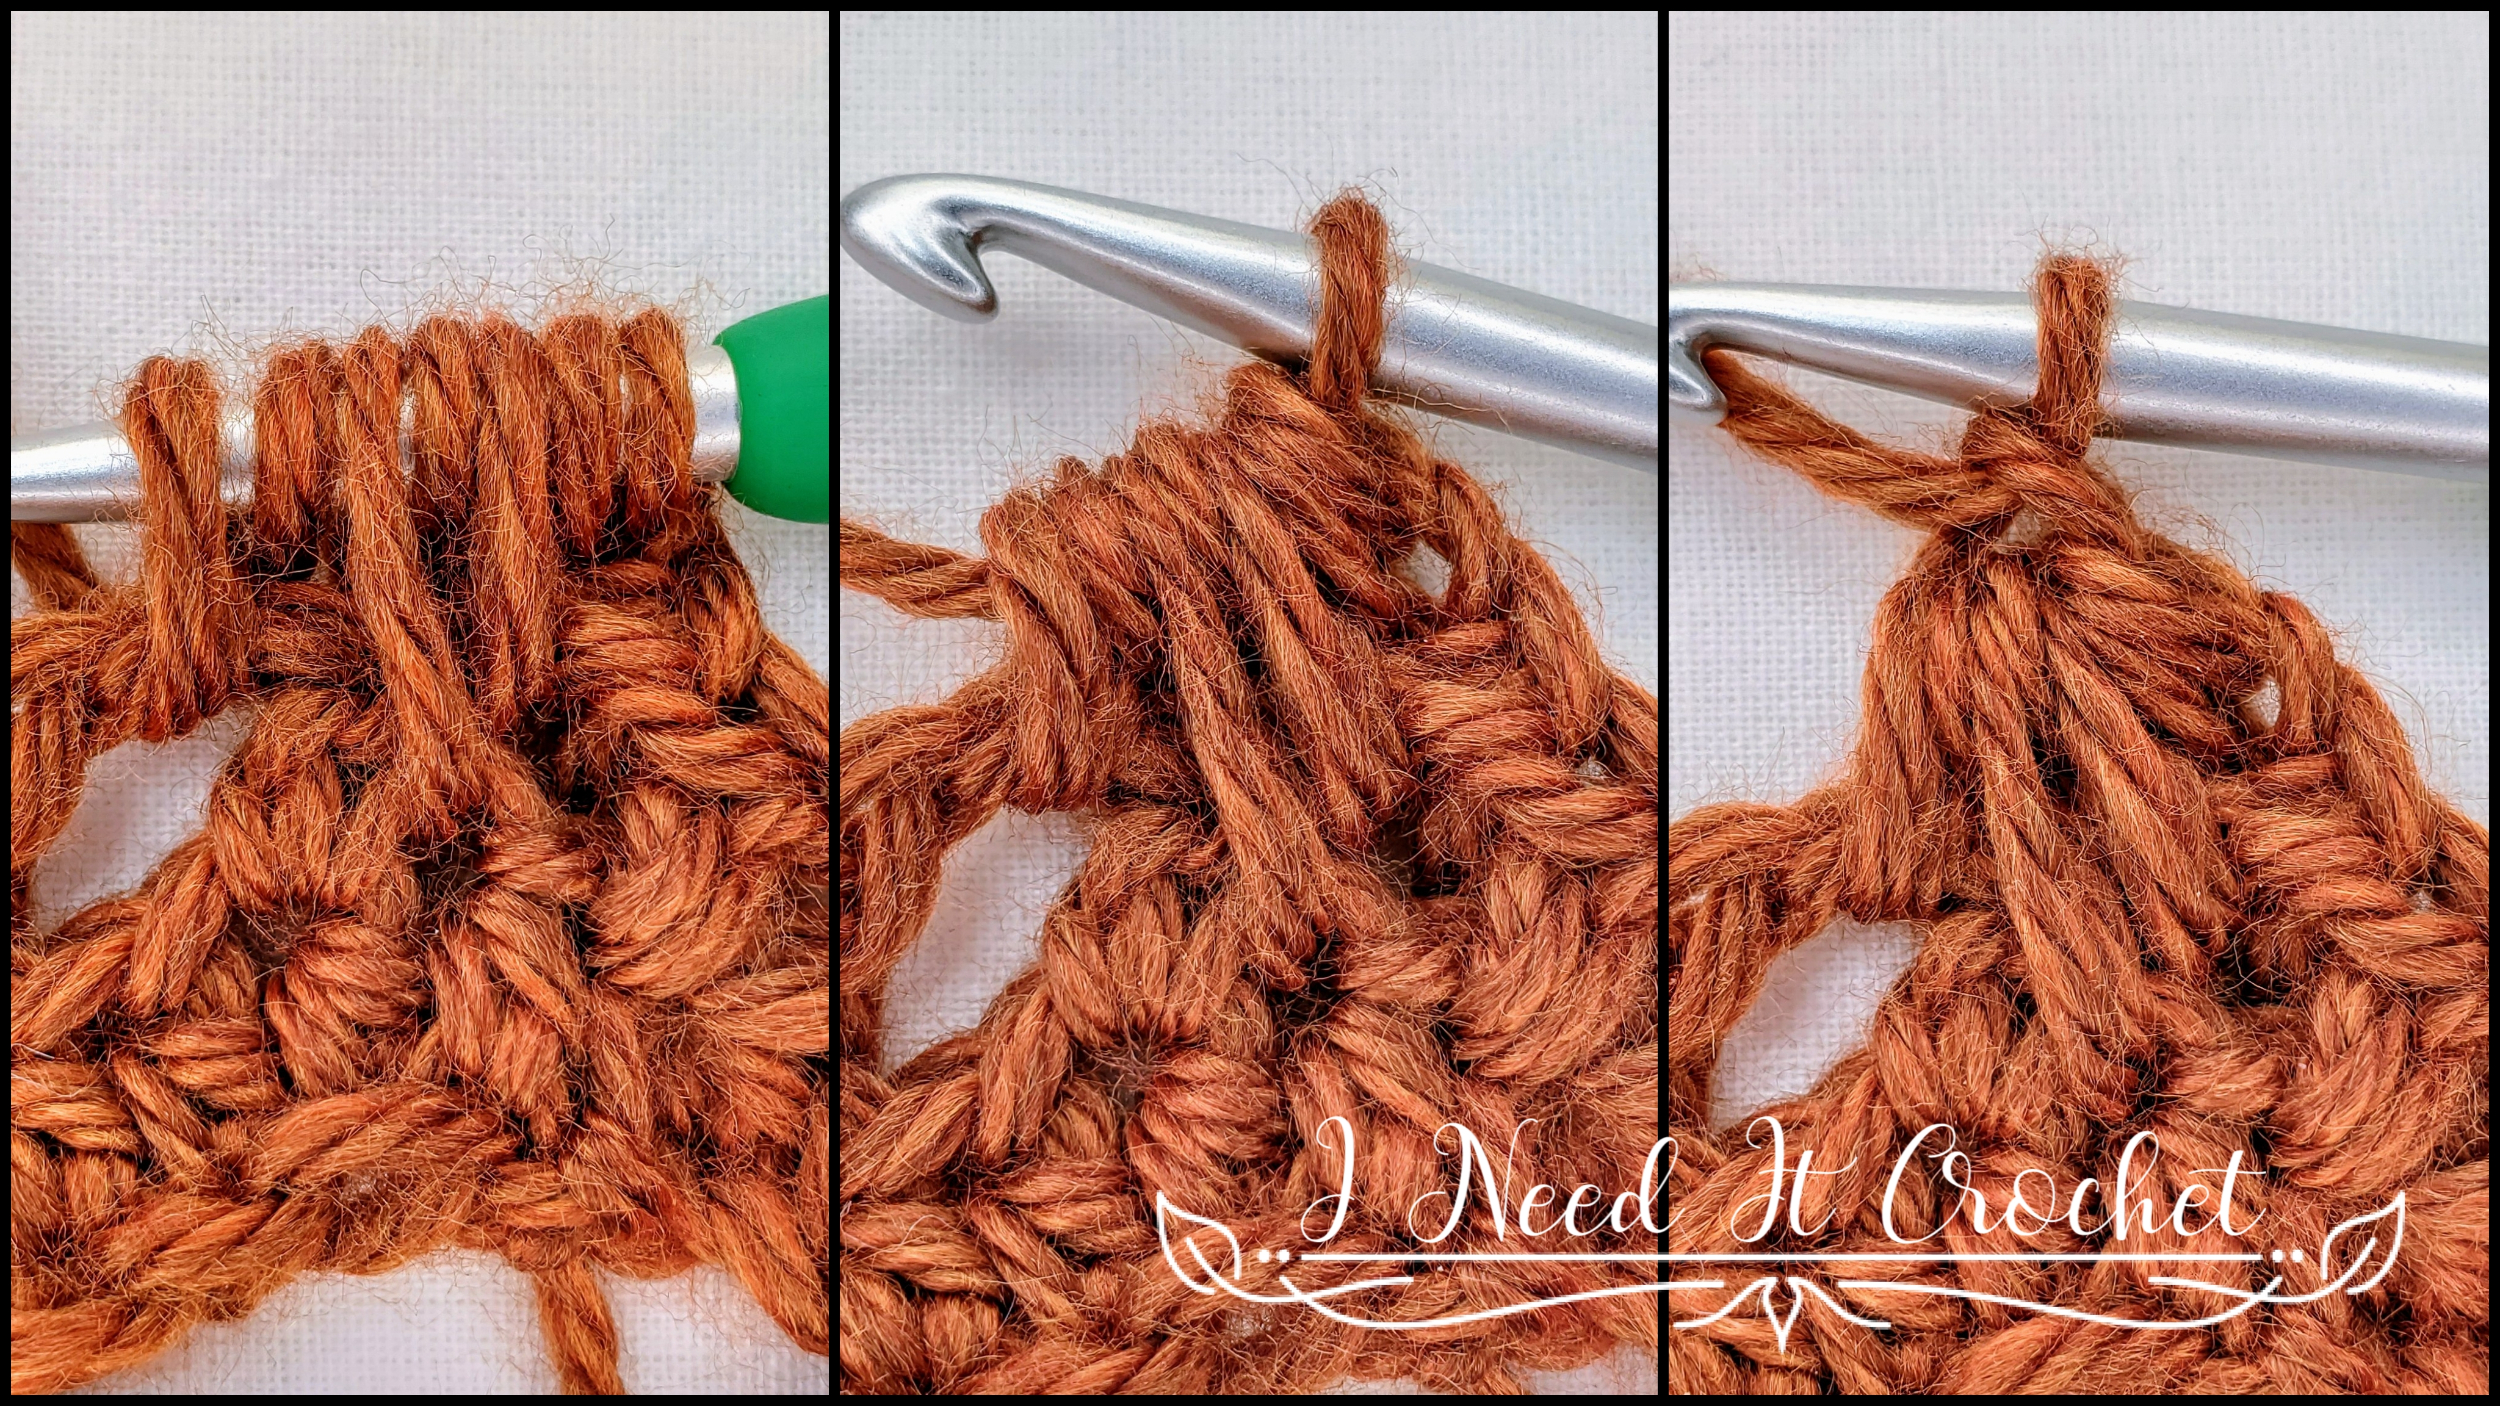
– First, you will ch1. Then, yo, insert your hook into the next ch1 sp, yo, and draw up a loop. You want to bring this loop up to the top of your first ch1, about the height of a hdc (see Figure 2).
– Next, yo, insert your hook into the st just below the ch1 you just worked into. Yo and draw up another loop. Bring this loop up to the same height as your first (see Figure 3).
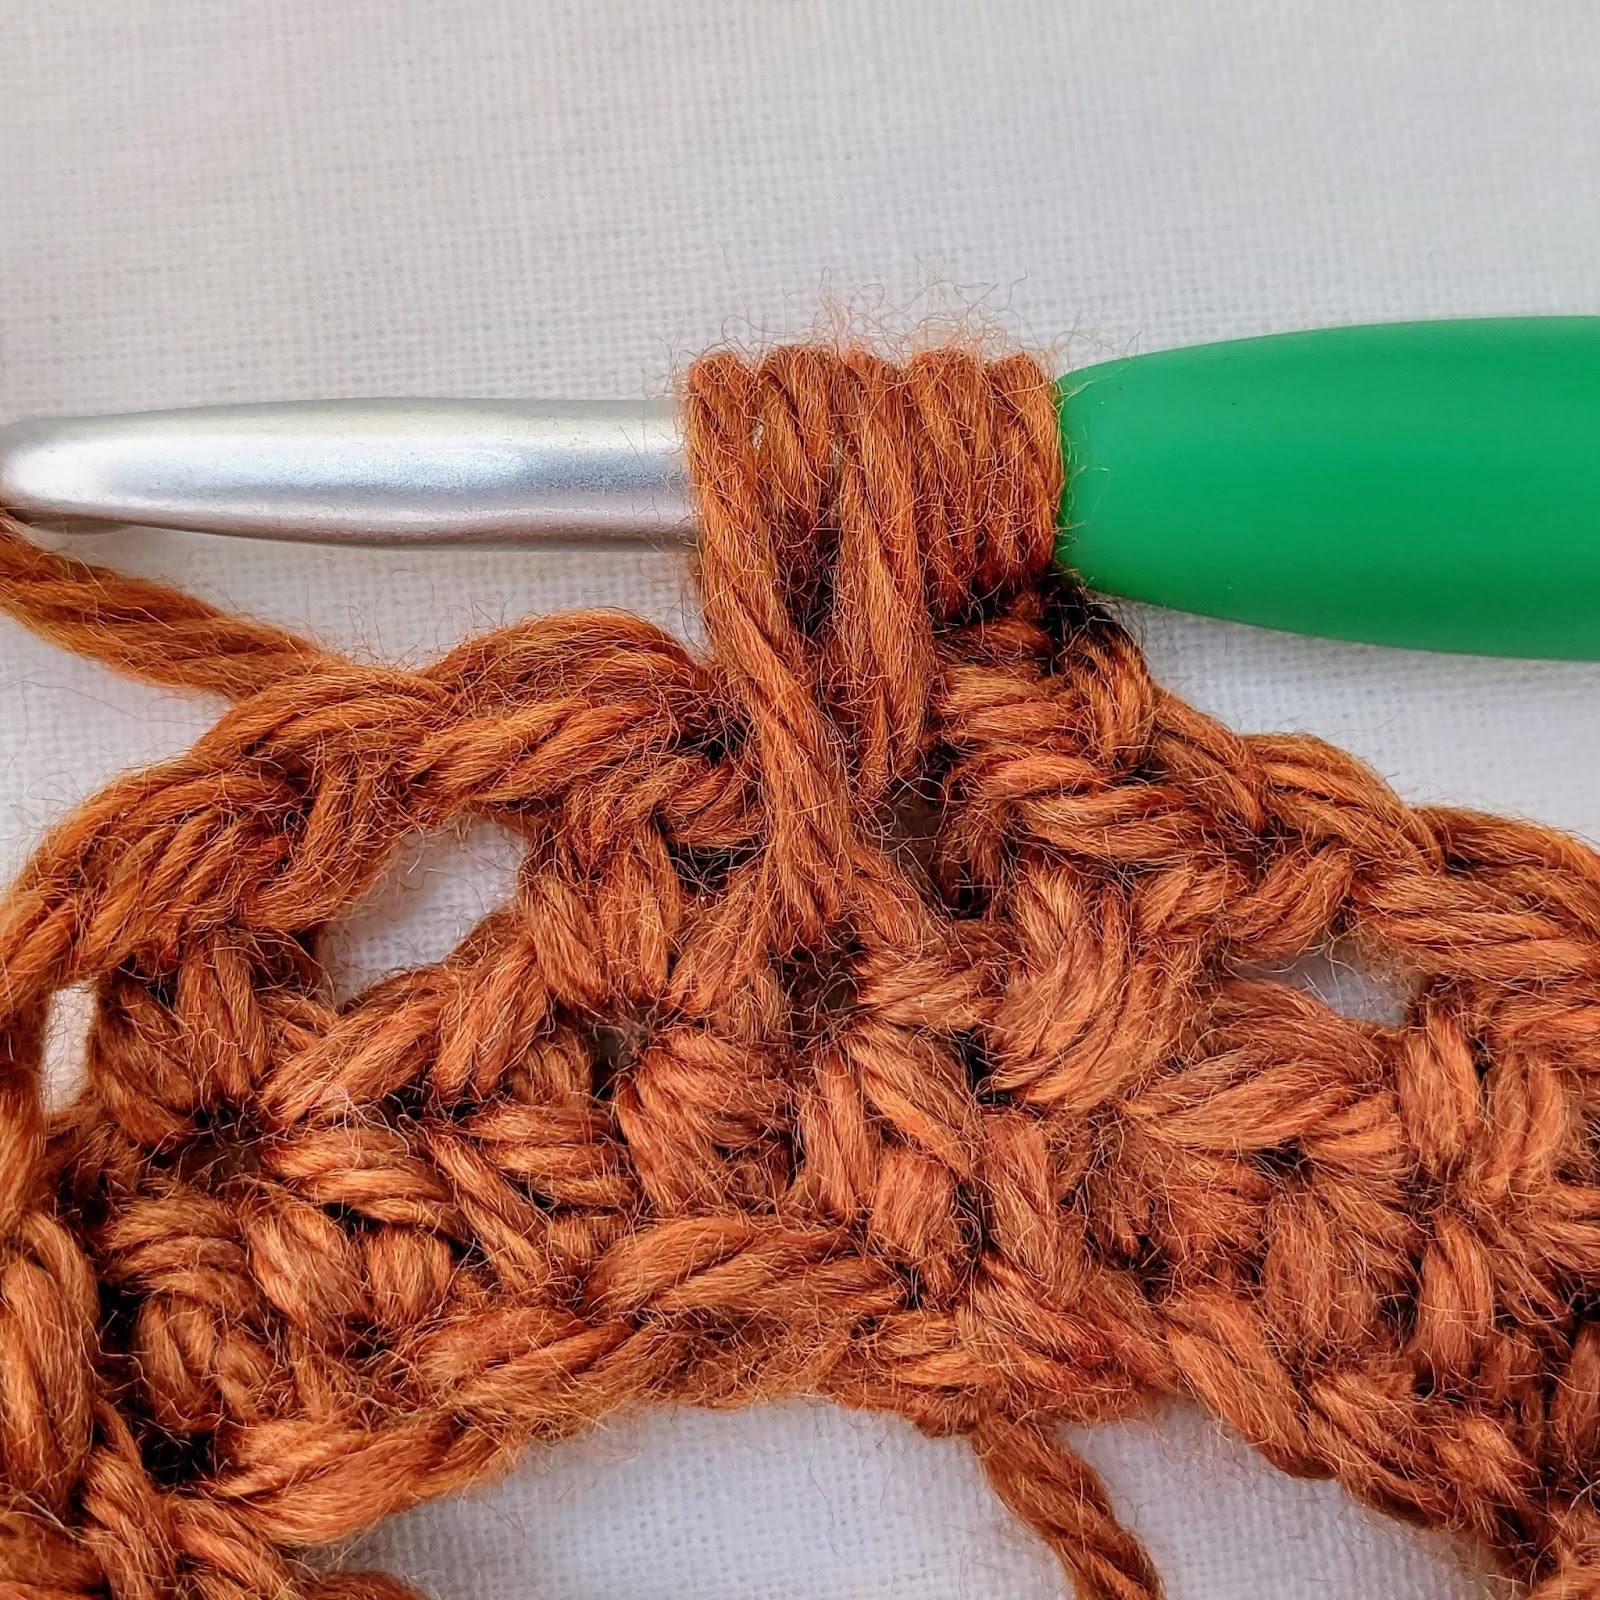
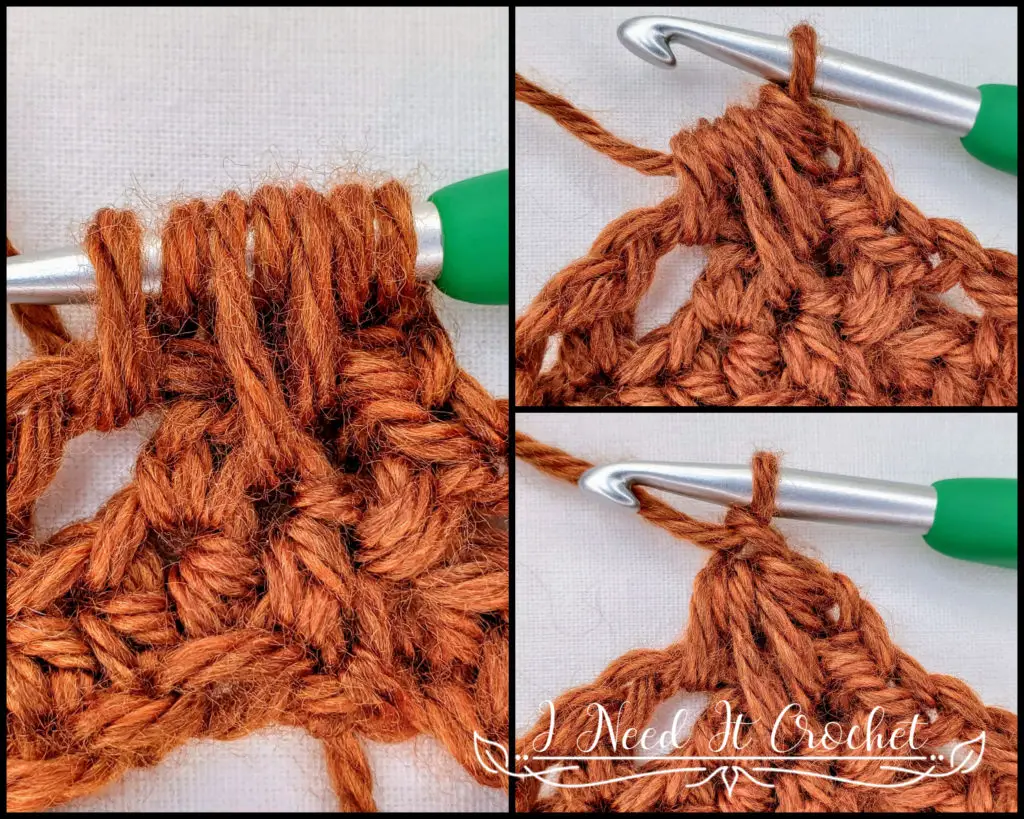
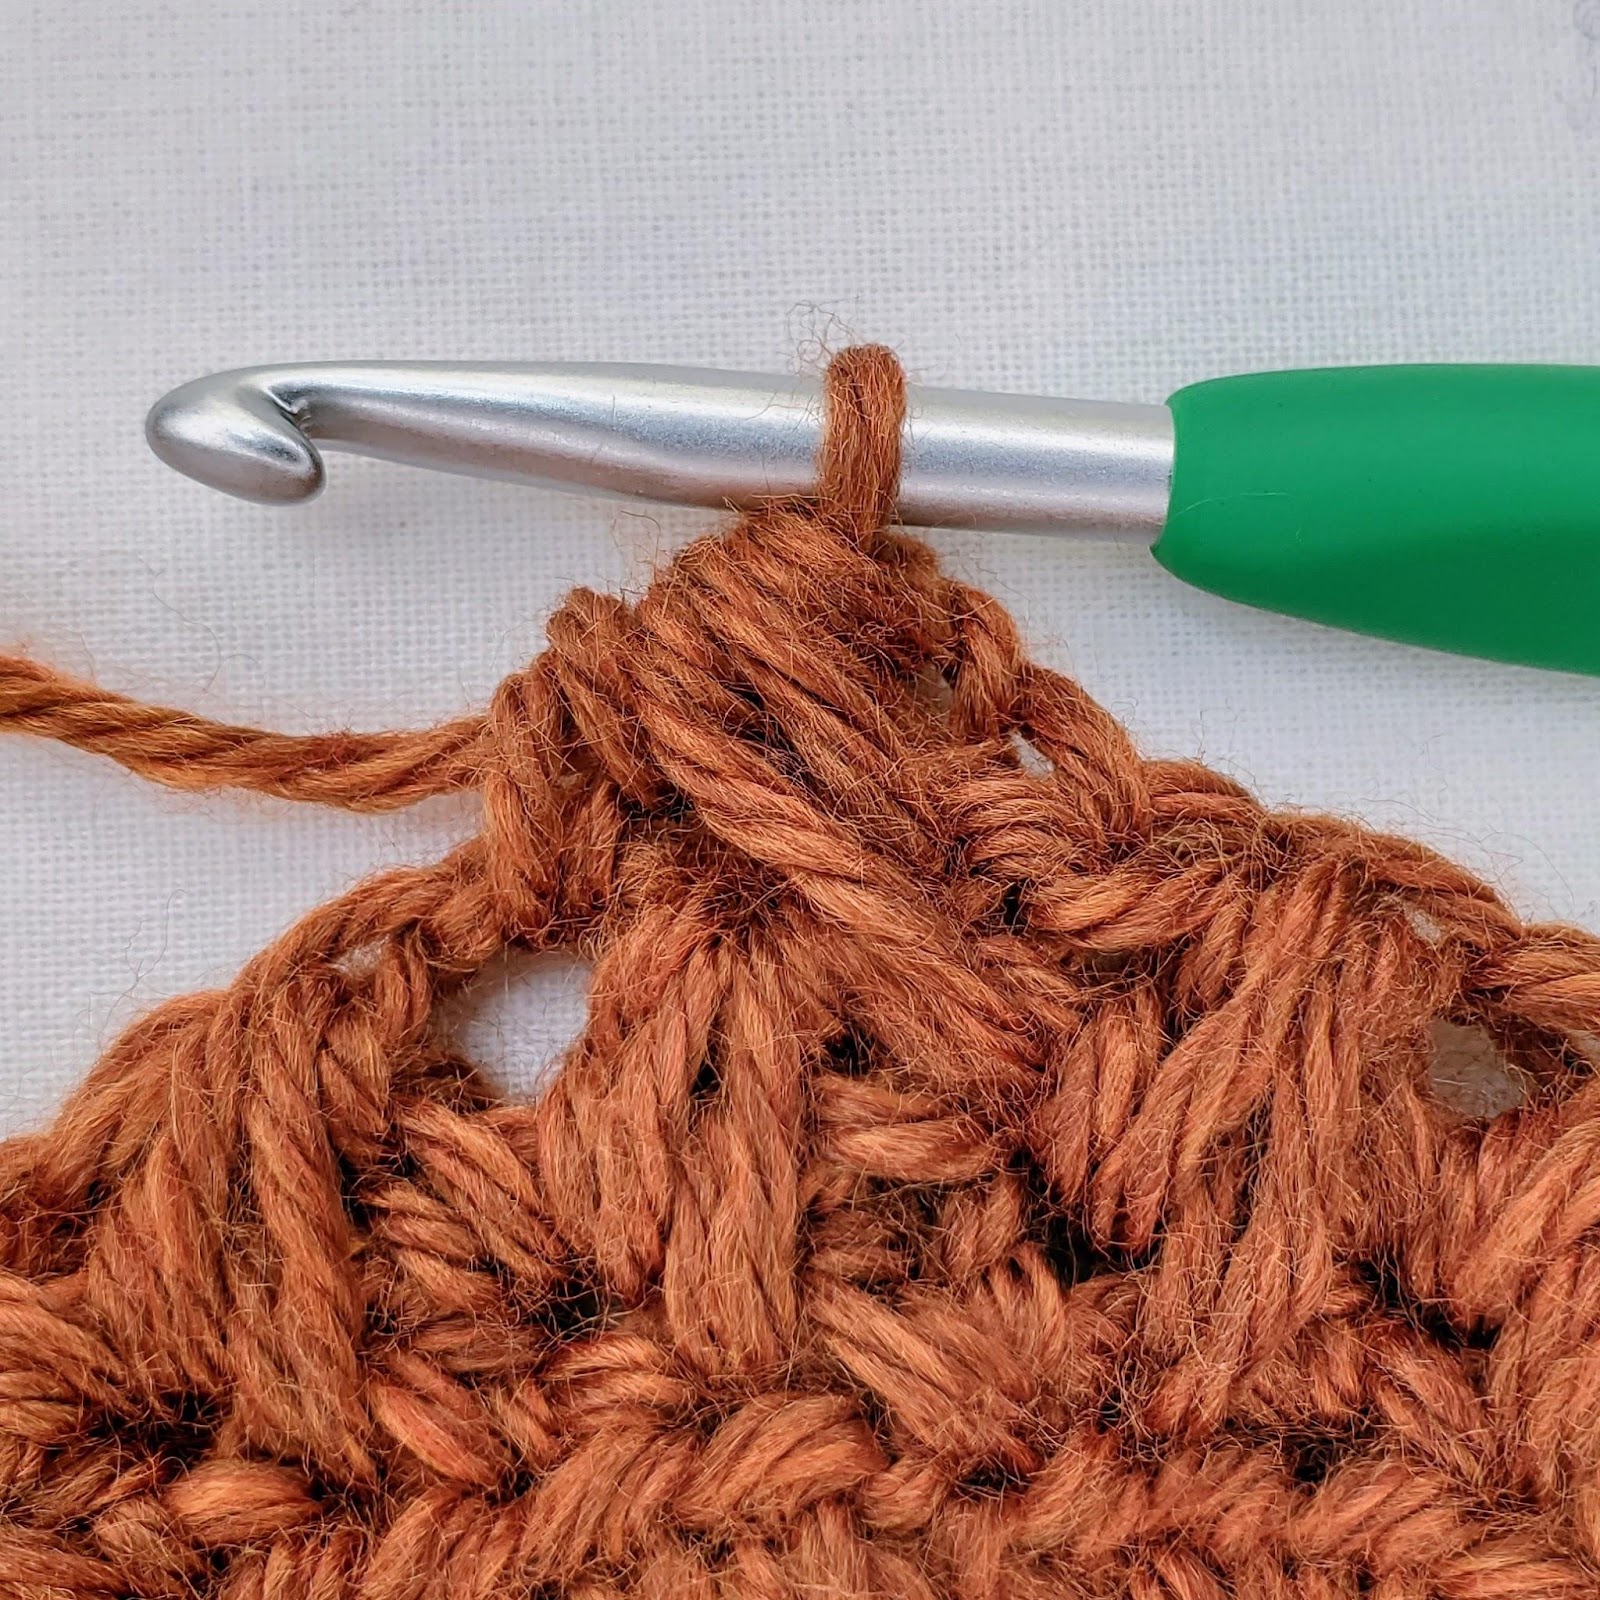
– Then, you will sk 1 st, yo, and insert your hook into the next ch1 sp. Yo and draw up another loop pulling it up to the height of the other loops. You should now have 7 loops on your hook (see Figure 4).
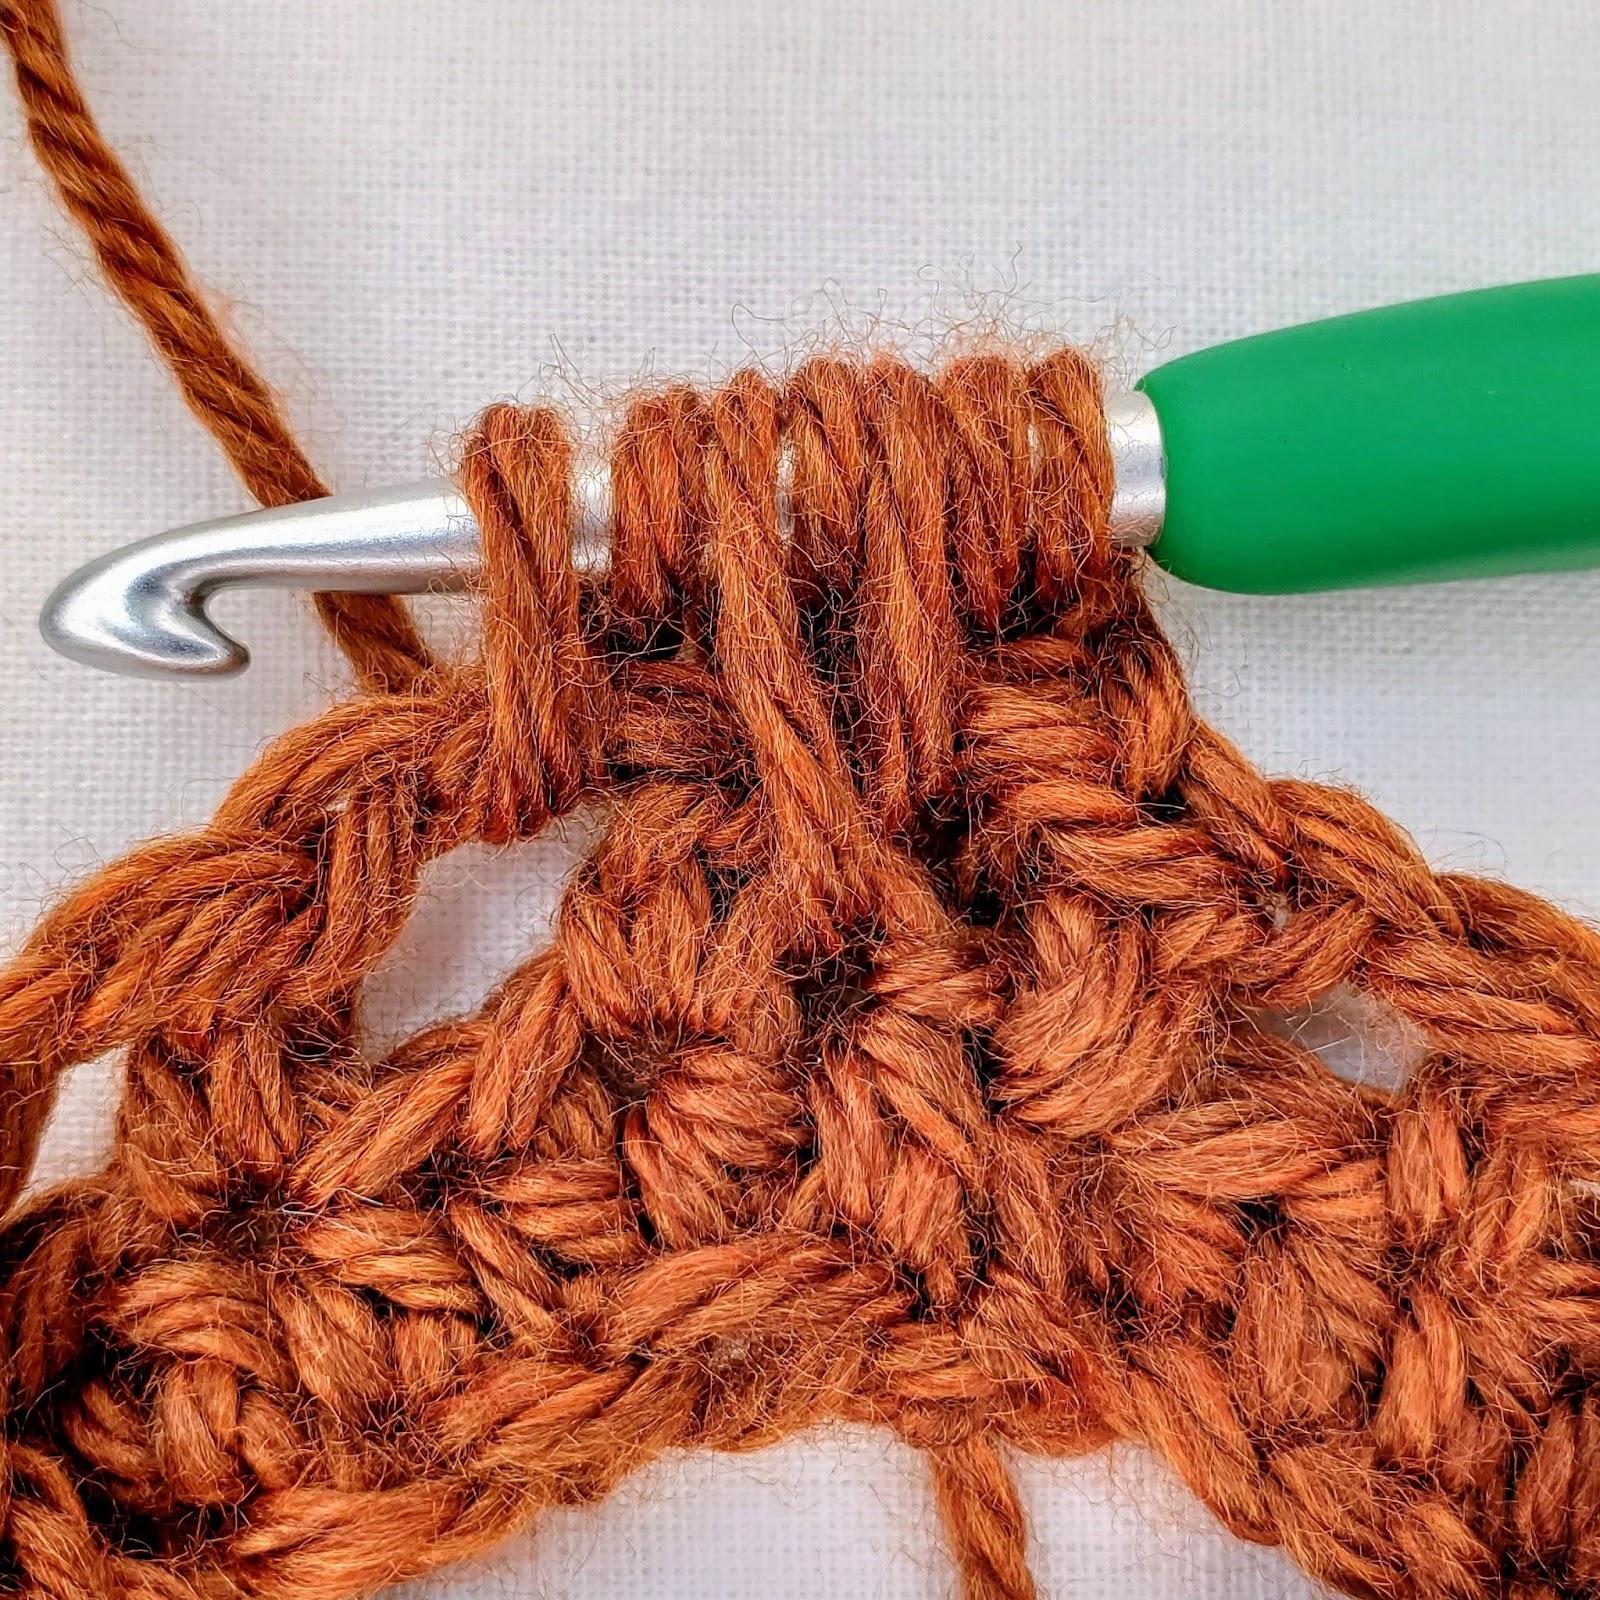
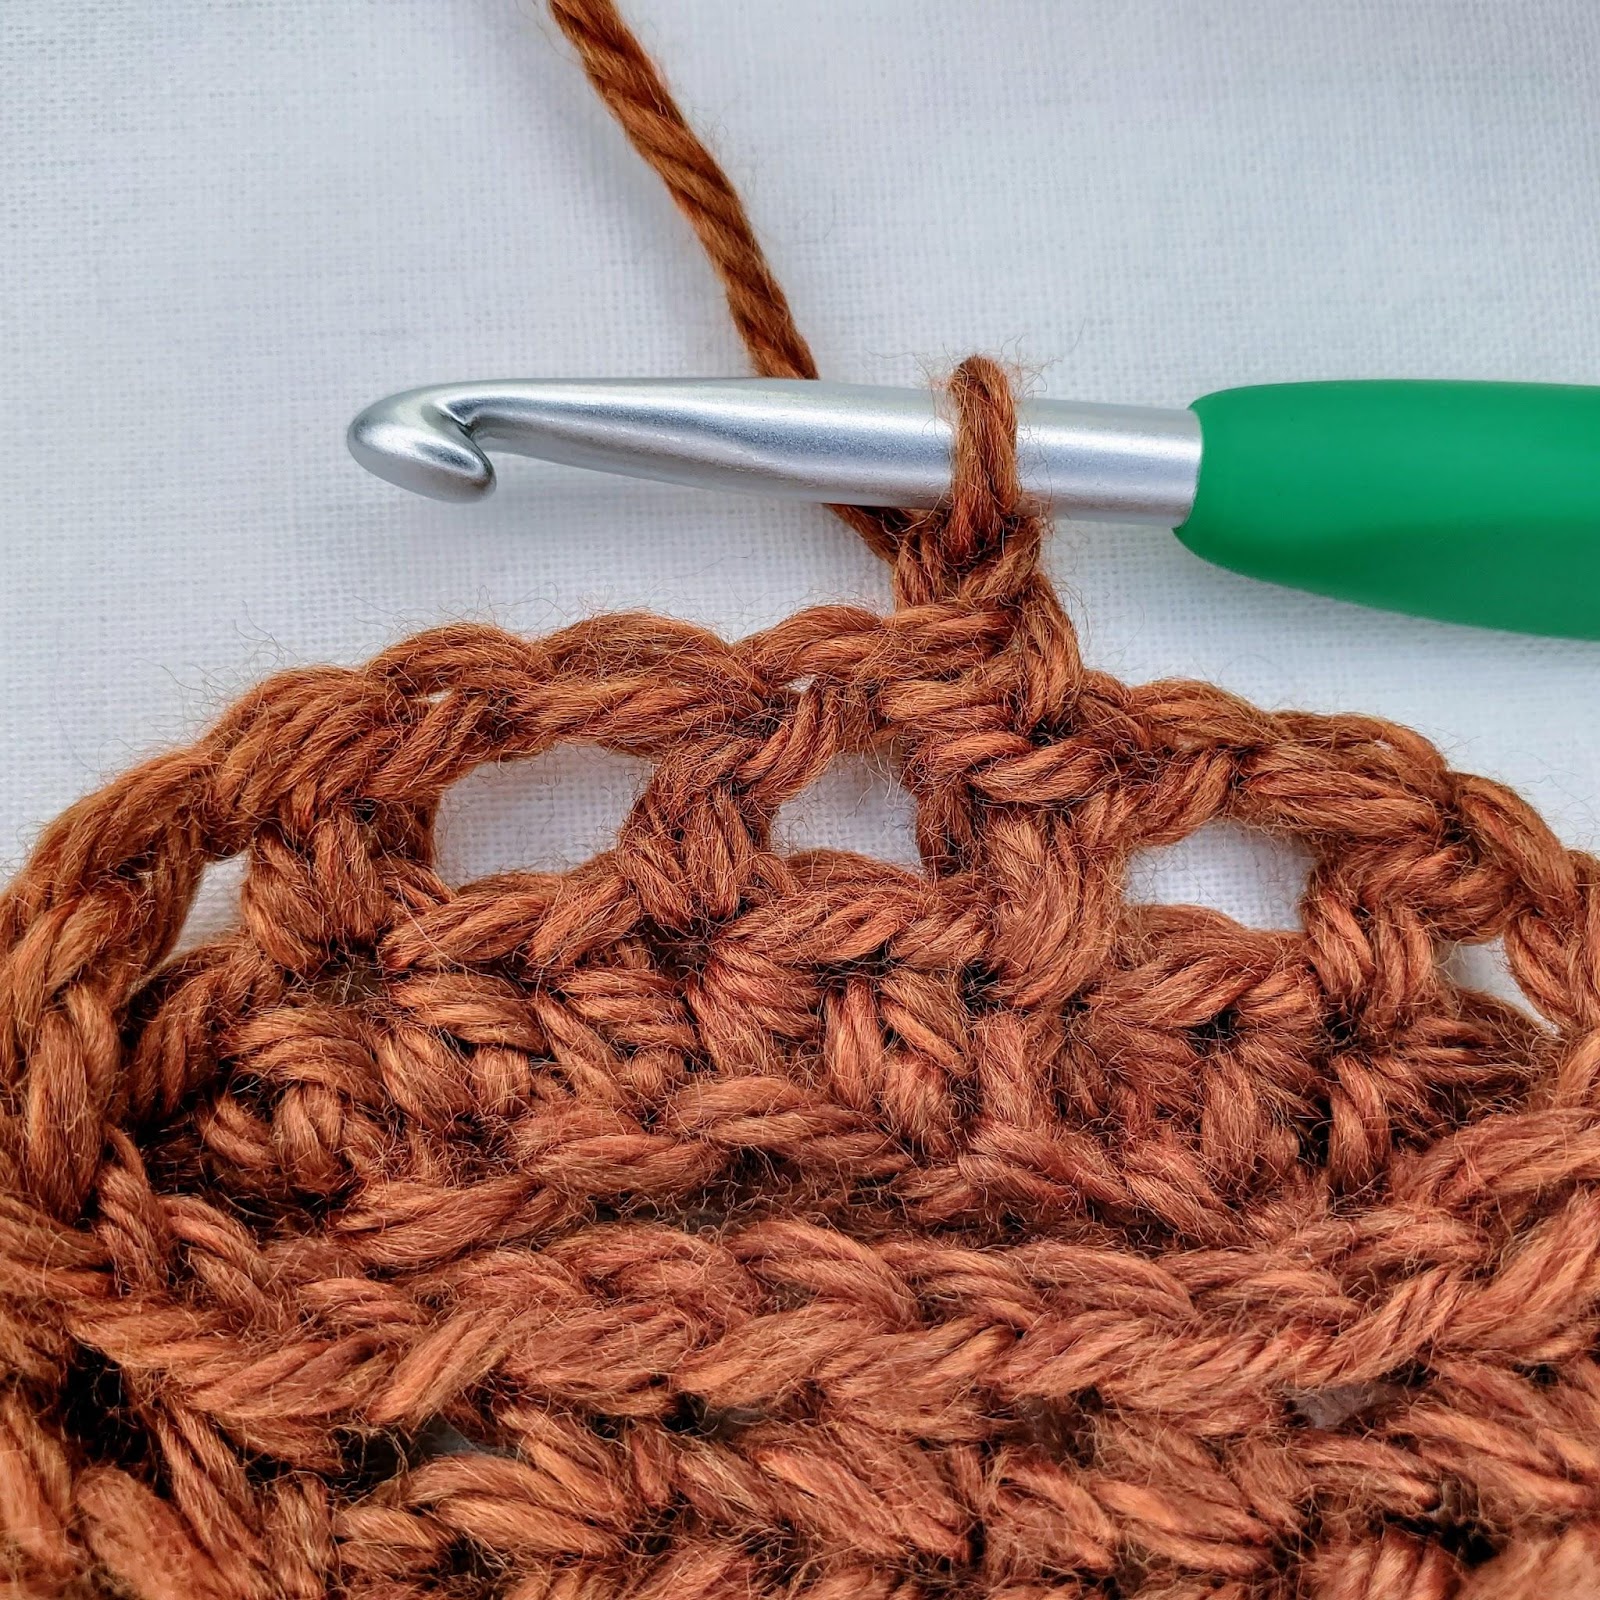
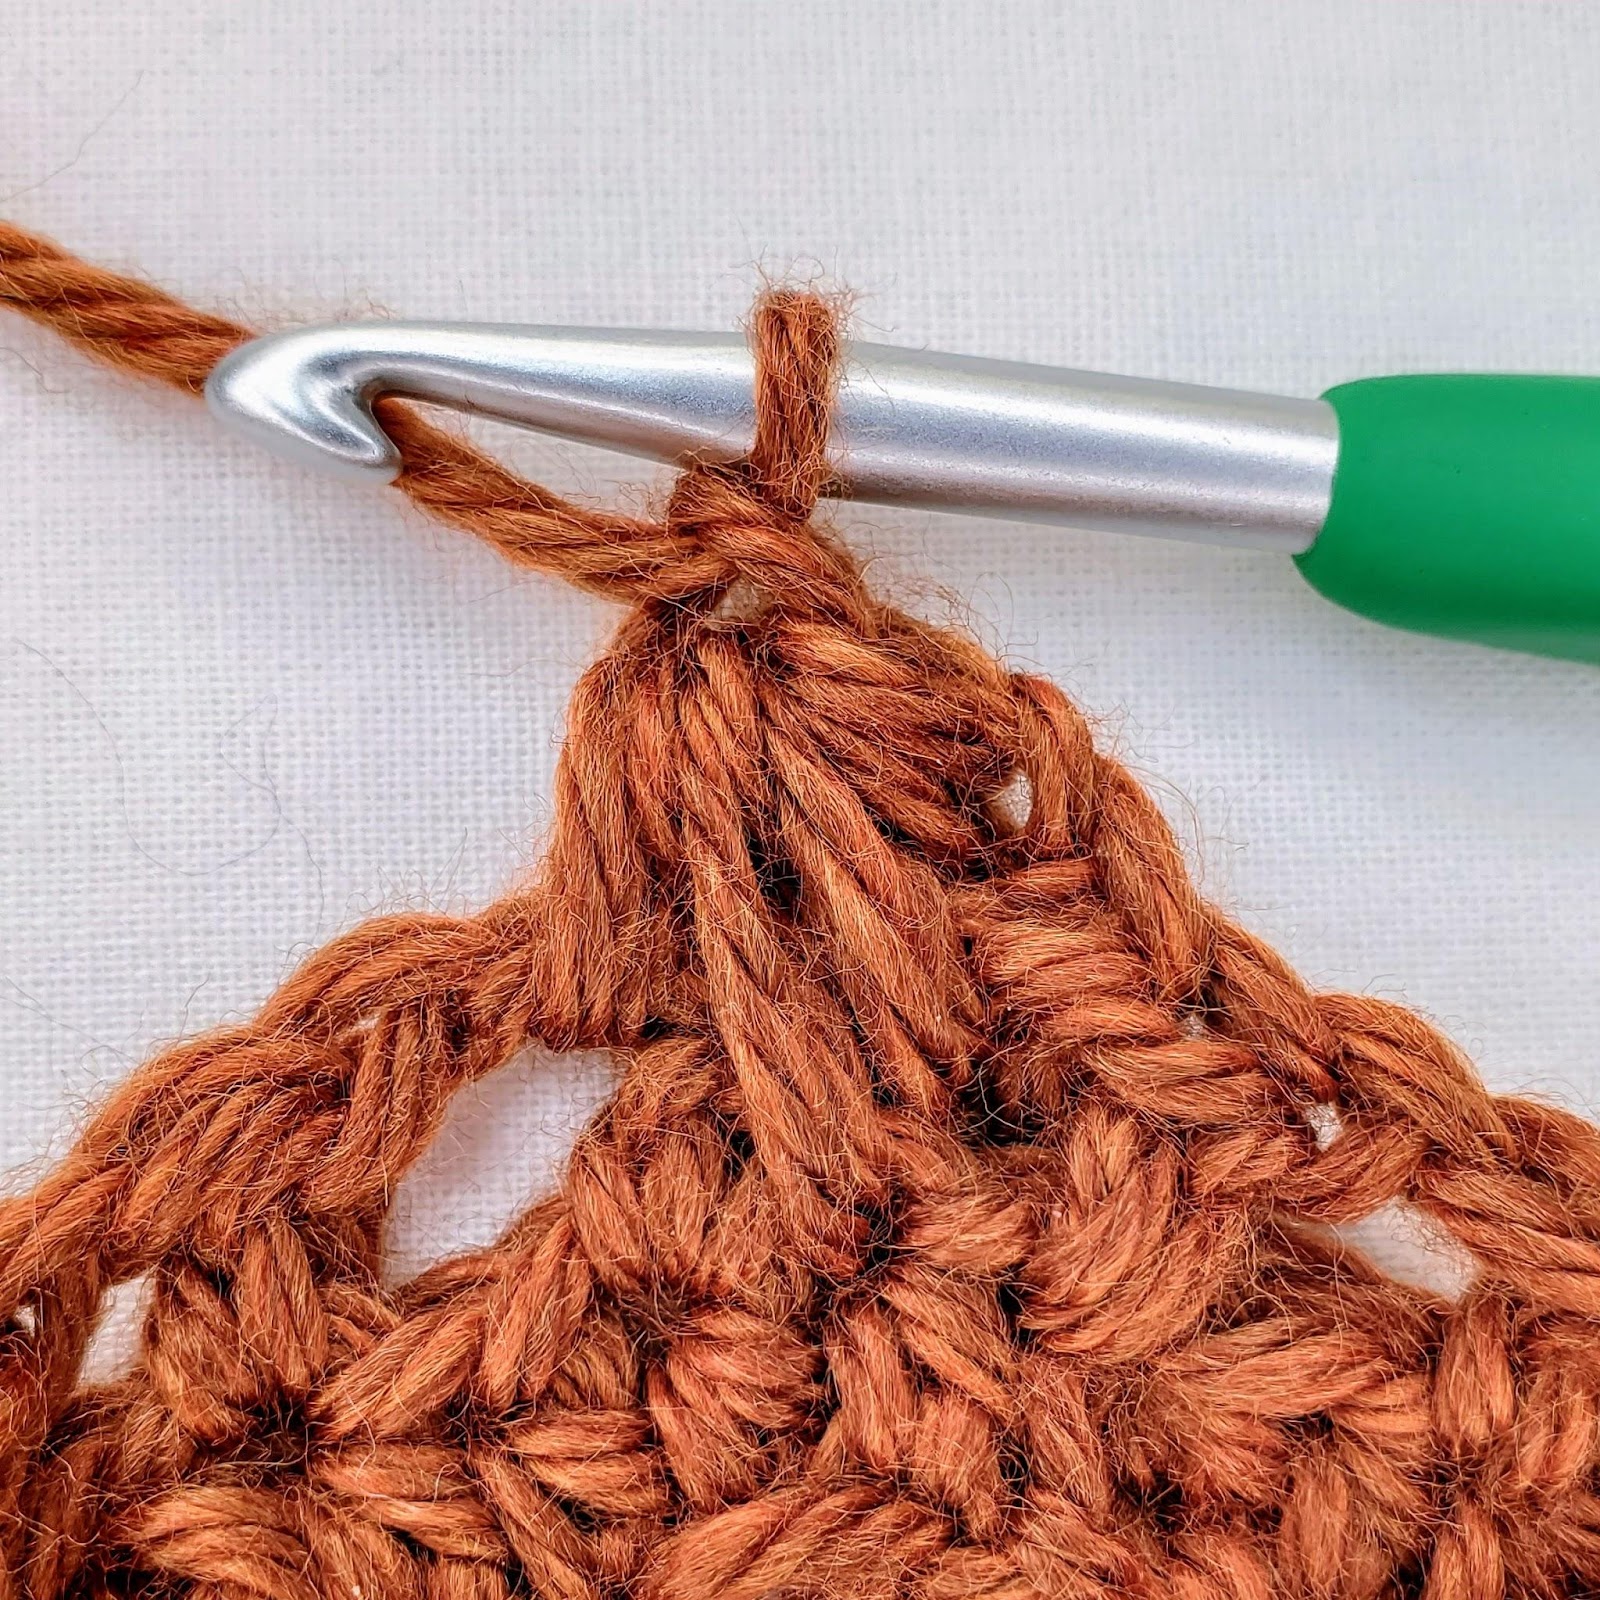
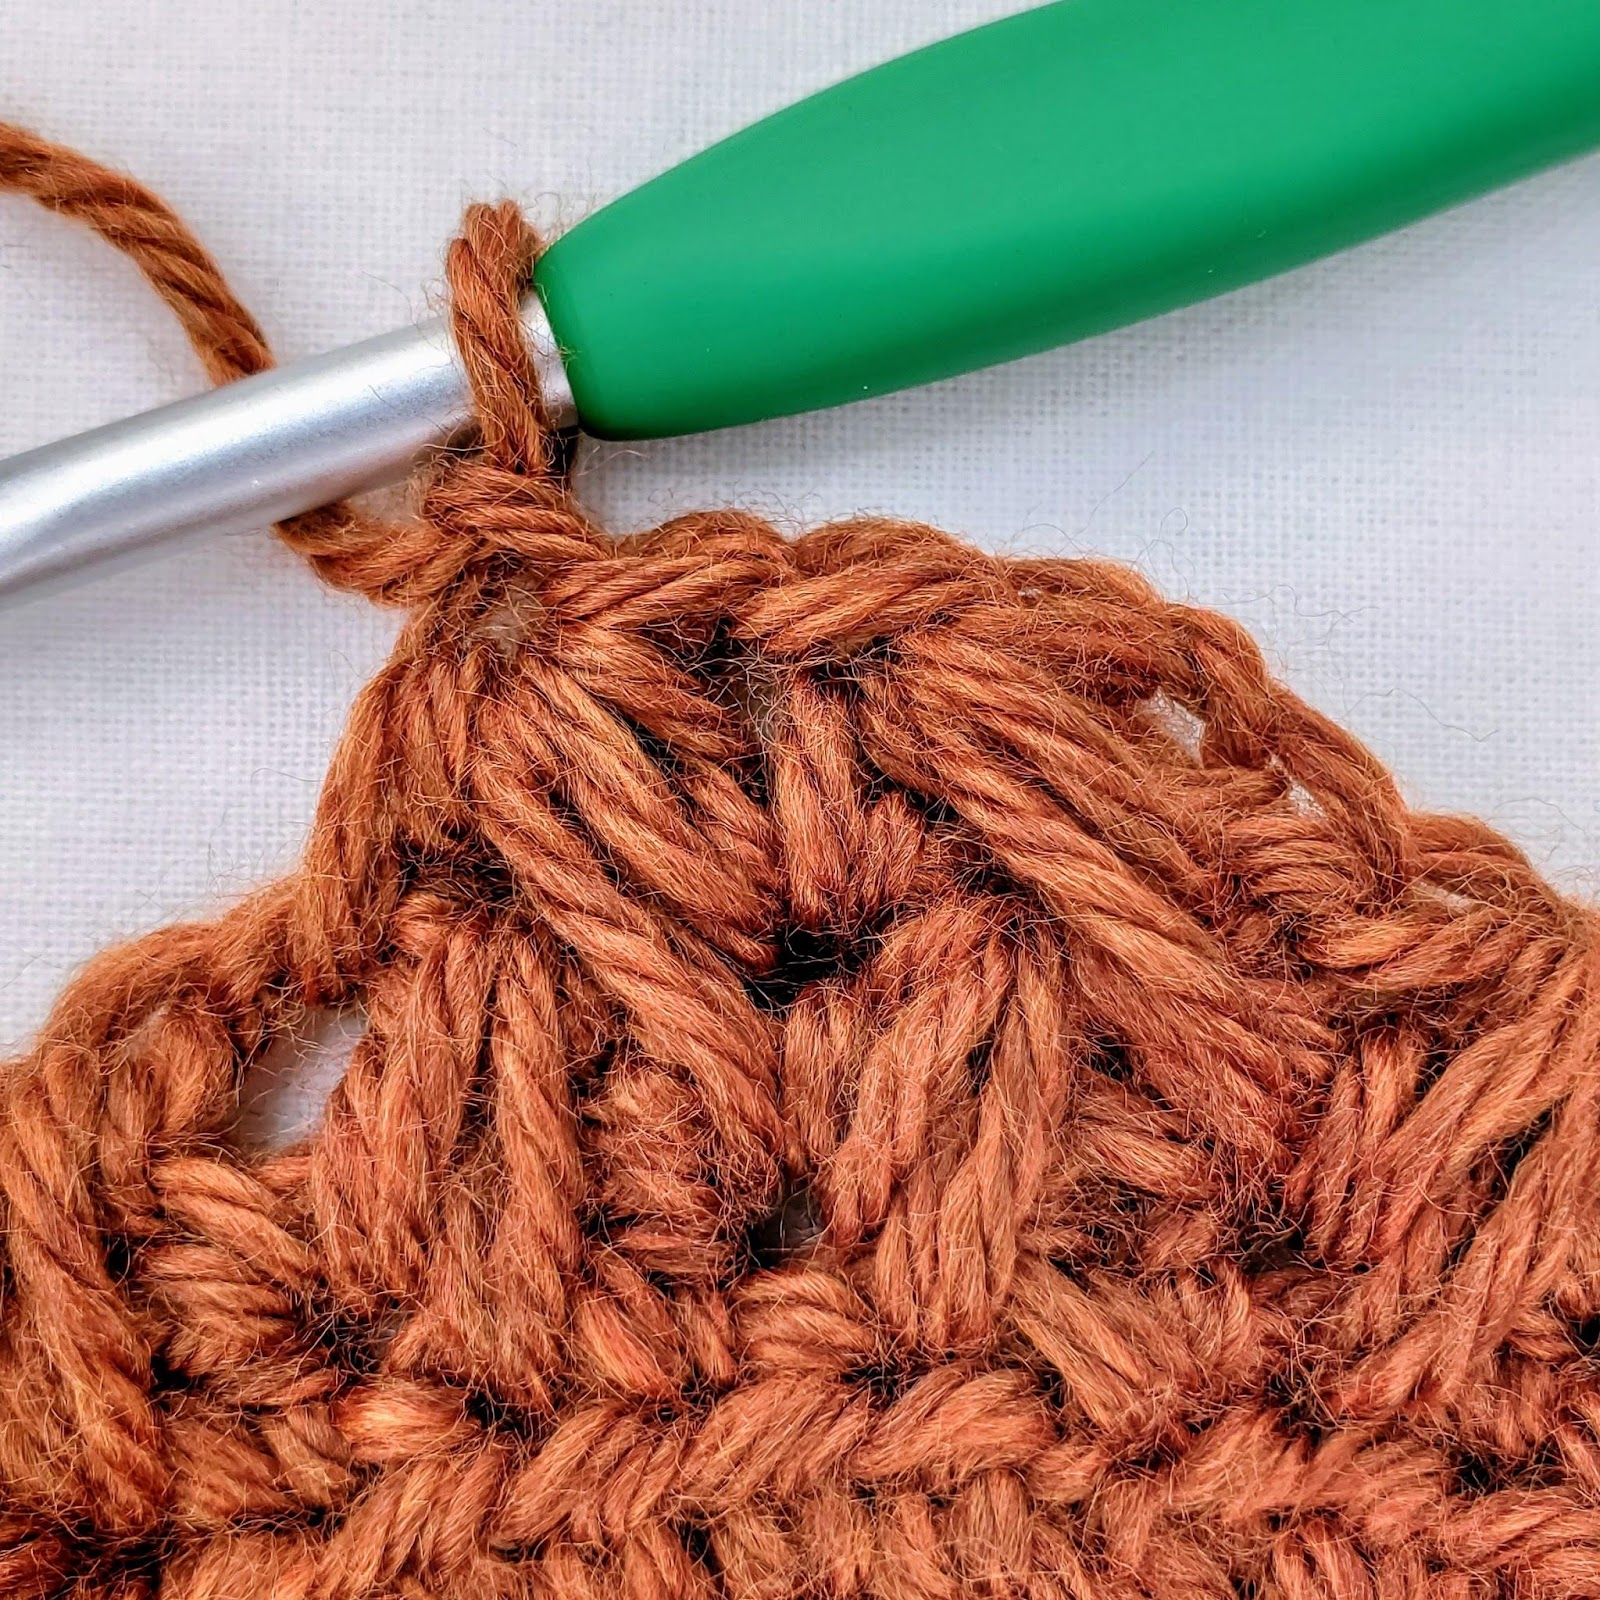
– Yo and pull your yarn through all 7 loops (see Figure 5). Then, ch1 to finish (see Figure 6).

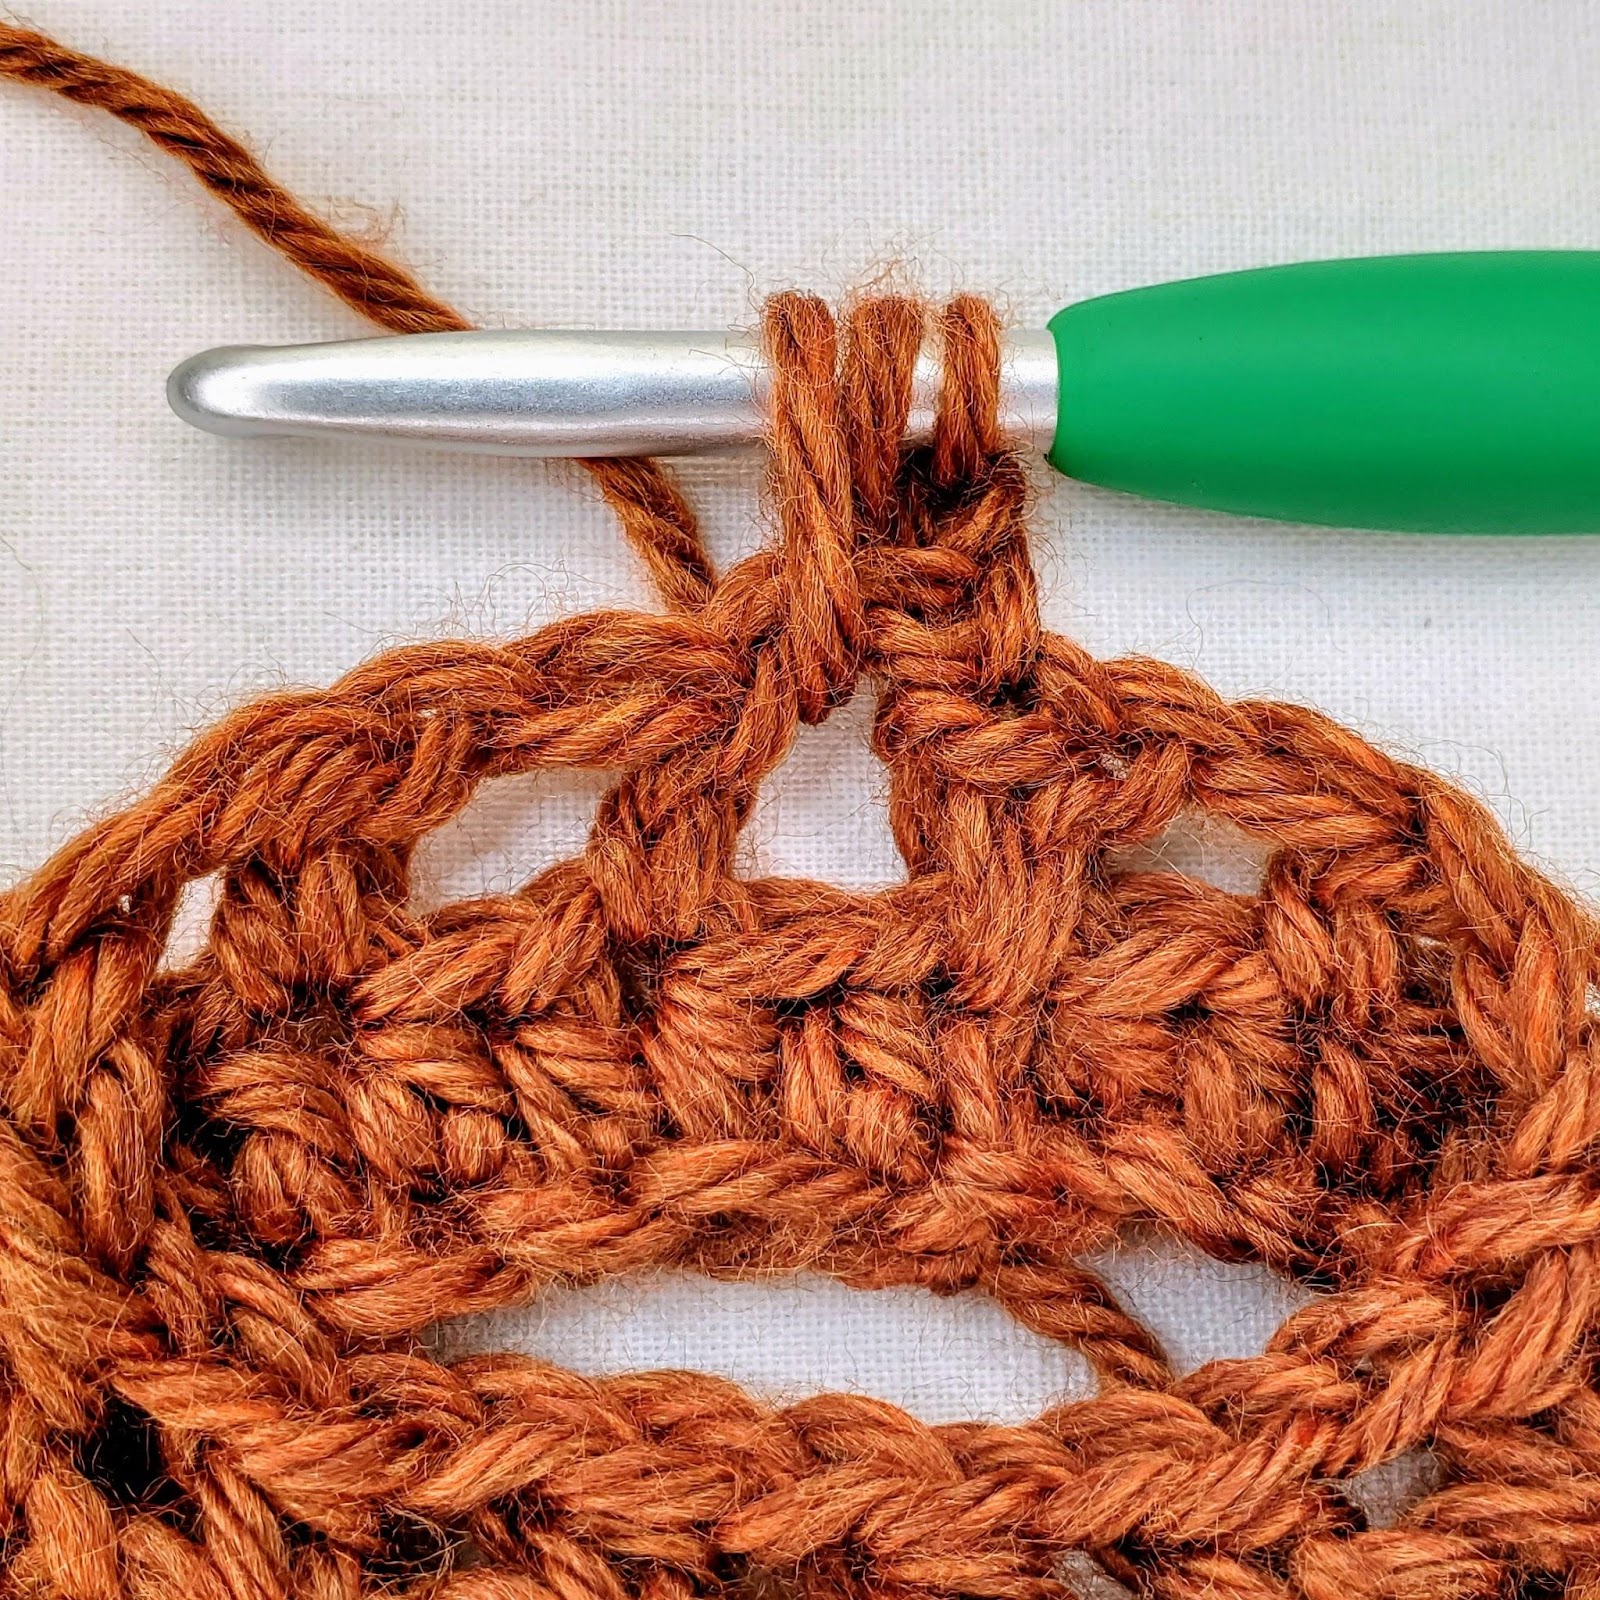
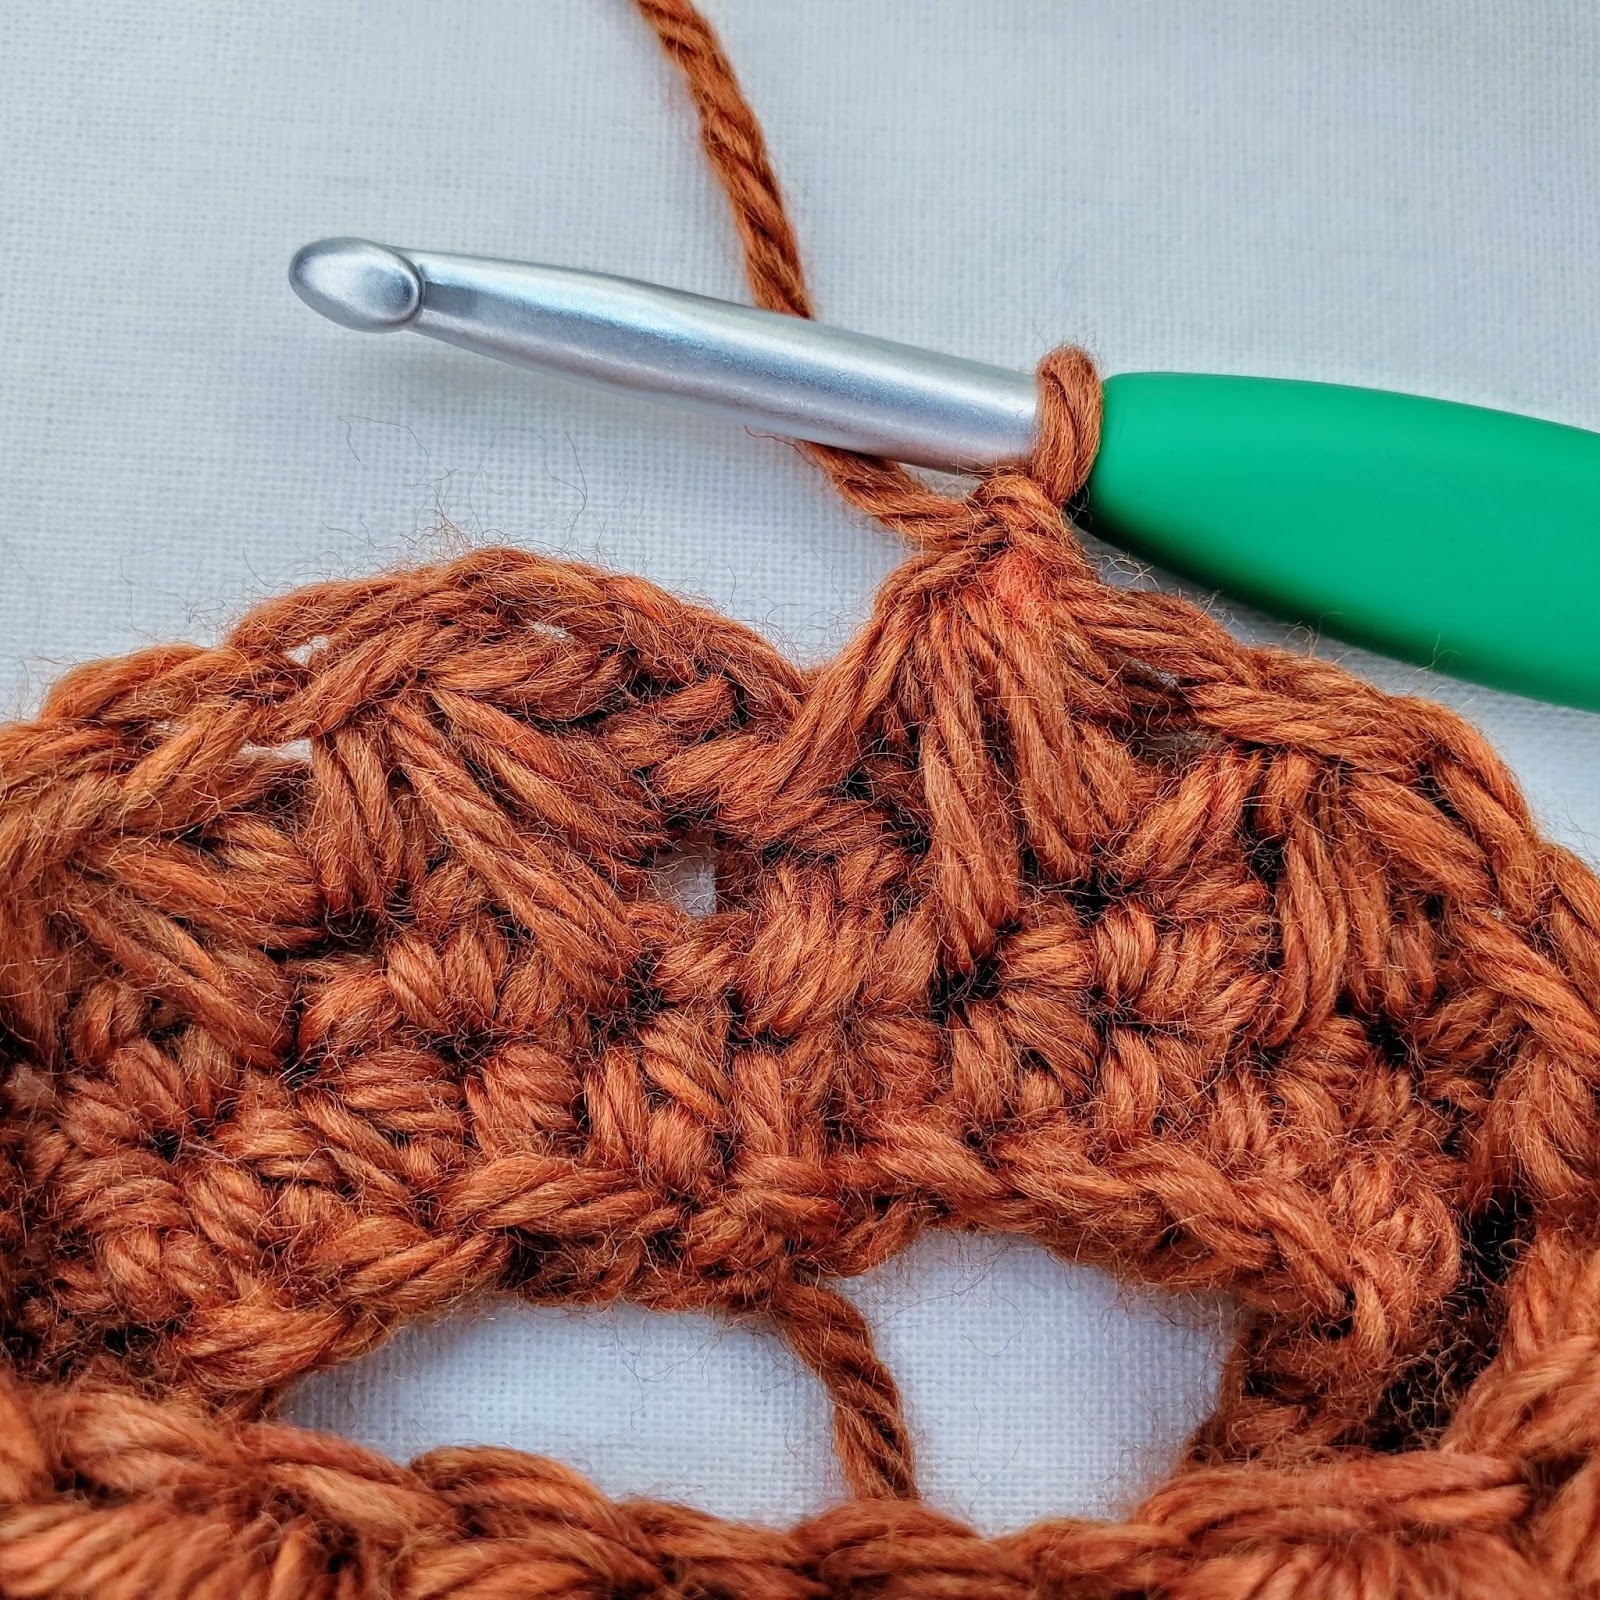
That is how you work your first feather stitch. The subsequent feather stitches will be worked in much the same way except you will begin the next fst in the same ch1 sp as you finished the previous fst. It should look similar to Figure 7. Each fst counts as 2 sts. Since we are working in the round, your last fst will finish in the same st as you began your first fst (see Figure 8). Then, you will ss to join to the 1st st and turn.

When working the next row, the ch1 spaces will be a little less obvious because the lower ones will have been used in the previous row. In Figures 9, 10, & 11, you can see where to work your first fst for row 2. Continue around in the same manner finishing your last fst in the same ch1 sp where you began your first fst (see Figures 12, 13, & 14).


If you enjoyed The Feather Stitch – Crochet Stitch Tutorial, you might want to check out my other Tips, Tricks, and Tutorials.
If you’d like to know when I post new patterns and tutorials, head on over to my Facebook and Instagram and give me a like and a follow!
Comments are closed.