This pattern for the Blissful Boho Shrug is copyrighted by I Need It Crochet. You may not copy, share, change, or sell the pattern itself. Also, you may not claim this pattern as your own. All pictures contained in this pattern fall under the copyright and may not be used.
Finished items made from this pattern belong to you and you may do what you wish with them. If you choose to sell them on Etsy I would very much appreciate it if you credited me as the pattern designer.


Or… Scroll down to view the pattern for free!
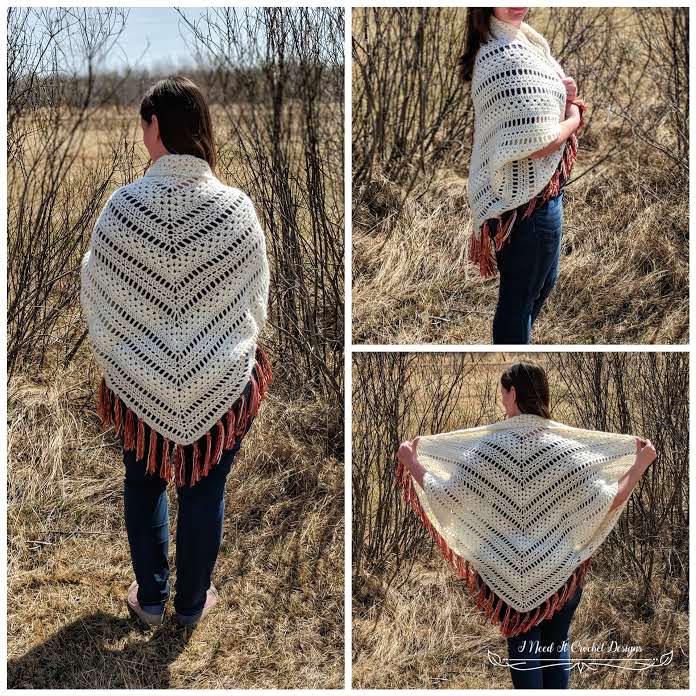
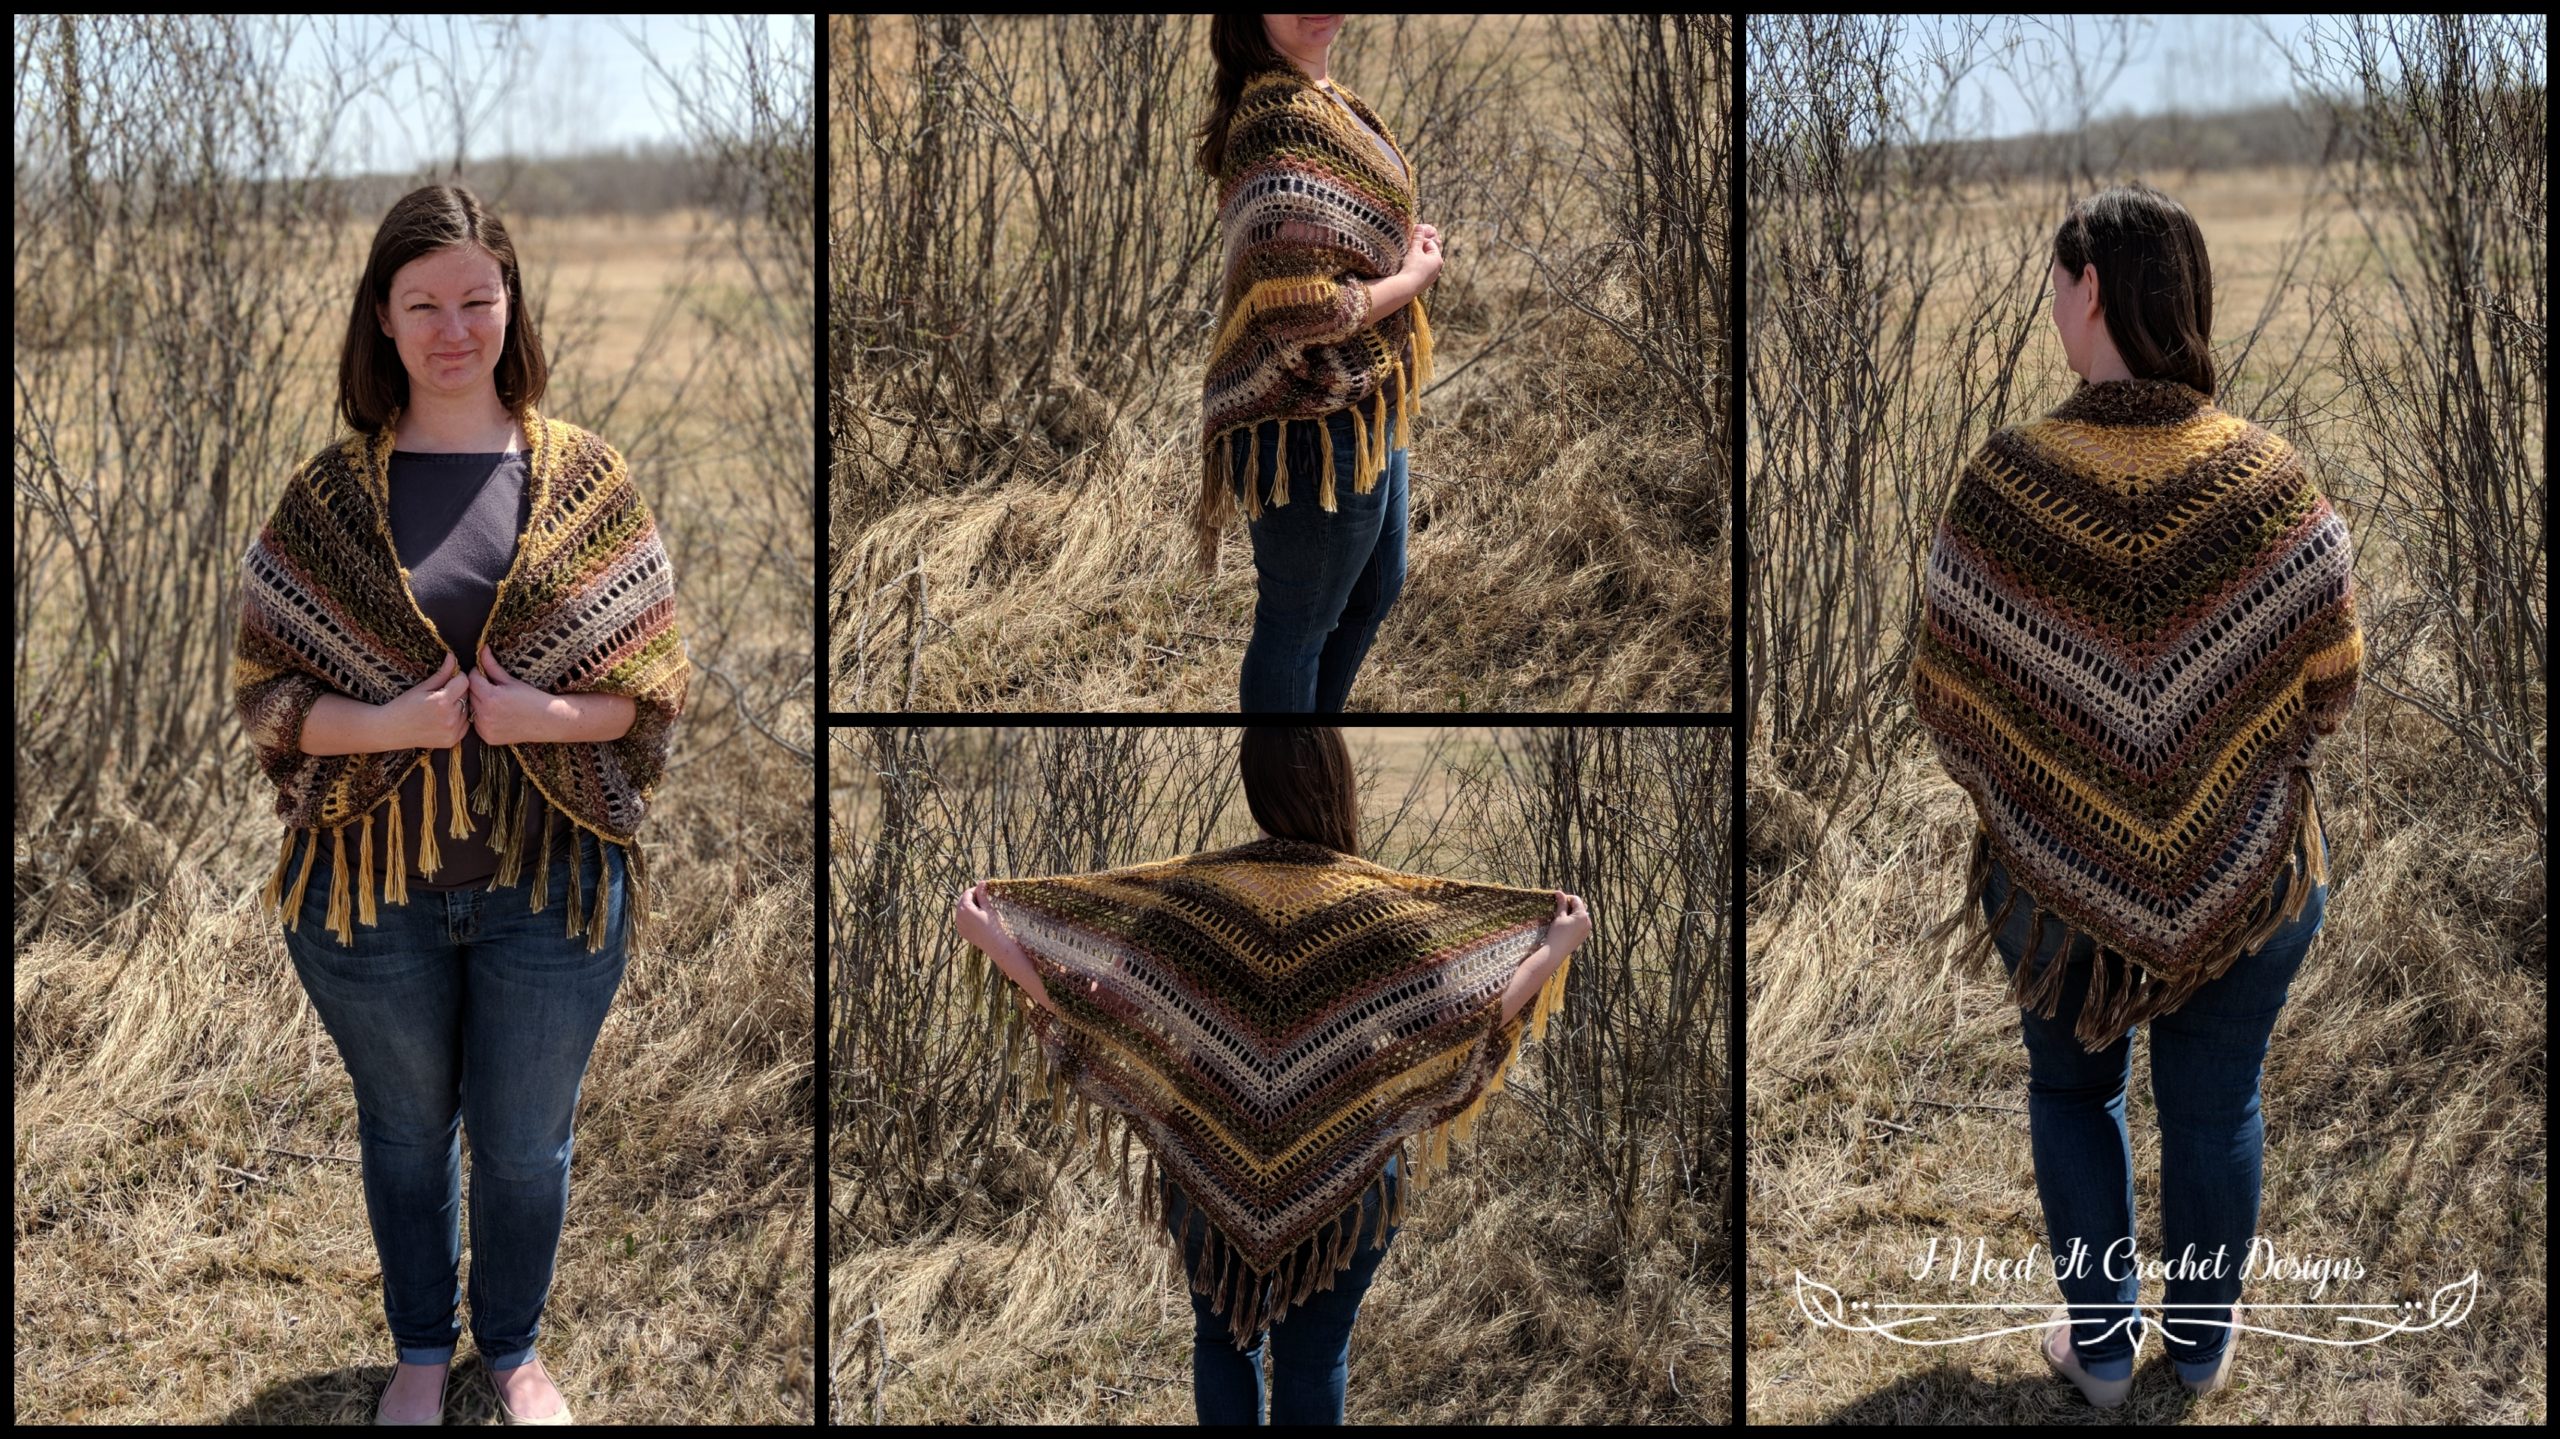
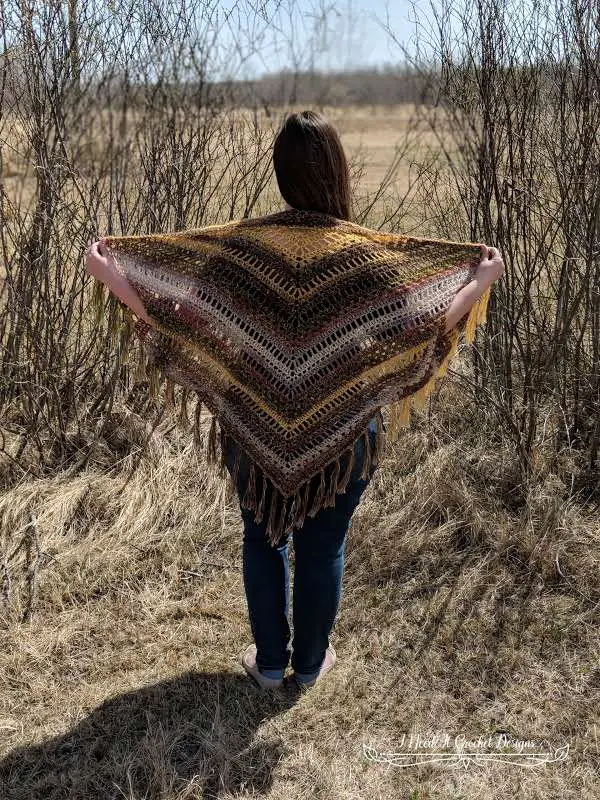
I love shrugs! They add a bucket load of style and just a little bit of warmth for chilly summer nights. Many shrugs are made from a rectangle folded in half and sewn at the short ends. I took this same concept and used it with a triangle instead. The result was this fun and funky shrug that is sure to turn heads. Wear it with your favourite dress or a pair of jeans and a t-shirt. This style will suit any wardrobe. You can even make one in some bright, flashy colours and wear it to your next music festival! Endless possibilities!
Finished Sizes:
Instructions given to fit size X-Small/Small; changes for Medium/Large and X-Large/XX-Large are in ()
XS/S (M/L, XL/XXL)
To fit bust size: 31-35” (36-40”, 41-45’)
Finished Width: (From Sleeve to Sleeve)
40” (44”, 47”)
Finished Length: (Without fringe)
30” (34”, 38”)
Materials:
I used Lion Brand Shawl in a Ball. It is 58% Cotton, 39% Acrylic and 3% Other Fiber
Any yarn of similar weight would work.
Approximately 700 (900, 1200) yds.
H/5mm Hook
I/5.5mm Hook
Stitch Markers
Yarn Needle
Scissors
Gauge:
Work the pattern and check gauge at two specified points:
Row 5: 7” W x 3 ½” H
Row 9: 13” W x 6 ½“ H
You will find reminders within the pattern to check you gauge.
Abbreviations:
Sk = Skip
St = Stitch
Ss = Slip Stich
Ch = Chain
Sc = Single Crochet
Hdc = Half Double Crochet
Dbtr = Double Treble Crochet
Hdc2tog = Half Double Crochet 2 Together
Dbtr2tog = Double Treble 2 Together
BLO = Back Loop Only
Notes:
Ch1 at the beginning of a row is never considered a stitch.
Ch3 at the beginning of a row is always considered a Dc.
Ch5 at the beginning of a row is always considered a Tr + ch1.
Be sure that you don’t chain too tightly.
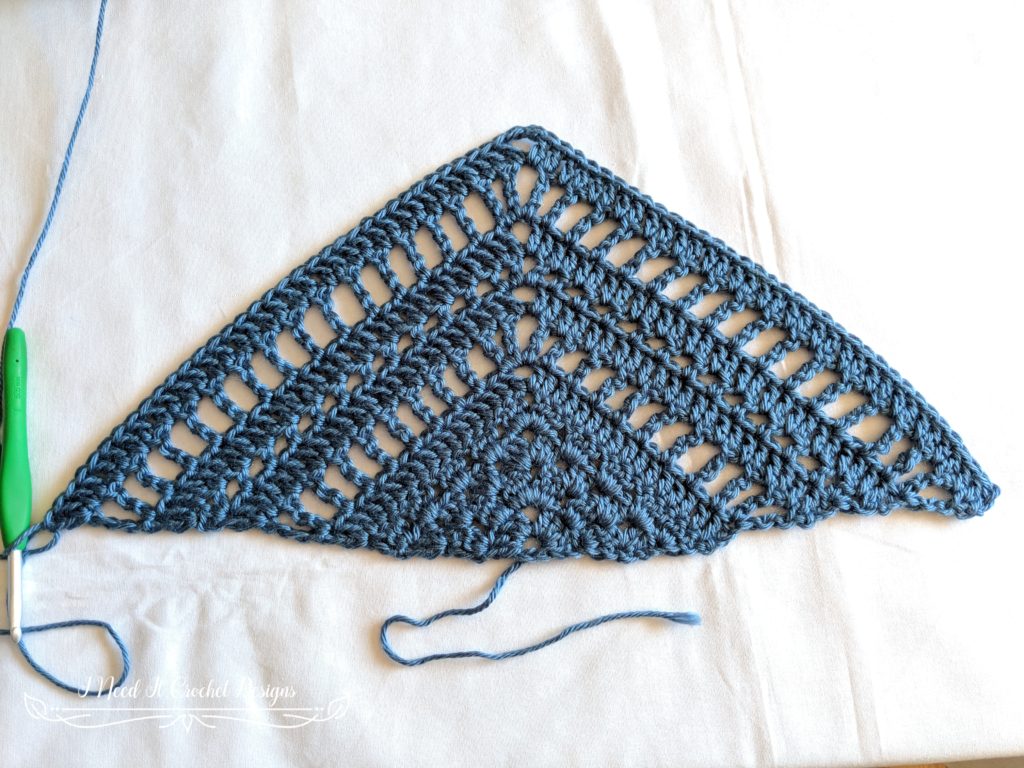
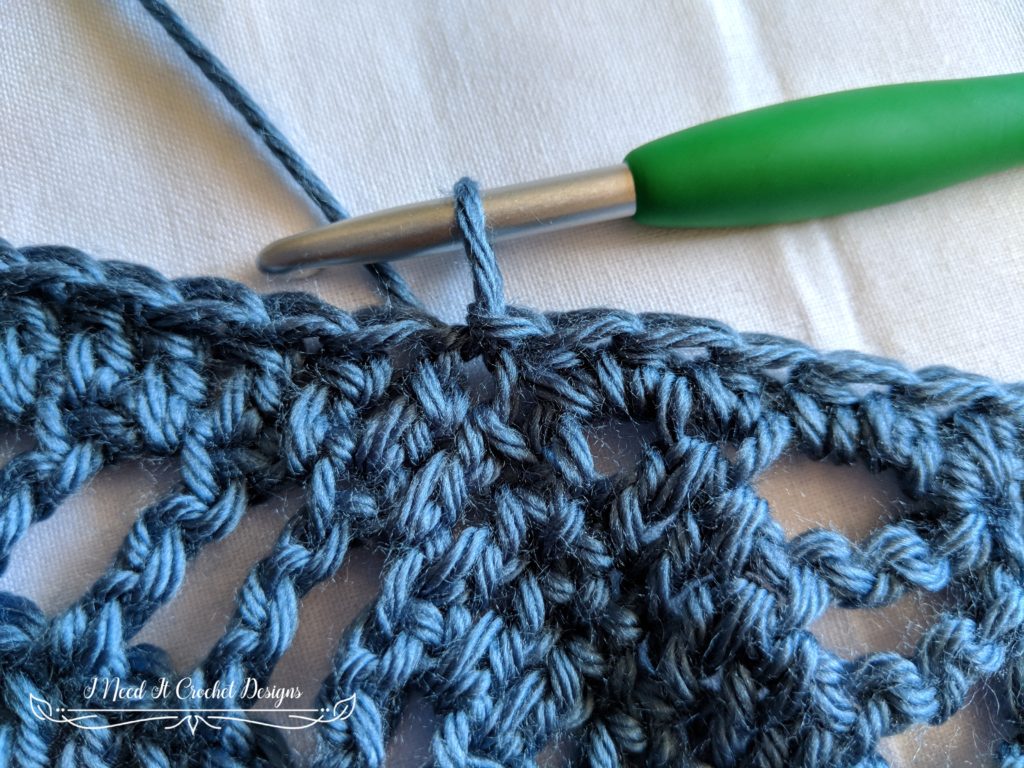
I have added many pictures to help you along the way.
The model above has a 39” bust and is wearing a M/L. I’ll also have pictures at the end of this post of an XL/XXL Blissful Boho Shrug made with Premier Yarns Alpaca Dance. Choose your size according to the finished measurements noted above and your preferences.
Instructions
With 5mm Hook
Ch5, sl st to 1st chain to form a ring.
1.Ch3, (3dc, ch2, 4dc) into ring. Turn.
- 8dc + 2ch
2. Ch3, 2dc into same st as ch3. Sk 1 st, 3dc in next st, sk 1 st, (3dc, ch2, 3dc) in ch2 sp, sk 1 st, 3dc in next st, sk 1 st, 3dc in top of ch3. Turn.
- 18dc + 2ch
3. Ch3, 2dc in same st as ch3. Sk 2dc, 3dc in sp between dc groups. *Sk 3dc, 3dc in sp between dc groups. ** Repeat from * to ** until you reach the ch2. (3dc, ch2, 3dc) in ch2 sp. Repeat from * to ** again until you reach the last sp. 3 dc in last sp, sk 2 st, 3dc in top of ch3.
- 24dc + 2ch
4. Ch3, 2dc in same st as ch3. Sk 2dc, 3dc in sp between dc groups. *Sk 3dc, 3dc in sp between dc groups. ** Repeat from * to ** until you reach the ch2. (3dc, ch2, 3dc) in ch2 sp. Repeat from * to ** again until you reach the last sp. 3dc in last sp, sk 2 st, 3dc in top of ch3. Turn.
- 30 dc + 2ch
5. Ch3, dc in same st as ch3. Dc in each st until you reach the ch2. (Dc, ch2, dc) in ch2 sp. Dc in each st until you reach the last st. 2dc in top of ch3. Turn. Check Gauge.
- 34dc + 2ch
Switch to 5.5mm Hook
6. Ch5, tr in same st as ch5. *Ch1, sk 1 st, tr in next st. ** Repeat from * to ** until you reach the ch2. Ch1, (tr, ch2, tr) in ch2 sp. Ch1, tr in next st. Repeat from * to ** again until you reach the last st. Ch1, (Tr, ch1, tr) in top of ch3. Turn.
- 22tr + 22ch
7. Ch3, dc in same st as ch3. Dc in each st and ch1 sp until you reach the ch2. (dc, ch2, dc) in ch2 sp. Dc in each st and ch1 sp until you reach the ch5. Dc in ch5 sp, 2dc in 4th ch of ch5. Turn.
- 46dc + 2ch
8. Ch1, (hdc, ch1, hdc) in same st as ch1. *Ch1, sk 1 st, hdc in next st. ** Repeat from * to ** until your reach the ch2. Ch1, (hdc, ch2, hdc) in ch2 sp. Ch1, hdc in next st. Repeat from * to ** again until you reach the last st. Ch1, (hdc, ch1, hdc) in top of ch3. Turn.
- 28hdc, 28 ch
9. Ch3, dc in same st as ch3. Dc in each st and ch1 sp until you reach the ch2. (dc, ch2, dc) in ch2 sp. Dc in each st and ch1 sp until you reach the last st. 2dc in last hdc. Turn. Check Gauge.
- 58dc + 2ch
10. Ch5, tr in same st as ch5. *Ch1, sk 1 st, tr in next st. ** Repeat from * to ** until you reach the ch2. Ch1, (tr, ch2, tr) in ch2 sp. Ch1, tr in next st. Repeat from * to ** again until you reach the last st. Ch1, (Tr, ch1, tr) in top of ch3. Turn.
- 34tr + 34ch
11. Ch3, dc in same st as ch3. Dc in each st and ch1 sp you reach the ch2. (dc, ch2, dc) in ch2 sp. Dc in each st and ch1 sp until you reach the ch5. Dc in ch5 sp, 2dc in 4th ch of ch5. Turn.
- 70dc + 2ch
12. Ch3, 2dc in same st as ch3. *Sk 2 st, 3dc in next st.** Repeat until you reach the ch2. Sk 1 st, (3dc, ch2, 3dc) in ch2 sp. Sk 1 st, 3dc in next st. Repeat from * to ** again until you reach the end. 3dc in top of ch3. Turn.
- 78dc + 2ch
13. Ch3, 2dc in same st as ch3. Sk 2dc, 3dc in sp between dc groups. *Sk 3dc, 3dc in sp between dc groups. ** Repeat from * to ** until you reach the ch2. (3dc, ch2, 3dc) in ch2 sp. Repeat from * to ** again until you reach the last sp. 3 dc in last sp, sk 2 st, 3dc in top of ch3. Turn.
- 84dc + 2ch
14. Ch3, 2dc in same st as ch3. Sk 2dc, 3dc in sp between dc groups. *Sk 3dc, 3dc in sp between dc groups. ** Repeat from * to ** until you reach the ch2. (3dc, ch2, 3dc) in ch2 sp. Repeat from * to ** again until you reach the last sp. 3 dc in last sp, sk 2 st, 3dc in top of ch3. Turn.
- 90dc + 2ch
15. Ch3, dc in same st as ch3. Dc in each st until you reach the ch2. (dc, ch2, dc) in ch2 sp. Dc in each st until you reach the last st. 2dc in top of ch3. Turn.
- 94dc + 2ch
From here you will repeat rows 6 – 15 until you have achieved the number of rows appropriate to your size:
For XS/S: Work 41 rows total, ending on a row 11 repeat. Fasten off.
- 250dc, + 2ch.
For M/L: Work 45 rows total, ending on a row 15 repeat. Fasten off.
- 274dc, + 2ch.
For XL/XXL: Work 51 rows total, ending on a row 11 repeat. Fasten off.
- 310dc, + 2ch.
Your last row is the right side of your work.
Now you will sew the sleeves.
Lay your triangle flat with the right side facing up.
From the end where you fastened off, count back 80 (90, 100) stitches and place a stitch marker.
Fold the corner of your triangle so that your last stitch meets your stitch marker. You will begin sewing here.
Working back toward your fold, whip stitch 25 (30, 35) stitches together. Repeat for the other sleeve.
At this point you may want to try on your shrug to see if the sleeves are to your liking. You may make them as tight or as loose as you want.
Then turn your shrug right side out.
From here you will add two rows to the top border, then add the trim.
Join your yarn in the 1st dc under the right arm seam. (The sleeve that would be on your right arm when wearing the shrug.)
Join your yarn in the 1st dc under the right arm seam. (The sleeve that would be on your right arm when wearing the shrug.)
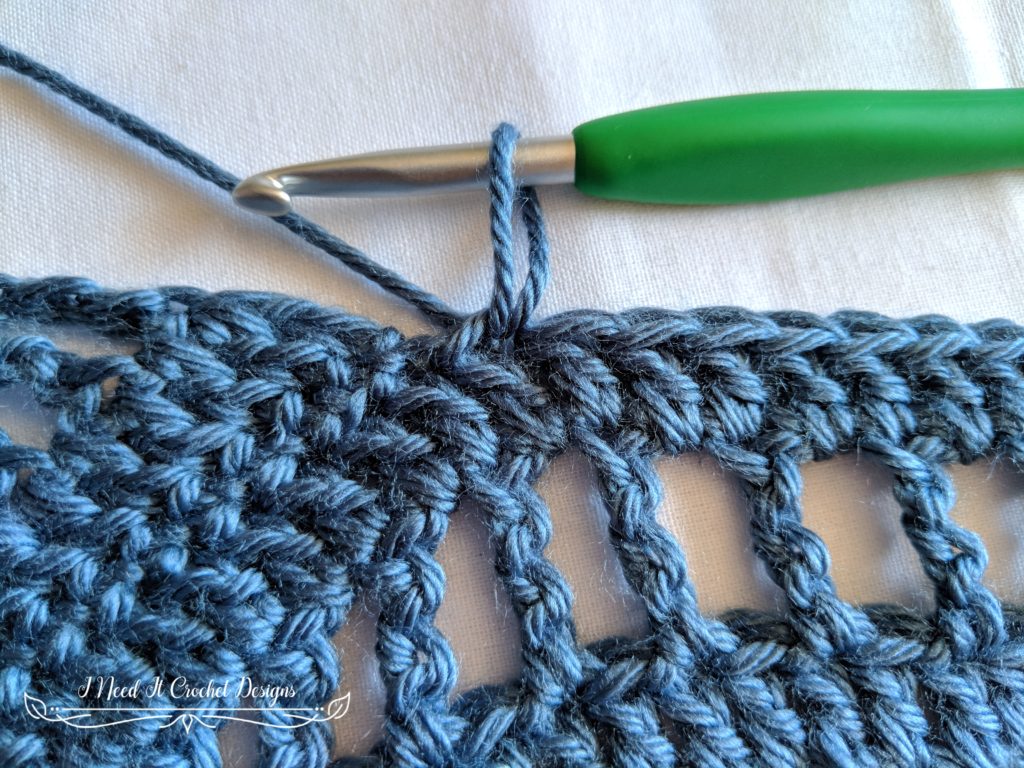
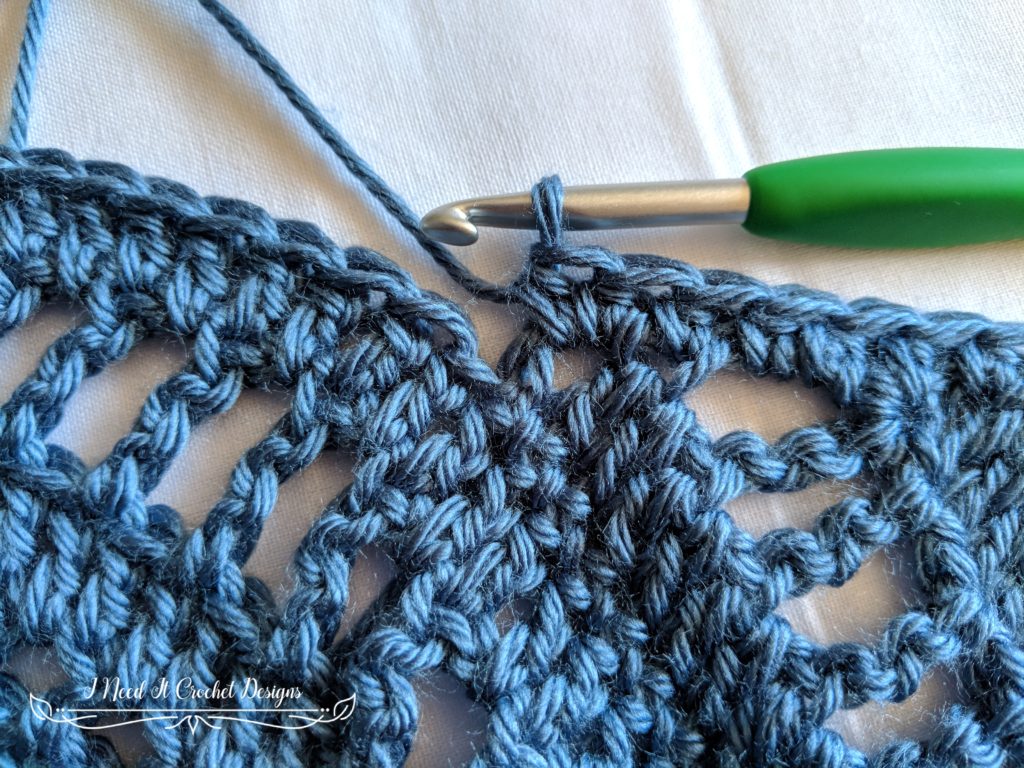
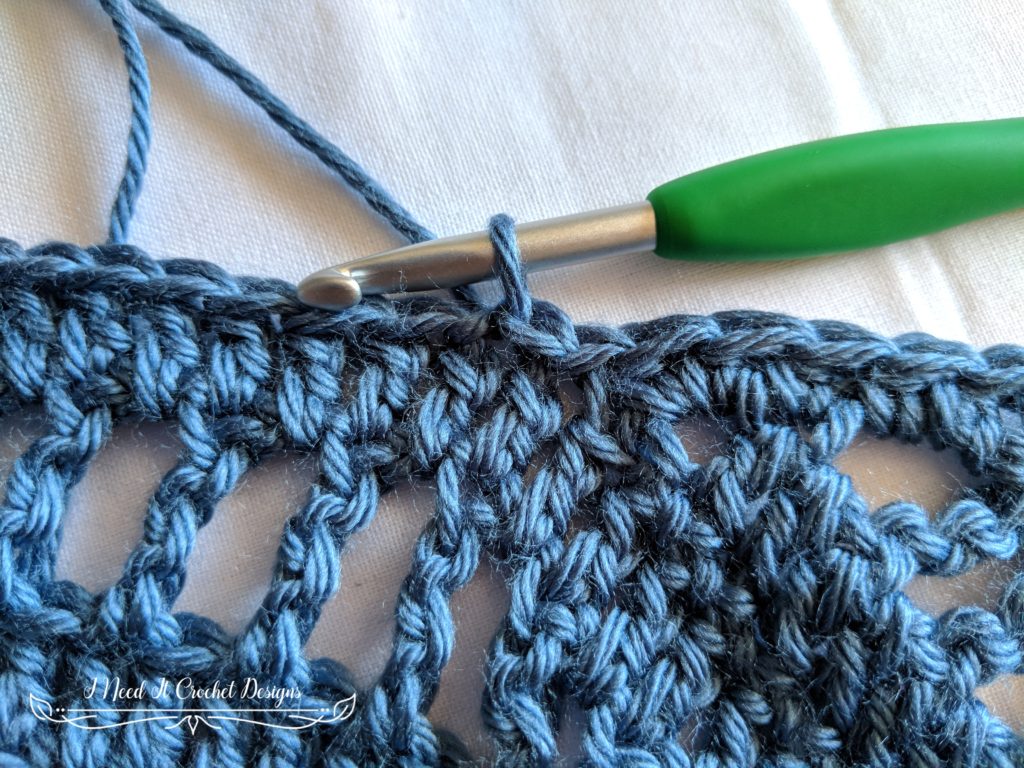
1.You will now place hdc stitches into the sides of each of the rows along the top of your shrug. Place your hdc in the following manner:
Each Tr row: 3hdc.
Each Dc row: 2hdc.
Each Hdc row: 1hdc.
Middle Ch Loop: 2hdc.
Continue in this manner until you reach the left arm seam. Sl st to the 1st dc under the left arm seam, then sl st to the next dc. Turn. Do not chain.
- 174 (190, 216) Hdc.
2. Hdc in each hdc across. Sk 1st dc, sl st in next dc. Turn.
- 174 (190, 216) Hdc.
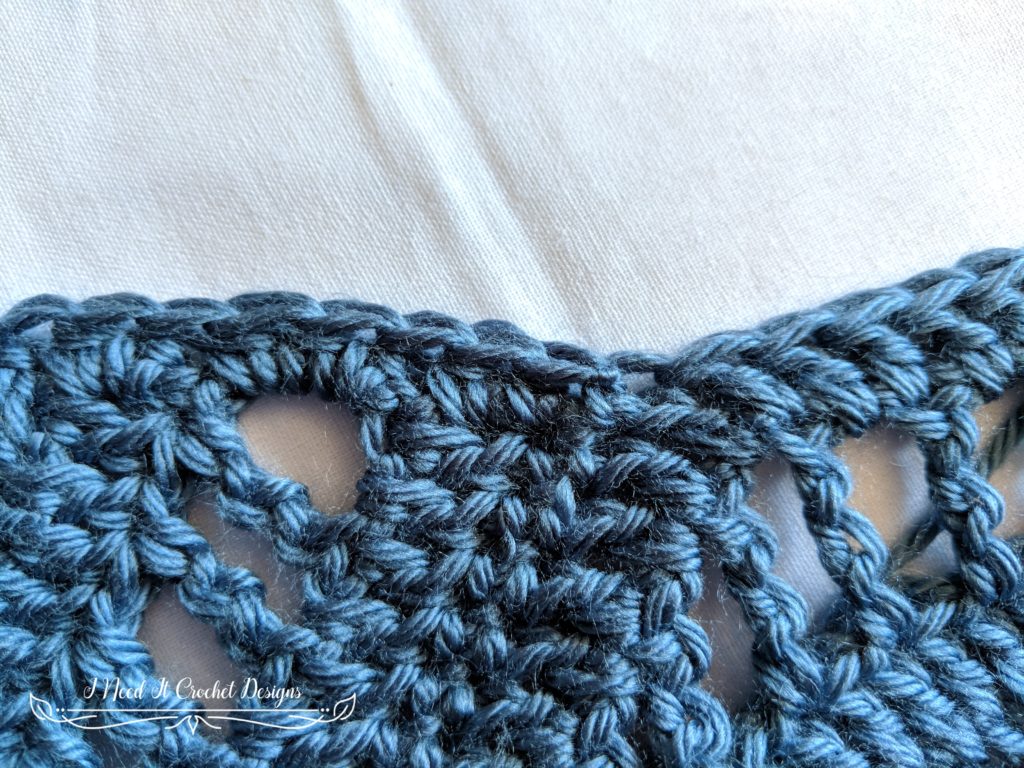
For this final row you will add picots around the entire border of your shrug. For those of you who have never done picots, I have written a little tutorial. You can find it here.
Know how to do a picot? Great! Now follow the instructions according to your size.
XS/S
Ch1, sc in next st (you are placing this sc in the first hdc, not the same st as your ch1), sc in next 2 st, picot.
*Sc in next 6 st, picot**. Repeat from * to ** around the shrug (working first into the hdcs, then into the dcs) until you reach the ch2 at the bottom.
(2sc, picot, 2sc) in the ch2 sp. Sc in next 4 st,
*picot, sc in next 6 st.** Repeat from * to ** around until you reach your starting ch1. Place your last sc in the same sp as your ch1, then sl st to your first sc.
You should have 6 sc between each picot around the whole shrug. Fasten off.
- 264sc, 44 picots
M/L
Ch1, sc in next st (you are placing this sc in the first hdc, not the same st as your ch1), picot.
*Sc in next 6 st, picot**. Repeat 14x (you will now have 16 picots).
Sc in next 8 st, picot.
Repeat From * to ** around the shrug (working into the hdcs, then into the dcs) until you reach the ch2 at the bottom.
(2sc, picot, 2sc) in the ch2 sp. Sc in next 4 st,
*picot, sc in next 6 st.** Repeat from * to ** around until you reach your starting ch1.
Place your last sc in the same sp as your ch1, then sl st to your first sc.
You should have 6 sc between each picot around the whole shrug except the top, where you will have 8sc. Fasten off.
- 288sc, 47 picots
XL/XXL
Ch1, sc in next st (you are placing this sc in the first hdc, not the same st as your ch1), sc in next 3 st, picot.
*Sc in next 6 st, picot**. Repeat 16x (you will now have 18 picots). Sc in next 4 st, picot.
Repeat From * to ** around the shrug (working into the hdcs, then into the dcs) until you reach the ch2 at the bottom.
(2sc, picot, 2sc) in the ch2 sp. Sc in next 4 st,
*picot, sc in next 6 st.** Repeat from * to ** around until you reach your starting ch1.
Place your last sc in the same sp as your ch1, then sl st to your first sc.
You should have 6 sc between each picot around the whole shrug except the top, where you will have 4sc. Fasten off.
- 316 sc, 53 picots
At this point you should weave in all of your ends.
Then you can add your fringe. I have written a little tutorial, which you can find here, to show you how I did mine.
You’re done! Go strut your stuff and let your hippie flag fly!
I really hope you enjoyed making your Blissful Boho Shrug. It is truly one of my favourite patterns. If you would like to know when I release new free crochet patterns, head on over to my Instagram and Facebook pages and give me a like and a follow.
Until next time….. Happy Hooking! 😉