

Picot Crochet Stitch Tutorial
The Picot Crochet Stitch Tutorial is copyrighted by I Need It Crochet. You may not copy, share, change, or sell the Picot Crochet Stitch Tutorial itself. Also, you may not claim this tutorial as your own. All pictures contained in this tutorial fall under the copyright and may not be used.
I just love the Picot crochet stitch! I think its super pretty in the right places, and adds a sweet little detail to the edging without taking over the piece.
I use the picot as a unique, but subtle border in a few of my patterns, including the Blissful Boho Shrug and Angles Tunic. So, I thought I would write a quick Picot Stitch Tutorial so you can learn how to do the picot stitch in crochet!
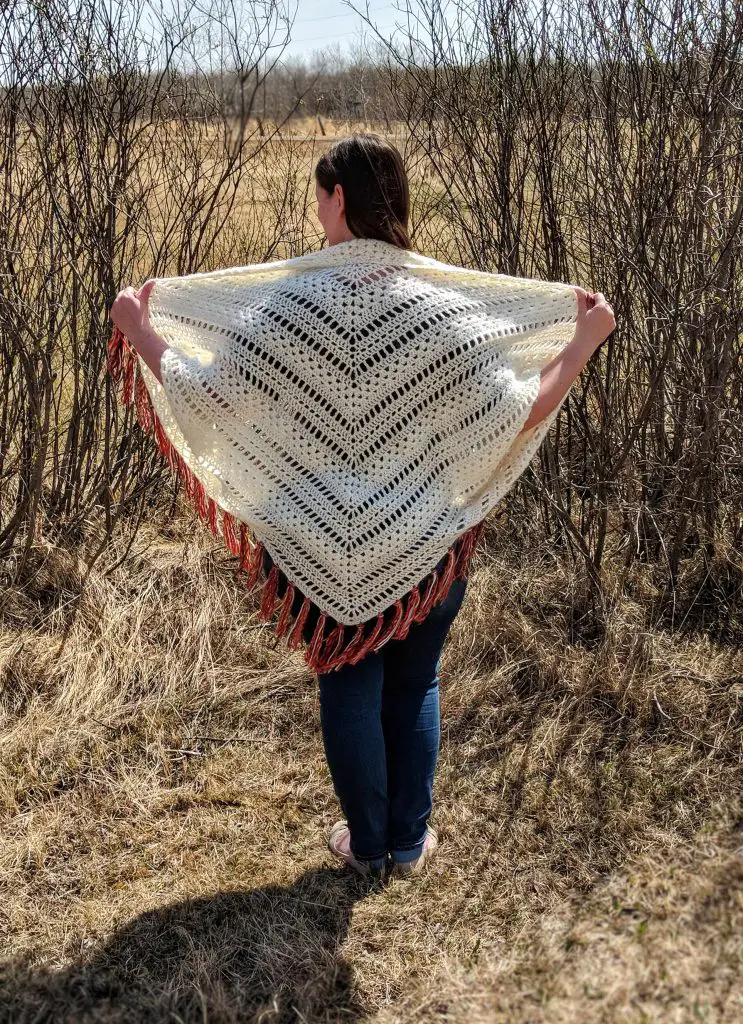
Blissful Boho Shrug
You can add the picot crochet stitch to a variety of different projects, including tops, ponchos, sweaters, blankets, washcloths… the possibilities are endless! This simple little stitch really adds a nice finishing touch to so many items.
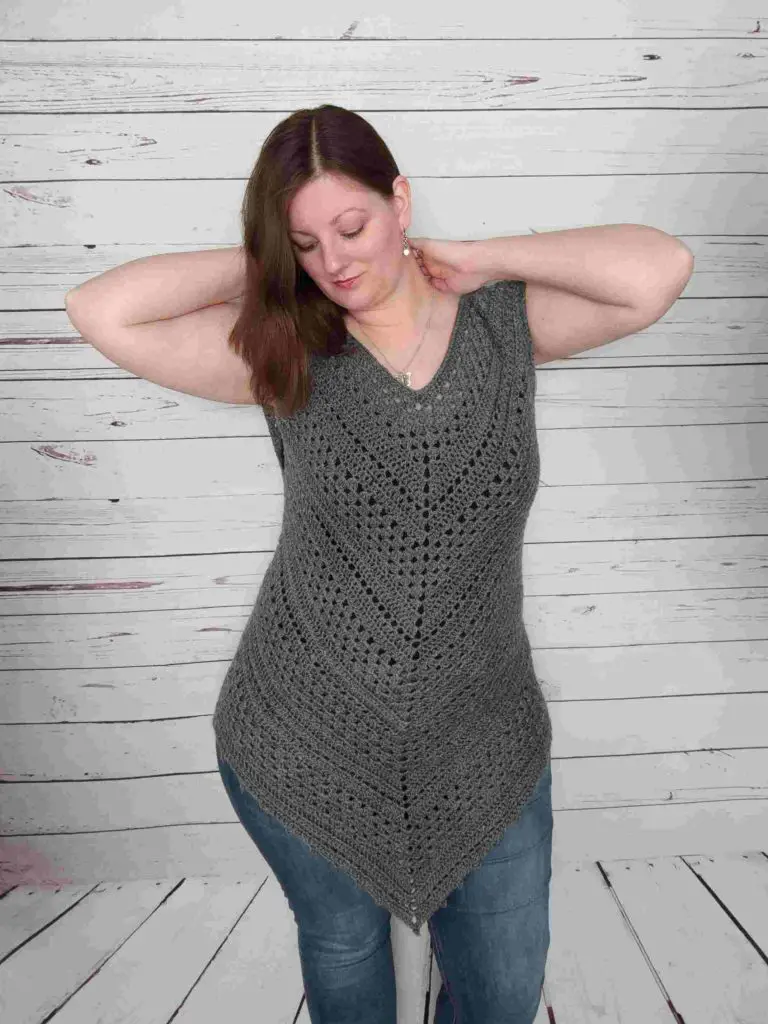
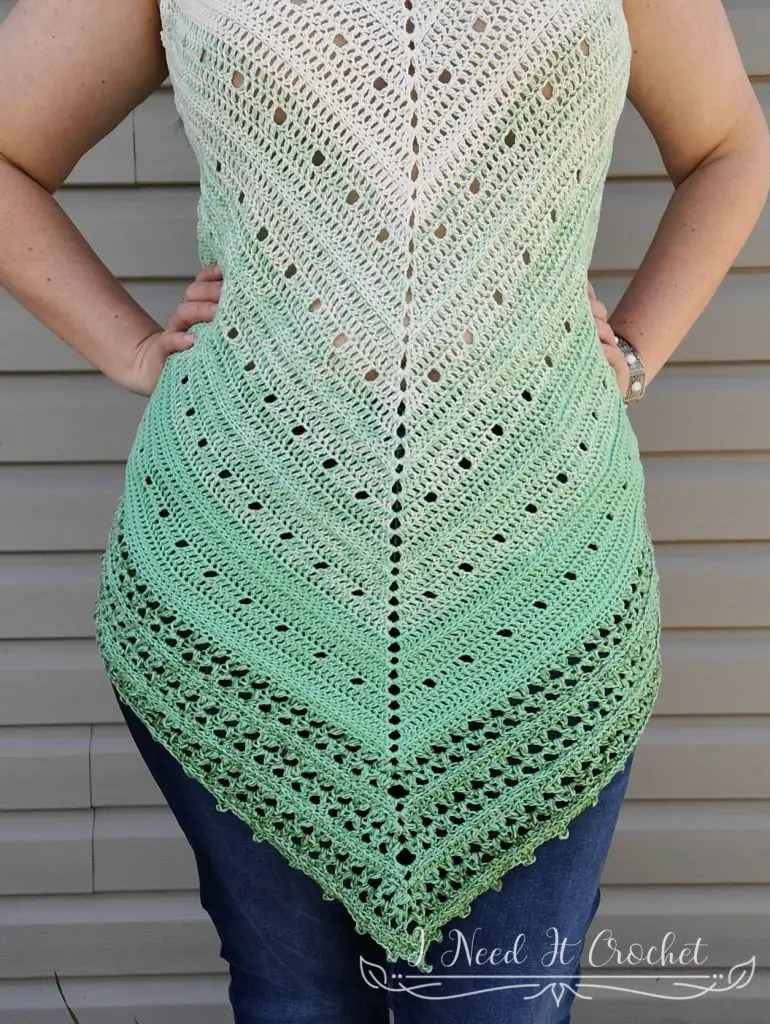
Angles Tunic Featuring Picot Crochet Stitch
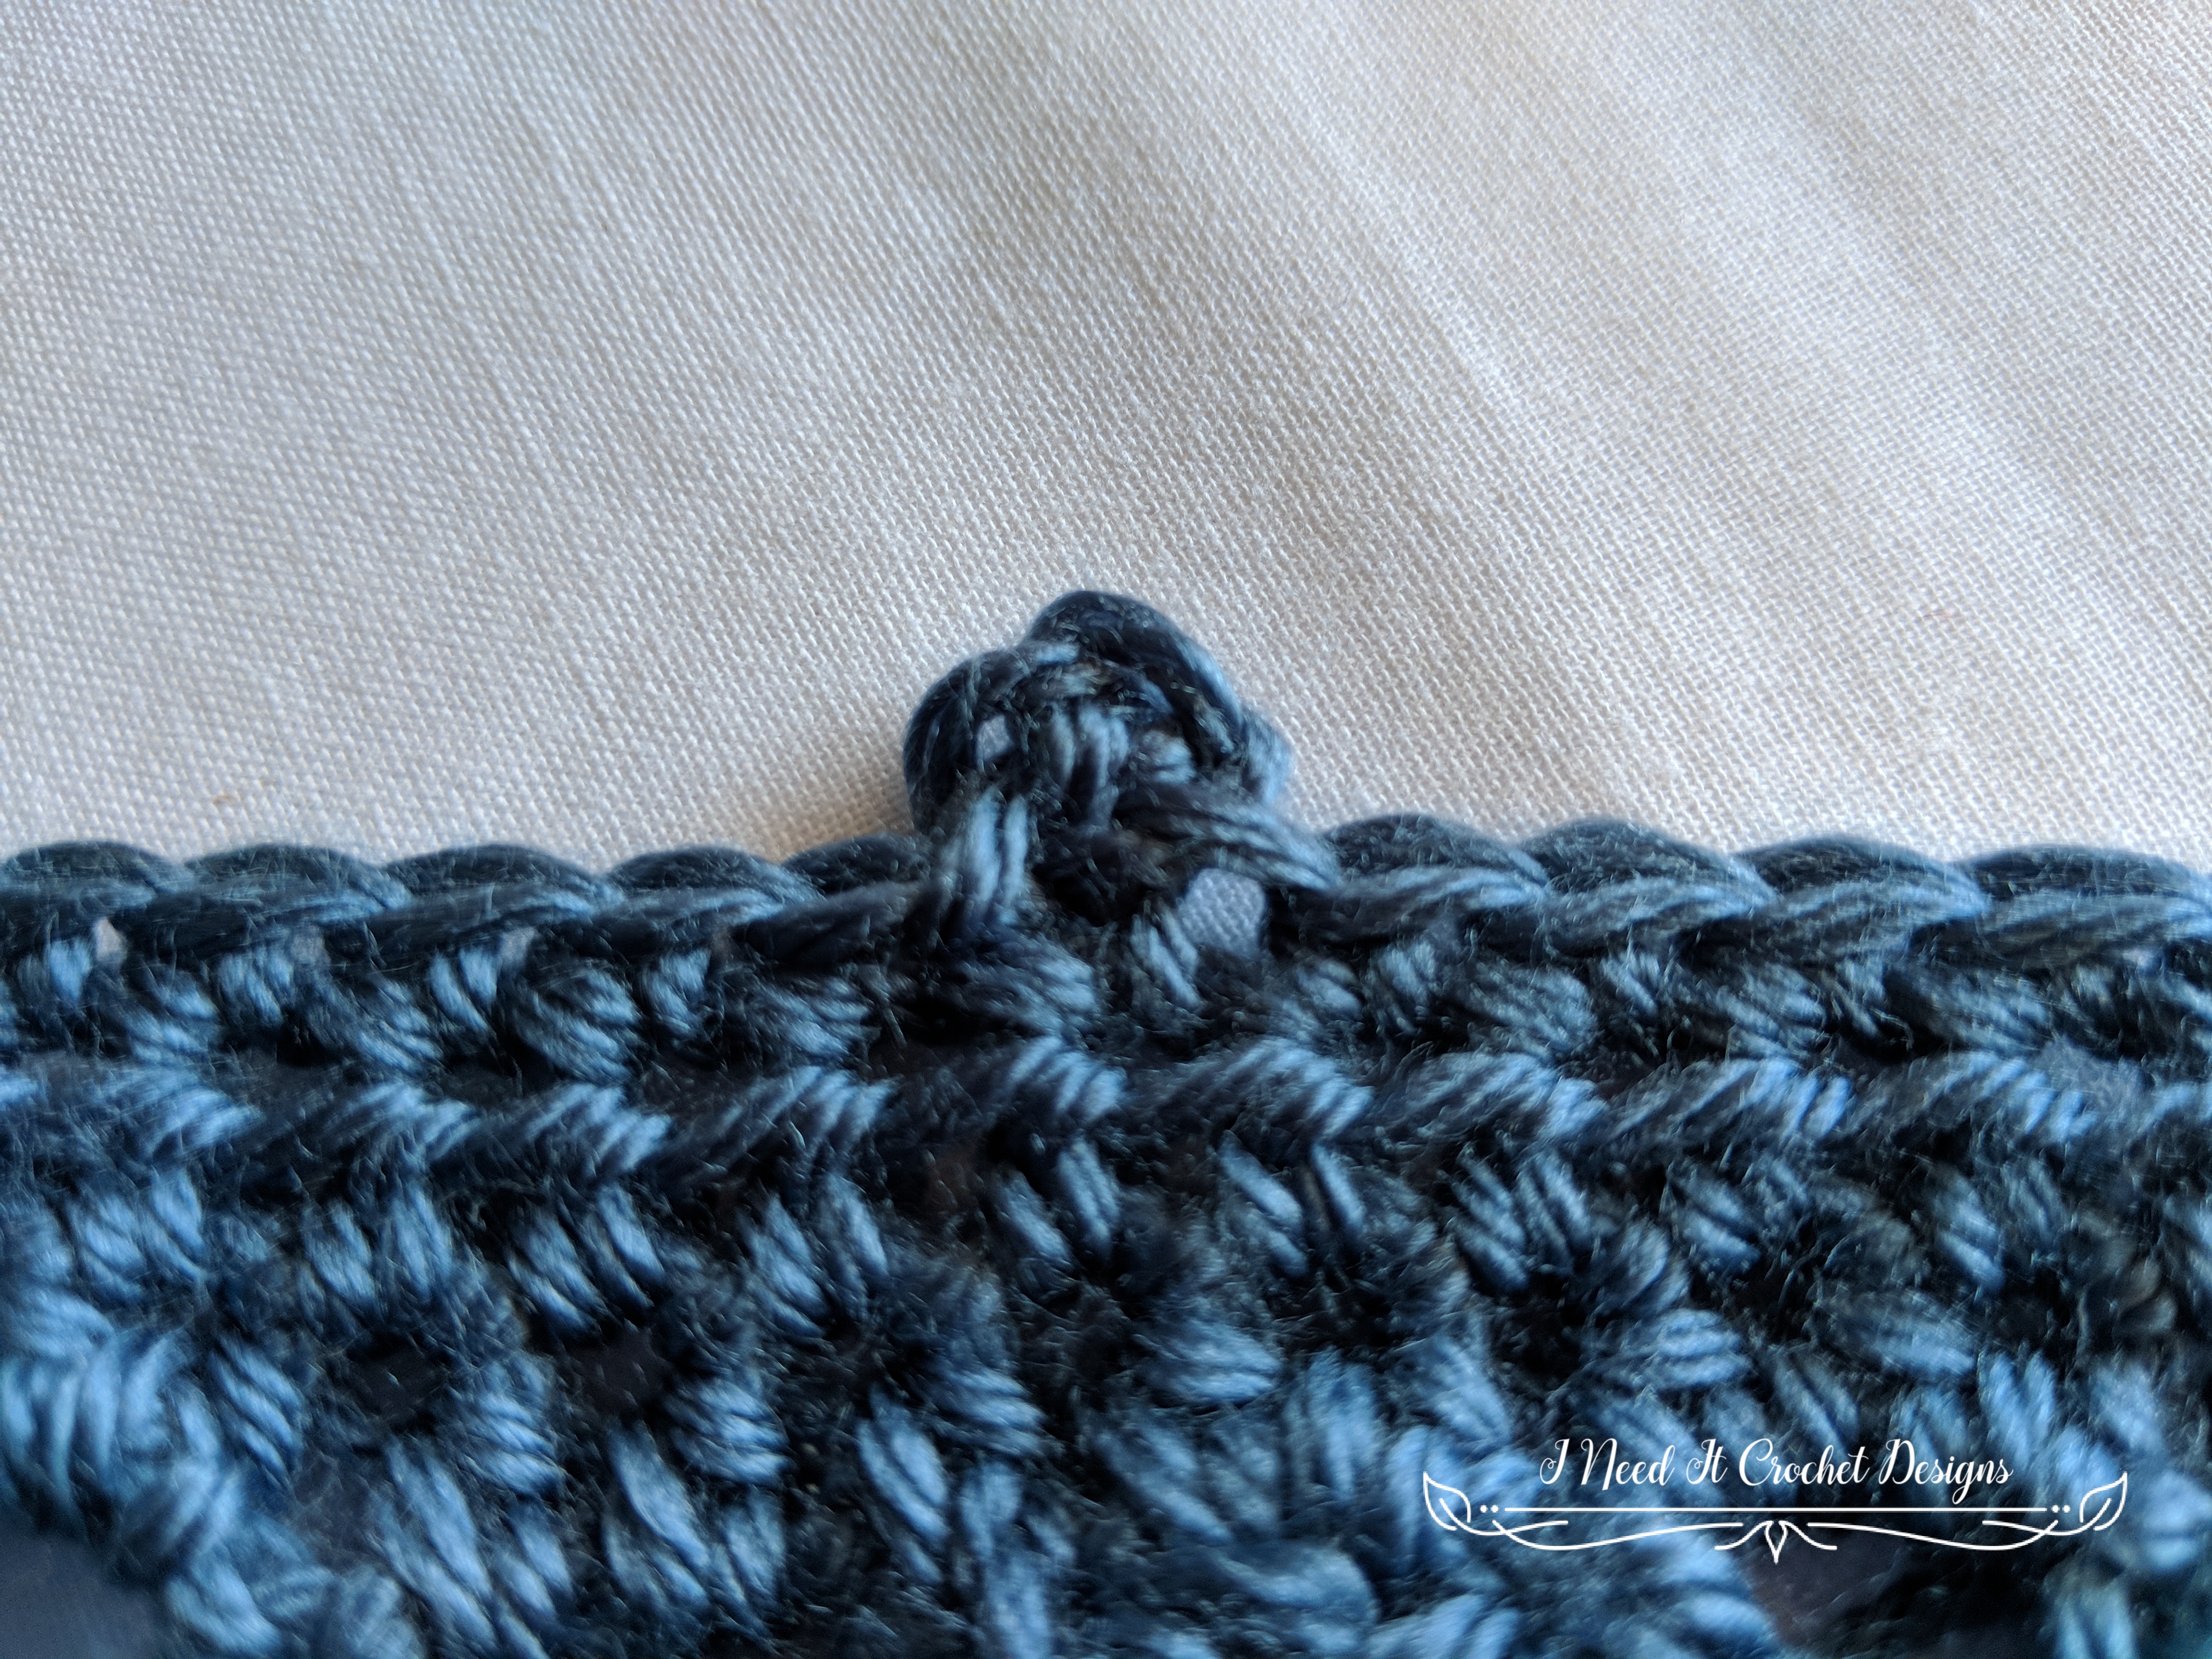
The Picot crochet stitch is a simple and easy stitch, consisting of single crochets, chains and slip stitches. It is very easy to learn and once you get the hang of it, you’ll be hooking picots like nobody’s business!
How To Crochet The Picot Stitch

First, you work the specified number of sc, then ch3…
Sl st into the side of the last sc you just made…
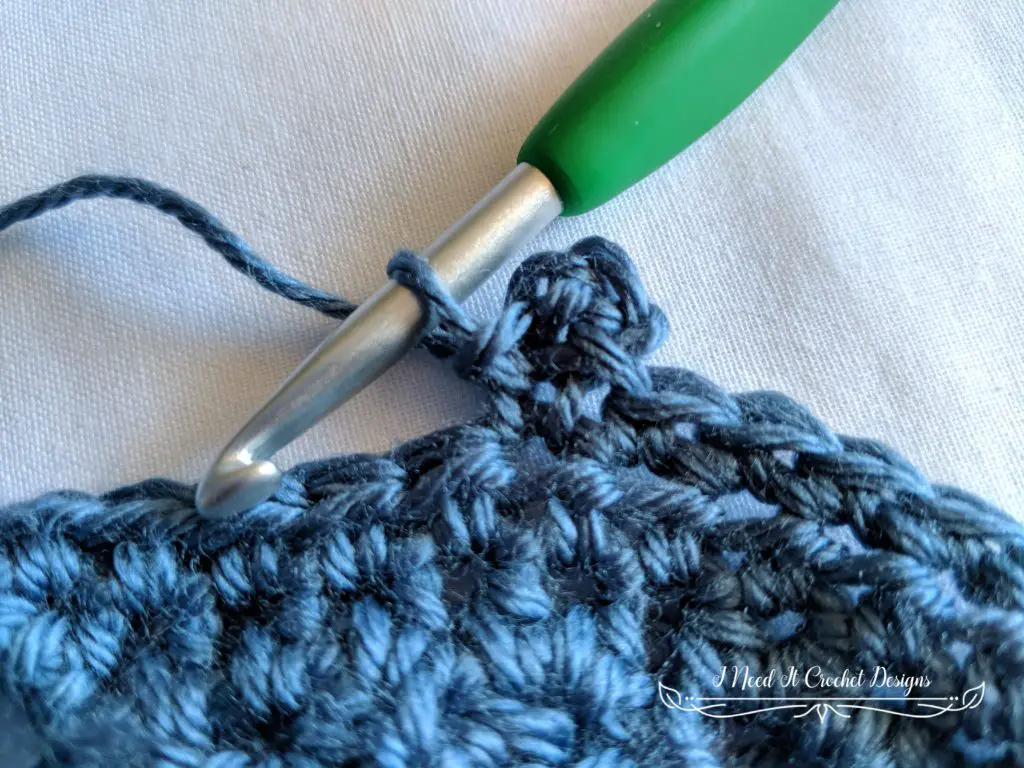
Then carry on with your next set of sc. Do not skip any stitches. The sl st goes into the sc that you just formed, not the row beneath. Also, be sure you don’t chain too tightly, or you’ll have tiny picots.
Time needed: 1 minute
How To Crochet The Picot Stitch
- Work the specified number of stitches (usually sc)
- Chain 3 (for larger picots you can ch 4 or more).
- Slip stitch to the side of the last stitch made (sc).
- Do not skip any stitches. Carry on with your next set of stitches.
Now you know how to do a crochet picot stitch! Easy, right?? Now go add this enchanting stitch to all your garments!
If you’d like more examples of patterns using the picot crochet stitch, check out the Summer Beauty Tunic, Spring Blooms Bandana Cowl, and Culmination Bandana Cowl.
I hope you found this Picot Stitch Crochet Tutorial helpful. If you would like to know when I post more free crochet patterns and tutorials, head on over to my Instagram and Facebook pages and give me a like and a follow.
And until next time….. Happy hooking! 😉