
The Cozy Blanket Shrug crochet pattern is copyrighted by I Need It Crochet. You may not copy, share, change, or sell the pattern itself. Also, you may not claim this pattern as your own. All pictures contained in this pattern fall under the copyright and may not be used.
Finished items made from this pattern belong to you and you may do what you wish with them. If you choose to sell them on Etsy I would very much appreciate it if you credited me as the pattern designer.


Or… Scroll down to find the free crochet pattern!
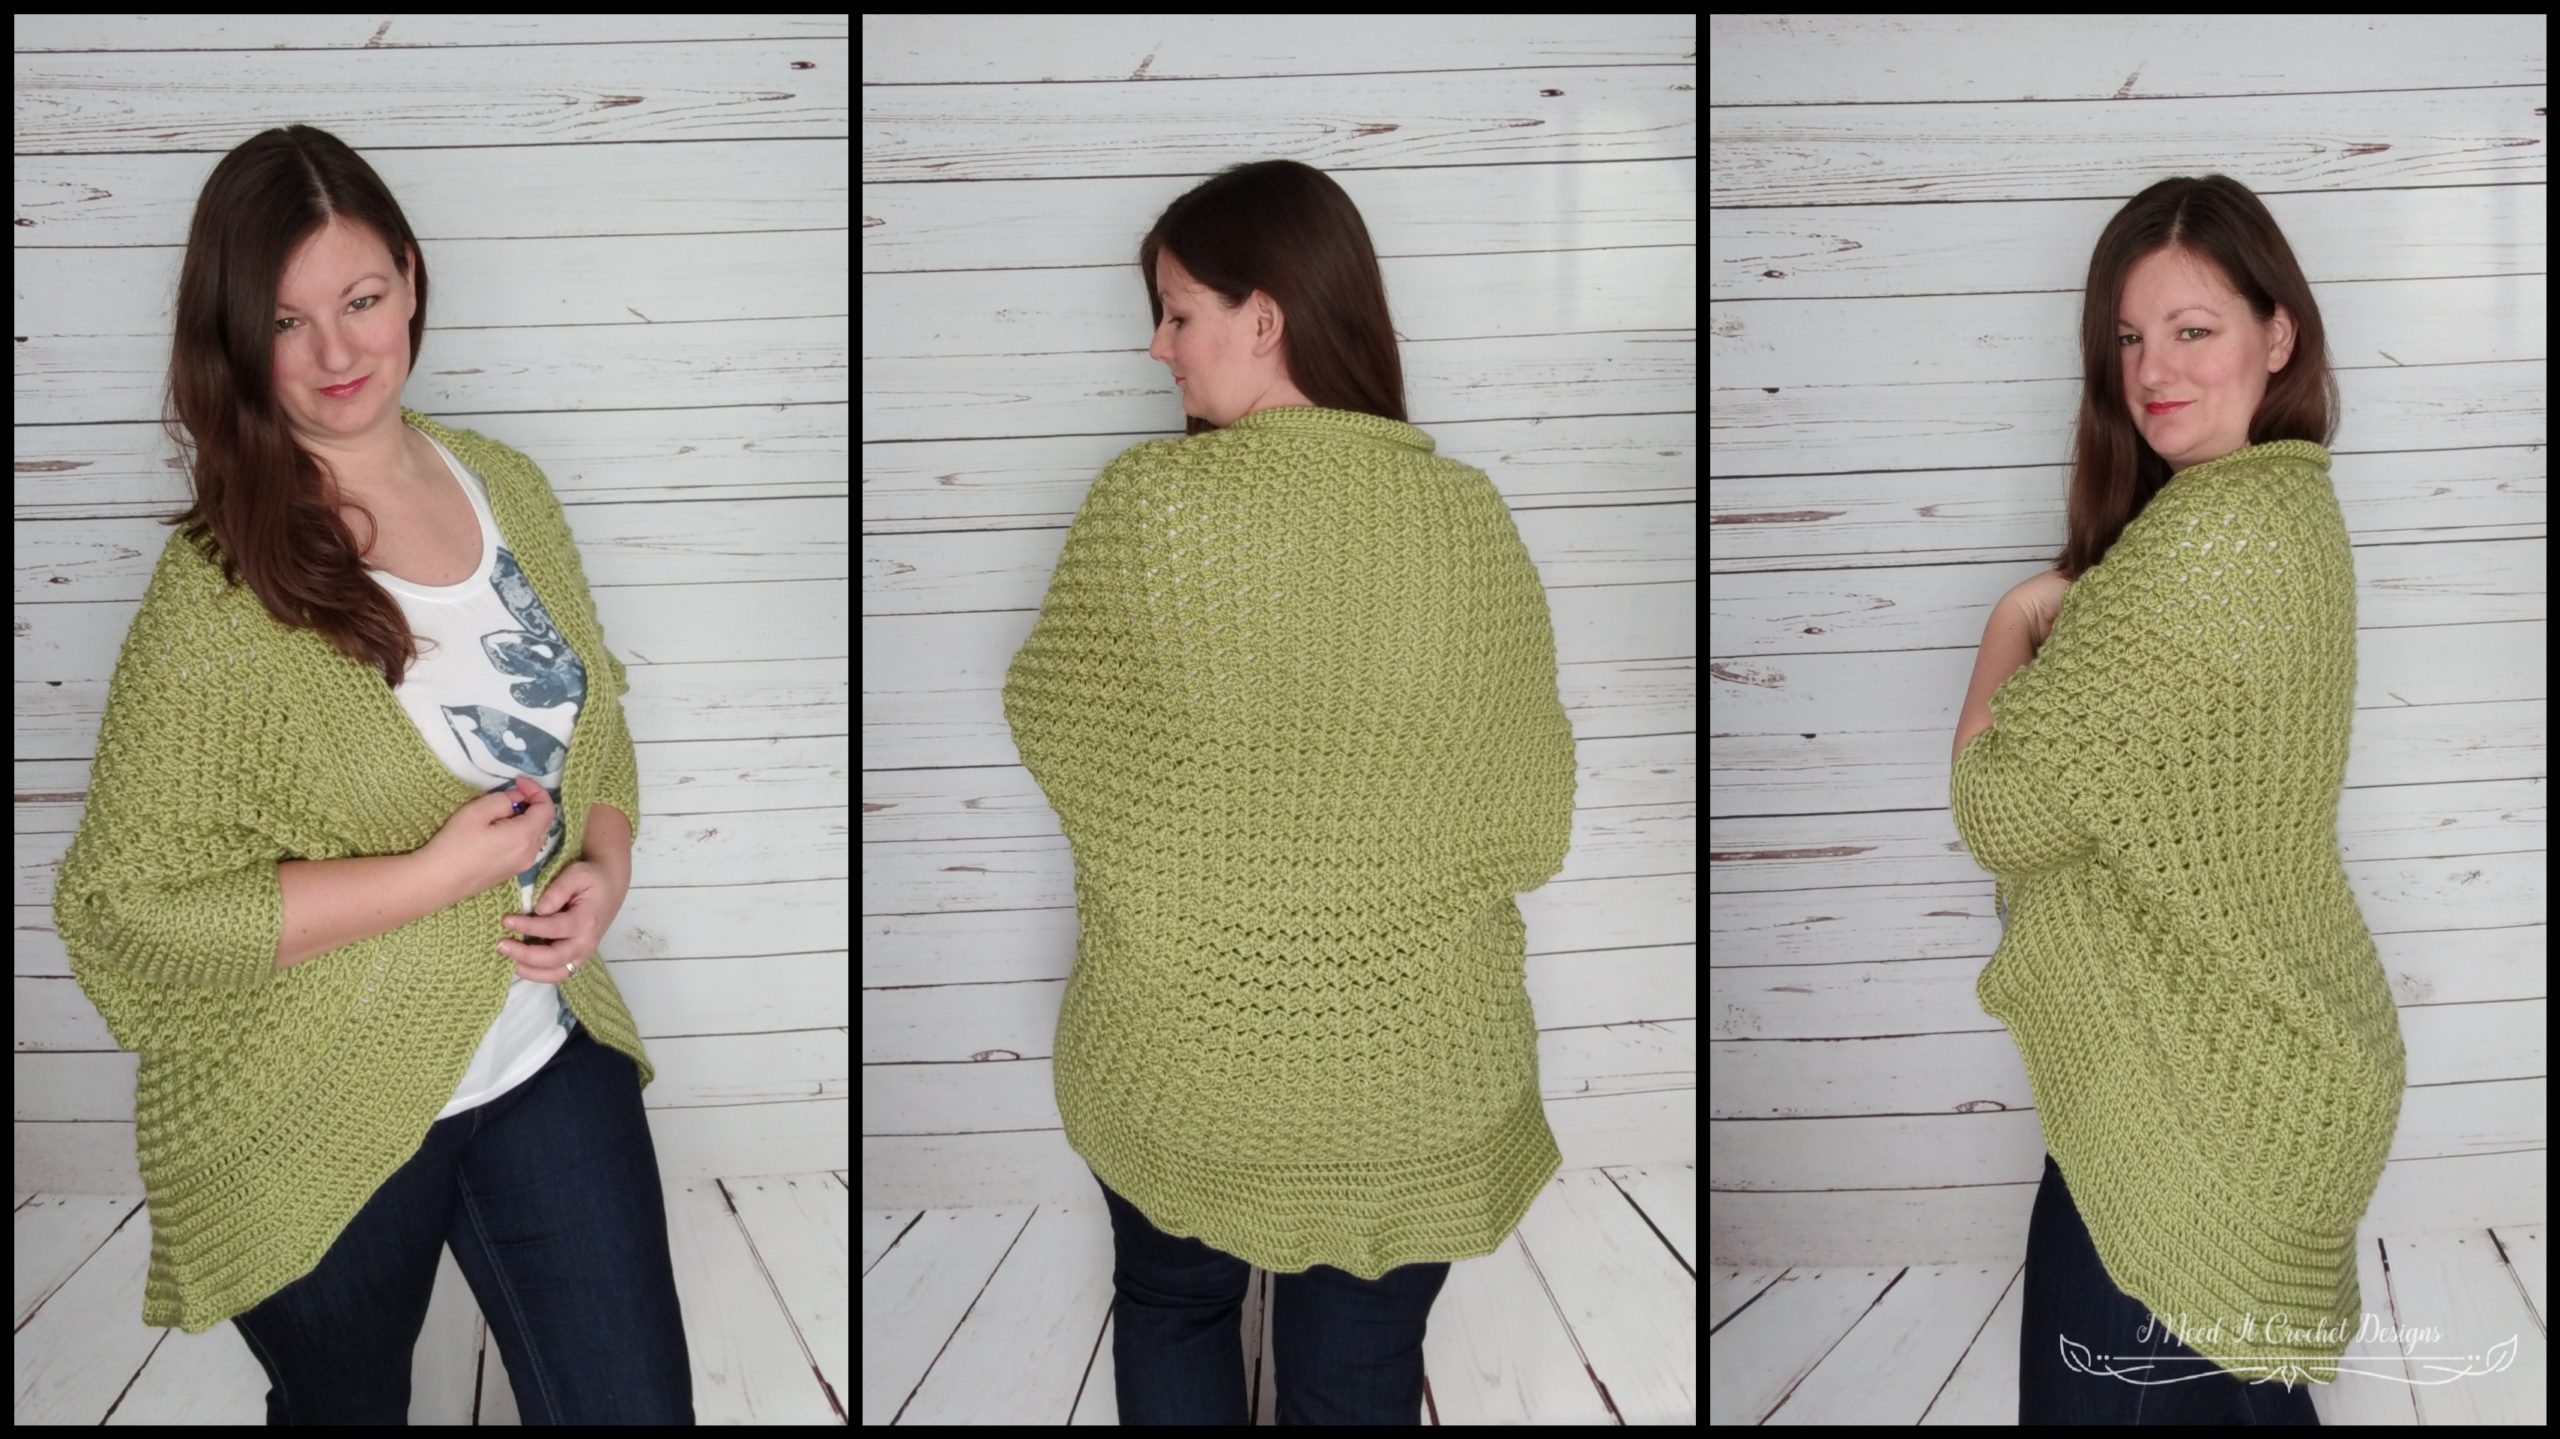
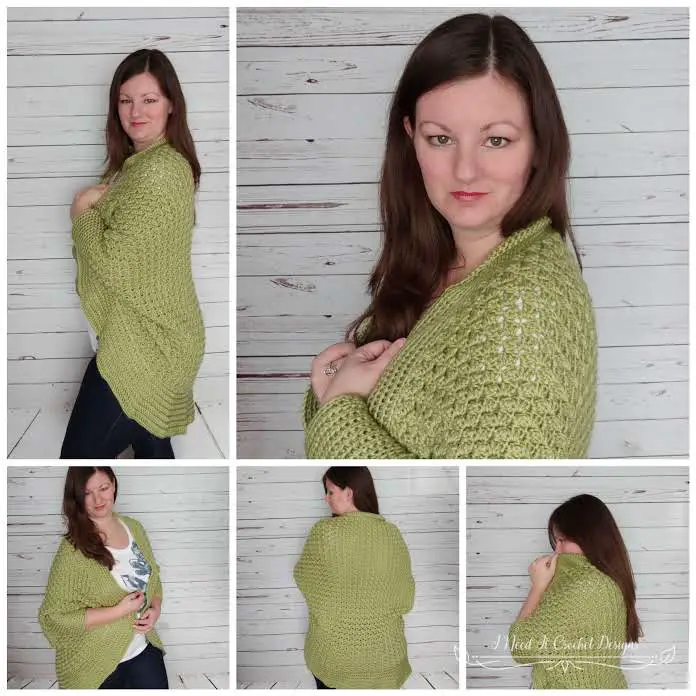
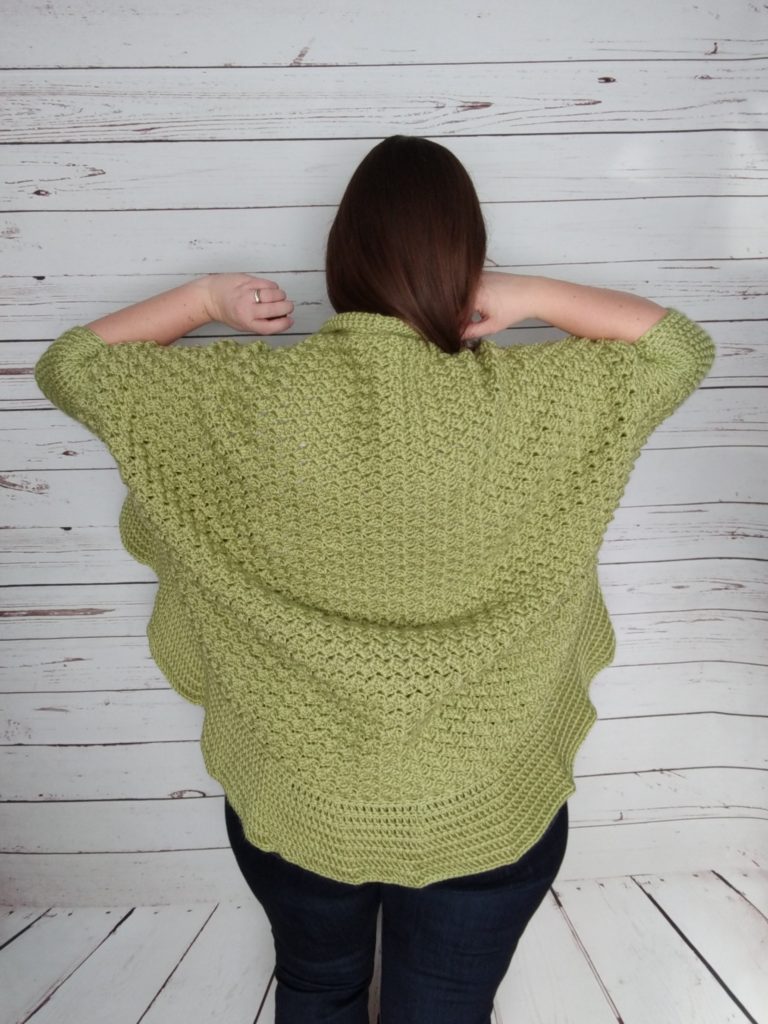
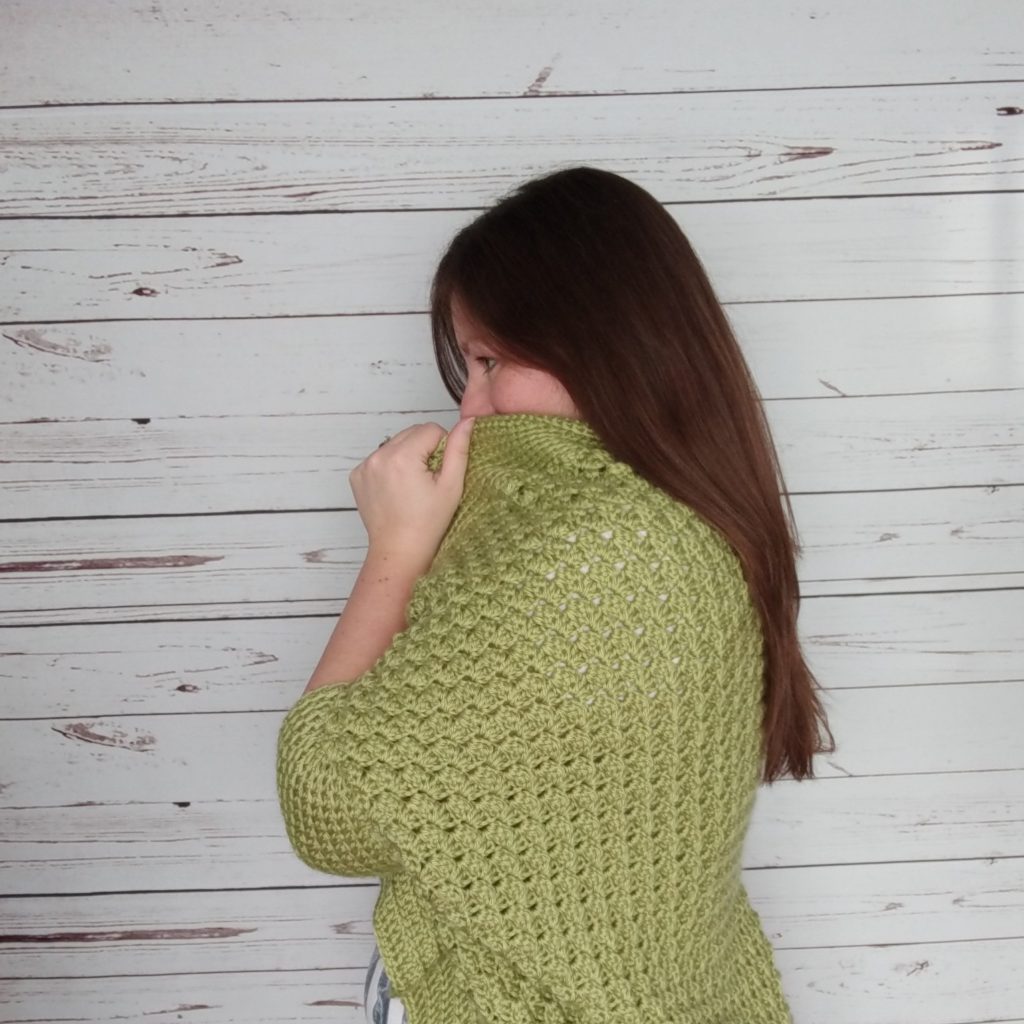
Did I mention that I love shrugs? I guess that’s why I simply had to write another shrug pattern. This one follows a typical rectangle shrug pattern. First making a large rectangle, then folding it in half and sewing the sleeves. But from there I had to give it my own little spin, adding a gracefully sloping collar and lengthening the sleeves. Resulting in a garment that will be warm, stylish and practical. I hope you enjoy making your Cozy Blanket Shrug as much as I enjoyed making mine.
Finished Sizes:
Instructions given to fit size X-Small/Small; changes for Medium/Large and X-Large/XX-Large are in ()
XS/S (M/L, XL/XXL)
To fit bust size: 31-35” (36-40”, 41-45’)
Finished Width: (Before the Sleeves)
34” (38”, 41”)
Finished Length: 36” (36”, 36”)
Gauge:
1.Ch 18. 2Dc 3rd ch from hook. (Ch2 at beginning of row counts as a stitch.) Sk 2 ch, *1Sc and 2Dc in next ch, Sk 2 ch.** Repeat from * to ** until there are 3 ch left. Sc in last ch. Turn. – 15 sts
2. Ch2, 2Dc in 1st Sc. Sk 2 Dc, *1Sc and 2Dc in next Sc, Sk 2 Dc.** Repeat from * to ** until there are 3 St left. Sc in turning Ch2 at end of row. Turn. – 15 sts
Repeat row 2 until you have 10 rows. Swatch should be 4 ¼ “ wide and 4” tall.
Materials:
I used Caron Simply Soft. It is 100% Acrylic.
Any yarn of similar weight would work.
Approximately 1350 (1500, 1650) yds.
J/6mm Hook
I/5.5mm Hook
Stitch Markers
Yarn Needle
Scissors
Abbreviations:
Sk = Skip
St = Stitch
Ss = Slip Stitch
Ch = Chain
Sc = Single Crochet
Hdc = Half Double Crochet
Dc= Double Crochet
BLO = Back Loop Only
Do you have a favourite brand of hook? My favourite crochet hooks are definitely Clover Amour! As soon as I started using them, I noticed a huge decrease in the strain in my hands, giving me a lot more time to crochet! And if you use this link to buy a set, I’ll get a small commission. 😉
Subscribe to get acces
Read more of this content when you subscribe today.
Instructions
Body of Shrug
With 6mm Hook
Begin with a long tail, which you will use to sew the arm seams. About 30” should be plenty.
Ch 108.
1. 2Dc in 3rd ch from hook. (Ch2 at beginning of row counts as a stitch.) Sk 2 ch, *1Sc and 2Dc in next ch, Sk 2 ch.** Repeat from * to ** until there are 3 ch left. Sc in last ch. Turn.
- 108 st
2. Ch2, 2Dc in 1st Sc. Sk 2 Dc, *1Sc and 2Dc in next Sc, Sk 2 Dc.** Repeat from * to ** until there are 3 St left. Sc in turning Ch2 at end of row. Turn.
- 108 st
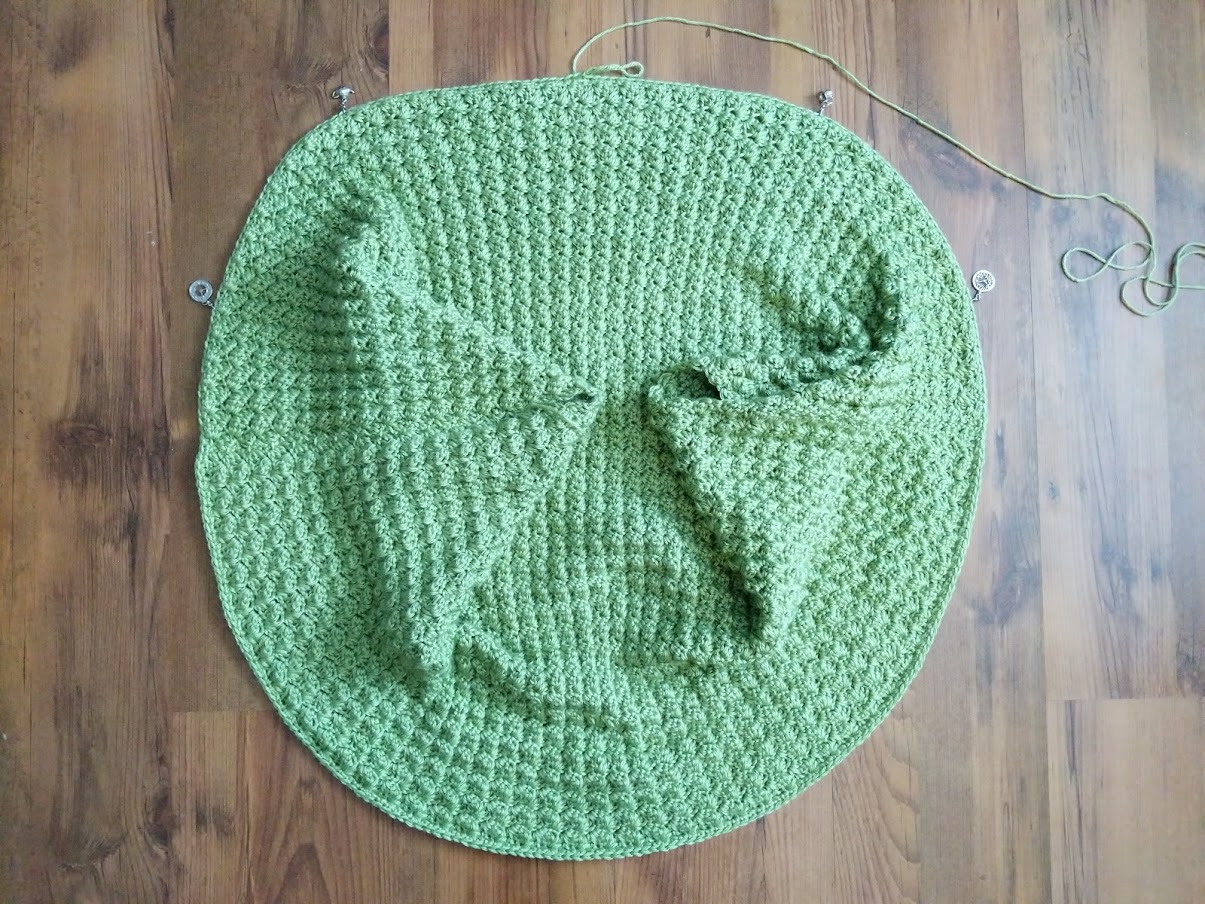
Repeat row 2 until you have a total of 82, (90, 98) rows. Fasten off, leaving another long tail to sew the arm seam. Your work should be 29 ½ “ Wide and 34”, (37”, 40”) Long.
Now you will create the arm holes.
Take your work and rotate it 90 degrees, so that you are now looking at it sideways.
Fold the edge closest to you up to meet the edge furthest from you. Now it is time to sew the arm seams.
Some find this a little confusing, so I made a little diagram to make it easier to visualize.

Sleeves
You may make your sleeves as loose or as fitted as you like. The sleeves we’ll be adding on in the next step are simple to construct, so no need to make sure you have a special amount of stitches.
For my Cozy Blanket Shrug, I counted 39 stitches down from the top corner and placed my stitch marker. Then I whip stitched the arm seams. This left me with a sleeve that was 9” (23cm) around, which fit my arms snugly and stretched a bit when I pulled them up.
Once you have sewn the seams for both arm holes you will be ready to add the sleeves.
First, I found the end of the seam I just finished sewing.
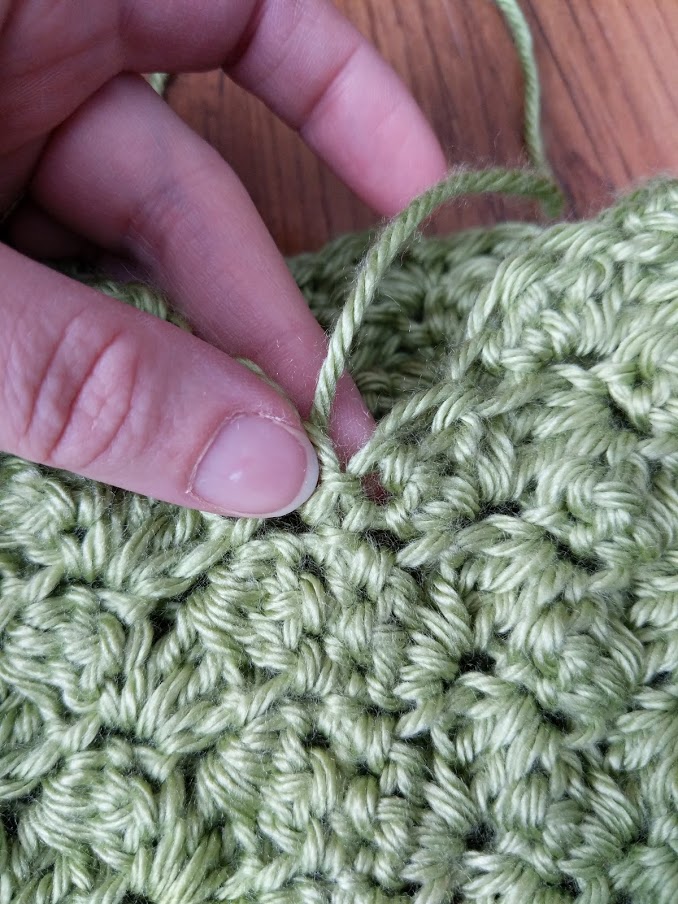
Then I joined my yarn into the stitch just to the right of the seam. Make sure you don’t join into the last stitches you just sewed together. You want the stitch just to the right of it.

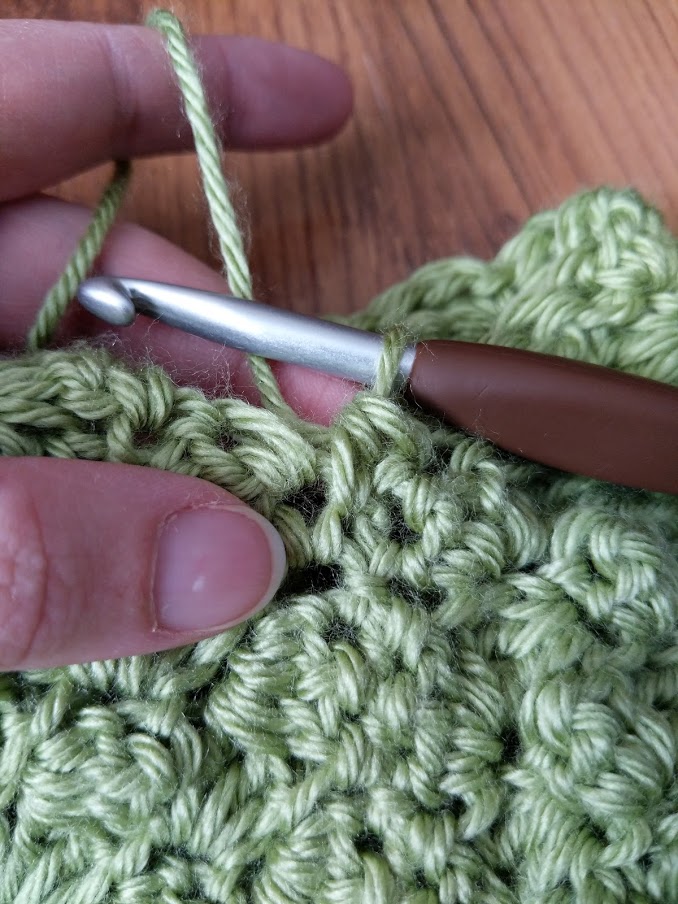
1. Place your first Hdc in the seam (I find it useful to place a stitch marker in the first Hdc), then Hdc in each St around. Do not join.
- 31 Hdc (Stitch count may be different depending how loose/tight you made your sleeves)
2. Hdc in first St in BLO (remember to move your stitch marker to your working row as you go) and each St around.
- 31 Hdc (Stitch count may be different depending how loose/tight you made your sleeves)

Repeat row 2 until you have 13 rows total. This is how many I added to my sleeves, but you can make yours as long or as short as you please.
14. Sc in first St and each St around. Ss into first Sc and fasten off.
- 31 Hdc (Stitch count may be different depending how loose/tight you made your sleeves)
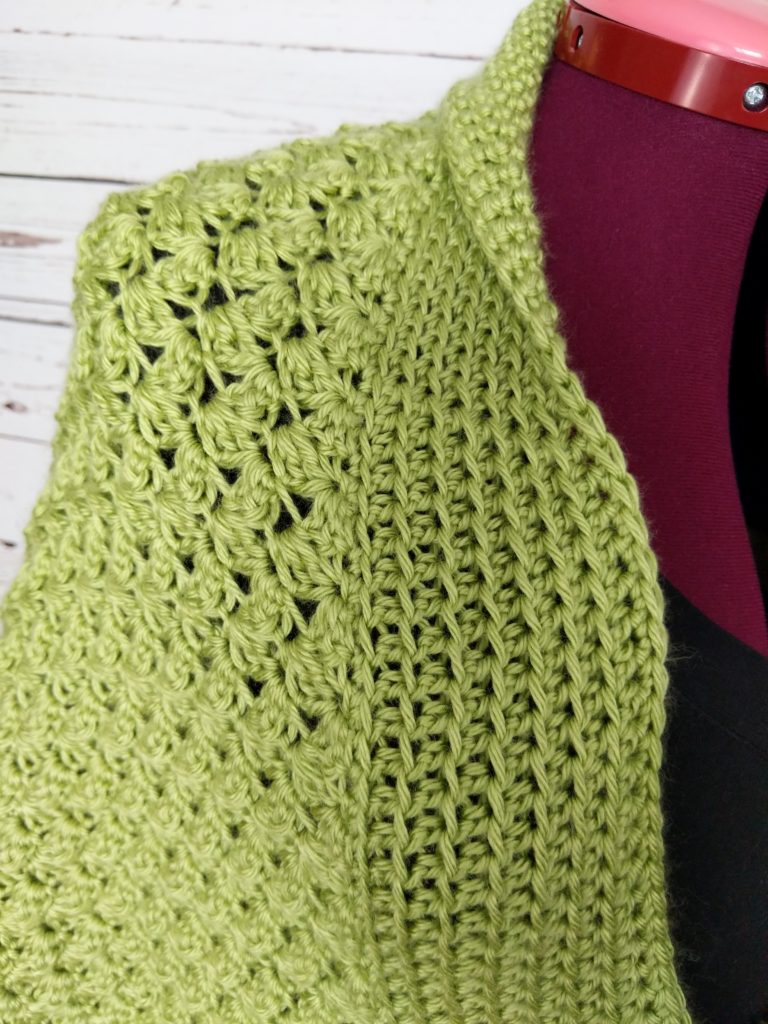
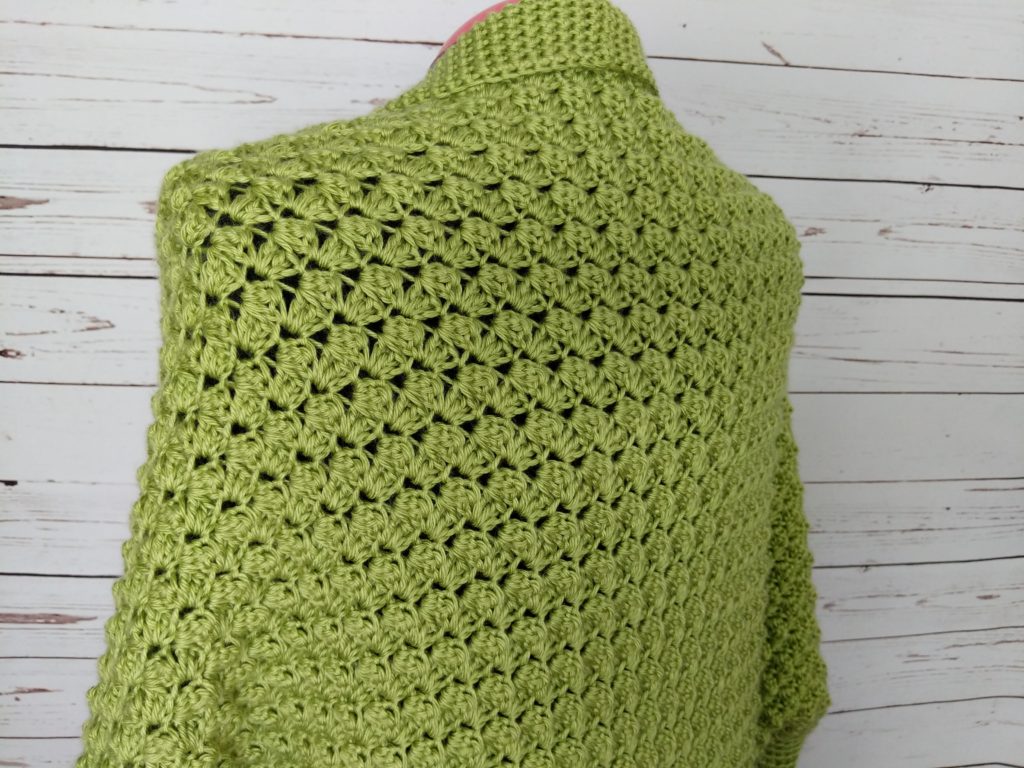
Edging
Once you have finished your sleeves, you will add rows, working in the round, around the body of your shrug. This adds more stability to the shoulders of the garment, helping to keep it from slipping off. It also adds a bit of length and a pretty collar.
Begin by finding the top center of your shrug. Lay the shrug out with the sleeves positioned to either side and the seams facing you. Find one arm seam and count 41, (45, 49) rows back toward the middle. Place a stitch marker at the top of row 41, (45, 49). This will be the top middle of your shrug, where you will join your yarn. Then you will work the body as follows.
1. Ch 1. Work 247, (272, 295) Sc around the body. Ss to first Sc.
Hint: This works out to 1.5 stitches per row, +1, (+2, +1).
What I did was work 1 stitch in the first row, 2 stitches in the next row around, making sure to throw the extra stitch(es) in at random places. It doesn’t matter where you add your extra stitches.
All that matters is that you end up with 247, (272, 295) stitches around in the end.
You can now remove your stitch marker. Do not turn.
- 247, (272, 295) Sc
2. Ch 1. Sc in first st and next 23, (26, 28) sts. Place stitch marker in top of 24, (27, 29)th Sc.
Hdc in next 24, (26, 28) sts. Place stitch marker in top of 24, (26, 28)th Hdc.
*2 Dc in next st, dc in next 9, (10, 11) sts. ** Repeat from * to ** 14 more times.
2 Dc in next st.
Hdc in next st and place a stitch marker in the top of that Hdc.
Hdc in next 23, (25, 27) sts.
Sc in next st and place a stitch marker in top of that sc. Sc in next 23, (25, 28) sts. Ss to first sc.
- 263, (288, 311) sts
Your shrug should now have 4 stitch markers placed in it, marking the beginnings and ends of your sc and hdc rows. You will want to move them up as you work each row. I found having these markers made it easier to remember where I am in a row, but if you find them cumbersome or annoying, feel free to remove them. I will provide you with stitch counts every step of the way.
For Size XS/S, switch to the 5.5mm hook.
For the other sizes, you can stick to your 6mm hook. If your finished edging looks too wavy (a little wave is fine) then frog it back to row 2 and try again with a 5.5mm hook. Some yarns will behave differently than others.
3. Ch 1. Sc in first st and next 23, (26, 28) sts.
Hdc in next 24, (26, 28) sts.
Dc in next st, *2 Dc in next st, Dc in next 10, (11, 12) sts. ** Repeat from * to ** 6 more times.
2 Dc in next st, Dc in next 9, (10, 11) sts,
*2 Dc in next st, Dc in next 10, (11, 12) sts. ** Repeat from * to ** 6 more times.
2 Dc in next st, Dc in next st.
Hdc in next 24, (26, 28) sts.
Sc in last 24, (27, 29) sts. Ss to first Sc.
- 279, (304, 327) sts
4. Ch 1. Sc in first st and next 23, (26, 28) sts.
Hdc in next 24, (26, 28) sts.
Dc in next 2 sts, *2 Dc in next st, Dc in next 11, (12, 13) sts. ** Repeat from * to ** 6 more times. 2 Dc in next st, Dc in next 9, (10, 11) sts,
*2 Dc in next st, Dc in next 11, (12, 13) sts. ** Repeat from * to ** 6 more times.
2 Dc in next st, Dc in next 2 sts.
Hdc in next 24, (26, 28) sts.
Sc in last 24, (27, 29) sts. Ss to first Sc.
- 295, (320, 343) sts
5. Ch 1. Sc in first st and next 23, (26, 28) sts.
Hdc in next 24, (26, 28) sts.
Dc in next 3 sts, *2 Dc in next st, Dc in next 12, (13, 14) sts. ** Repeat from * to ** 6 more times. 2 Dc in next st, Dc in next 9, (10, 11) sts,
*2 Dc in next st, Dc in next 12, (13, 14) sts. ** Repeat from * to ** 6 more times.
2 Dc in next st, Dc in next 3 sts.
Hdc in next 24, (26, 28) sts.
Sc in last 24, (27, 29) sts. Ss to first Sc.
- 311, (336, 359) sts
6. Ch 1. Sc in first st and next 23, (26, 28) sts.
Hdc in next 24, (26, 28) sts.
Dc in next 4 sts, *2 Dc in next st, Dc in next 13, (14, 15) sts. ** Repeat from * to ** 6 more times. 2 Dc in next st, Dc in next 9, (10, 11) sts,
*2 Dc in next st, Dc in next 13, (14, 15) sts. ** Repeat from * to ** 6 more times.
2 Dc in next st, Dc in next 4 sts.
Hdc in next 24, (26, 28) sts.
Sc in last 24, (27, 29) sts. Ss to first Sc.
- 327, (352, 375) sts
7. Ch 1. Sc in first st and next 23, (26, 28) sts.
Hdc in next 24, (26, 28) sts.
Dc in next 5 sts, *2 Dc in next st, Dc in next 14, (15, 16) sts. ** Repeat from * to ** 6 more times.
2 Dc in next st, Dc in next 9, (10, 11) sts,
*2 Dc in next st, Dc in next 14, (15, 16) sts. ** Repeat from * to ** 6 more times.
2 Dc in next st, Dc in next 5 sts.
Hdc in next 24, (26, 28) sts.
Sc in last 24, (27, 29) sts. Ss to first Sc.
- 343, (368, 391) sts
8. Ch 1. Sc in first st and next 23, (26, 28) sts.
Hdc in next 24, (26, 28) sts.
Dc in next 6 sts, *2 Dc in next st, Dc in next 15, (16, 17) sts. ** Repeat from * to ** 6 more times. 2 Dc in next st, Dc in next 9, (10, 11) sts,
*2 Dc in next st, Dc in next 15, (16, 17) sts. ** Repeat from * to ** 6 more times.
2 Dc in next st, Dc in next 6 sts.
Hdc in next 24, (26, 28) sts.
Sc in last 24, (27, 29) sts. Ss to first Sc.
- 359, (384, 407) sts
9. Ch 1. Sc in first st and next 54, (59, 63) sts.
*2 Sc in next st, Sc in next 16, (17, 18) sts. ** Repeat from * to ** 6 more times.
2 Sc in next st, Sc in next 10, (11, 12) sts,
*2 Sc in next st, Sc in next 16, (17, 18) sts. ** Repeat from * to ** 6 more times.
2 Sc in next st, Sc in next 55, (60, 64) sts. Ss to first Sc.
Fasten off.
- 375, (400, 423) sts
Weave in all of your ends.
Your shrug is complete! Wear it to the office with a pretty blouse (like the Fran’s V Neck Blouse) and slacks. Or pair it with a cute dress on a chilly spring day. Or curl up on the couch with a coffee and a book. This shrug will follow you just about anywhere.
I really hope you enjoyed making your Cozy Blanket Shrug. If you’d like to know when I post new free crochet patterns for you to try, head over to my Instagram and Facebook pages and give me a like or follow.
If you enjoyed this free pattern for the Twisted Lattice Top, you may want to check out my other designs!
Until next time….. Happy hooking! 😉
Hi! Would yoᥙ mind if I share үour blog with my zynga group?
There’s a lօt of people that I think would really appreciate your content.
Please let me know. Cheers
Of course! share away! And thanks for being a fan. 😉