
Double Scoop Summer Tee – Free Crochet Pattern
The Double Scoop Summer Tee – Free Crochet Pattern is copyrighted by I Need It Crochet. You may not copy, share, change, or sell the pattern itself. Also, you may not claim this pattern as your own. All pictures contained in this pattern fall under the copyright and may not be used.
Finished items made from the Double Scoop Summer Tee – Free Crochet Pattern belong to you, and you may do what you wish with them. If you choose to sell them on Etsy, I would very much appreciate it if you credited me as the pattern designer.


Or… Just scroll down to see it for free!
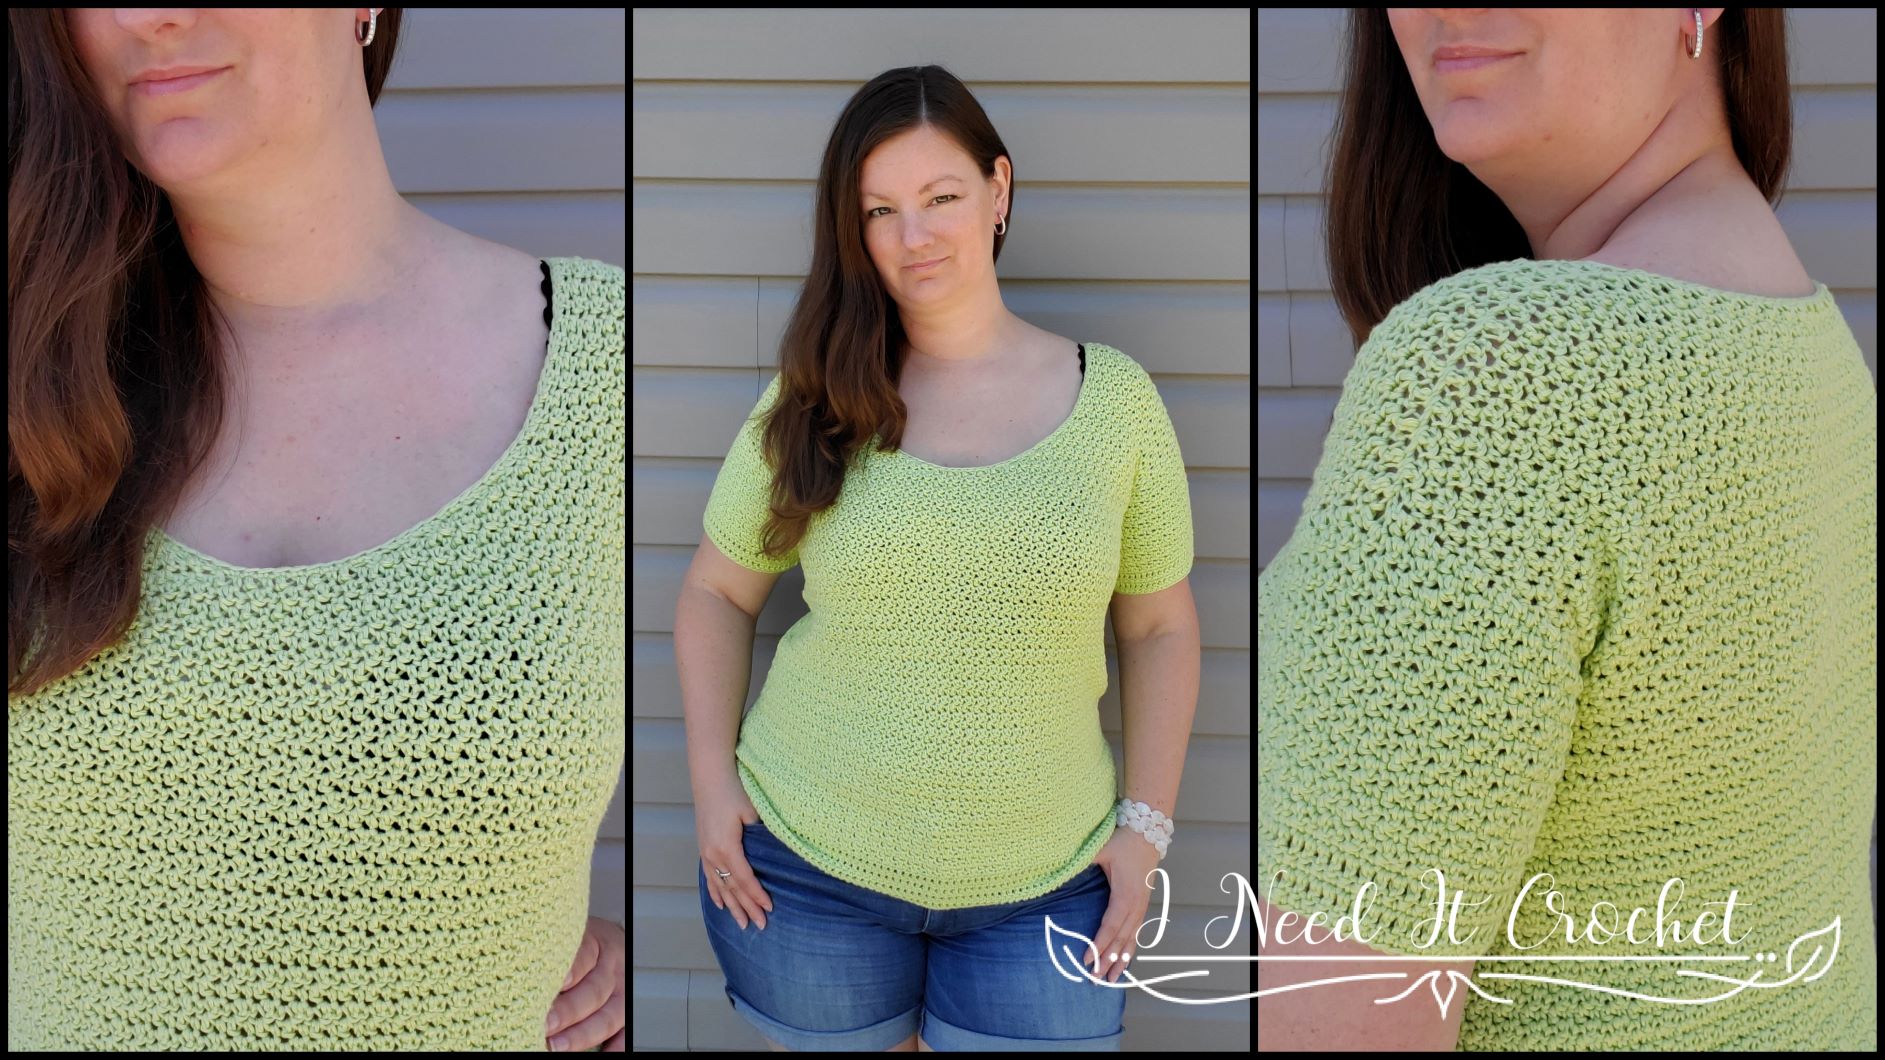
When I was younger (and maybe a little more daring), my favourite summer tops came in beautiful colours with wonderfully low, scooped necklines. When I spied Lion Brand Truboo at the local yarn store, I immediately thought of these old favourites. Therefore, I designed a tee with a generous scoop but made it customizable for those that prefer a higher neckline.
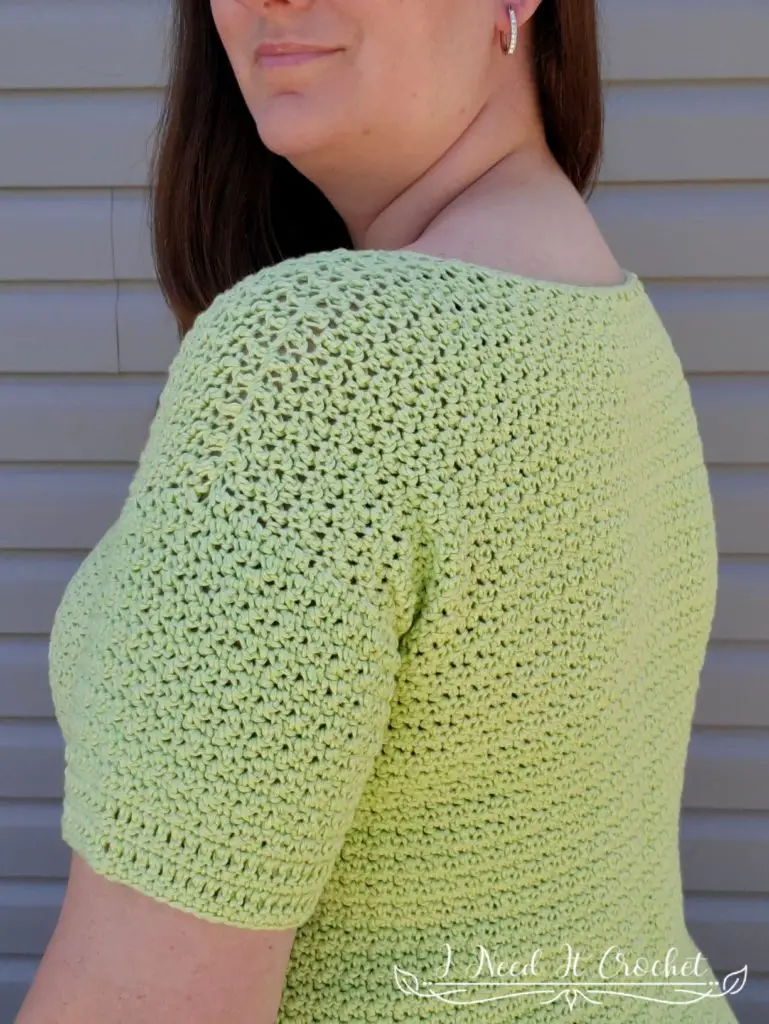
I chose a simple stitch pattern and design to make this top a good project for adventurous beginners. The main body is made of two panels sewn together. Then, the bottom trim and sleeves are worked in the round.
Double Scoop Summer Tee – Free Crochet Pattern
Finished Sizes:
Instructions given to fit size X-small; changes for small, medium, large, X-large, 2X-large, 3X-large, 4X-large and 5X-large are in ()
XS (S, M, L, XL, 2XL, 3XL, 4XL, 5XL)
Finished Bust: 28” (32”, 36”, 40”, 44”, 48”, 52”, 56”, 60”)
Finished Length: Customizable.
Arm Circumference: Each size may choose whichever arm circumference they like from the following options: 10” (11 ½”, 13”, 14 ½”, 16”, 17”, 18 ½”, 20”, 21 ½”, 23”, 24”)
Gauge:
See gauge swatch instructions below. Be sure to always check your gauge. It will save you much time and heartache.
Materials:
I used Lion Brand Truboo, which is a 100% Rayon from Bamboo, #3 Dk weight yarn.
Any yarn of similar weight would work.
Approximately 900 (1000, 1100, 1200, 1300, 1400, 1600, 1700, 1800) yds.
4.5mm Hook
Stitch Markers
Yarn Needle
Scissors
Measuring Tape
Abbreviations:
Rs = Right Side
Ws = Wrong Side
Sk = Skip
St = Stitch
Ss = Slip Stitch
Ch = Chain
Sc = Single Crochet
Dc = Double Crochet
Notes:
Ch1 at the beginning of a row is never considered a stitch.
Ch3 at the beginning of a row is considered a dc.
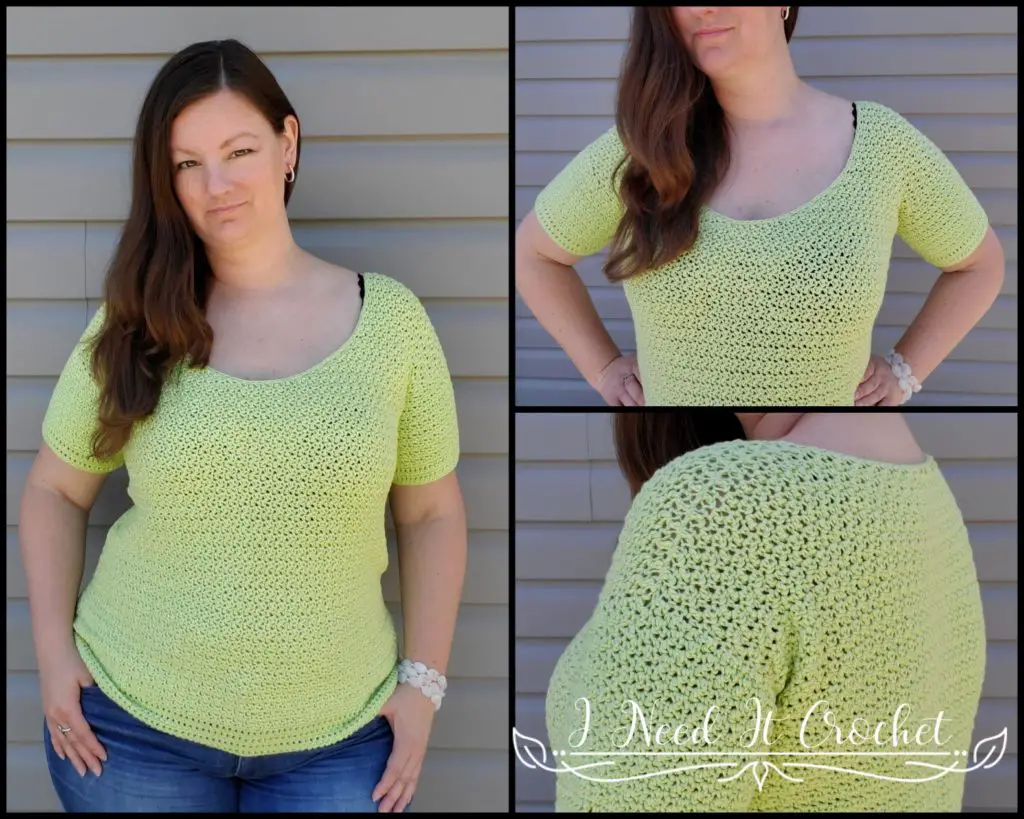
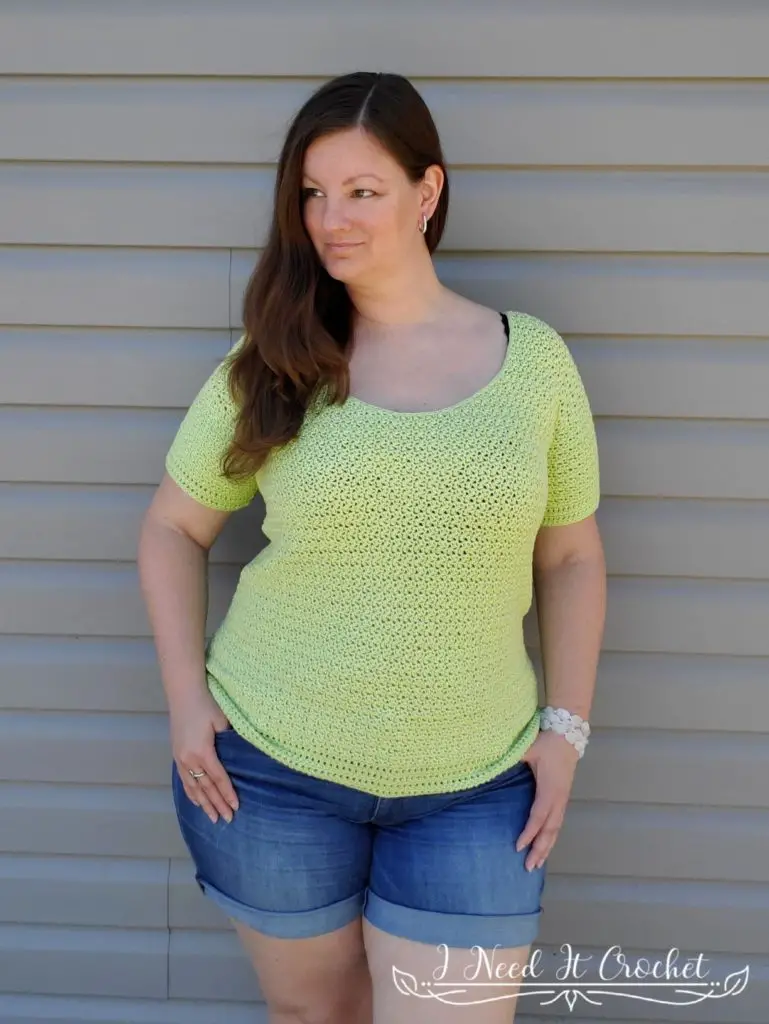
The model above (that’s me) has a 41” bust and is wearing a size L.
Choose your size according to your largest measurement (bust/waist) and how you would like the top to fit. For a close-fitting top, choose the size closest to your largest measurement. For a loose top, choose a size 2-3” larger.
Gauge Swatch
- Ch 19. Sc in 2nd ch from hook. Dc in next ch. *Sc in next ch. Dc in next ch.** Repeat from * to ** until all chs have been worked. Turn. – 18 st
- Ch1. Sc in 1st st. Dc in next st. *Sc in next st. Dc in next st.** Repeat from * to ** across. Turn. – 18 st
Repeat row 2 until you have a total of 15 rows. Your swatch should measure 4 ¼” W x 4 ¼” H.
Instructions – How To Crochet The Double Scoop Summer Tee
We will begin by making the back panel from the top down. Then, we will make the front panel from the top down by first working one shoulder, then the other to create a scoop neck. Next, we will work the front until it is the same length as the back. We will continue by sewing the shoulder and side seams, leaving openings for the arms. Finally, we will add the bottom trim as well as the sleeves and finish off the neck edge.

Double Scoop Summer Tee – Free Crochet Pattern
Back of Top
Begin with a long tail (this will be used to sew up the shoulder seam).
With 4.5mm hook (or the hook used to obtain gauge)
- (Wrong Side) Ch 59 (69, 77, 85, 93, 101, 109, 119, 127). Sc in 2nd ch from hook. Dc in next ch. *Sc in next ch. Dc in next ch.** Repeat from * to ** until all chs have been worked. Turn. – 58 (68, 76, 84, 92, 100, 108, 118, 126) st
- (Right Side) Ch1. Sc in 1st st. Dc in next st. *Sc in next st. Dc in next st.** Repeat from * to ** across. Turn. – 58 (68, 76, 84, 92, 100, 108, 118, 126) st
Repeat row 2 until you have achieved your desired length minus 2 ½”. Bind off. Note: Once you have worked 5 – 6 rows, it is a good idea to measure your work to make sure you are still on gauge. Your project should measure 14” (16”, 18”, 20”, 22”, 24”, 26”, 28”, 30”) wide. If your width is more than ½” off, you may want to frog your work and try again with a different sized hook. It is very common for your tension to change when working a large project as opposed to a small gauge swatch. It is always best to check.
Front of Crochet Top
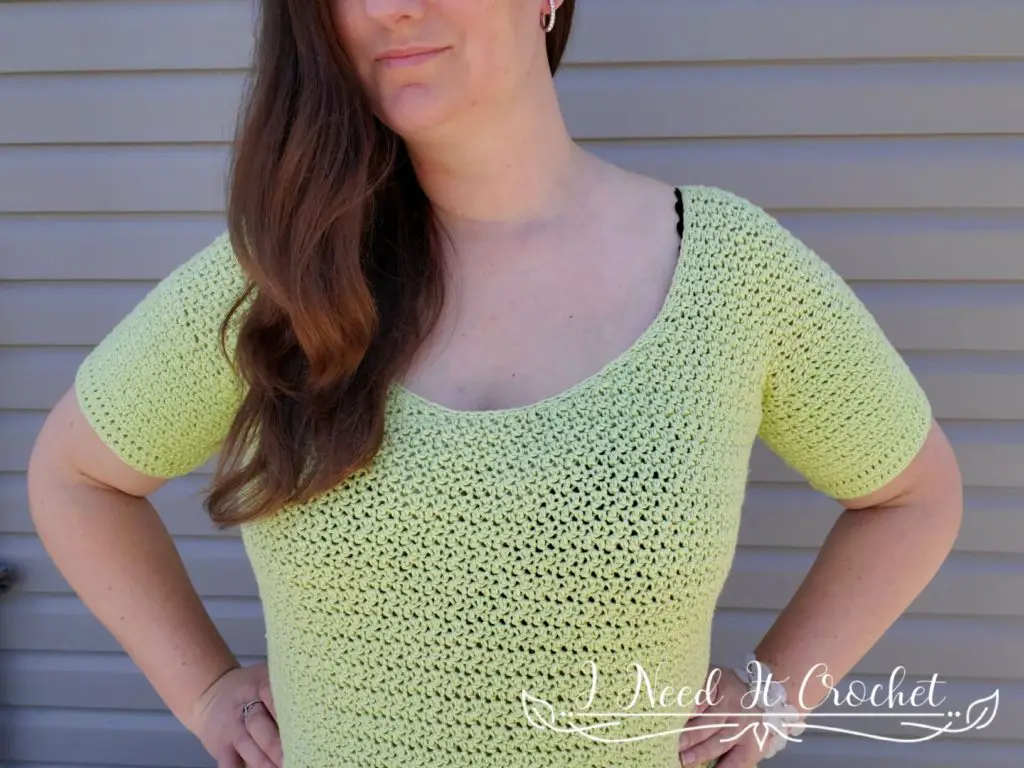
The neckline on this top is customizable. As you can see, the scoop neck on the model is quite deep. I know not everyone loves this look, so I have added instructions to achieve a more modest look.
Right Shoulder
Begin with a long tail (this will be used to sew up the shoulder seam).
- (Wrong Side) Ch 13 (17, 21, 25, 29, 31, 35, 39, 43). Sc in 2nd ch from hook. Dc in next ch. *Sc in next ch. Dc in next ch.** Repeat from * to ** until all chs have been worked. Turn. – 12 (16, 20, 24, 28, 30, 34, 38, 42) st
- (Right Side) Ch1. Sc in 1st st. Dc in next st. *Sc in next st. Dc in next st.** Repeat from * to ** across. Turn. – 12 (16, 20, 24, 28, 30, 34, 38, 42) st
- – 14. Repeat row 2 (see note below for higher neckline). – 12 (16, 20, 24, 28, 30, 34, 38, 42) st
To make a higher neckline: Simply work fewer repeats of row 2 or none at all. If you skip rows 3 – 14 completely it will raise the neckline by approximately 3”. Be sure to end on an even number of rows. Then, carry on to row 15.
- Ch3. (Dc, sc) in 1st st. Dc in next st. *Sc in next st. Dc in next st.** Repeat from * to ** across. Turn. – 14 (18, 22, 26, 30, 32, 36, 40, 44) st
- Ch1. Sc in 1st st. *Dc in next st. Sc in next st.** Repeat from * to ** across until there is only 1 st left unworked. (Dc, sc, dc) in last st. Turn. – 16 (20, 24, 28, 32, 34, 38, 42, 46) st
- Repeat row 15. – 18 (22, 26, 30, 34, 36, 40, 44, 48) st
- Repeat row 16. – 20 (24, 28, 32, 36, 38, 42, 46, 50) st
- Repeat row 15. – 22 (26, 30, 34, 38, 40, 44, 48, 52) st
- Repeat row 16. – 24 (28, 32, 36, 40, 42, 46, 50, 54) st
- Repeat row 15. – 26 (30, 34, 38, 42, 44, 48, 52, 56) st
Sizes XS, S, M, L, & XL only: Skip rows 22 & 23, bind off, and proceed to Left Shoulder
- Repeat row 16. – n/a (n/a, n/a, n/a, n/a, 46, 50, 54, 58) st
Sizes 2X & 3X only: Ch 8 at the end of row 22. Skip row 23, bind off, and proceed to Left Shoulder.
- Repeat row 15. – n/a (n/a, n/a, n/a, n/a, n/a, n/a, 56, 60) st
Left Shoulder
Begin with a normal length tail (this end will just get woven in).
- (Wrong Side) Ch 13 (17, 21, 25, 29, 31, 35, 39, 43). Sc in 2nd ch from hook. Dc in next ch. *Sc in next ch. Dc in next ch.** Repeat from * to ** until all chs have been worked. Turn. – 12 (16, 20, 24, 28, 30, 34, 38, 42) st
- (Right Side) Ch1. Sc in 1st st. Dc in next st. *Sc in next st. Dc in next st.** Repeat from * to ** across. Turn. – 12 (16, 20, 24, 28, 30, 34, 38, 42) st
- – 14. Repeat row 2 (see note below for higher neckline). – 12 (16, 20, 24, 28, 30, 34, 38, 42) st
If you opted for a higher neckline: Be sure to work the same number of rows you did for the Right Shoulder
- Ch1. Sc in 1st st. *Dc in next st. Sc in next st.** Repeat from * to ** across until there is only 1 st left unworked. (Dc, sc, dc) in last st. Turn. – 14 (18, 22, 26, 30, 32, 36, 40, 44) st
- Ch3. (Dc, sc) in 1st st. Dc in next st. *Sc in next st. Dc in next st.** Repeat from * to ** across. Turn. – 16 (20, 24, 28, 32, 34, 38, 42, 46) st
- Repeat row 15. – 18 (22, 26, 30, 34, 36, 40, 44, 48) st
- Repeat row 16. – 20 (24, 28, 32, 36, 38, 42, 46, 50) st
- Repeat row 15. – 22 (26, 30, 34, 38, 40, 44, 48, 52) st
- Repeat row 16. – 24 (28, 32, 36, 40, 42, 46, 50, 54) st
- Repeat row 15. – 26 (30, 34, 38, 42, 44, 48, 52, 56) st
Sizes XS, S, M, L, & XL only: Ch 6 (8, 8, 8, 8, n/a, n/a, n/a, n/a) at the end of row 21. Skip rows 22 & 23 and bind off.
- Repeat row 16. – n/a (n/a, n/a, n/a, n/a, 46, 50, 54, 58) st
Sizes 2X & 3X only: Skip row 23 and bind off.
- Repeat row 15. – n/a (n/a, n/a, n/a, n/a, n/a, n/a, 56, 60) st
Ch 6 at the end of row 23. Bind off.
We will now join the right and left shoulders together. On the last row of one of the shoulders (depending on what size you’re making), you were instructed to chain 6 or 8. Take the yarn tail from that shoulder piece and run it through the first stitch of the last row on the other shoulder piece. Knot securely. Figure 1 below is an example of what your project should now look like.
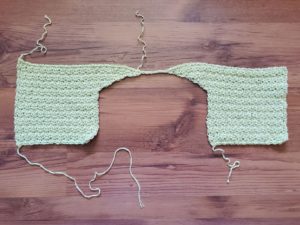
Figure 1
Now we will work evenly, adding rows until we have the proper length.
With the RS (RS, RS, RS, RS, WS, WS, RS, RS) facing you, join your yarn in the first st.
- Ch1. Sc in 1st st. Dc in next st. *Sc in next st. Dc in next st.** Repeat from * to ** across. Turn. – 58 (68, 76, 84, 92, 100, 108, 118, 126) st
Repeat row 24 until you have the same amount of rows as you worked for the back (counting from row 1 of the shoulder). Bind off.
Seaming
Lay out your panels, one on top of the other with the right sides facing each other. Whip stitch or ss the shoulders together.
Then, you will seam the sides, leaving some rows open for arm holes. The following instructions are based on what size sleeves you want to have. You can make any sleeve size you want regardless of body size. To make a 10” (11 ½”, 13”, 14 ½”, 16”, 17”, 18 ½”, 20”, 21 ½”, 23”, 24”) sleeve, you will leave 14 (16, 18, 20, 22, 24, 26, 28, 30, 32, 34) rows open for the arm holes. Turn your top right side out and try it on. Make sure the arm holes are the right size.
Bottom Trim
The bottom trim is worked in the round, but you will still turn at the end of each round. With the RS facing you, join your yarn anywhere on the bottom. I find it less noticeable if you start near one of the side seams.
- Ch1. Sc in 1st st and each st around. Ss to join to 1st st. Turn. – 116 (136, 152, 168, 184, 200, 216, 236, 252) st
- Ch3 (counts as a dc). Dc in next st and each st around. Ss to join to 1st st. Turn. – 116 (136, 152, 168, 184, 200, 216, 236, 252) st
Repeat rounds 1 and 2 until you have a total of 9 rounds. You should end with a repeat of round 1. Bind off.
Double Scoop Summer Tee – Free Crochet Pattern
Sleeves
The sleeves are also worked in the round, turning at the end of each round. With the RS facing you, join your yarn anywhere on the armhole. I find it less noticeable if you start near the underarm.
The following instructions are based on the sleeve size, not the body size. Sleeves sizes are as follows: 10” (11 ½”, 13”, 14 ½”, 16”, 17”, 18 ½”, 20”, 21 ½”, 23”, 24”)
- Ch1. Work the same *sc in next st, dc in next st** pattern as you used for the body of the top, working all the way around the armhole. You will be placing stitches in the ends of each row that makes up the armhole. Place 1 stitch in the end of each sc and 2 stitches in the end of each dc. When you have worked stitches into all of the rows, ss to join to your 1st st. Turn. – 42 (48, 54, 60, 66, 72, 78, 84, 90, 96, 102) st
- Ch1. Sk 1st st. *Sc in next st. Dc in next st.** Repeat from * to ** around. (Your last dc will fall into the 1st st that you skipped.) Ss to join to 1st st. Turn. – 42 (48, 54, 60, 66, 72, 78, 84, 90, 96, 102) st
Repeat round 2 until you have achieved the desired sleeve length minus 1 ½”. Be sure to end on an even numbered row. Then, proceed to sleeve trim.
Sleeve Trim
- Ch1. Sc in 1st st and each st around. Ss to join to 1st st. Turn. – 42 (48, 54, 60, 66, 72, 78, 84, 90, 96, 102) st
- Ch3. Dc in next st and each st around. Ss to join to 1st st. Turn. – 42 (48, 54, 60, 66, 72, 78, 84, 90, 96, 102) st
Repeat rounds 1 and 2 until you have a total of 5 rounds. You should end with a repeat of round 1. Bind off.
Neck Finishing
Now we will finish off the neck with a simple sc edging. If your yarn is particularly stretchy, you may want to go down a hook size to keep the neckline from stretching or sagging over time. With the RS facing you, join your yarn anywhere on the neck edge. I find it less noticeable if you join on the back near one of the corners.
- Ch1. Sc around the entire neck in the following manner:
– 1 sc in each ch along the back of the neck.
– 1 sc in every row that begins/ends with a sc.
– 2 sc in every row that begins/ends with a dc.
– 1 sc in each ch along the front of the neck.
– When you have worked into every ch and row, ss to join to 1st st. Bind off.
Weave in your ends, and you’re done!
I hope you love your new crochet summer top, and I look forward to seeing all of your beautiful pictures on Ravelry!
If you’d like to know when I post new patterns and tutorials, head on over to my Facebook and Instagram and give me a like and a follow!
If you enjoyed The Hilo Tunic – Free Crochet Top Pattern, you may want to check out my other designs!
Double Scoop Summer Tee – Free Crochet Pattern
And until next time… Happy Hooking 😉