
Hilo Tunic – Free Crochet Top Pattern
The Hilo Tunic – Free Crochet Top Pattern is copyrighted by I Need It Crochet. You may not copy, share, change, or sell the pattern itself. Also, you may not claim this pattern as your own. All pictures contained in this pattern fall under the copyright and may not be used.
Finished items made from the Hilo Tunic – Free Crochet Top Pattern belong to you, and you may do what you wish with them. If you choose to sell them on Etsy, I would very much appreciate it if you credited me as the pattern designer.


Or… Just scroll down to see it for free!
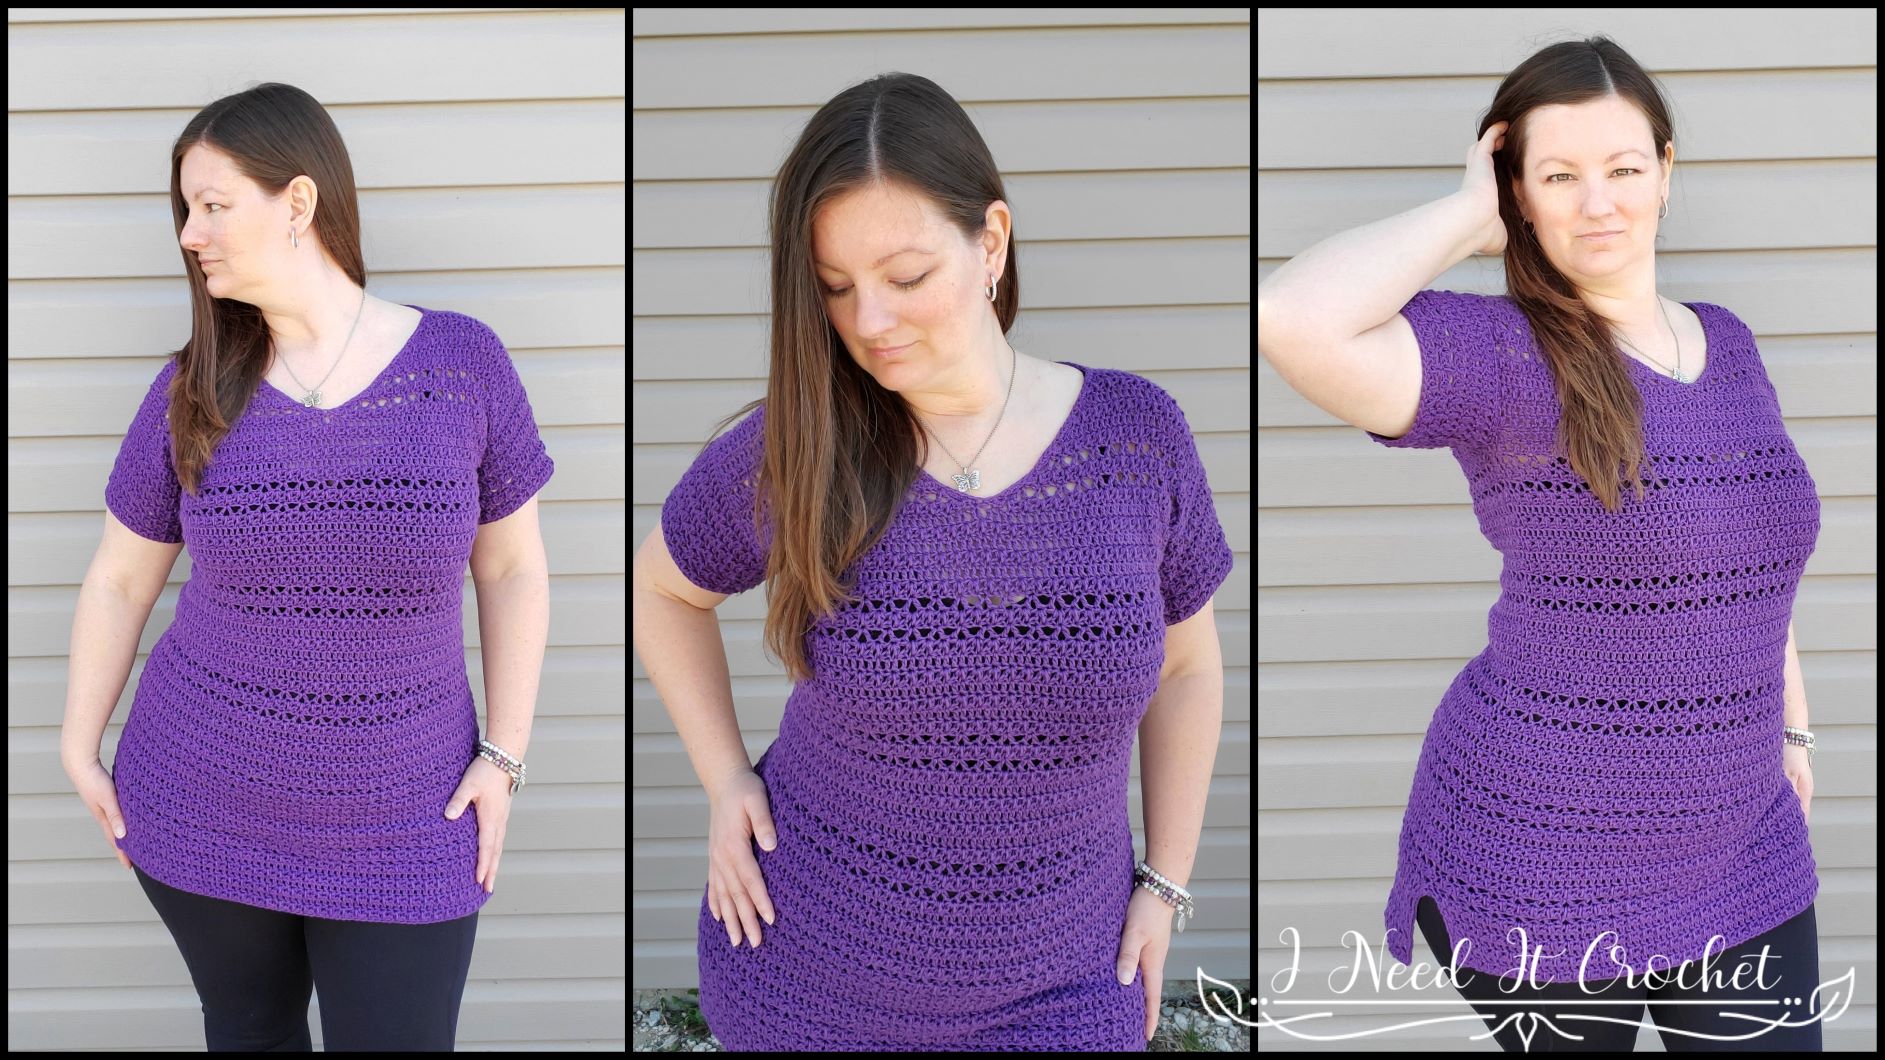
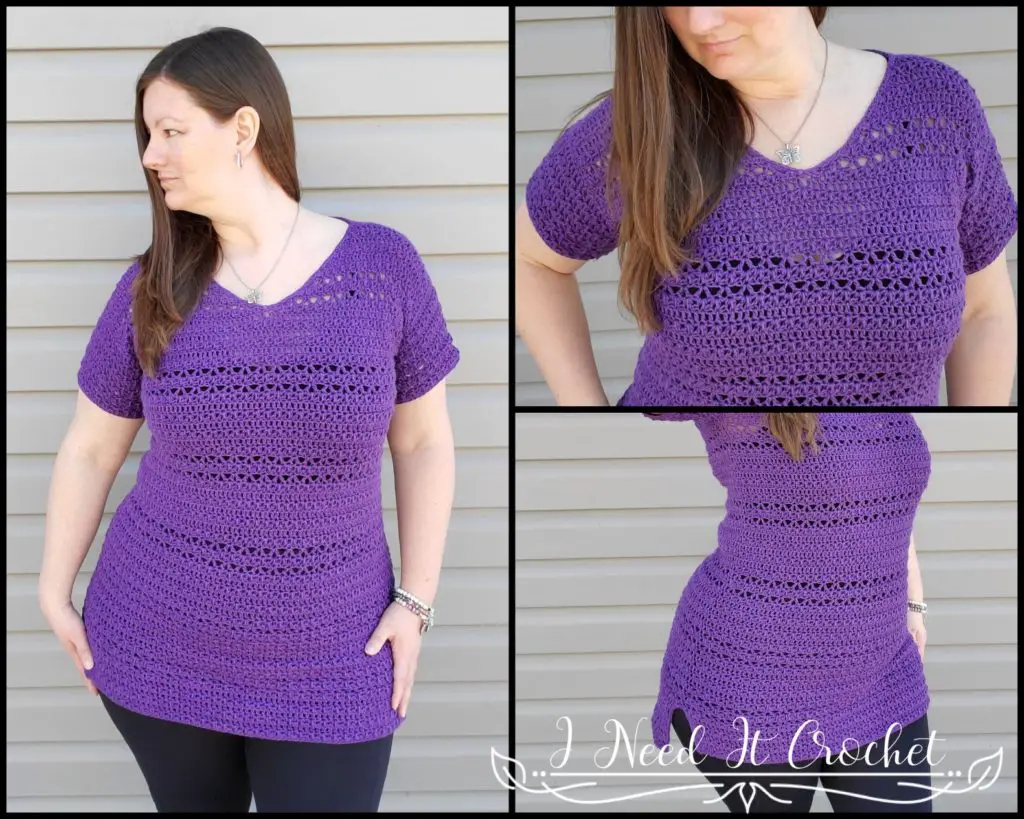
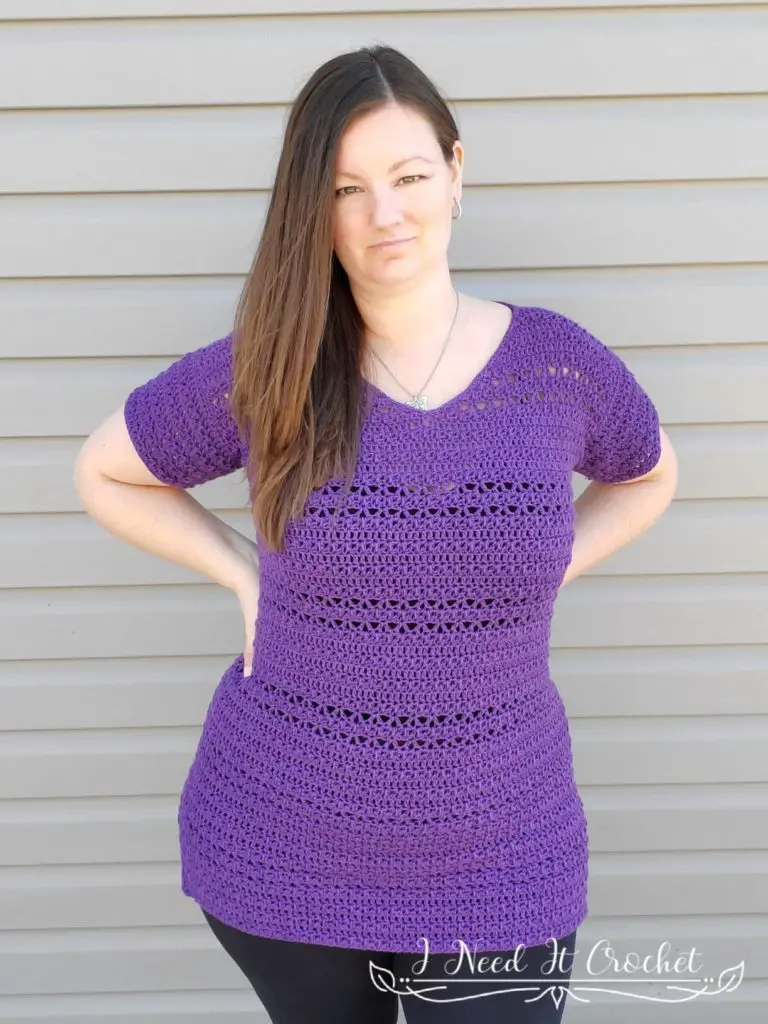
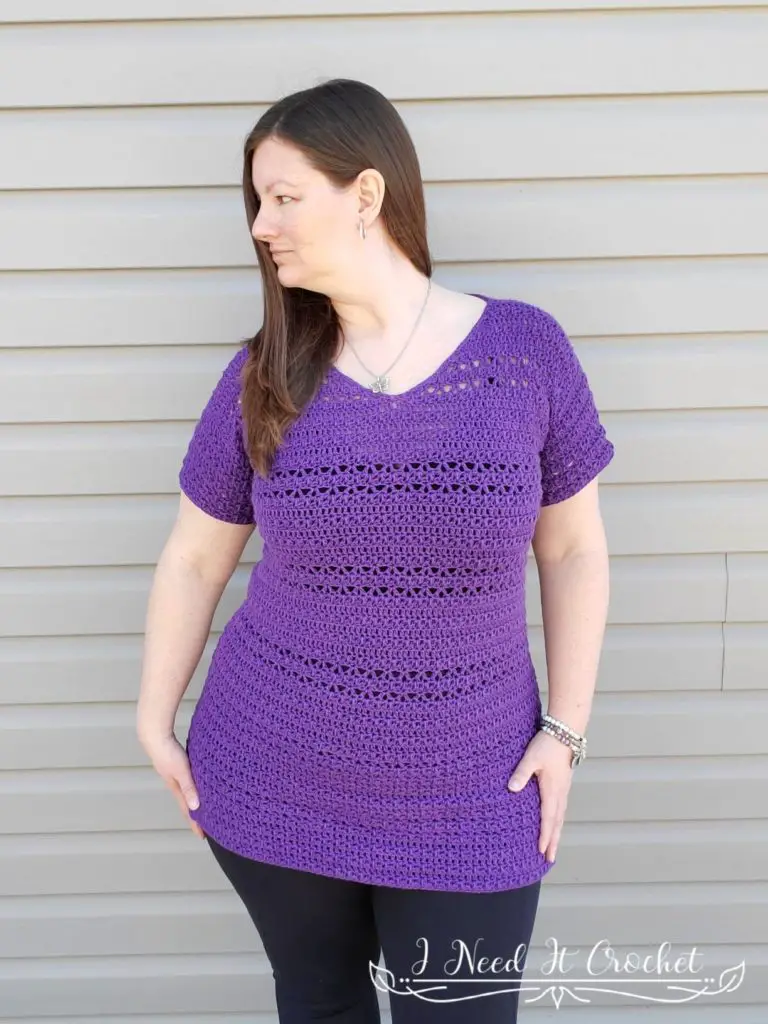
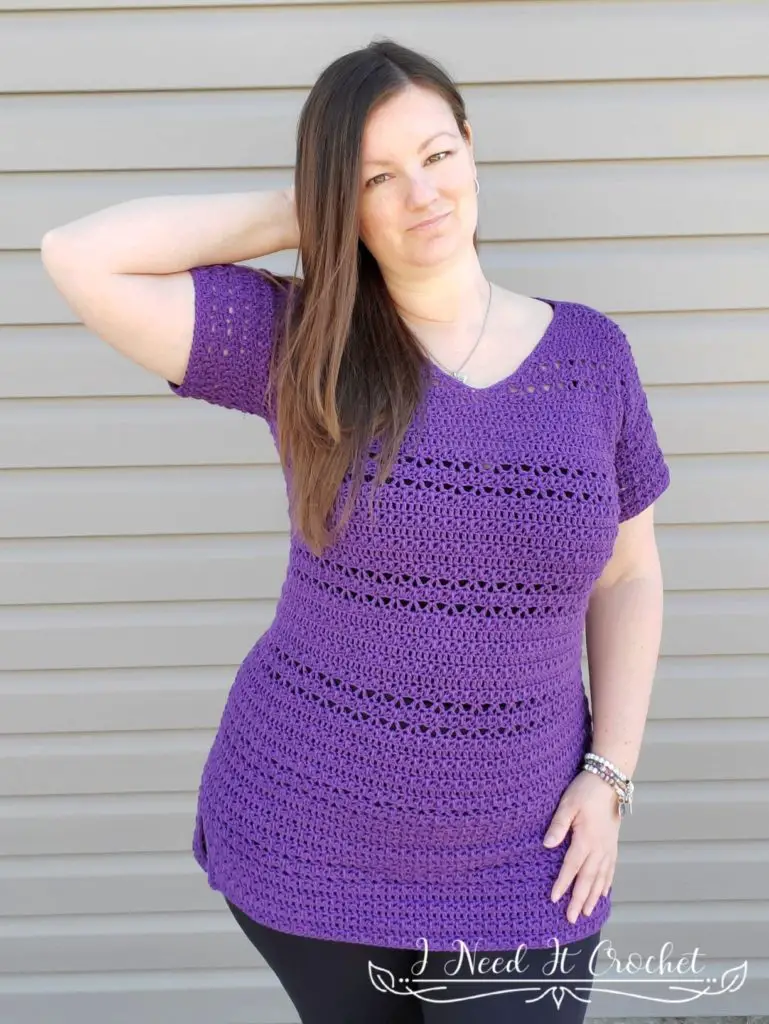
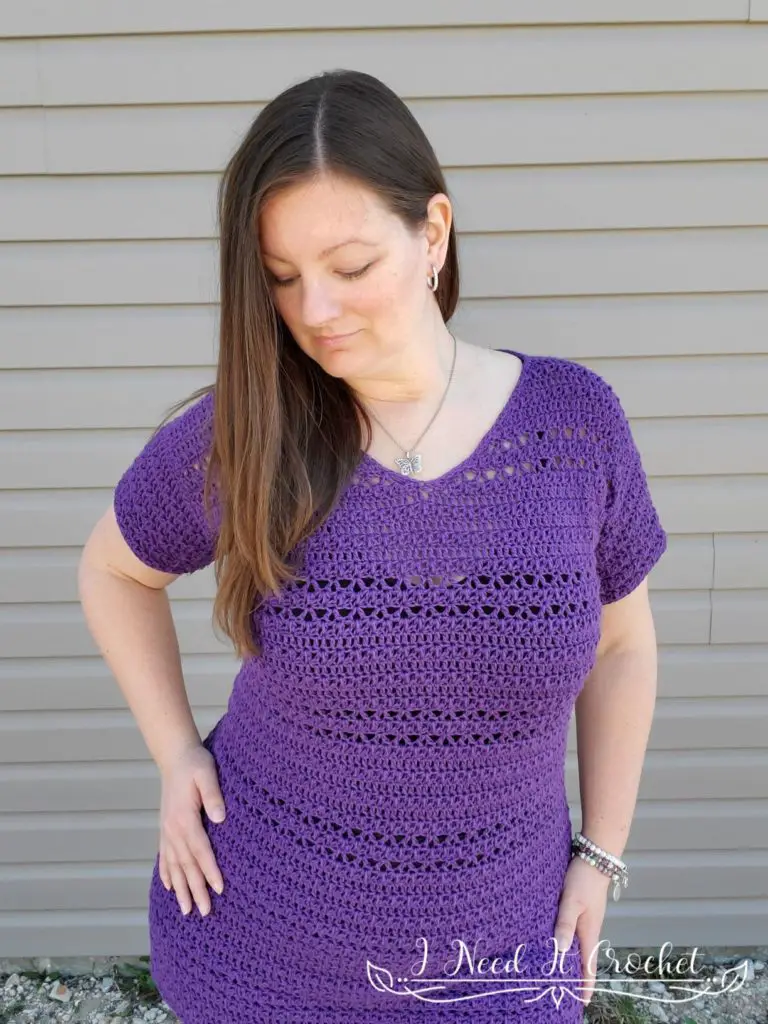
The Hilo Tunic – Free Crochet Pattern features The Mixed Cluster and V-Stitch, which makes the pattern interesting to work and results in a wonderful texture.
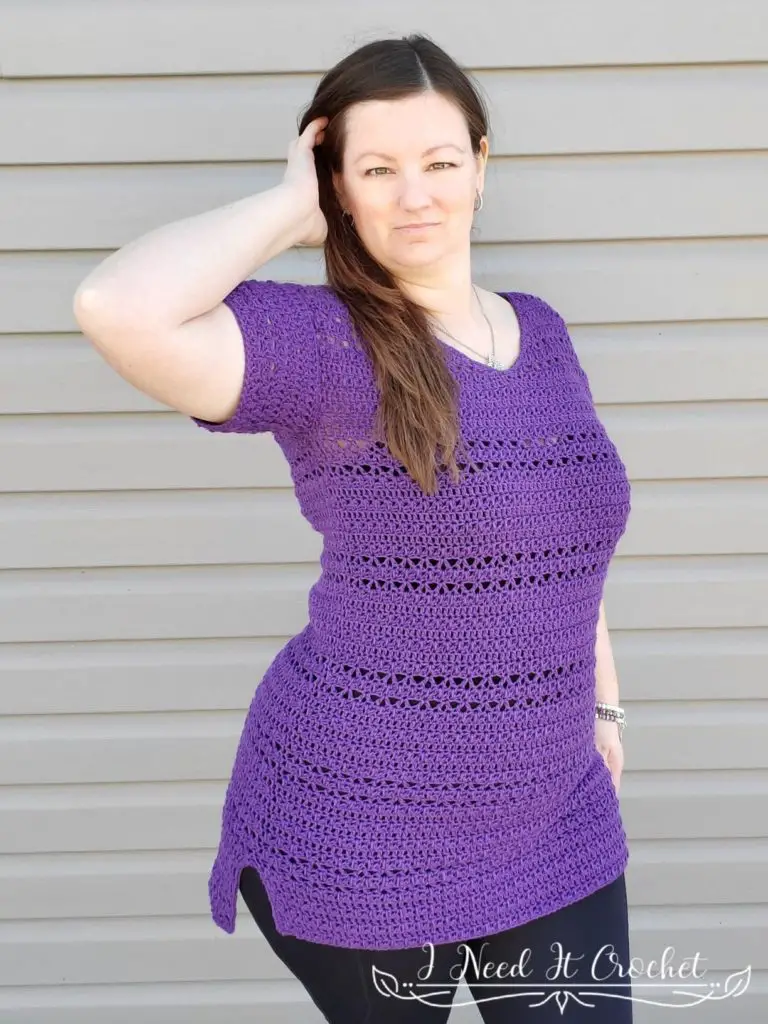
The v-neck and high/low design make this top easy to wear with leggings, jeans, or even shorts. This versatile top can take you through spring, summer, and fall.
Hilo Tunic – Free Crochet Top Pattern
Finished Sizes:
Instructions given to fit size X-small. Changes for small, medium, large, X-large, 2X-large, 3X-large, 4X-large and 5X-large are in ()
XS (S, M, L, XL, 2XL, 3XL, 4XL, 5XL).
Finished Bust Size: 28” (31”, 37”, 40”, 43”, 49”, 52”, 55”, 61”)
Finished Length: Customizable. Length shown on the model is 29” on the front, 31” on the back.
Arm Circumference: Each size may choose whichever arm circumference they like from the following options: 9 ½” (11”, 12 ½”, 14”, 15 ½”, 17”, 18 ½”, 20, 21 ½”, 23”, 24 ½”).
Materials:
I used Sugarbush Cabot, which is a 70% Pima Cotton/30% Linen, #3 Dk weight yarn.
Any yarn of similar weight would work.
Approximately 1000 (1100, 1200,1300, 1400, 1500, 1600, 1700, 1800) yds.
4.5mm Hook
Stitch Markers
Yarn Needle
Scissors
Measuring Tape
Abbreviations:
Rs = Right Side
Ws = Wrong Side
Sk = Skip
Sp = Space
St = Stitch
BLO = Back Loop Only
Ss = Slip Stitch
Ch = Chain
Sc = Single Crochet
Hdc = Half Double Crochet
Dc = Double Crochet
Tr = Treble Crochet
Vst = V Stitch
Gauge:
You will find instructions for a gauge swatch below. Be sure to check your gauge. It will save you much time and heartache.
Notes:
Ch1 at the beginning of a row is never considered a stitch.
Ch3 at the beginning of a row is considered a dc.
Ch4 at the beginning of a row is considered a tr.
A Vst consists of a (Dc, ch1, dc) all in the same st.
A Vst counts as 3 sts.
You will find a tutorial for the Mixed Cluster (Mc) stitch here.
A Mc counts as 2 sts.
The 1st stitch is always the same stitch you chained from after turning.
The model above (that’s me) has a 41” bust and is wearing a size L.
Hilo Tunic – Free Crochet Top Pattern
Gauge Swatch
With 4.5mm hook:
- Ch17. Hdc in 2nd ch from hook and each ch across. Turn. – 16 st
- Ch3. Dc in next st and each st across. Turn. – 16 st
- Ch1. Hdc in 1st st. Beginning in same st, mc across until there is only 1 st left unworked. Hdc in last st. Turn. – 16 st
Repeat rows 2 & 3 until you have a total of 9 rows. You gauge swatch should measure 4” x 4”.
Instructions for Hilo Tunic – Free Crochet Top Pattern
The Hilo Tunic – Free Crochet Pattern is worked seamlessly from the top down. First, we will work the upper back from the shoulder down to the underarm and bind off. Next, we will reattach our yarn in the shoulder and work the upper front in 2 pieces to form the v-neck, which we will join and continue to work until we have the same amount of rows on the front and back. Then, we will join the front and back at the underarms and begin working the lower body in the round. Once we have reached the desired length, we will add length to the front and back, creating a split on either side, and finish the bottom edge. Finally, we will add the sleeves and finish the neck edge.
Upper Back of Crochet Top
In this section, we will create the upper back.
With 4.5mm hook (or the hook used to obtain gauge)
Ch 57 (63, 75, 81, 87, 99, 105, 111, 123)
- (Wrong Side) Working into back hump of ch: Hdc in 2nd ch from hook and each ch across. Turn. – 56 (62, 74, 80, 86, 98, 104, 110, 122) st
- (Right Side) Ch3. Dc in next st and each st across. Turn. – 56 (62, 74, 80, 86, 98, 104, 110, 122) st
- Ch1. Hdc in 1st st. Beginning in same st, mc across until there is only 1 st left unworked. Hdc in last st. Turn. – 56 (62, 74, 80, 86, 98, 104, 110, 122) st
- Ch3. Dc in next st and each st across. Turn. – 56 (62, 74, 80, 86, 98, 104, 110, 122) st
- Ch1. Hdc in 1st st. Beginning in same st, mc across until there is only 1 st left unworked. Hdc in last st. Turn. – 56 (62, 74, 80, 86, 98, 104, 110, 122) st
Measurement Check: When making garments, it’s always a good idea to check that your gauge is still on target. Often, our tension will change when making a large project as opposed to a small gauge swatch. At this point, your project should be 14” (15 ½”, 18 ½”, 20”, 21 ½”, 24 ½”, 26”, 27 ½”, 30 ½”) wide. If you are off by ½” or so, it’s ok. But if you are off by 1” or more, you may want to try again with a different hook or adjust your tension.
- Ch3. Dc in next st and each st across. Turn. – 56 (62, 74, 80, 86, 98, 104, 110, 122) st
- Ch1. Hdc in 1st st. Beginning in same st, mc across until there is only 1 st left unworked. Hdc in last st. Turn. – 56 (62, 74, 80, 86, 98, 104, 110, 122) st
- Ch3. Sk 1 st, Vst in next st. *Sk 2 sts, Vst in next st.** Repeat from * to ** across until there are only 2 sts left unworked. Sk 1 st, dc in last st. Turn. – 56 (62, 74, 80, 86, 98, 104, 110, 122) st
- Note: For this row, you will be working into the tops of sts as well as into ch1 spaces. Ch1. Hdc in 1st st. Beginning in same st, mc across until there is only 1 st left unworked. Hdc in last st. Turn. – 56 (62, 74, 80, 86, 98, 104, 110, 122) st
This next instruction will depend on what sleeve size you are making. The sleeve sizes (in circumference) available are: 9 ½” (11”, 12 ½”, 14”, 15 ½”, 17”, 18 ½”, 20”, 21 ½”, 23”, 24 ½”). You may choose whatever sleeve size you wish, regardless of body size. To figure out your sleeve size, wrap a measuring tape around the fullest part of your upper arm. If you would like close fitting sleeves, choose the sleeve size closest to your measurement. If you would like them looser, choose a size ½” to 1” larger.
If you are making a 9 ½” sleeve, skip the paragraph below, bind off, and proceed to the Upper Front instructions.
Repeat rows 2 – 11 until you have a total of n/a (12, 14, 16, 17, 19, 21, 22, 24, 26, 27) rows. Bind off and proceed to the Upper Front instructions.

Hilo Tunic – Free Crochet Top Pattern
Upper Front of Crochet Tunic Top
In this section, we will work the front downward, adding increases to create the v-neck. Lay your work out with the wrong side facing up and the bottom of the foundation chain at the top (as seen in Figure 1). Join your yarn in the first stitch of the top right corner (where your starting yarn end is as indicated in Figure 1).
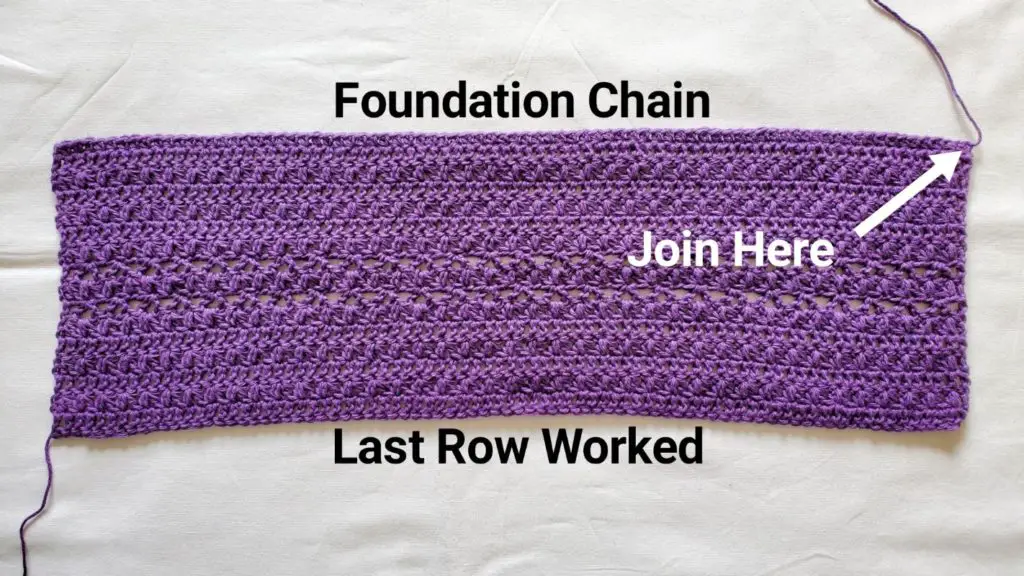
Figure 1
Left Side of V Neck
- Ch1. Hdc in 1st st and next 7 (10, 16, 19, 22, 28, 31, 34, 40) sts. Turn. – 8 (11, 17, 20, 23, 29, 32, 35, 41) st
- Ch4. 2dc in 1st st Dc in each st across. Turn. – 10 (13, 19, 22, 25, 31, 34, 37, 43) st
- Follow only the instructions labeled with your body size:
Sizes XS, L, & 3X:
Ch1. Hdc in 1st st. Beginning in same st, mc across until there is only 1 st left. (2hdc, dc) in last st. Turn. – 12 ( n/a, n/a, 24, n/a, n/a, 36, n/a, n/a) st
Sizes S, M, XL, 2X, 4X, & 5X:
Ch1. Hdc in 1st st. Beginning in same st, mc across until there are only 2 sts left. Hdc in next st. (2hdc, dc) in last st. Turn. – n/a (15, 21, n/a, 27, 33, n/a, 39, 45) st
- Ch4. 2dc in 1st st Dc in each st across. Turn. – 14 (17, 23, 26, 29, 35, 38, 41, 47) st
- Follow only the instructions labeled with your body size:
Sizes XS, L, & 3X:
Ch1. Hdc in 1st st. Beginning in same st, mc across until there is only 1 st left. (2hdc, dc) in last st. Turn. – 16 ( n/a, n/a, 28, n/a, n/a, 40, n/a, n/a) st
Sizes S, M, XL, 2X, 4X, & 5X:
Ch1. Hdc in 1st st. Beginning in same st, mc across until there are only 2 sts left. Hdc in next st. (2hdc, dc) in last st. Turn. – n/a (19, 25, n/a, 31, 37, n/a, 43, 49) st
- Ch4. 2dc in 1st st Dc in each st across. Turn. – 18 (21, 27, 30, 33, 39, 42, 45, 51) st
- Follow only the instructions labeled with your body size:
Sizes XS, L, & 3X:
Ch1. Hdc in 1st st. Beginning in same st, mc across until there is only 1 st left. (2hdc, dc) in last st. Turn. – 20 ( n/a, n/a, 32, n/a, n/a, 44, n/a, n/a) st
Sizes S, M, XL, 2X, 4X, & 5X:
Ch1. Hdc in 1st st. Beginning in same st, mc across until there are only 2 sts left. Hdc in next st. (2hdc, dc) in last st. Turn. – n/a (23, 29, n/a, 35, 41, n/a, 47, 53) st
- Ch5. Dc in 1st st (counts as (tr, ch1, dc) in 1 st). Sk 1 st, Vst in next st. *Sk 2 sts, Vst in next st.** Repeat from * to ** until there are only 2 sts left. Sk 1 st, dc in last st. Turn. – 22 (25, 31, 34, 37, 43, 46, 49, 55) st
- Follow only the instructions labeled with your body size:
Sizes XS, L, & 3X:
Ch1. Hdc in 1st st. Beginning in same st, mc across until there is only 1 st left. (2hdc, dc) in last st. Turn. – 24 ( n/a, n/a, 36, n/a, n/a, 48, n/a, n/a) st
Sizes S, M, XL, 2X, 4X, & 5X:
Ch1. Hdc in 1st st. Beginning in same st, mc across until there are only 2 sts left. Hdc in next st. (2hdc, dc) in last st. Turn. – n/a (27, 33, n/a, 39, 45, n/a, 51, 57) st
- Ch4, Vst in 1st st. *Sk 2 sts, Vst in next st.** Repeat from * to ** until there are only 2 sts left. Sk 1 st, dc in last st. Turn. – 26 (29, 35, 38, 41, 47, 50, 53, 59) st
- Follow only the instructions labeled with your body size:
Sizes XS, L, & 3X:
Ch1. Hdc in 1st st. Beginning in same st, mc across until there is only 1 st left. (2hdc, dc) in last st. – 28 ( n/a, n/a, 40, n/a, n/a, 52, n/a, n/a) st
Sizes S, M, XL, 2X, 4X, & 5X:
Ch1. Hdc in 1st st. Beginning in same st, mc across until there are only 2 sts left. Hdc in next st. (2hdc, dc) in last st. – n/a (31, 37, n/a, 43, 49, n/a, 55, 61) st
Bind off.
Right Side of V Neck
Your work should look similar to Figure 2 (except for the number of rows worked on the left side; that is incorrect in this picture). Lay your project out again with the wrong side up as it appears in Figure 2. From the left side, count back 8 (11, 17, 20, 23, 29, 32, 35, 41) sts and place a stitch marker (as indicated in Figure 2). Join yarn in the stitch you have marked.
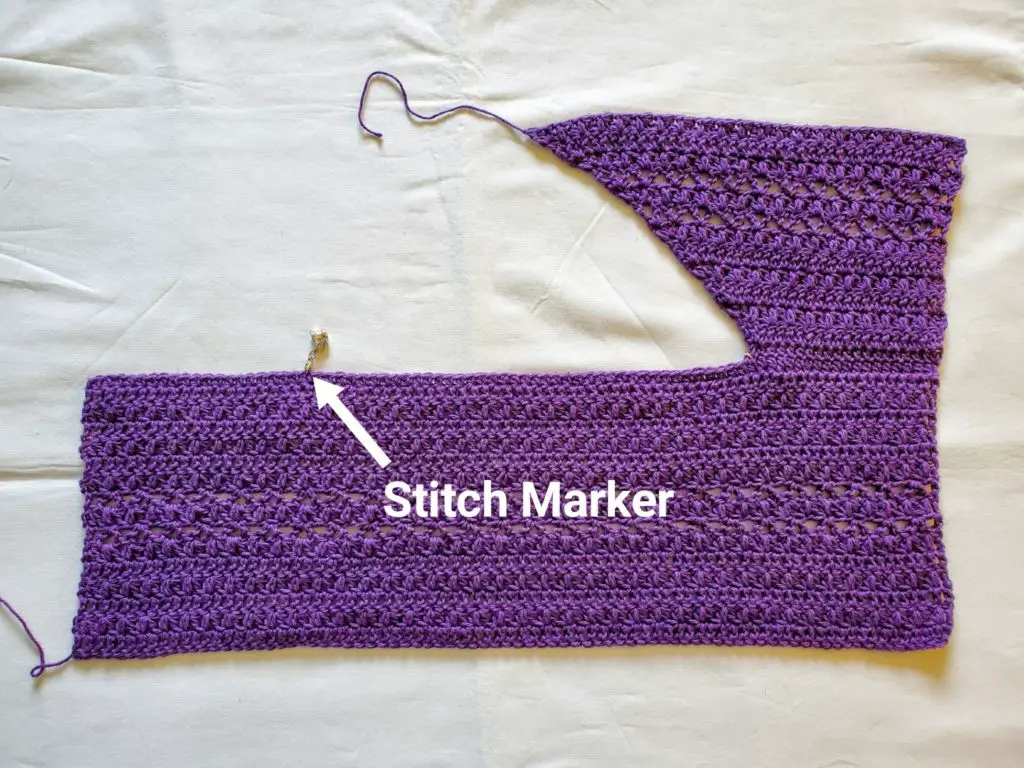
Figure 2
- Ch1. Hdc in 1st st and each st across. Turn. – 8 (11, 17, 20, 23, 29, 32, 35, 41) st
- Ch3. Dc in next st and each st across until there is only 1 st left unworked. (2dc, tr) in last st. – 10 (13, 19, 22, 25, 31, 34, 37, 43) st
- Follow only the instructions labeled with your body size:
Sizes XS, L, & 3X:
Ch3. 2hdc in 1st st. Beginning in same st, mc across until there is only 1 st left unworked. Hdc in last st. Turn. – 12 ( n/a, n/a, 24, n/a, n/a, 36, n/a, n/a) st
Sizes S, M, XL, 2X, 4X, & 5X:
Ch3. 2hdc in 1st st. Hdc in next st. Beginning in same st, mc across until there is only 1 st left unworked. Hdc in last st. Turn. – n/a (15, 21, n/a, 27, 33, n/a, 39, 45) st
- Ch3. Dc in next st and each st across until there is only 1 st left unworked. (2dc, tr) in last st. – 14 (17, 23, 26, 29, 35, 38, 41, 47) st
- Follow only the instructions labeled with your body size:
Sizes XS, L, & 3X:
Ch3. 2hdc in 1st st. Beginning in same st, mc across until there is only 1 st left unworked. Hdc in last st. Turn. – 16 ( n/a, n/a, 28, n/a, n/a, 40, n/a, n/a) st
Sizes S, M, XL, 2X, 4X, & 5X:
Ch3. 2hdc in 1st st. Hdc in next st. Beginning in same st, mc across until there is only 1 st left unworked. Hdc in last st. Turn. – n/a (19, 25, n/a, 31, 37, n/a, 43, 49) st
- Ch3. Dc in next st and each st across until there is only 1 st left unworked. (2dc, tr) in last st. – 18 (21, 27, 30, 33, 39, 42, 45, 51) st
- Follow only the instructions labeled with your body size:
Sizes XS, L, & 3X:
Ch3. 2hdc in 1st st. Beginning in same st, mc across until there is only 1 st left unworked. Hdc in last st. Turn. – 20 ( n/a, n/a, 32, n/a, n/a, 44, n/a, n/a) st
Sizes S, M, XL, 2X, 4X, & 5X:
Ch3. 2hdc in 1st st. Hdc in next st. Beginning in same st, mc across until there is only 1 st left unworked. Hdc in last st. Turn. – n/a (23, 29, n/a, 35, 41, n/a, 47, 53) st
- Ch3. Sk 1 st, Vst in next st. *Sk 2 sts, Vst in next st.** Repeat from * to ** until there are only 2 sts left unworked. Sk 1 st, (dc, ch1, tr) in last st. Turn. – 22 (25, 31, 34, 37, 43, 46, 49, 55) st
- Follow only the instructions labeled with your body size:
Sizes XS, L, & 3X:
Ch3. 2hdc in 1st st. Beginning in same st, mc across until there is only 1 st left unworked. Hdc in last st. Turn. – 24 ( n/a, n/a, 36, n/a, n/a, 48, n/a, n/a) st
Sizes S, M, XL, 2X, 4X, & 5X:
Ch3. 2hdc in 1st st. Hdc in next st. Beginning in same st, mc across until there is only 1 st left unworked. Hdc in last st. Turn. – n/a (27, 33, n/a, 39, 45, n/a, 51, 57) st
- Ch3. Sk 1 st, Vst in next st. *Sk 2 sts, Vst in next st.** Repeat from * to ** until there are only 3 sts left unworked. Sk 2 sts, (Vst, tr) in last st. Turn. – 26 (29, 35, 38, 41, 47, 50, 53, 59) st
- Follow only the instructions labeled with your body size:
Sizes XS, L, & 3X:
Ch3. 2hdc in 1st st. Beginning in same st, mc across until there is only 1 st left unworked. Hdc in last st. – 28 ( n/a, n/a, 40, n/a, n/a, 52, n/a, n/a) st
Sizes S, M, XL, 2X, 4X, & 5X:
Ch3. 2hdc in 1st st. Hdc in next st. Beginning in same st, mc across until there is only 1 st left unworked. Hdc in last st. – n/a (31, 37, n/a, 43, 49, n/a, 55, 61) st
Do not bind off. Lay your project out with the wrong side facing up as pictured in Figure 3. Use the yarn tail from your left side (indicated in Figure 3) to attach the two sides together in the middle. I just ran the yarn tail through the top loops of the first stitch and made a knot (as seen in Figure 4).
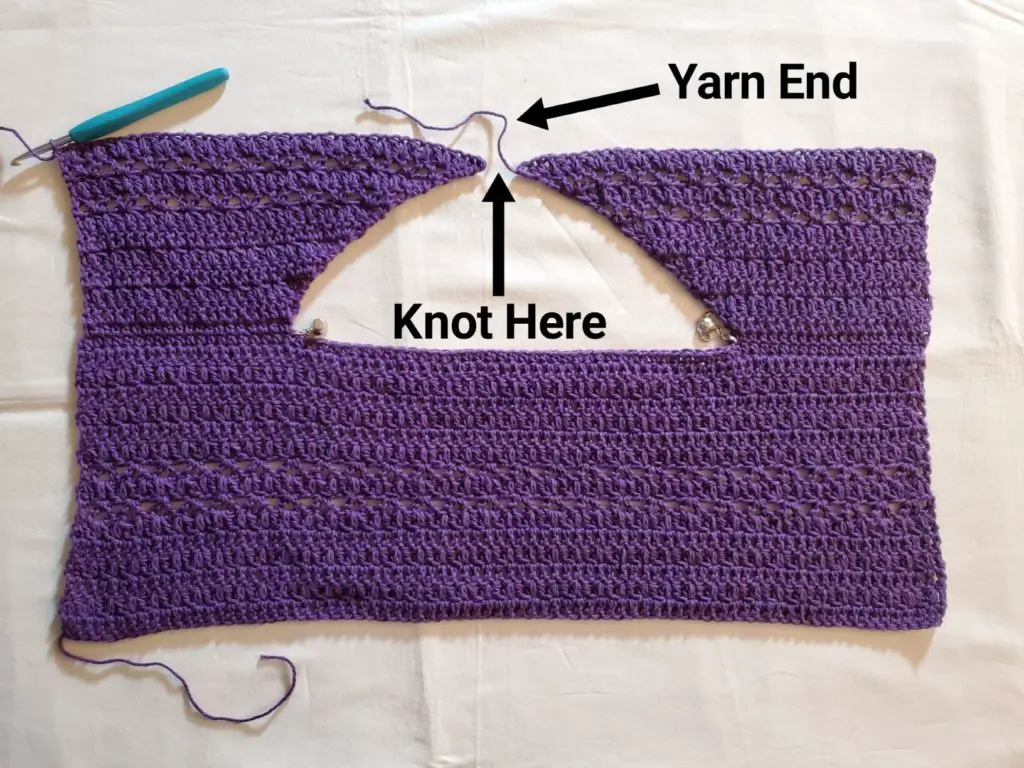
Figure 3
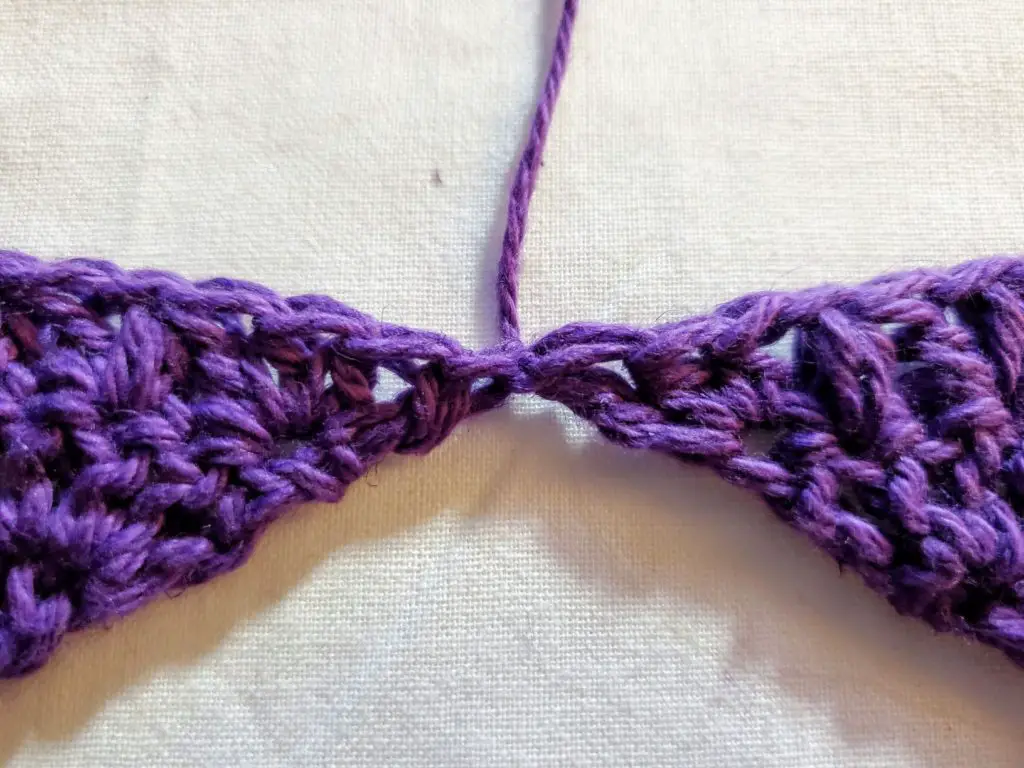
Figure 4
Upper Front Continued
The next instructions will depend on your sleeve size. If you are making a 9 ½” sleeve, you will skip the below instructions and proceed to Lower Body. If you are making any other sleeve size, you will follow the row instructions below until you have the same number of rows that you worked for the Upper Back. That is n/a (12, 14, 16, 17, 19, 21, 22, 24, 26, 27) rows, counting from row 1 of the Upper Front. Note: Sleeve sizes 20” – 24 ½” will work to row 21, then repeat from row 12 – 21 until you have the correct number of rows.
- Ch3. Dc in next st and each st across. Turn. – 56 (62, 74, 80, 86, 98, 104, 110, 122) st
- Ch1. Hdc in 1st st. Beginning in same st, mc across until there is only 1 st left unworked. Hdc in last st. Turn. – 56 (62, 74, 80, 86, 98, 104, 110, 122) st
- Ch3. Dc in next st and each st across. Turn. – 56 (62, 74, 80, 86, 98, 104, 110, 122) st
- Ch1. Hdc in 1st st. Beginning in same st, mc across until there is only 1 st left unworked. Hdc in last st. Turn. – 56 (62, 74, 80, 86, 98, 104, 110, 122) st
- Ch3. Dc in next st and each st across. Turn. – 56 (62, 74, 80, 86, 98, 104, 110, 122) st
- Ch1. Hdc in 1st st. Beginning in same st, mc across until there is only 1 st left unworked. Hdc in last st. Turn. – 56 (62, 74, 80, 86, 98, 104, 110, 122) st
- Ch3. Sk 1 st, Vst in next st. *Sk 2 sts, Vst in next st.** Repeat from * to ** across until there are only 2 sts left unworked. Sk 1 st, dc in last st. Turn. – 56 (62, 74, 80, 86, 98, 104, 110, 122) st
- Note: For this row, you will be working into the tops of sts as well as into ch1 spaces. Ch1. Hdc in 1st st. Beginning in same st, mc across until there is only 1 st left unworked. Hdc in last st. Turn. – 56 (62, 74, 80, 86, 98, 104, 110, 122) st
Once you have the correct number of rows, do not bind off.
Hilo Tunic – Free Crochet Top Pattern
Lower Body of Crochet Top
Your project will look similar to Figure 5 (you may have a different number of rows after the Left and Right Sides on the Upper Front or none at all). Arrange your project so that it is folded in half with the wrong sides facing each other and the right side facing out, as seen in Figure 6. Note: Depending on what size you are making, your neckline may be facing away from you, and your hook may be on the other side. Use the yarn end indicated in Figure 6 to join to the first st on the front. Use your hook and working yarn to ss into the first st on the back. Turn.
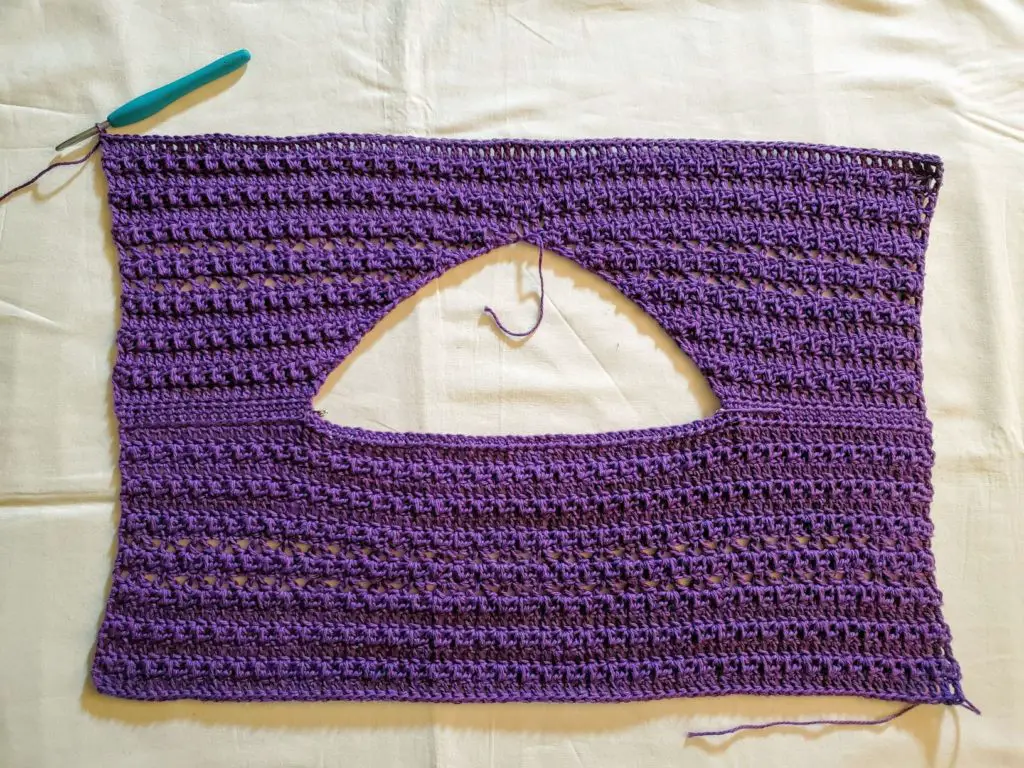
Figure 5
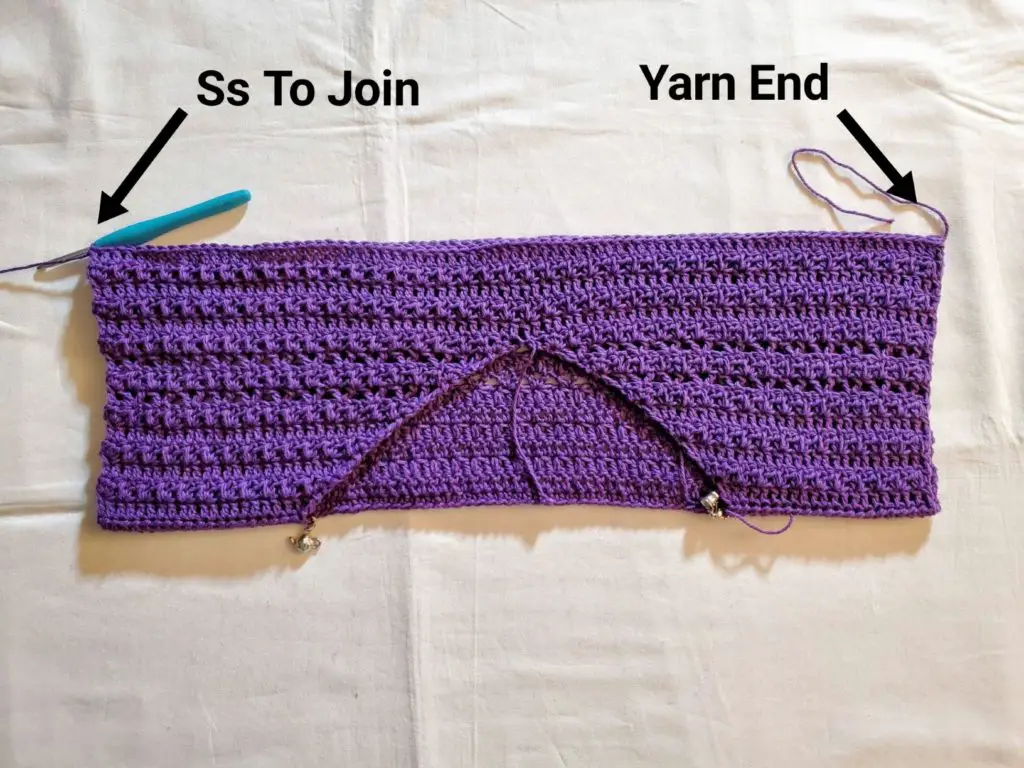
Figure 6
We will now be working in the round but still turning at the end of each round. The following rounds are numbered to match up with the previous row numbers. You will begin with the round that comes after the row number you finished with for the Upper Front. For example if you finished with row 11, you will begin at round 12. If you finished at row 19, you will begin at round 20. Then, you will work through round 21 and repeat rounds 12 – 21 until you have achieved your desired length minus 3” for the front (4 ½” for the back). Make sure you end on an even numbered round.
- Ch3. Dc in next st and each st around. Ss to join to 1st st. Turn. – 112 (124, 148, 160, 172, 196, 208, 220, 244) st
- Ch1. Hdc in 1st st. Beginning in same st, mc over next 54 (60, 72, 78, 84, 96, 102, 108, 120) sts. Hdc in next 2 sts. Beginning in same st, mc around until there is only 1 st left unworked. Hdc in last st. Ss to join to 1st st. Turn. – 112 (124, 148, 160, 172, 196, 208, 220, 244) st
Tip: If you are not a fan of counting, place a stitch marker in the 1st hdc st that comes after the first half of mc sts. Just remember to move that st marker up at each round.
- Ch3. Dc in next st and each st around. Ss to join to 1st st. Turn. – 112 (124, 148, 160, 172, 196, 208, 220, 244) st
- Ch1. Hdc in 1st st. Beginning in same st, mc over next 54 (60, 72, 78, 84, 96, 102, 108, 120) sts. Hdc in next 2 sts. Beginning in same st, mc around until there is only 1 st left unworked. Hdc in last st. Ss to join to 1st st. Turn. – 112 (124, 148, 160, 172, 196, 208, 220, 244) st
- Ch3. Dc in next st. Sk 1 st, Vst in next st. *Sk 2 sts, Vst in next st.** Repeat from * to ** over next 48 (54, 66, 72, 78, 90, 96, 102, 114) sts (you should now have 18 (20, 24, 26, 28, 32, 34, 36, 40) Vst worked). Sk 1 st, dc in next 2 sts. Sk 1 st, Vst in next st. Repeat from * to ** around until there is only 1 st left unworked. Sk last st. Ss to join to 1st st. Turn. – 112 (124, 148, 160, 172, 196, 208, 220, 244) st
- Ch1. Hdc in 1st st. Beginning in same st, mc over next 54 (60, 72, 78, 84, 96, 102, 108, 120) sts. Hdc in next 2 sts. Beginning in same st, mc around until there is only 1 st left unworked. Hdc in last st. Ss to join to 1st st. Turn. – 112 (124, 148, 160, 172, 196, 208, 220, 244) st
Once you have the desired length, make sure you finish on an even numbered round and that you have turned. The wrong side of your work should now be facing you. You will now begin working in rows again to create the side slits and front and back panels. Do not bind off.
Hilo Tunic – Free Crochet Top Pattern
Back Panel
Again, the rows below are numbered to match up with the rounds above. Begin with the row that comes after the round you just finished. You will work 11 of the rows below, so when you get to row 21, repeat from row 12 until you have 11 rows total.
- Ch3. Dc in next 55 (61, 73, 79, 85, 97, 103, 109, 121) sts. Turn. – 56 (62, 74, 80, 86, 98, 104, 110, 122) st
- Ch1. Hdc in 1st st. Beginning in same st, mc over next 54 (60, 72, 78, 84, 96, 102, 108, 120) sts. Hdc in next st. Turn. – 56 (62, 74, 80, 86, 98, 104, 110, 122) st
- Ch3. Dc in next 55 (61, 73, 79, 85, 97, 103, 109, 121) sts. Turn. – 56 (62, 74, 80, 86, 98, 104, 110, 122) st
- Ch1. Hdc in 1st st. Beginning in same st, mc over next 54 (60, 72, 78, 84, 96, 102, 108, 120) sts. Hdc in next st. Turn. – 56 (62, 74, 80, 86, 98, 104, 110, 122) st
- Ch3. Dc in next 55 (61, 73, 79, 85, 97, 103, 109, 121) sts. Turn. – 56 (62, 74, 80, 86, 98, 104, 110, 122) st
- Ch1. Hdc in 1st st. Beginning in same st, mc over next 54 (60, 72, 78, 84, 96, 102, 108, 120) sts. Hdc in next st. Turn. – 56 (62, 74, 80, 86, 98, 104, 110, 122) st
- Ch3. Sk 1 st, Vst in next st. *Sk 2 sts, Vst in next st.** Repeat from * to ** over next 48 (54, 66, 72, 78, 90, 96, 102, 114) sts (you should now have 18 (20, 24, 26, 28, 32, 34, 36, 40) Vst worked). Sk 1 st, dc in next st. Turn. – 56 (62, 74, 80, 86, 98, 104, 110, 122) st
- Ch1. Hdc in 1st st. Beginning in same st, mc over next 54 (60, 72, 78, 84, 96, 102, 108, 120) sts. Hdc in next st. Turn. – 56 (62, 74, 80, 86, 98, 104, 110, 122) st
Once you have worked 11 of the rows above, bind off.
Front Panel
With the wrong side facing you, attach your yarn in the first unworked stitch on the front lower body. Work 7 of the rows above (under Back Panel), beginning with the same row you began with for the back panel. Do not bind off.
Bottom Edging
We will now add a simple sc edge to the bottom. Begin with the right side of your work facing you.
- Ch1. 3sc in 1st st. 1 sc in next st and each st across the front panel until there is only 1 st left unworked. 3sc in last st.
Working into the ends of each row in the side slit, sc evenly in the following manner: [Work 1 sc into the 1st mc row. Work 2 sc into each dc row. Work 2 sc into the next mc row.] Repeat everything in the [ ], alternating between 1sc and 2sc in the mc rows and working 2sc into each dc row. You should end up with 31 – 33 sts in the side slit (not including the 3sc corners) give or take. The exact number doesn’t matter. What matters is that the side slit is even and flat, not stretched or bunched up.
Work 3sc into the 1st st on the back panel. 1 sc in next st and each st across until there is only 1 st left unworked. 3sc in last st. Work this side slit in the same manner you did for the other one. Ss to join to 1st st. Bind off.
Sleeves
Follow these instructions according to your sleeve size (not body size). Join your yarn with the wrong side facing you, close to the underarm.
- Ch1. Work 38 (44, 50, 56, 62, 68, 74, 80, 86, 92, 98) hdc sts evenly around the armhole. Ss to join to 1st st. Turn. – 38 (44, 50, 56, 62, 68, 74, 80, 86, 92, 98) st
Note: To make this easier, I divided the total number of sts in half and worked the sleeve one half at a time. I placed 2hdc in the end of each dc row and alternated between 1 & 2 hdc in the end of each mc/hdc row. Then, I counted how many sts I had, and if I needed to, I added or subtracted sts. Unfortunately, there is no exact science for this round, but I promise it is the only round where you will have to improvise.
- Ch3. Dc in next st and each st around. Ss to join to 1st st. Turn. – 38 (44, 50, 56, 62, 68, 74, 80, 86, 92, 98) st
- Ch1. Hdc in 1st st. Beginning in same st, mc around until you have only 1 st left unworked. Hdc in last st. Ss to join to 1st st. Turn. – 38 (44, 50, 56, 62, 68, 74, 80, 86, 92, 98) st
- Ch3. Dc in next st. Sk 1 st, Vst in next st. *Sk 2 sts, Vst in next st.** Repeat from * to ** around until you have only 1 st left unworked. Sk last st. Ss to join to 1st st. Turn. – 38 (44, 50, 56, 62, 68, 74, 80, 86, 92, 98) st
- Ch1. Hdc in 1st st. Beginning in same st, mc around until you have only 1 st left unworked. Hdc in last st. Ss to join to 1st st. Turn. – 38 (44, 50, 56, 62, 68, 74, 80, 86, 92, 98) st
If you would like longer sleeves, simply repeat rounds 2 – 11 until you have achieved your desired length. Then, proceed to Sleeve Edging. Do not bind off.
Sleeve Edging
- Ch1. Sc in 1st st and each st around. Ss to join to 1st st. Bind off. – 38 (44, 50, 56, 62, 68, 74, 80, 86, 92, 98) st
Neck Edging
With the right side facing you, join your yarn somewhere on the back of the neck.
- Ch1. Sc around the neck in the following manner:
- 1 sc in each st along the back of the neck.
- When you get to the front of the neck, place 2sc in the end of each hdc/mc row and 3sc in the end of each dc row.
- Once all sts and row ends have been worked, ss to join to 1st st. Bind Off
Weave in your ends, and you’re done!
I hope you love your new crochet tunic, and I look forward to seeing all of your beautiful pictures on Ravelry!
If you’d like to know when I post new patterns and tutorials, head on over to my Facebook and Instagram and give me a like and a follow!
If you enjoyed The Hilo Tunic – Free Crochet Top Pattern, you may want to check out my other designs!
Hilo Tunic – Free Crochet Top Pattern
And until next time… Happy Hooking! 😉