
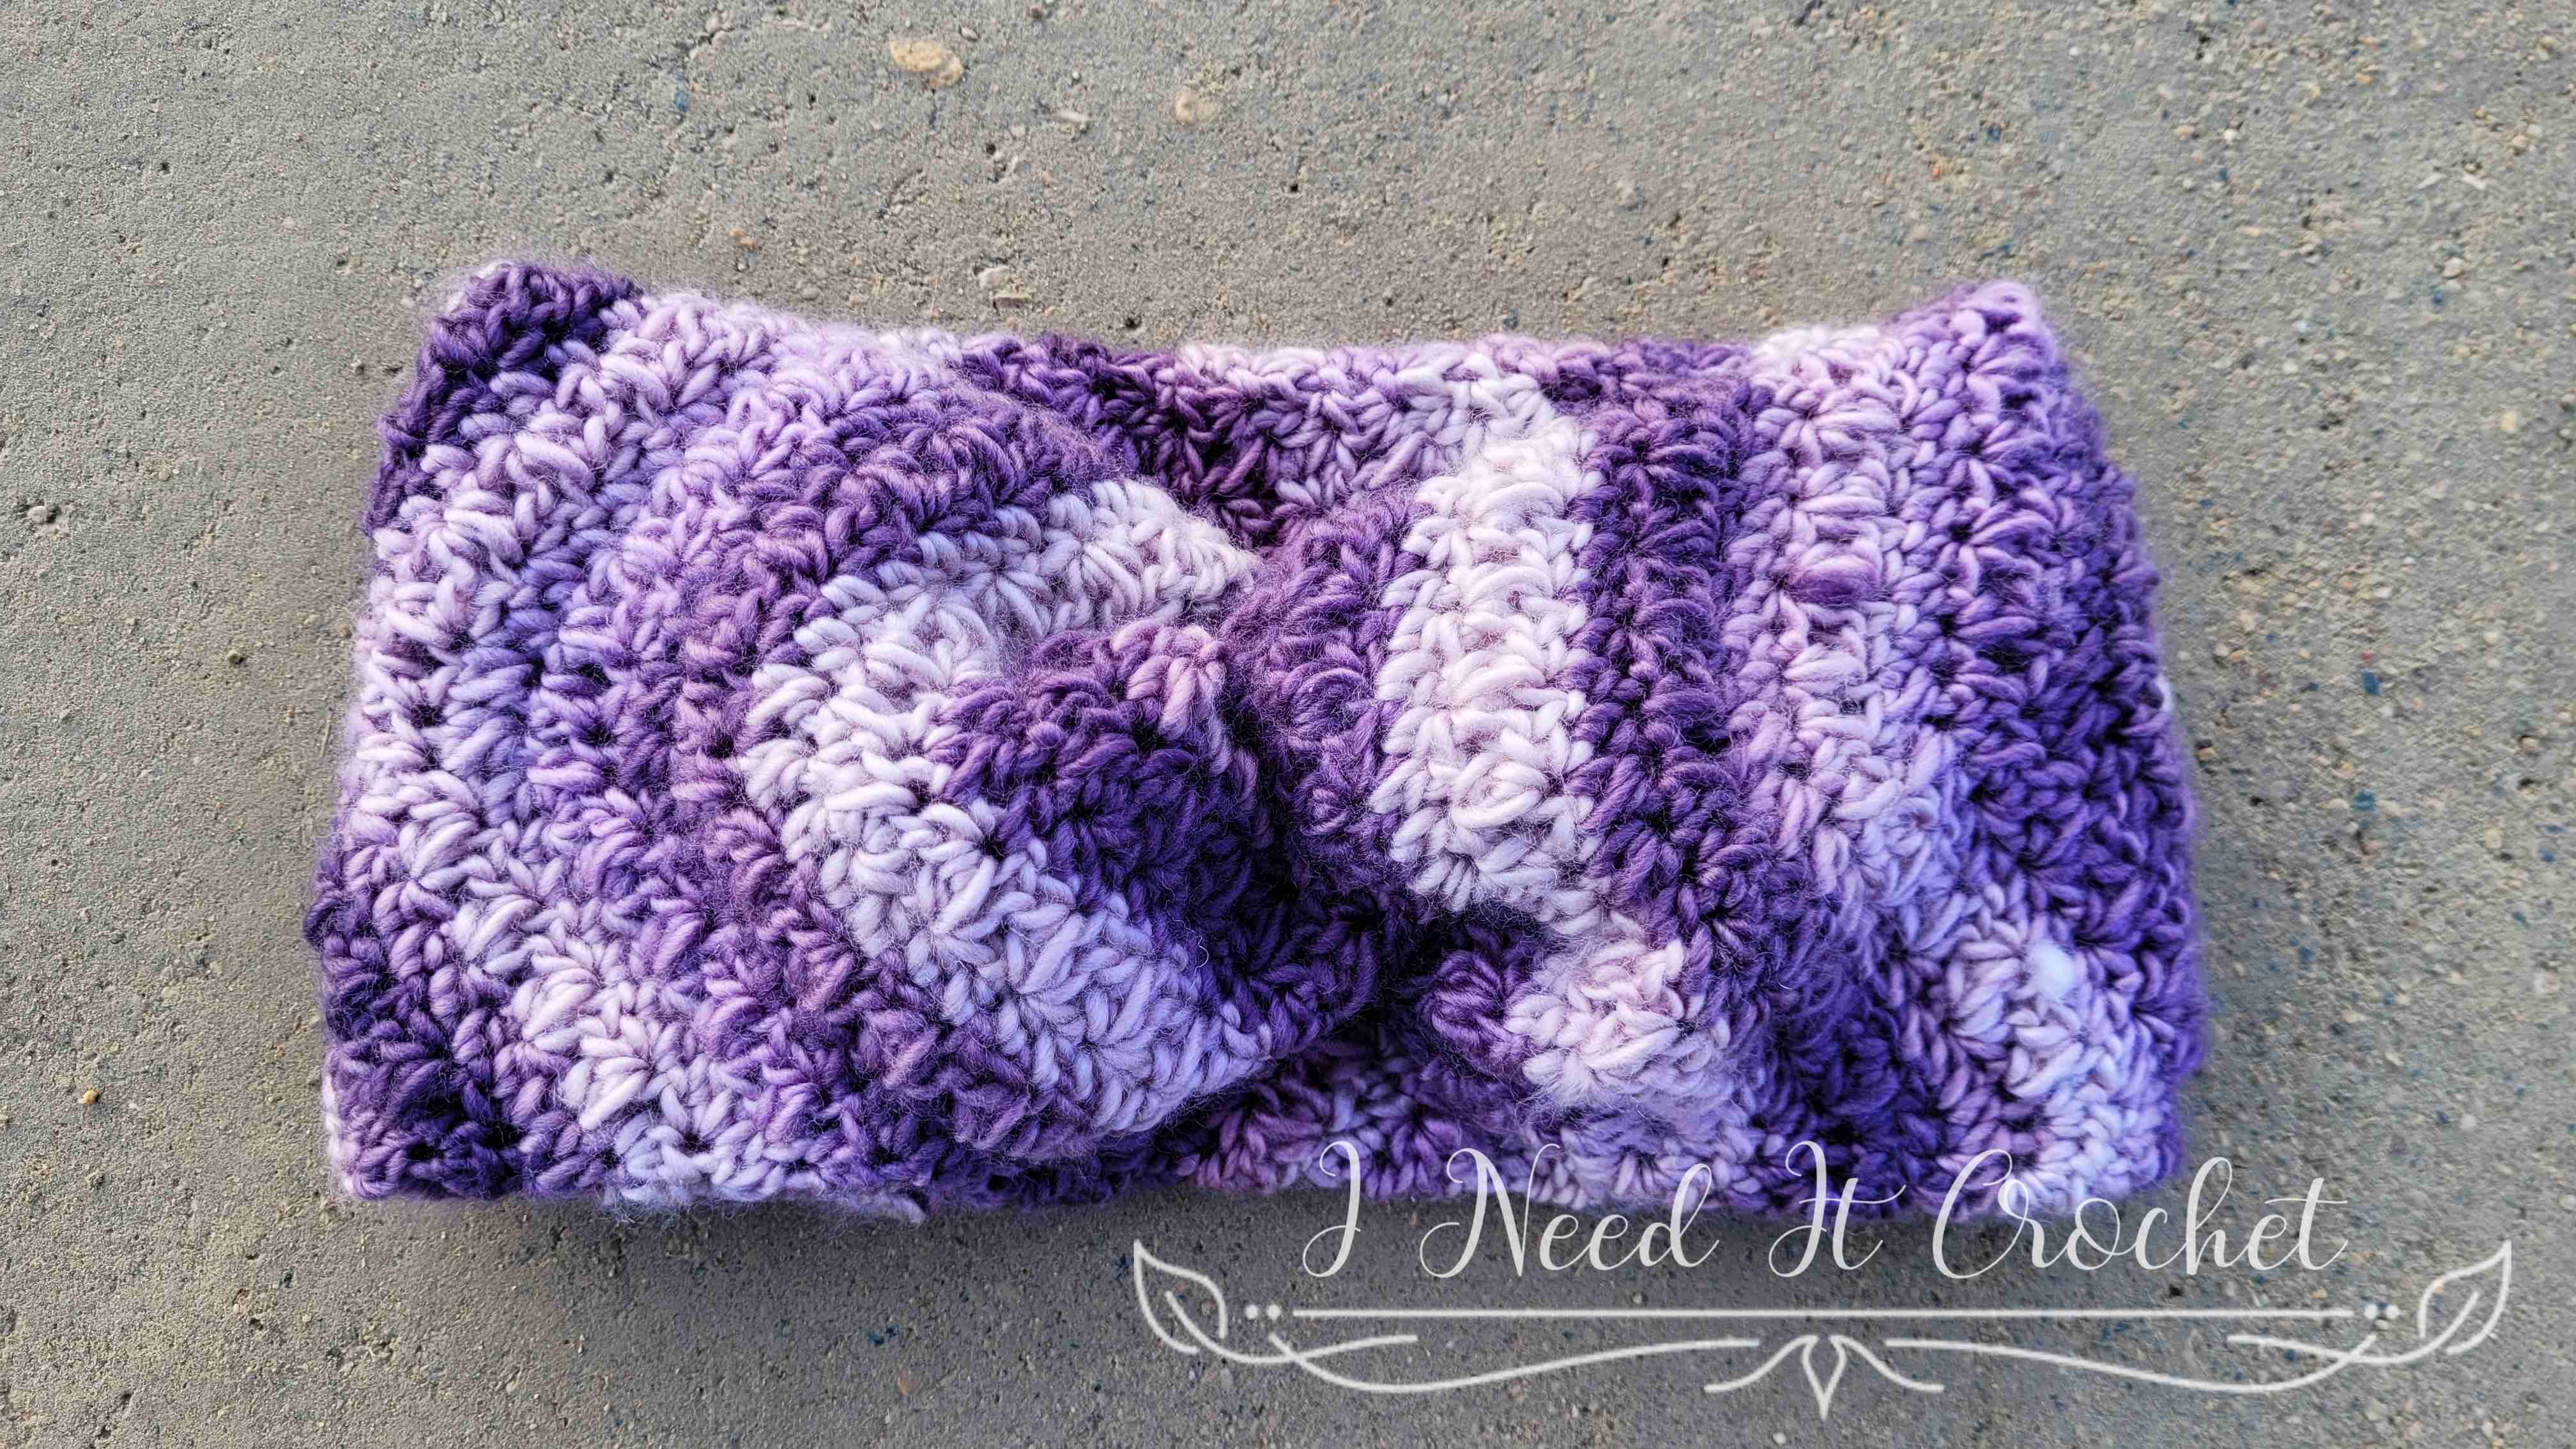
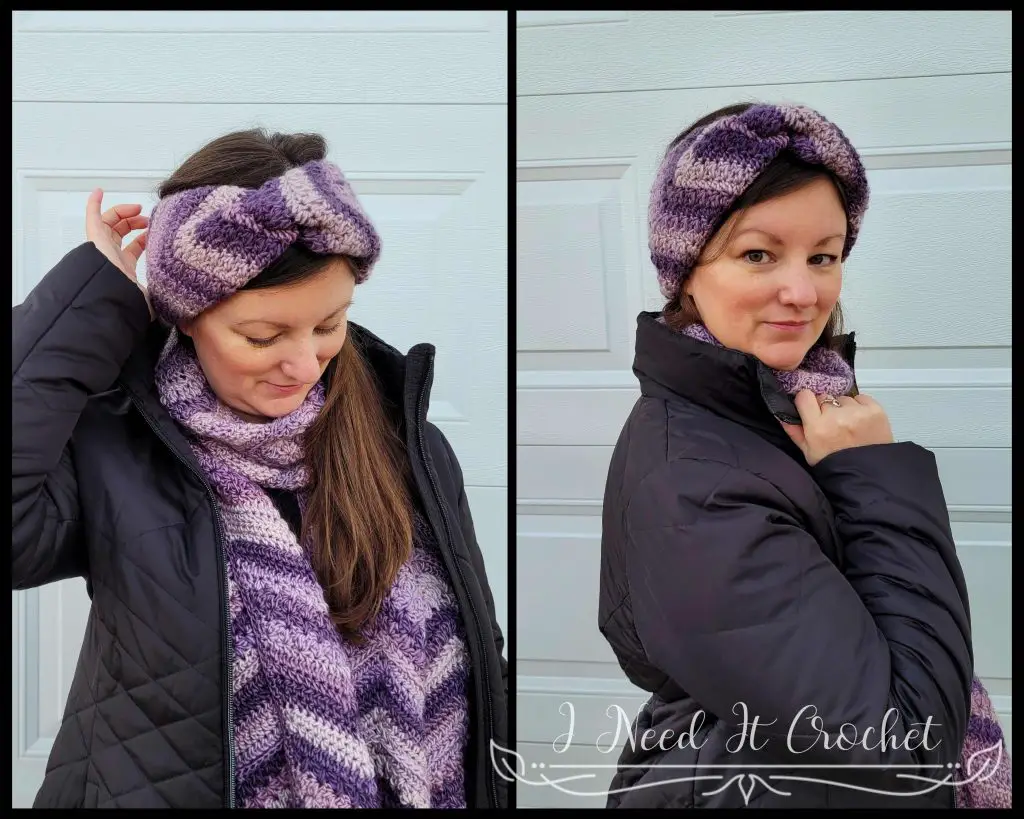
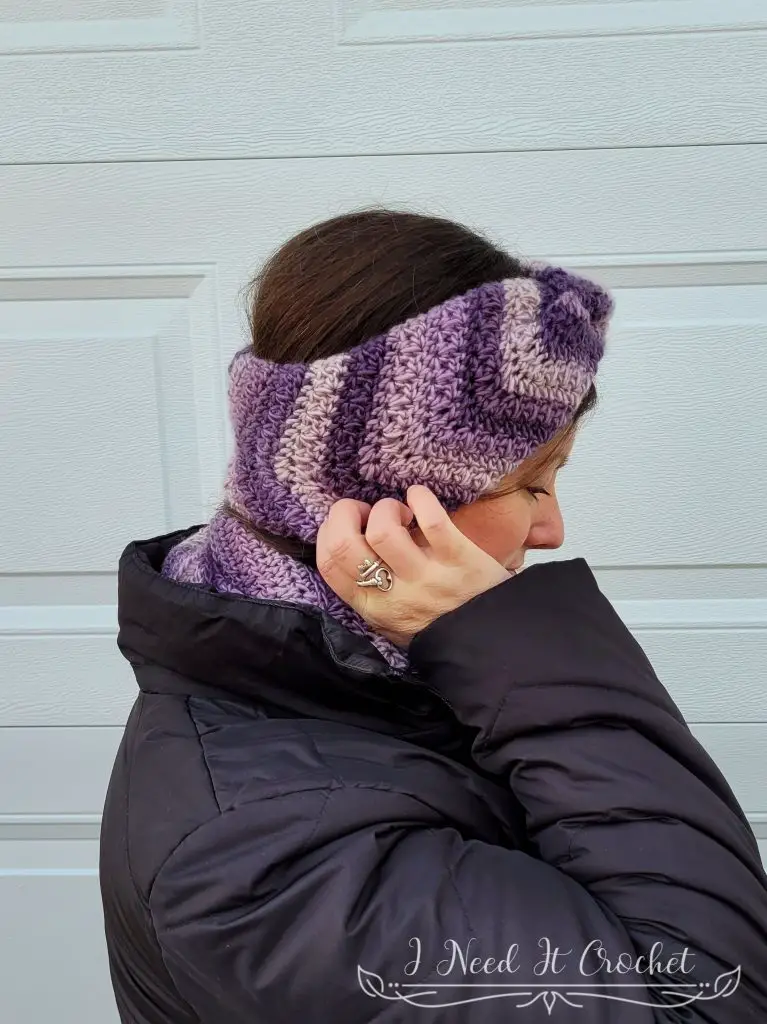
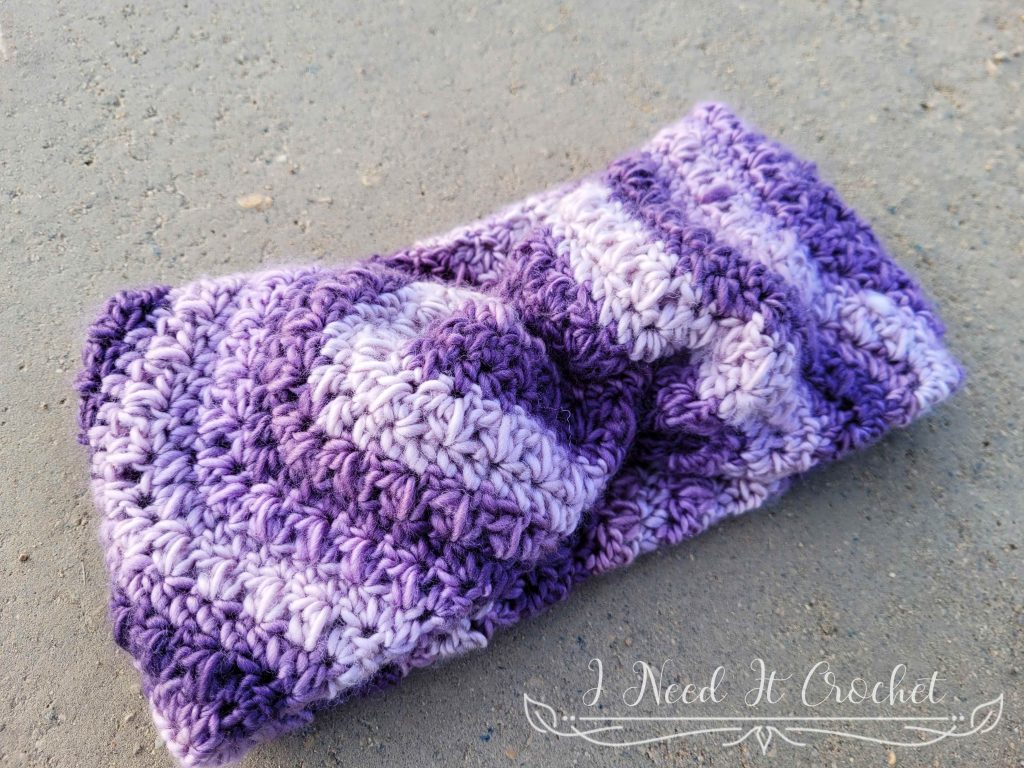
Ear Warmer Crochet Pattern – Wandering Clusters
The Ear Warmer Crochet Pattern – Wandering Clusters is copyrighted by I Need It Crochet. You may not copy, share, change, or sell the pattern itself. Also, you may not claim this pattern as your own. All pictures contained in this pattern fall under the copyright and may not be used.
Finished items made from the Ear Warmer Crochet Pattern – Wandering Clusters belong to you, and you may do what you wish with them. If you choose to sell them on Etsy, I would very much appreciate it if you credited me as the pattern designer.


Or… Just scroll down to see it for free!
I was surprised to look through my collection of crochet patterns and find that I had never designed an ear warmer! How did that happen?? Oh well, I guess there’s no time like the present!
The chunky texture of the mixed cluster stitch was just begging me to make it into a twisted ear warmer. So I doubled it up to make it extra warm!
Ear Warmer Crochet Pattern – Wandering Clusters
You may have noticed that I have also written a matching scarf pattern. To view the Wandering Clusters Scarf crochet pattern for free, click here.
Finished Sizes:
Instructions given to fit size Small; changes for Medium & Large are in ()
S (M, L)
To Fit Head Circumference: 21” (22”, 23”)
Finished Circumference: 20” (21”, 22”)
Finished Width: 4 ¾”
Materials:
I used Loops & Threads Facets, which is 100% Acrylic, #4 Worsted weight yarn.
Any yarn of similar weight would work.
Approximately 213 (220, 227) yds.
5mm Hook
Stitch Markers
Yarn Needle
Scissors
Measuring Tape
Abbreviations:
Sk = Skip
Sp = Space
St = Stitch
Ss = Slip Stitch
Ch = Chain
Hdc = Half Double Crochet
Mc = Mixed Cluster (see tutorial here)
Gauge Swatch:
16 hdc x 10 rows = 4” H x 4” W
Notes:
Ch1 at the beginning of a row is never considered a stitch.
A Mixed Cluster counts as 2 stitches.
Ear Warmer Crochet Pattern – Wandering Clusters
Instructions
This ear warmer is made of a long tube and sewn together at the ends. You will be working in the round and turning at the end of each round.
To make this pattern easier to work, after round 1 you will be starting each round in the 2nd stitch. This is the stitch immediately to the left of where you placed your slip stitch in the previous row. If you look at Figure 1 below, you will see that I have ch1 and worked my 1st hdc2tog beginning in the next st. When you do this, you must remember that the stitch where you placed your slip stitch in the previous row, is where you will finish your last stitch. (See Figure 2)
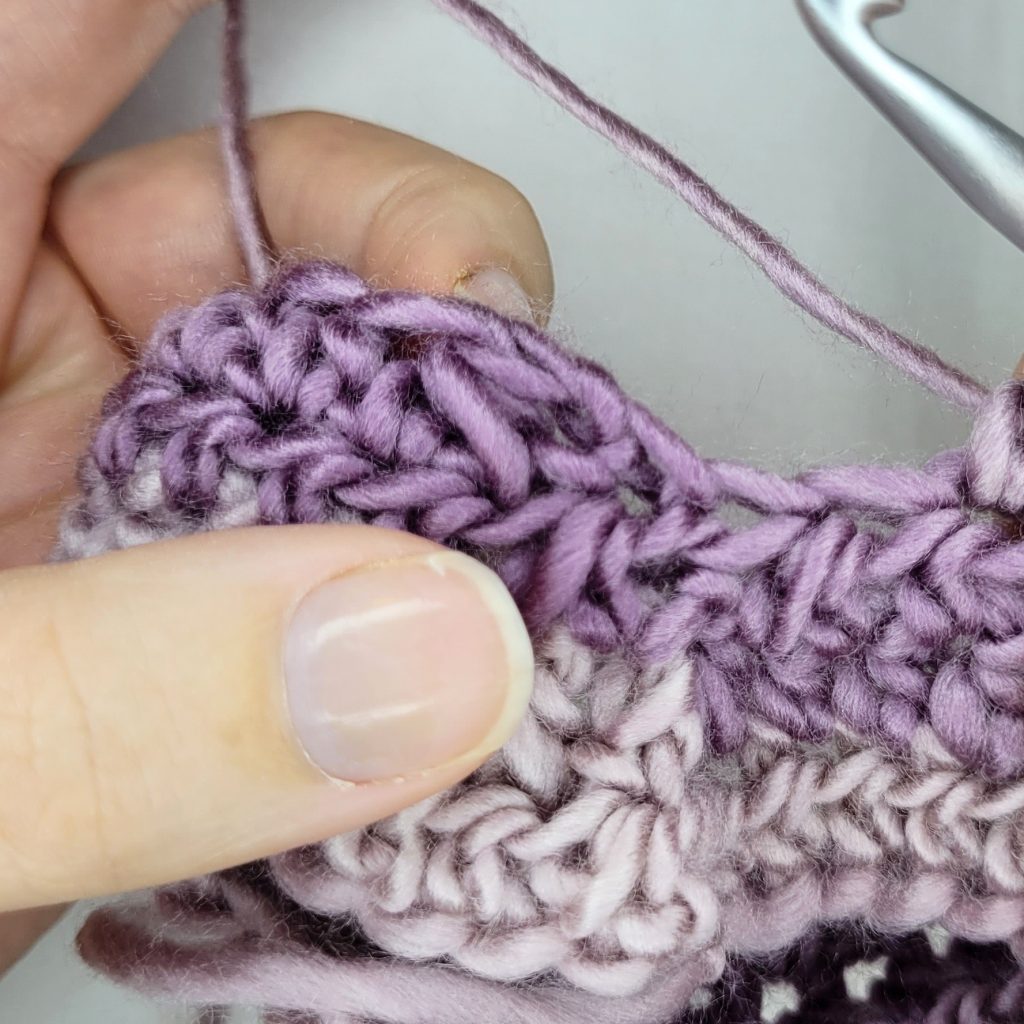
Figure 1

Figure 2
With 5mm hook (or the hook used to obtain gauge)
Ear Warmer
Ch44. Ss to 1st ch to form a ring.
- (RS) Ch1. Working in the back hump of the ch: Hdc2tog. *Hdc in next 8 chs. 2hdc in next ch twice. Hdc in next 8 chs.** Hdc2tog twice. Repeat from * to **. Hdc2tog over last 2 chs. Ss to join to 1st st. Turn. – 44 st
- (WS) Ch1. Beginning in next st, hdc2tog. *Work 4 mc. 2hdc in next st twice. Work 4 mc.** Hdc2tog twice. Repeat from * to **. Hdc2tog over last 2 sts. Ss to join to 1st st. Turn. – 44 st
- Ch1. Beginning in next st, hdc2tog. *Hdc in next 8 sts. 2hdc in next st twice. Hdc in next 8 sts.** Hdc2tog twice. Repeat from * to **. Hdc2tog over last 2 sts. Ss to join to 1st st. Turn. – 44 st
Repeat rounds 2 & 3 until your project is 20” (21”, 22”) long, ending with a repeat of round 3. Bind off, leaving a long tail for sewing.
Note: If you are using Loops and Threads Facets or a similar 1-ply yarn, you will need a more sturdy yarn to sew the ends with, as 1-ply yarns do not hold up to a lot of pulling. I used a purple cotton blend yarn to sew my ends together (see Figure 3 below). You should pick a yarn that is close to the same colour as your project. This was what I had on hand. Cut off a 12” strand.
Before we sew the ends together, we need to fold them to give the twisted/knotted look.
- Start by folding in half lengthwise, as shown in Figure 4. Do not match the ends up evenly. They should only be overlapping half way. From here the half shown on top will be called the upper half, and the half shown on bottom will be called the lower half.
- Fold the upper half widthwise so it’s wrapped behind part of the lower half (see Figure 5).
- Fold the lower half widthwise so it’s wrapped behind part of the upper half (see Figure 6).
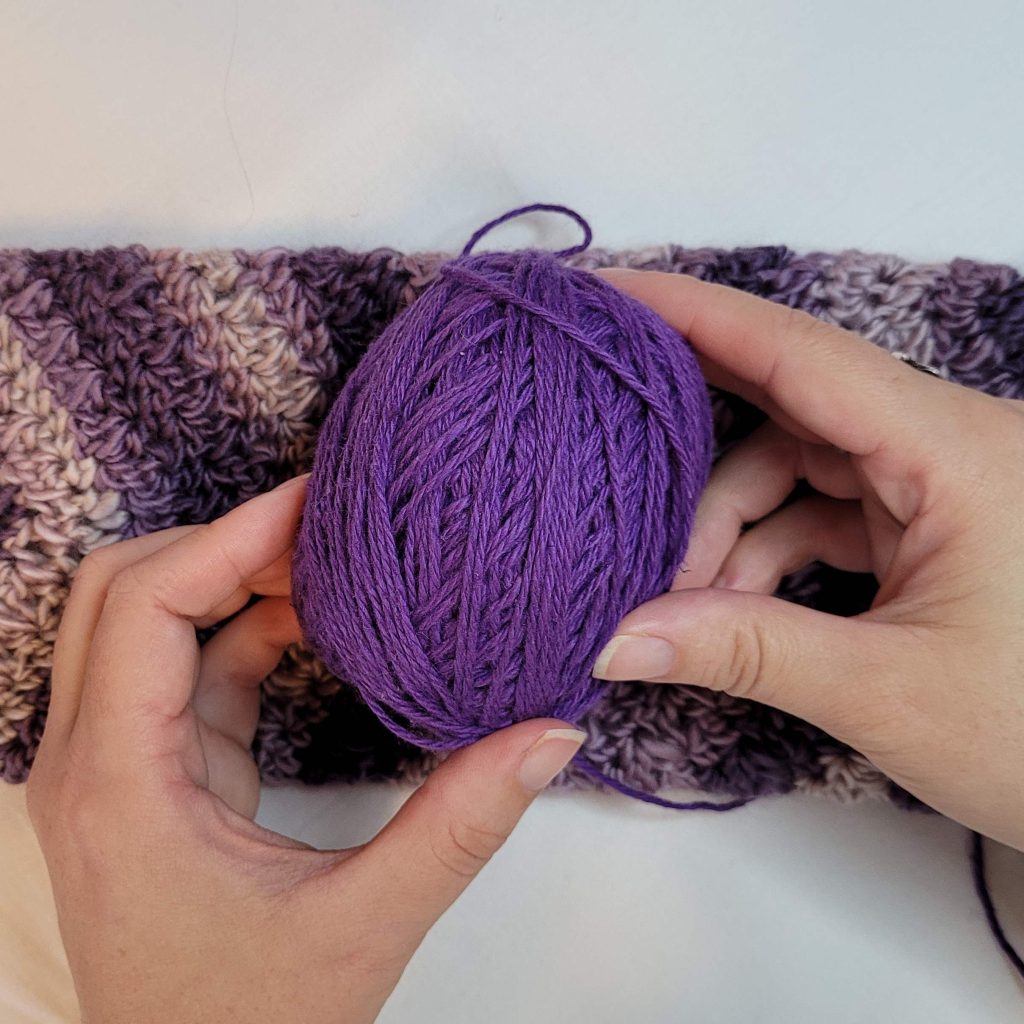
Figure 3
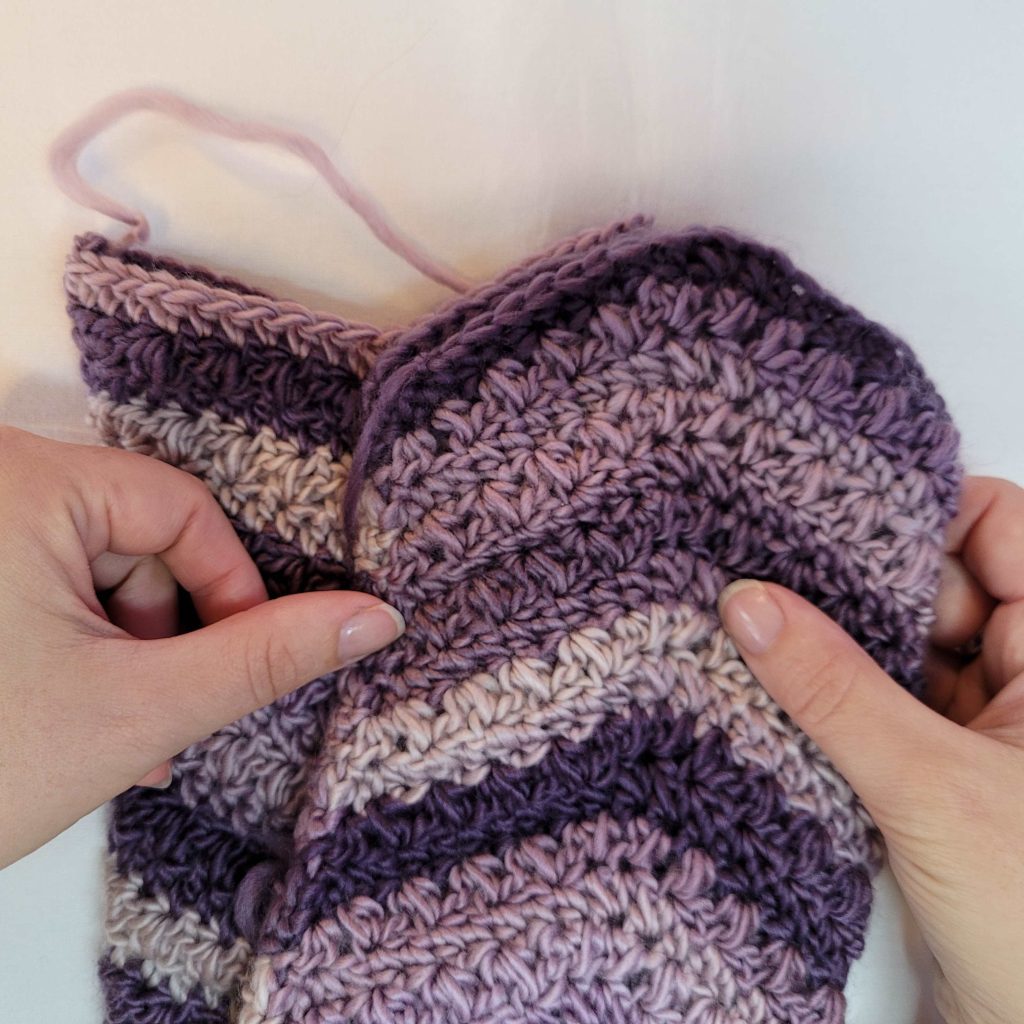
Figure 4
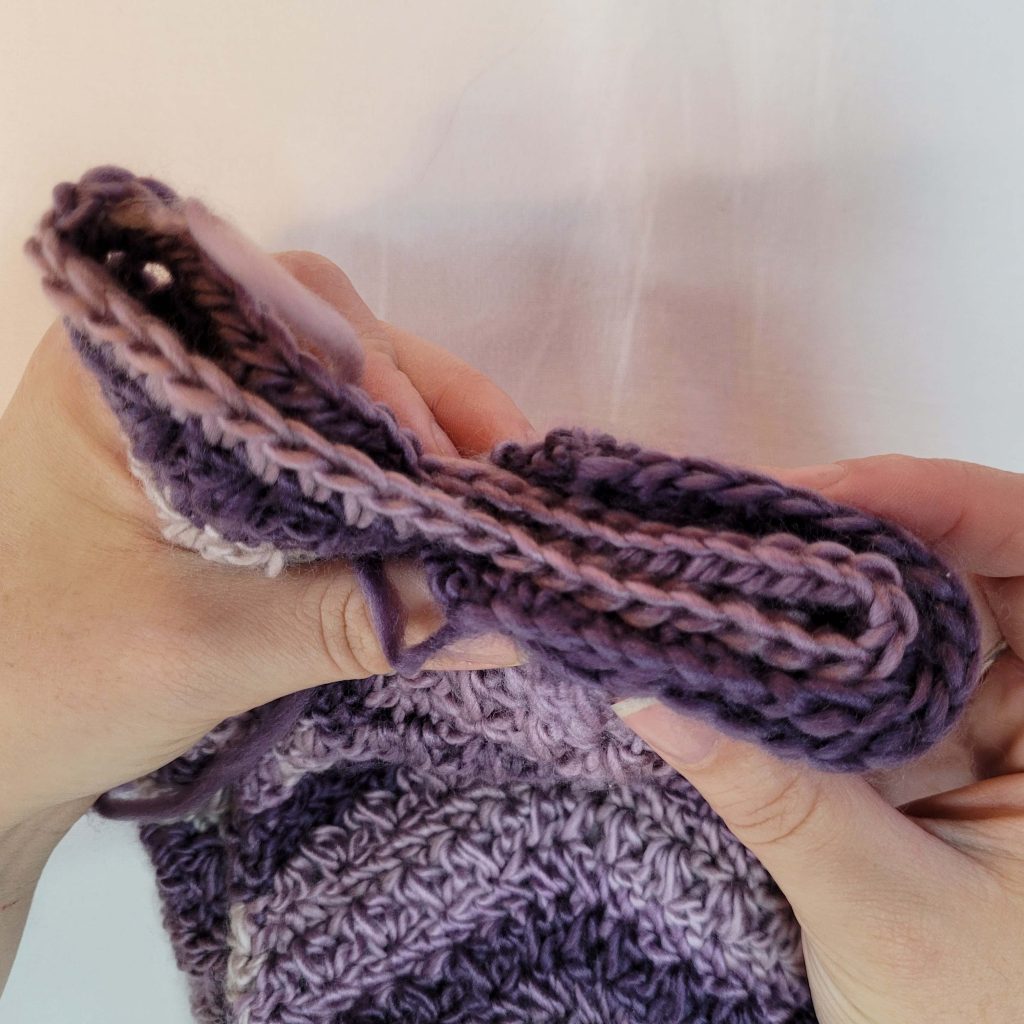
Figure 5
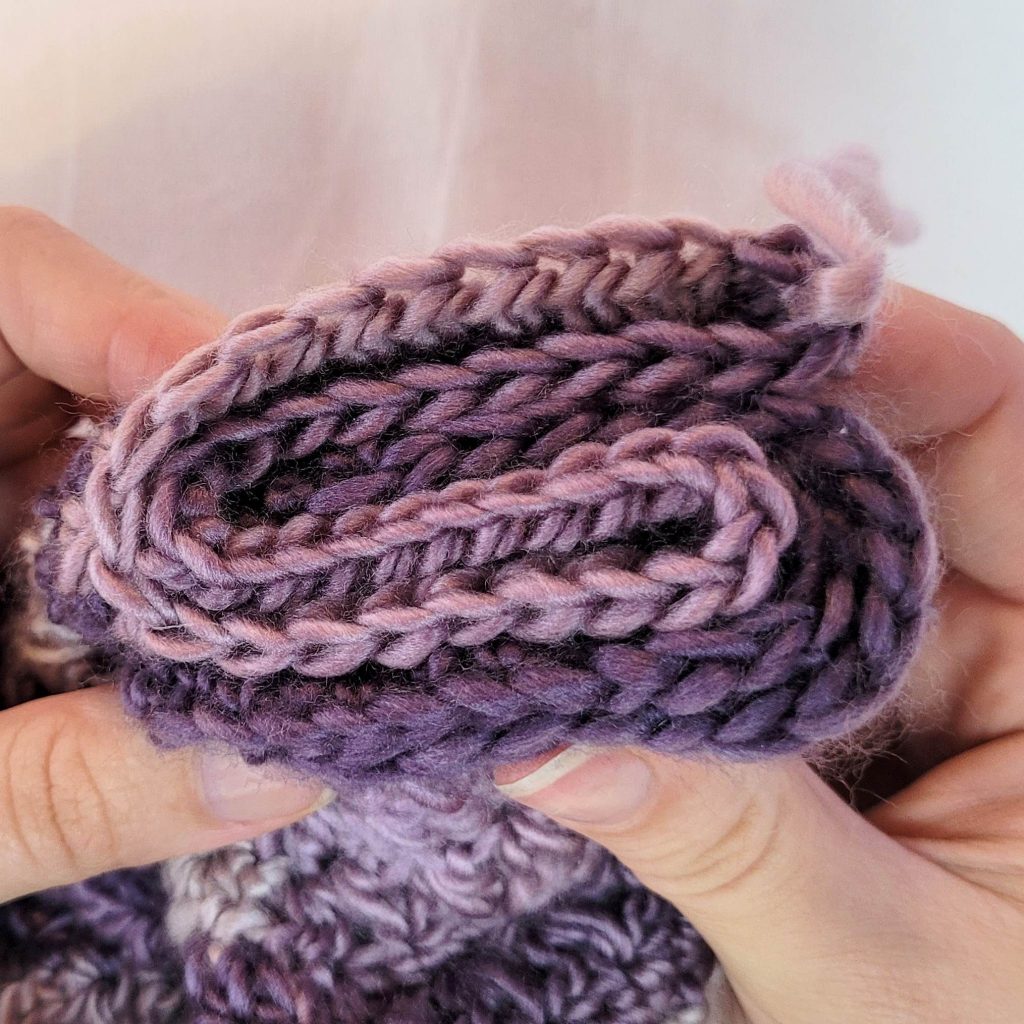
Figure 6
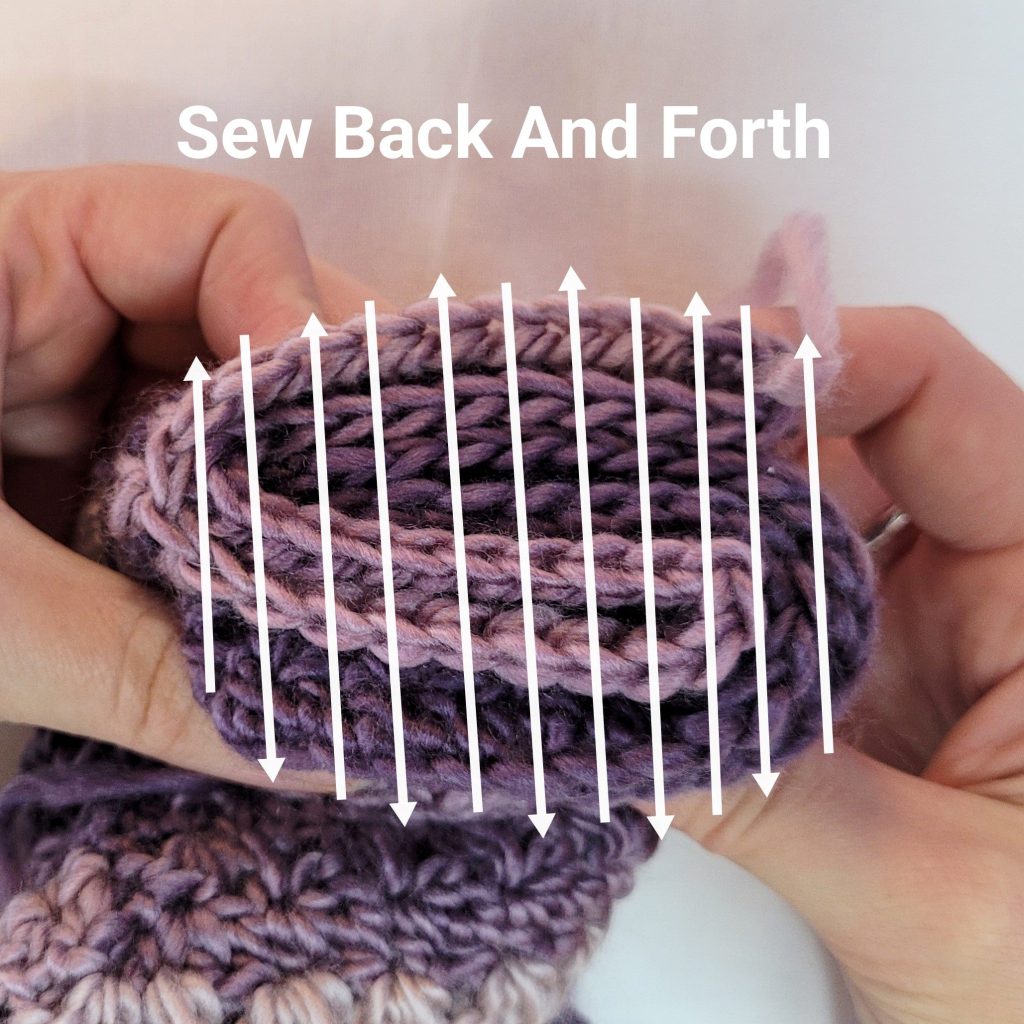
Figure 7
Now we’ll sew the ends together.
- Using your yarn needle, sew back and forth through all 8 layers (see Figure 7 above).
- Make sure you get all the way across and take extra care to pick up the ends of each layer on your way by.
- Then pull the yarn tight. The layers should squish together, but don’t scrunch them sideways.
- Knot the end(s). This is the wrong side of your work.
- Turn your ear warmer right side out and give it a tug to adjust it.
Weave in your ends, and you’re done!
I hope you love your new crochet ear warmer, and I look forward to seeing all of your beautiful pictures on Ravelry!
If you’d like to know when I post new patterns and tutorials like the Free Crochet Scarf Pattern – Wandering Clusters, head on over to my Facebook and Instagram and give me a like and a follow!
If you enjoyed The Free Crochet Scarf Pattern – Wandering Clusters, you may want to check out my other designs!
Looking for the matching scarf pattern? Click the image below to view the Wandering Clusters Scarf crochet pattern for free!
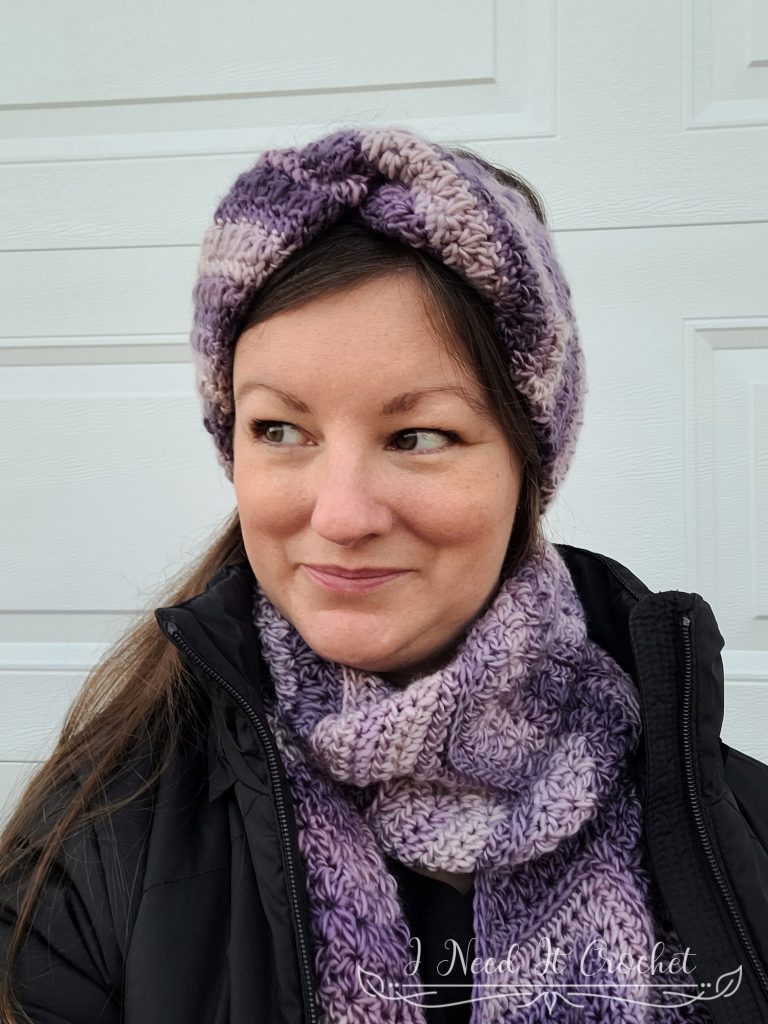
Ear Warmer Crochet Pattern – Wandering Clusters
And until next time… Happy Hooking! 😉