
This Flower Puff Stitch Tutorial for Spring Blooms is copyrighted by I Need It Crochet. You may not copy, share, change, or sell the tutorial itself. Also, you may not claim this tutorial as your own. All pictures contained in this tutorial fall under the copyright and may not be used.
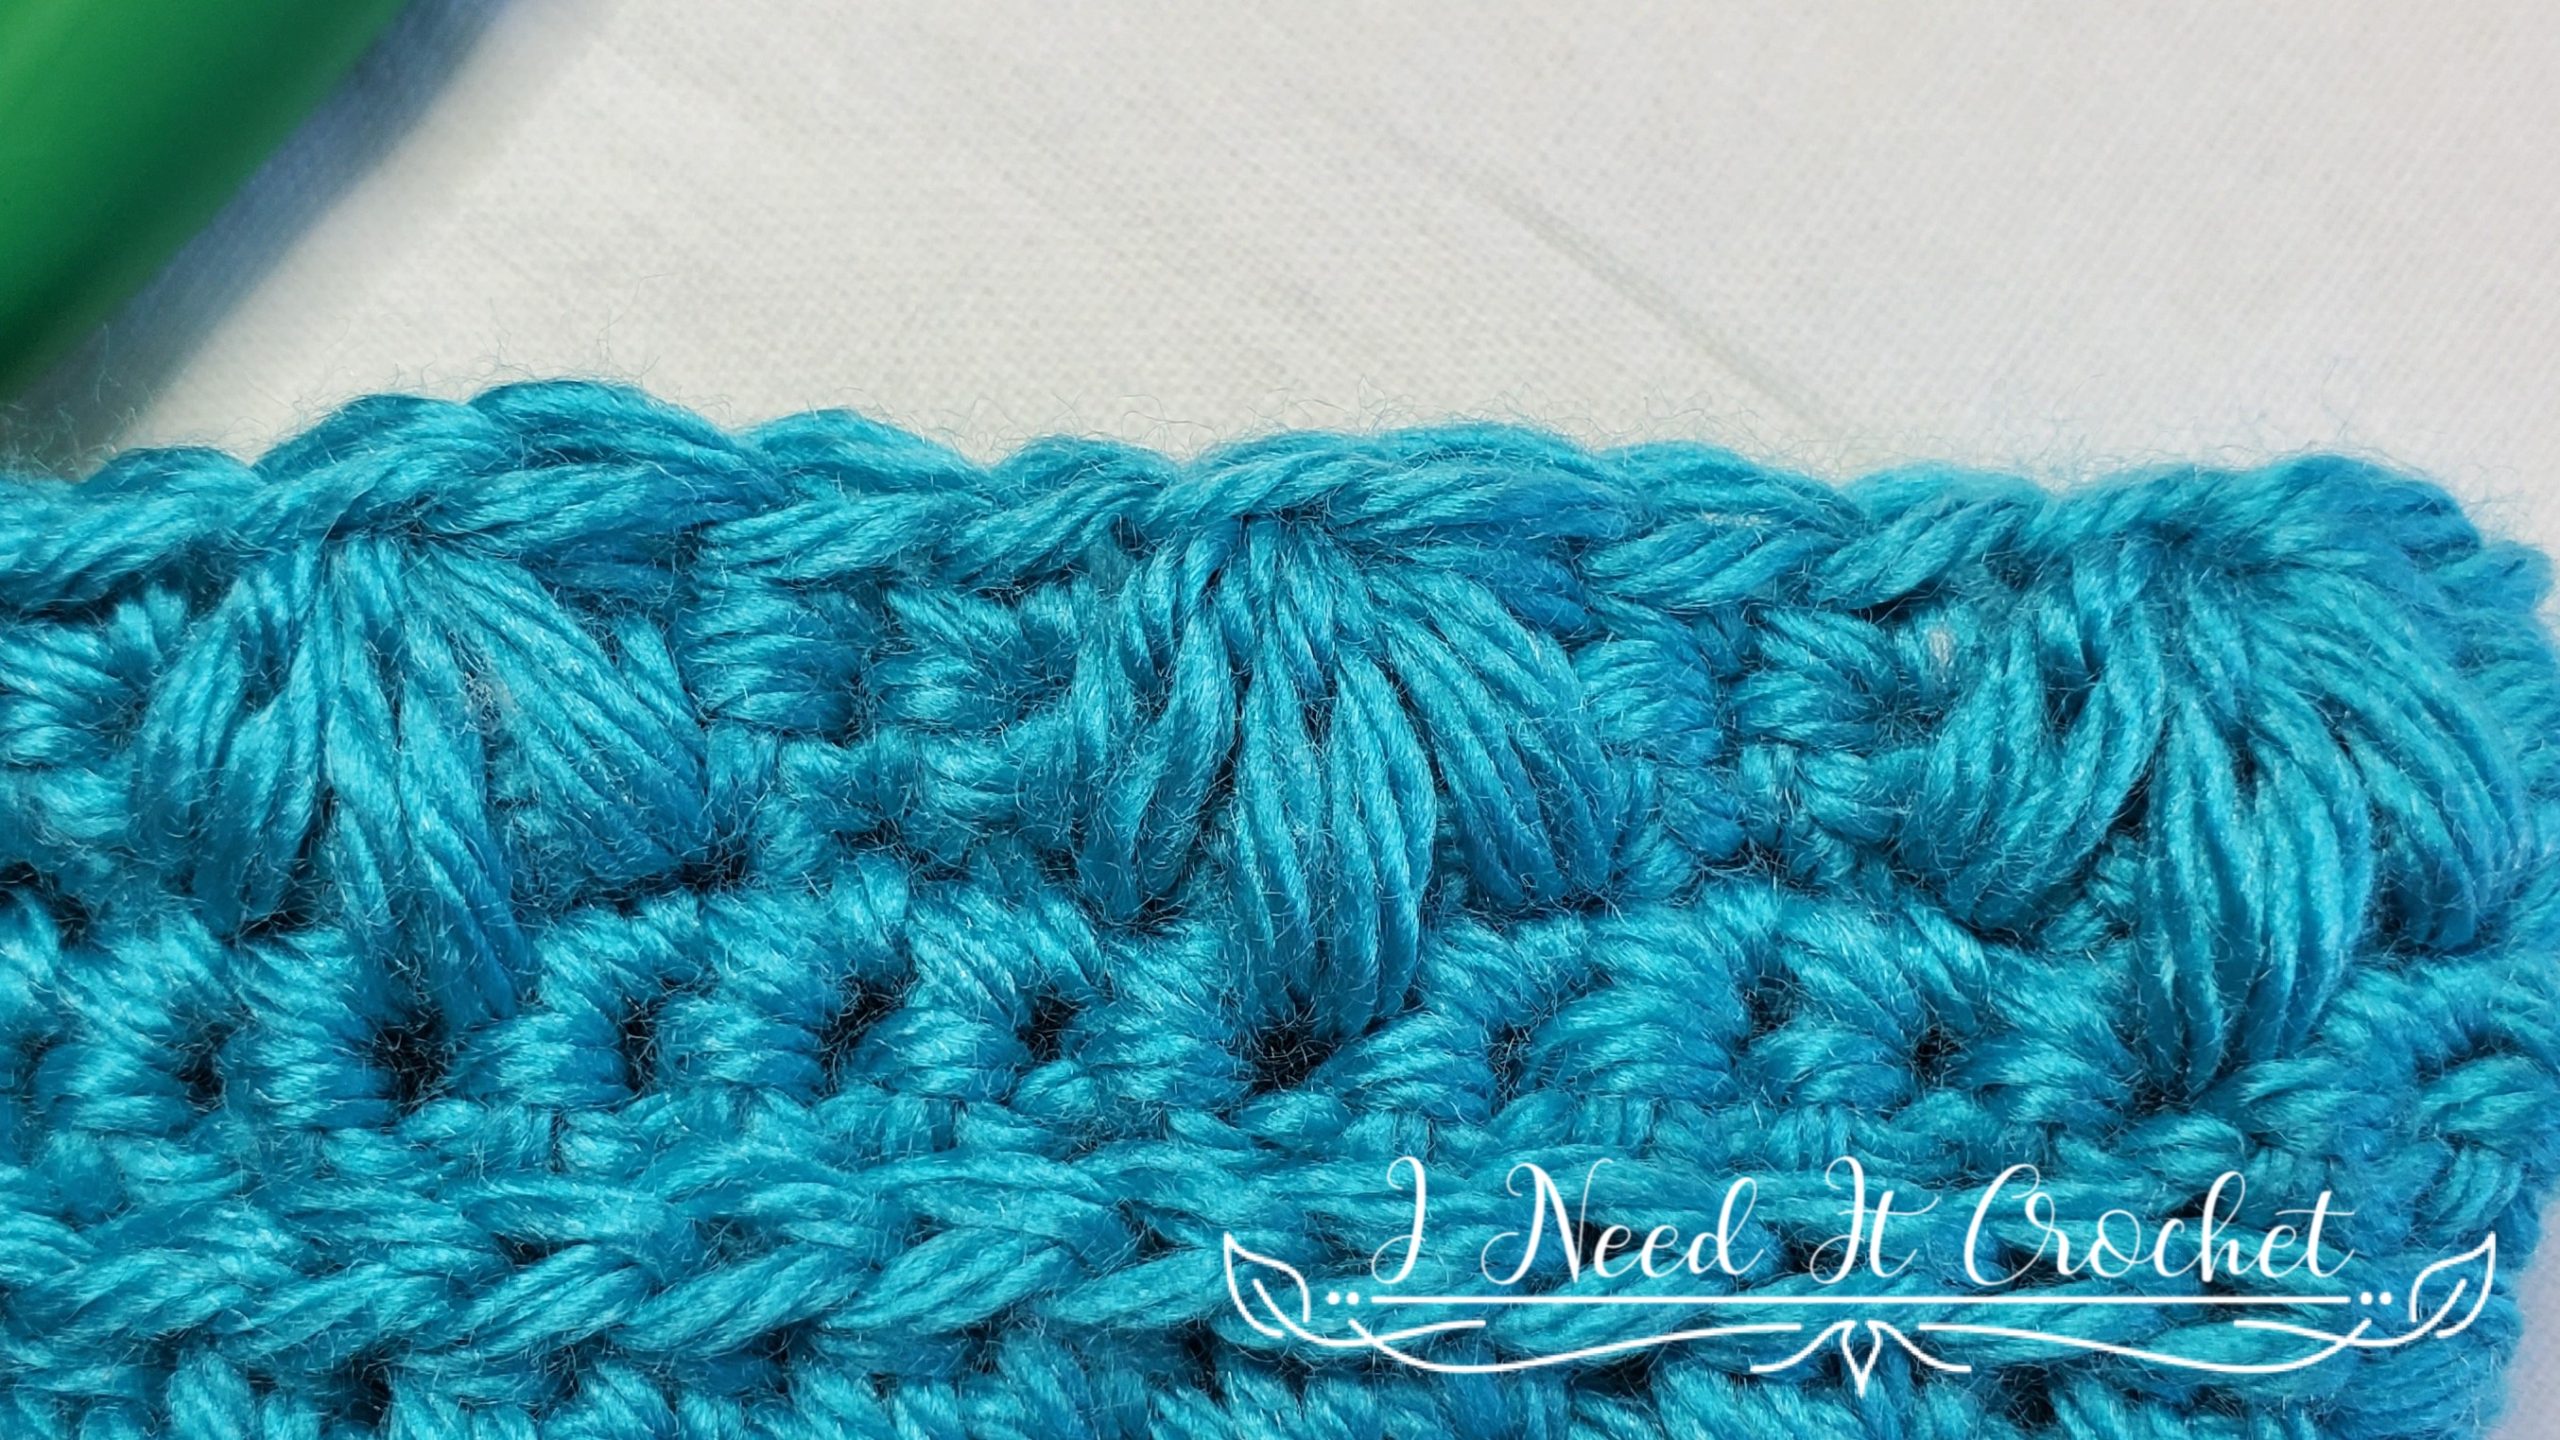
For the Spring Blooms patterns, I wanted to create a stitch that would have a similar look to the puff stitch, but with spread petals like a flower. I couldn’t find anything that suited my needs, so I just made this one up myself. It is basically a hdc6tog (half double crochet 6 together) spread over 3 different sts. Then, once you have finished your hdc6tog, you close the top of the flower puff with a ch1. This will result in a neat little flower-shaped puff. A flower puff stitch is considered 2 sts.
First, you place the specified number of sc. Then:
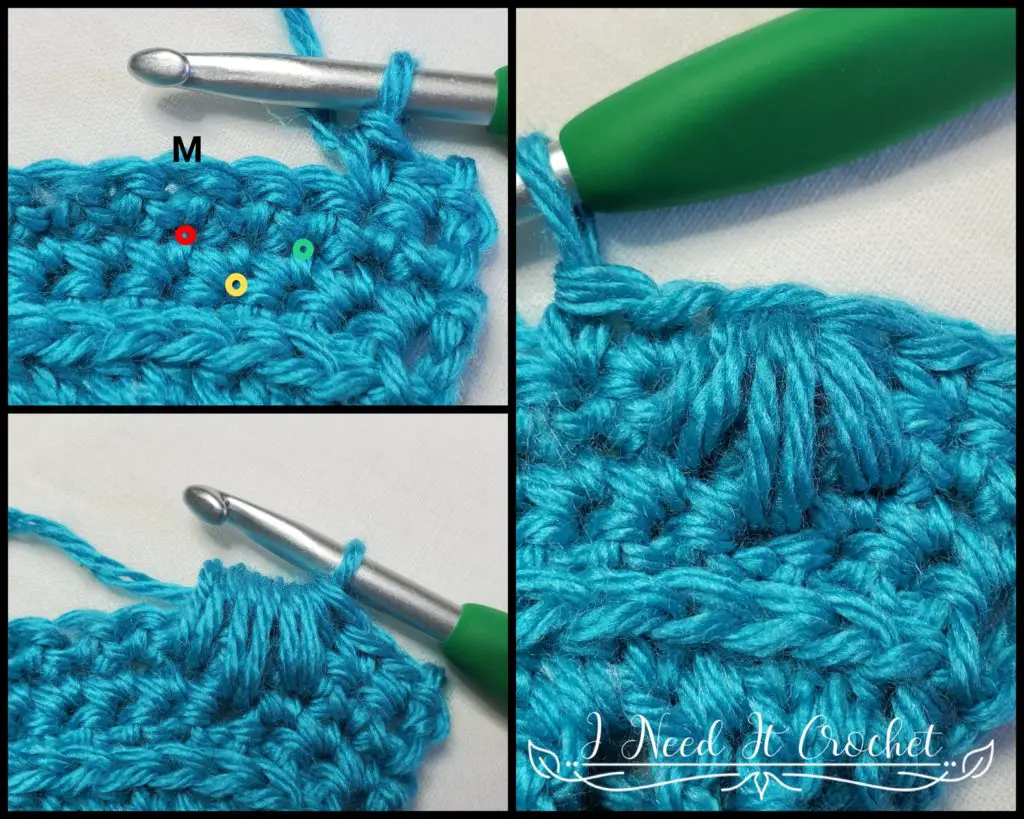
– *Yarn over, insert your hook into the first specified stitch (shown in green in figure 1), yarn over, and draw up a loop. ** Repeat from * to ** 1 more time. You should have 5 loops on your hook.
– *Yarn over, insert your hook into the second specified stitch (shown in yellow in figure 1), yarn over, and draw up a loop. ** Repeat from * to ** 1 more time. You should have 9 loops on your hook.
– *Yarn over, insert your hook into the third specified stitch (shown in red in figure 1), yarn over, and draw up a loop. ** Repeat from * to ** 1 more time. You should have 13 loops on your hook.
– Yarn over and pull your yarn through all 13 loops (see figure 2). Finish off with a ch1.
– You have now made a flower puff stitch. Skip the specified number of stitches, and continue on with your next set of sc. Your work should now look like figure 3.
Tip: Once you have completed your flower puff stitch, it can be difficult to tell where to put your next sc because your skipped st(s) are hiding under a flower puff. If you’re having trouble with this, try placing a stitch marker in the stitch where you should be placing your next sc. As you can see in figure 1, I have skipped 2 sts and placed my marker in the next st. This is where my next sc will go

Figure 1
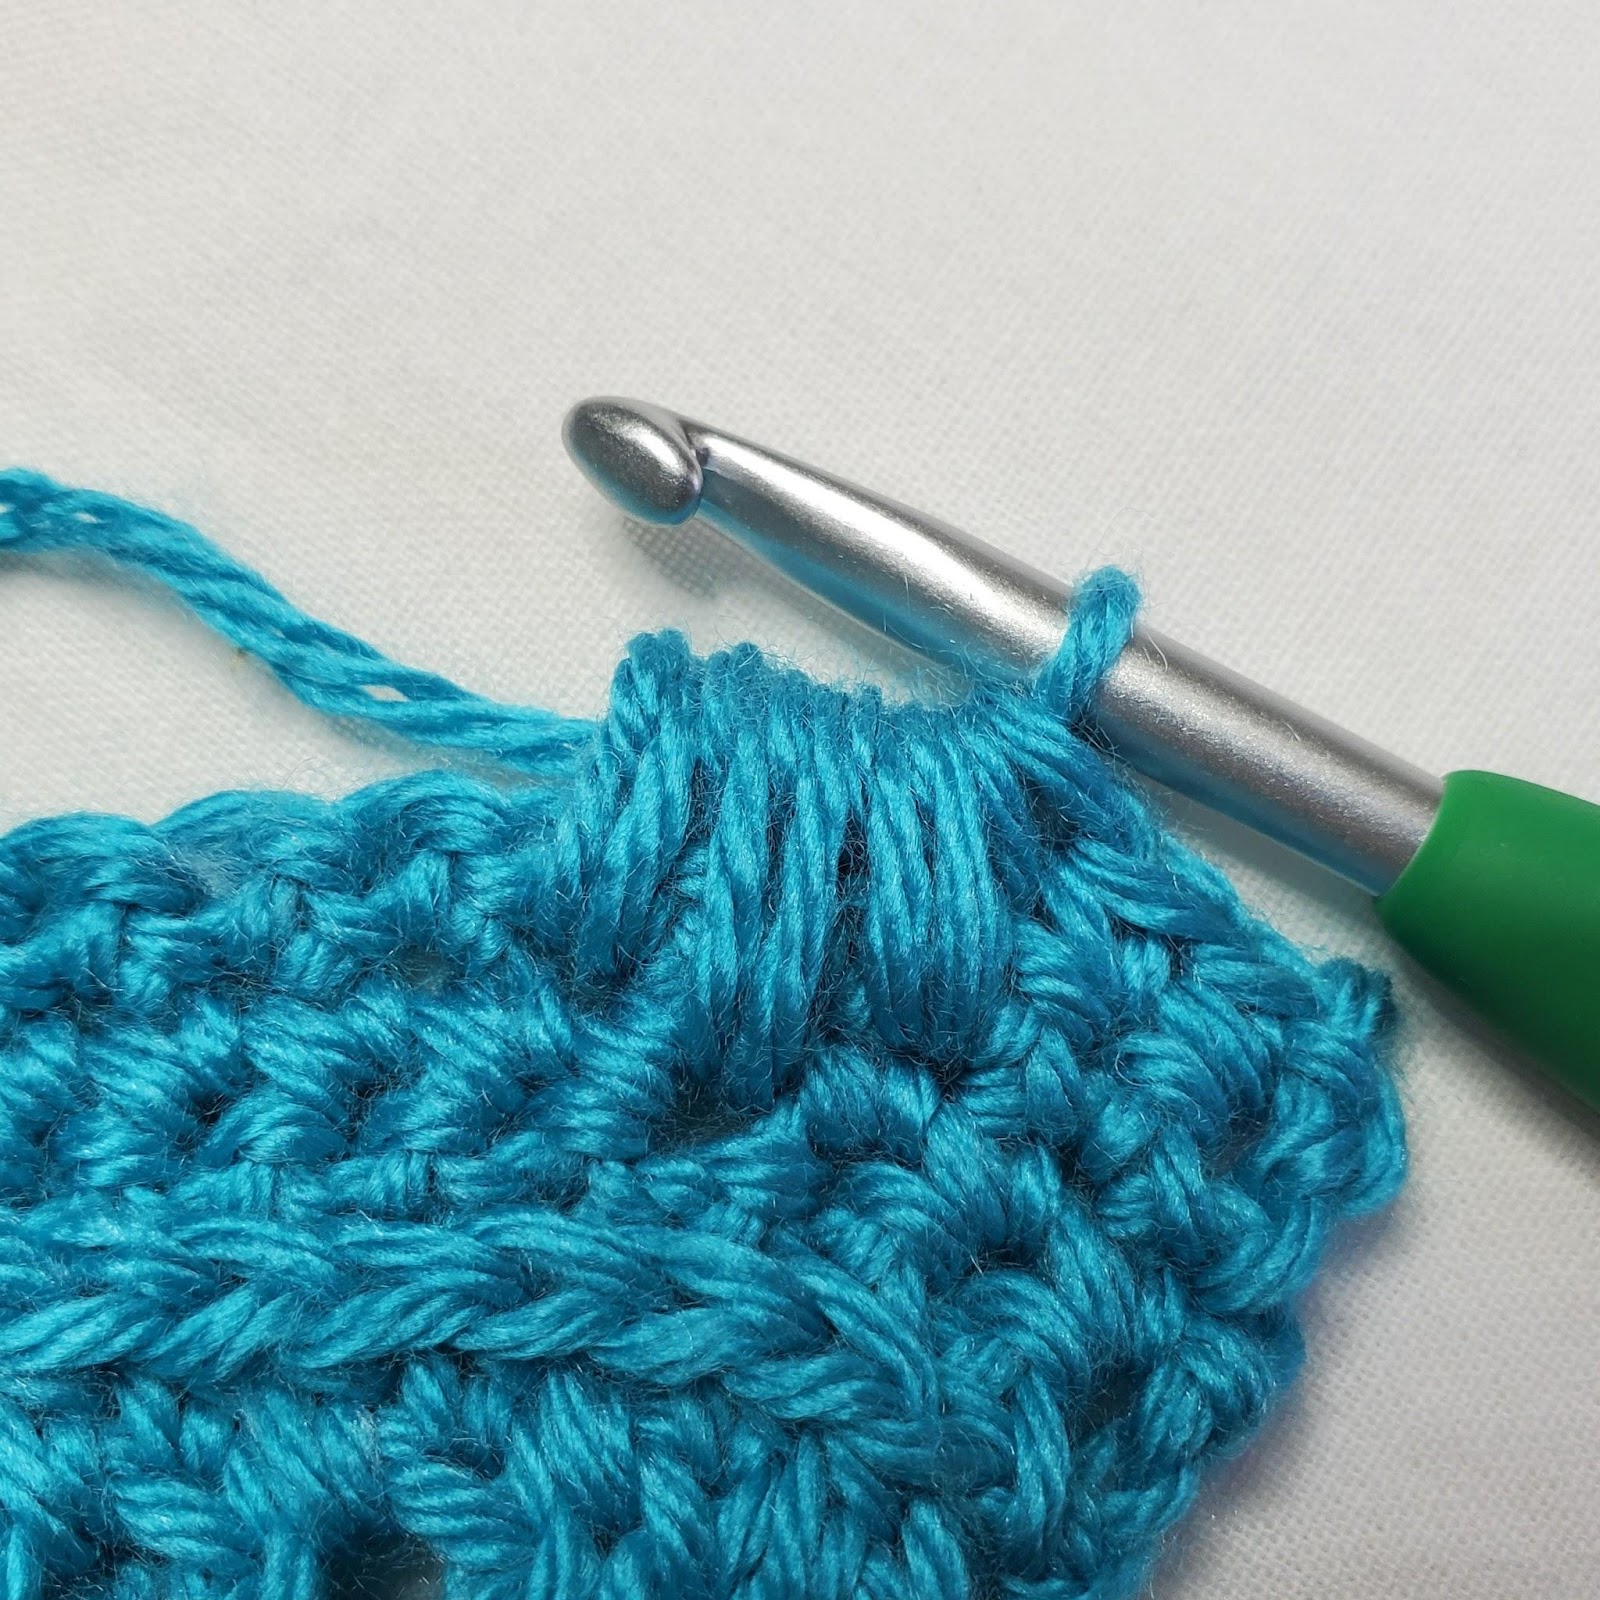
Figure 2

Figure 3
So now you know how to do the Flower Puff Stitch for Spring Blooms. Head on over to the Spring Blooms Bandana Cowl pattern and give it a go!
If you enjoyed this Flower Puff Stitch Tutorial for Spring Blooms, you might want to check out my other Tips, Tricks, and Tutorials.
If you’d like to know when I post new patterns and tutorials, head on over to my Facebook and Instagram and give me a like and a follow!

Happy Hooking! 😉