
The Kids Cozy Cabled Sweater Dress – Free Crochet Pattern is copyrighted by I Need It Crochet. You may not copy, share, change, or sell the pattern itself. Also, you may not claim this pattern as your own. All pictures contained in this pattern fall under the copyright and may not be used.
Finished items made from the Kids Cozy Cabled Sweater Dress – Free Crochet Pattern belong to you, and you may do what you wish with them. If you choose to sell them on Etsy, I would very much appreciate it if you credited me as the pattern designer.


Or… Just scroll down to see it for free!
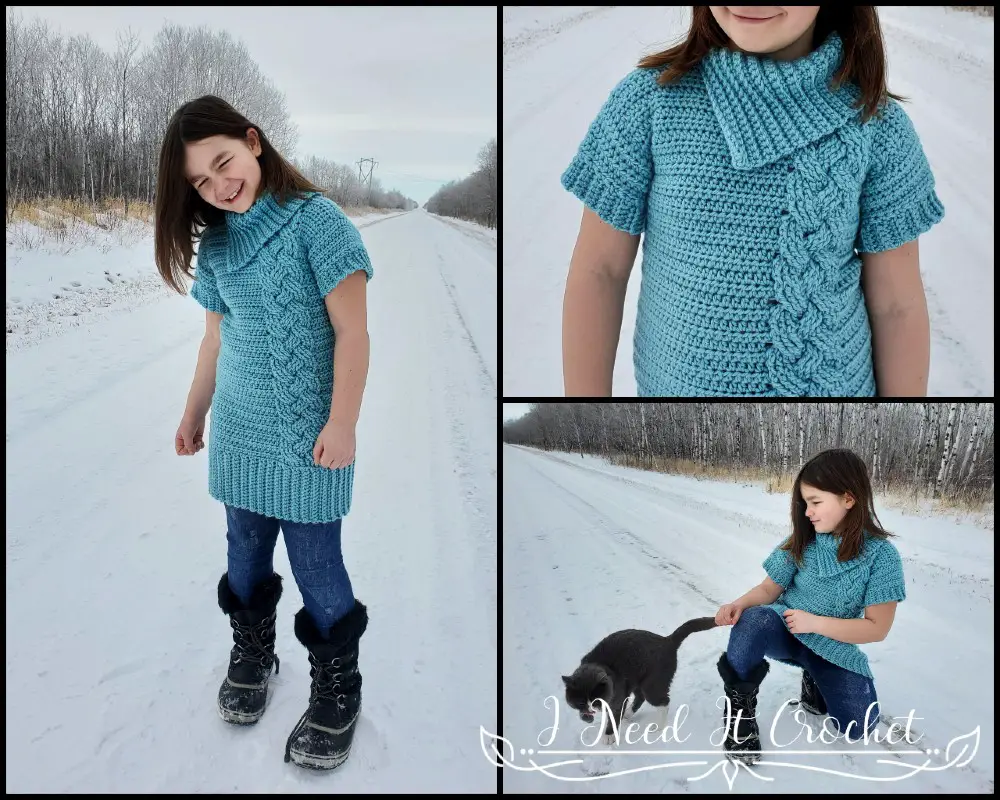
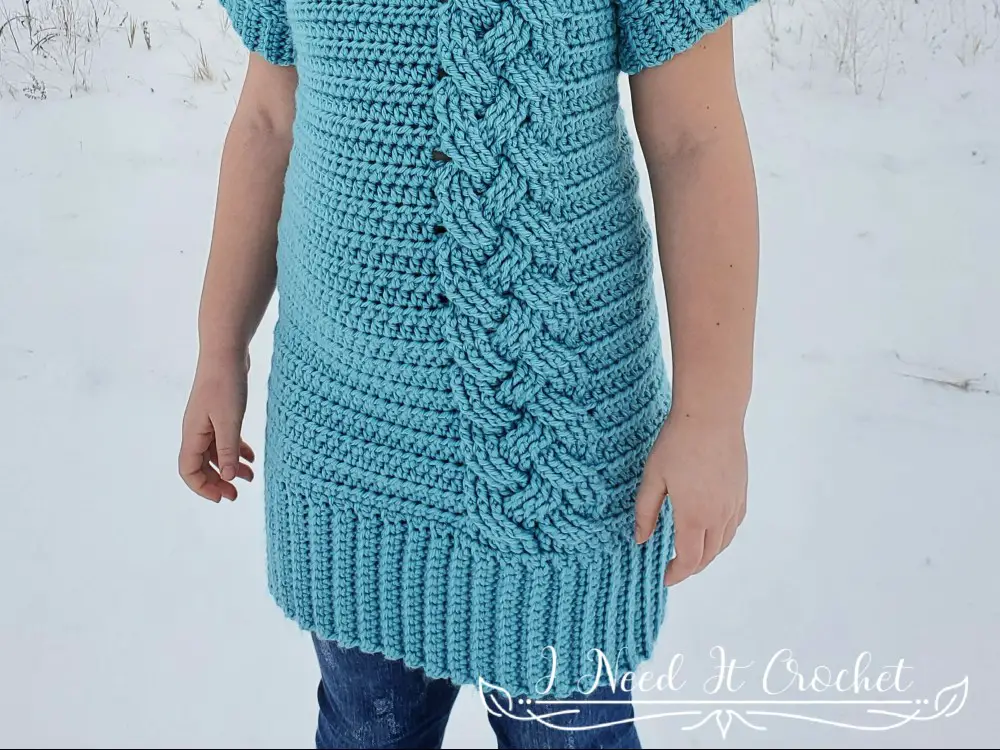
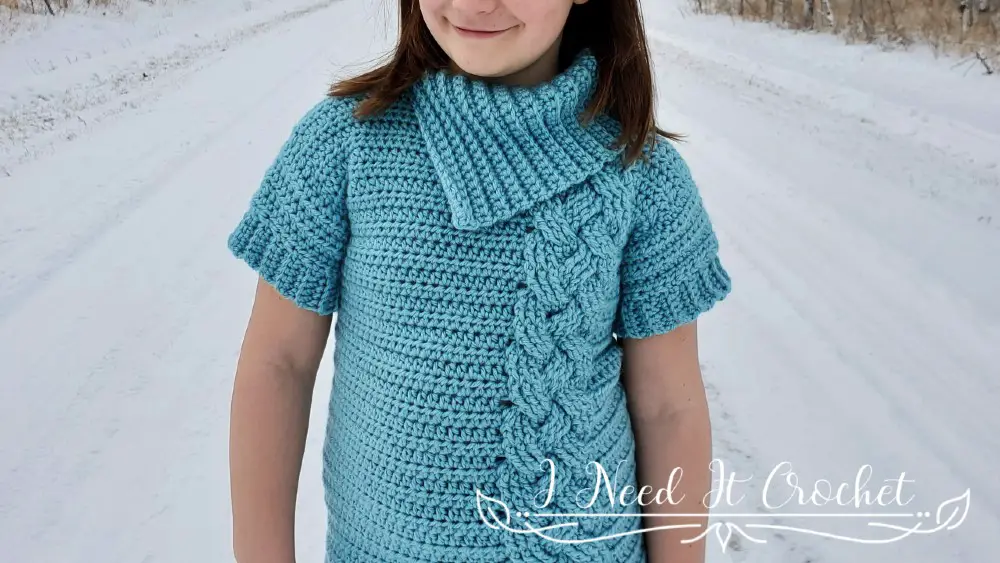
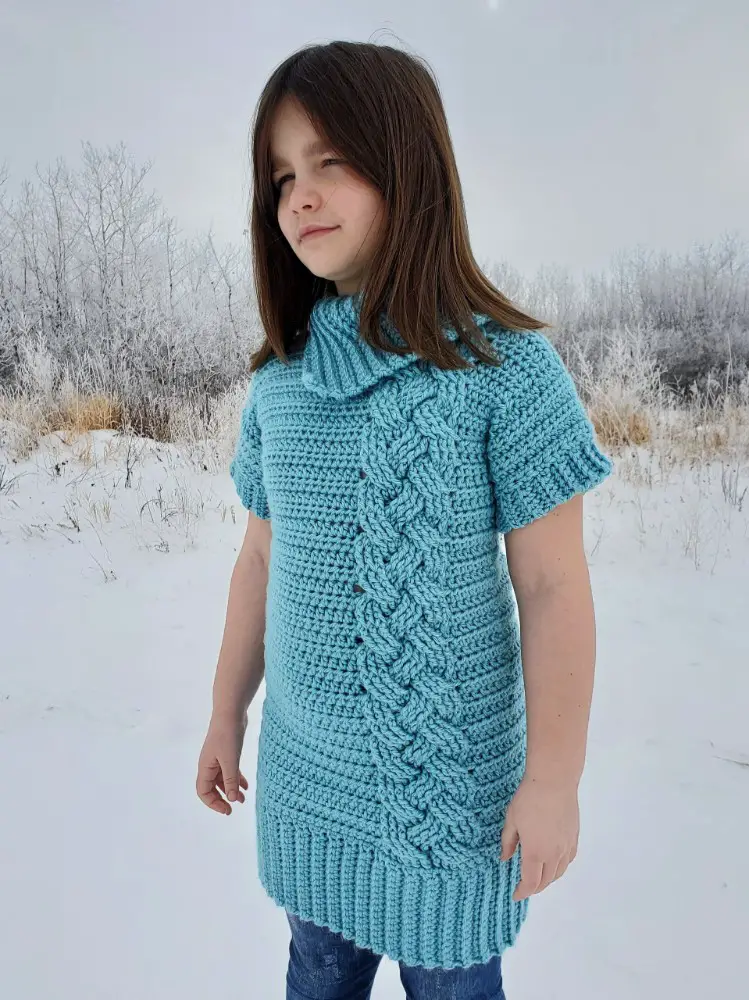
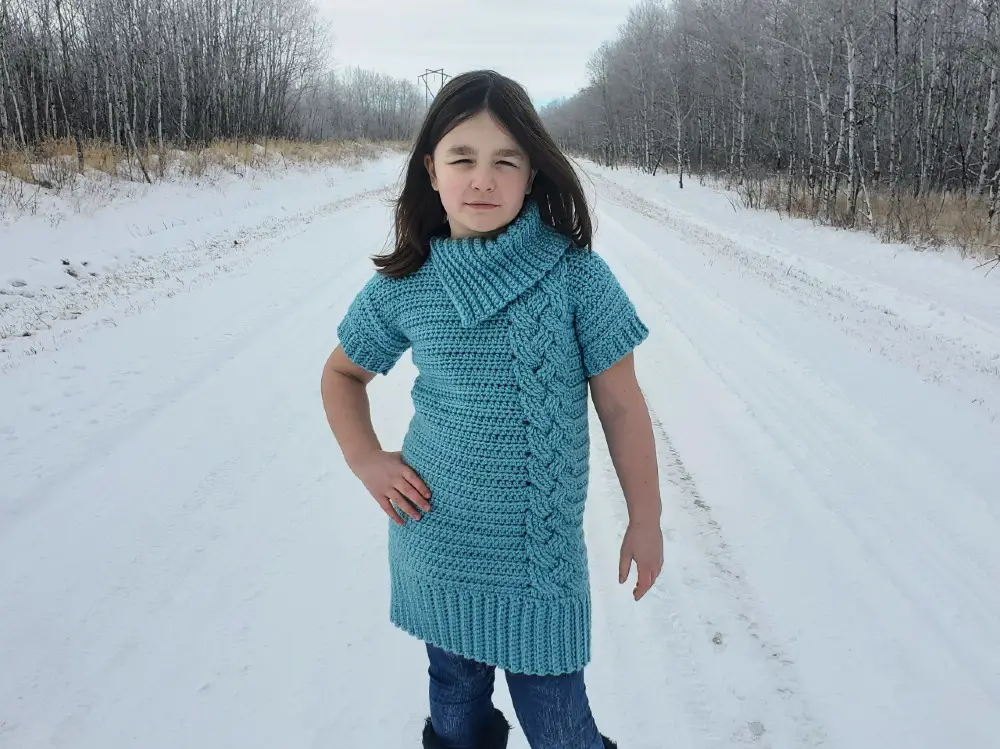
I was so excited to make this sweater dress for my girl. When I designed the adult version last year, my first thought was that my daughter would definitely want one. Not only is it super cute, but it’s so comfortable!
This sweater features stretchy ribbed cuffs that match the bottom band. But, it’s the wide cable detail that really steals the show. Pair it with leggings or tights, and your kid is ready for any occasion.
And if you would like to make a matching sweater dress in an adult size, you can find the Cozy Cabled Sweater Dress (Adult) crochet pattern here.
Finished Sizes:
Instructions given to fit children’s size 2; changes for 4, 6, 8, 10, 12, 14 & 16 are in ()
2 (4, 6, 8, 10, 12, 14, 16)
To Fit Chest Size: 21” (23”, 25”, 26 ½”, 28”, 30”, 31 ½”, 32 ½”)
Finished Length: Customizable.
Arm Circumference: Each size may choose whichever arm circumference they like from the following options: 7” (8”, 9 ¼”, 10 ¼”, 11 ½”,12 ½”, 13 ¾”, 15)
Gauge:
With 6.5mm hook, ch 12.
1. Hdc in 2nd ch from hook and each ch across. Turn. – 11 st
2. Ch1, Hdc in each st across. Turn. – 11 st
Repeat row 2 until you have 8 rows total. Swatch should measure 4 ¼” x 4 ¼”. If your swatch measurements are off, try again with a different sized hook.
Materials:
I used Red Heart Soft Essentials, which is a 100% Acrylic, #5 Bulky weight yarn.
Any yarn of similar weight would work.
Approximately 350 (400, 450, 500, 600, 700, 800, 900, ) yds.
6.5mm Hook
Stitch Markers
Yarn Needle
Scissors
Measuring Tape
Abbreviations:
Sk = Skip
Sp = Space
St(s) = Stitch(es)
Yo = Yarn Over
Ss = Slip Stitch
Ch = Chain
Sc = Single Crochet
Hdc = Half Double Crochet
Fpsc = Front Post Single Crochet
Fpdc = Front Post Double Crochet
Bpdc = Back Post Double Crochet
Fptr = Front Post Triple Crochet
Tr = Triple Crochet
BLO = Back Loop Only
Notes:
Ch1 at the beginning of a row is never considered a stitch.
The model is 4’ tall and has a 31” chest and is wearing a size 14.
I have added many pictures to help you along the way.
Instructions
This sweater is worked from the bottom up. First, we will create the bottom band. Then, we will join the ends of that band and continue working upwards in the round. Once we have achieved the proper length up to the waist, we will work decrease rows until we have the proper chest size. Then, we will continue working until we have achieved the proper length up to the underarm. Next, we will split off to create the armholes. We will do a tiny bit of sewing in the shoulder seams. Finally, we will add the sleeves and the cowl neck.
Bottom Band
With 6.5mm Hook (or hook used to obtain gauge)
Note: A few of my testers noted that going down a hook size from your gauge hook makes the band a bit more stable and less stretchy. If you are using velvet yarn this would be a good option. Always check your measurements.
1. Ch 6 (6, 10, 10, 10, 16, 16, 16), sc in 2nd ch from hook and each ch across. Turn. – 5 (5, 9, 9, 9, 15, 15, 15) st
2. Working this row in BLO: Ch1, sc in 1st st and each st across. Turn. – 5 (5, 9, 9, 9, 15, 15, 15) st
Gauge Check: Repeat row 2 until you have 12 rows. At this point, your band should be 4 ¼” high. The height of your stitches is most important for this part, so if you are not meeting gauge, you should adjust your hook size.
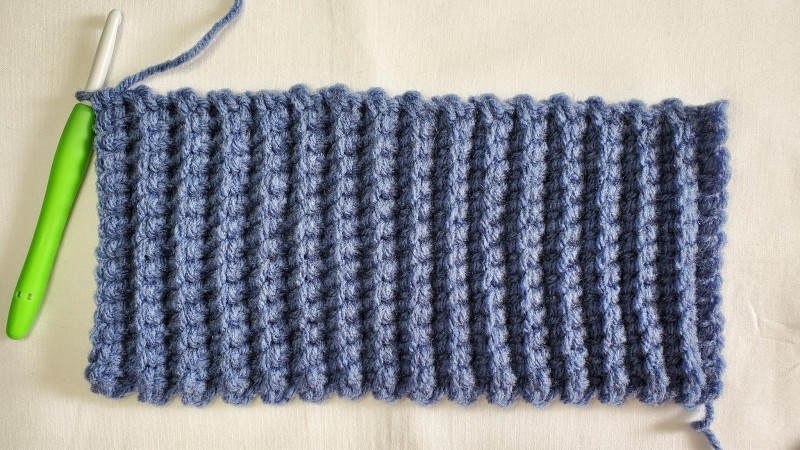
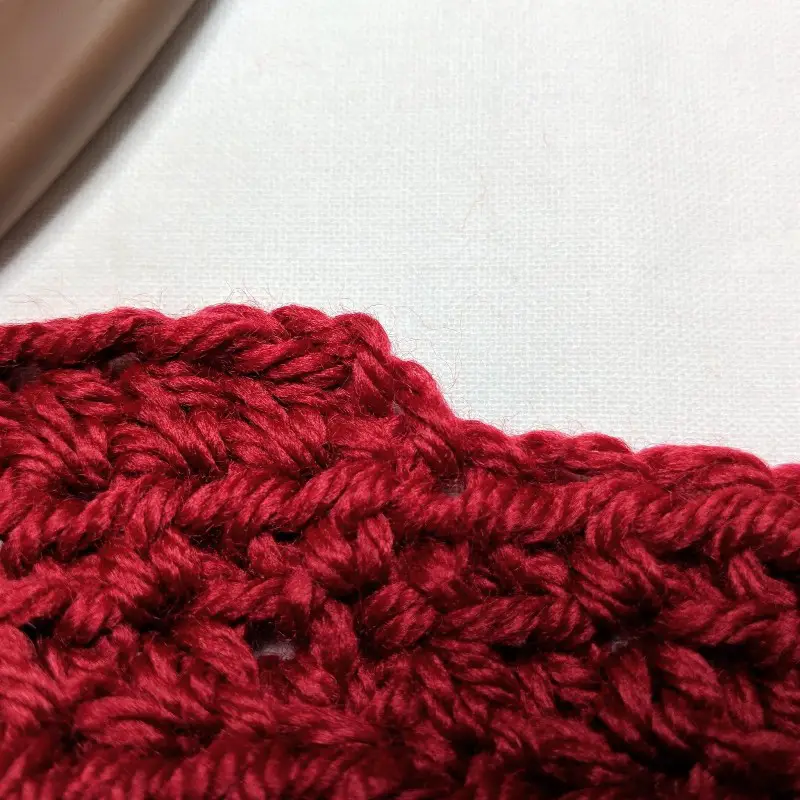
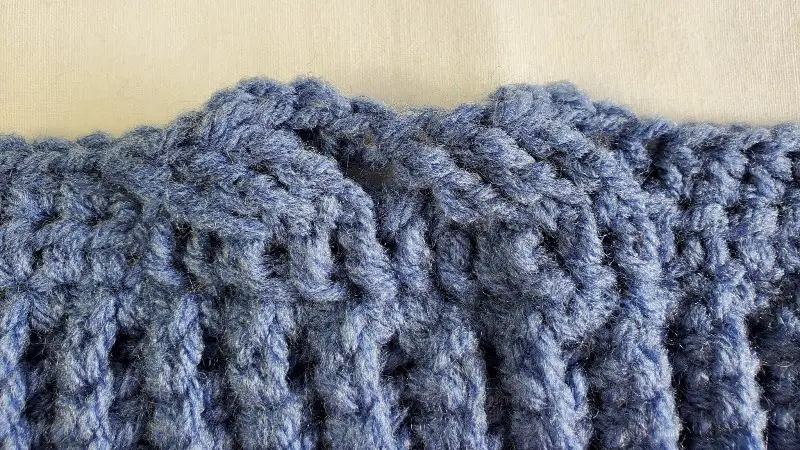
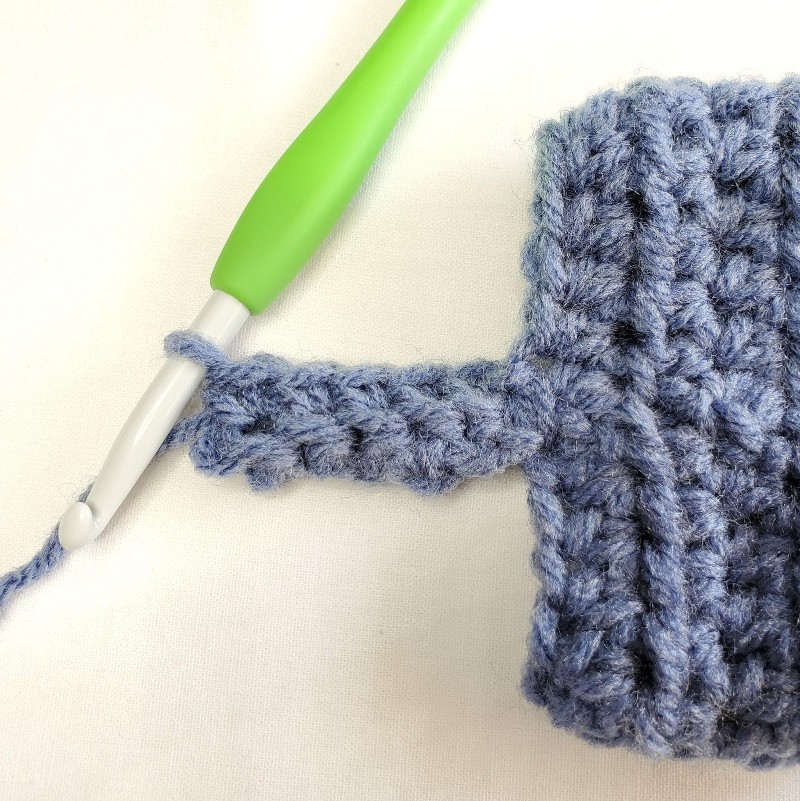
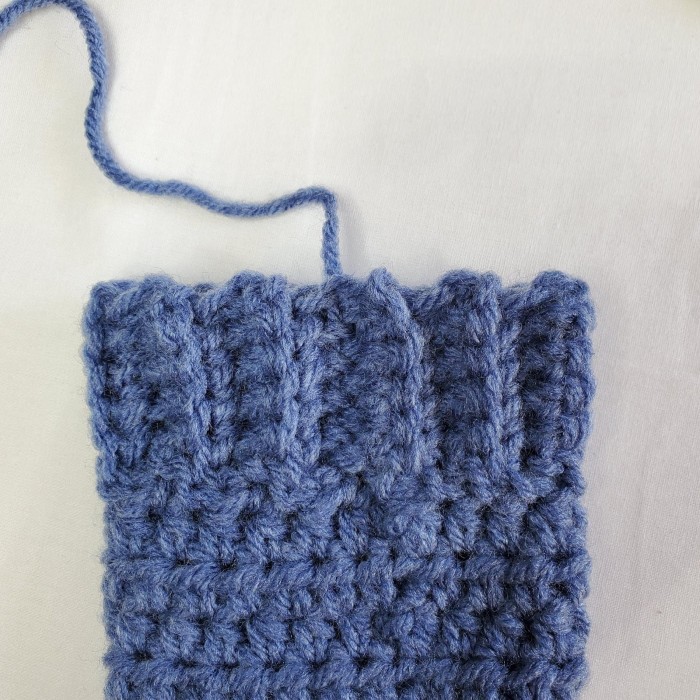
Repeat row 2 until you have a total of 58 (62, 68, 74, 78, 82, 86, 92) rows. Your band will look similar to Figure 1 (just quite a bit longer). Your band should be roughly 22” (23 ½”, 26”, 28”, 29 ½”, 31 ½”, 33”, 35”) long.
If it is a bit longer, don’t panic. Lay it out and give the sides of the band a tug sideways, like you’re trying to stretch it wider, it will put some spring back in the stitches and decrease the length. If it is still 1-2” off, it isn’t a big deal. This stitch is stretchy, and sometimes it can lose its shape. This is why I only use it for edgings or in places where I can anchor it. When you ss it together and add the sc around the top, it should keep it under control. If it’s still too long and you’re unhappy with it, another option is to try using a smaller hook. Just be sure to switch back to the hook you achieved gauge with when you get to the lower body.
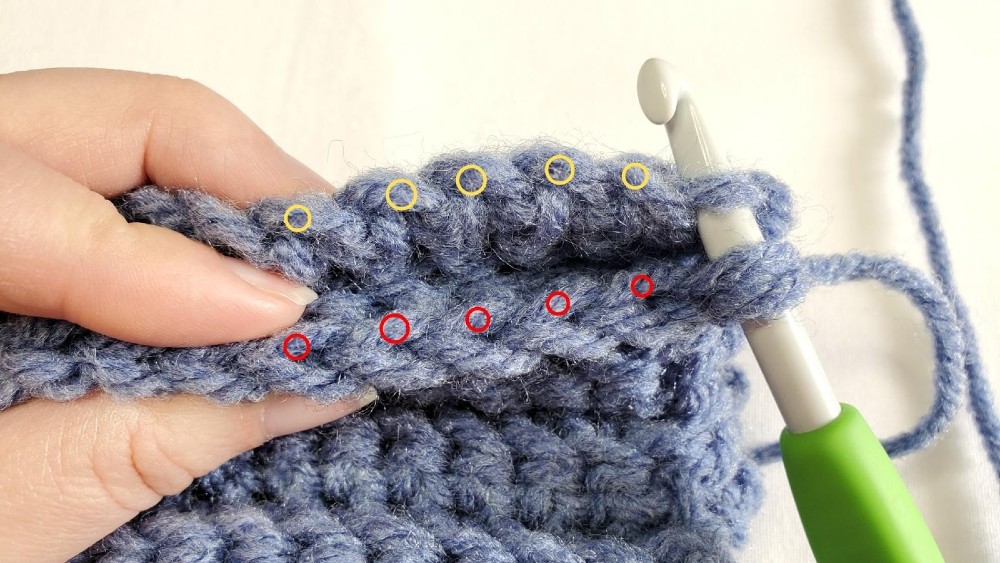
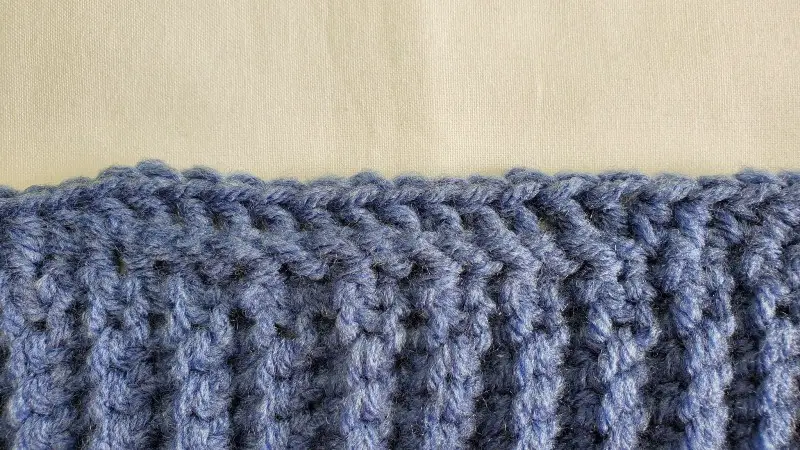
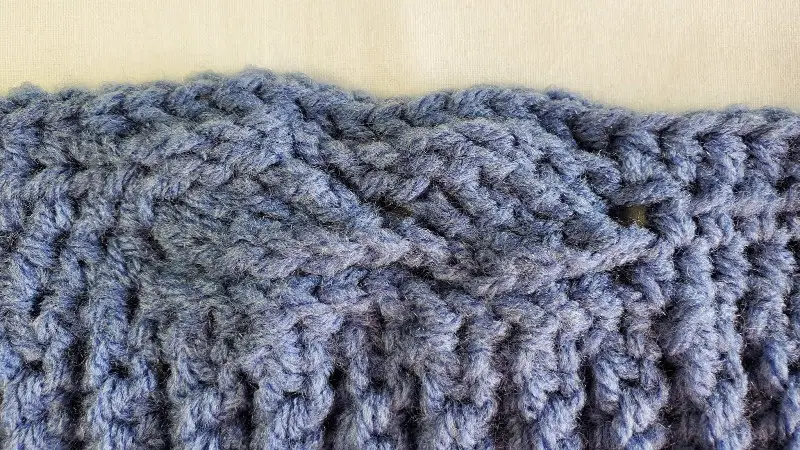
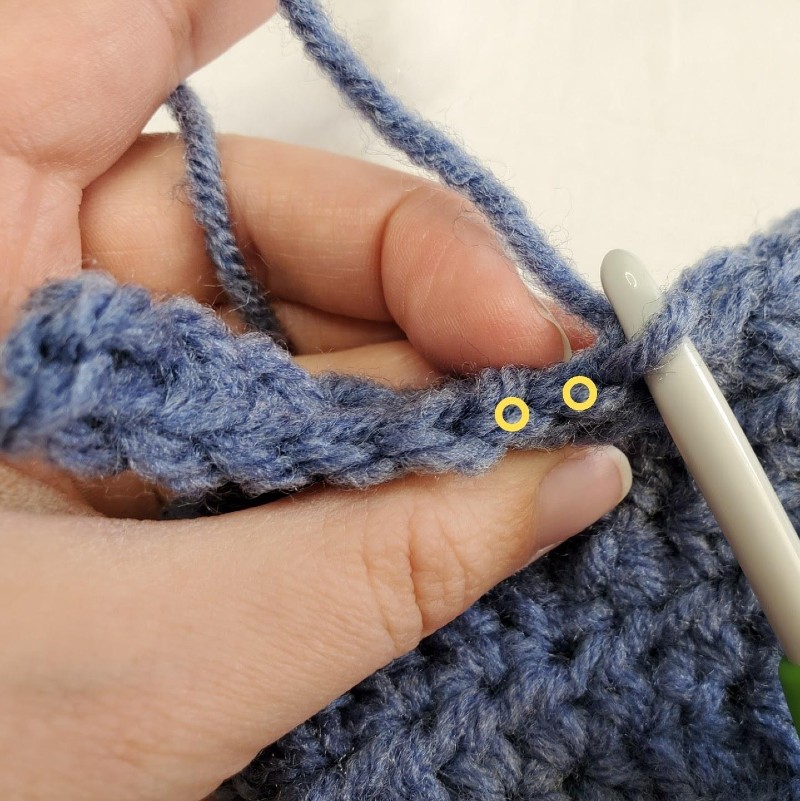
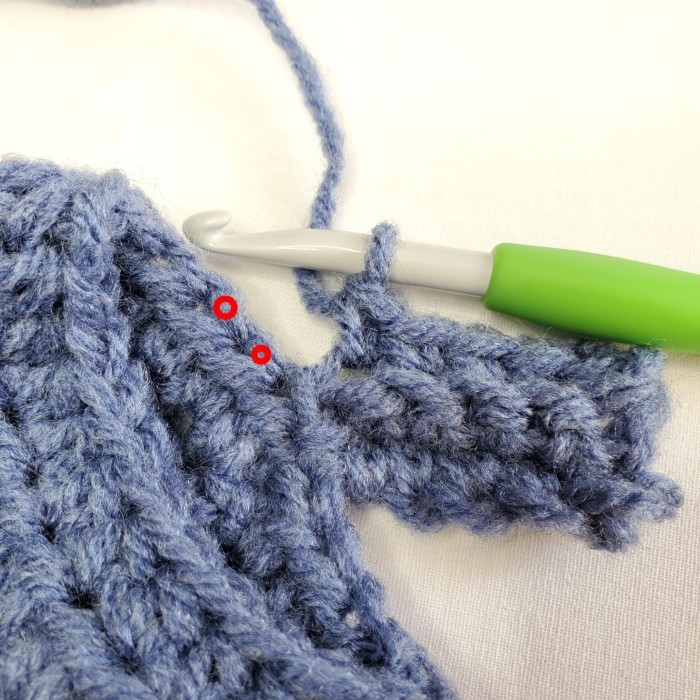
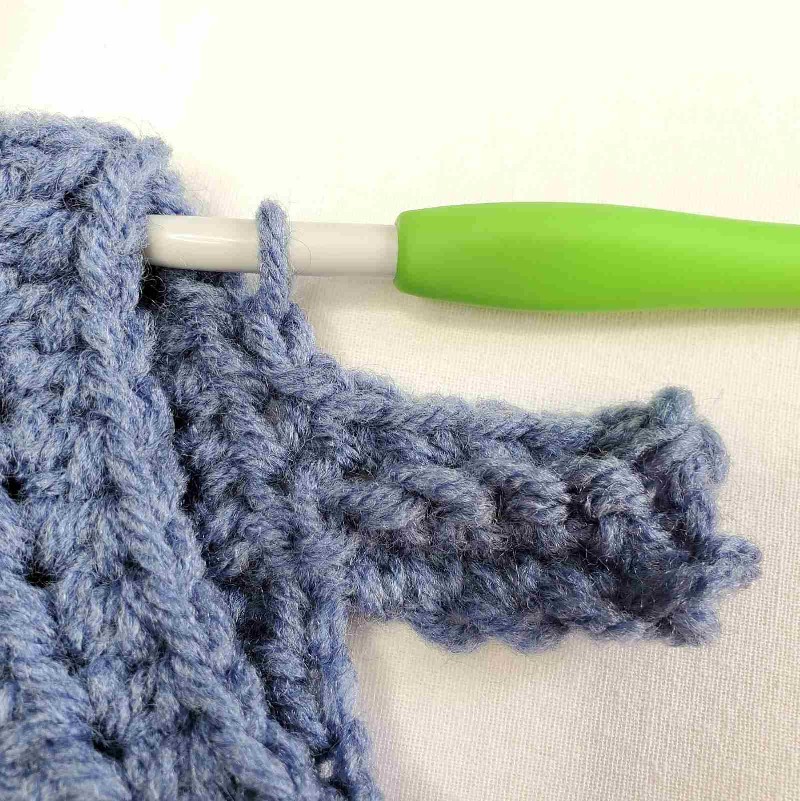
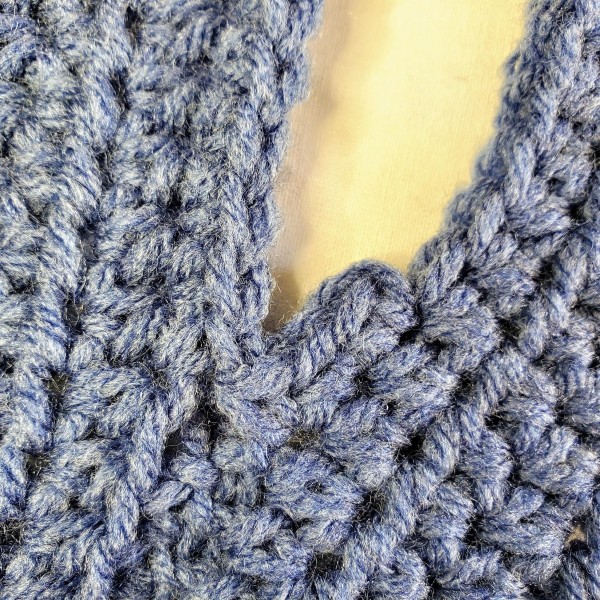
Ss the ends of your band together through the BLO of your last row (shown in red in Figure 2) and the bottom bar of your starting chain (shown in yellow in Figure 2) . Your band is currently wrong side out. Turn your band so that it is right side out. It should now look like Figure 3. Do not fasten off.
If you switched your hook size to work the band, remember to switch back to the hook you achieved gauge with when you made the gauge swatch on page 2.
Lower Body of Kids Sweater
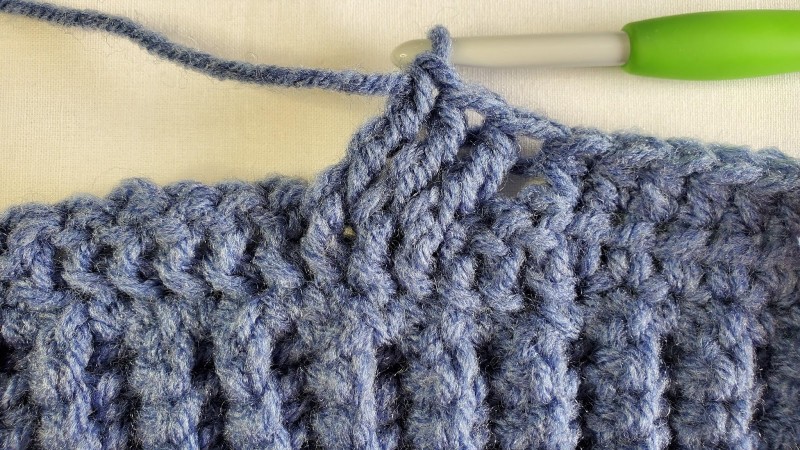
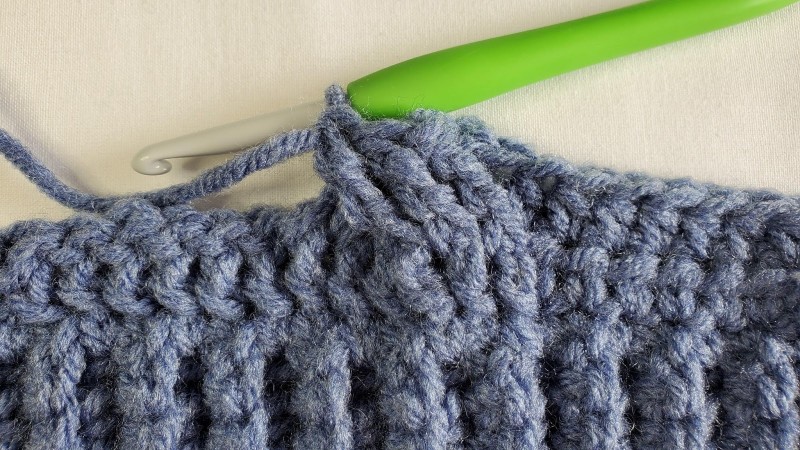
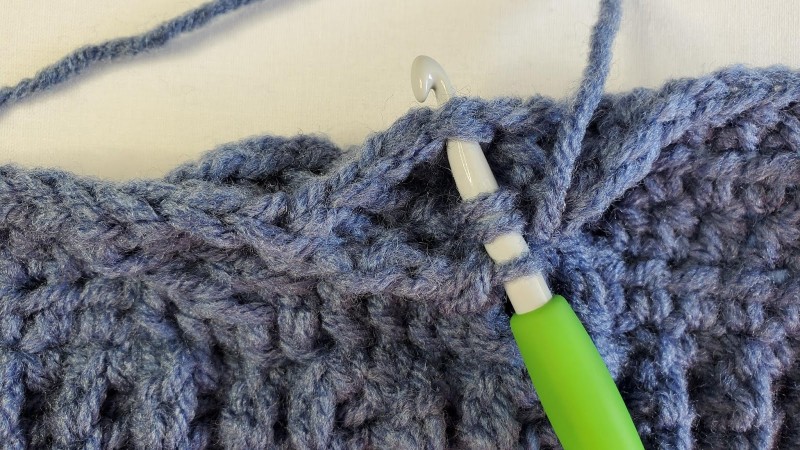
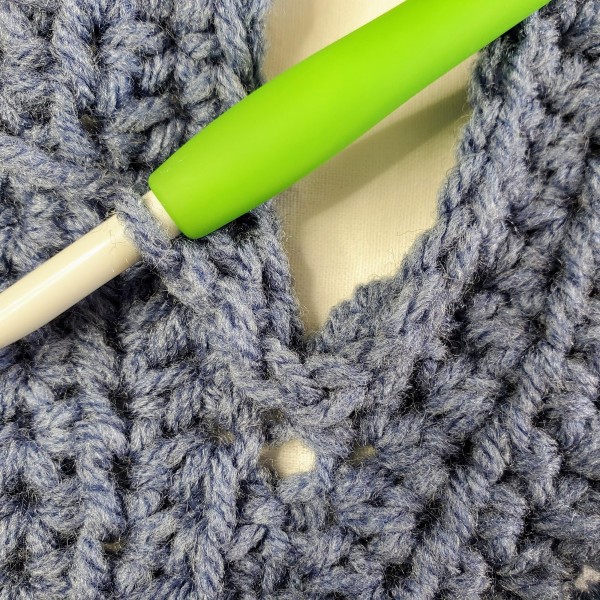
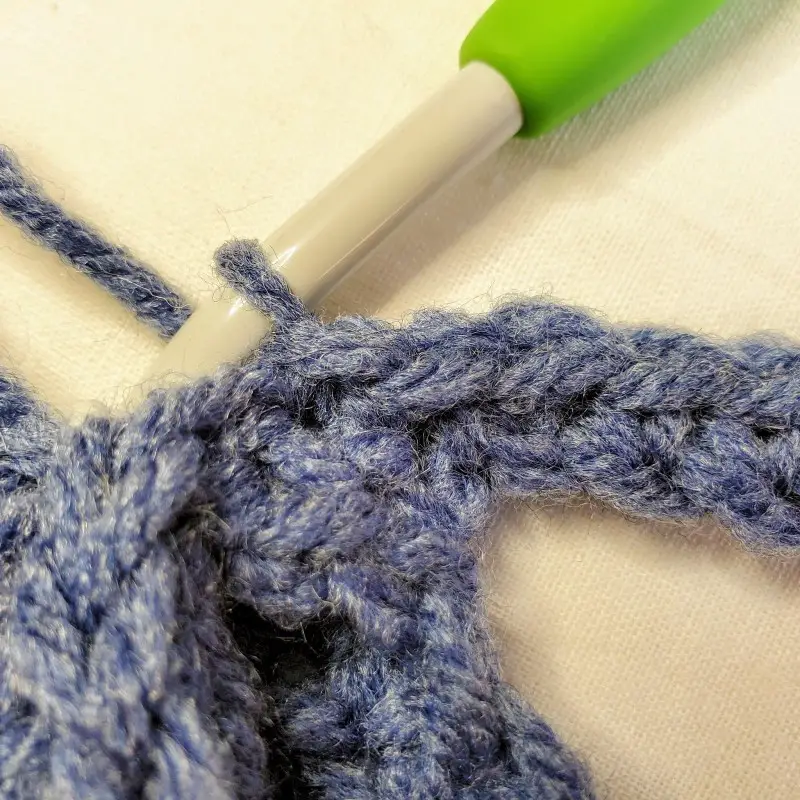
We will now continue working upwards in the round. We will be joining each round with a ss and turning after each round. To make this pattern easier to work, you will be starting each round in the 2nd stitch (unless specified). This is the stitch immediately to the left of where you placed your slip stitch in the previous row. If you look at figure 4 below, you will see that I have ch1 and worked my 1st hdc into the next st. When you do this, you must remember that the stitch where you placed your slip stitch in the previous row, is where you will place your last stitch. (See figure 5)

1. Ch1. Work 1 sc into the end of each row around. Ss to 1st sc. Turn. – 58 (62, 68, 74, 78, 82, 86, 92) st
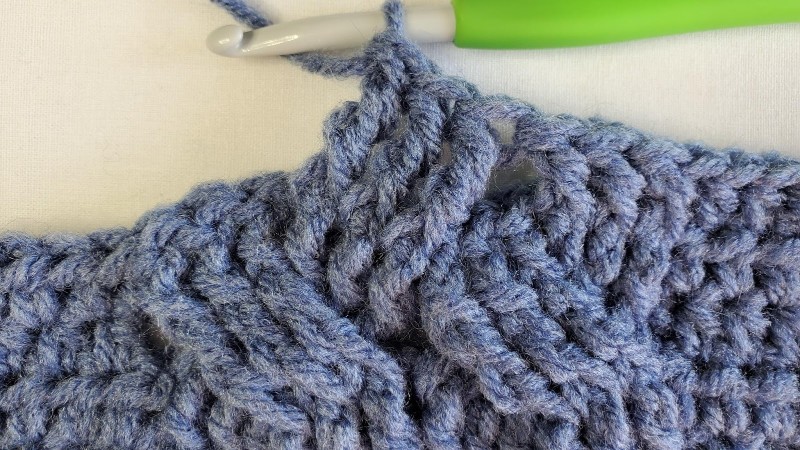
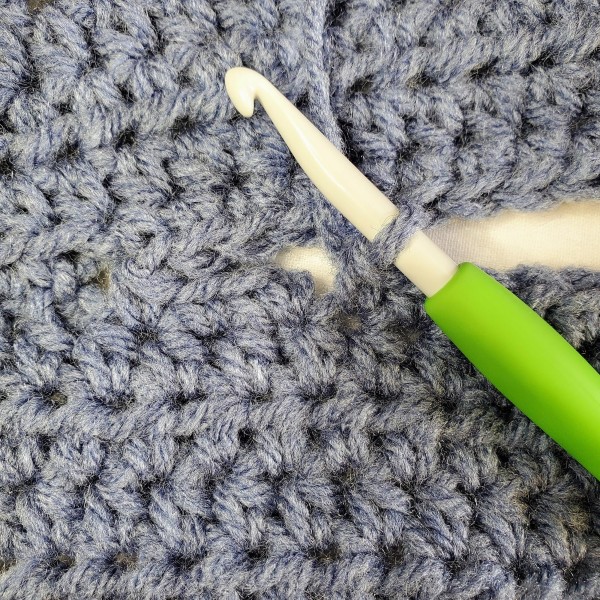
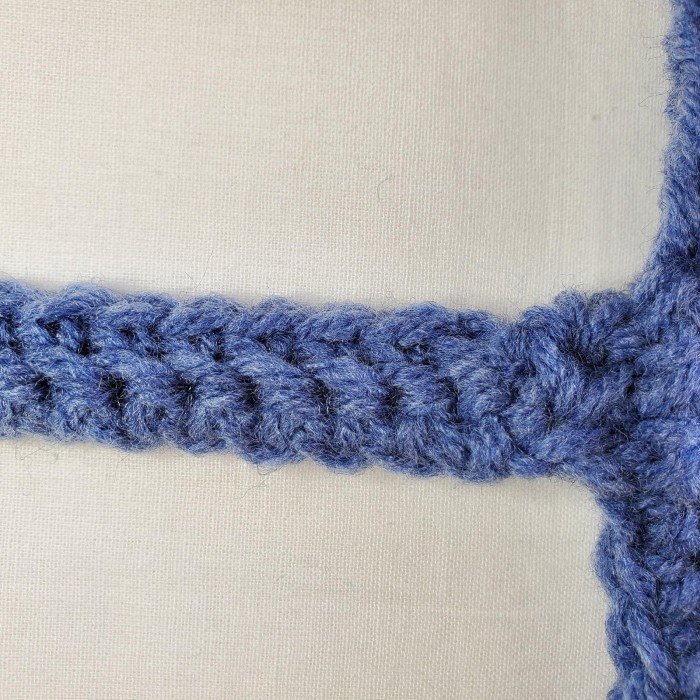
2. Ch1. Hdc in next 44 (47, 52, 57, 60, 64, 67, 72) sts. Bpdc in next 12 sts (see Figure 6). Hdc in each remaining st around. Ss to 1st hdc. Turn. – 58 (62, 68, 74, 78, 82, 86, 92) st
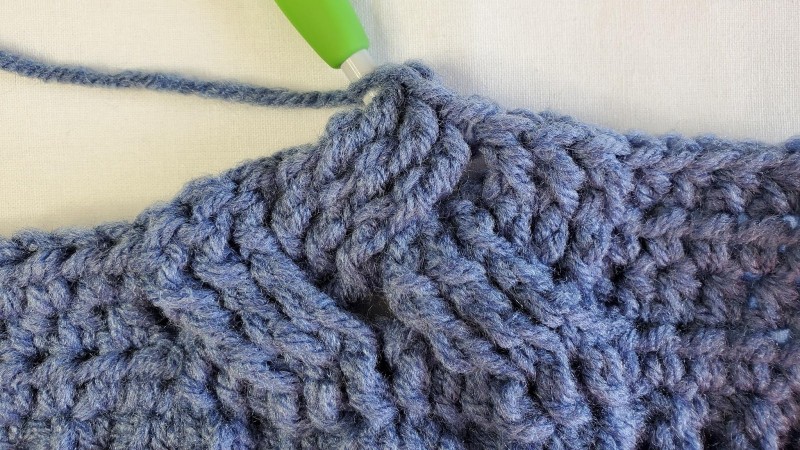
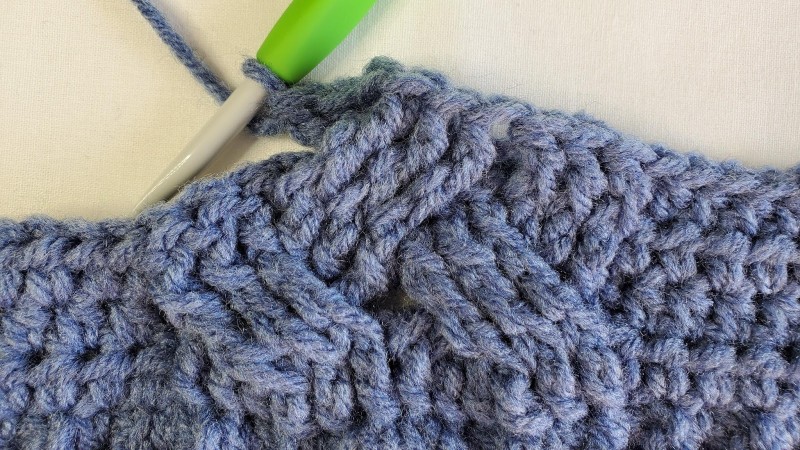
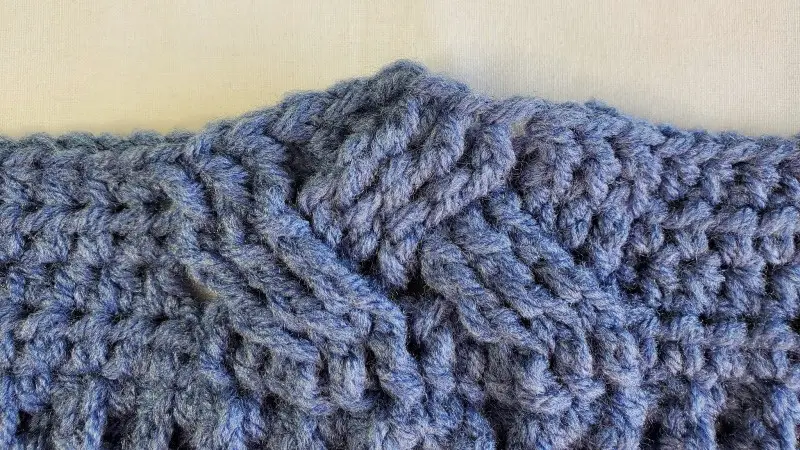
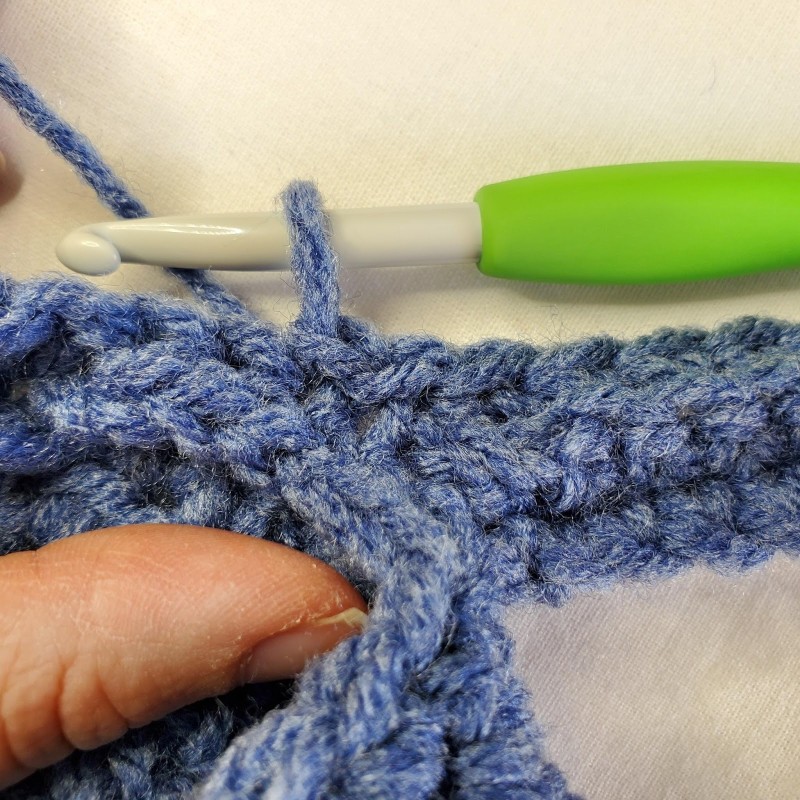
3. Ch1. Hdc in next 2 (3, 4, 5, 6, 6, 7, 8) sts. *Sk3 sts, fptr in next 3 sts (see Figure 7), working in front of the sts you just made, fptr in the 3 sts you previously skipped (see Figure 8). ** Repeat from * to ** 1 more time (see Figure 9). Hdc in each remaining st around. Ss to 1st hdc. Turn. – 58 (62, 68, 74, 78, 82, 86, 92) st
4. Ch1. Hdc in next 44 (47, 52, 57, 60, 64, 67, 72) sts. Bpdc in next 12 sts (see Figure 10). Hdc in each remaining st around. Ss to 1st hdc. Turn. – 58 (62, 68, 74, 78, 82, 86, 92) st
5. Ch1. Hdc in next 2 (3, 4, 5, 6, 6, 7, 8) sts. Fpdc in next 3 sts. Sk 3 sts, fptr in next 3 sts (see Figure 11). Working behind the fptr you just worked, tr in the 3 sts you previously skipped (see Figures 12, 13, & 14). Fpdc in next 3 sts (see Figure 15). Hdc in each remaining st around. Ss to 1st hdc. Turn. – 58 (62, 68, 74, 78, 82, 86, 92) st
Measurement check: Your sweater should be approximately 11” (11 ¾”, 13”, 14”, 14 ¾”, 15 ¾”, 16 ½”, 17 ½”) wide.
Repeat rounds 2 – 5 until your sweater is long enough so that the bottom edge sits where you would like the bottom hem to be and the top edge sits just at the belly button. Be sure to end with a round 5 repeat. For my model, I worked until it was 15” long. If you don’t have your recipient present for measurements, you will have to guesstimate. Height and torso length can differ from one child to the next, so there are no standard measurements available. But, since the decrease in this pattern is pretty subtle, it won’t be noticeable if you are a few inches off.
Next, we will work a few decrease rounds to bring the width down to chest size.
Decrease Rounds
Note: Decreasing is optional! If the chest measurement is the same or slightly larger than the hip measurement, you’d be better off to skip the decrease rows altogether. Just remember that your stitch count will be different and you will have to do a little math when it comes to the upper body. If you have the knack of working the cable stitch, it will be easy.
1. Ch1. Hdc in next 27 (29, 32, 35, 37, 39, 41, 44) sts. Hdc2tog. Hdc in next 15 (16, 18, 20, 21, 23, 24, 26) sts. Bpdc in next 12 sts. Hdc in next 0 (1, 2, 3, 4, 4, 5, 6) sts. Hdc2tog. Ss to 1st hdc. Turn. – 56 (60, 66, 72, 76, 80, 84, 90) st
Sizes 2, 4, & 6: Skip the rest of the decrease rounds and continue at the instructions below labelled ‘All Sizes’.
All other sizes: Continue with decrease rounds.
2. Ch1. Hdc in next n/a (n/a, n/a, 4, 5, 5, 6, 7) sts. *Sk3 sts, fptr in next 3 sts, fptr in the 3 sts you previously skipped. ** Repeat from * to ** 1 more time. Hdc in next n/a (n/a, n/a, 18, 19, 21, 22, 24) sts. Hdc2tog. Hdc in next n/a (n/a, n/a, 34, 36, 38, 40, 43) sts. Hdc2tog. Ss to 1st hdc. Turn. – n/a (n/a, n/a, 70, 74, 78, 82, 88) st
Sizes 8, 10, 12, & 14: Skip the last decrease round and continue at the instructions below labelled ‘All Sizes’.
Size 16: Continue with last decrease round.
3. Ch1. Hdc in next n/a (n/a, n/a, n/a, n/a, n/a, n/a, 42) sts. Hdc2tog. Hdc in next n/a (n/a, n/a, n/a, n/a, n/a, n/a, 25) sts. Bpdc in next 12 sts. Hdc in next n/a (n/a, n/a, n/a, n/a, n/a, n/a, 5) sts. Hdc2tog. Ss to 1st hdc. Turn. – n/a (n/a, n/a, n/a, n/a, n/a, n/a, 86) st
All Sizes
Your stitch count should now be 56 (60, 66, 70, 74, 78, 82, 86) st, which will create a 21” (23”, 25”, 26 ½”, 28”, 30”, 31 ½”, 32 ½”) chest. Be sure to check your measurements. We will now continue working upwards towards the underarms. Begin with the row marked with your size and continue from there.
For example: If you are making a size 2, begin with round 2, and then work rounds 3 & 4. Then, read the instructions below.
1. Ch1. Hdc in next 43 (46, 51, 54, 57, 61, 64, 68) sts. Bpdc in next 12 sts. Hdc in each remaining st around. Ss to 1st hdc. Turn. – 56 (60, 66, 70, 74, 78, 82, 86) st
2. Sizes 2, 4, & 6: Begin here. Ch1. Hdc in next 1 (2, 3, 4, 5, 5, 6, 6) sts. *Sk3 sts, fptr in next 3 sts, working in front of the stitches you just made, fptr in the 3 sts you previously skipped. ** Repeat from * to ** 1 more time. Hdc in each remaining st around. Ss to 1st hdc. Turn. – 56 (60, 66, 70, 74, 78, 82, 86) st
3. Sizes 8, 10, 12, & 14: Begin here. Ch1. Hdc in next 43 (46, 51, 54, 57, 61, 64, 68) sts. Bpdc in next 12 sts. Hdc in each remaining st around. Ss to 1st hdc. Turn. – 56 (60, 66, 70, 74, 78, 82, 86) st
4. Size 16: Begin here. Ch1. Hdc in next 1 (2, 3, 4, 5, 5, 6, 6) sts. Fpdc in next 3 sts. Sk 3 sts, fptr in next 3 sts. Working behind the fptr you just worked, tr in the 3 sts you previously skipped. Fpdc in next 3 sts. Hdc in each remaining st around. Ss to 1st hdc. Turn. – 56 (60, 66, 70, 74, 78, 82, 86) st
Repeat rounds 1 – 4 until the sweater is long enough so the top edge sits just below the underarm. For my model, I worked until it was 21” long. Be sure to end with a round 2 or 4 repeat. Do not bind off.
Upper Body Of Kids Crochet Sweater
Next, we will divide the sweater in half (front and back) and continue working upward toward the shoulders. We will begin with the upper back.
Note: You may choose whichever arm size you want regardless of body size. Instructions are given for the following sleeve circumferences: 7” (8”, 9 ¼”, 10 ¼”, 11 ½”, 12 ½”, 13 ¾”, 15”). If the upper arm measurement of the recipient doesn’t match up with the sweater size you are making, feel free to follow the instructions according to their upper arm measurement. You will have to use the stitch counts for your chosen body size but change the row counts according to your arm size.
So for example, If you are making a size 2 body but a 9 ¼” arm, your stitch count will still be 28, but you will work 8 rows instead of 6.
Upper Back
1. Ch1. Hdc in next 28 (30, 33, 35, 37, 39, 41, 43) sts. Leave remaining sts unworked. Turn. – 28 (30, 33, 35, 37, 39, 41, 43) st
2. Ch1. Hdc in 1st st and each st across. Turn. – 28 (30, 33, 35, 37, 39, 41, 43) st
Repeat row 2 until you have a total of 6 (7, 8, 9, 10, 11, 12, 13) rows. Bind off, leaving a long tail to sew the shoulder.
Upper Front
At the underarm, I instructed you to end with a round 2 or 4 repeat. Follow these instructions according to where you left off. For example: Those that ended with a round 4 repeat will begin with row 1 and continue with 2, 3, & 4. Then read the instructions below.
With the wrong side facing you, join your yarn in the next unworked st on the front.
1. If you ended with a round 4 repeat: Begin here. Ch1. Hdc in the next 15 (16, 18, 19, 20, 22, 23, 25) sts. Bpdc in the next 12 sts. Hdc in each remaining st across. Turn. – 28 (30, 33, 35, 37, 39, 41, 43) st
2. Ch1. Hdc in next 1 (2, 3, 4, 5, 5, 6, 6) sts. *Sk3 sts, fptr in next 3 sts, fptr in the 3 sts you previously skipped. ** Repeat from * to ** 1 more time. Hdc in each remaining st across. Turn. – 28 (30, 33, 35, 37, 39, 41, 43) st
3. If you ended with a round 2 repeat: Begin here. Ch1. Hdc in the next 15 (16, 18, 19, 20, 22, 23, 25) sts. Bpdc in the next 12 sts. Hdc in each remaining st across. Turn. – 28 (30, 33, 35, 37, 39, 41, 43) st
4. Ch1. Hdc in next 1 (2, 3, 4, 5, 5, 6, 6) sts. Fpdc in next 3 sts. Sk 3 sts, fptr in next 3 sts. Working behind the fptr you just worked, tr in the 3 sts you previously skipped. Fpdc in next 3 sts. Hdc in each remaining st across. Turn. – 28 (30, 33, 35, 37, 39, 41, 43) st
Repeat rows 1 – 4 until you have a total of 6 (7, 8, 9, 10, 11, 12, 13) rows. Bind off, leaving a long tail to sew the shoulder. Note: You want your row count for the front to match your row count for the back.
Shoulder Seams
We will now sew the shoulders closed.
– Begin by turning your sweater inside out.
– Using your yarn end and a darning needle, whip stitch the tops of the last rows together leaving a big enough hole for the head. You can make the head hole any size you wish, keeping in mind that the average child’s head is 21-22” around, so the neck hole will have to stretch to at least that measurement. It would also be a good idea to try it on the recipient before proceeding. Knot securely.
– Turn your sweater right side out.
– If you have the recipient there, they can try on the sweater to check the fit. Do you like the size of the neck and arm holes? If you don’t love it, now is the time to change it.
Sleeves
Now we will create the sleeves. We will once again be working in the round and each round will begin in the 2nd st as it did with the body of the sweater.
You can begin with either sleeve. With the right side facing you, join your yarn in the bottom corner where the underarm will be. We are working the first round into the side edges of the upper body rows.
1. Ch1. Place 1 hdc in the end of the 1st row. *Place 2 hdc in the end of the next row. Place 1 hdc in the end of the next row. ** Repeat from * to ** around. Ss to the 1st hdc. Turn. – 18 (21, 24, 27, 30, 33, 36, 39) st
2. Ch1. Hdc in next st and each st around. Ss to the 1st hdc. Turn. – 18 (21, 24, 27, 30, 33, 36, 39) st
Repeat round 2 until your sleeve is your preferred length minus 1” (1”, 1”, 1”, 2”, 2”, 2”, 2”). Do not bind off.
Sleeve Edging
Now we will add a ribbed edge to the sleeve. This edging is made by working short rows off of each stitch of the end of the sleeve. Turn your work so that the wrong side is facing you.
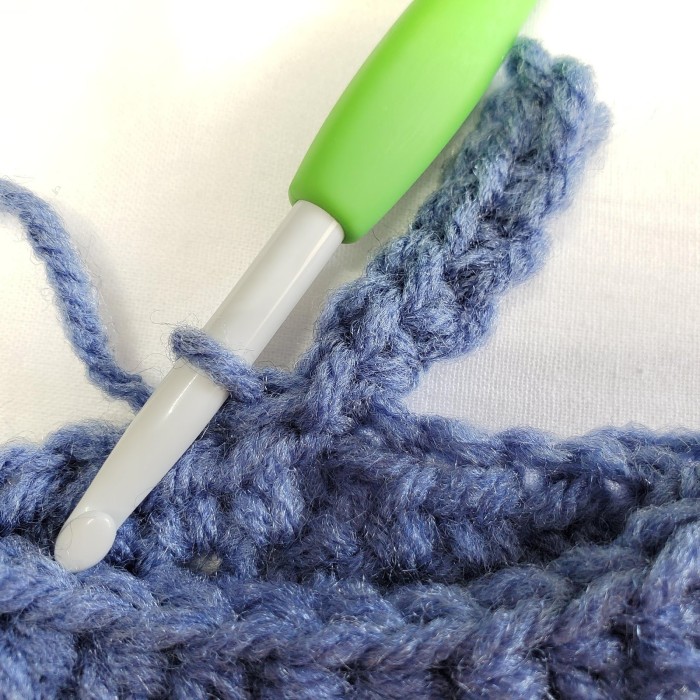
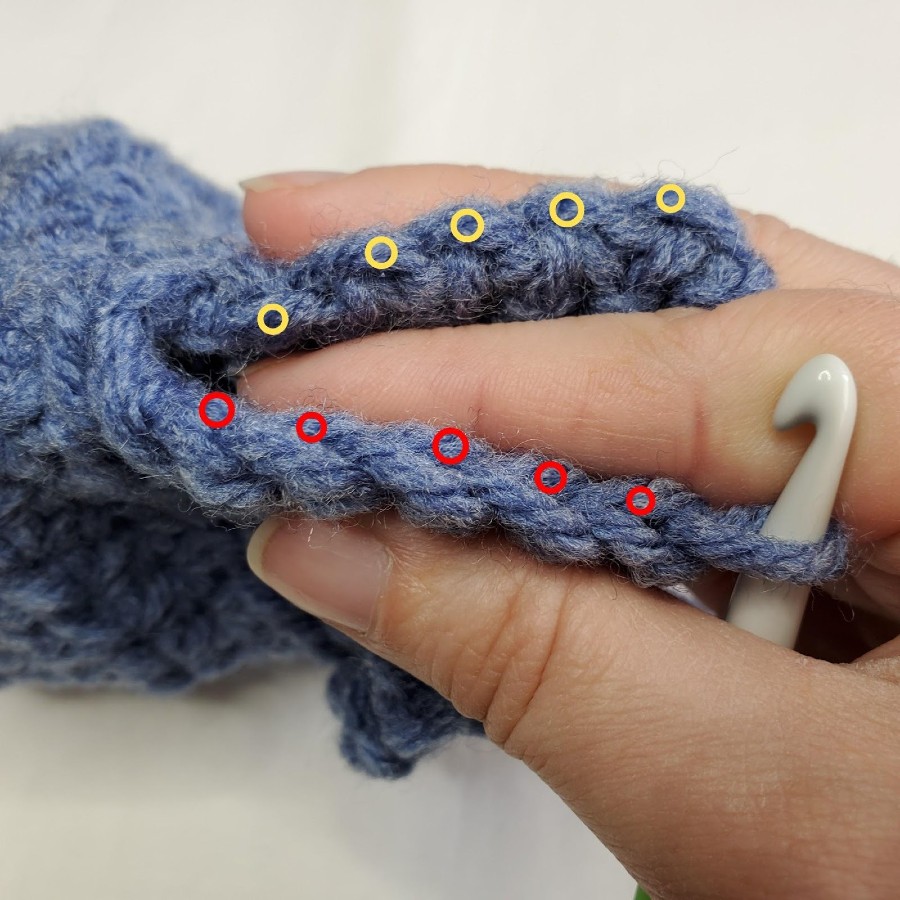
1. Ch 5 (5, 5, 5, 6, 6, 6, 6). Sc in 2nd ch from hook and each ch across. Ss into 1st st on sleeve (the st where you chained from marked in red in Figure 16), ss into the next unworked st on sleeve (marked in red in Figure 16). Your work should now look like Figure 17. Turn. – 4 (4, 4, 4, 5, 5, 5, 5) st
2. Working this row in BLO: Sk 2 ss (marked in yellow in Figure 18). Sc in next st and each st across. Your work should now look like Figure 19. Turn. – 4 (4, 4, 4, 5, 5, 5, 5) st
3. Working this row in the BLO: Ch1. Sc in 1st st and each st across. Ss into next 2 unworked sts on sleeve (marked in red in Figure 20). Your work should now look like Figure 21. Turn. – 4 (4, 4, 4, 5, 5, 5, 5) st
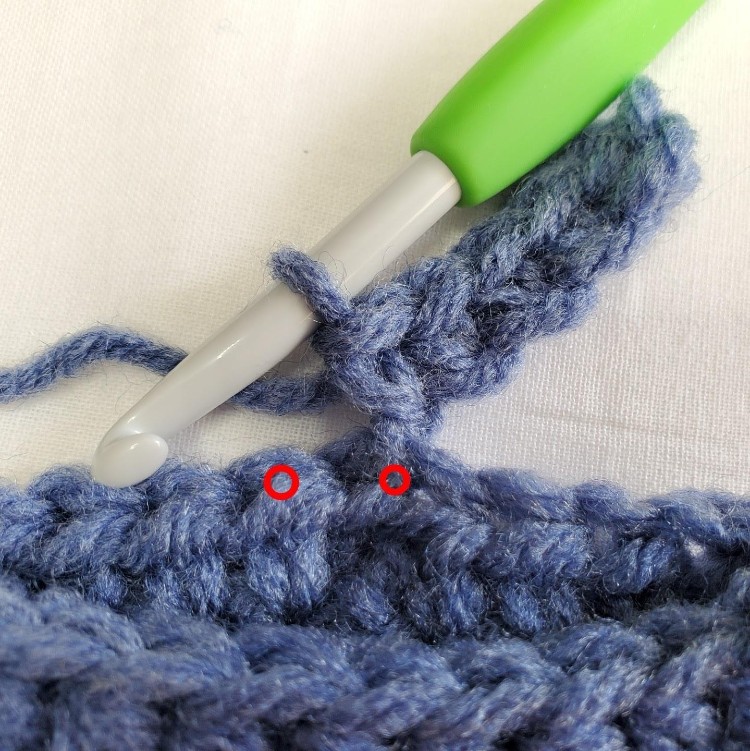
Repeat rows 2 & 3 around the entire edge of the sleeve. You should now have worked a short row off of each of the sleeve stitches and ended with a row 2 repeat (if there is 1 st left unworked, you may skip it). Turn so that the wrong side is facing you again. Ss the edge closed through the BLO of your last row (marked in red in Figure 22) and the bottom bar of your 1st row (marked in yellow in Figure 22). Bind off. Your seam should be invisible like in Figure 23. Repeat for the other sleeve.
Cowl Neck Of Sweater Dress
The neck is worked in a similar fashion as the sleeve edging except we will leave it open with a slight overlap.
– Begin by laying out your sweater, right side out, with the front facing you.
– On the front of the neck hole, count 3 sts in from the left edge. Join your yarn here.
– Ch1. Sc in 1st st and each st around (see Figure 24). You should now have 1sc in each st of your neck hole (see Figure 25).
– Do not join. Instead, you will do a Fpsc in the first 6 sc that you worked for this row. Now you will have 1 sc for each st of your neck hole, + 6 (see Figure 26). Do not bind off. Turn.
1. Ch 11 (11, 11, 16, 16, 16, 21, 21). Sc in 2nd ch from hook and each ch across. Ss into 1st st on neck (the st where you chained from), ss into the next unworked st on neck (see Figure 27). Turn. – 10 (10, 10, 15, 15, 15, 20, 20) st
2. Working this row in BLO: Sk 2 ss. Sc in next st and each st across (see Figure 28). Turn. – 10 (10, 10, 15, 15, 15, 20, 20) st
3. Working this row in BLO: Ch1. Sc in 1st st and each st across. Ss into next 2 unworked sts on neck (see Figure 29). Turn. – 10 (10, 10, 15, 15, 15, 20, 20) st
Repeat rows 2 & 3 until all of your neck sts have been worked (including the 6 ‘extra’ sts) and you have ended on a row 2 repeat. Bind off.
Weave in your ends, and you’re done!
I hope you love your new sweater, and I look forward to seeing all of your beautiful pictures on Ravelry!
If you’d like to know when I post new patterns and tutorials, head on over to my Facebook and Instagram and give me a like and a follow!
If you enjoyed The Kids Cozy Cabled Sweater Dress – Free Crochet Pattern, you may want to check out my other designs!
And until next time… Happy Hooking! 😉
Sarah, Your designs are so beautiful, and your photo tutorials are extremely well done. Thank you for another awesome design. My great niece is going to love this.
Thank you so much, Emma! I am so glad you are enjoying my website! <3
- Sarah
Thanks so much for making a pattern to fit tan 8year old.?usually they are mad for babies or adults!
You are very welcome! I’m very lucky to have a girl willing to model for me! 😉