
The Shells And Trellis Tunic – Free Crochet Top Pattern is copyrighted by I Need It Crochet. You may not copy, share, change, or sell the pattern itself. Also, you may not claim this pattern as your own. All pictures contained in this pattern fall under the copyright and may not be used.
Finished items made from the Shells And Trellis Tunic – Free Crochet Top Pattern belong to you, and you may do what you wish with them. If you choose to sell them on Etsy, I would very much appreciate it if you credited me as the pattern designer.


Or… Just scroll down to see it for free!
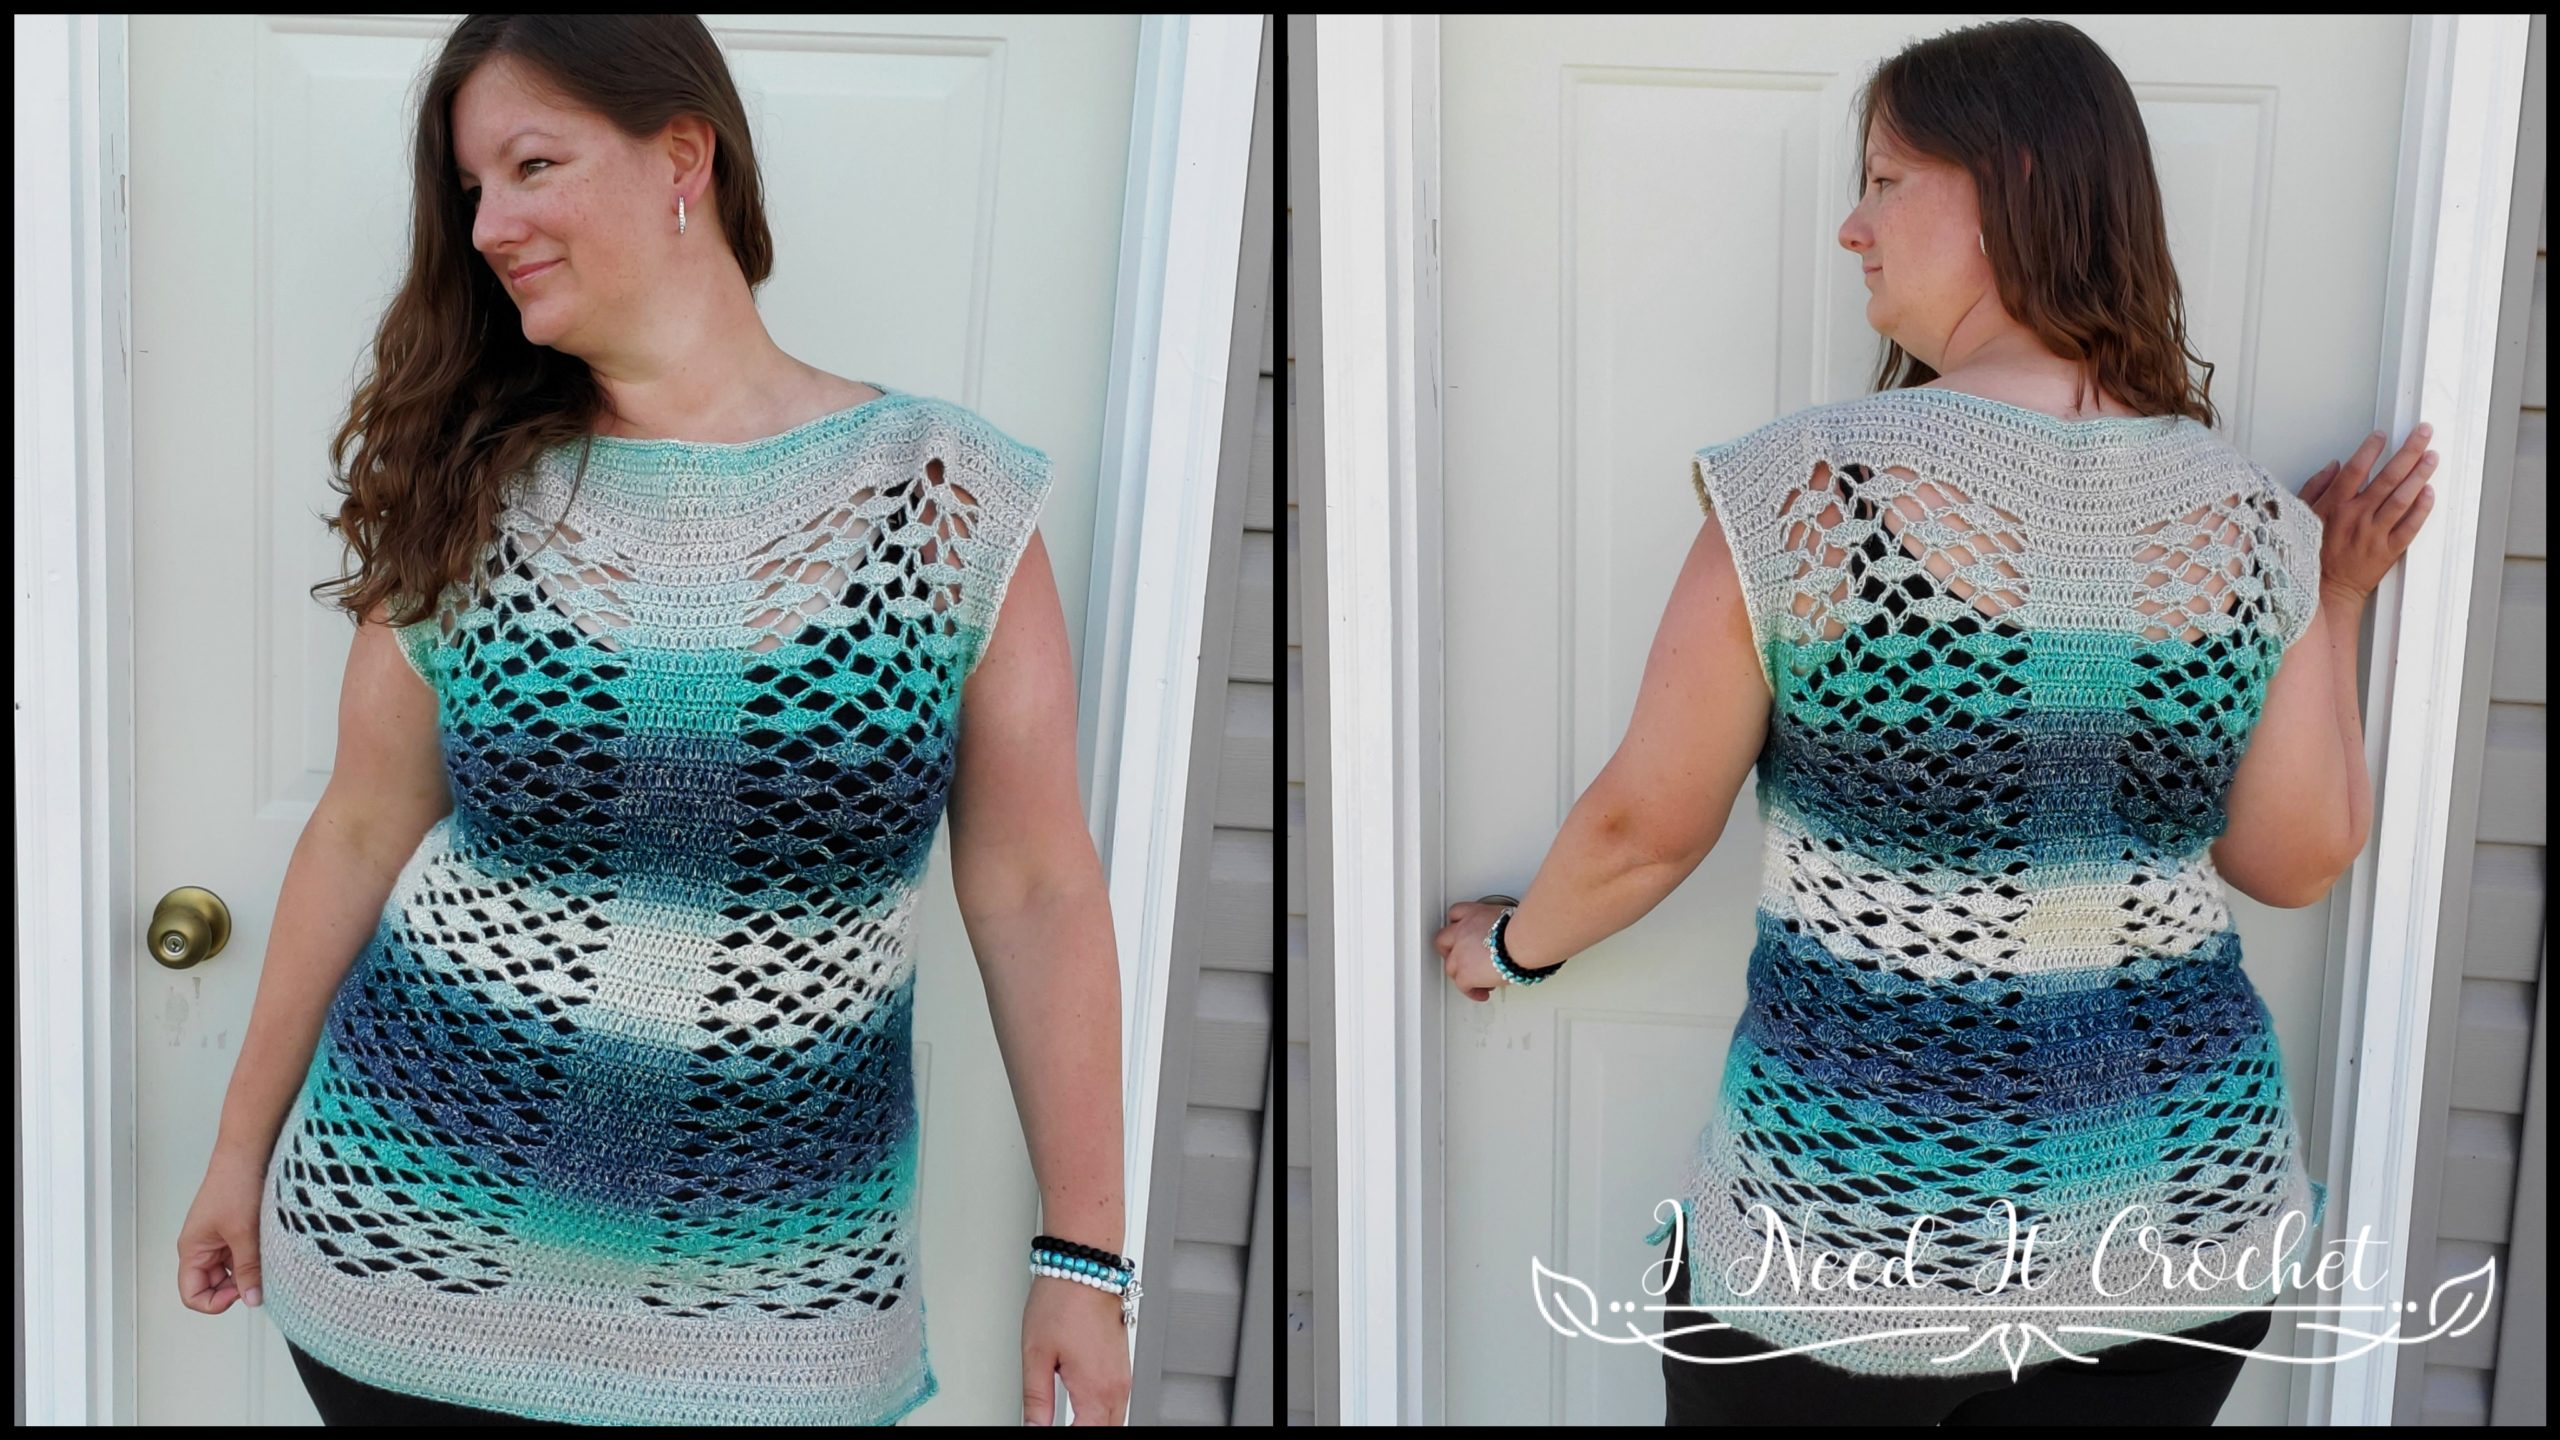
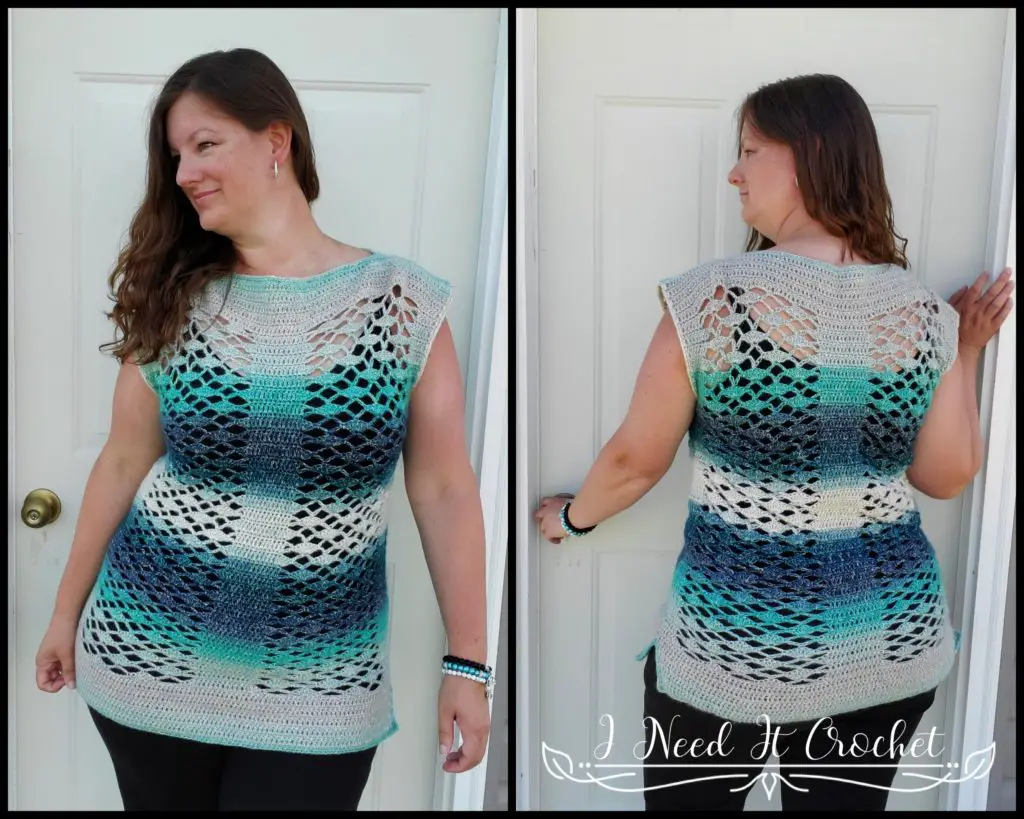
This tunic is another one of those patterns that just fell out of my head and onto my hook. I love it when that happens.
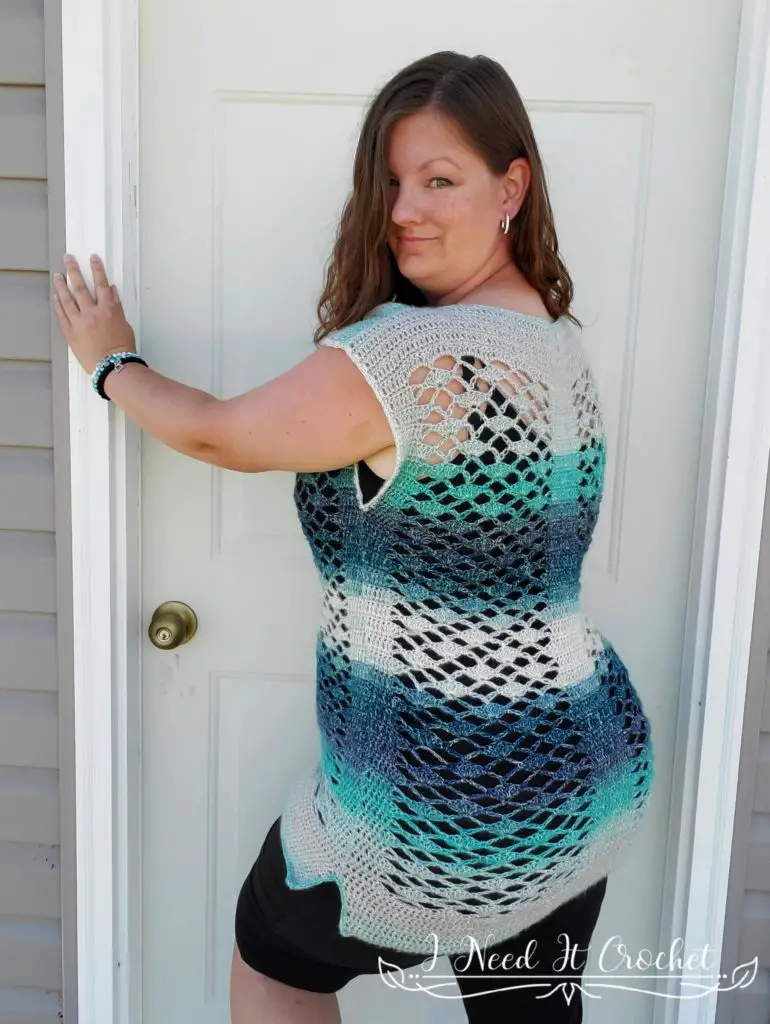
My goal was to go back to basics and make a garment that was quick and easy to work up. I loved the Shells and Trellis stitch pattern, but I felt it needed to be broken up and stabilized a little, so I added solid columns down the sides and middle. The effect compliments just about every woman’s shape.
The Yarn
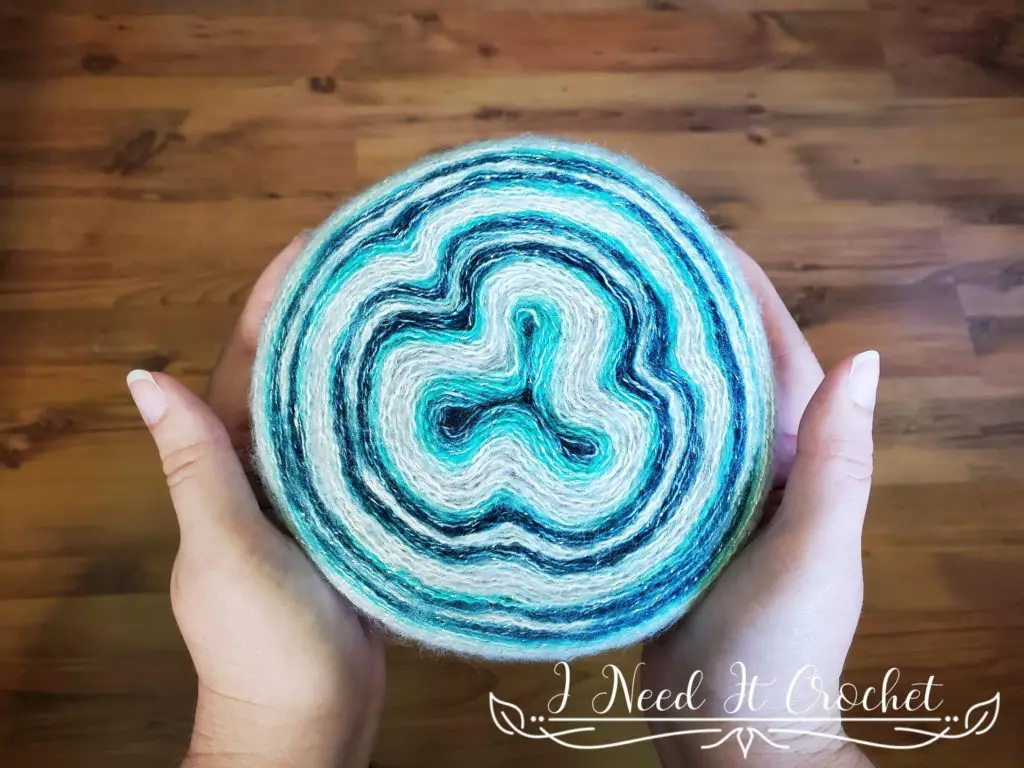
For this Project, I used Loops & Threads Shimmer Shawl Yarn. I LOVE how this yarn worked up for this tunic. The colour bands could not have come out more perfectly! I really had no clue how it was going to come out, so I just started working my first panel from the middle of the cake. Once I got an idea of how the colour bands work, I finished my first panel and started on my second. I did have to “cut my cake” in order to match the colour bands up with my first panel, but it was well worth it. If you are using this yarn to make this tunic and you want your colours to match, I do recommend purchasing 2 cakes. It will make things much easier.
Finished Sizes:
Instructions given to fit size X-small; changes for small, medium, large, X-large, 2X-large, 3X-large, 4X-large, and 5X-large are in ()
XS (S, M, L, XL, 2XL, 3XL, 4XL, 5XL)
Finished Bust: 29” (32”, 36”, 40”, 44”, 48”, 52”, 56”, 60”)
Finished Length: Customizable. Length on model shown is 26”
Gauge:
1. Ch18. Sc in 2nd ch from hook and each ch across. Turn – 17 st
2. Ch3. Dc in next st and each st across. Turn. – 17 st
3. Ch1. Sc in 1st st and each st across. Turn. – 17 st
Repeat rows 2 & 3 until you have 14 rows total. Your swatch should measure 4” W x 4” H.
Always be sure to swatch before you begin. It will save you a lot of time and heartache!
Materials:
I used Loops & Threads Shimmer Shawl, which is 61% Cotton/34% Acrylic/5% Polyester, #3 Dk weight yarn.
Any yarn of similar weight would work.
Approximately 600 (700, 800, 900, 1000, 1100, 1200, 1300, 1400) yds.
4mm Hook
Stitch Markers
Yarn Needle
Scissors
Measuring Tape
Abbreviations:
Sk = Skip
Sp = Space
St = Stitch
Ss = Slip Stitch
Ch = Chain
Sc = Single Crochet
Dc = Double Crochet
Sh = Shell (See notes)
Notes:
Ch1 at the beginning of a row is never considered a stitch.
Ch3 at the beginning of a row is always considered a dc.
A Shell is made by working 5dc into one st.
I have added many pictures to help you along the way.
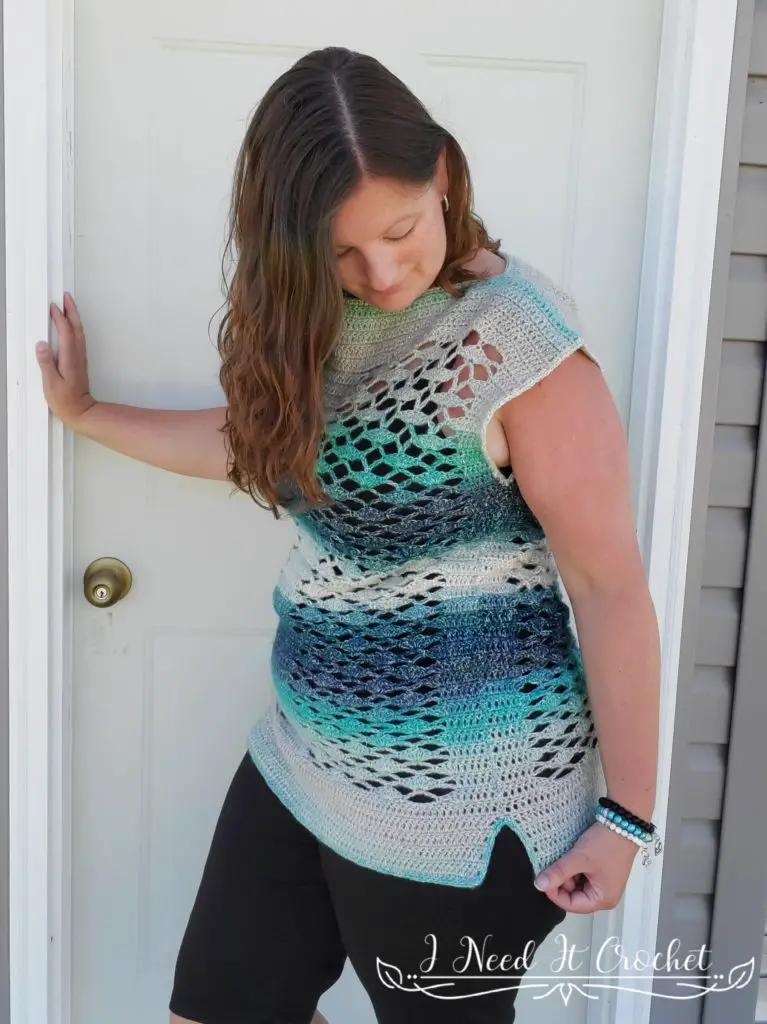
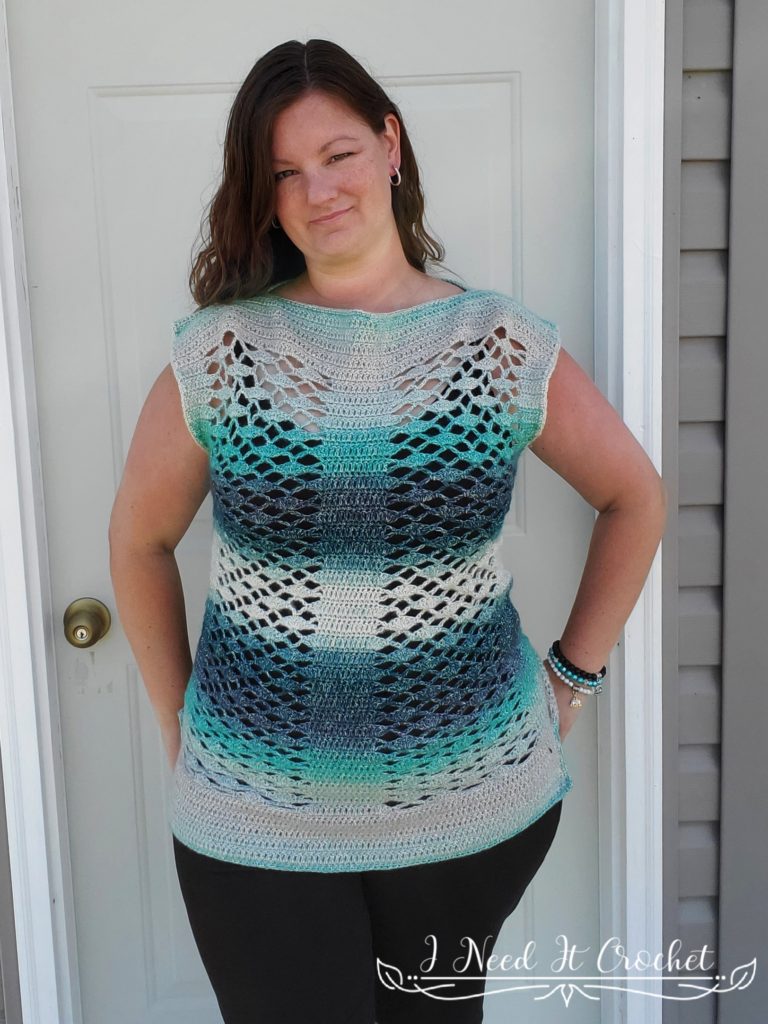
The model above has a 42” bust and is wearing a size X-Large. Choose your size according to your largest measurement and desired fit. For example, if you would like to make a tunic length and your hip is larger than your bust, choose according to your hip measurement. If you are making a regular top length and your bust is larger than your waist, choose your bust measurement. This top is written with zero ease.
Instructions
This tunic is easy peasy. We will make 2 identical panels, and then seam the sides and shoulders. Finally, we will finish off the edges. Each panel is worked from the bottom up.
Note: When working your ch 5s, make sure you don’t make them too tight or your piece will start to pull in on the sides. You may even have to make them a little looser than you’re used to.
Panel (Make 2)
Ch 63 (69, 78, 86, 95, 103, 112, 120, 129)
1. Sc in 2nd ch and each ch across. Turn. – 62 (68, 77, 85, 94, 102, 111, 119, 128)
2. Ch3. Dc in next st and each st across. Turn. – 62 (68, 77, 85, 94, 102, 111, 119, 128)
3. Ch1. Sc in 1st st and each st across. Turn. – 62 (68, 77, 85, 94, 102, 111, 119, 128)
Repeat rows 2 & 3 until you have 11 rows total
12. Ch3. Dc in next 2 (3, 6, 1, 4, 6, 1, 4, 6) sts.
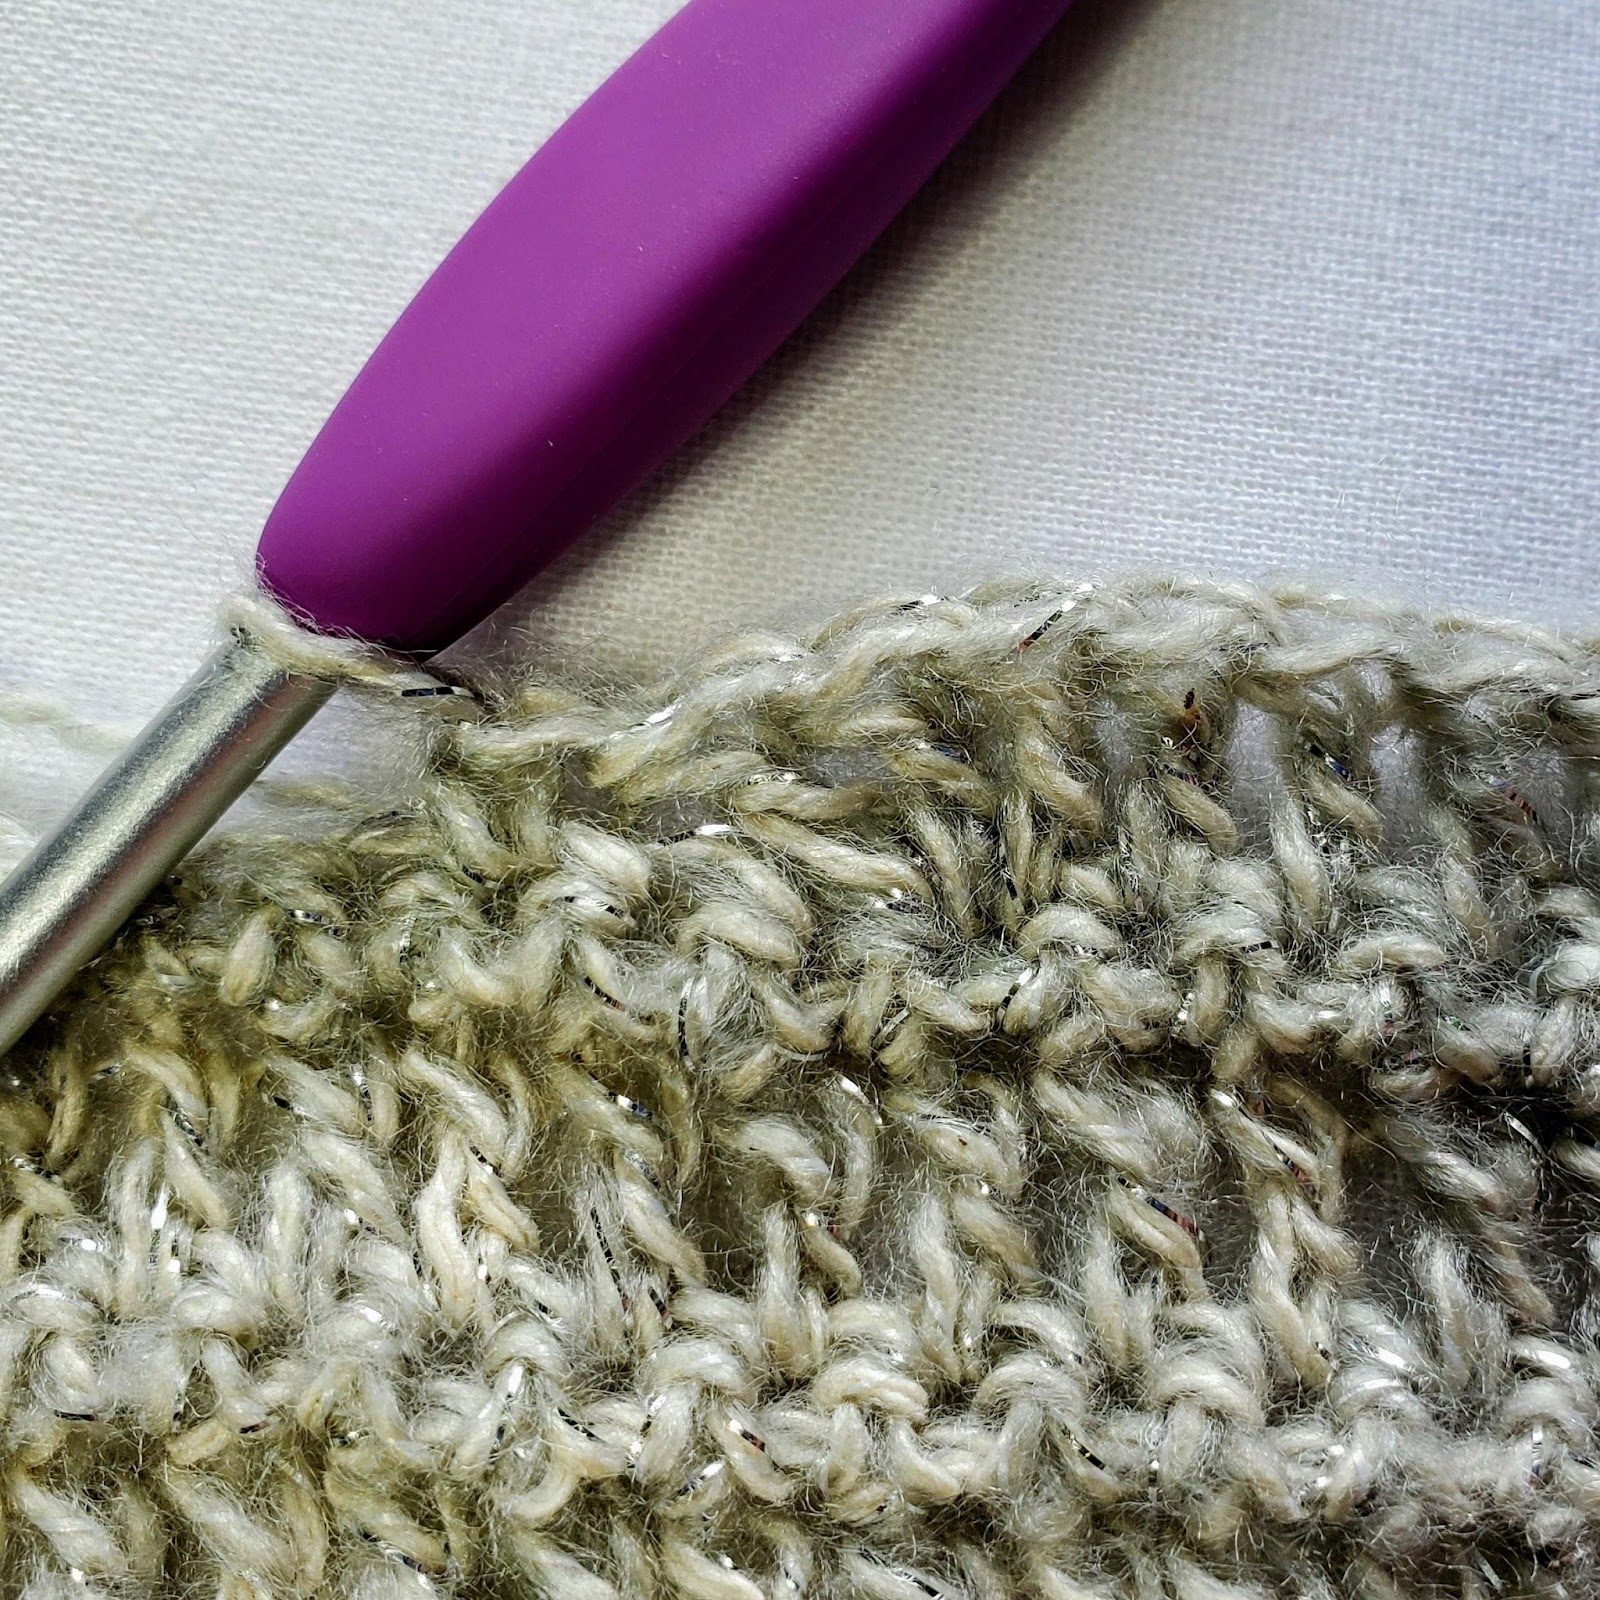
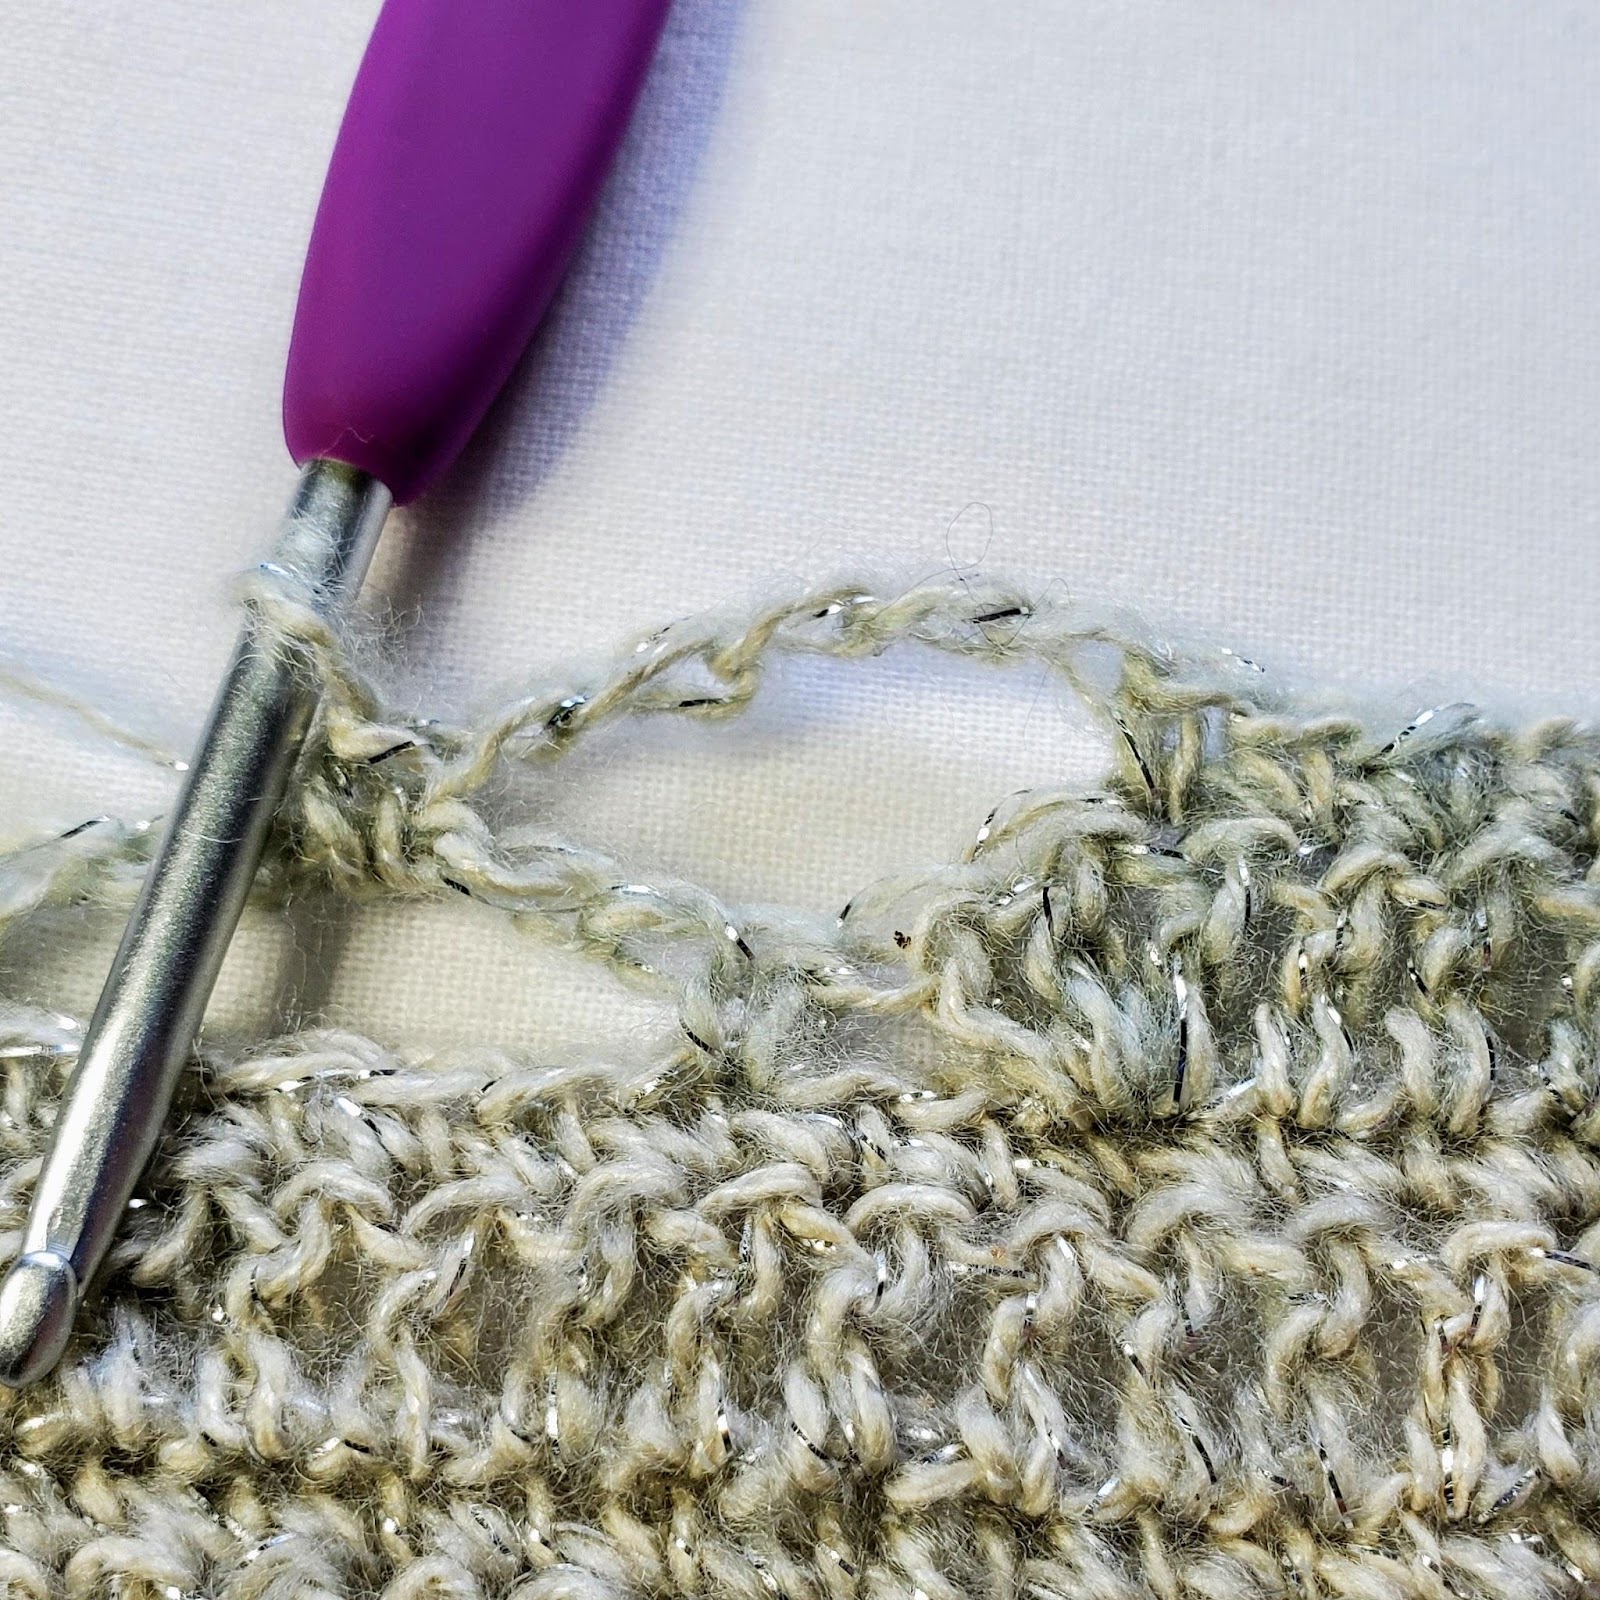
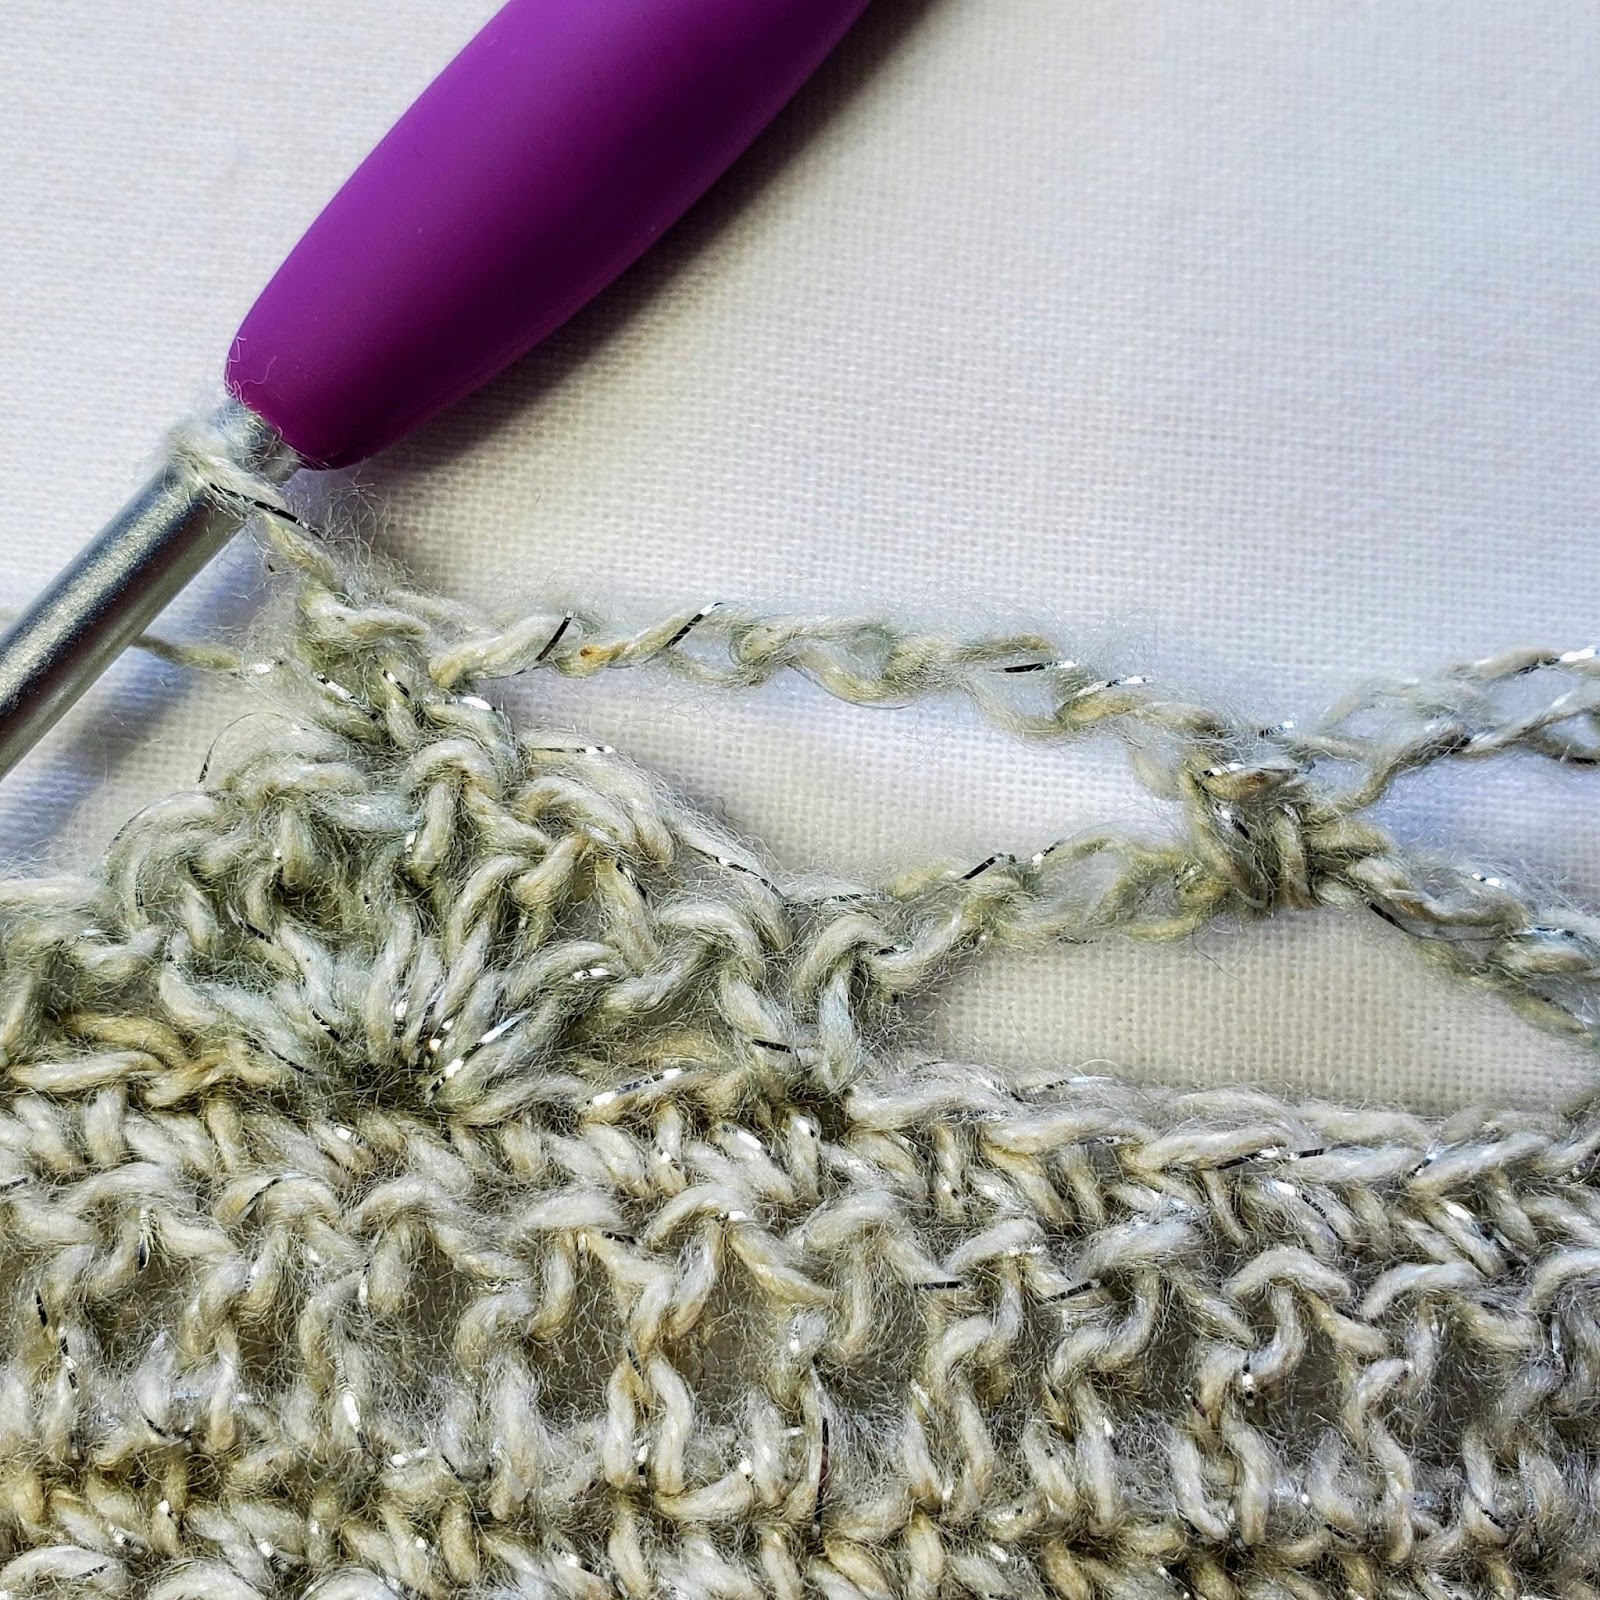
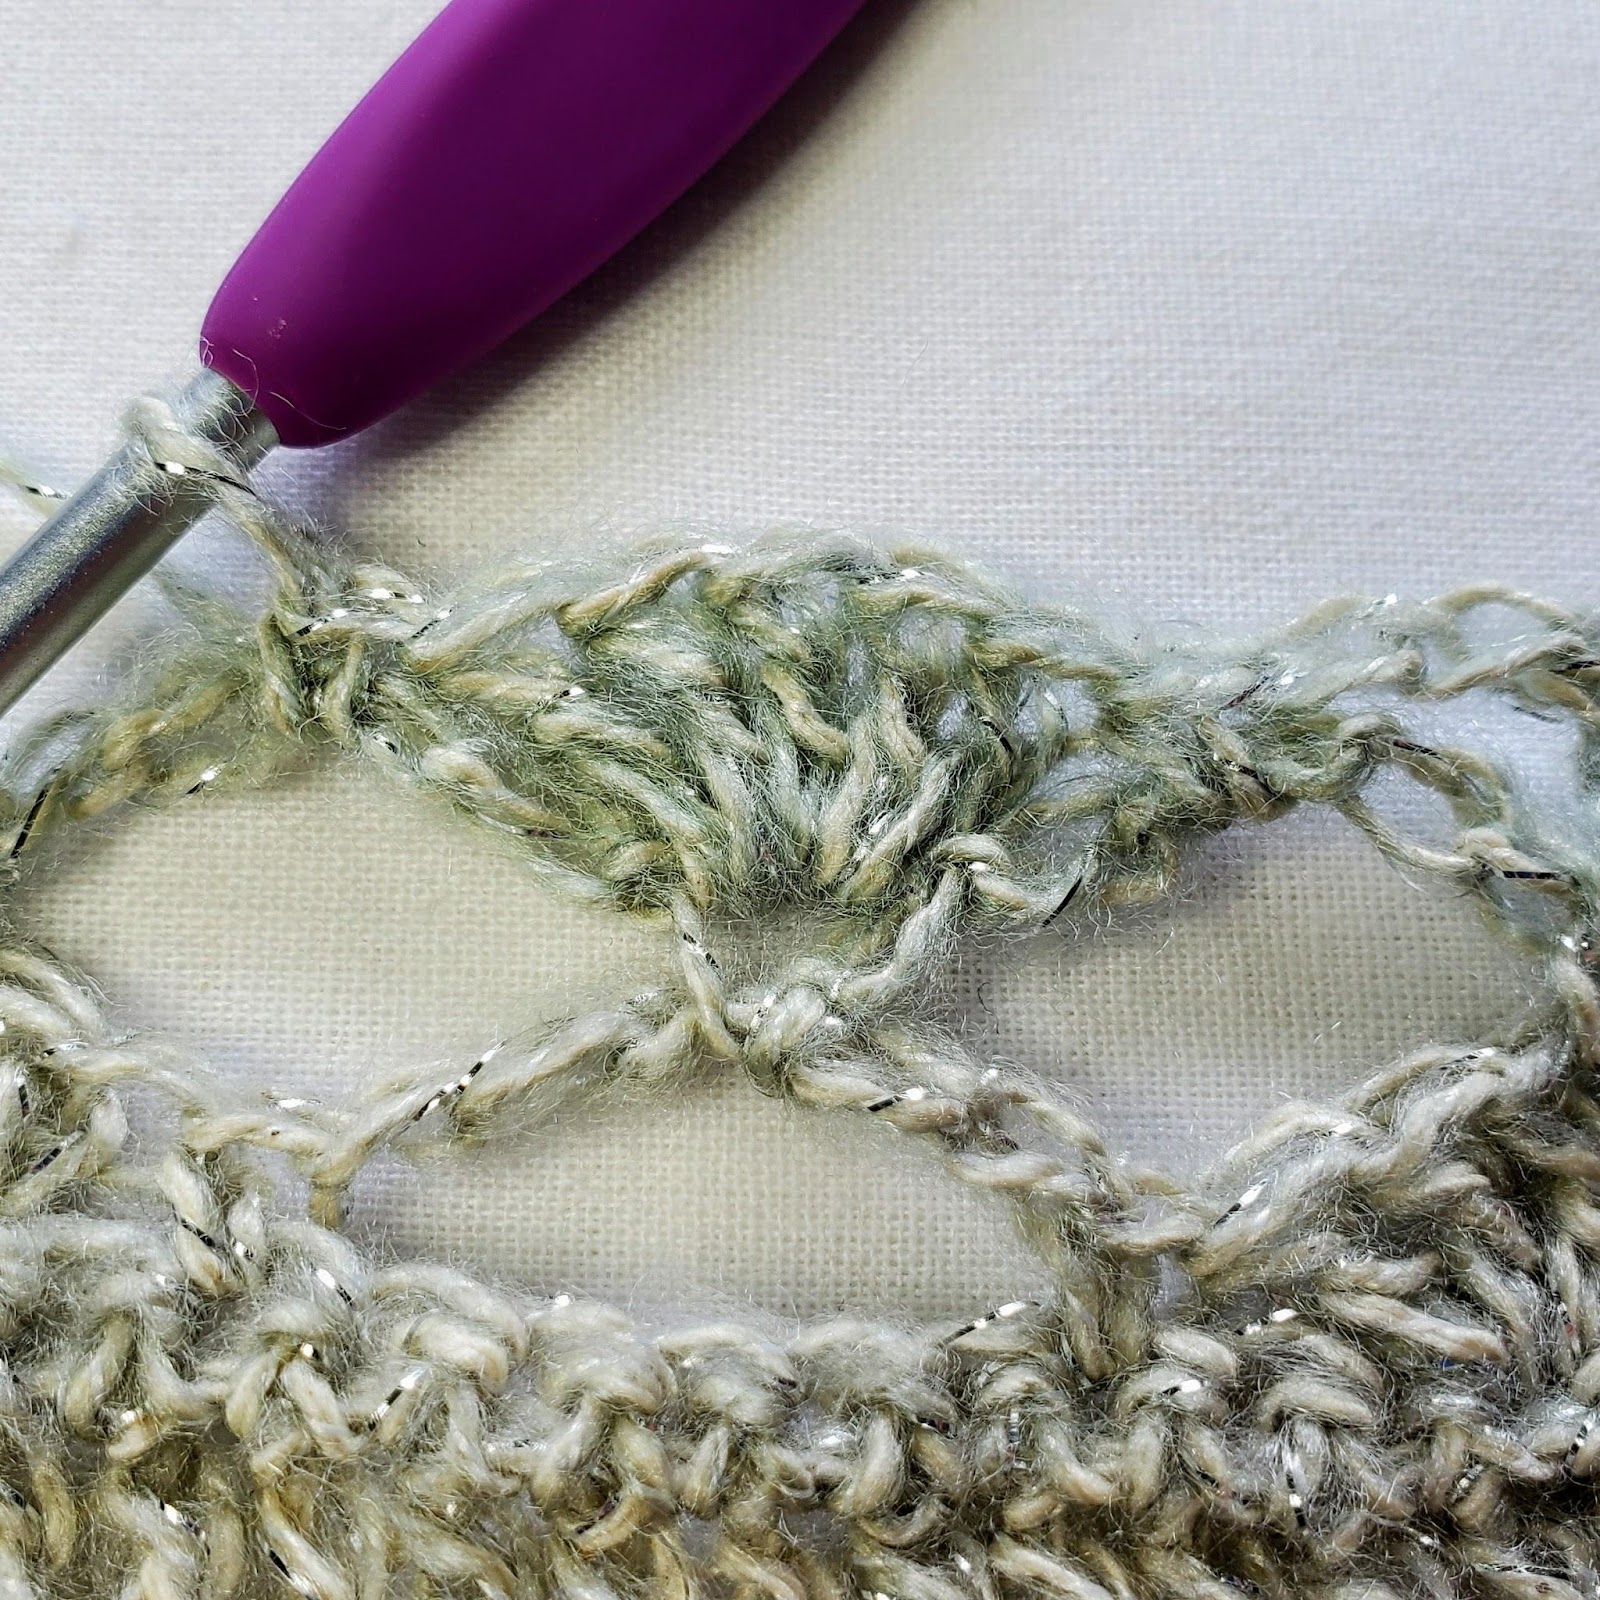
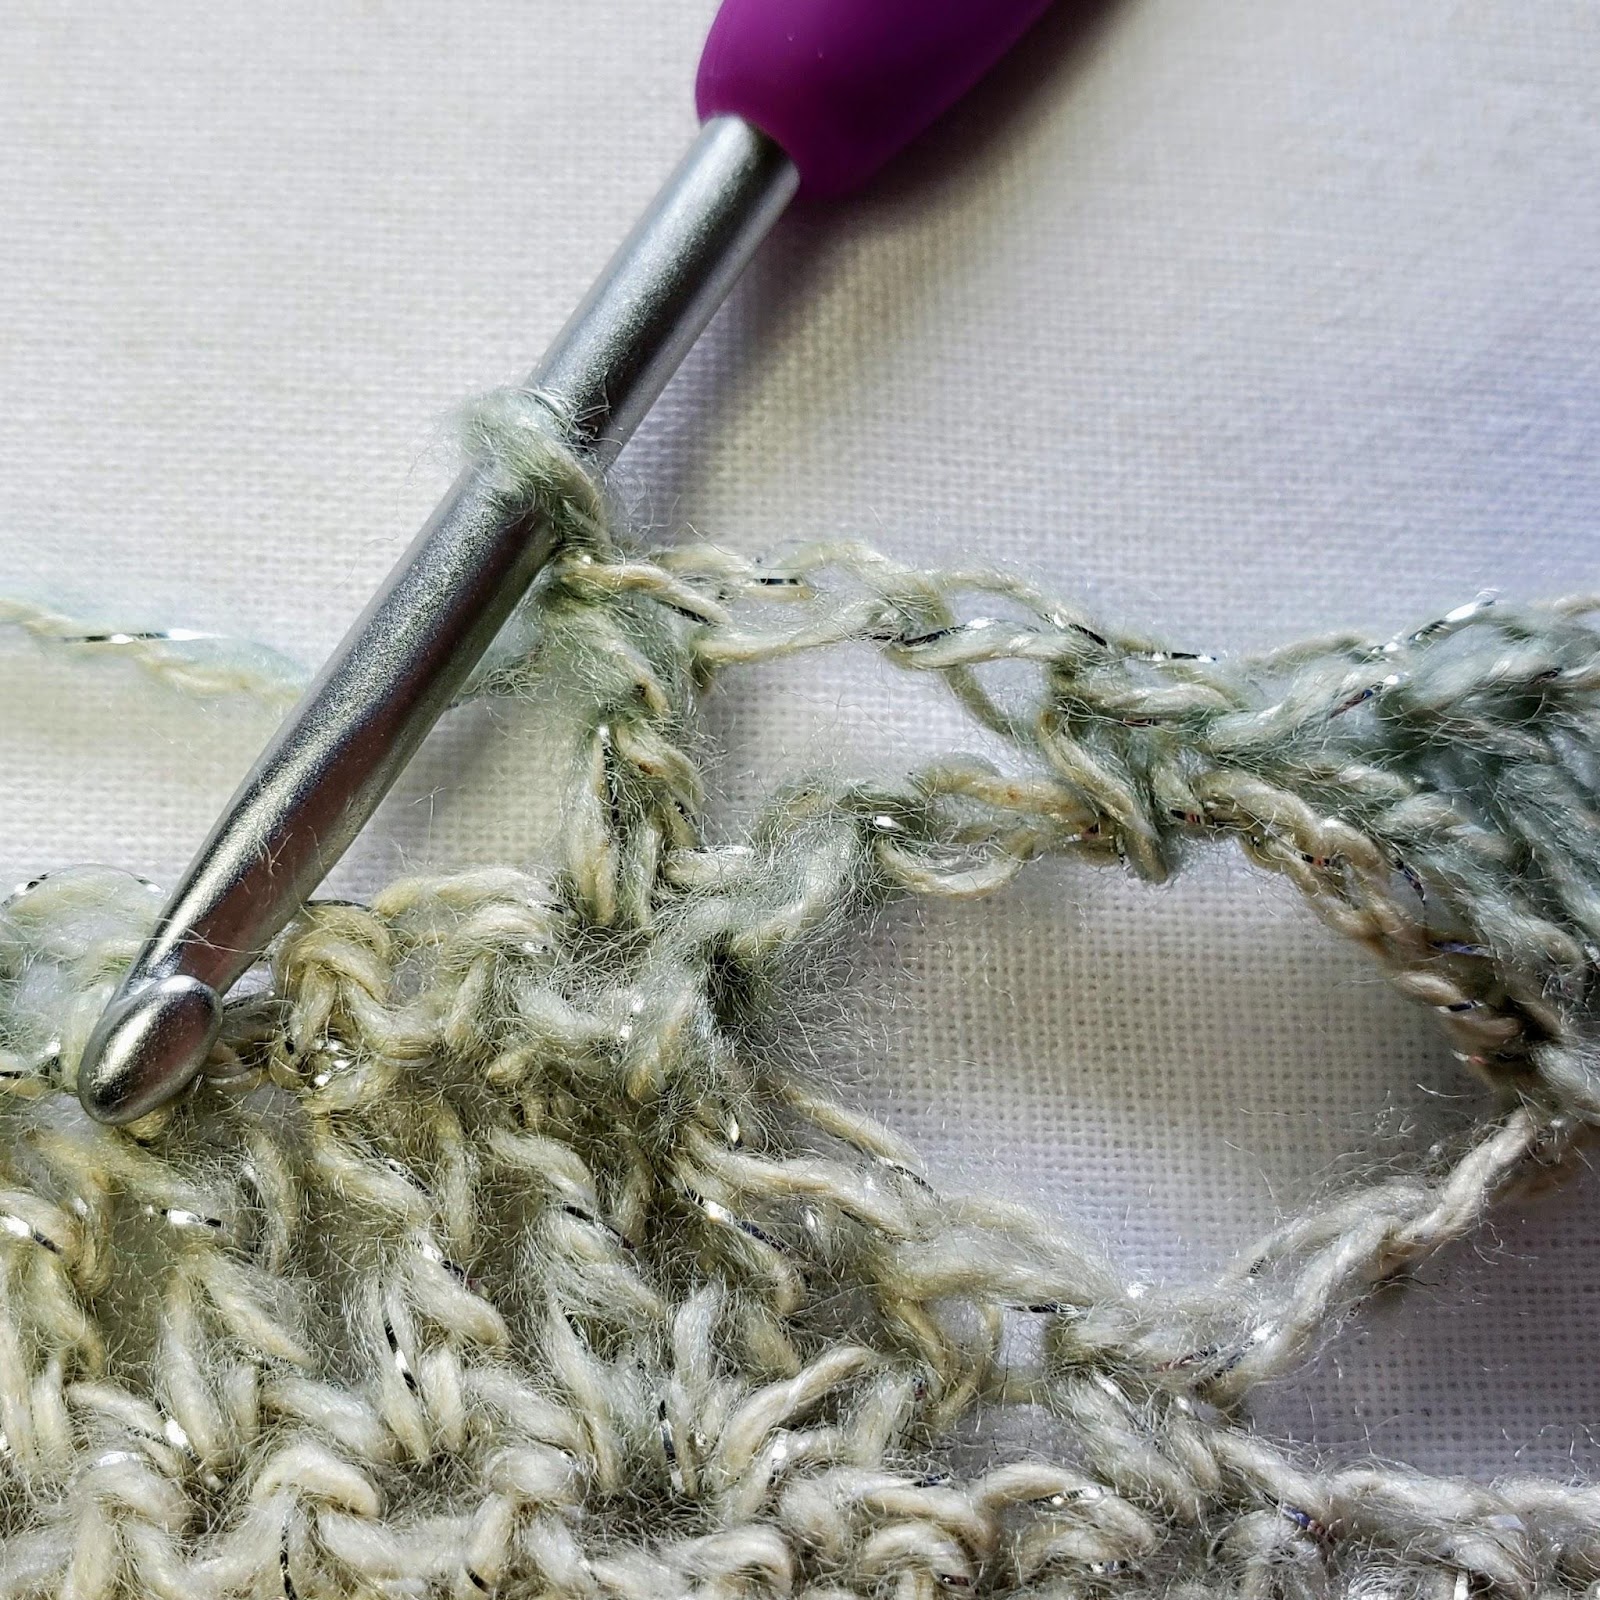
[3dc in next st. Sk 2 st, sc in next st (see Figure 1). *Ch5, sk 5 sts, sc in next st (see Figure 2). Sk 2 sts, sh in next st, sk 2 sts, sc in next st (see Figure 3). ** Repeat from * to ** 0 (0, 0, 1, 1, 1, 2, 2, 2) more times. Ch5, sk 5 sts, sc in next st. Sk 2 sts, 3dc in next st (see Figure 4). ]
Dc in next 6 (10, 13, 7, 10, 14, 9, 11, 16) sts.
Repeat from [ to ]. Dc in last 3 (4, 7, 2, 5, 7, 2, 5, 7) sts. Turn. – 62 (68, 77, 85, 94, 102, 111, 119, 128)


13. Ch1 sc in 1st st and next 3 (4, 7, 2, 5, 7, 2, 5, 7) sts.
[*Ch5, sk 5 sts, sc in middle of next ch5 sp (see Figure 5). Ch5, sk 5 sts, sc in middle dc of next sh (see Figure 6). ** Repeat from * to ** 0 (0, 0, 1, 1, 1, 2, 2, 2) more times. Ch 5, sk 5 sts, sc in middle of ch5 sp. Ch5, sk 5 sts, sc in next st (see Figure 7). ]
Sc in next 7 (11, 14, 8, 11, 15, 10, 12, 17) sts.
Repeat from [ to ]. Sc in last 3 (4, 7, 2, 5, 7, 2, 5, 7) sts. Turn. – 62 (68, 77, 85, 94, 102, 111, 119, 128)

14. Ch3. Dc in next 3 (4, 7, 2, 5, 7, 2, 5, 7) sts.
[Ch2, sk 2 sts, sc in middle of next ch5 sp (see Figure 8). *Sk 2 sts, sh in next st, sk 2 sts, sc in middle of next ch5 sp (see Figure 9). Ch5, sk 5 sts, sc in middle of next ch5 sp (see Figure 10). ** Repeat from * to ** 0 (0, 0, 1, 1, 1, 2, 2, 2) more times. Sk 2 sts, sh in next st, sk 2 sts, sc in middle of next ch5 sp. Ch2, sk 2 sts, dc in next st (See Figure 11). ]
Dc in next 7 (11, 14, 8, 11, 15, 10, 12, 17) sts.
Repeat from [ to ]. Dc in last 3 (4, 7, 2, 5, 7, 2, 5, 7) sts. Turn. – 62 (68, 77, 85, 94, 102, 111, 119, 128)


15. Ch1 sc in 1st st and next 3 (4, 7, 2, 5, 7, 2, 5, 7) sts.
[*Ch5, sk 5 st, sc in middle dc of next sh (see Figure 12). Ch5, sk 5 sts, sc in middle of next ch5 sp (see Figure 13). ** Repeat from * to ** 0 (0, 0, 1, 1, 1, 2, 2, 2) more times. Ch5, sk 5 sts, sc in middle dc of next sh. Ch5, sk 5 sts, sc in next st (see Figure 14). ]
Sc in next 7 (11, 14, 8, 11, 15, 10, 12, 17) sts.
Repeat from [ to ]. Sc in last 3 (4, 7, 2, 5, 7, 2, 5, 7) sts. Turn. – 62 (68, 77, 85, 94, 102, 111, 119, 128)
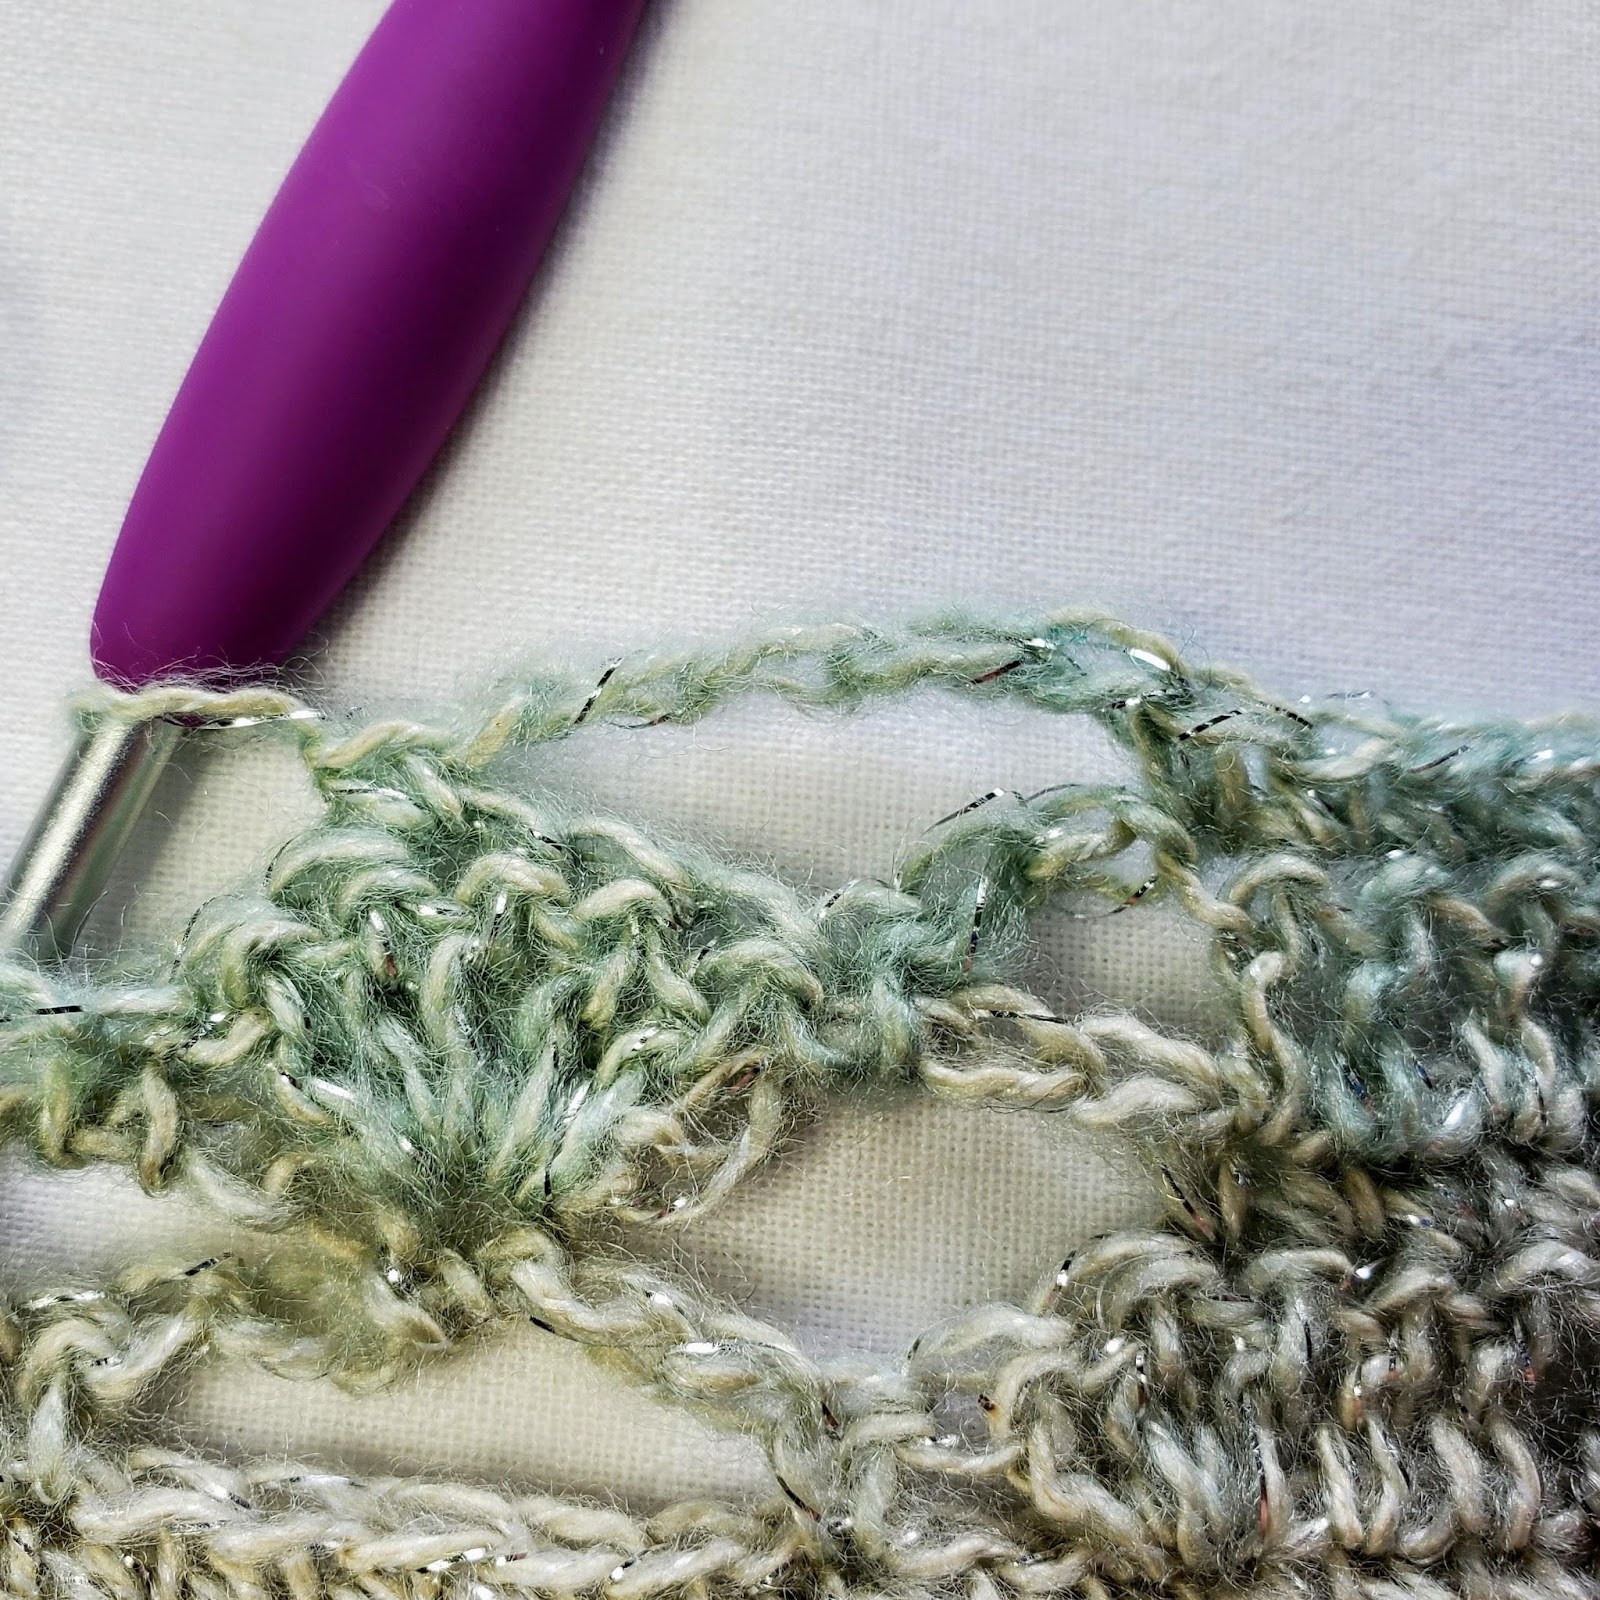


Figure 12 Figure 13 Figure 14
16. Ch3. Dc in next 2 (3, 6, 1, 4, 6, 1, 4, 6) sts.
[3dc in next st. Sk 2 st, sc in middle of next ch5 sp (see Figure 15). *Ch5, sk 5 sts, sc in middle of next ch5 sp (see Figure 16). Sk 2 sts, sh in next st, sk 2 sts, sc in middle of next ch5 sp (see Figure 17). ** Repeat from * to ** 0 (0, 0, 1, 1, 1, 2, 2, 2) more times. Ch5, sk 5 sts, sc in middle of next ch5 sp. Sk 2 sts, 3dc in next st (see Figure 18). ]
Dc in next 6 (10, 13, 7, 10, 14, 9, 11, 16) sts.
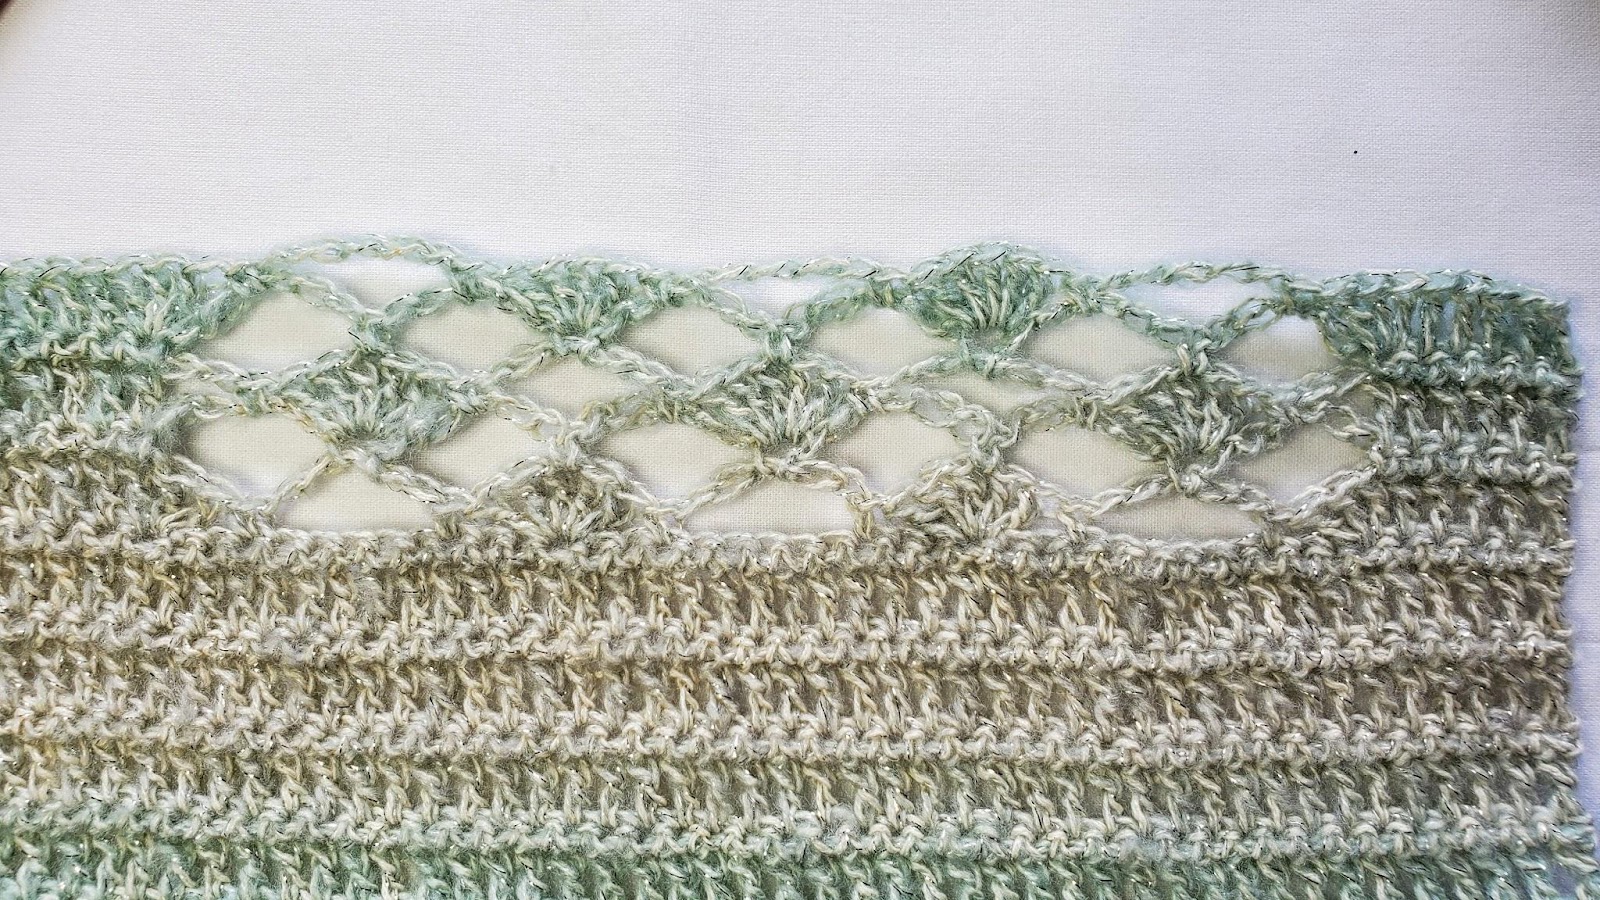
Repeat from [ to ]. Dc in last 3 (4, 7, 2, 5, 7, 2, 5, 7) sts. Turn. Figure 19 shows what the lacy portion should currently look like. – 62 (68, 77, 85, 94, 102, 111, 119, 128)


Gauge check: It is very common for our tension to change when transitioning from a small project (like a gauge swatch) to a large one (like a top). That is why, even if you have made a gauge swatch, it is important to check your measurements, especially if you are making a plus-sized top. At this point, your project should be approximately 14 ½” (16”, 18”, 20”, 22”, 24”, 26”, 28”, 30”) wide and 4 ½” high. Because of the lacy nature of the pattern, it may appear to be 1-2” narrower. Just give the sides a tug and measure again. It should stretch out to the right width without bouncing back too much.
Repeat rows 13 – 16 until you have achieved your desired length, minus 3 ½”. You want to end on a repeat of row 13 or 15. Note: The lacy pattern will make your panel want to narrow in the middle and stretch longer. In order to get an accurate measurement of your panel, you should lay it flat and tug the sides outwards until you have reached the proper width.
17. Ch3. Dc in next st and each st and ch sp across. Note: You should be placing 5 dc in each ch5 sp and 1 dc in each sc. Turn. – 62 (68, 77, 85, 94, 102, 111, 119, 128)
18. Ch1. Sc in 1st st and each st across. Turn. – 62 (68, 77, 85, 94, 102, 111, 119, 128)
19. Ch3. Dc in next st and each st across. Turn. – 62 (68, 77, 85, 94, 102, 111, 119, 128)
Repeat rows 18 & 19 until you have a total of 10 rows, starting at row 17. Bind off, leaving a long tail for seaming the shoulders.
Seaming
You should now have 2 panels that are equal in height and width. We are now going to seam these 2 panels together. Before you begin, you want to figure out how big you want your neckline, your bottom slits, and your armholes to be.
– Lay out your panels one on top of the other with their right sides facing together.
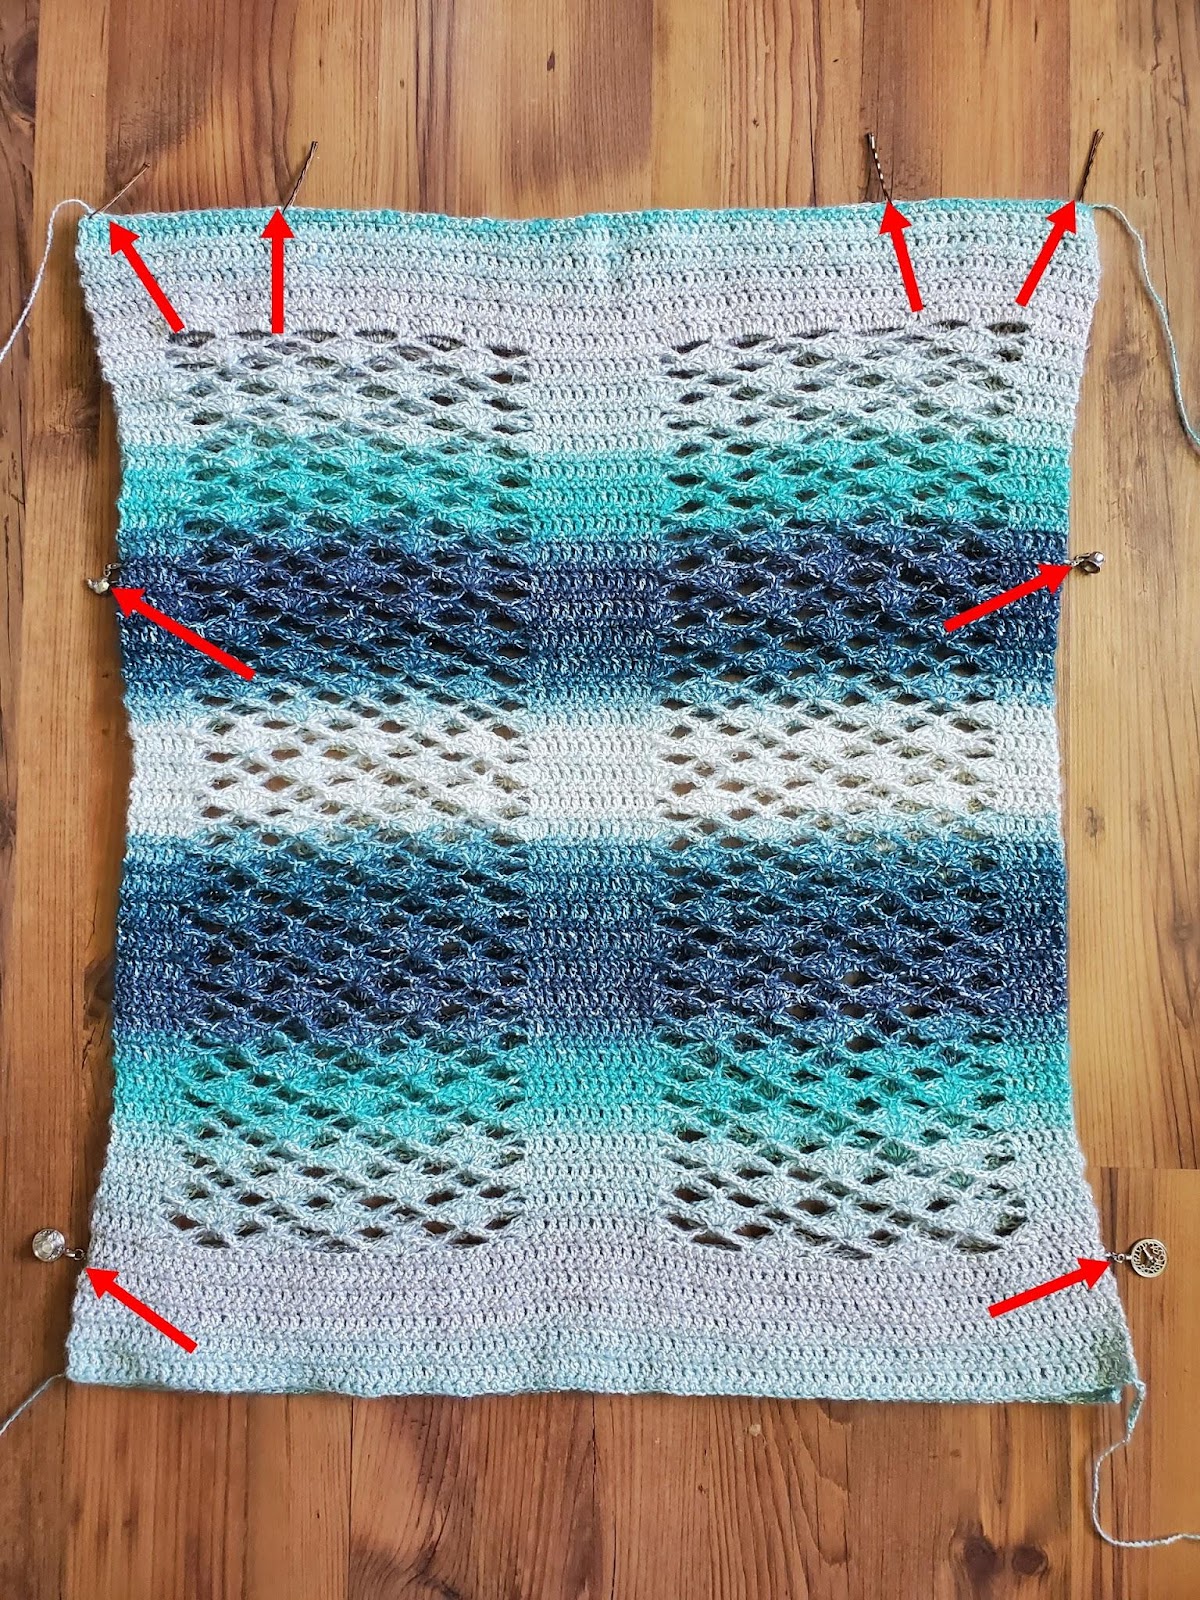
– Use stitch markers (the locking type works best, or you can use bobby pins like I did for the markers on the shoulders) to pin the 2 panels together in the places where you would like your seams to start and finish. You can see how I did this in Figure 20 below (I used red arrows to point out my stitch markers). Make sure that your shoulder seams are equal as well as your arm holes and bottom slits.
– Sew your panels together using whatever method you like best.
Now you will have something that really looks like a tunic! Be sure to try it on to make sure you are totally happy with your seams, your neckline, and your armhole depth. If it’s not as amazing as you want it to be, now is the time to change it.
Finishing The Edges
Lastly, all of the edges will get a neat sc row to finish them off.
Neck
Attach your yarn anywhere on the neck (I find it less conspicuous by the shoulder seam). Ch1 and sc in each st around the neck. Ss to join to 1st sc. Bind off.
Armholes
Join your yarn in the bottom of the armhole. Sc evenly around the entire armhole in the following manner:
– Place 1 sc in the side seam at the bottom of the armhole.
– Place 1 sc in the side of each sc row.
– Place 2 sc in the side of each dc row.
– Place 1 sc in the shoulder seam at the top of the armhole.
– Continue in the same manner until you have worked around the entire armhole. Ss to join to 1st sc. Bind off.
Bottom Hem
Join your yarn anywhere along the bottom, ch1, and sc evenly around the bottom in the following manner:
– 1 sc in each st along the bottom of each panel.
– When you get to the corner (side slit),
– Work 3sc into the corner (see Figure 21).
– Then sc evenly up the slit, placing 1 sc in the end of each sc row and 2 sc in the end of each dc row. Place 1 sc in the side seam at the top of the slit (see Figure 22).
– Continue in the same manner until you have reached the other corner. Work 3 sc into the corner (see Figure 23).
– Continue in the same manner until you have worked around the entire bottom hem Bind off.


Weave in all your ends, and you’re done!
I hope you love your new top, and I look forward to seeing all of your beautiful pictures on Ravelry!
If you’d like to know when I post new patterns and tutorials, head on over to my Facebook and Instagram and give me a like and a follow!
If you enjoyed The Shells And Trellis Tunic – Free Crochet Top Pattern, you may want to check out my other designs!
And until next time… Happy Hooking! 😉
I’m wondering if this beautiful top could be done in uk 4ply cotton using a uk 3 hook and do you think if I went up a size it could work. Thankyou for your advice. Dawn xxx
Hi Dawn! Thanks so much for visiting my blog!
I think your idea might work. The best way to know would be to make a swatch with your intended yarn and hook. Make it at least 4″ across. Then figure out how many stitches you have per inch. Multiply your stitches per inch by the width of your intended size (this can be found in the gauge check after row 16). This will give you the ideal stitch count for your size. Then you just follow the instructions for the size that is closest to that stitch count. I hope that helps! If you still have questions, please feel free to email me through the contact page.
– Sarah