

The Tie Up Top – Free Children’s Crochet Pattern is copyrighted by I Need It Crochet. You may not copy, share, change, or sell the pattern itself. Also, you may not claim this pattern as your own. All pictures contained in this pattern fall under the copyright and may not be used.
Finished items made from the Tie Up Top – Free Children’s Crochet Pattern belong to you, and you may do what you wish with them. If you choose to sell them on Etsy, I would very much appreciate it if you credited me as the pattern designer.


Or… Just scroll down to see it for free!
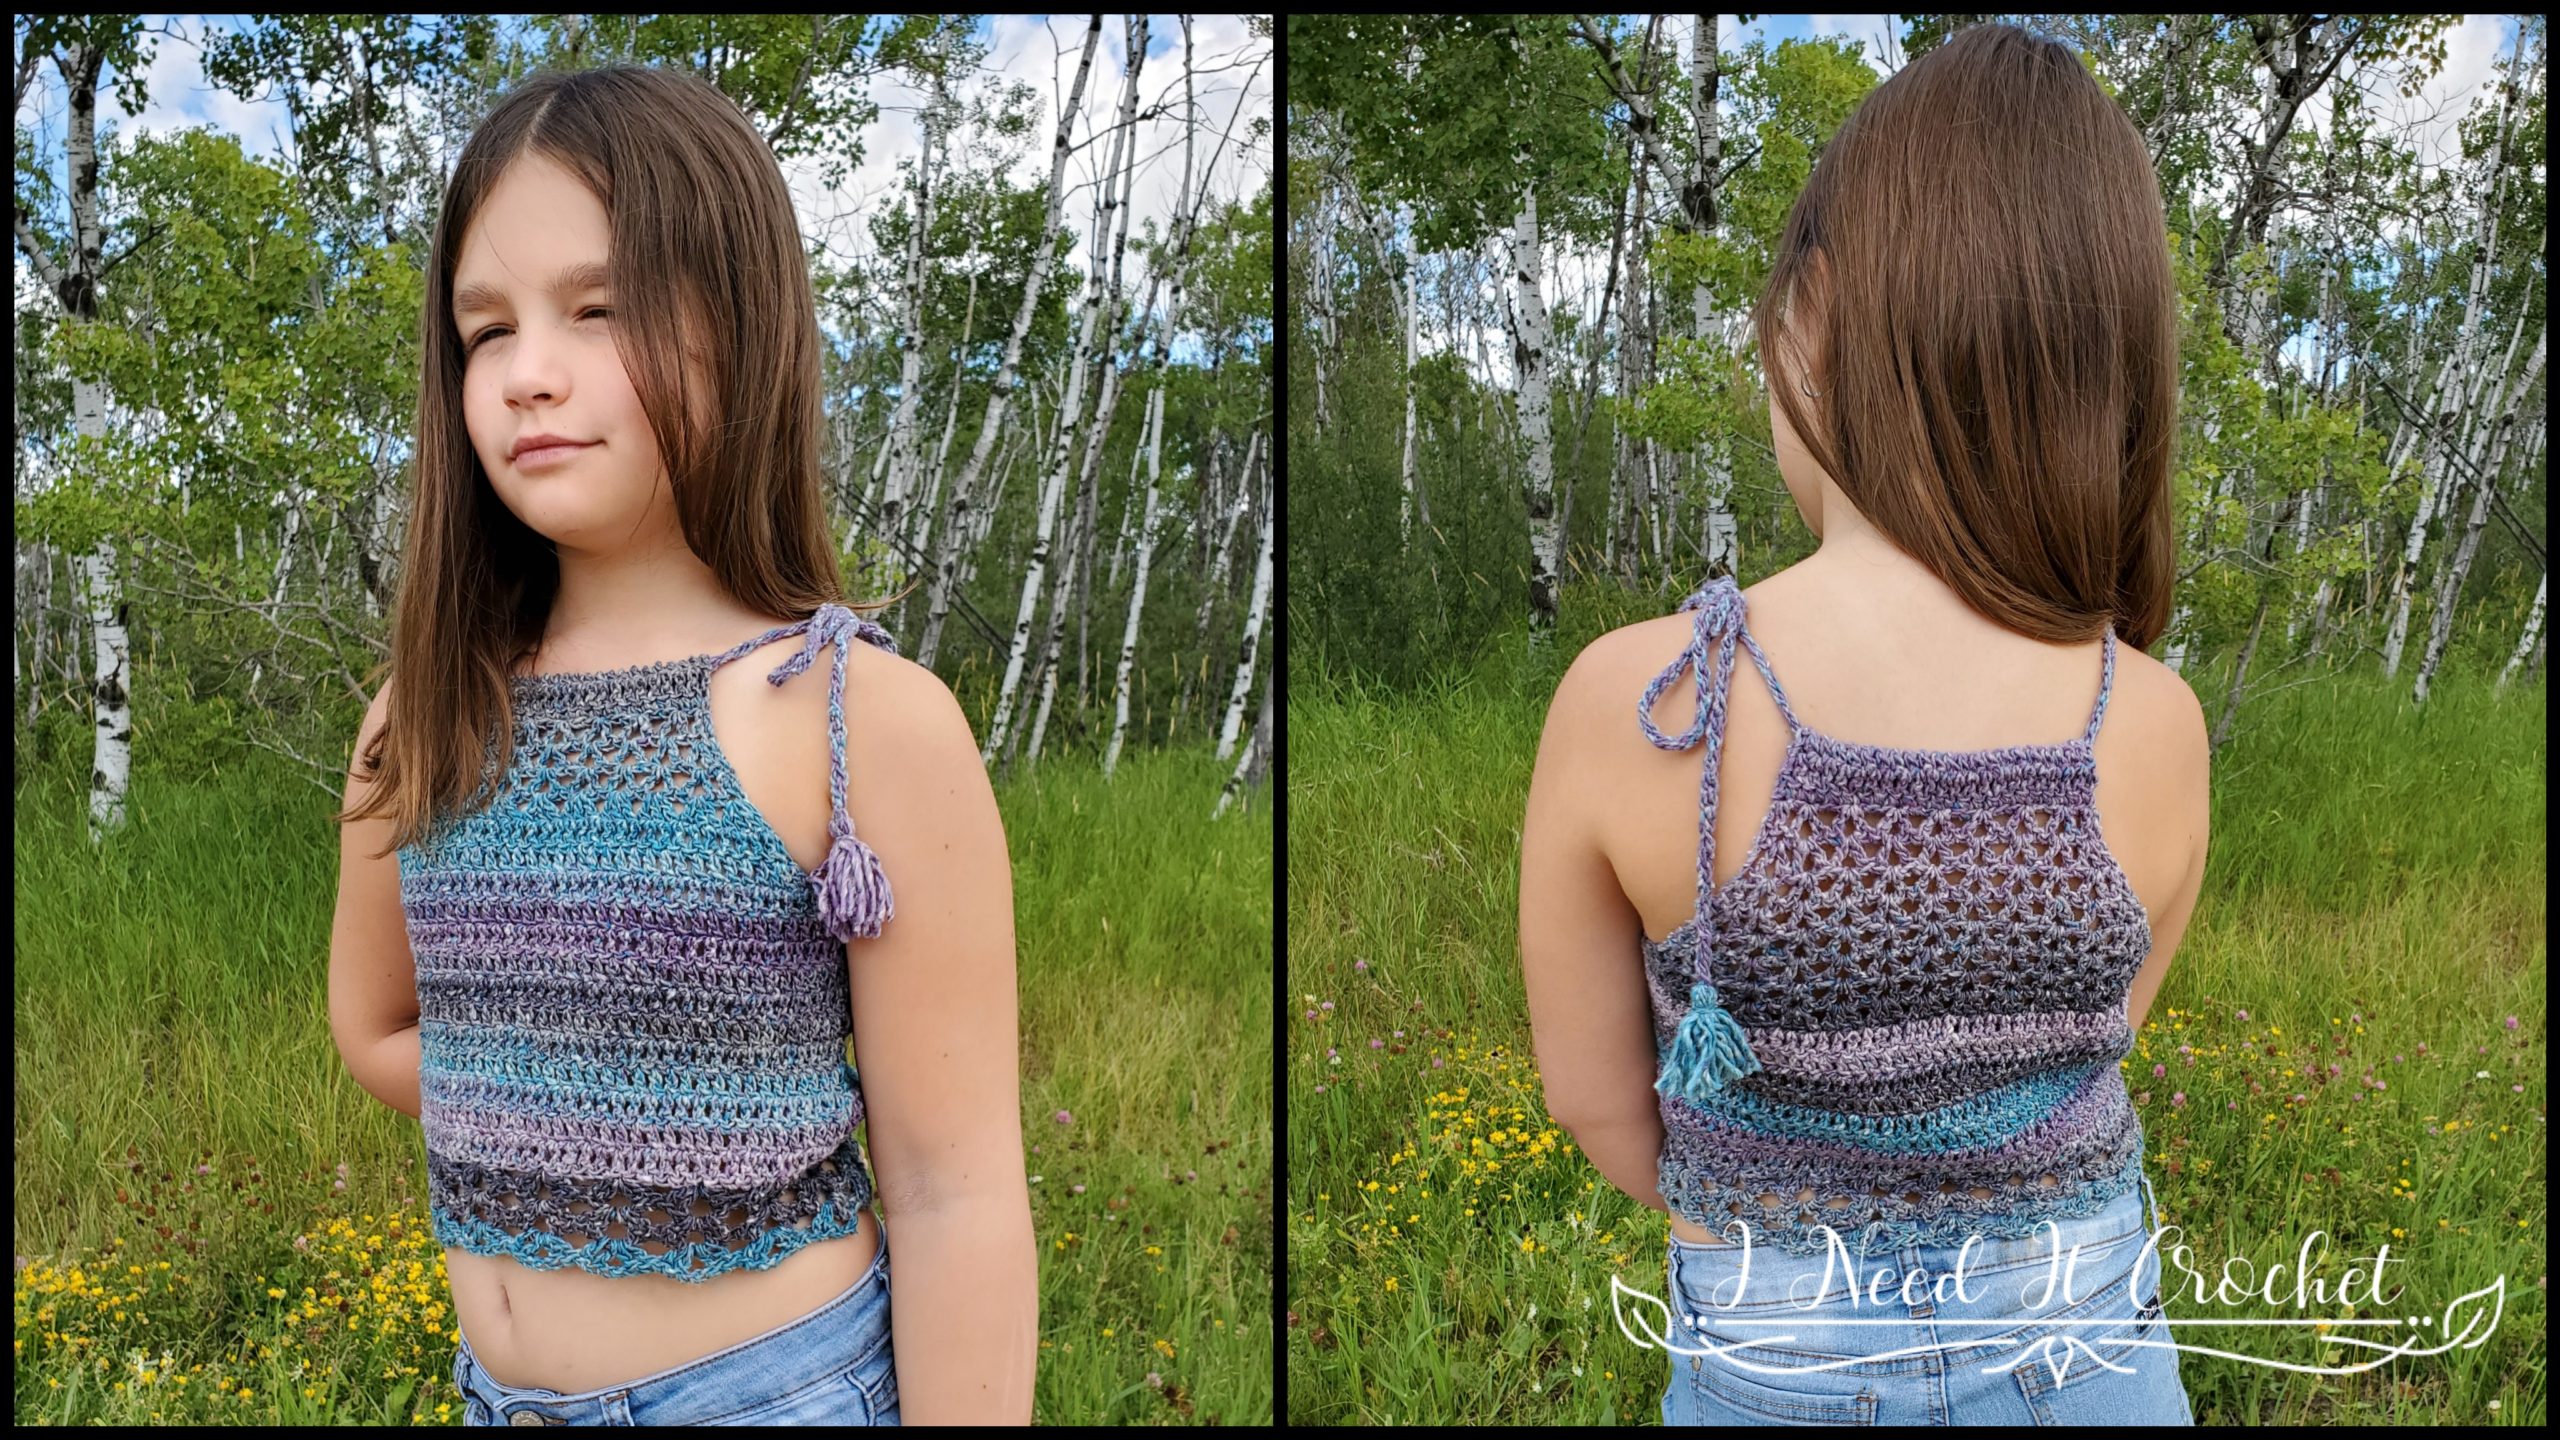
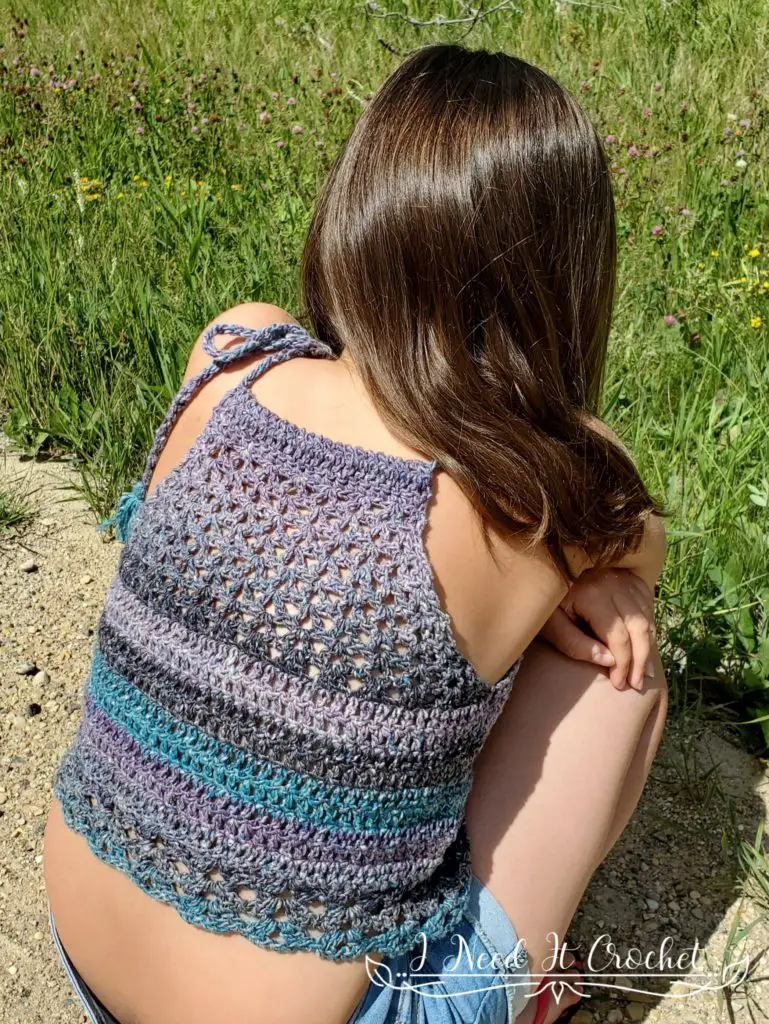
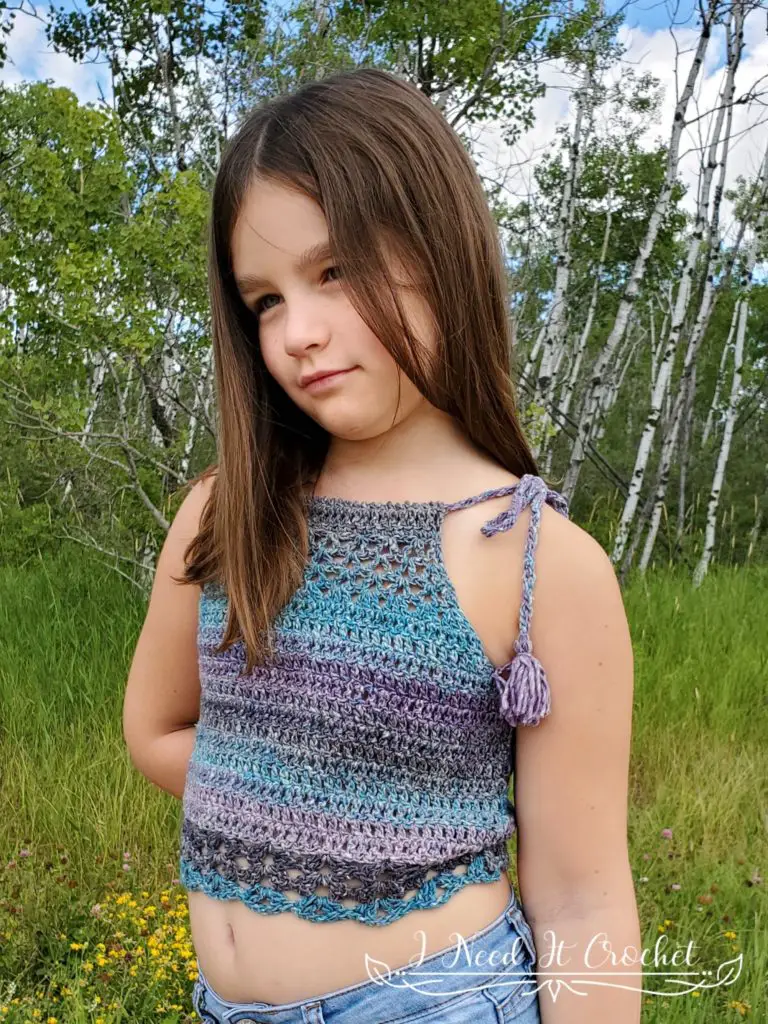
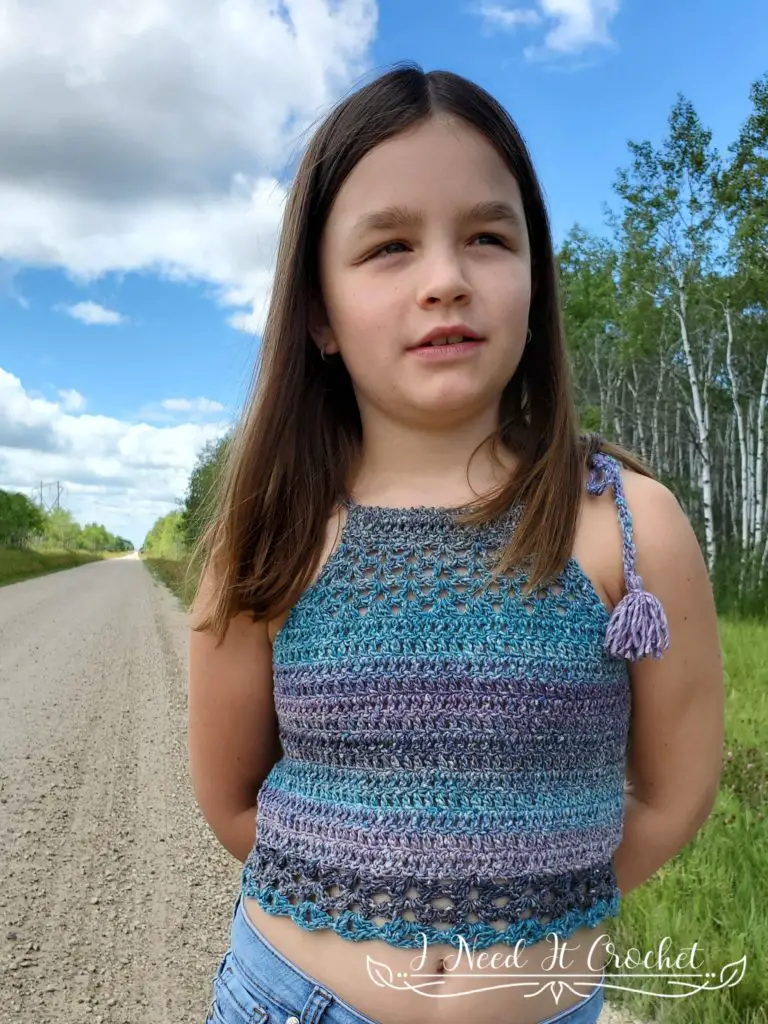
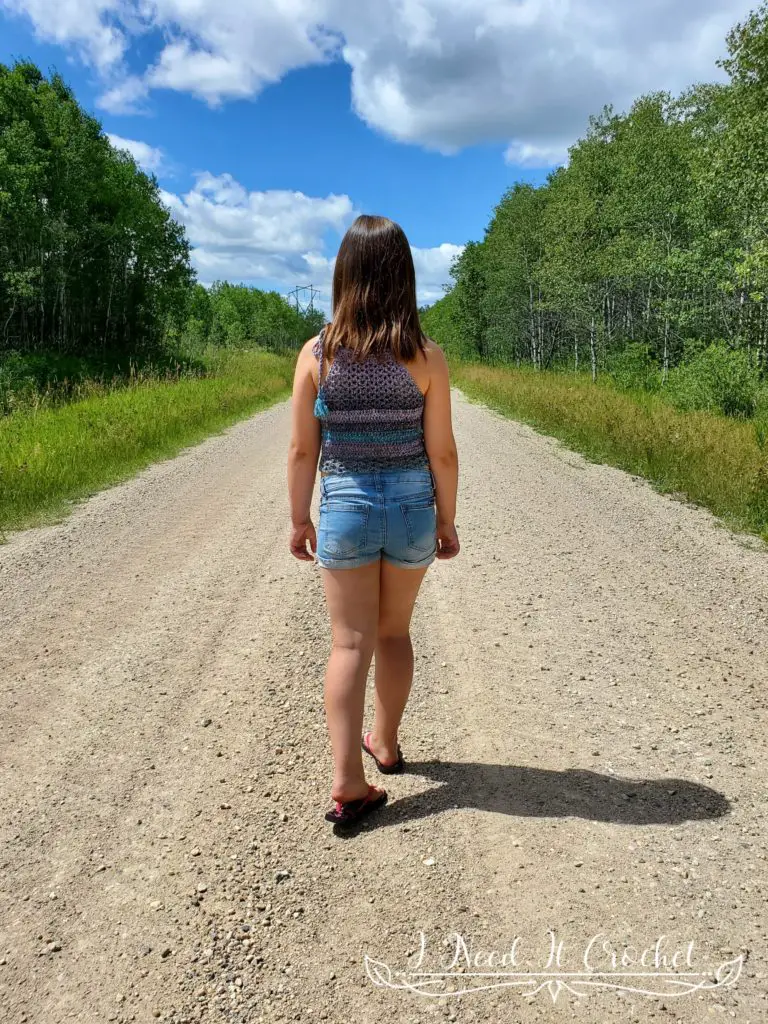
In so many ways, my daughter is a mini version of me. One of these ways is how much she adores summer. Once the warm weather starts, I can barely keep her in the house! I wanted to keep her cool while she goes on her adventures, so I made her this light, strappy summer top. I finished it with a couple of cute little tassels to give it a hippie, boho vibe, and now it’s her favourite thing to wear!
This pattern is a simple design, so it won’t take long to whip one up for your little flower child.
Finished Sizes:
Instructions given to fit size 2; changes for sizes 4, 6, 8, 10, 12, 14, and 16 are in ()
2 (4, 6, 8, 10, 12, 14, 16)
To Fit Chest: 21” (22 ½”, 25”, 226 ½”, 28”, 30”, 31 ½”, 32 ½”)
Finished Length: Customizable.
Materials:
I used Loops & Threads Cottonie Silk, which is 60% Polyester/20% Cotton/20% Silk, #3 Dk weight.
Any yarn of similar weight would work.
Approximately 100 (150, 200, 250, 300, 350, 400, 450) yds to make the length shown.
5mm Hook
Stitch Markers
Yarn Needle
Scissors
Measuring Tape
Abbreviations:
Sk = Skip
Sp = Space
Inc = Increase
Dec = Decrease
St = Stitch
Ss = Slip Stitch
Ch = Chain
Sc = Single Crochet
Dc = Double Crochet
Dc2tog = Double Crochet 2 together
Vst = V Stitch (See Notes)
Gauge:
1. Ch16. Dc in 4th ch from hook and each ch across. Turn. – 14 st
2. Ch3. Dc in next st and each st across. Turn. – 14 st
Repeat row 2 until you have a total of 8 rows. Your swatch should measure 4” W x 4” H.
Notes:
V Stitch: A Vst consists of a (dc, ch1, dc) all in the same stitch.
Ch1 and ch2 at the beginning of a row is never considered a stitch.
Each Ch st between sts is always considered a stitch.
Ch3 at the beginning of a row is always considered a dc.
I have added many pictures to help you along the way.
Instructions
This top is made from the top down. We will begin by making the upper back portion, then make the upper front portion. Next, we will join the two pieces and continue working downward in the round. Lastly, we will create the tie and tassels.
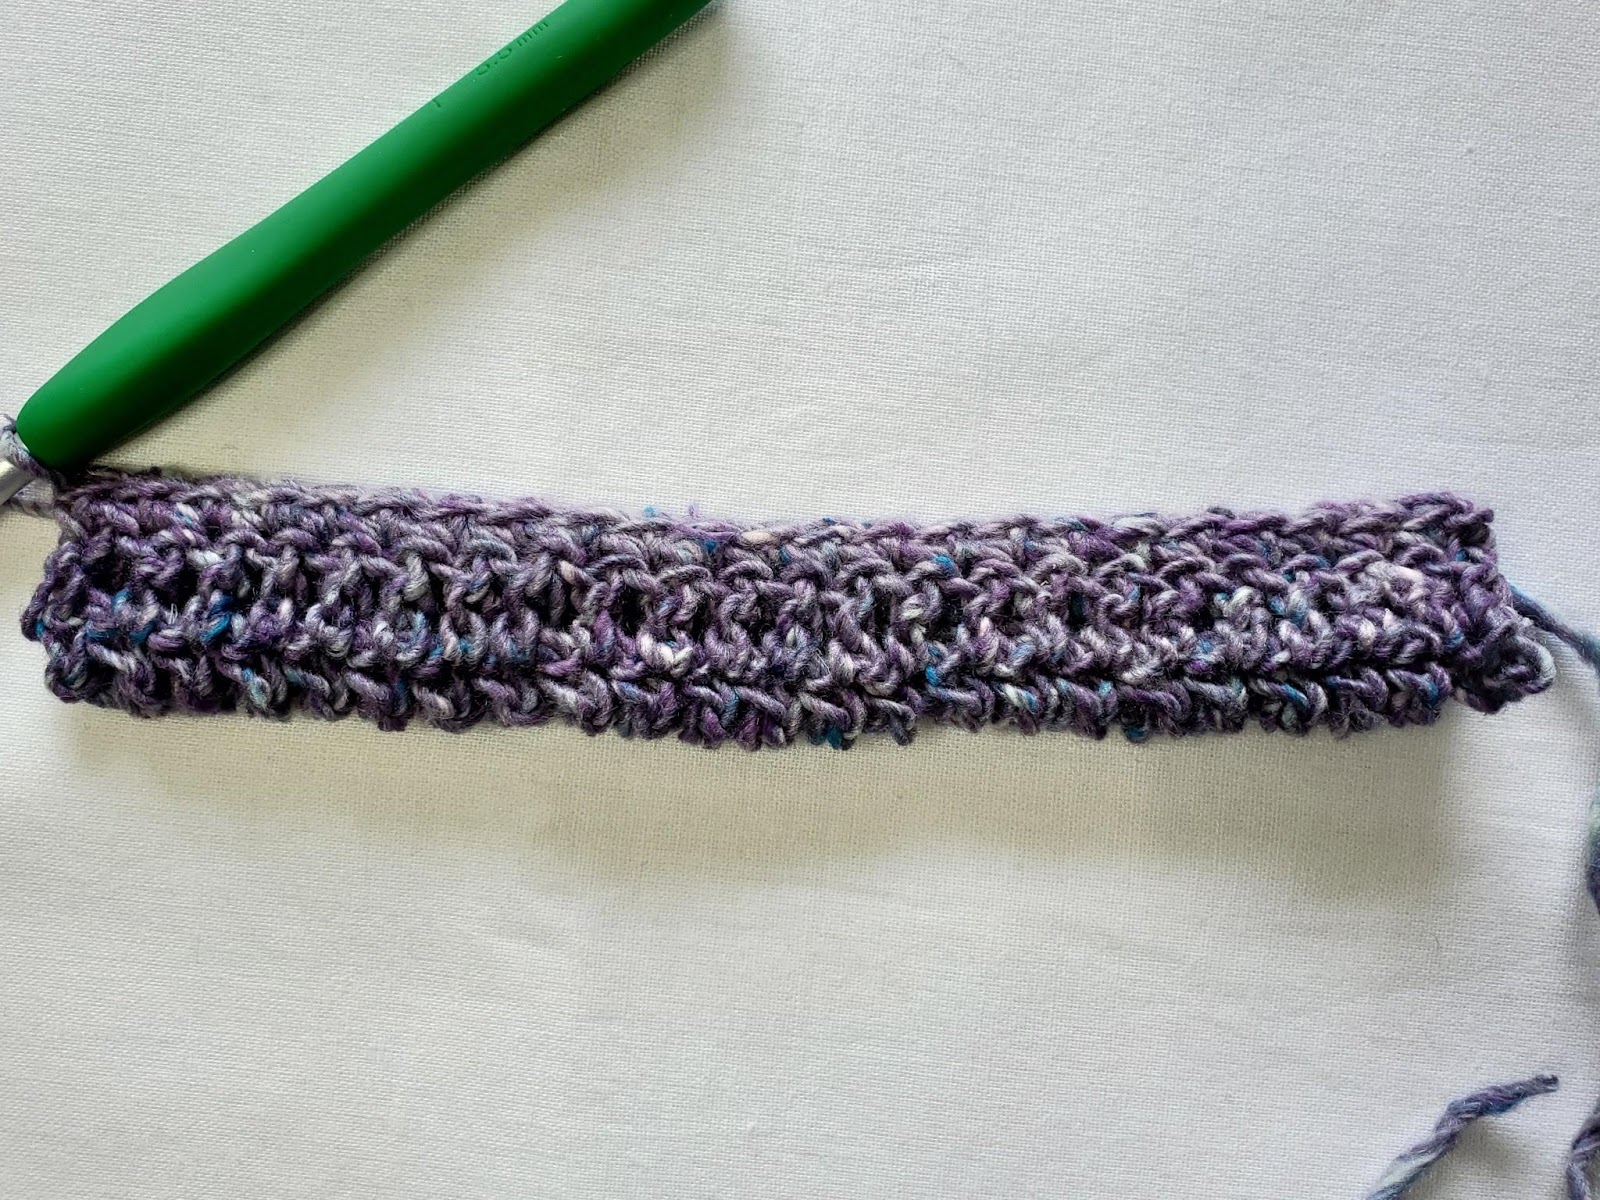
Upper Back
Tie Sleeve
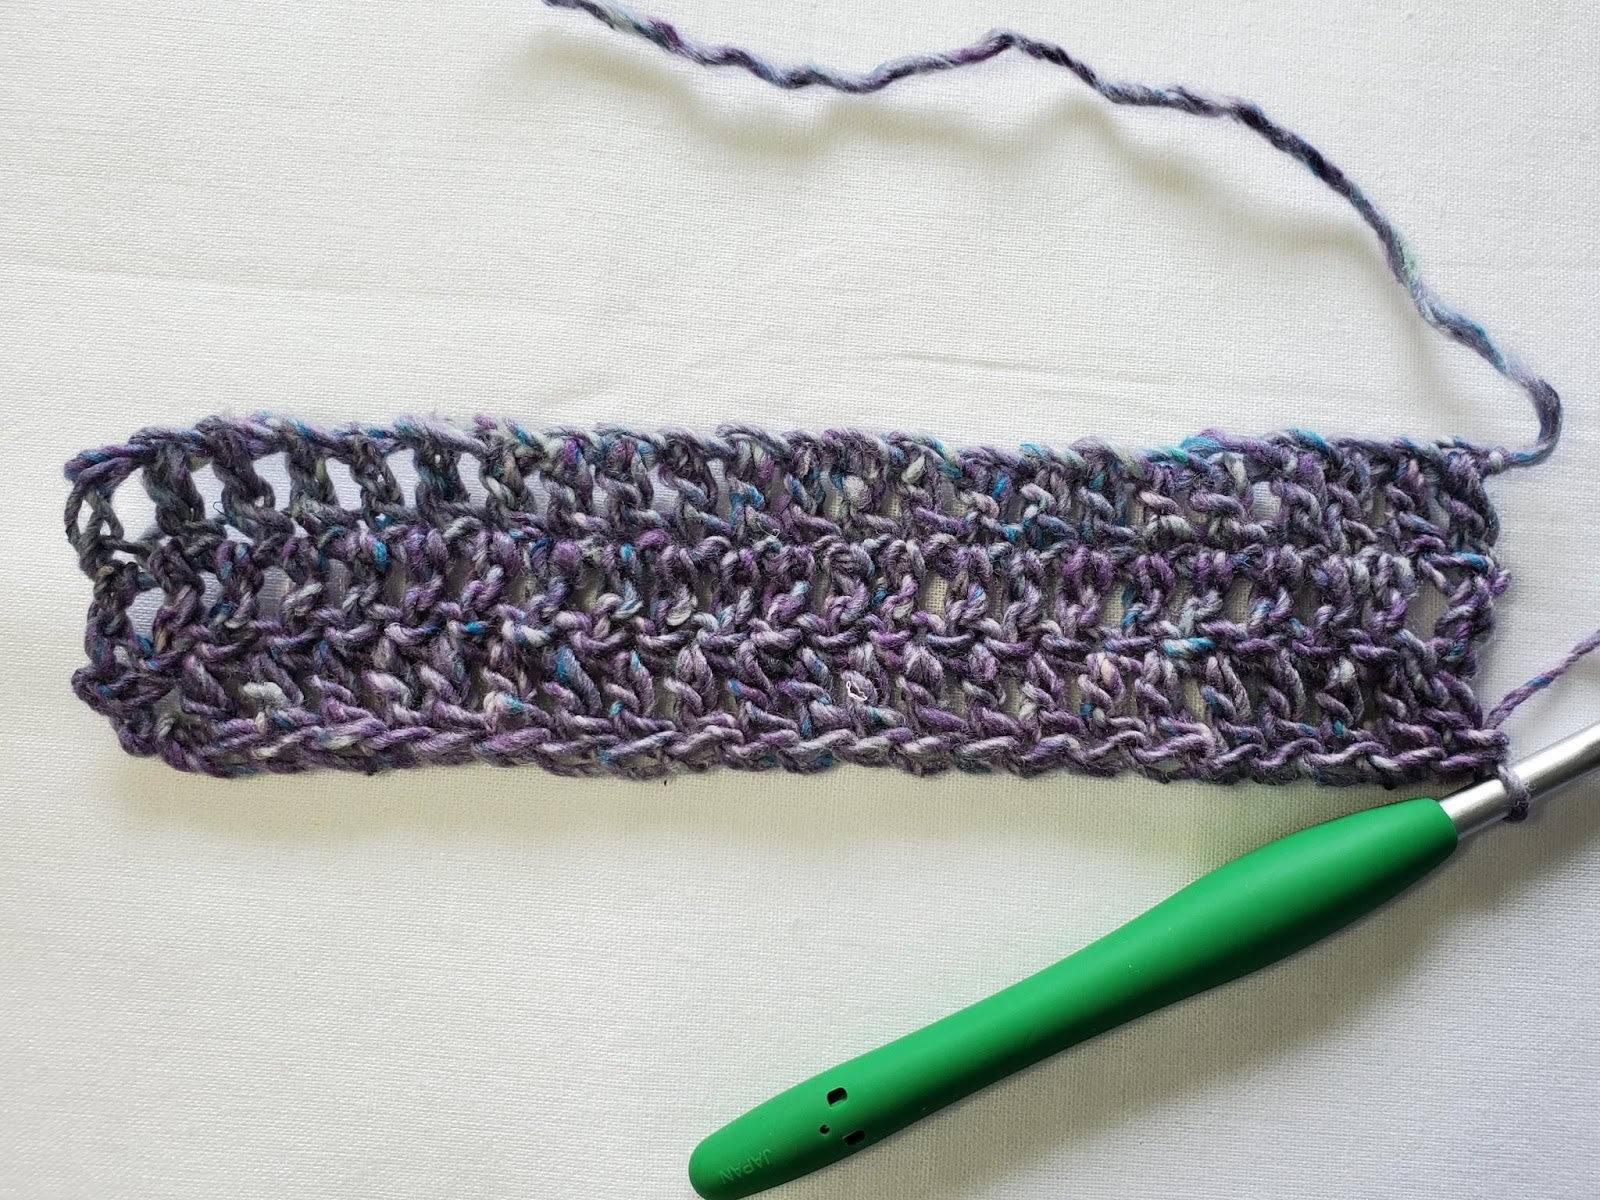
Ch 28 (31, 28, 31, 28, 31, 28, 31)
1. Dc in 4th ch from hook and each ch across. Turn. – 26 (29, 26, 29, 26, 29, 26, 29) st
2. Ch3. Dc in next st and each st across. Turn. – 26 (29, 26, 29, 26, 29, 26, 29) st
3. Repeat Row 2.
Do not bind off. We will now create a narrow sleeve to hold the tie.
– Lay your work out as it appears in Figure 1. With your hook on the bottom right.
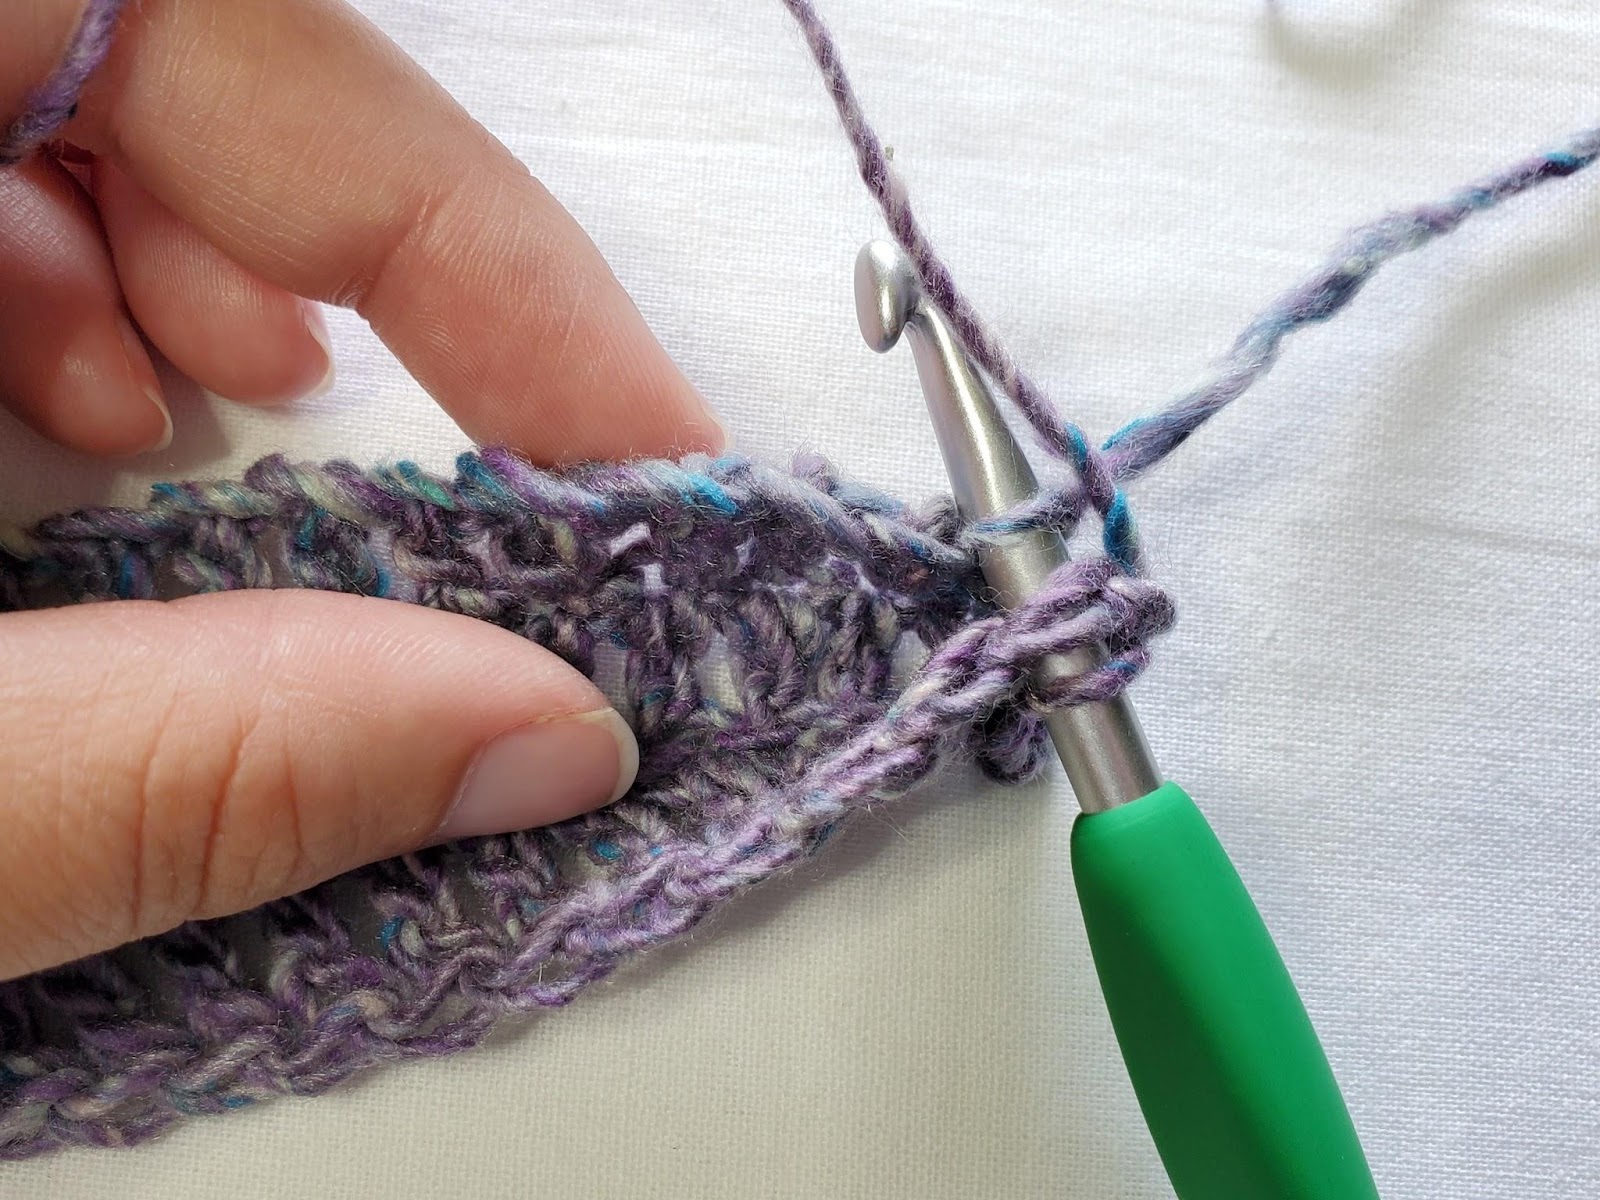
– Sc the top and bottom rows of your work together, working through the top 2 loops of row 3 and bottom loop of your starting chain (see Figure 2).
– You should now have a long tube (see Figure 3). Turn. – 26 (29, 26, 29, 26, 29, 26, 29) st
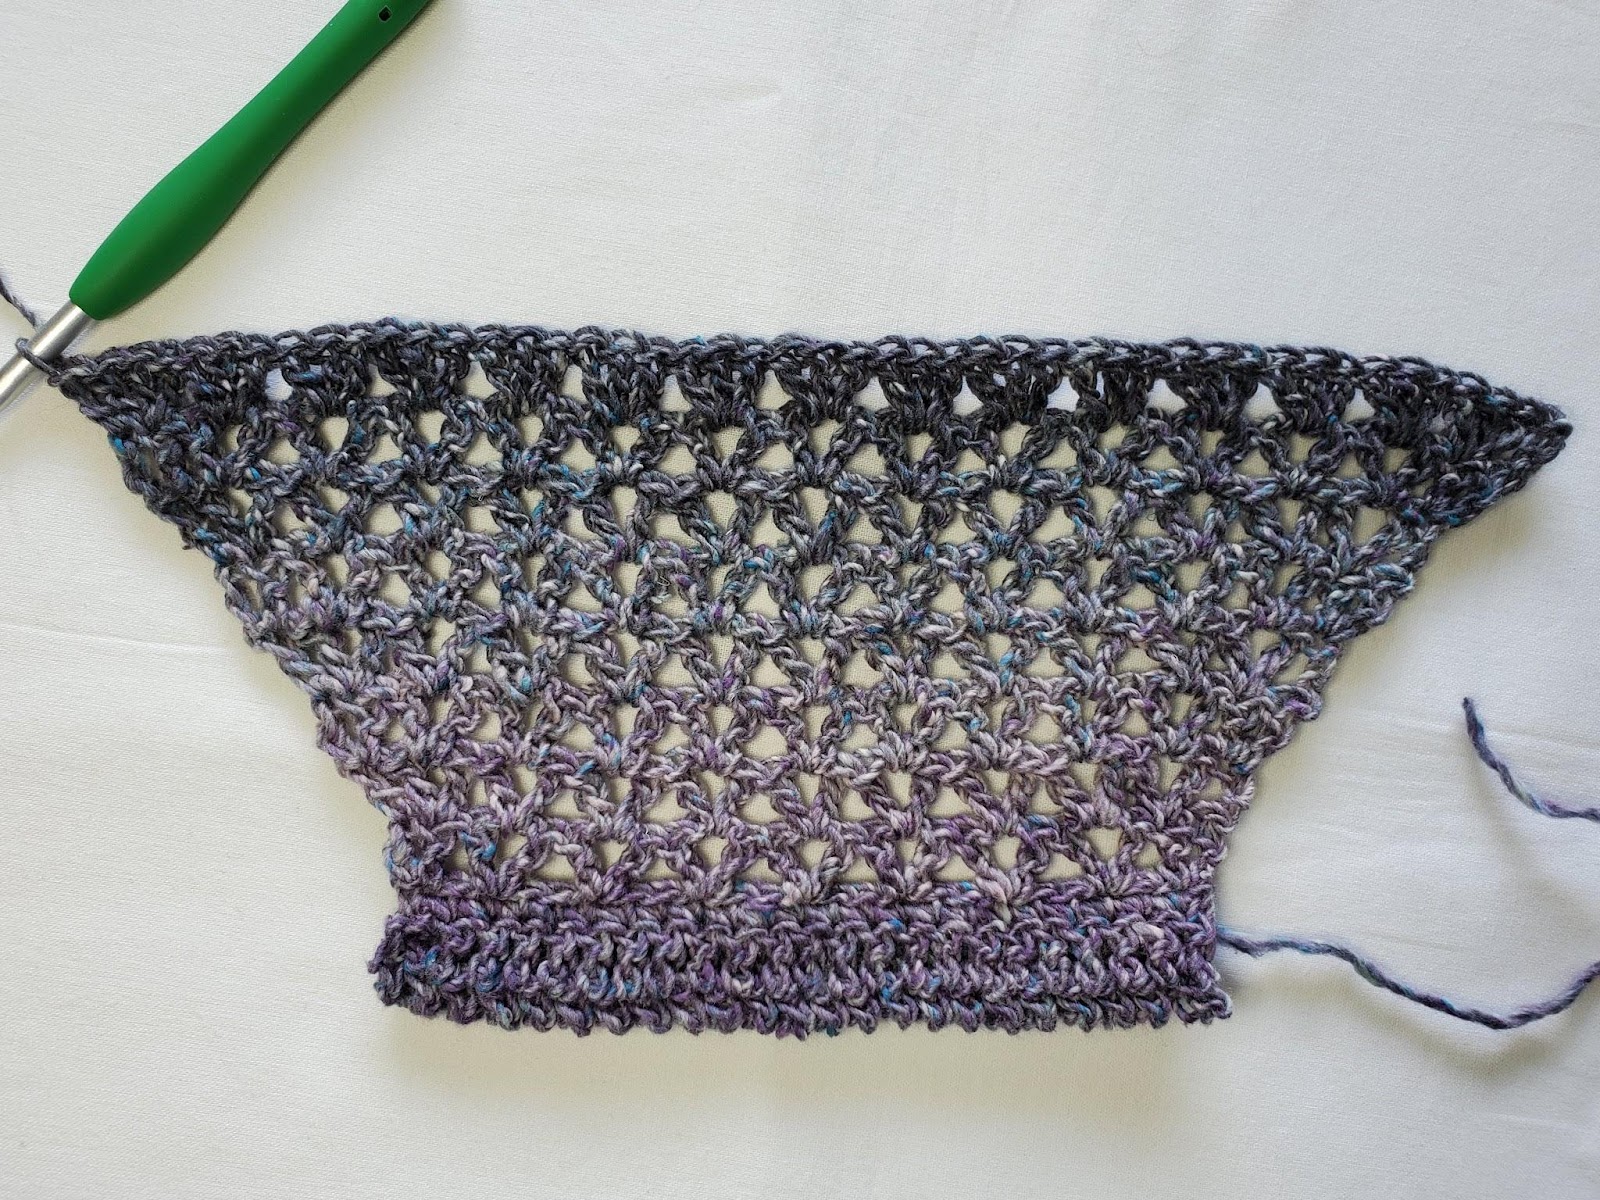
Shirt Body
1. Ch3, dc in 1st st (inc made). Sk1 st, Vst in next st. *Sk 2 sts, Vst in next st. ** Repeat from * to ** until you have only 2 sts left unworked. Sk 1 st, 2dc in last st. Turn. – 28 (31, 28, 31, 28, 31, 28, 31) st
2. Ch3. Vst in next st. *Sk1 sts, Vst in next ch1 sp. ** Repeat from * to ** until you have only 3 sts left unworked. Sk 1 st, Vst in next st, dc in last st. Turn. – 32 (35, 32, 35, 32, 35, 32, 35) st
3. Ch3, dc in 1st st (inc made). Sk1 st, Vst in next ch1 sp. *Sk 2 sts, Vst in next ch1 sp. ** Repeat from * to ** until you have only 2 sts left unworked. Sk 1 st, 2dc in last st. Turn. – 34 (37, 34, 37, 34, 37, 34, 37) st
Repeat rows 2 & 3 until you have a total of 3 (3, 5, 5, 7, 7, 9, 9) rows, starting with row 1 of the shirt body. You should now have a total of 34 (37, 40, 43, 46, 49, 52, 55) sts. Note: sizes 2 & 4 do not have to repeat any rows. They can proceed directly to row 4.
4. Ch3. 3dc in next st. Sk 1 st, 3dc in next ch1 sp. *Sk 2 sts, 3dc in next ch1 sp. ** Repeat from * to ** until there are only 3 sts left unworked. Sk 1 st, 3dc in next st, dc in last st. Bind off. – 38 (41, 44, 47, 50, 53, 56, 59) st
Upper Front
Tie Sleeve
Follow the instructions for the Upper Back, Tie Sleeve above.
Shirt Body
Follow only the instructions marked with your size.
Sizes 2 & 4:
1. Ch3, dc in 1st st (inc made). Sk1 st, Vst in next st. *Sk 2 sts, Vst in next st. ** Repeat from * to ** until you have only 2 sts left unworked. Sk 1 st, 2dc in last st. Turn. – 28 (31, n/a, n/a, n/a, n/a, n/a, n/a) st
2. Ch3. 3dc in next st. Sk 1 st, 3dc in next ch1 sp. *Sk 2 sts, 3dc in next ch1 sp. ** Repeat from * to ** until there are only 3 sts left unworked. Sk 1 st, 3dc in next st, dc in last st. Turn. – 32 (35, n/a, n/a, n/a, n/a, n/a, n/a) st
3. Ch3, dc in 1st st (inc made). Dc in each st across until you only have 1 st left unworked. 2dc in last st. Turn. – 34 (37, n/a, n/a, n/a, n/a, n/a, n/a) st
4. (Right side) Ch3, dc in 1st st (inc made), 2dc in next st. Dc in each st across until there are only 2 sts left unworked. 2dc in next st, 2dc in last st. – 38 (41, n/a, n/a, n/a, n/a, n/a, n/a) st
Proceed to the Joining instructions. Do not bind off.
Sizes 6, 8, 10, & 12:
1. Ch3, dc in 1st st (inc made). Sk1 st, Vst in next st. *Sk 2 sts, Vst in next st. ** Repeat from * to ** until you have only 2 sts left unworked. Sk 1 st, 2dc in last st. Turn. – n/a (n/a, 28, 31, 28, 31, n/a, n/a) st
2. Ch3. Vst in next st. *Sk1 sts, Vst in next ch1 sp. ** Repeat from * to ** until you have only 3 sts left unworked. Sk 1 st, Vst in next st, dc in last st. Turn. – n/a (n/a, 32, 35, 32, 35, n/a, n/a) st
3. Ch3, dc in 1st st (inc made). Sk1 st, Vst in next ch1 sp. *Sk 2 sts, Vst in next ch1 sp. ** Repeat from * to ** until you have only 2 sts left unworked. Sk 1 st, 2dc in last st. Turn. – n/a (n/a, 34, 37, 34, 37, n/a, n/a) st
4. Ch3. 3dc in next st. Sk 1 st, 3dc in next ch1 sp. *Sk 2 sts, 3dc in next ch1 sp. ** Repeat from * to ** until there are only 3 sts left unworked. Sk 1 st, 3dc in next st, dc in last st. Turn. – n/a (n/a, 38, 41, 38, 41, n/a, n/a) st
5. Ch3, dc in 1st st (inc made). Dc in each st across until you only have 1 st left unworked. 2dc in last st. Turn. – n/a (n/a, 40, 43, 40, 43, n/a, n/a) st
6. (Right side) Ch3, dc in 1st st (inc made), 2dc in next st. Dc in each st across until there are only 2 sts left unworked. 2dc in next st, 2dc in last st. Turn. – n/a (n/a, 44, 47, 44, 47, n/a, n/a) st
Sizes 6 & 8: Proceed to the Joining instructions. Do not bind off.
Sizes 10 & 12: Repeat rows 5 & 6 one more time, then proceed to Joining instructions. Do not bind off. – n/a (n/a, n/a, n/a, 50, 53, n/a, n/a) st
Sizes 14 & 16:
1. Ch3, dc in 1st st (inc made). Sk1 st, Vst in next st. *Sk 2 sts, Vst in next st. ** Repeat from * to ** until you have only 2 sts left unworked. Sk 1 st, 2dc in last st. Turn. – n/a (n/a, n/a, n/a, n/a, n/a, 28, 31) st
2. Ch3. Vst in next st. *Sk2 sts, Vst in next ch1 sp. ** Repeat from * to ** until you have only 3 sts left unworked. Sk 1 st, Vst in next st, dc in last st. Turn. – n/a (n/a, n/a, n/a, n/a, n/a, 32, 35) st
3. Ch3, dc in 1st st (inc made). Sk1 st, Vst in next ch1 sp. *Sk 2 sts, Vst in next ch1 sp. ** Repeat from * to ** until you have only 2 sts left unworked. Sk 1 st, 2dc in last st. Turn. – n/a (n/a, n/a, n/a, n/a, n/a, 34, 37) st
4. Repeat Row 2. – n/a (n/a, n/a, n/a, n/a, n/a, 38, 41) st
5. Repeat Row 3. – n/a (n/a, n/a, n/a, n/a, n/a, 40, 43) st
6. Ch3. 3dc in next st. Sk 1 st, 3dc in next ch1 sp. *Sk 2 sts, 3dc in next ch1 sp. ** Repeat from * to ** until there are only 3 sts left unworked. Sk 1 st, 3dc in next st, dc in last st. Turn. – n/a (n/a, n/a, n/a, n/a, n/a, 44, 47) st
7. Ch3, dc in 1st st (inc made). Dc in each st across until you only have 1 st left unworked. 2dc in last st. Turn. – n/a (n/a, n/a, n/a, n/a, n/a, 46, 49) st
8. (Right side) Ch3, dc in 1st st (inc made), 2dc in next st. Dc in each st across until there are only 2 sts left unworked. 2dc in next st, 2dc in last st. Turn. – n/a (n/a, n/a, n/a, n/a, n/a, 50, 53) st
Repeat rows 7 & 8 one more time, then proceed to Joining instructions. Do not bind off. – n/a (n/a, n/a, n/a, n/a, n/a, 56, 59) st
Joining
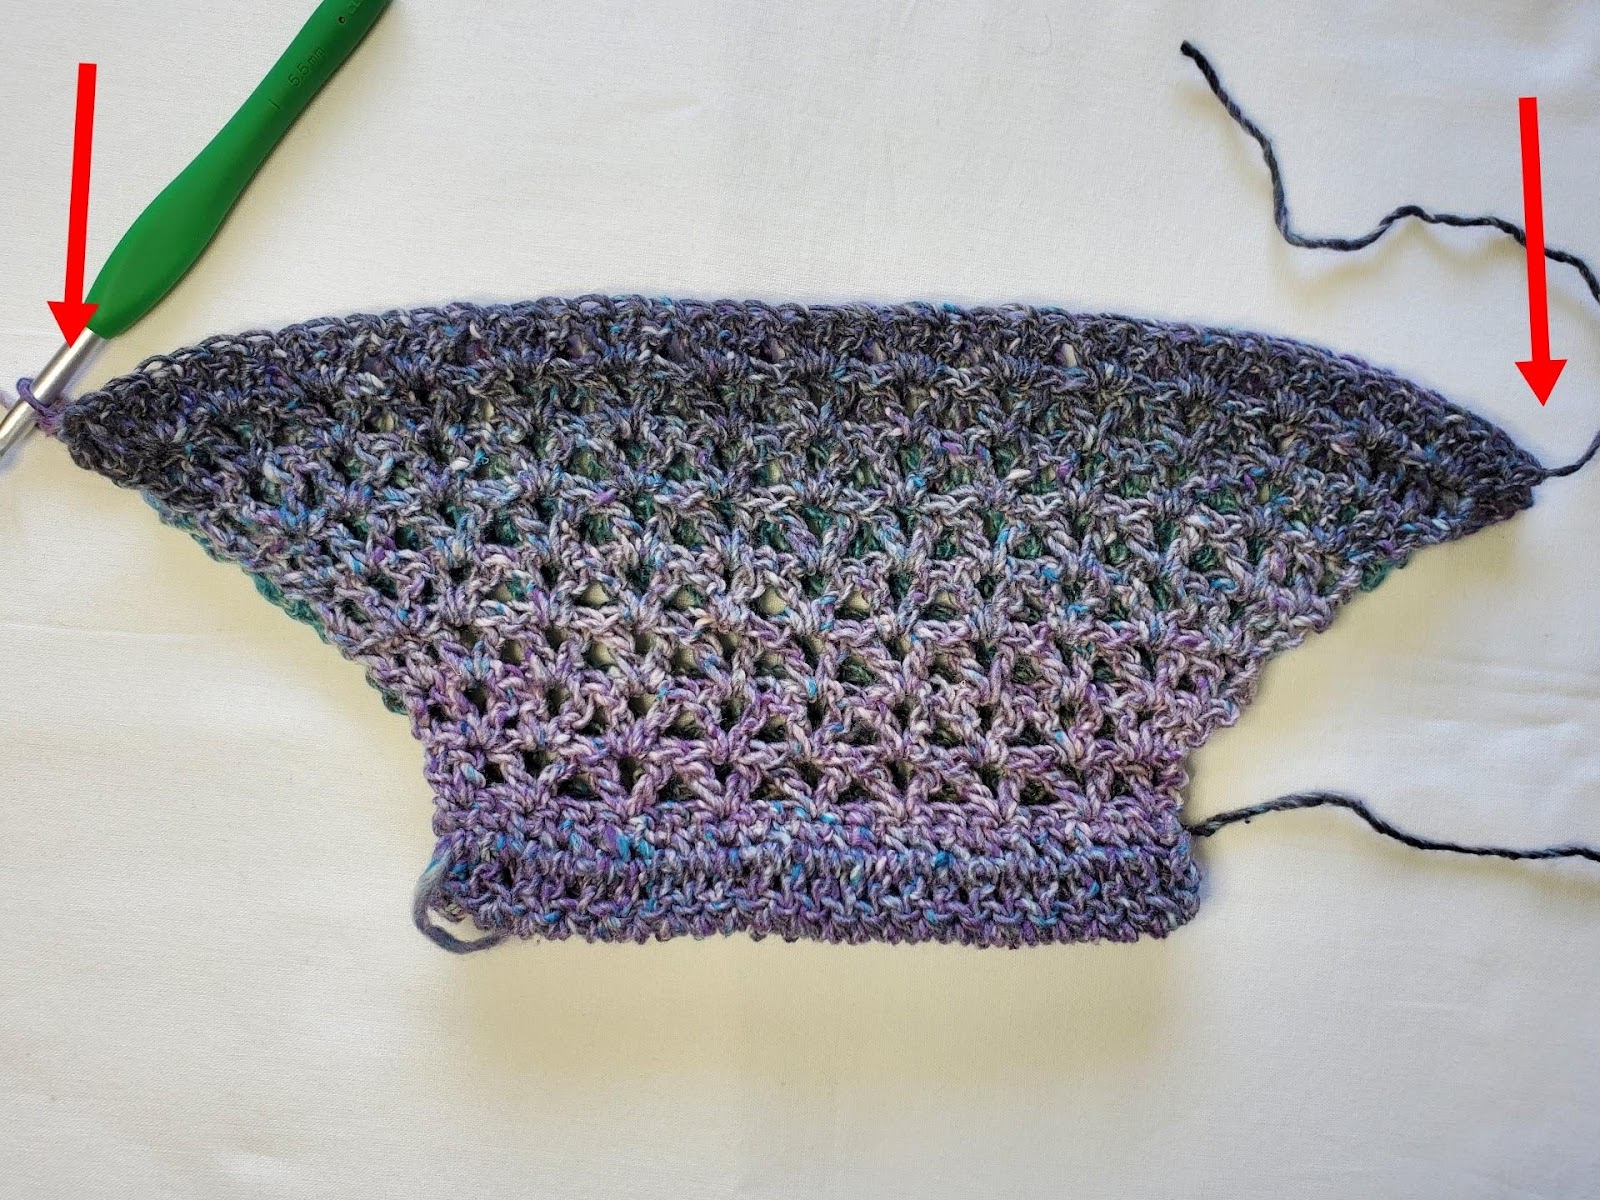
You should now have 2 pieces. A back piece (see Figure 4) and a front piece (see Figure 5). We are going to join these pieces at the two corners indicated by the red arrows in Figure 6.
– Begin by laying the back piece over the front piece, as you see in Figure 6. You want the right sides of each piece to be facing each other.
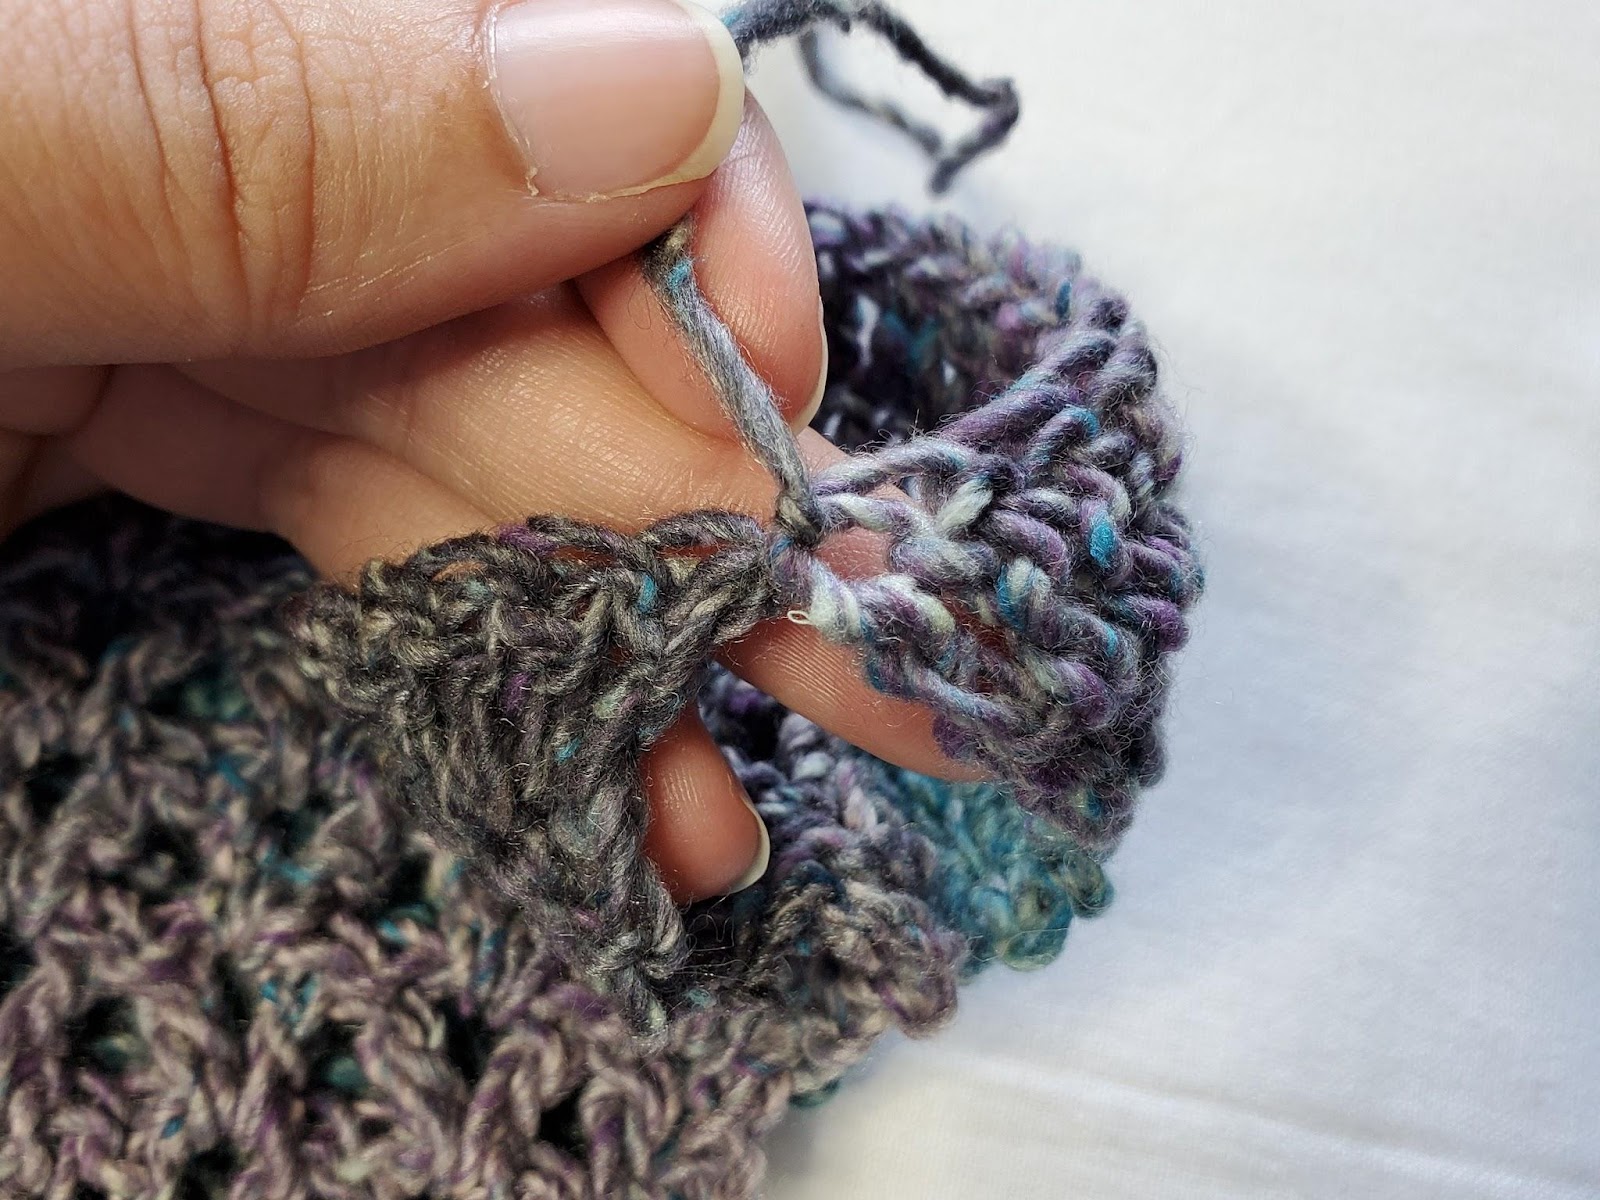
– Use your yarn end from the back piece to attach to the first stitch of the last row on the front piece (see Figure 7).
– With your loop on your hook, slip stitch into the first stitch of the last row on the back piece (see Figure 8).
– Turn. We will now be working in the round, but still turning at the end of each round.
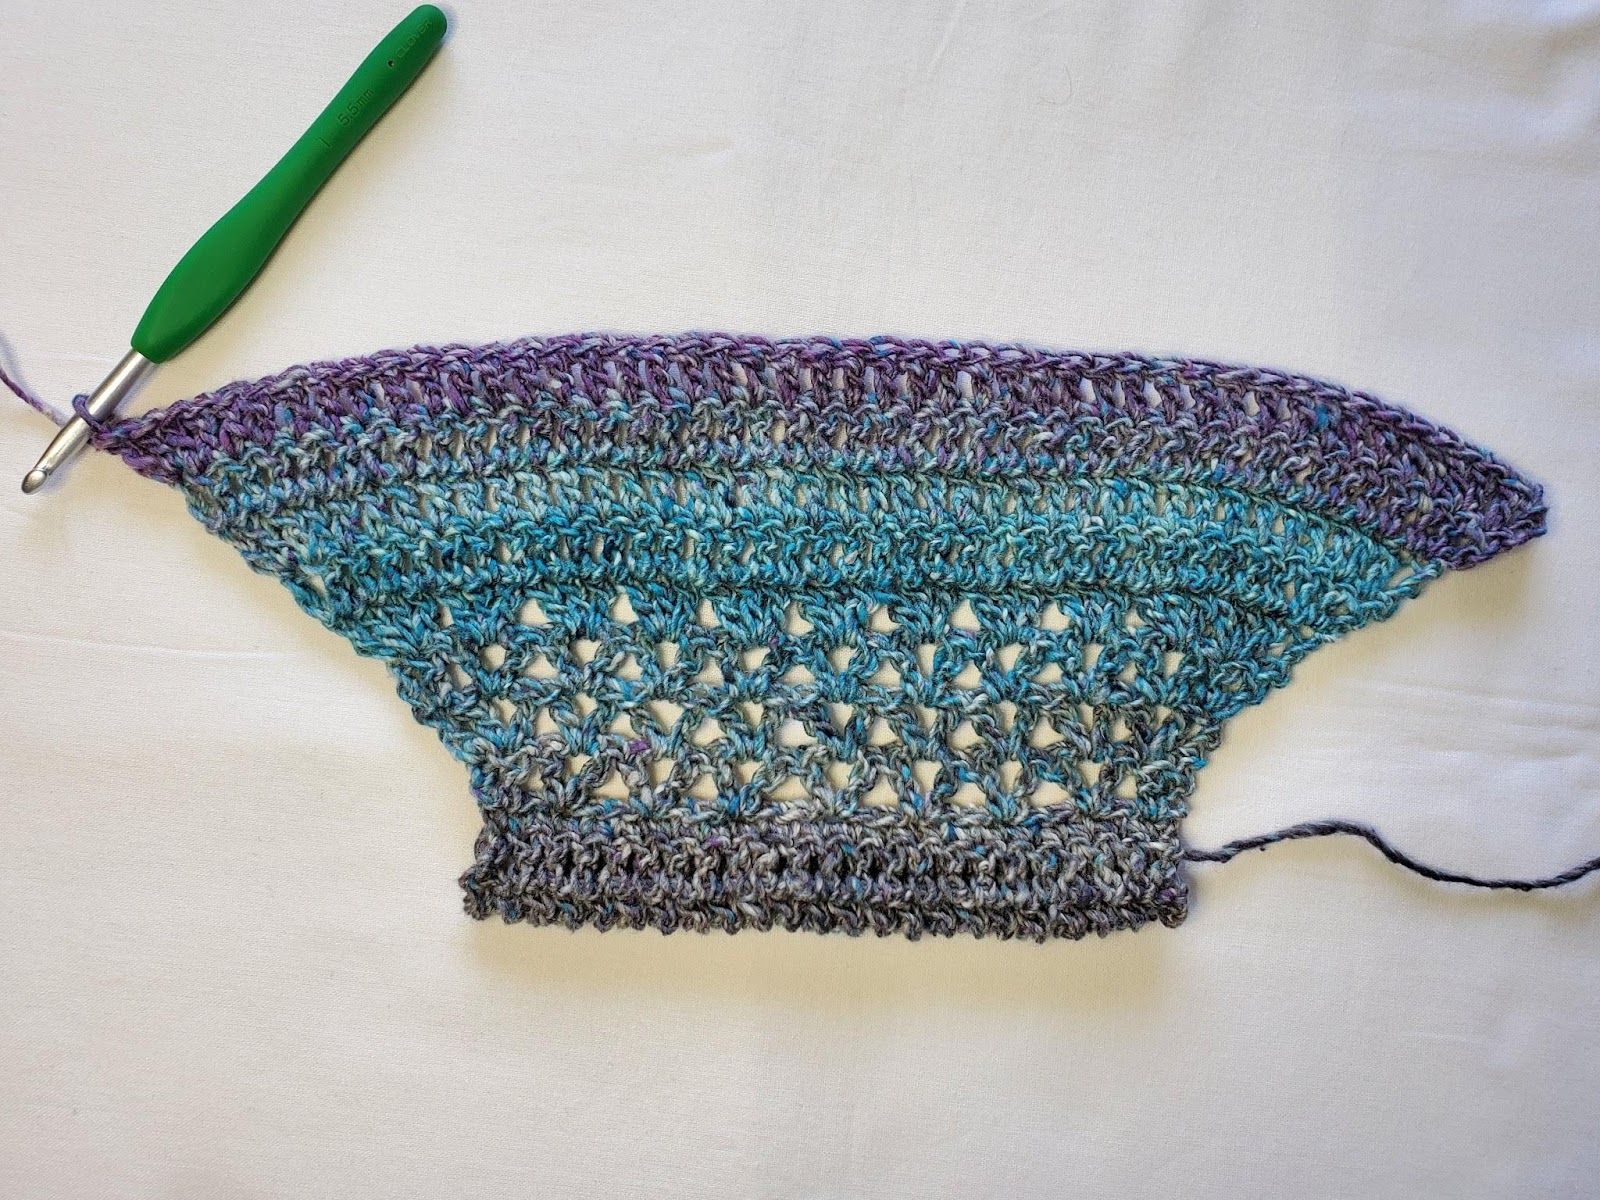

Lower Body
We are starting with a set-up round. Follow only the Round 1 that is marked with your size. Then proceed to Round 2.
Sizes 2 & 12:
1. Ch2, dc in next st (dec made). Dc in each st around. Ss to join to 1st st. Turn. – 75 (n/a, n/a, n/a, n/a, 105, n/a, n/a)
Sizes 4 & 14:
1. Ch2, dc in next st (dec made). Dc in next n/a (39, n/a, n/a, n/a, n/a, 54, n/a) sts. Dc2tog. Dc in each st around. Ss to join to 1st st. Turn. – n/a (80, n/a, n/a, n/a, n/a,110, n/a) st
Sizes 6 & 16:
1. Ch3, dc in 1st st (inc made). Dc in next n/a (n/a, 43, n/a, n/a, n/a, n/a, 58) sts. 2dc in next st. Dc in each st around. Ss to join to 1st st. Turn. – n/a (n/a, 90, n/a, n/a, n/a, n/a, 120) st
Size 8:
1. Ch3, dc in 1st st (inc made). Dc in each st around. Ss to join to 1st st. Turn. – n/a (n/a, n/a, 95, n/a, n/a, n/a, n/a) st
Size 10:
1. Ch3. Dc in next st and each st around. Ss to join to 1st st. Turn. – n/a (n/a, n/a, n/a, 100, n/a, n/a, n/a) st
All Sizes follow Round 2.
2. Ch3. Dc in next st and each st around. Ss to join to 1st st. Turn. – 75 (80, 90, 95, 100, 105, 110, 120) st
Repeat Round 2 until you have achieved your desired length, minus 2”. Be sure to end with a wrong side round. Do not bind off. Then proceed to Bottom Trim.
Bottom Trim
1. Ch3, dc in 1st st. *Sk 4 sts, (2dc, ch2, 2dc) in next st. ** Repeat from * to ** around until there are only 4 sts left unworked. Sk 4 sts, 2dc in same st as 1st 2 dc. Ch2, ss to join to 1st st. Turn. – 90 (96, 108, 114, 120, 126, 132, 144) st
2. Loosely ss into ch2 sp. Ch3, dc in same ch2 sp. *Sk 4 sts, (2dc, ch2, 2dc) in next ch2 sp. ** Repeat from * to ** until all ch2 spaces have been worked. Sk 4 sts, 2dc in 1st ch2 sp, ch2, ss to join to 1st st. Turn. – 90 (96, 108, 114, 120, 126, 132, 144) st
3. Repeat Round 2. Bind off.
Tie
To make the tie, simply chain to the desired length (for the tie pictured, I chained to 50”), then ss into the 2nd ch from your hook and each ch across. Bind off.
Tassels
These little tassels are of course optional. But I think they add the perfect little, boho touch to this top. Here is how I made mine.
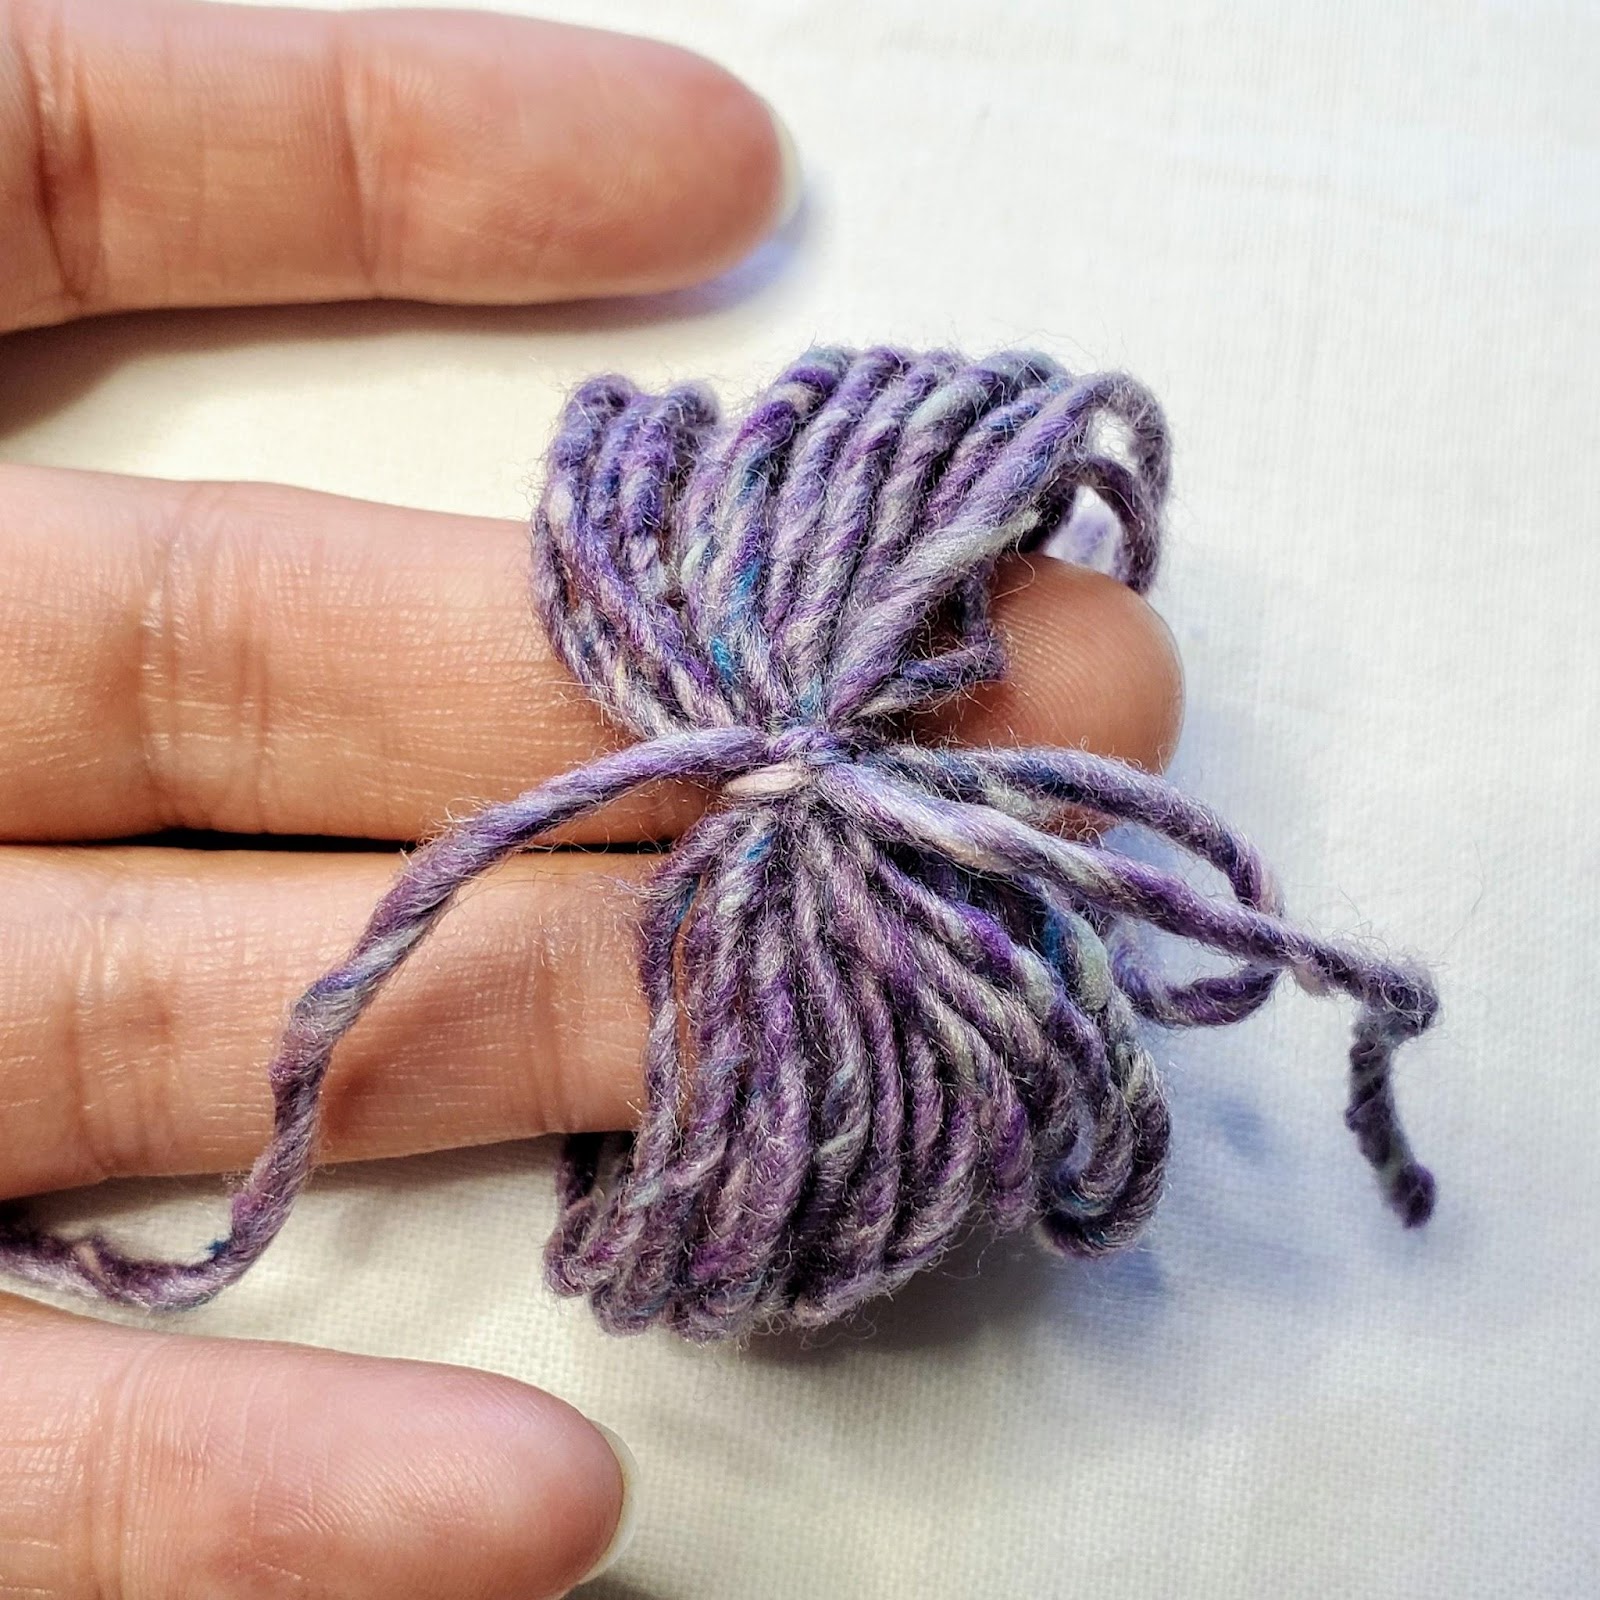
– Begin by wrapping your yarn around the first three fingers of your less dominant hand. For my tassels, I wrapped the yarn around about 20 times. Be careful not to wrap it too tightly! Snip your yarn close to the bottom (see Figure 9).
– Take a short length of yarn (about 6-8”) and slip it between your fingers and the wrapped yarn. Then pull it up to the top (see Figure 9).
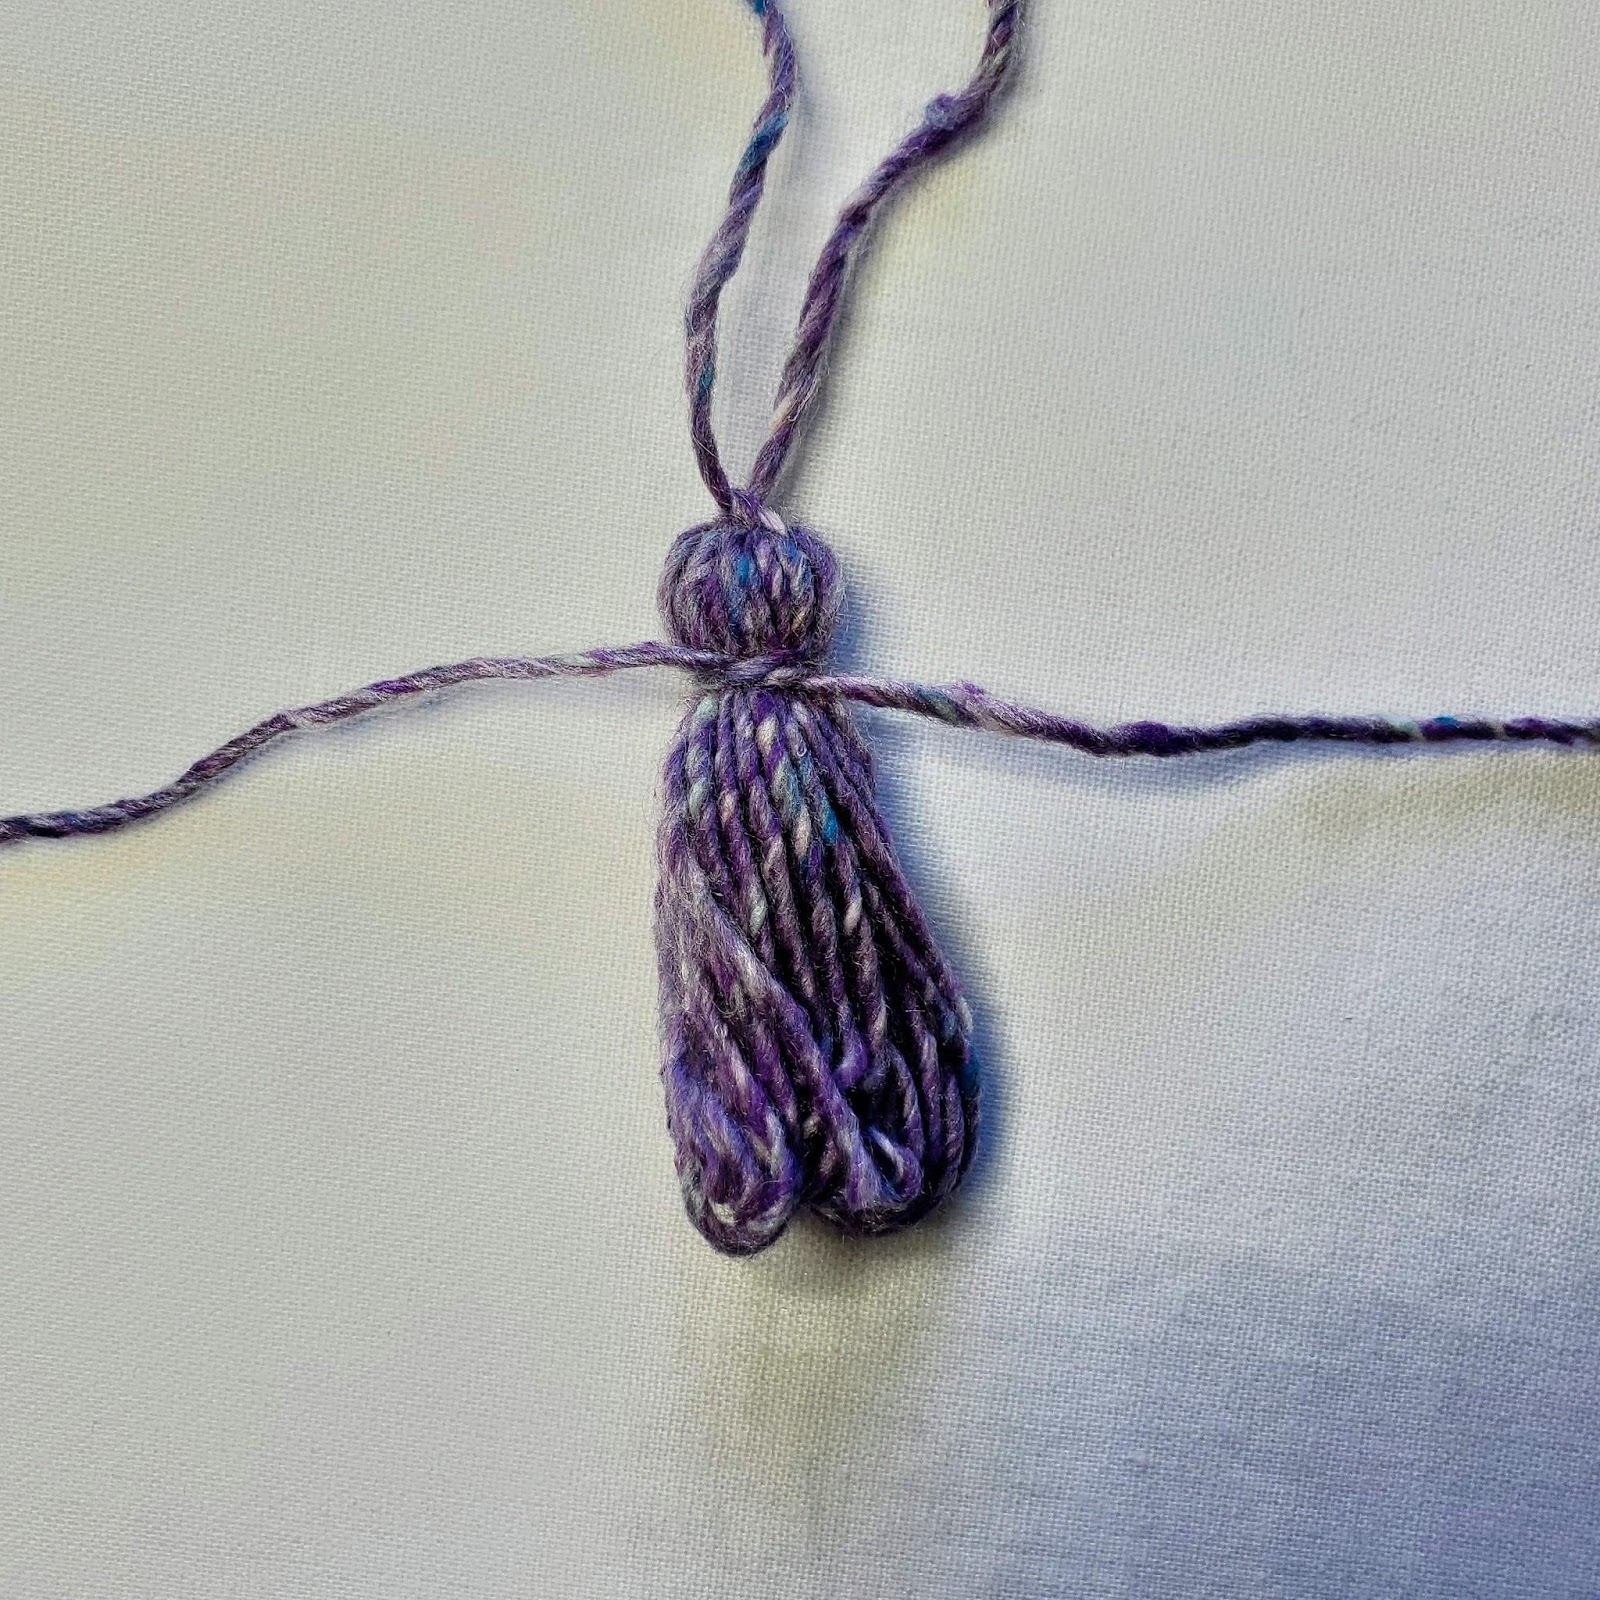
– Carefully slip the wrapped yarn off of your fingers and tie the short length tight (see Figure 10).
– Smooth out the wrapped yarn so all of the loops are laying straight. Take another short length of yarn (6-8”) and tie it around the loops just a little ways down from the top. Knot it tightly (see Figure 11). I like to wrap this length around the tassel a few times. It is prettier and more secure.
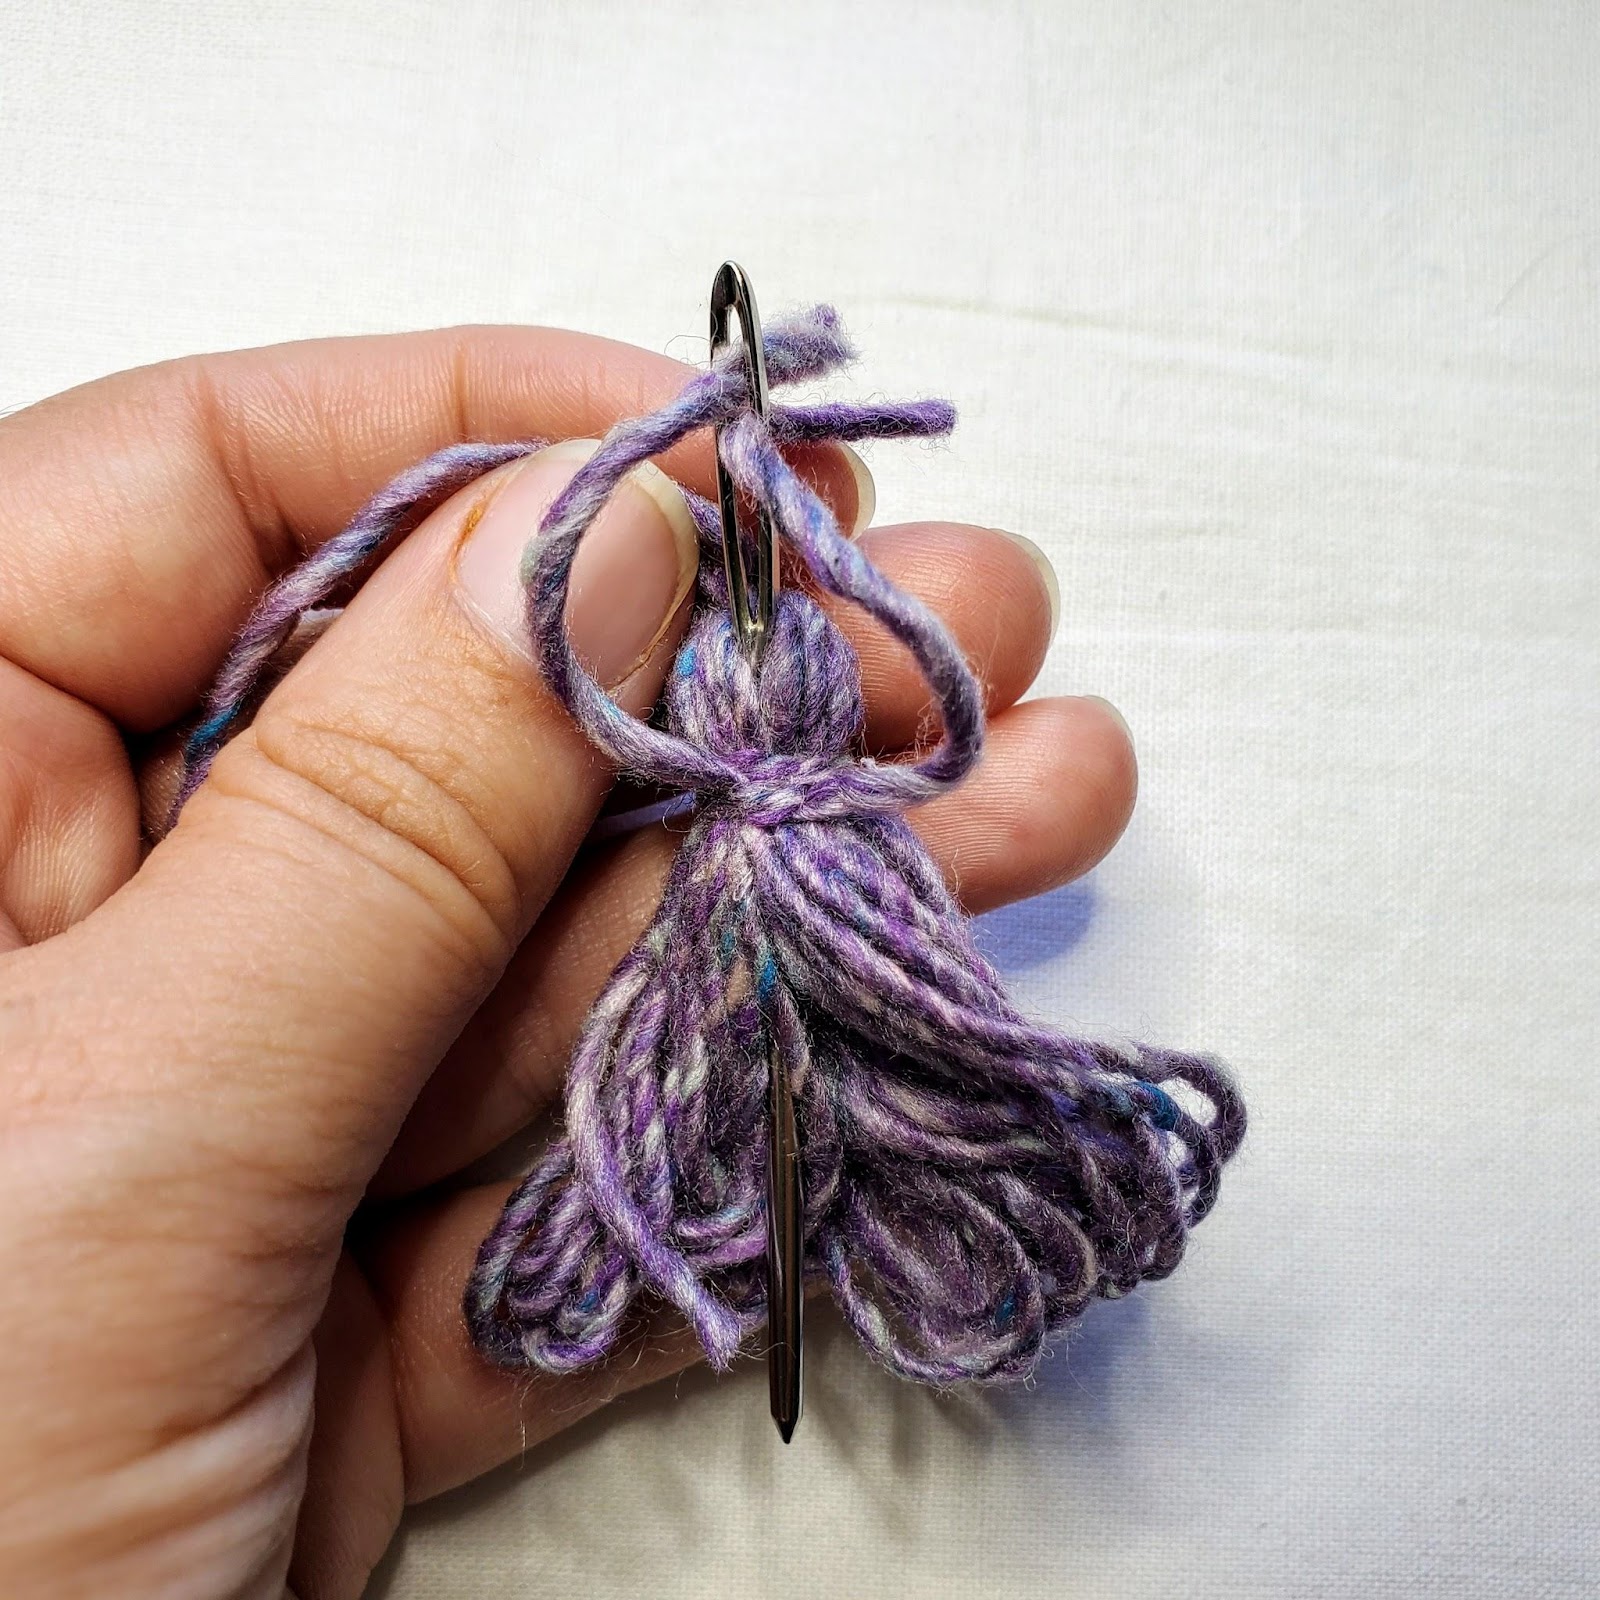
– Once you have wrapped and knotted your short length, you can hide your ends by threading them onto a yarn needle and running them down through the head of the tassel (see Figure 12).
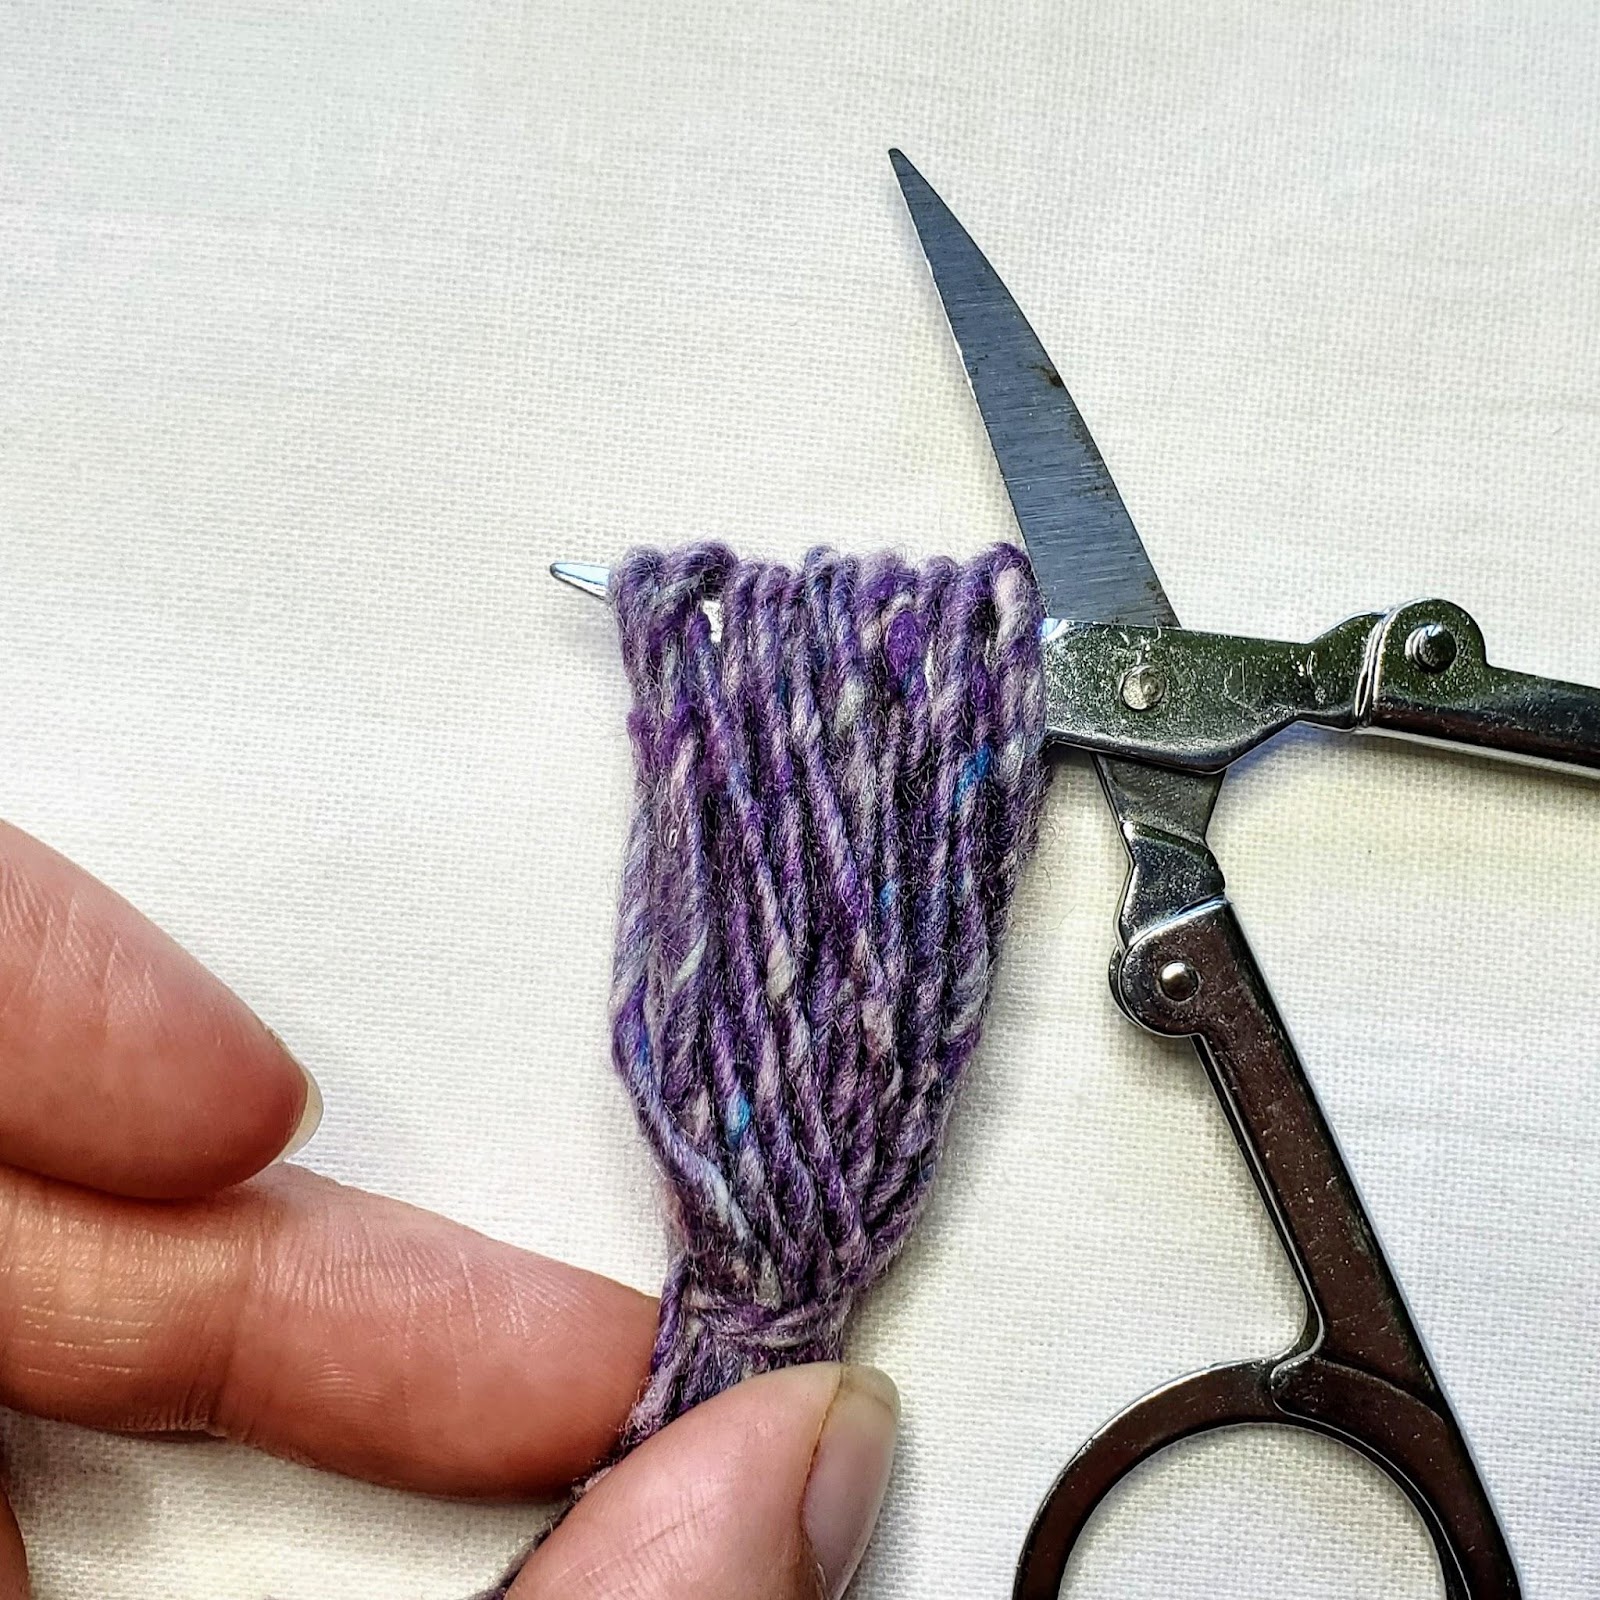
– Insert your scissors through the bottom of the loops and snip them (see Figure 13). At this time you can trim the bottom of your tassel to neaten it up, but I left mine just a little messy. I think it adds to the look.
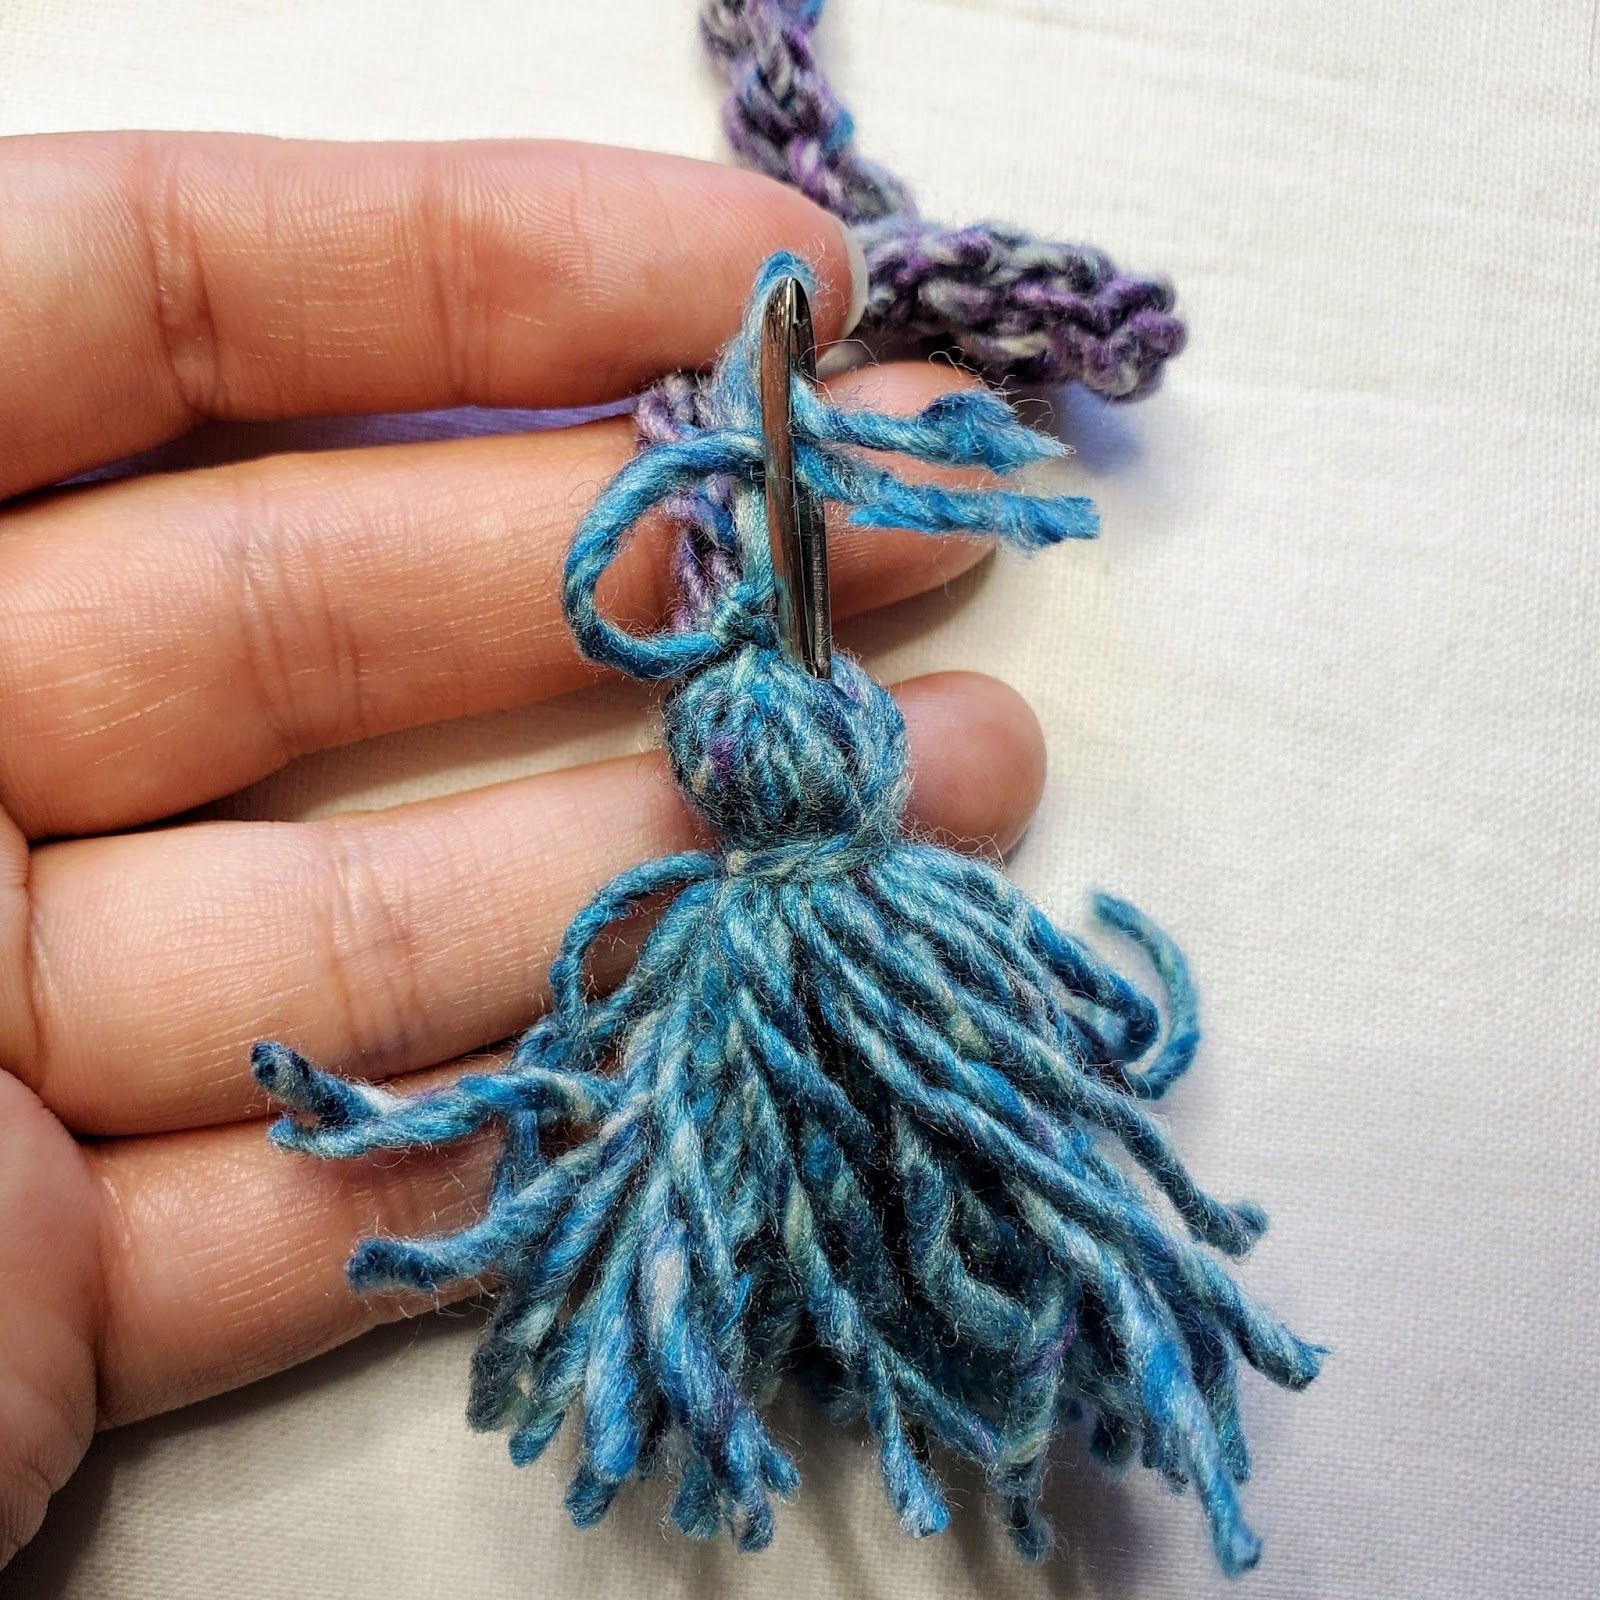
– Once you have attached your tassel to the end of the tie, you can hide your ends the same way you did above. Just thread them onto a yarn needle and run them down through the head of the tassel. Be sure to trim them if they are too long (see Figure 14).

Weave in all your ends, and you’re done!
I hope you love your new children’s top, and I look forward to seeing all of your beautiful pictures on Ravelry!
If you’d like to know when I post new patterns and tutorials, head on over to my Facebook and Instagram and give me a like and a follow!
If you enjoyed The Tie Up Top – Free Children’s Crochet Pattern, you may want to check out my other designs!
And until next time… Happy Hooking! 😉