
The Twisted Lattice Top crochet pattern is copyrighted by I Need It Crochet. You may not copy, share, change, or sell the pattern itself. Also, you may not claim this pattern as your own. All pictures contained in this pattern fall under the copyright and may not be used.
Finished items made from this pattern belong to you and you may do what you wish with them. If you choose to sell them on Etsy I would very much appreciate it if you credited me as the pattern designer.


Or… Scroll down to find the free crochet pattern!
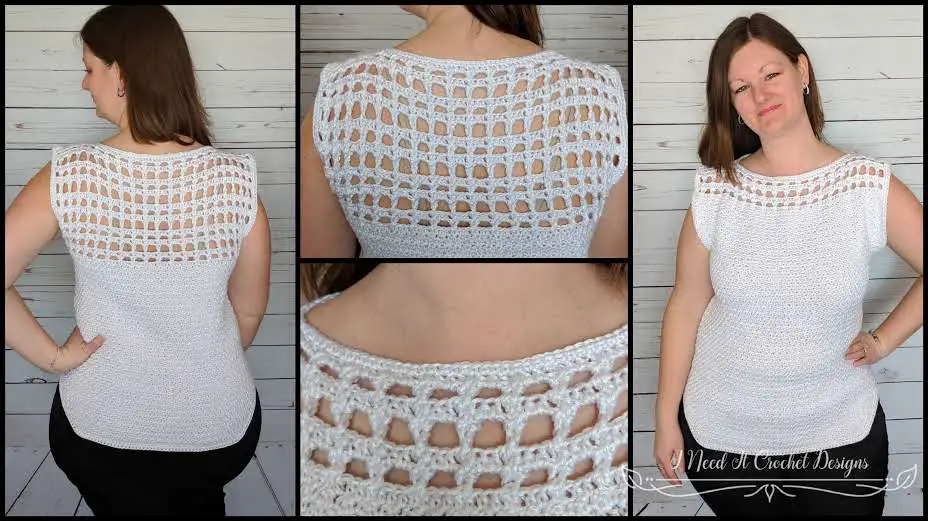
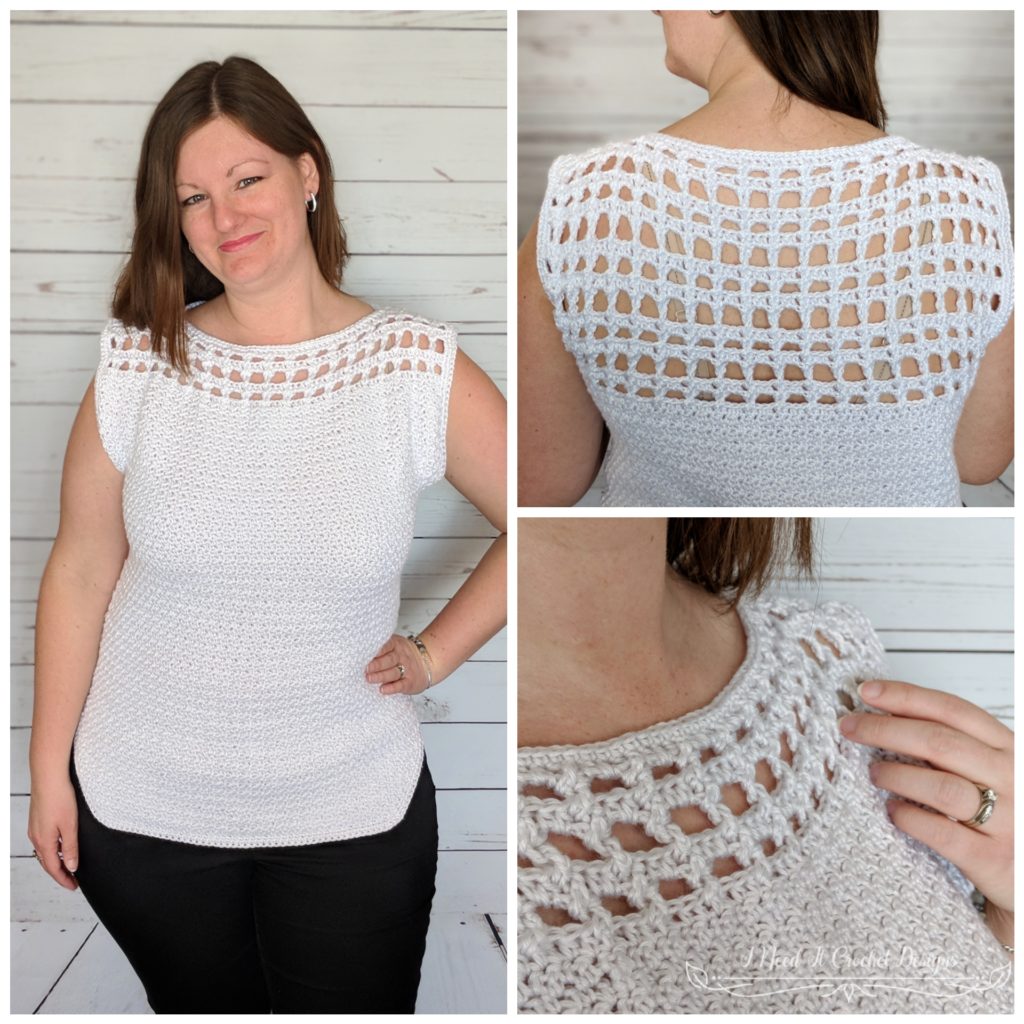
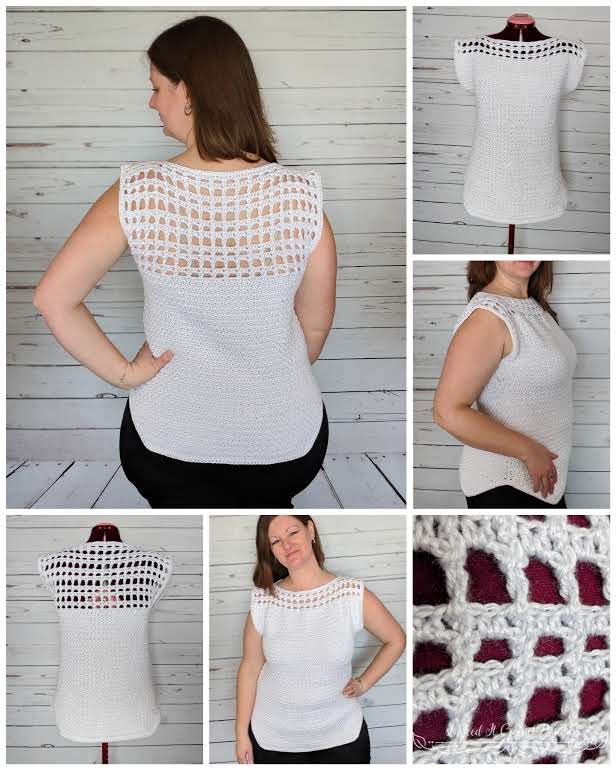
I have quite a few beloved tops in my closet with rounded bottoms. Thus, I wanted to design one myself. The nicely rounded bottom hem compliments the natural curves of your body, without adding restrictions. While the twisted lattice pattern adds intrigue. I love the look of the alternating single crochet and double crochet pattern. It results in the loveliest texture, without being too bulky and hot. Made in a cotton or bamboo blended yarn, the Twisted Lattice Top will be the perfect piece for your spring and summer wardrobe. It fits nicely under a blazer or cardigan and will keep you cool on the hottest summer days.
Finished Sizes:
Instructions given to fit size X-small; changes for small, medium, large, X-large and XX-Large are in ( ).
XS (S, M, L, XL, XXL)
To fit bust size: 31-33” (34-35”, 36-37”, 38-40”, 41-43”, 44-45’)
Finished Bust: 34” (36”, 38”, 40”, 44”, 46”)
Finished Length: 22” (22”, 22 ½”, 23”, 23 ½”, 24”)
Materials:
I used Patons Silk Bamboo in White. This is a 70% bamboo/30% silk dk weight (#3) yarn. Any yarn of similar weight would work.
Approx. 800 (800, 900, 1000, 1100, 1200) yards
7/4.5mm Hook
Stitch Markers
Yarn Needle
Scissors
Gauge:
16 st (dc, sc repeat) and 16 rows = 4” square. See gauge swatch instructions.
Please check your gauge before beginning. It will save you time and heartache!
Abbreviations:
Sk = Skip
St = Stitch
Ss = Slip Stich
Ch = Chain
Sc = Single Crochet
Hdc = Half Double Crochet
Dc = Double Crochet
Tr = Triple Crochet
Fpdc = Front Post Double Crochet
Bpdc = Back Post Double Crochet
Fptr = Front Post Triple Crochet
Bptr = Back Post Triple Crochet
Notes:
Ch3 at the beginning of a row is always considered a Dc.
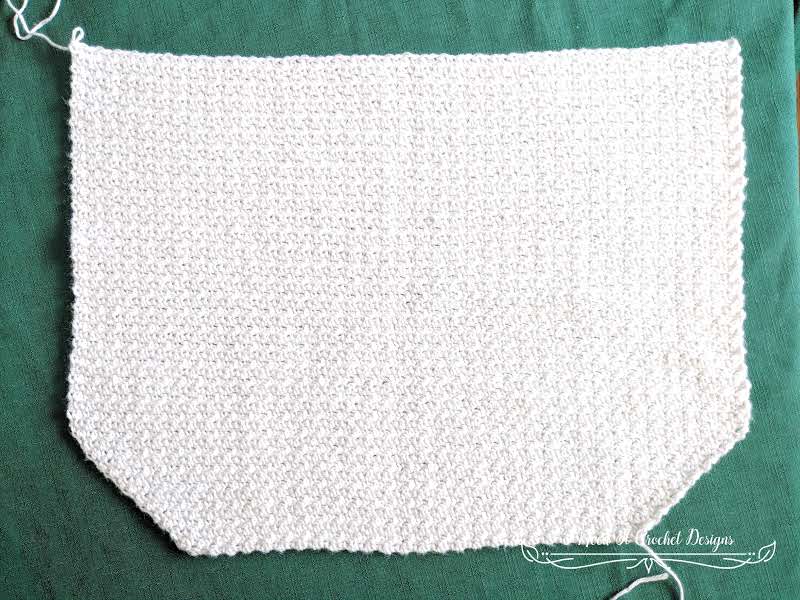
The top is worked in two pieces. Each piece is worked from the bottom up. You will start with the Solid Pattern, making increases to form the rounded bottom. Once the proper width and length is achieved you will work the Lattice Pattern. The pieces are then sewn together and the hems are added.
I have added many pictures to help you along the way, however these pictures are only of one size (L) and should not be used as reference for stitch and row counts.
The model has a 39” bust and is wearing a size Large. Choose your size according to the finished measurements noted above.
Gauge Swatch
Ch 17.
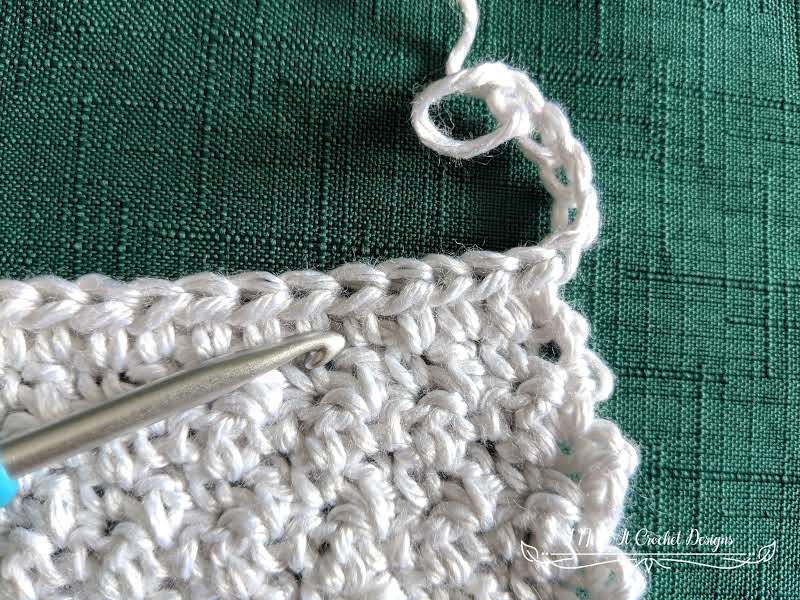
1. Sc in 2nd ch from hook, Dc in next ch, *Sc in next ch, Dc in next ch** Repeat in each ch to end. – 16 sts
2.-16. Ch1, sc in 1st st, dc in next st, *sc in next st, dc in next st** Repeat in every st to end. – 16 sts
-Following this pattern, you should be placing your dc in the sc from the previous row, and your sc in the dc from the previous row. This will form a lovely, textured stitch.
-Once you have 16 rows, measure your swatch. It should be 4” x 4”.
Instructions
Back
Solid Pattern
Make a slip knot and Ch 43 (47, 51, 55, 63, 67)
1. Sc in 2nd ch from hook, Dc in next ch, *Sc in next ch, Dc in next ch** Repeat in each ch to end. Turn.
- 42 (46, 50, 54, 62, 66) sts
2. Ch1, 2sc in 1st st, dc in next st, *sc in next st, dc in next st ** Repeat until there is only 1 stitch left. (dc, sc) in last st. Turn.
- 44 (48, 52, 56, 64, 68) sts
3. Ch3 (counts as 1st dc), dc in same st as ch3, sc in next st, * dc in next st, sc in next st** Repeat from * to ** until there is only 1 stitch left. (sc, dc) in last st. Turn.
- 46 (50, 54, 58, 66, 70) sts
4.-13. Repeat rows 2. And 3. five times
- 66 (70, 74, 78, 86, 90) sts
14. Repeat row 2 once more. Your piece should now measure 17” (18”, 19”, 20”, 22”, 23”) Wide. Turn.
- 68 (72, 76, 80, 88, 92) sts
15. Ch3 (counts as 1st dc), sc in next st, *dc in next st, sc in next st** Repeat in every st to end. Turn
- 68 (72, 76, 80, 88, 92) sts
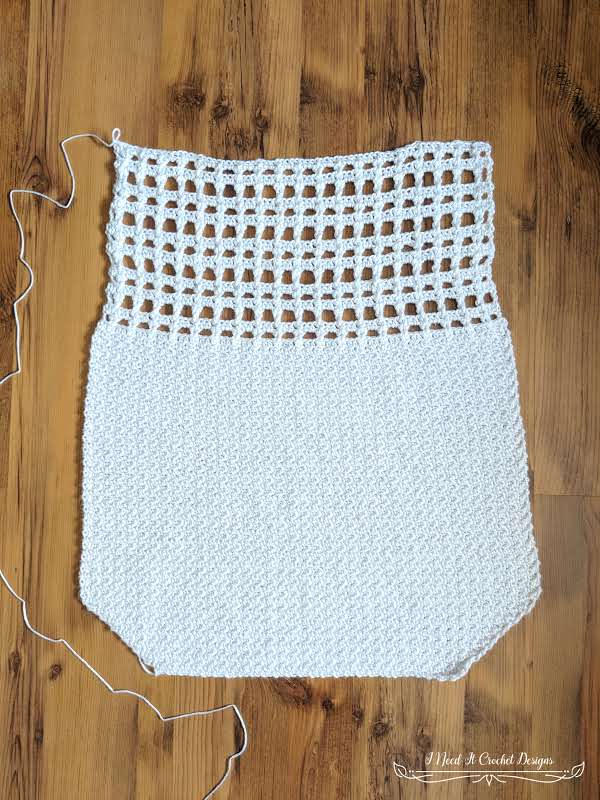
Repeat row 15. until you have 54 (54, 56, 58, 60, 62) rows total.
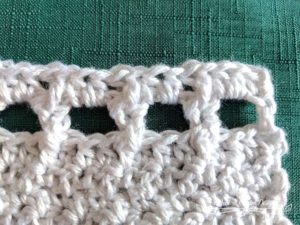
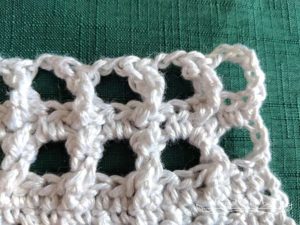
Your piece should now measure 17” (18”, 19”, 20”, 22”, 23”) Wide and 12” (13”, 13 ½ “, 14”, 14 ½”, 15”) Long. See below for a general idea of what your piece should look like.
From here you will work the lattice portion of the back. I have reset the row count to make the pattern easier to follow. Note: You will be working front post and back post stitches. When you turn your work at the end of the row, front post stitches from the previous row will look like back post stitches. Likewise, back post stitches will look like front post stitches. To avoid confusion I will refer to back post stitches from the previous row as front post stitches and front post stitches from the previous row as back post stitches.
Lattice Pattern
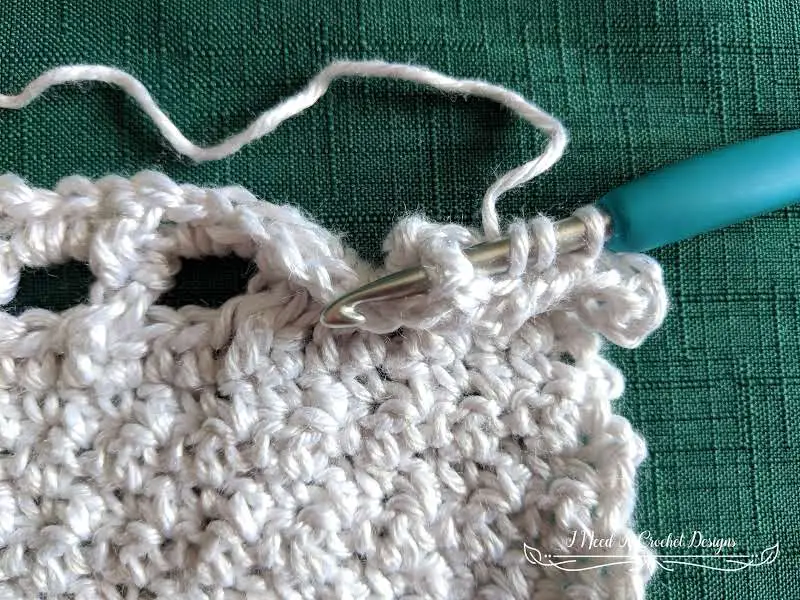
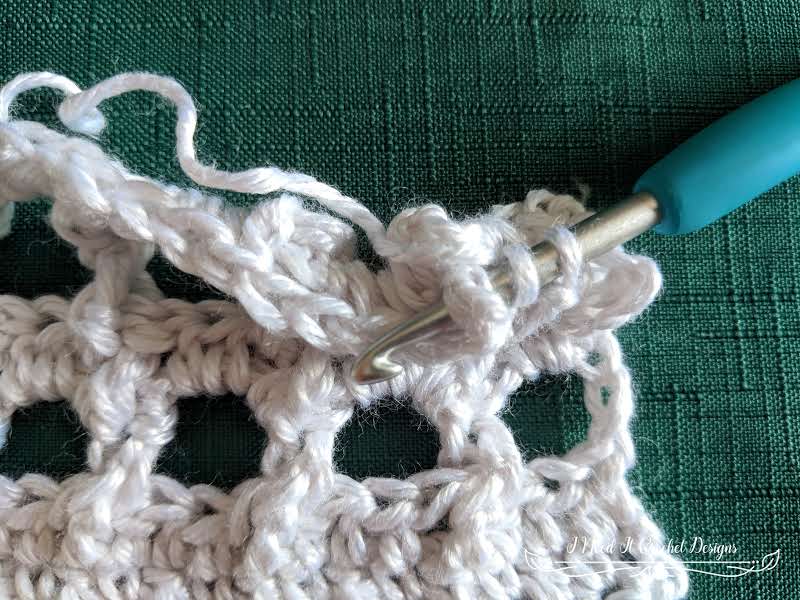
1. Ch1, hdc in same st as ch1 and in each st across. This will be the right side of your work. Turn.
- 68 (72, 76, 80, 88, 92) sts
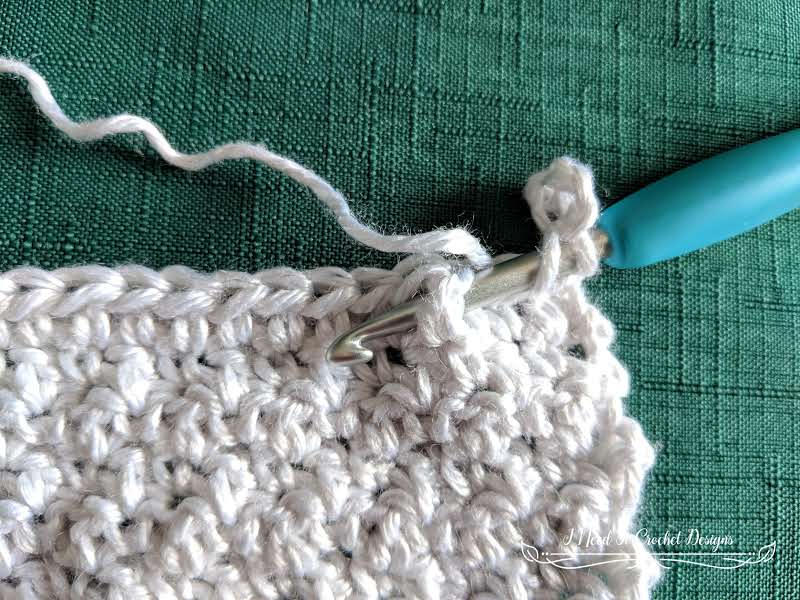
2. Ch5 (counts as dc and ch2), sk 4 hdc, fpdc in 5th hdc, bpdc in skipped 4th hdc. *Ch2, Sk 3 hdc, fpdc in 4th hdc, bpdc in 3rd hdc** Repeat from * to ** until only 3 hdc are left. Ch2, dc in last hdc. This will be the wrong side of your work. Turn.
- 2 dc, 2ch + 16 (17, 18, 19, 21, 22) ch2, fpdc, bpdc pattern repeats = 68 (72, 76, 80, 88, 92) sts
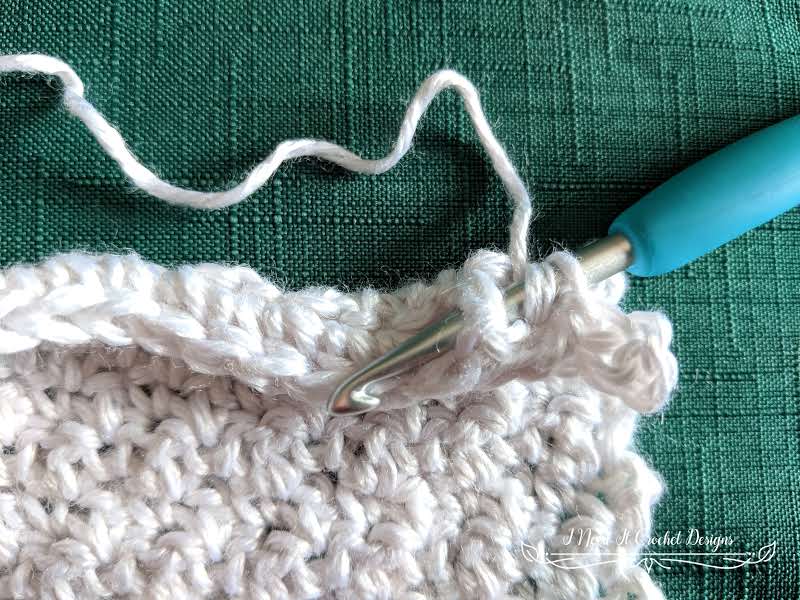

3. Ch1, hdc in same st, *2hdc in ch2 space, sk fpdc, fpdc in bpdc, bpdc in skipped fpdc, ** Repeat from * to ** until only ch5 left. 2 hdc in ch5 space. Hdc in 3rd ch of ch5. Turn.
- 4 hdc + 16 (17, 18, 19, 21, 22) fpdc, bpdc, 2hdc pattern repeats = 68 (72, 76, 80, 88, 92) sts
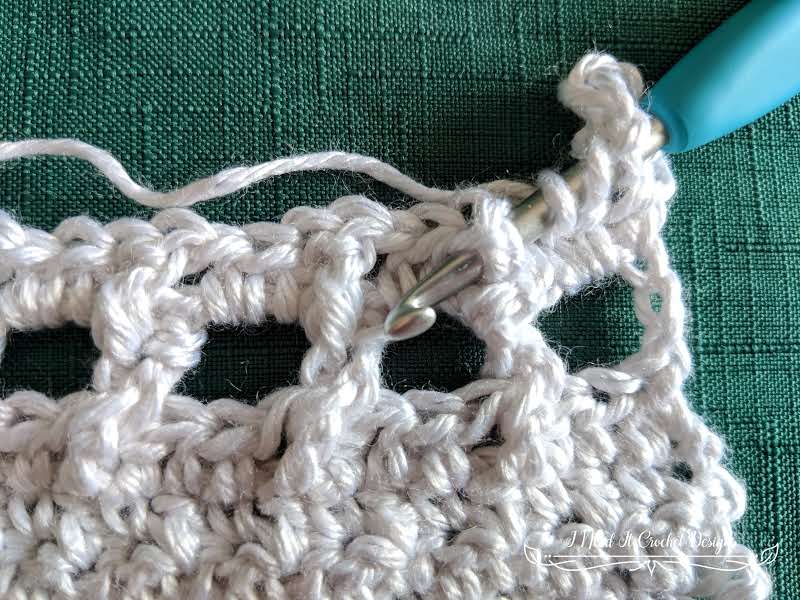
4. Ch6 (counts as tr and ch2), sk 3hdc and fpdc, fptr in bpdc, bptr in skipped fpdc. * Ch2, sk 2hdc and fpdc, fptr in bpdc, bptr in skipped fpdc** Repeat from * to ** until only 3 st are left. Ch2, tr in last st. Turn.
- 2 tr, 2ch + 16 (17, 18, 19, 21, 22) ch2, fptr, bptr pattern repeats = 68 (72, 76, 80, 88, 92) sts
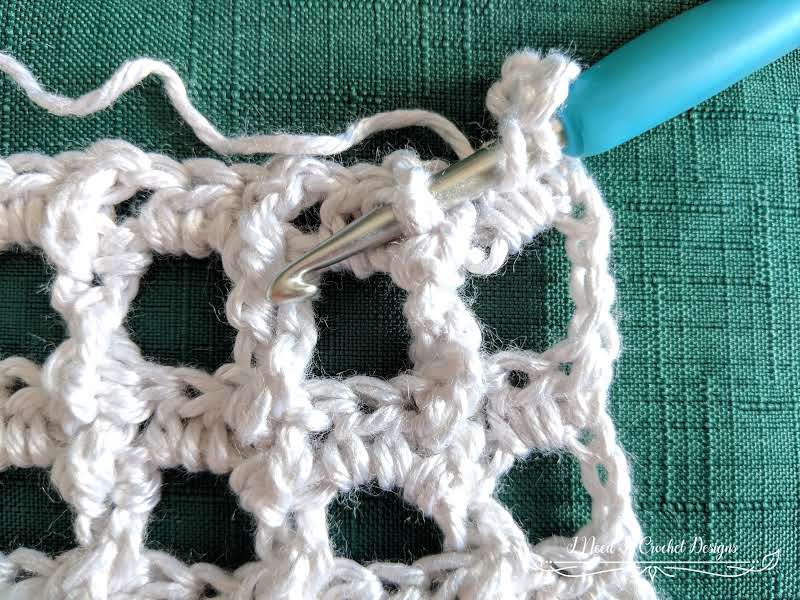
5. Ch1, hdc in same st, *2hdc in ch2 space, sk fptr, fpdc in bptr, bpdc in skipped fptr, ** Repeat from * to ** until only ch6 of previous row is left. 2 hdc in ch6 space, hdc in 4th ch of ch6. Turn.
- 4 hdc + 16 (17, 18, 19, 21, 22) fpdc, bpdc, 2hdc pattern repeats = 68 (72, 76, 80, 88, 92) sts
6. Ch5 (counts as dc and ch2), sk 3 hdc and fpdc, fpdc in bpdc, bpdc in skipped fpdc. *Ch2 sk 2 hdc and fpdc, fpdc in bpdc, bpdc in skipped fpdc ** Repeat from * to ** until only 3 hdc are left. Ch2, dc in last hdc. Turn.
- 2 dc, 2ch + 16 (17, 18, 19, 21, 22) ch2, fpdc, bpdc pattern repeats = 68 (72, 76, 80, 88, 92) sts
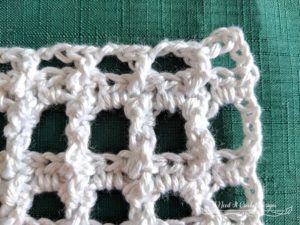
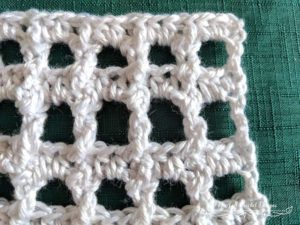
7. – 19. Repeat rows 3. – 6. three more times. Then repeat row 3. one more time.
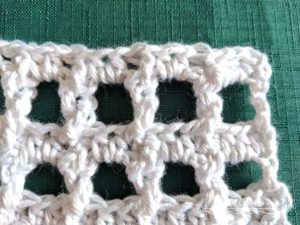
- 4 hdc + 16 (17, 18, 19, 21, 22)fpdc, bpdc, 2hdc pattern repeats = 68 (72, 76, 80, 88, 92) sts
At this point your back panel should look similar to the picture below. Fasten off. You will now make your front panel. I found that the lattice part of my pattern pulled in a bit and made the panel a bit narrower at the top. This is normal. The back may end up slightly narrower than the front, but the effect is actually quite attractive.
Front
Solid Pattern
Make a slip knot and Ch 43 (47, 51, 55, 63, 67)
1. Sc in 2nd ch from hook, Dc in next ch, *Sc in next ch, Dc in next ch** Repeat in each ch to end. Turn.
- 42 (46, 50, 54, 62, 66) sts
2. Ch1, 2sc in 1st st, dc in next st, *sc in next st, dc in next st ** Repeat until there is only 1 stitch left. (dc, sc) in last st. Turn.
- 44 (48, 52, 56, 64, 68) sts
3. Ch3 (counts as 1st dc), dc in same st as ch3, sc in next st, * dc in next st, sc in next st** Repeat from * to ** until only 1 st left on row. (sc, dc) in last st. Turn.
- 46 (50, 54, 58, 66, 70) sts
4. -13. Repeat rows 2. And 3. five times,
- 66 (70, 74, 78, 86, 90) sts
14. Repeat row 2 once more. Your piece should now measure 17” (18”, 19”, 20”, 22”, 23”) Wide. Turn.
- 68 (72, 76, 80, 88, 92) sts
15. Ch3 (counts as 1st dc), sc in next st, *dc in next st, sc in next st** Repeat in every st to end. Turn.
- 68 (72, 76, 80, 88, 92) sts
Repeat row 15. until you have 76 (76, 78, 80, 84, 88) rows total.
Your piece should now measure 17” (18”, 19”, 20”, 22”, 23”) Wide and 18 ½” (18 ½”, 19”, 19 ½”, 20”, 20 ½”) Long.
From here you will work the lattice portion of the front. I have reset the row count to make the pattern easier to follow. Note: You will be working front post and back post stitches. When you turn your work at the end of the row, front post stitches from the previous row will look like back post stitches. Likewise, back post stitches will look like front post stitches. To avoid confusion I will refer to back post stitches from the previous row as front post stitches and front post stitches from the previous row as back post stitches.
Lattice Pattern
1. Ch1, hdc in same st as ch1 and in each st across. This will be the right side of your work. Turn.
- 68 (72, 76, 80, 88, 92) sts
2. Ch5 (counts as dc and ch2), sk 4 hdc, fpdc in 5th hdc, bpdc in skipped 4th hdc. *Ch2, Sk 3 hdc, fpdc in 4th hdc, bpdc in 3rd hdc** Repeat from * to ** until only 3 hdc are left. Ch2, dc in last hdc. This will be the wrong side of your work. Turn.
- 2 dc, 2ch + 16 (17, 18, 19, 22, 22) ch2, fpdc, bpdc pattern repeats = 68 (72, 76, 80, 88, 92) sts
3. Ch1, hdc in same st, *2hdc in ch2 space, sk fpdc, fpdc in bpdc, bpdc in skipped fpdc. ** Repeat from * to ** until only ch5 left. 2hdc in ch5 space, hdc in 3rd ch of ch5. Turn.
- 4 hdc + 16 (17, 18, 19, 22, 22) fpdc, bpdc, 2hdc pattern repeats = 68 (72, 76, 80, 88, 92) sts
4. Ch6 (counts as tr and ch2), sk 3hdc and fpdc, fptr in bpdc, bptr in skipped fpdc. * Ch2, sk 2hdc and fpdc, fptr in bpdc, bptr in skipped fpdc** Repeat from * to ** until only 3 st are left. Ch2, tr in last st. Turn.
- 2 tr, 2ch + 16 (17, 18, 19, 22, 22) ch2, fptr, bptr pattern repeats = 68 (72, 76, 80, 88, 92) sts
5. Ch1, hdc in same st, *2hdc in ch2 space, sk fptr, fpdc in bptr, bpdc in skipped fptr. ** Repeat from * to ** until only ch6 is left. 2hdc in ch6 space, hdc in 4th ch of ch6. Turn.
- 4 hdc + 16 (17, 18, 19, 22, 22) fpdc, bpdc, 2hdc pattern repeats = 68 (72, 76, 80, 88, 92) sts
6. Ch5 (counts as dc and ch2), sk 3 hdc and fpdc, fpdc in bpdc, bpdc in skipped fpdc. *Ch2 sk 2 hdc and fpdc, fpdc in bpdc, bpdc in skipped fpdc ** Repeat from * to ** until only 3 hdc are left. Ch2, dc in last st. Turn.
- 2 dc, 2ch + 16 (17, 18, 19, 22, 22) ch2, fpdc, bpdc pattern repeats = 68 (72, 76, 80, 88, 92) sts
7. Repeat row 3. Fasten off.
- 4 hdc + 16 (17, 18, 19, 22, 22) fpdc, bpdc, 2hdc pattern repeats = 68 (72, 76, 80, 88, 92) sts
Join Front and Back
You will now sew your front and back panels together.
Hold the two panels with right sides facing each other (see lattice pattern to find the right sides).
Whip stitch the shoulders together 17 stitches from the edges.
Whip stitch the sides together. You will be sewing rows 15 – 54 (54, 56, 58, 60, 62). This will result in an 8” armhole depth. I would suggest trying on the top at this point and seeing if you like the depth of the armholes. If you want them a bit tighter, sew more rows together. If you prefer them looser, Remove a few of your whip stitches.
Tip: I find it easier to sew long seams like this if I place locking stitch markers on each end. It helps to make sure my seams are straight and right where they should be.
Turn your piece right side out.
Neck
Join yarn in one side in shoulder seam with right side facing you.
1. Ch1, sc in shoulder seam, sc in each hdc, sc in shoulder seam, sc in each hdc. Slst to first sc. Fasten off.
- 70 (78, 86, 94, 110, 122) sc
Armholes
Join your yarn in either arm hole at the armpit with right side facing you.
1. Sc evenly around the entire armhole. I placed 1 sc in each sc/dc row, 1 sc in each hdc row, 3 sc in each dc row, 4 sc in each tr row and 1 sc in the top shoulder seam. Continue in this pattern until you come around to the first sc. Slst in the first sc. Do not turn.
2. Ch1, hdc in each sc around. Slst in first hdc. Fasten off.
Repeat for the other arm.
Bottom Hem
Join your yarn in the bottom of one side seam.
1. Ch1, place 1 sc in the side seam, 20 sc in the sides of rows 14 – 1, 1 sc in each stitch across bottom, 20 sc in sides of rows 1 – 14, 1 sc in side seam, 20 sc in sides of rows 14 – 1, 1 sc in each stitch across bottom, 20 sc in sides of rows 1 – 14. Slst to first sc. Do not turn.
- 166 (174, 182, 190, 206, 214) sc
2. Ch1, Hdc in same st and next 20 sts. 2 hdc in next st, 1 hdc in next st, 2 hdc in next st, 1 hdc in next 36 (40, 44, 48, 56, 62) sts, 2 hdc in next st, 1 hdc in next st, 2 hdc in next st, 1 hdc in next 41 st, 2 hdc in next st, 1 hdc in next st, 2 hdc in next st, 1 hdc in next 36 (40, 44, 48, 56, 62) sts, 2 hdc in next st, 1 hdc in next st, 2 hdc in next st, 1 hdc in next 20 sts. Sl st to first hdc. Fasten off.
- 174 (182, 190, 198, 214, 222) hdc
Weave in all your ends, and you’re done! I would suggest washing and blocking your project as I find the stitches fall into place better when I do that.
I hope you enjoy wearing your Twisted Lattice Top and I look forward to seeing all your beautiful pictures on ravelry!
If you’d like to know when I post new patterns and tutorials, head on over to my Facebook and Instagram and give me a like and a follow!
If you enjoyed this free pattern for the Twisted Lattice Top, you may want to check out my other designs!
Until next time… Happy Hooking! 😉