
Free Crochet Cowl Pattern – Aisling Cowl
The Free Crochet Cowl Pattern – Aisling Cowl is copyrighted by I Need It Crochet. You may not copy, share, change, or sell the pattern itself. Also, you may not claim this pattern as your own. All pictures contained in this pattern fall under the copyright and may not be used.
Finished items made from the Free Crochet Cowl Pattern – Aisling Cowl belong to you, and you may do what you wish with them. If you choose to sell them on Etsy, I would very much appreciate it if you credit me as the pattern designer.
Where Can I Buy The Pdf?
The entire pattern is available to view for free on this page (you just have to scroll down to see it). But if you would prefer to have a printable pdf copy of the pattern, you can purchase it for a small fee from my Ravelry and Etsy stores. Just click the graphics below.
This pattern is 9 pages long and contains 33 pictures to help you along the way. a printable pdf will be easier to follow, and you can make notes on it as you go. I find it to be the easier option. But if you like to use the online version, it is here 24/7 for you to view. Enjoy!

Free Crochet Cowl Pattern – Aisling Cowl
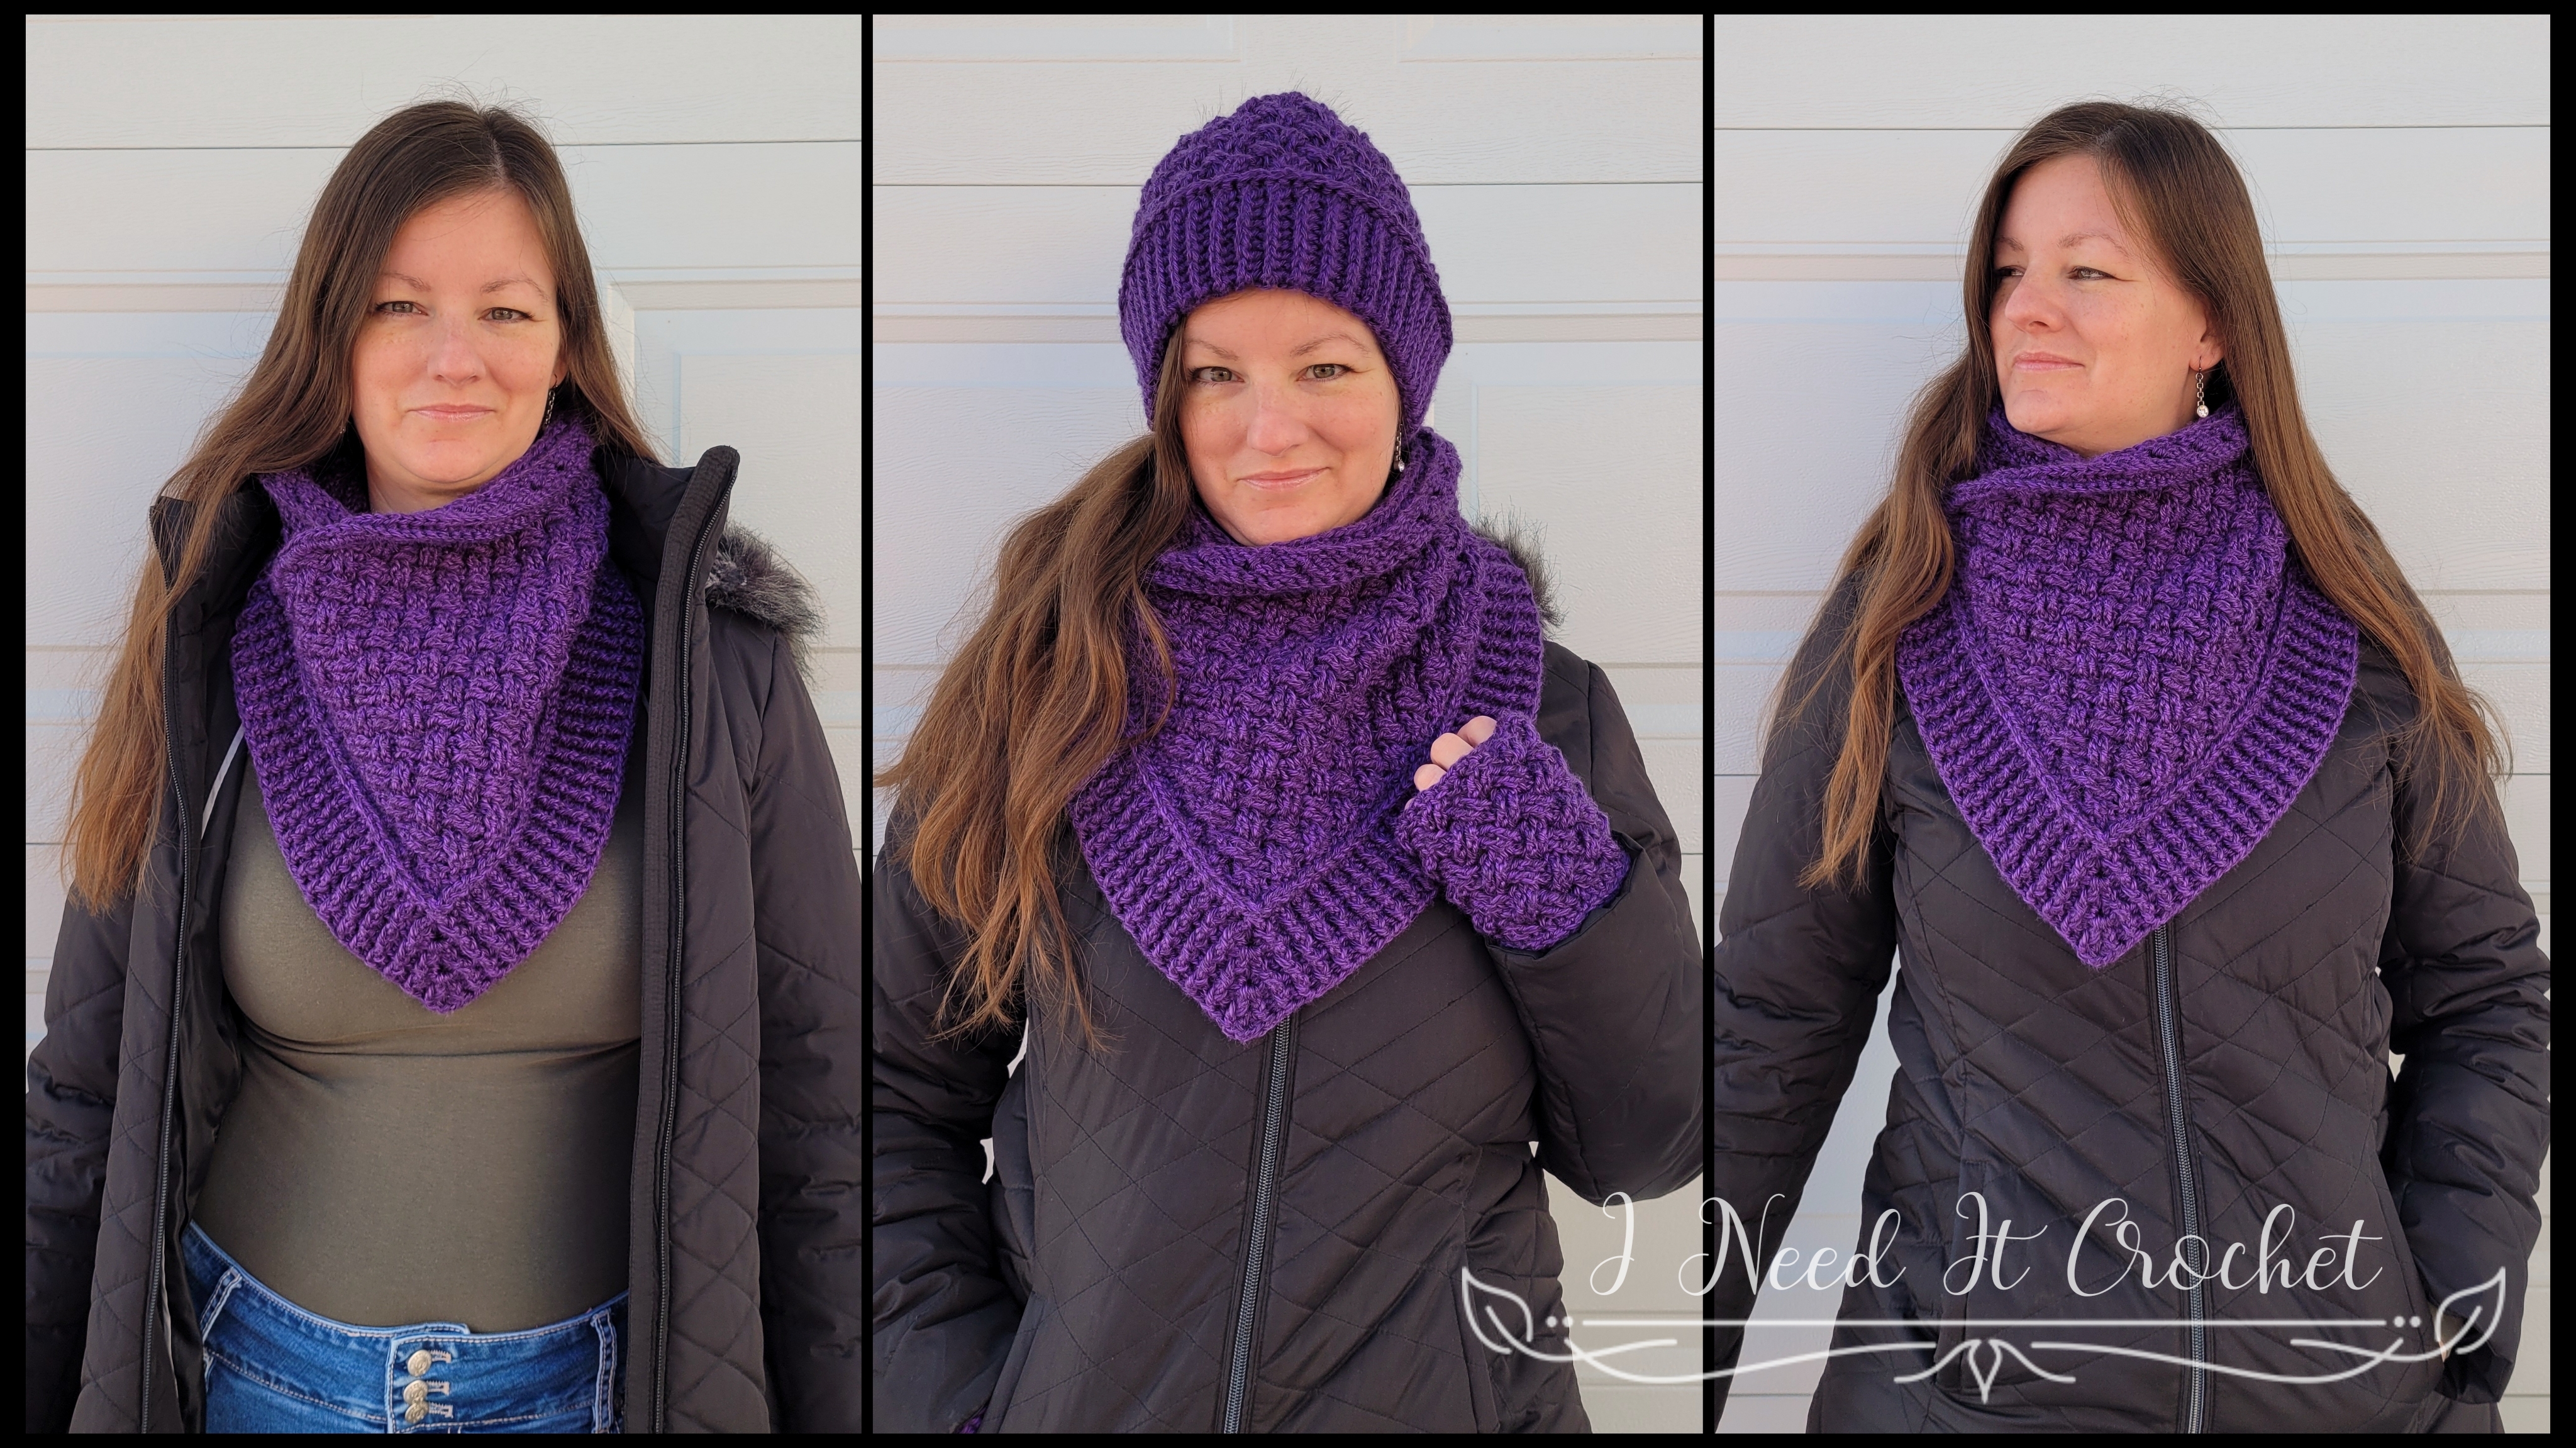
One of my favourite things about crochet is the variety of rich textures you can achieve with just one hook and some yarn. The Celtic Weave stitch is definitely on my list of top ten crochet textures. It takes a little practice, but once you get the two-row repeat down, it’s a breeze to work through.
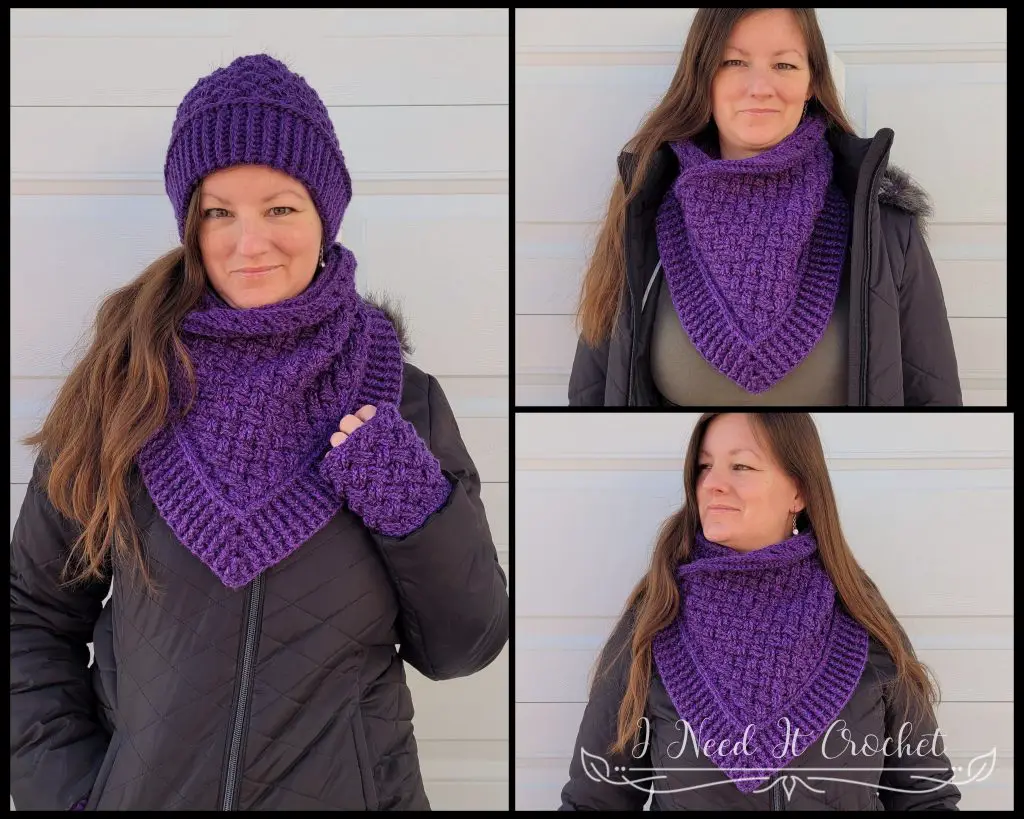
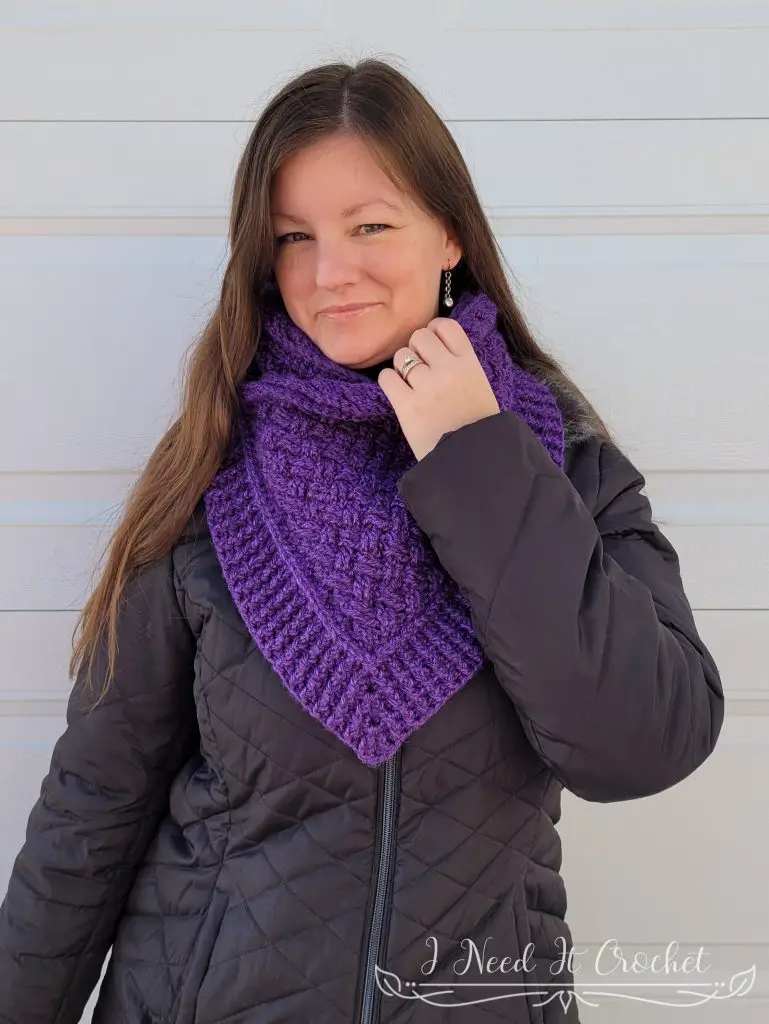
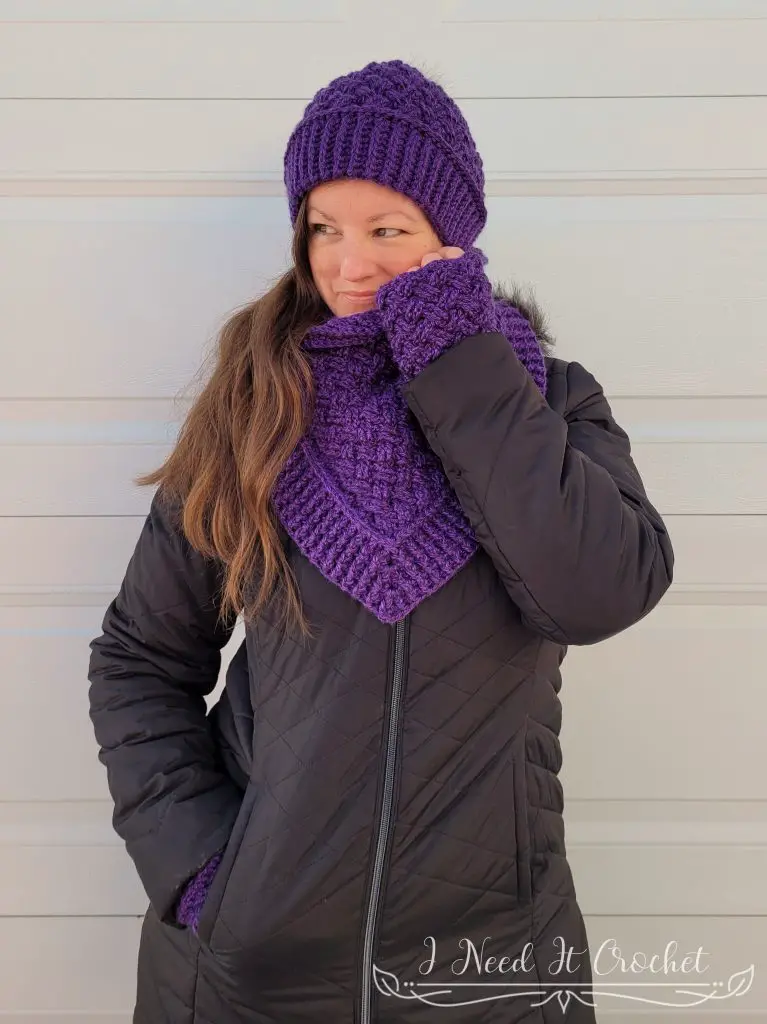
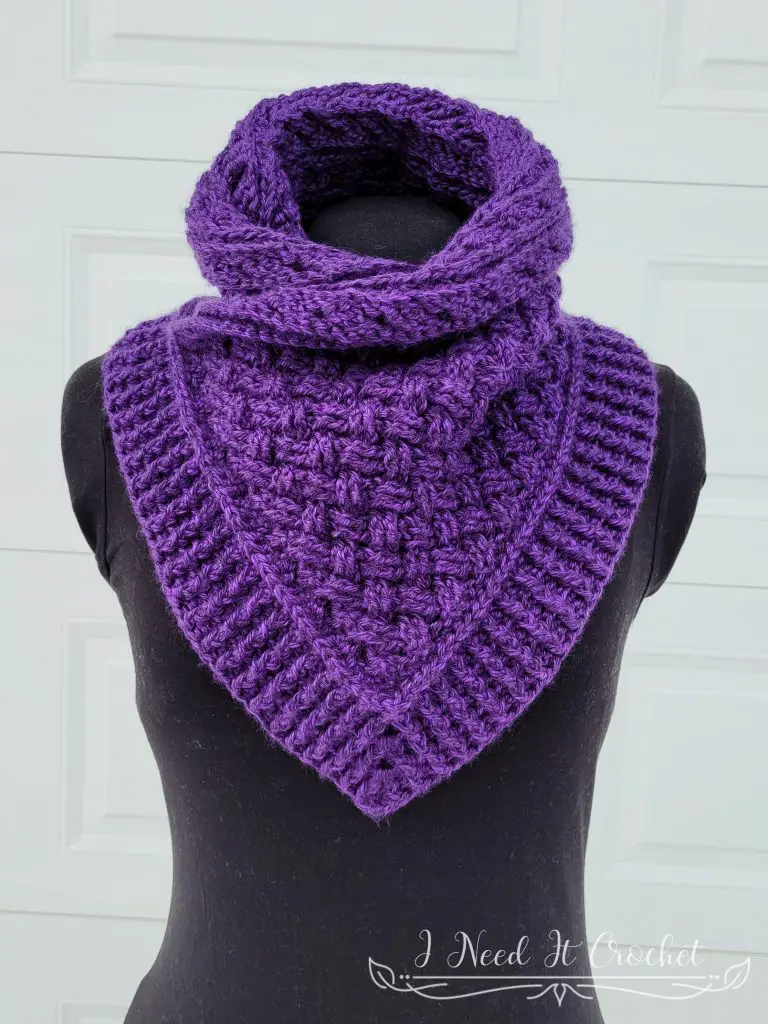
The Aisling Cowl is made from one long rectangle, folded in front, and finished with a ribbed edging. So your neck and chest are protected by a double layer of the Celtic Weave stitch. The result is a warm, cozy cowl that can be worn inside or outside your jacket.
Pair it with the matching toque and fingerless mittens for a set that will add loads of style and texture to your winter outerwear.
Free Crochet Cowl Pattern – Aisling Cowl
How To Crochet The Free Crochet Cowl Pattern – Aisling Cowl
Finished Size:
This cowl is meant to fit close to the neck. The bib front measures approximately 10” long.
Abbreviations:
Sk = Skip
Sp = Space
St = Stitch
Ss = Slip Stitch
Ch = Chain
Sc = Single Crochet
Hdc = Half Double Crochet
Dc = Double Crochet
FPDC = Front Post Double Crochet
BPDC = Back Post Double Crochet
FPTR = Front Post Treble Crochet
BPTR = Back Post Treble Crochet
Materials:
I used Lion Brand Heartland, which is 100% Acrylic, #4 Worsted weight yarn.
Any yarn of similar weight would work.
Approximately 560 yds.
5.5mm Hook
Stitch Markers
Yarn Needle
Scissors
Measuring Tape
Gauge:
See gauge swatch instructions below. Be sure to always check your gauge. It will save you much time and heartache.
Notes:
Ch1 and ch2 at the beginning of a row is never considered a stitch.
Ch3 at the beginning of a row is always considered a Dc.
I have added many pictures to help you along the way.
Free Crochet Cowl Pattern – Aisling Cowl
Gauge Swatch
With 5.5mm hook
- Ch 18. Dc in 4th ch from hook and each ch across. Turn. – 16 st
- Ch3. *Sk 2 sts, fptr in next 2 sts. Fptr in 2 previously skipped sts.** Repeat from * to ** until 3 sts left. Fpdc in next 2 sts. Dc in last st. Turn. – 16 st
- Ch3. *Sk 2 sts, bptr in next 2 sts. Bptr in 2 previously skipped sts.** Repeat from * to ** until 3 sts left. Bpdc in next 2 sts. Dc in last st. – 16 st
Repeat rows 2 & 3 until you have a total of 8 rows. Your swatch should measure 4” W x 4” H.
Instructions
To make this cowl, we will first create a large rectangle. Then, we will fold it and add the bottom trim.
With 5.5mm Hook (or hook used to achieve gauge)
- Ch 126. Dc in 4th ch from hook and each ch across. Turn. – 124 st
- (RS) Ch3. *Sk 2 sts, fptr in next 2 sts. Fptr in 2 previously skipped sts.** Repeat from * to ** until 3 sts left. Fpdc in next 2 sts. Dc in last st. Turn. – 124 st
- (WS) Ch3. *Sk 2 sts, bptr in next 2 sts. Bptr in 2 previously skipped sts.** Repeat from * to ** until 3 sts left. Bpdc in next 2 sts. Dc in last st. – 124 st
Repeat rows 2 & 3 until you have a total of 20 rows. Bind off. Your project should now measure approximately 10” H x 31” W.
With RS facing you, join your yarn in the bottom of the 1st ch.
- Ch1. Sc in 1st ch and each across. Do not bind off. – 124 st
Your project should look like a rectangle as in Figure 1. We will now fold this rectangle into the cowl shape.
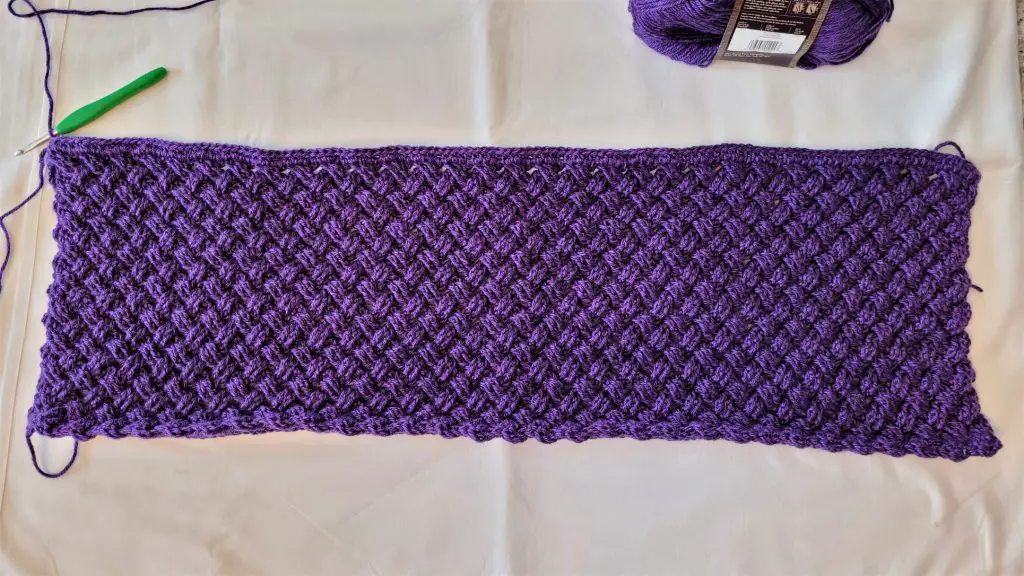
Figure 1
- Flip your work so that the WS is facing you, and the last sc row you just completed is at the top.
- Fold the left side down as pictured in Figure 2, then fold the right side down as pictured in Figure 3. Use a locking st marker to pin the bottom corner sts together.
- Count 39 sts up the right side. Place a locking st marker in the 39th st, using it to secure to the last row of the other layer. Repeat for the left side.
- We will begin the next step by stitching these 2 layers together (see Figure 4). Row 1 will work down one side to the peak, then up the other side, and finally around the back.
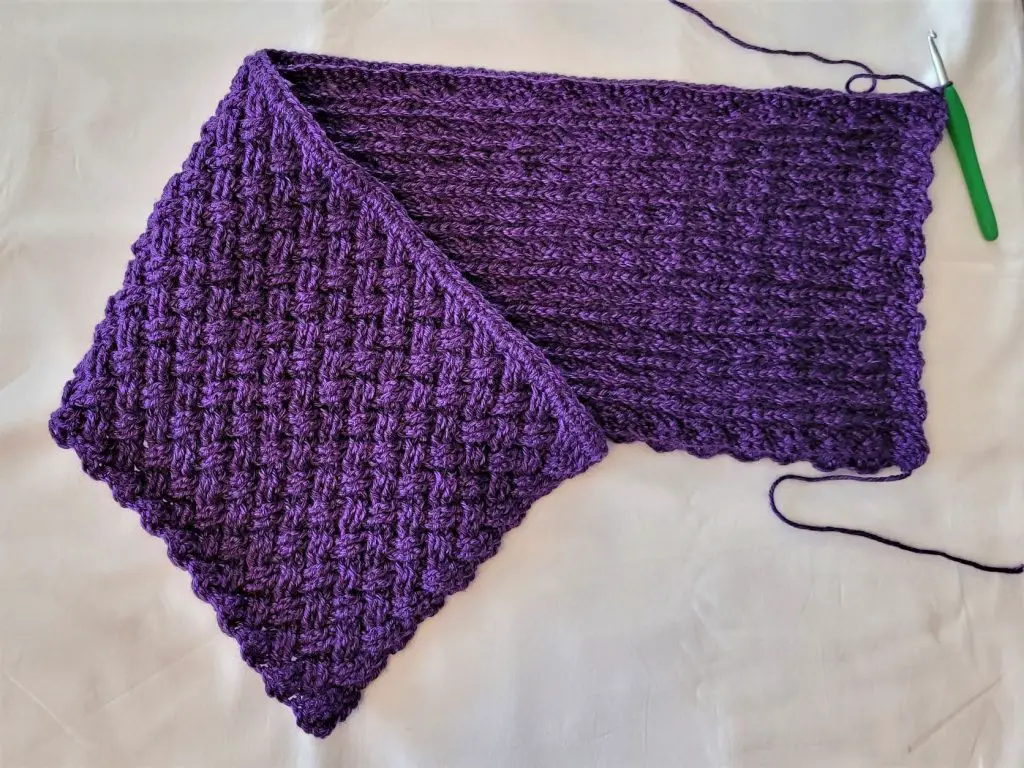
Figure 2
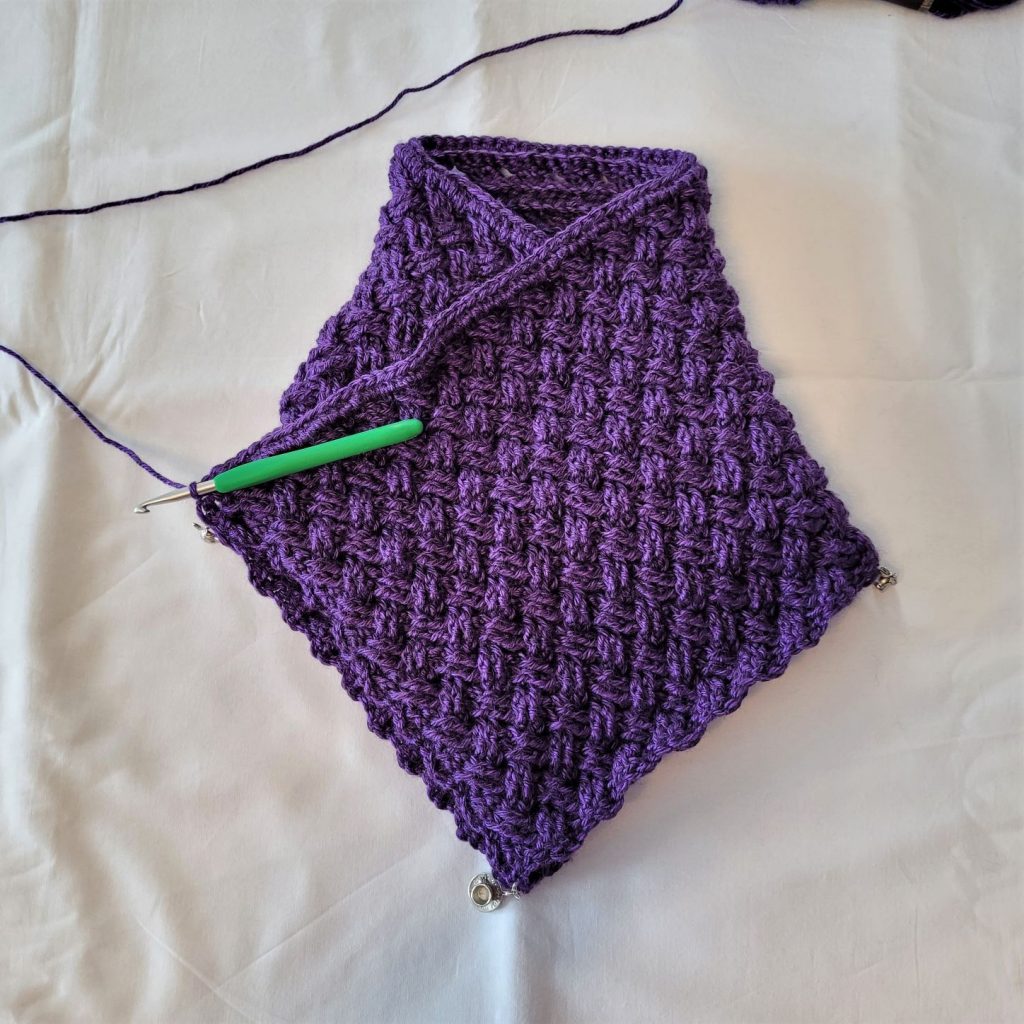
Figure 3
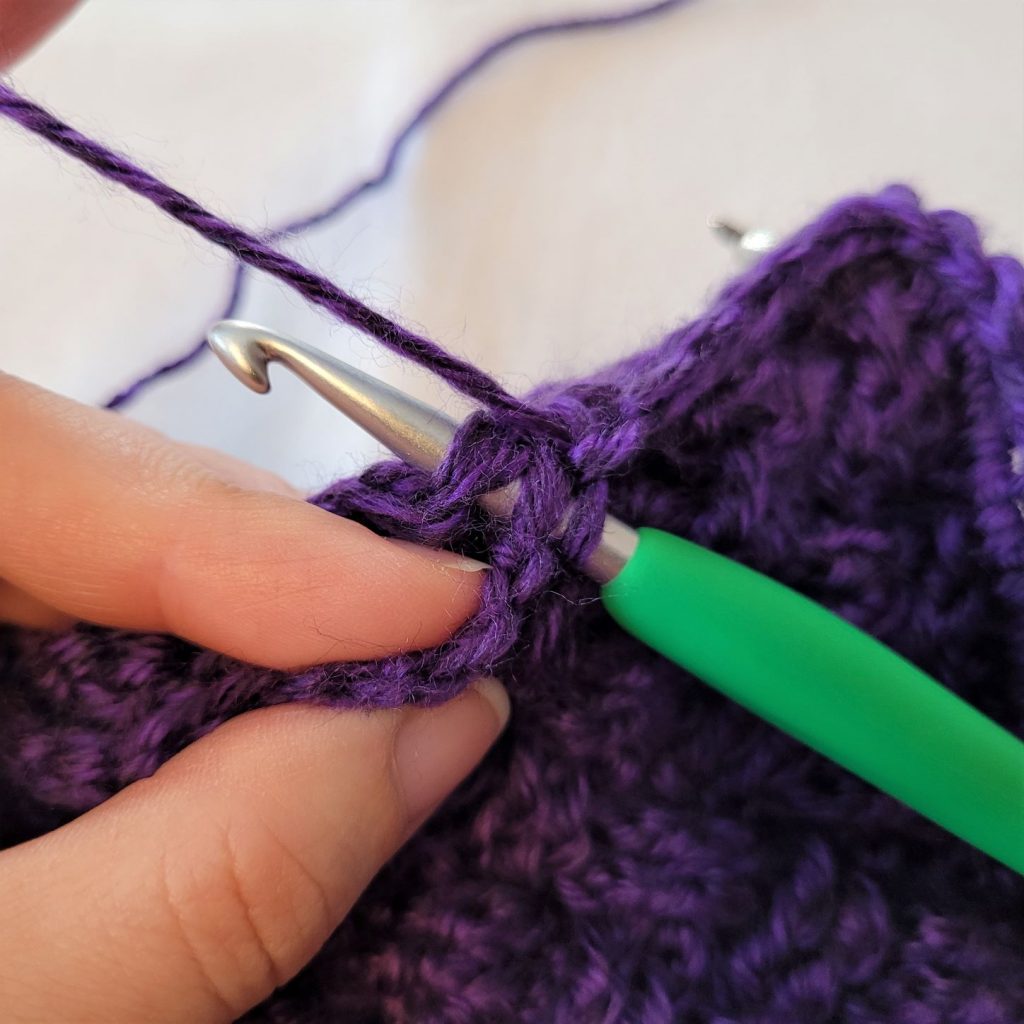
Figure 4
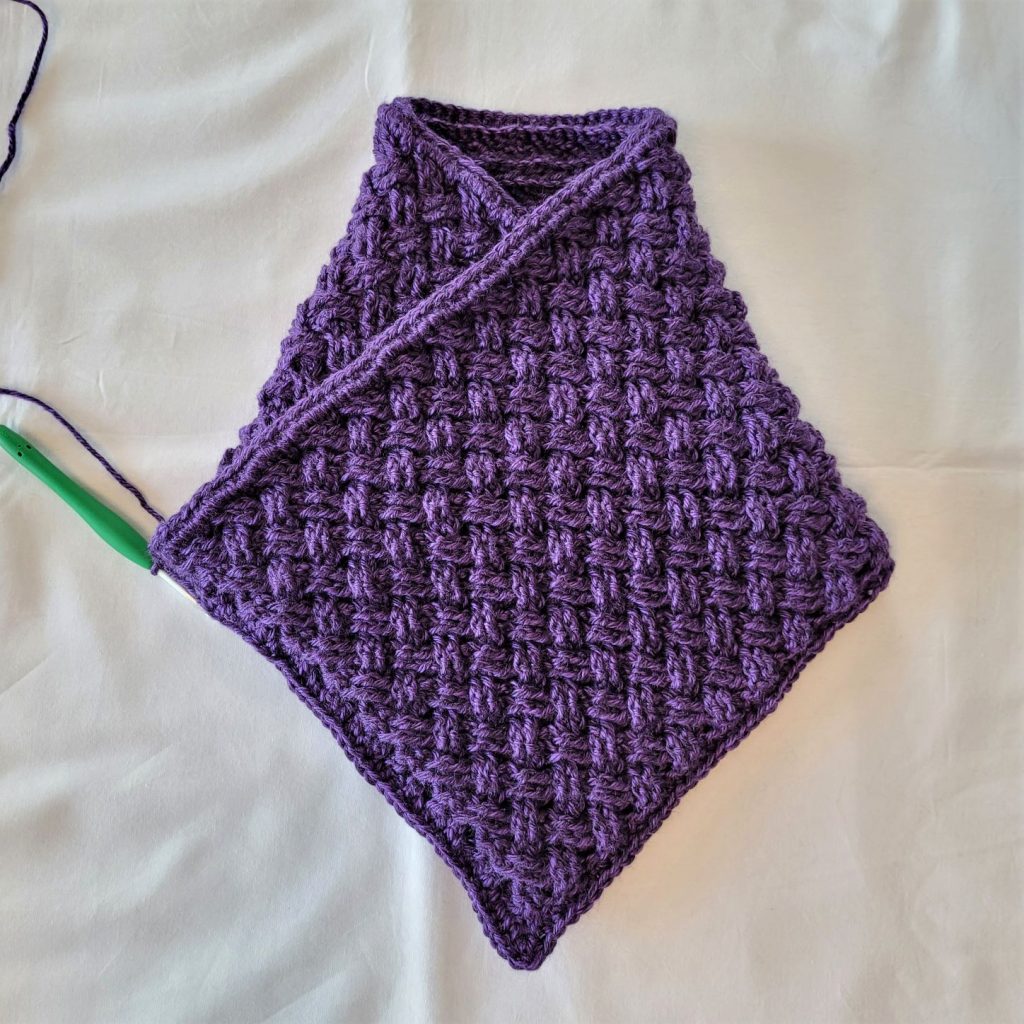
Figure 5
With RS facing you.
- (RS) Ch1. Working through both layers, hdc in 1st st and next 38sts. (3hdc) in next st (corner). Hdc in next 39 sts. Now working through 1 layer, hdc in last 44 sts. Ss to join to 1st st. Your project should now look like Figure 5 (above). Turn. – 125 st
- (WS) Ch2. Fpdc in 1st st, 2 fpdc in next st. Fpdc in next 3 sts, 2fpdc in next st. *Fpdc in next 5 sts, 2fpdc in next st.** Repeat from * to ** 5 more times. Fpdc in next 2 sts, 2fpdc in next st. Fpdc in next 40 sts. (Fpdc, ch1, fpdc) in next st. Fpdc in last 39 sts. Ss to join to 1st st. Turn. – 135 st + ch1 peak
- Ch2. Fpdc in 1st st. *Bpdc in next st. Fpdc in next st.** Repeat from * to ** until you reach the ch1 peak. (Dc, ch1, dc) in ch1 sp. *Fpdc in next st. Bpdc in next st.** Repeat from * to ** to end. Ss to join to 1st st. Turn. – 137 st + ch1 peak
- Ch2. Bpdc in 1st st. Fpdc in next st. *Bpdc in next st. Fpdc in next st.** Repeat from * to ** until you reach the ch1 peak. (Dc, ch1, dc) in ch1 sp. Fpdc in next st. Repeat from * to ** to end. Ss to join to 1st st. Turn. – 139 st + ch1 peak
- Repeat round 3. – 141 st + ch1 peak
- Repeat round 4. – 143 st + ch1 peak
- Repeat round 3. Bind off. – 145 st + ch1 peak
Weave in your ends, and you’re done!
I hope you love your new crochet cowl, and I look forward to seeing all of your beautiful pictures on Ravelry!
If you’d like to know when I post new patterns and tutorials like the Free Crochet Cowl Pattern – Aisling Cowl, head on over to my Facebook and Instagram and give me a like and a follow!
If you enjoyed The Free Crochet Cowl Pattern – Aisling Cowl, you may want to check out my other designs!
Free Crochet Cowl Pattern – Aisling Cowl
And until next time… Happy Hooking! 😉