
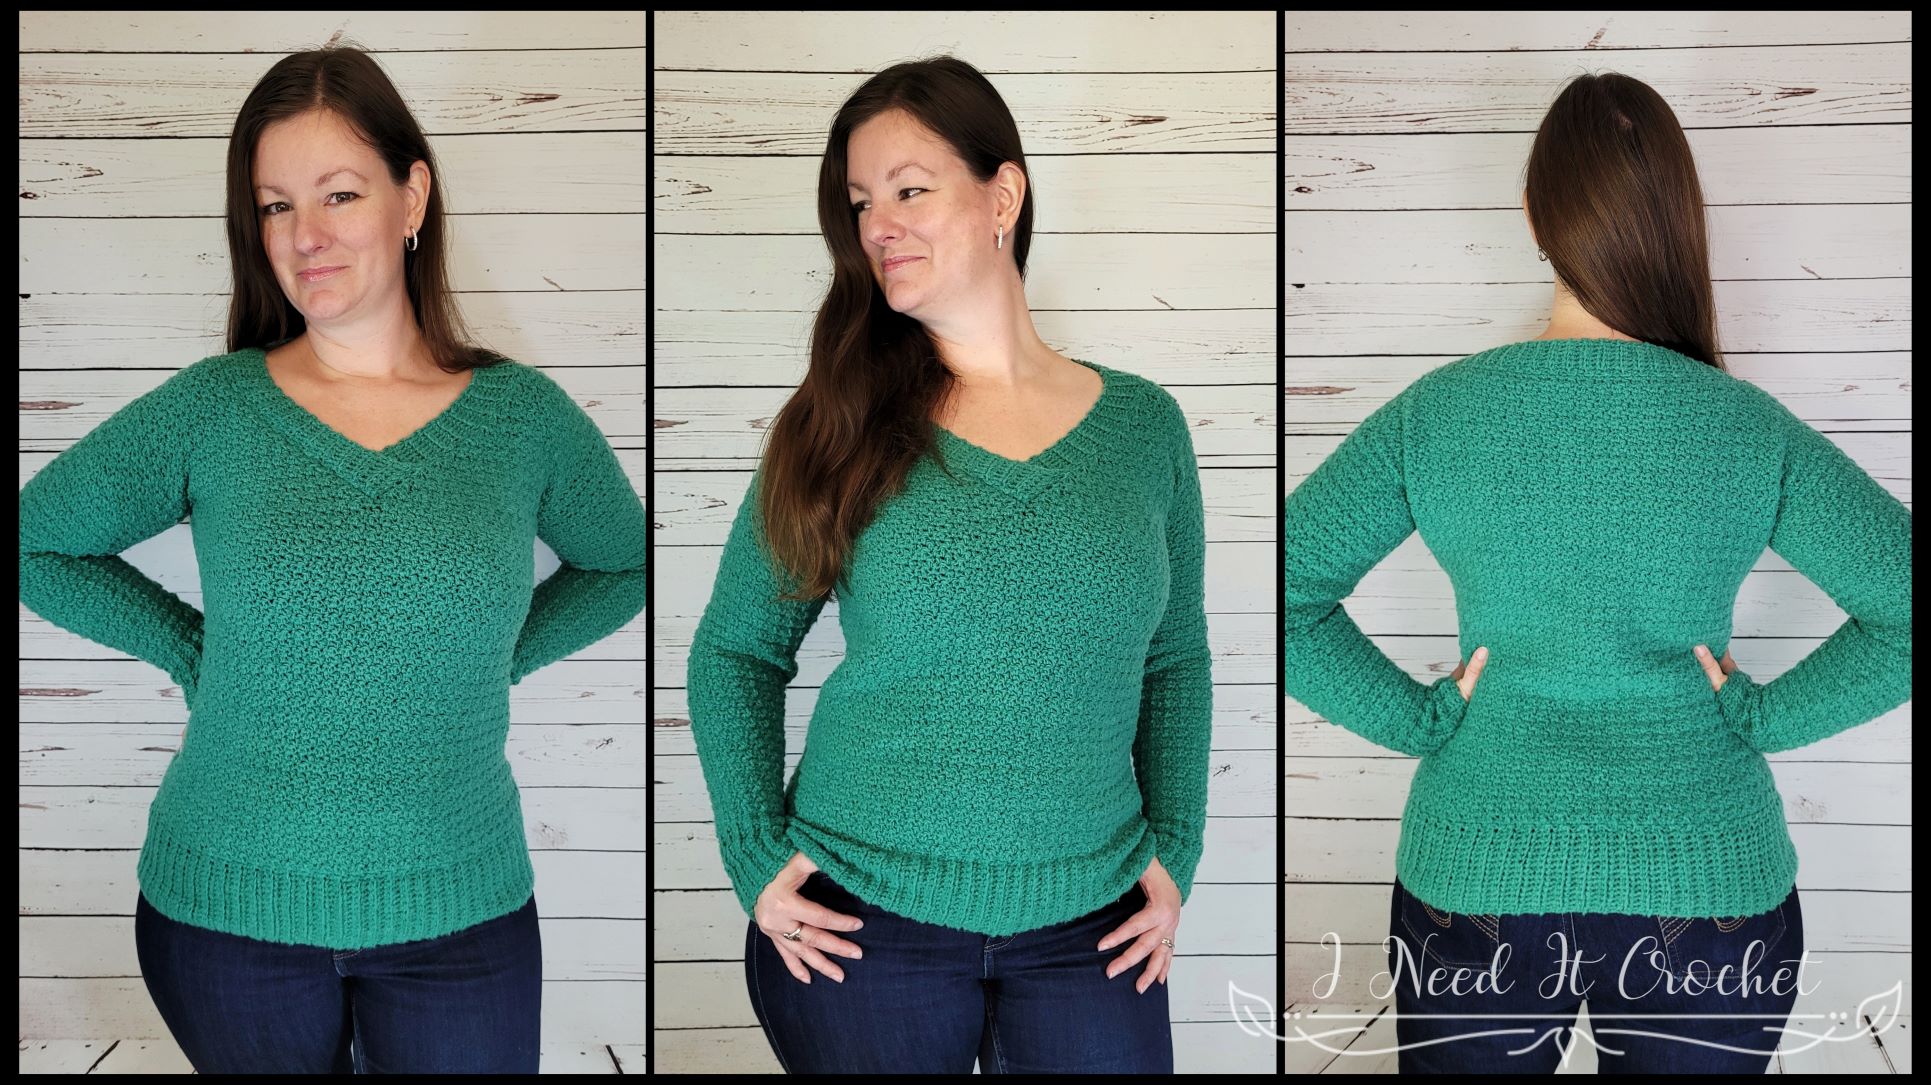
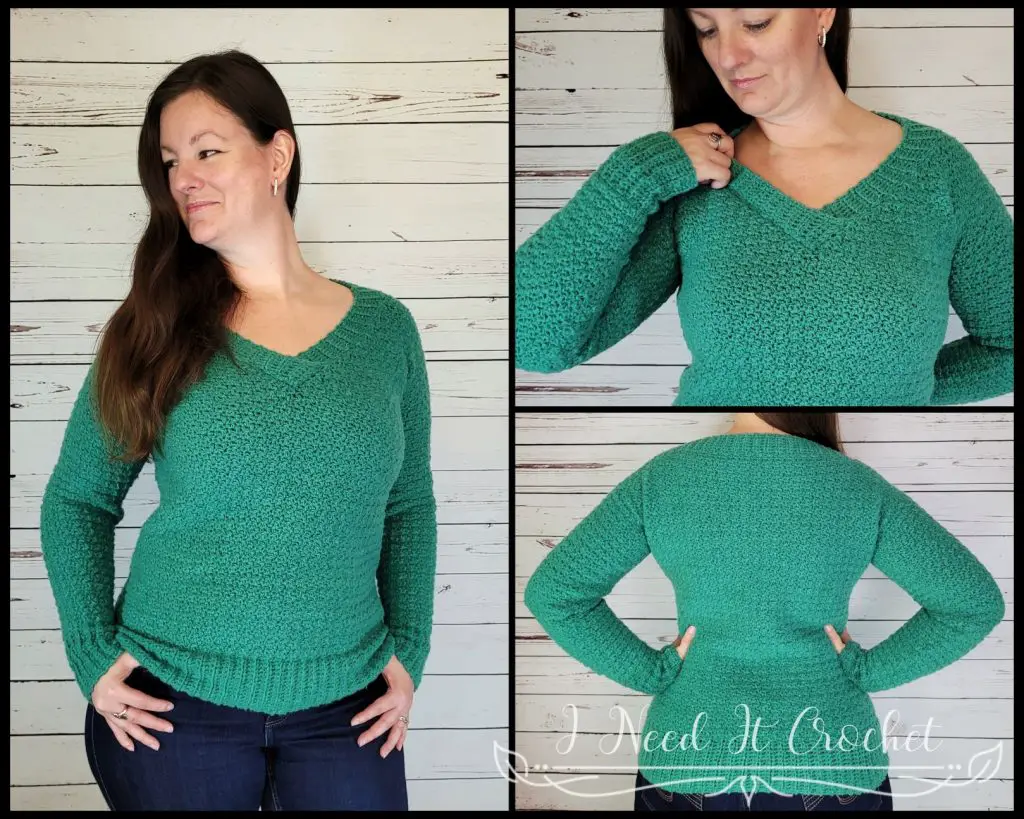
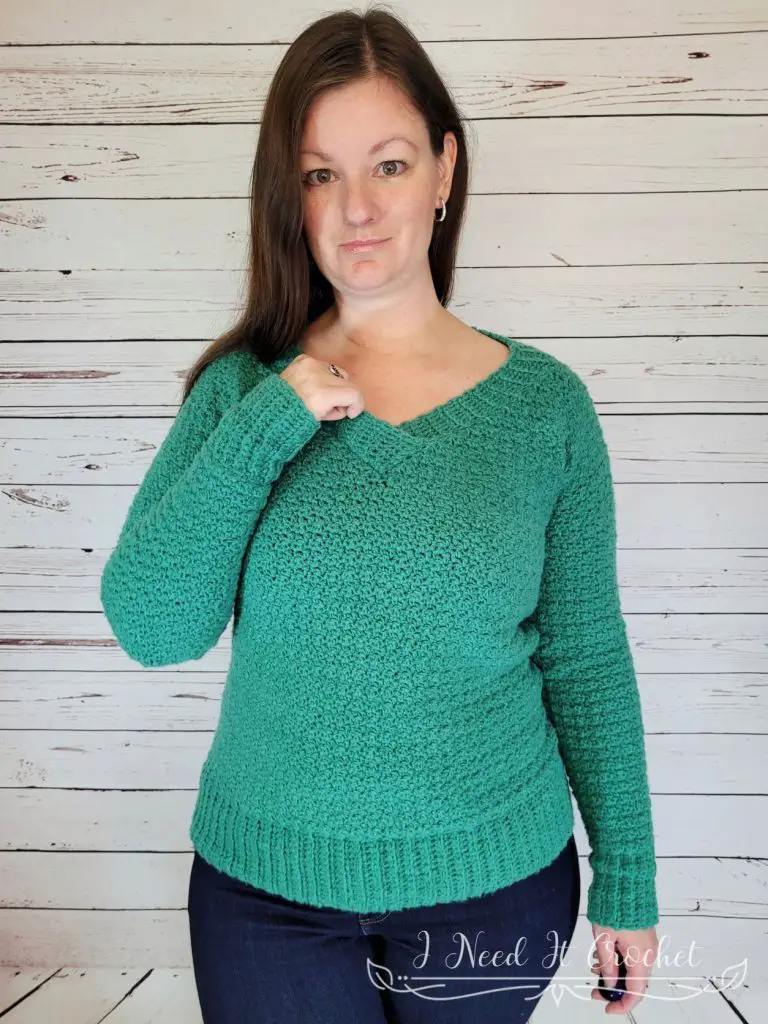
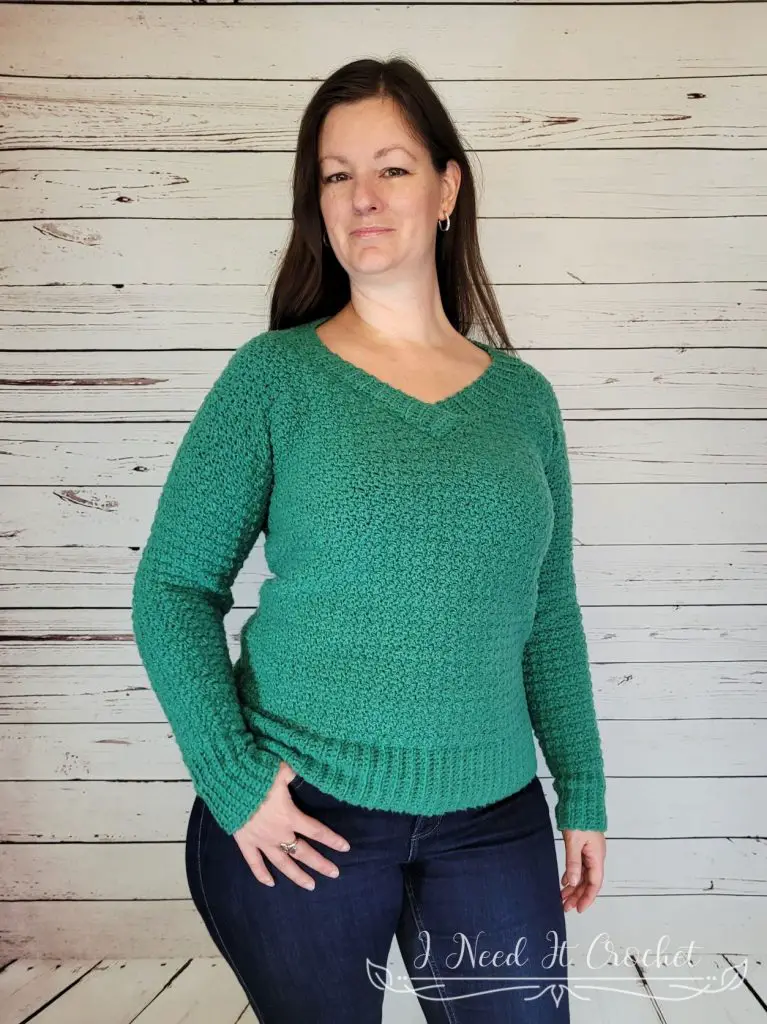
Free Crochet Sweater Pattern – Up And Down Pullover
The Free Crochet Sweater Pattern – Up And Down Pullover is copyrighted by I Need It Crochet. You may not copy, share, change, or sell the pattern itself. Also, you may not claim this pattern as your own. All pictures contained in this pattern fall under the copyright and may not be used.
Finished items made from the Free Crochet Sweater Pattern – Up And Down Pullover belong to you, and you may do what you wish with them. If you choose to sell them on Etsy, I would very much appreciate it if you credited me as the pattern designer.


Or… Just scroll down to see it for free!
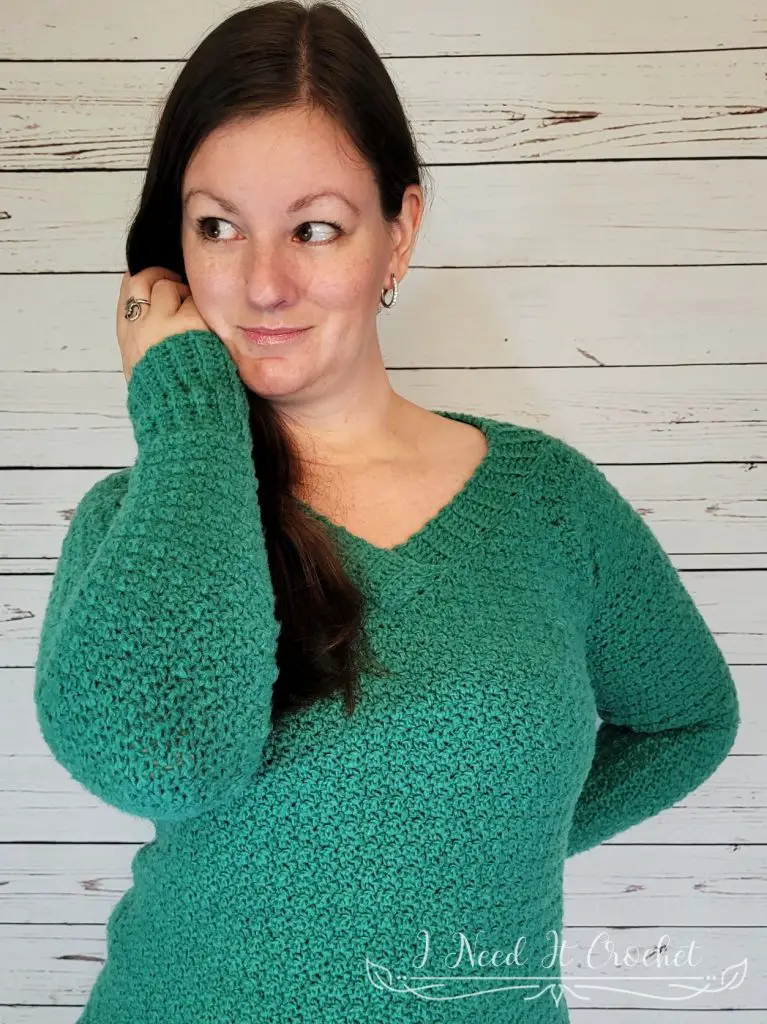
As a designer, I get most of my inspiration from my own closet. I tend to crochet what I want to wear. Sometimes when I’m feeling adventurous, I’ll make something new that I’ve never tried. Looking at my closet this winter, I realised that it was missing something- a cozy but flattering v-neck sweater! Something with extra long sleeves and an interesting, but subtle texture.
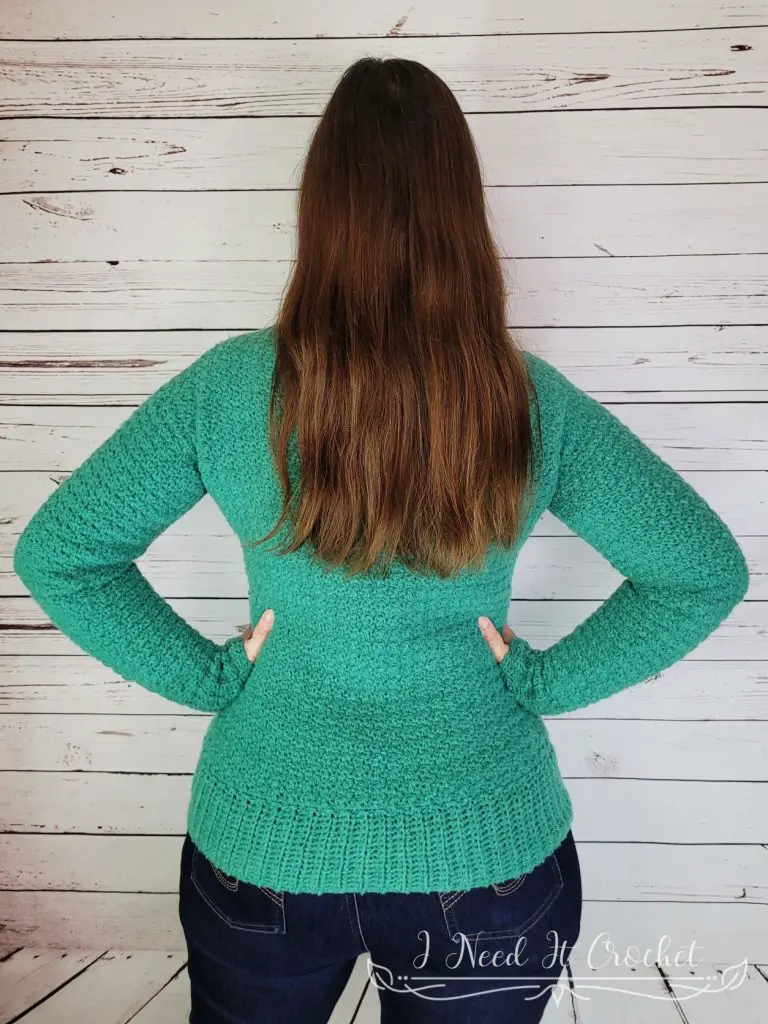
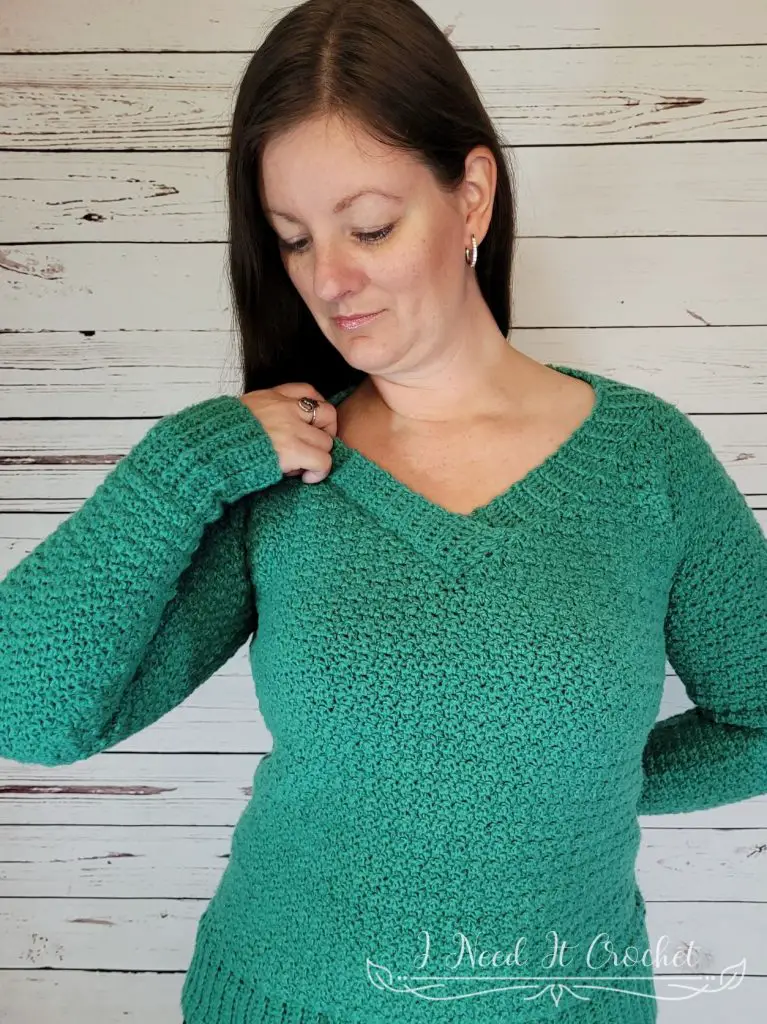
The Free Crochet Sweater Pattern – Up And Down Pullover has it all. The body consists of a simple single crochet/double crochet stitch pattern that keeps you interested and gives a nicely muted texture. The design is easy to customize for length and fit. All of this combined with the v-neck and wide ribbing will give you a flattering sweater you’ll want to wear again and again.
Free Crochet Sweater Pattern – Up And Down Pullover
How To Crochet The Free Crochet Sweater Pattern – Up And Down Pullover
Finished Sizes:
Instructions given to fit size X-small; changes for small, medium, large, X-large, 2X-large, 3X-large, 4X-large and 5X-large are in ()
XS (S, M, L, XL, 2XL, 3XL, 4XL, 5XL)
Body Circumference: 28” (32”, 36”, 40”, 44”, 48 ½”, 53”, 57”, 61 ½”)
Finished Length: Customizable.
Upper Arm Circumference: Each size may choose whichever arm circumference they like from the following options: 9 ½” (10 ½”, 11 ½”, 12 ¾”, 13 ¾”, 14 ¾”, 15 ¾”, 17”, 18”, 19”, 20”, 21 ¼”)
Gauge:
See gauge swatch instructions below. Be sure to always check your gauge. It will save you much time and heartache.
Materials:
I used Caron Cloud Cakes, which is a 100% Polyester, #4 Worsted weight yarn.
See notes section for important comments about yarn substitutions.
Approximately 1200 (1300, 1400, 1500, 1600, 1700, 1800, 1900, 2000) yds.
5.5mm Hook
Stitch Markers
Yarn Needle
Scissors
Measuring Tape
Abbreviations:
RS = Right Side
WS = Wrong Side
Sk = Skip
St = Stitch
Ss = Slip Stitch
Ch = Chain
Sc = Single Crochet
Dc = Double Crochet
Notes:
Ch1 at the beginning of a row is never considered a stitch.
The model above (that’s me) has a 38” bust and is wearing a size M.
Choose your size according to your largest measurement (bust/waist) and how you would like the top to fit. For a close-fitting top, choose the size closest to your largest measurement. For a loose top, choose a size 2-3” larger.
Yarn Substitutions: The yarn I used is listed as a #4 worsted, but it is very thin and light. Many of my testers had to use #3 dk to achieve gauge. If you are using a different yarn, it is very important to make a gauge swatch and check your measurements.
Free Crochet Sweater Pattern – Up And Down Pullover
Gauge Swatch
I have written gauge swatch instructions for a small and large swatch. If you are making a plus size sweater or generally have trouble with gauge, I recommend making the larger swatch.
With 5.5mm hook
- Ch17 (33). Sc in 2nd ch from hook. Dc in next ch. *Sc in next ch. Dc in next ch.** Repeat from * to ** across. Turn. – 16 (32) st
- Ch1. Sc in 1st st. Dc in next st. *Sc in next st. Dc in next st.** Repeat from * to ** across. Turn. – 16 (32) st
Repeat row 2 until you have 16 (32) rows total. Your swatch should measure 4 ¼” (8 ½”) wide by 4 ¼” (8 ½”) high. The width of your gauge is more important than the height. If you can achieve gauge for the width, but not the height, that is alright.
Instructions
We will begin by working the back and front panels from the bottom up. Then, we will sew them together, leaving space for the arm holes. Next, we will add the sleeves. Finally, we will finish off with the bottom and neck edging.
Tip: When making your front and back panels, use a st marker to mark the right side of each panel, so you won’t have to guess later.
Back Panel
Begin with a long tail for sewing up the side. You will want at least a yard or so.
- (WS) Ch 53 (61, 69, 77, 85, 93, 101, 109, 117). Sc in 2nd ch from hook. Dc in next ch. *Sc in next ch. Dc in next ch.** Repeat from * to ** across. Turn. – 52 (60, 68, 76, 84, 92, 100, 108, 116) st
- (RS) Ch1. Sc in 1st st. Dc in next st. *Sc in next st. Dc in next st.** Repeat from * to ** across. Turn. – 52 (60, 68, 76, 84, 92, 100, 108, 116) st
Repeat row 2 until you have a total of 10 rows.
Measurement Check: Your project should be 14” (16”, 18”, 20”, 22”, 24 ¼”, 26 ½”, 28 ½”, 30 ¾”) wide. If the width of your project is off, you may wish to start again with a different sized hook.
Keep repeating row 2 until your project is the desired length minus 4”. For example: I wanted my sweater to be 23” long, so I worked my back panel until it was 19” long. Be sure to work an even number of rows, finishing with the RS facing you. Make a note of how many rows you worked, as you will need to know later.
Bind off, leaving about 12” of a tail for sewing the shoulder.
Lower Front Panel
Again, begin with a long tail for sewing up the side.
- (WS) Ch 53 (61, 69, 77, 85, 93, 101, 109, 117). Sc in 2nd ch from hook. Dc in next ch. *Sc in next ch. Dc in next ch.** Repeat from * to ** across. Turn. – 52 (60, 68, 76, 84, 92, 100, 108, 116) st
- (RS) Ch1. Sc in 1st st. Dc in next st. *Sc in next st. Dc in next st.** Repeat from * to ** across. Turn. – 52 (60, 68, 76, 84, 92, 100, 108, 116) st
We will repeat row 2 until we come to the bottom of the neckline. To figure out how many rows you need, subtract 20 (22, 24, 24, 26, 26, 28, 28, 30) from the total rows you worked for your back panel. For example: If you worked 70 rows for your back panel, you would work 50 (48, 46, 46, 44, 44, 42, 42, 40) rows for your front panel. Do not bind off. Continue to the next section.
Upper Front Panel
Beginning from where your hook is in the 1st st, count 27 (31, 35, 39, 43, 47, 51, 55, 59) sts. Place a st marker in the last st counted.
Upper Right Decrease Rows
- (WS) Ch1. Sc in 1st st. Dc in next st. *Sc in next st. Dc in next st.** Repeat from * to ** until you have 2 sts left before the st marker. Sc2tog. Leave the remaining sts unworked. Turn. – 25 (29, 33, 37, 41, 45, 49, 53, 57) st
- (RS) Ch1, sk 1st st. *Sc in next st. Dc in next st.** Repeat from * to ** across. Turn. – 24 (28, 32, 36, 40, 44, 48, 52, 56) st
- (WS) Ch1. Sc in 1st st. Dc in next st. *Sc in next st. Dc in next st.** Repeat from * to ** until you have 2 sts left. Sc2tog. Turn. – 23 (27, 31, 35, 39, 43, 47, 51, 55) st
Repeat rows 2 & 3 until you have a total of 16 (18, 20, 20, 22, 22, 24, 24, 26) rows, counting from row 1 of the Upper Front Panel section. Each row decreases your st count by 1 st. When you finish your decrease rows, you should have a st count of 10 (12, 14, 18, 20, 24, 26, 30, 32).
Upper Right Even Rows
- Ch1. Sc in 1st st. Dc in next st. *Sc in next st. Dc in next st.** Repeat from * to ** across. Turn. – 10 (12, 14, 18, 20, 24, 26, 30, 32) st
Repeat row 1 three more times. Bind off, leaving about 12” of a tail for sewing the shoulder.
Upper Left Decrease Rows
Turn your work so that the WS is facing you. Join your yarn in the first unworked stitch of the Lower Front Panel.
- (WS) Ch1, sk 1st st. Dc in next st (dec made). *Sc in next st. Dc in next st.** Repeat from * to ** across. Turn. – 25 (29, 33, 37, 41, 45, 49, 53, 57) st
- (RS) Ch1. Sc in 1s st. *Dc in next st. Sc in next st.** Repeat from * to ** until you have 2 sts left. Sc2tog. Turn. – 24 (28, 32, 36, 40, 44, 48, 52, 56) st
Repeat rows 1 & 2 until you have a total of 16 (18, 20, 20, 22, 22, 24, 24, 26) rows, counting from row 1 of the Upper Front Panel section. Each row decreases your st count by 1 st. When you finish your decrease rows, you should have a st count of 10 (12, 14, 18, 20, 24, 26, 30, 32).
Upper Left Even Rows
- Ch1. Sc in 1st st. Dc in next st. *Sc in next st. Dc in next st.** Repeat from * to ** across. Turn. – 10 (12, 14, 18, 20, 24, 26, 30, 32) st
Repeat row 1 three more times. Bind off.
Free Crochet Sweater Pattern – Up And Down Pullover
Sewing
Before we get to sewing the sides, we have to decide what size sleeves we are making. You may choose whichever sleeve size you want from the options I have written. It does not matter what body size you are making. I have written instructions for sleeve with an upper arm circumference of 9 ½” (10 ½”, 11 ½”, 12 ¾”, 13 ¾”, 14 ¾”, 15 ¾”, 17”, 18”, 19”, 20”, 21 ¼”) and wrist circumference of 6 ½” (7 ½”, 7 ½”, 7 ½”, 9 ½”, 9 ½”,9 ½”, 9 ½”, 9 ½”, 11”, 11”, 11”).
To determine your sleeve size, use a soft tape measure to measure the circumference of your upper arm. Use this measurement to choose a sleeve size from the ones available. For a fitted sleeve, choose the size closest to your upper arm measurement. For a loose sleeve, choose the size 1” to 1 ½” larger.
Lay out your front and back panels with the right sides together. I find it helpful to use locking st markers to hold the panels together and mark out where you want your arm holes to be. Measure 4 ¾” (5 ¼”, 5 ¾”, 6 ½”, 7”,7 ½”, 8”, 8 ½”, 9”, 9 ½”, 10”, 10 ½”) down from the shoulder and place a st marker for each arm hole.
Use more locking st markers to hold the sides and shoulders of the 2 panels together. This will help to keep the panels even and match up the rows, making the side seam less noticeable.
Whip stitch the sides and shoulders together. Your project should now look similar to Figure 1 below.
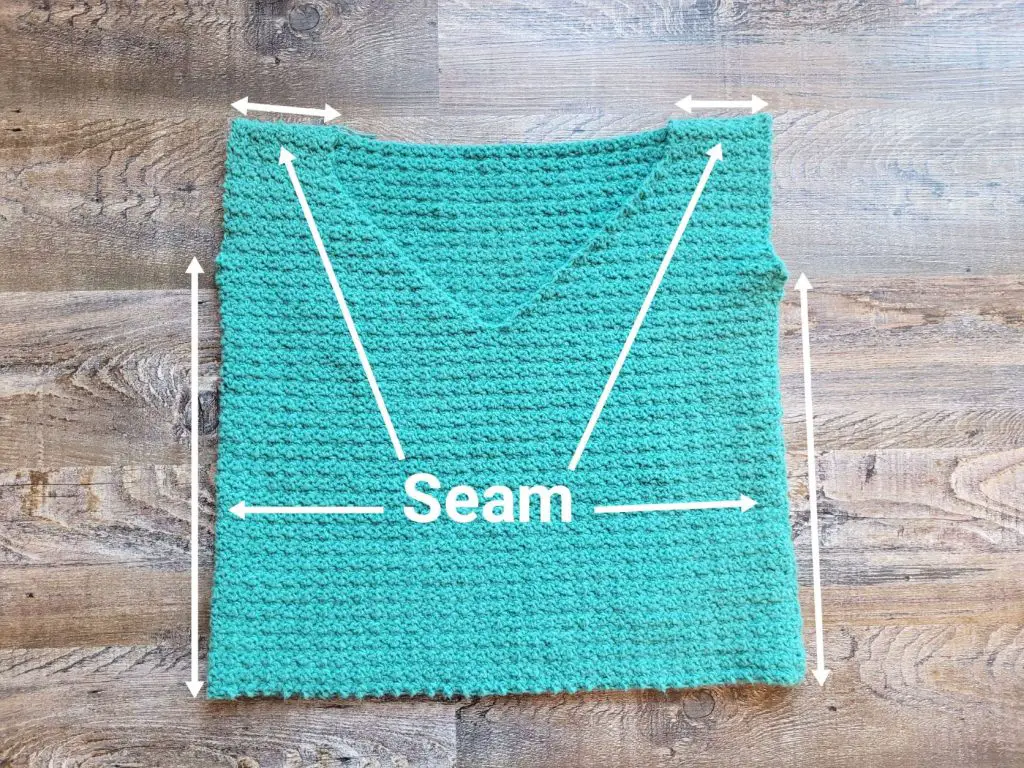
Figure 1
Sleeves
The sleeves are worked in the round, but you will still turn at the end of each round. Begin by joining your yarn at the bottom of the arm hole with the right side facing you. Work the instructions below according to your chosen arm size. Not your body size.
Upper Arm Circumference: 9 ½” (10 ½”, 11 ½”, 12 ¾”, 13 ¾”, 14 ¾”, 15 ¾”, 17”, 18”, 19”, 20”, 21 ¼”)
Wrist Circumference: 6 ½” (7 ½”, 7 ½”, 7 ½”, 9 ½”, 9 ½”, 9 ½”, 9 ½”, 9 ½”, 11”, 11”, 11”)
Note: I have written the sleeves to be 21” long. If you would like your sleeves to be longer or shorter than mine, simply work more or less even rounds. I find it very helpful to use a row counter when working this sleeve pattern to keep track of how many rounds I’ve worked.
- (RS) Ch1. Work 36 (40, 44, 48, 52, 56, 60, 64, 68, 72, 76, 80) sts around the arm hole. You will be working in same *sc in next, dc in next** pattern as you did with the body of your sweater. Ss to join to 1st st. Turn. – 36 (40, 44, 48, 52, 56, 60, 64, 68, 72, 76, 80) st
Tip: To keep your sts evenly spaced, use st markers to divide your arm opening into 4 quarters. Then divide your final st count by 4 and work that number of sts per quarter.
- (WS) Ch1, sk 1st st. *Sc in next st. Dc in next st.** Repeat from * to ** around, placing your last dc in the 1st skipped st. Ss to join to 1st st. Turn. – 36 (40, 44, 48, 52, 56, 60, 64, 68, 72, 76, 80) st
To make this section easier to read, I have written each round out in short form. Only follow the instructions marked with your sleeve size or all sizes.
Decrease Round: Ch1, sk 1st st. Dc2tog. *Sc in next st. Dc in next st.** Repeat from * to ** until there are only 2 sts left (including 1st sk st). Sc2tog. Ss to join to 1st st. Ss to next st. Turn.
Even Round: Repeat round 2 above.
- All Sizes: Even round. – 36 (40, 44, 48, 52, 56, 60, 64, 68, 72, 76, 80) st
- All Sizes: Even round. – 36 (40, 44, 48, 52, 56, 60, 64, 68, 72, 76, 80) st
- All Sizes: Even round. – 36 (40, 44, 48, 52, 56, 60, 64, 68, 72, 76, 80) st
- Size 21 ¼”: Decrease round.
All Other Sizes: Even round.
– 36 (40, 44, 48, 52, 56, 60, 64, 68, 72, 76, 78) st - All Sizes: Even round. – 36 (40, 44, 48, 52, 56, 60, 64, 68, 72, 76, 78) st
- All Sizes: Even round. – 36 (40, 44, 48, 52, 56, 60, 64, 68, 72, 76, 78) st
- Size 21 ¼”: Decrease round.
All Other Sizes: Even round.
– 36 (40, 44, 48, 52, 56, 60, 64, 68, 72, 76, 76) st - All Sizes: Even round. – 36 (40, 44, 48, 52, 56, 60, 64, 68, 72, 76, 76) st
- All Sizes: Even round. – 36 (40, 44, 48, 52, 56, 60, 64, 68, 72, 76, 76) st
- Sizes 20” & 21 ¼”: Decrease round.
All Other Sizes: Even round.
– 36 (40, 44, 48, 52, 56, 60, 64, 68, 72, 74, 74) st - All Sizes: Even round. – 36 (40, 44, 48, 52, 56, 60, 64, 68, 72, 74, 74) st
- All Sizes: Even round. – 36 (40, 44, 48, 52, 56, 60, 64, 68, 72, 74, 74) st
- Sizes 18”, 20”, & 21 ¼”: Decrease round.
All Other Sizes: Even round.
– 36 (40, 44, 48, 52, 56, 60, 64, 66, 72, 72, 72) st - Size 15 ¾”: Decrease round.
All Other Sizes: Even round.
– 36 (40, 44, 48, 52, 56, 58, 64, 66, 72, 72, 72) st - All Sizes: Even round. – 36 (40, 44, 48, 52, 56, 58, 64, 66, 72, 72, 72) st
- Sizes 18”, 19”, 20”, & 21 ¼”: Decrease round.
All Other Sizes: Even round.
– 36 (40, 44, 48, 52, 56, 58, 64, 64, 70, 70, 70) st - All Sizes: Even round. – 36 (40, 44, 48, 52, 56, 58, 64, 64, 70, 70, 70) st
- Size 15 ¾”: Decrease round.
All Other Sizes: Even round.
– 36 (40, 44, 48, 52, 56, 56, 64, 64, 70, 70, 70) st - Sizes 17”, 18”, 19”, 20”, & 21 ¼”: Decrease round.
All Other Sizes: Even round.
– 36 (40, 44, 48, 52, 56, 56, 62, 62, 68, 68, 68) st - All Sizes: Even round. – 36 (40, 44, 48, 52, 56, 56, 62, 62, 68, 68, 68) st
- All Sizes: Even round. – 36 (40, 44, 48, 52, 56, 56, 62, 62, 68, 68, 68) st
- Sizes 12 ¾”, 14 ¾”, 15 ¾”, 17”, 18”, 19”, 20”, & 21 ¼”: Decrease round.
All Other Sizes: Even round.
– 36 (40, 44, 46, 52, 54, 54, 60, 60, 66, 66, 66) st - All Sizes: Even round. – 36 (40, 44, 46, 52, 54, 54, 60, 60, 66, 66, 66) st
- All Sizes: Even round. – 36 (40, 44, 46, 52, 54, 54, 60, 60, 66, 66, 66) st
- Sizes 17”, 18”, 19”, 20”, & 21 ¼”: Decrease round.
All Other Sizes: Even round.
– 36 (40, 44, 46, 52, 54, 54, 58, 58, 64, 64, 64) st - Sizes 12 ¾”, 14 ¾”, & 15 ¾”: Decrease round.
All Other Sizes: Even Round.
– 36 (40, 44, 44, 52, 52, 52, 58, 58, 64, 64, 64) st - All Sizes: Even round. – 36 (40, 44, 44, 52, 52, 52, 58, 58, 64, 64, 64) st
- Sizes 17”, 18”, 19”, 20”, & 21 ¼”: Decrease round.
All Other Sizes: Even round.
– 36 (40, 44, 44, 52, 52, 52, 56, 56, 62, 62, 62) st - All Sizes: Even round. – 36 (40, 44, 44, 52, 52, 52, 56, 56, 62, 62, 62) st
- Sizes 11 ½”, 12 ¾”, 13 ¾”, 14 ¾”, & 15 ¾”: Decrease round.
All Other Sizes: Even round.
– 36 (40, 42, 42, 50, 50, 50, 56, 56, 62, 62, 62) st - Sizes 17”, 18”, 19”, 20”, & 21 ¼”: Decrease round.
All Other Sizes: Even round.
– 36 (40, 42, 42, 50, 50, 50, 54, 54, 60, 60, 60) st - All Sizes: Even round. – 36 (40, 42, 42, 50, 50, 50, 54, 54, 60, 60, 60) st
- Sizes 9 ½” & 10 ½”: Decrease round.
All Other Sizes: Even round.
– 34 (38, 42, 42, 50, 50, 50, 54, 54, 60, 60, 60) st - Sizes 11 ½”, 12 ¾”, 13 ¾”, 14 ¾”, 15 ¾”, 17”, 18”, 19”, 20”, & 21 ¼”: Decrease round.
All Other Sizes: Even round.
– 34 (38, 40, 40, 48, 48, 48, 52, 52, 58, 58, 58) st - All Sizes: Even round. – 34 (38, 40, 40, 48, 48, 48, 52, 52, 58, 58, 58) st
- All Sizes: Even round. – 34 (38, 40, 40, 48, 48, 48, 52, 52, 58, 58, 58) st
- Sizes 17”, 18”, 19”, 20”, & 21 ¼”: Decrease round.
All Other Sizes: Even round.
– 34 (38, 40, 40, 48, 48, 48, 50, 50, 56, 56, 56) st - Sizes 9 ½”, 10 ½”, 11 ½”, 12 ¾”, 13 ¾”, 14 ¾”, & 15 ¾”: Decrease round.
All Other Sizes: Even round.
– 32 (36, 38, 38, 46, 46, 46, 50, 50, 56, 56, 56) st - All Sizes: Even round. – 32 (36, 38, 38, 46, 46, 46, 50, 50, 56, 56, 56) st
- Sizes 17”, 18”, 19”, 20”, & 21 ¼”: Decrease round.
All Other Sizes: Even round.
– 32 (36, 38, 38, 46, 46, 46, 48, 48, 54, 54, 54) st - All Sizes: Even round. – 32 (36, 38, 38, 46, 46, 46, 48, 48, 54, 54, 54) st
- Sizes 11 ½”, 12 ¾”, 13 ¾”, 14 ¾”, & 15 ¾”: Decrease round.
All Other Sizes: Even round.
– 32 (36, 36, 36, 44, 44, 44, 48, 48, 54, 54, 54) st - Sizes 9 ½”, 10 ½”, 17”, 18”, 19”, 20”, & 21 ¼”: Decrease round.
All Other Sizes: Even round.
– 30 (34, 36, 36, 44, 44, 44, 46, 46, 52, 52, 52) st - All Sizes: Even round. – 30 (34, 36, 36, 44, 44, 44, 46, 46, 52, 52, 52) st
- All Sizes: Even round. – 30 (34, 36, 36, 44, 44, 44, 46, 46, 52, 52, 52) st
- Sizes 11 ½”, 12 ¾”, 13 ¾”, 14 ¾”, 15 ¾”, 17”, 18”, 19”, 20”, & 21 ¼”: Decrease round.
All Other Sizes: Even round.
– 30 (34, 34, 34, 42, 42, 42, 44, 44, 50, 50, 50) st - All Sizes: Even round. – 30 (34, 34, 34, 42, 42, 42, 44, 44, 50, 50, 50) st
- Sizes 9 ½” & 10 ½”: Decrease round.
All Other Sizes: Even round.
– 28 (32, 34, 34, 42, 42, 42, 44, 44, 50, 50, 50) st - Sizes 17”, 18”, 19”, 20”, & 21 ¼”: Decrease round.
All Other Sizes: Even round.
– 28 (32, 34, 34, 42, 42, 42, 42, 42, 48, 48, 48) st - Sizes 11 ½”, 12 ¾”, 13 ¾”, 14 ¾”, & 15 ¾”: Decrease round.
All Other Sizes: Even round.
– 28 (32, 32, 32, 40, 40, 40, 42, 42, 48, 48, 48) st - All Sizes: Even round. – 28 (32, 32, 32, 40, 40, 40, 42, 42, 48, 48, 48) st
- Sizes 17”, 18”, 19”, 20”, & 21 ¼”: Decrease round.
All Other Sizes: Even round.
– 28 (32, 32, 32, 40, 40, 40, 40, 40, 46, 46, 46) st - Sizes 9 ½”& 10 ½”: Decrease round.
All Other Sizes: Even round.
– 26 (30, 32, 32, 40, 40, 40, 40, 40, 46, 46, 46) st - Sizes 11 ½”, 12 ¾”, 13 ¾”, 14 ¾”, & 15 ¾”: Decrease round.
All Other Sizes: Even round.
– 26 (30, 30, 30, 38, 38, 38, 40, 40, 46, 46, 46) st - Sizes 17”, 18”, 19”, 20”, & 21 ¼”: Decrease round.
All Other Sizes: Even round.
– 26 (30, 30, 30, 38, 38, 38, 38, 38, 44, 44, 44) st - All Sizes: Even round. – 26 (30, 30, 30, 38, 38, 38, 38, 38, 44, 44, 44) st
- All Sizes: Even round. – 26 (30, 30, 30, 38, 38, 38, 38, 38, 44, 44, 44) st
- All Sizes: Decrease round. – 24 (28, 28, 28, 36, 36, 36, 36, 36, 42, 42, 42) st
Free Crochet Sweater Pattern – Up And Down Pullover
Cuffs
- Ch1. Sc in 1st st and each st around. Ss to join to 1st st. Do not turn. – 24 (28, 28, 28, 36, 36, 36, 36, 36, 42, 42, 42) st
We will now work the ribbed cuff. You should still have the RS facing you.
- (RS) Ch16. Sc in 2nd ch from hook and each ch across. Ss to 1st st of the sleeve (the st you just chained from), ss to next st of the sleeve (see Figure 2). Turn. – 15 st
- (WS) Sc in BLO of each st across until there is 1 st left. Sc in both loops of last st (see Figure 3). Turn. – 15 st
- Ch1. Sc in both loops of 1st st. Sc in BLO of each st across. Ss to next st of sleeve body. Ss to next st of sleeve body (see Figure 4). Turn. – 15 st
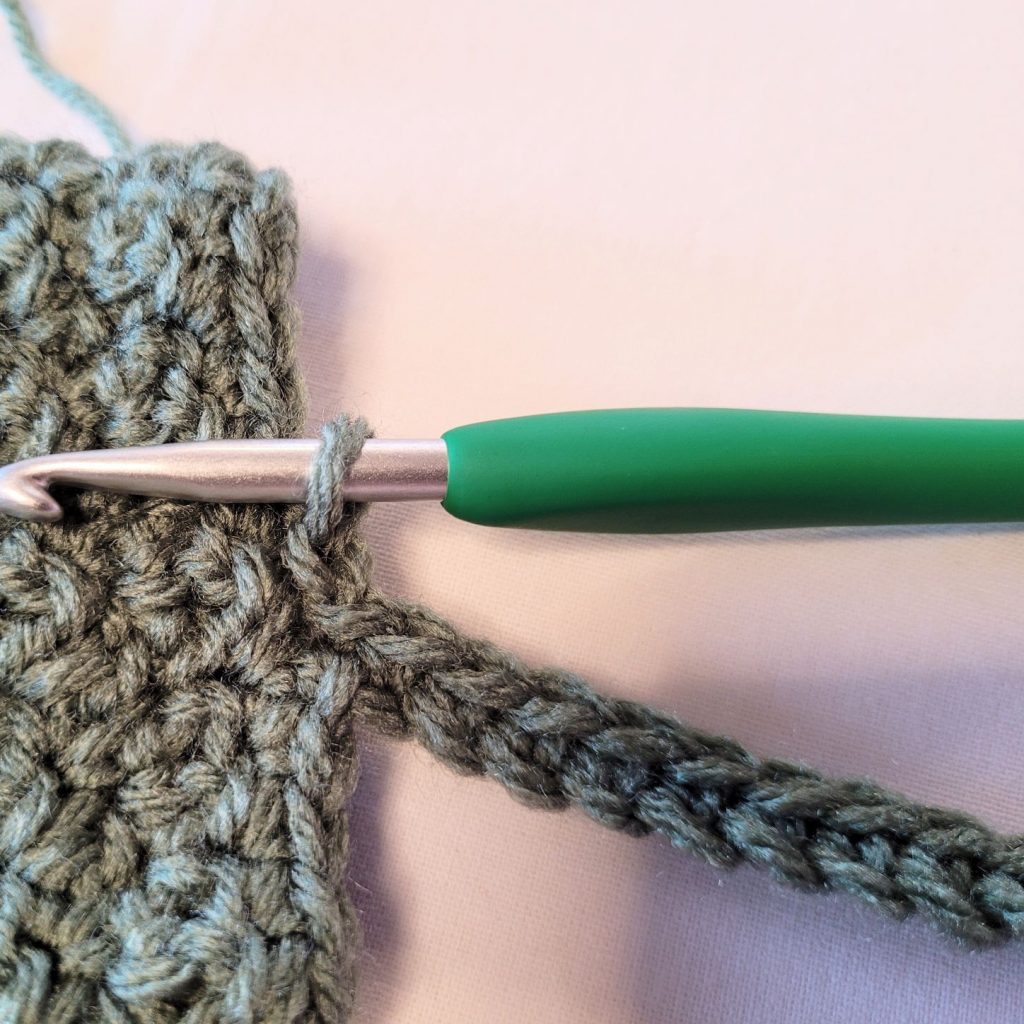
Figure 2
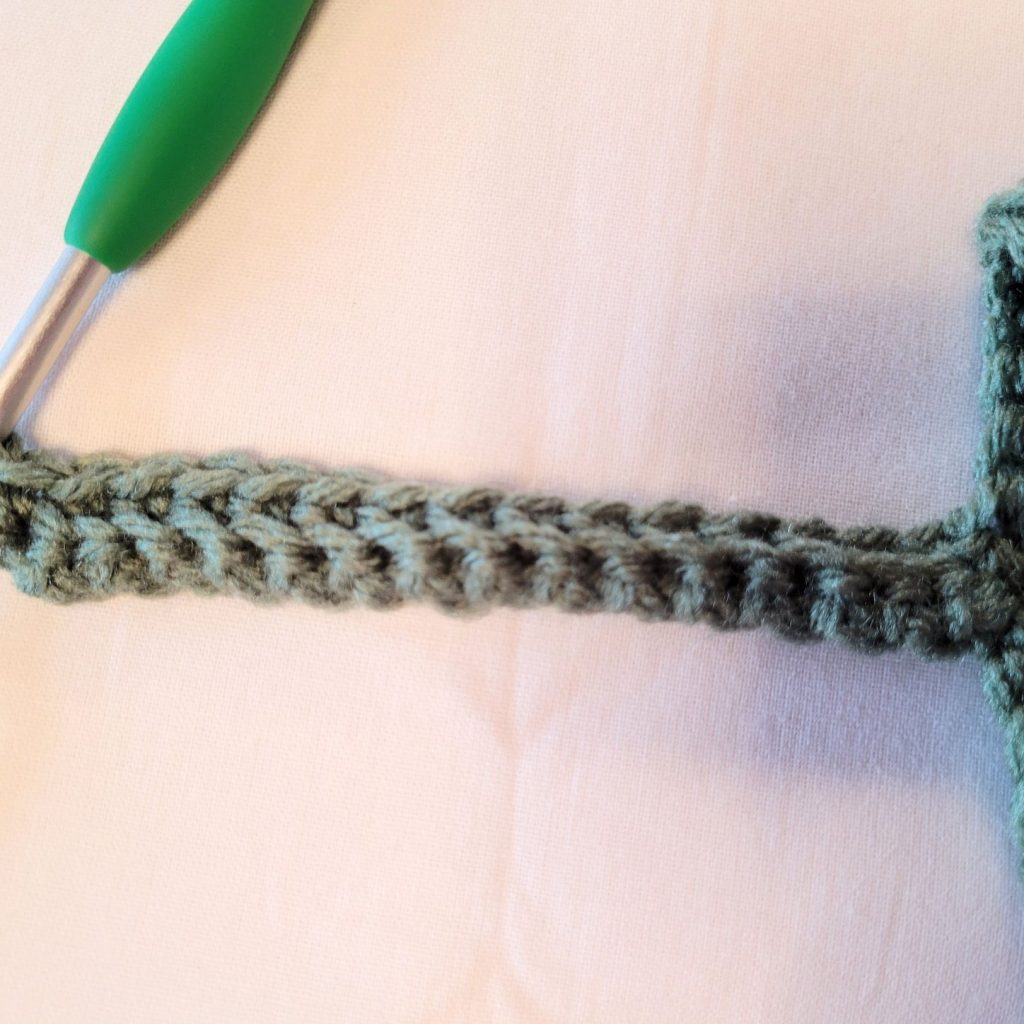
Figure 3
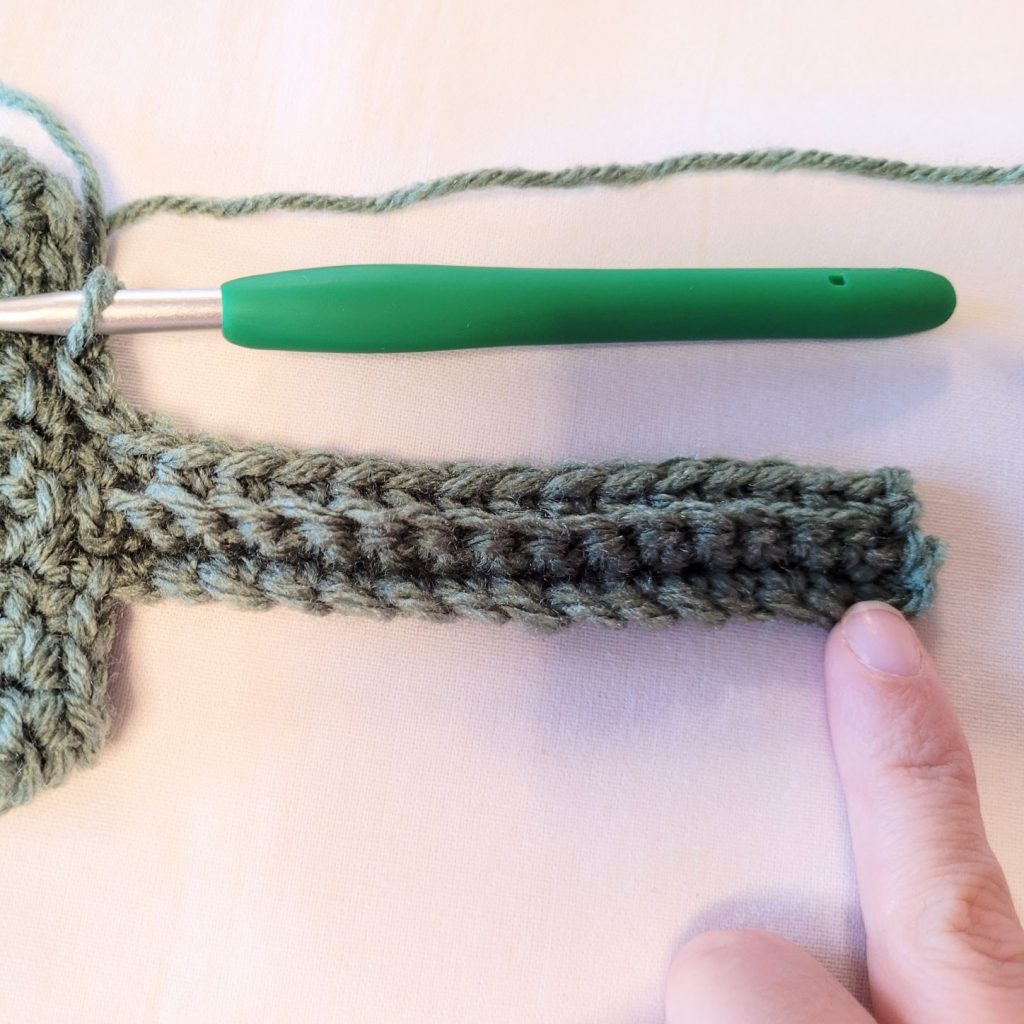
Figure 4
Repeat rows 2 & 3 around the edge of the sleeve until all sts have been worked, ending with a repeat of row 2. Turn the sleeve inside out so the WS is facing you. SS the edges of the cuff closed, working through the bottom bar of the 1st row and the BLO of the last row (see Figures 5 & 6). Your seam should be almost invisible once you turn the sleeve right side out (see figure 7). Bind off.
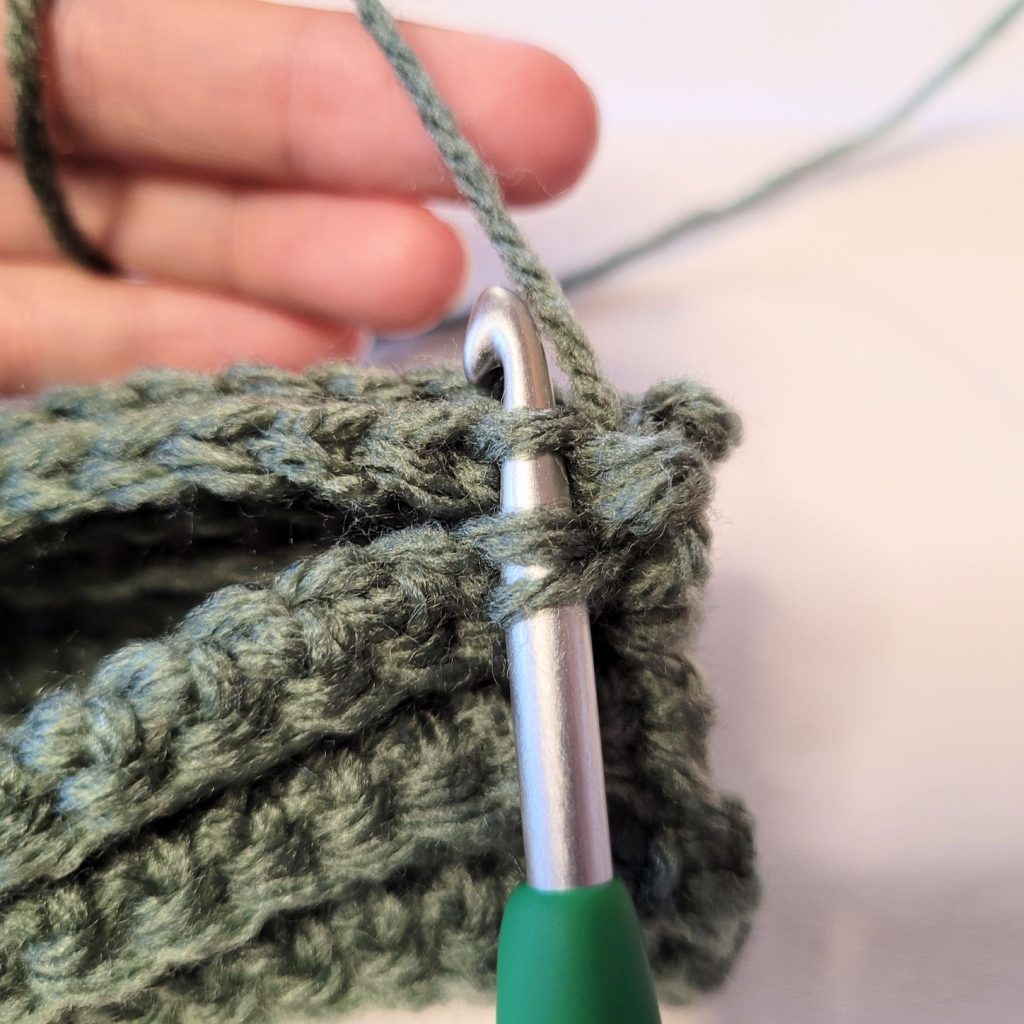
Figure 5
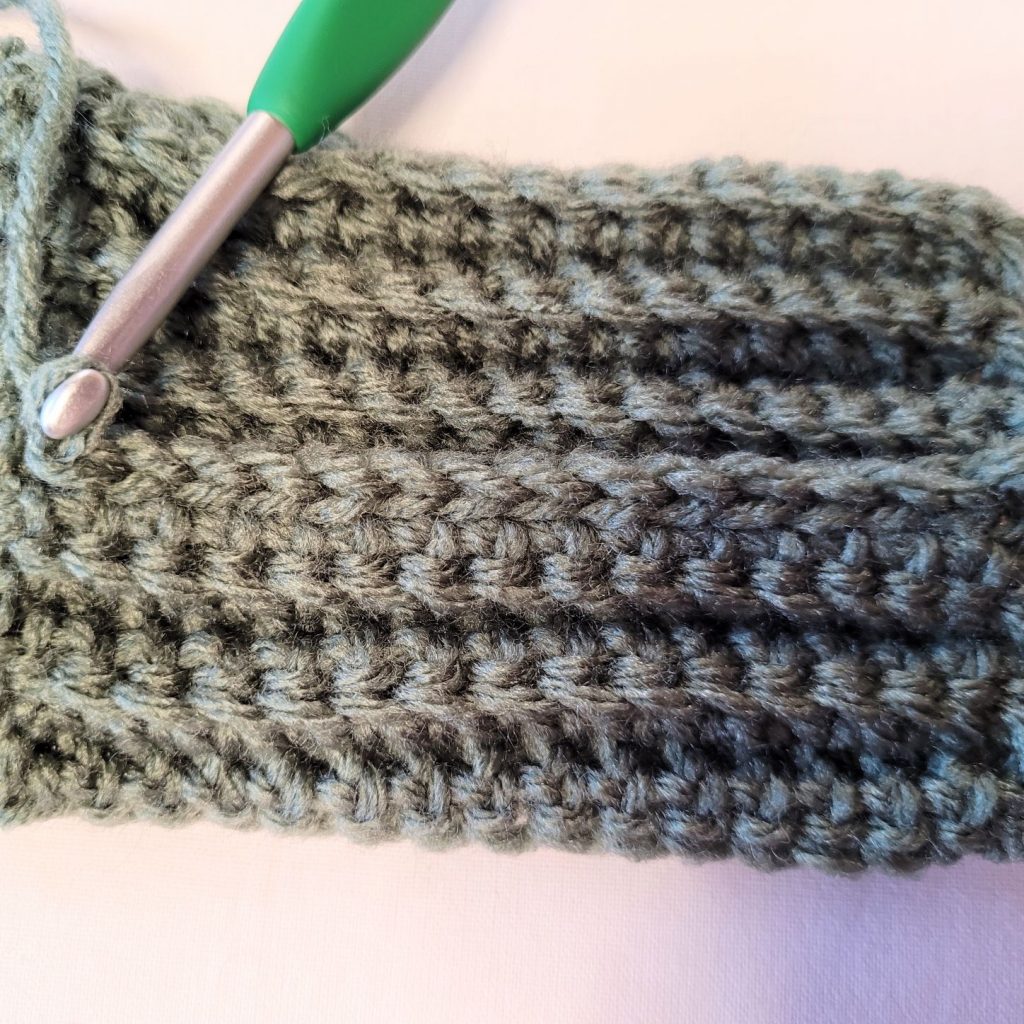
Figure 6
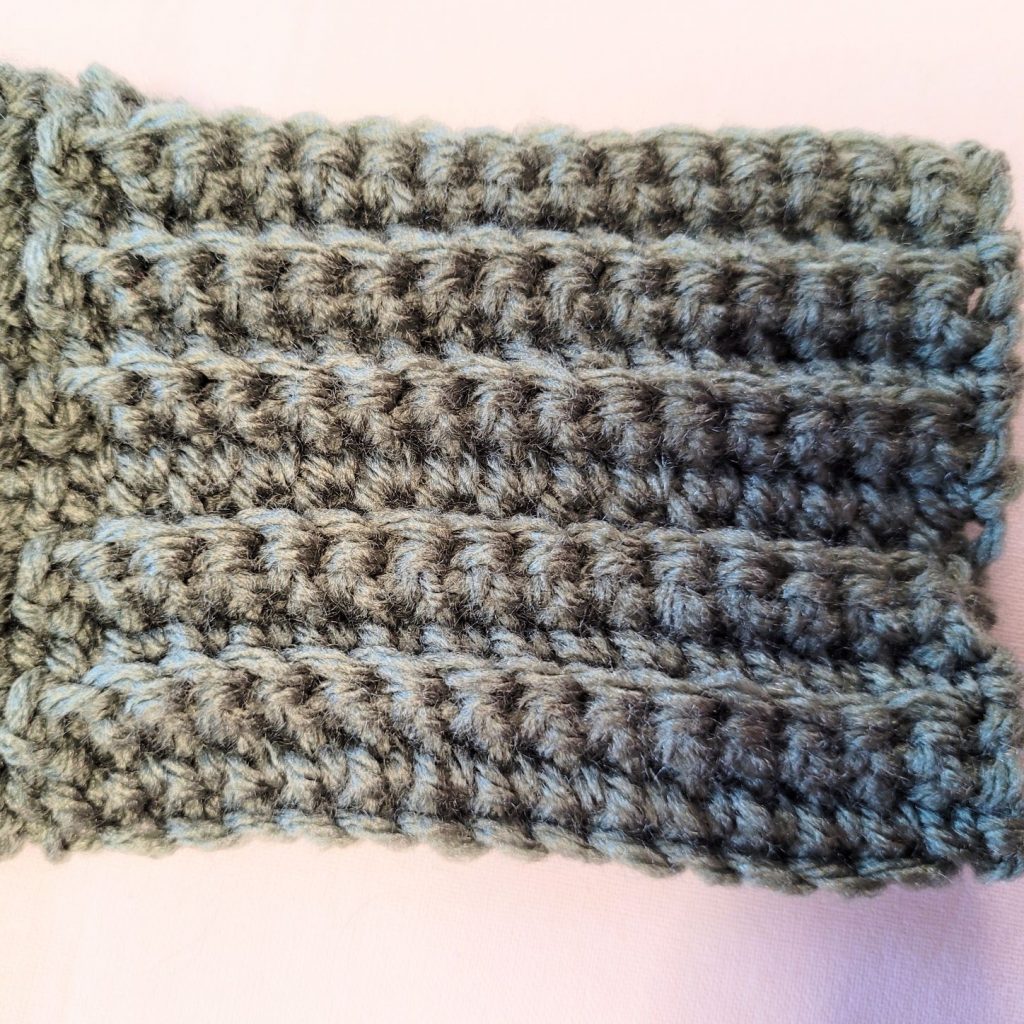
Figure 7
Bottom Trim
The bottom trim is worked in the same manner as the sleeve cuffs. With the right side facing you, join your yarn anywhere on the bottom edge of the body. We will begin with a round of sc.
- Ch1. Sc in 1st st and each st around. Ss to join to 1st st. Do not turn. – 104 (120, 136, 152, 168, 184, 200, 216, 232) st
Now we will work the ribbing.
- (RS) Ch16. Sc in 2nd ch from hook and each ch across. Ss to 1st st of the body (the st you just chained from), ss to next st of the body (see Figure 2). Turn. – 15 st
- (WS) Sc in BLO of each st across until there is 1 st left. Sc in both loops of last st (see Figure 3). Turn. – 15 st
- Ch1. Sc in both loops of 1st st. Sc in BLO of each st across. Ss to next st of body. Ss to next st of body (see Figure 4). Turn. – 15 st
Repeat rows 2 & 3 around the bottom until all sts have been worked, ending with a repeat of row 2. Turn the sweater inside out so the WS is facing you. SS the edges of the trim closed, working through the bottom bar of the 1st row and the BLO of the last row (see Figures 5 & 6). Your seam should be almost invisible once you turn the sweater right side out (see Figure 7). Bind off.
Neck Edging
Lastly, we will finish off the neck with the same ribbed edging we used for the cuffs and bottom. With the right side facing you, join your yarn in the middle of the V in front. We will begin by working a round of sc around the edge of the neckline. Begin with a long tail for sewing the ends of the edging later.
- Ch1. Work 16 (18, 20, 20, 22, 22, 24, 24, 26) sc evenly up the diagonal edge (works out to 1 sc per row). Next, work 6sc up the vertical edge. Place 1sc in each st across the back of the neck. Then 6sc down the other vertical edge, and 16 (18, 20, 20, 22, 22, 24, 24, 26) sc evenly down the other diagonal edge. Ss to join to 1st st. Do not turn. – 76 (84, 92, 92, 100, 100, 108, 108, 116) st
Note: This round of sc should leave your neck edge looking flat and even. If the neck is looking puckered, you may want to redo it, adding a few more sc along the sides of the V. The final stitch count does not matter in this case.
Now we will work the ribbing.
- (RS) Ch8. Sc in 2nd ch from hook and each ch across. Ss to 1st st of the neck edge (the st you just chained from), ss to next st of the neck edge. Turn. – 7 st
- (WS) Sc in BLO of each st across until there is 1 st left. Sc in both loops of last st. Turn. – 7 st
- Ch1. Sc in both loops of 1st st. Sc in BLO of each st across. Ss to next st of neck edge. Ss to next st of neck edge. Turn. – 7 st
Repeat rows 2 & 3 until you have worked all sts around the neck edge, finishing with a repeat of row 2. Bind off, leaving a long tail for sewing. Your edging should now look like Figure 8. Whip stitch one end of the edging down to the neck edge as pictured in Figure 9. Then whip stitch the other end of the edging down to the neck edging as pictured in Figure 10.
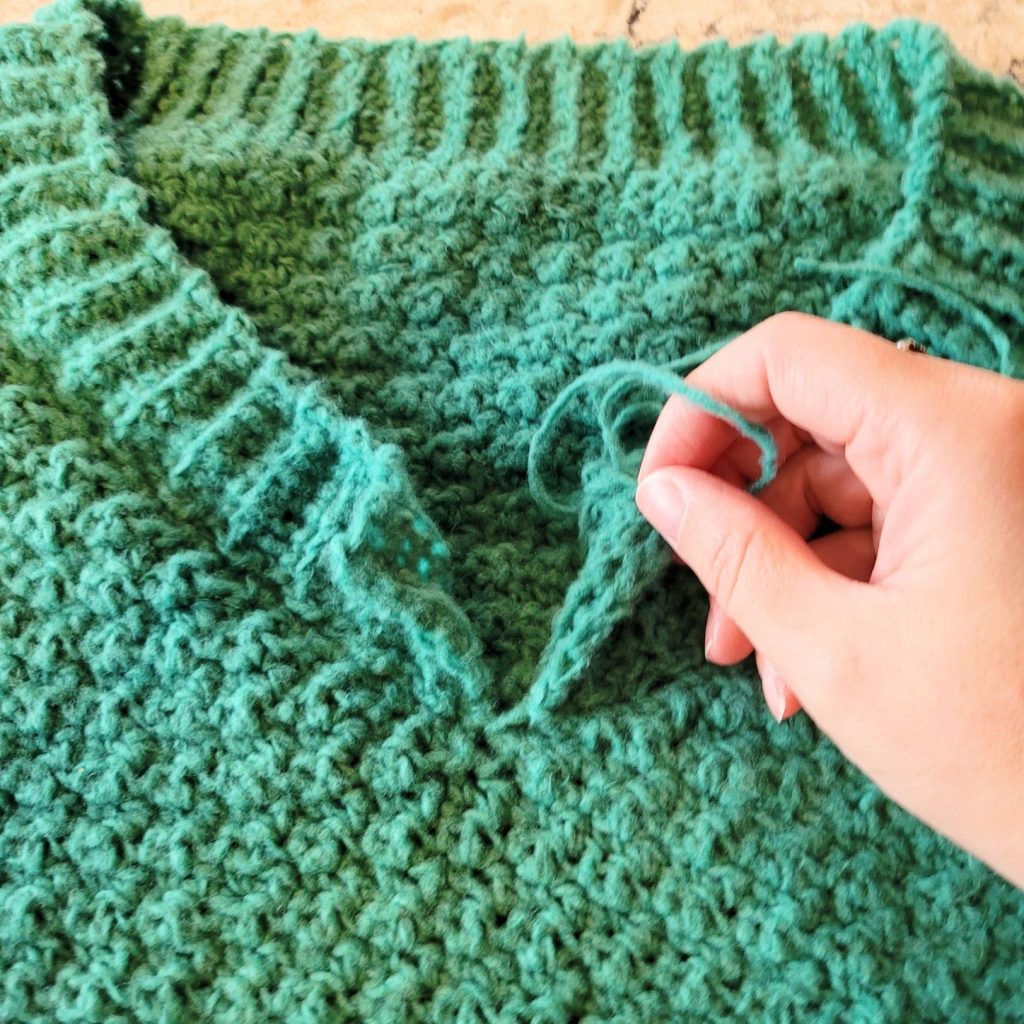
Figure 8
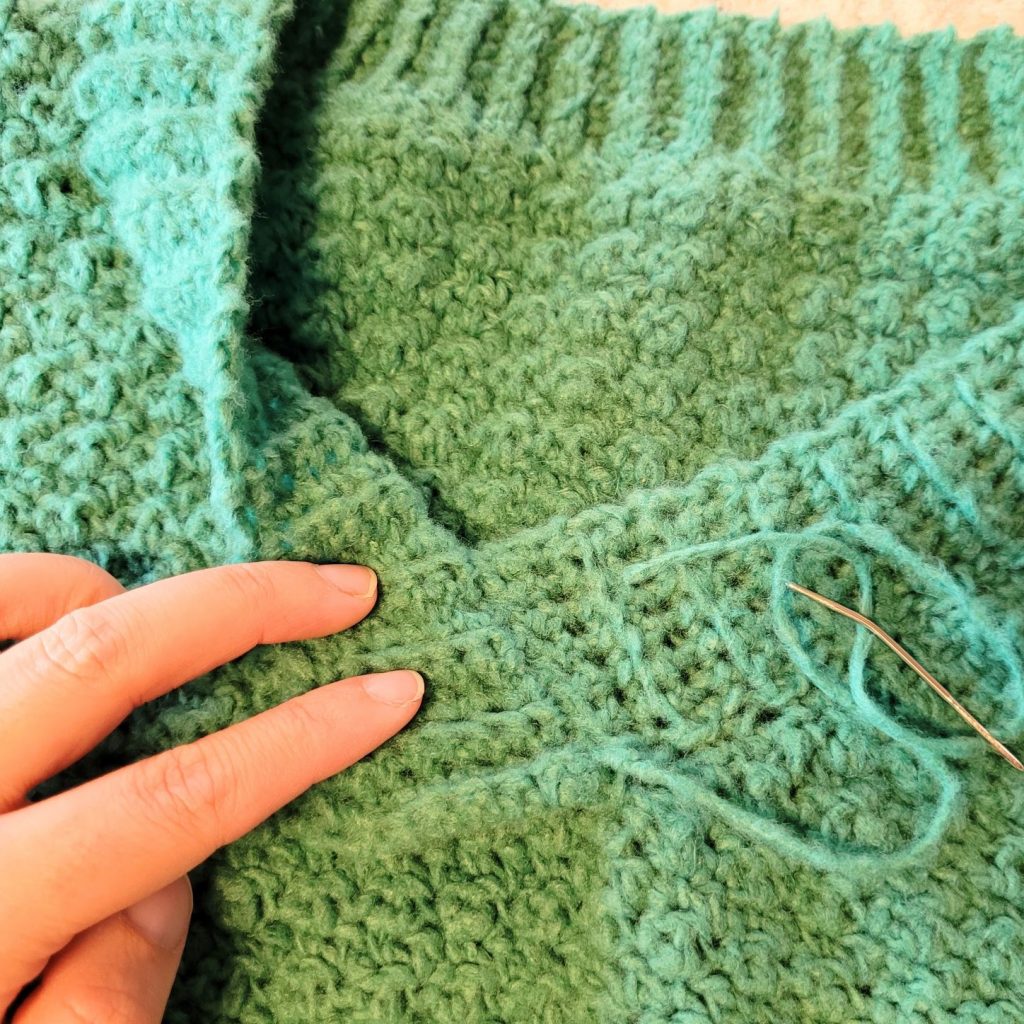
Figure 9
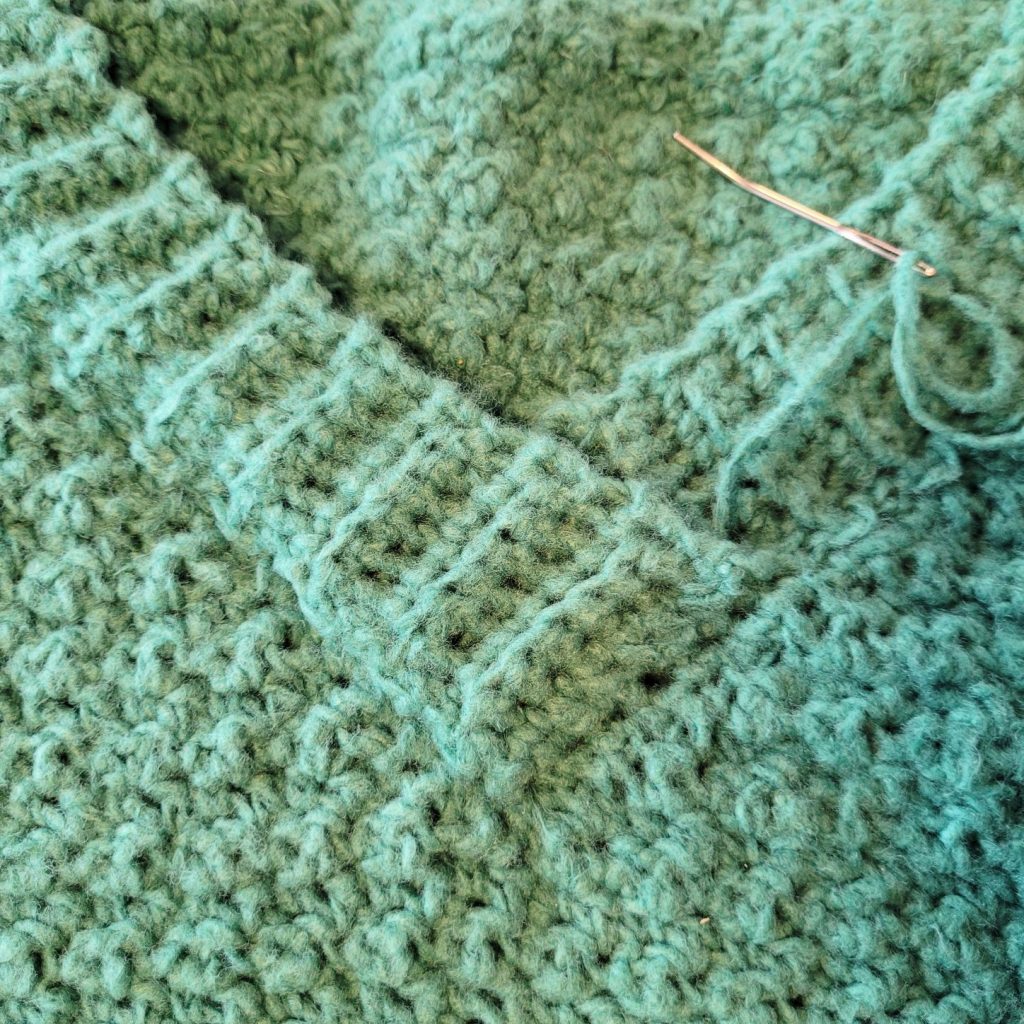
Figure 10
Weave in your ends, and you’re done!
I hope you love your new crochet sweater, and I look forward to seeing all of your beautiful pictures on Ravelry!
If you’d like to know when I post new patterns and tutorials like the Free Crochet Sweater Pattern – Up And Down Pullover, head on over to my Facebook and Instagram and give me a like and a follow!
If you enjoyed The Free Crochet Sweater Pattern – Up And Down Pullover, you may want to check out my other designs!
Free Crochet Sweater Pattern – Up And Down Pullover
And until next time… Happy Hooking! 😉
In row 2 of the upper left decrease rows on the front of the sweater, I’m having trouble figuring out how to end up with an even number of stitches. That row alternates SC and DC across the row and ends with an sc2tog in the 2 remaining stitches after the DC, which leaves me with an odd number.
Ah! Thank you for pointing that out, Amy! The stitch count is correct, but I need to change the row wording. Instead of “Ch1. Sc in 1s st. Dc in next st. *Sc in next st. Dc in next st.** Repeat…” It should say “Ch1. Sc in 1s st. *Dc in next st. Sc in next st.** Repeat…”
I appreciate you finding my mistake. I will fix it right away.