
The Alluvium Top free crochet pattern is copyrighted by I Need It Crochet. You may not copy, share, change, or sell the pattern itself. Also, you may not claim this pattern as your own. All pictures contained in this pattern fall under the copyright and may not be used.
Finished items made from The Alluvium Top free crochet pattern belong to you and you may do what you wish with them. If you choose to sell them on Etsy I would very much appreciate it if you credited me as the pattern designer.


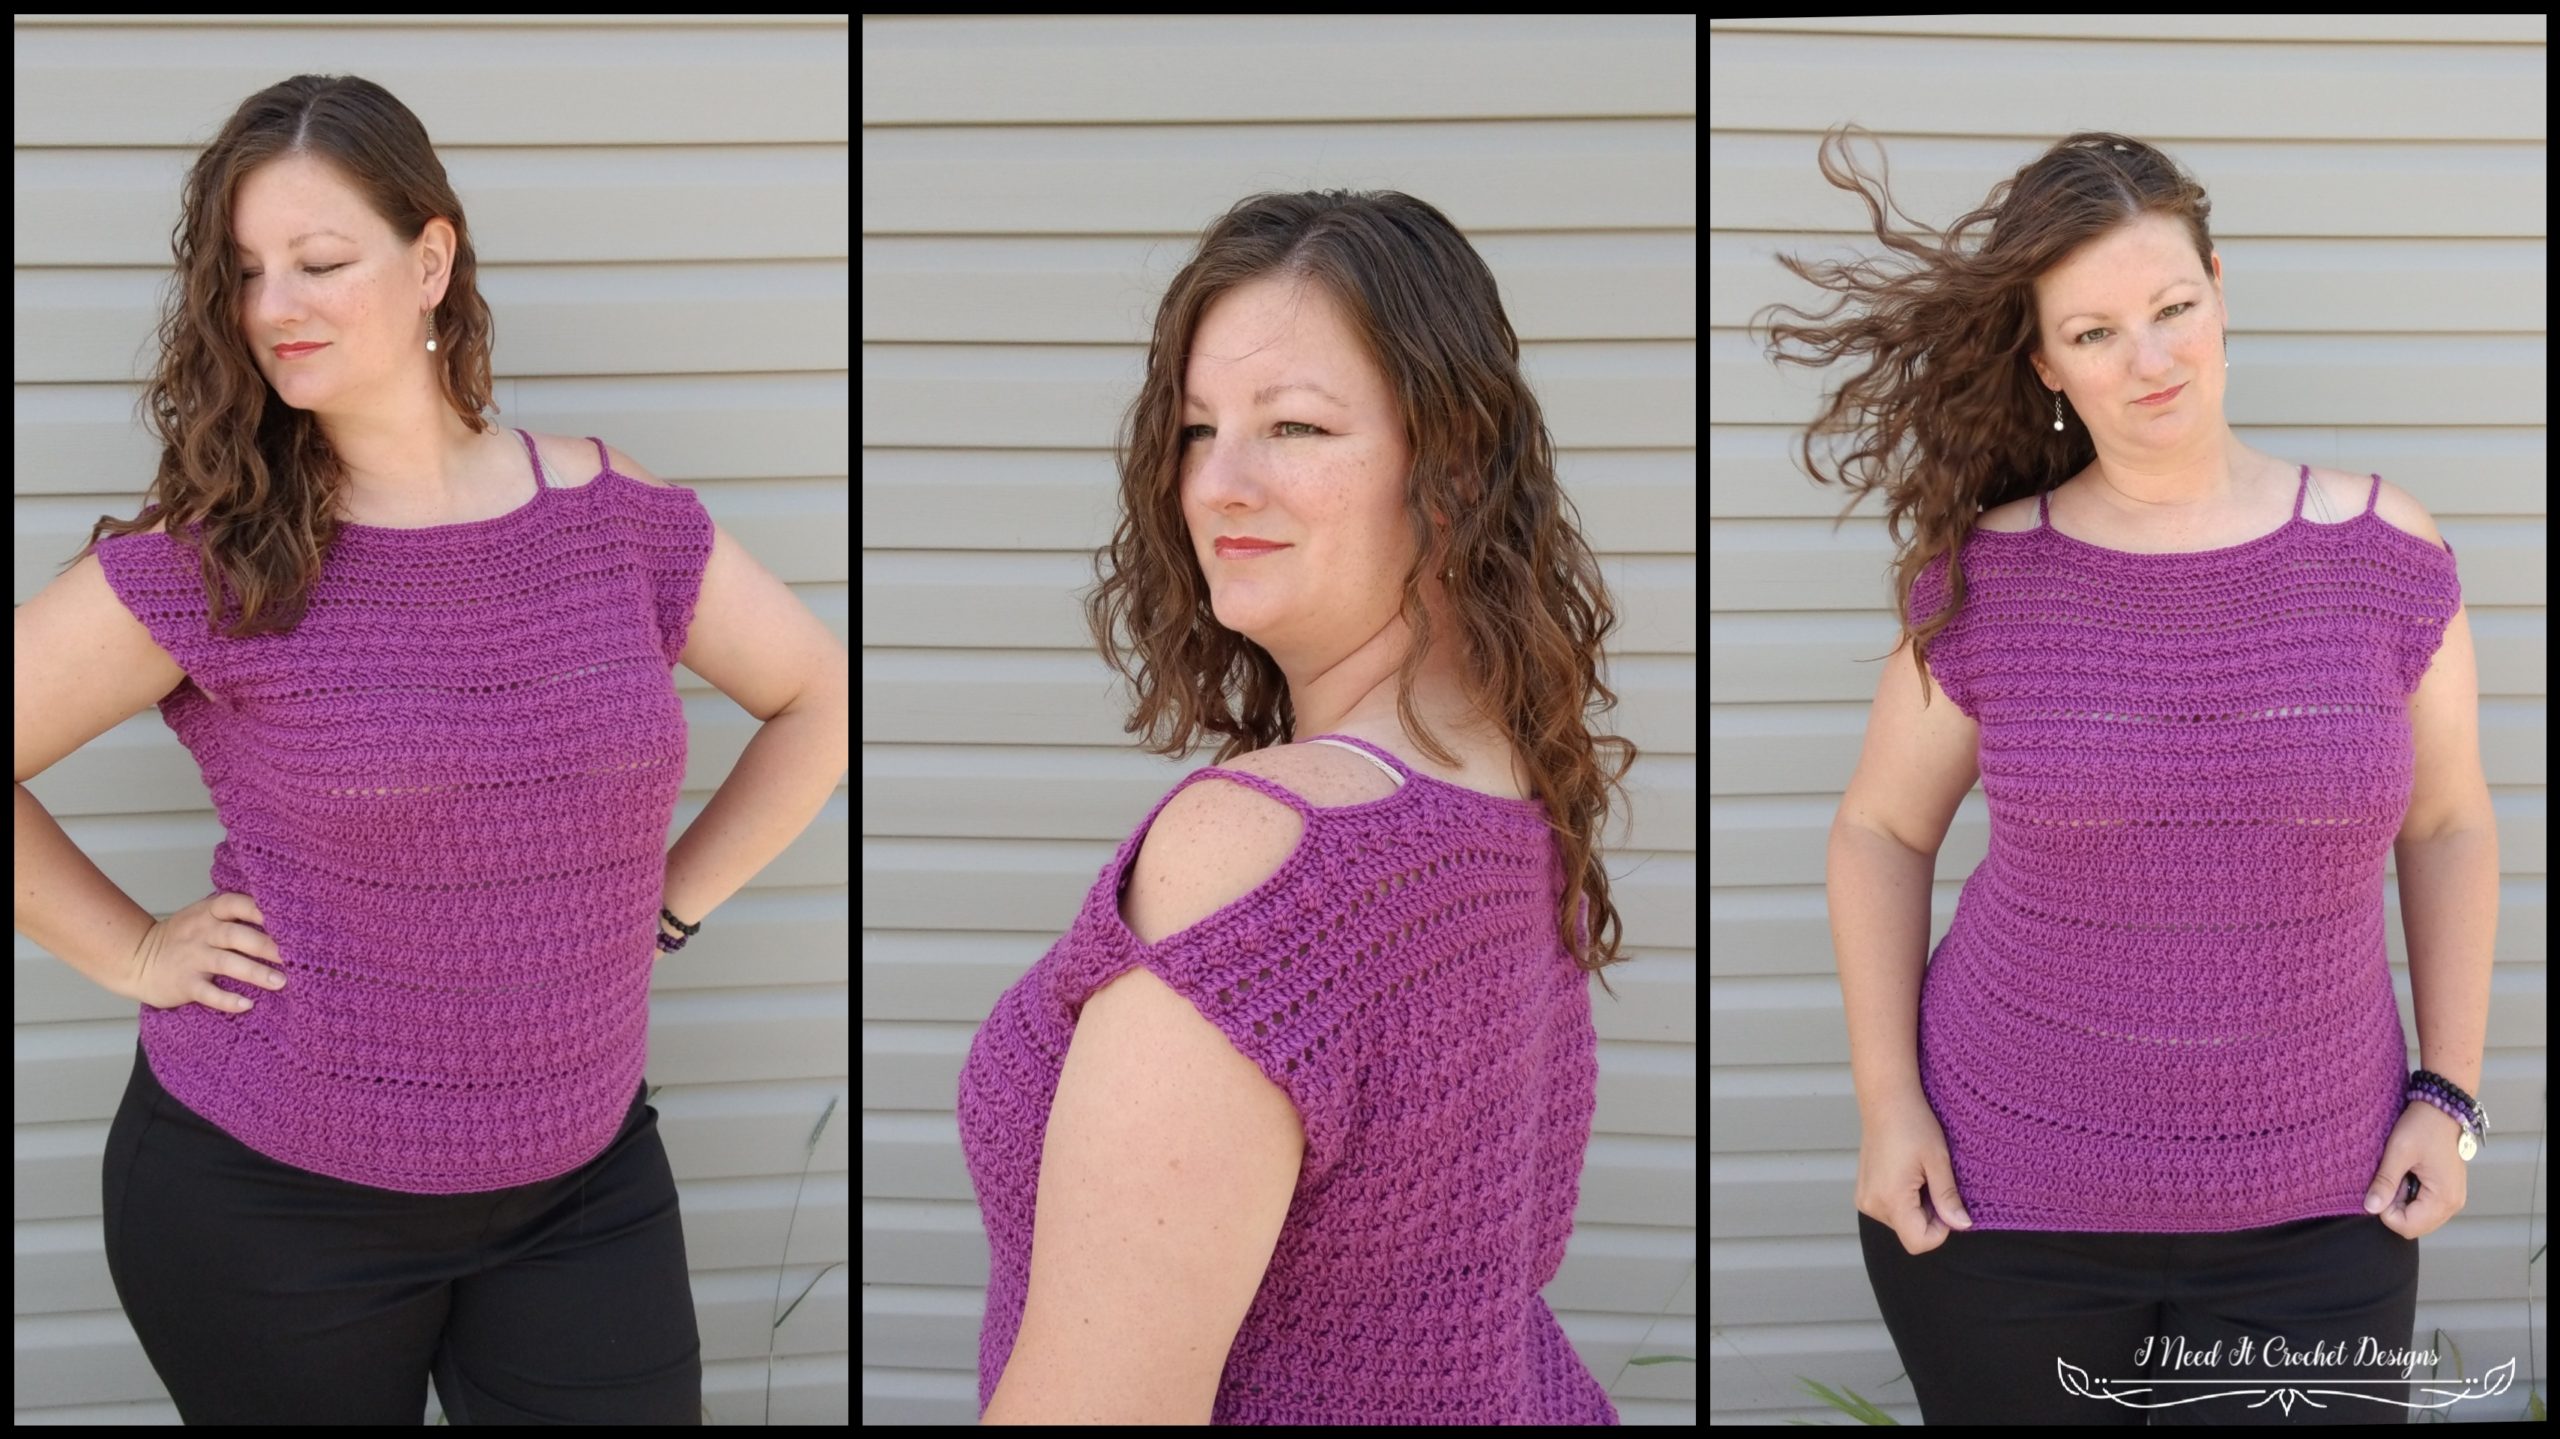
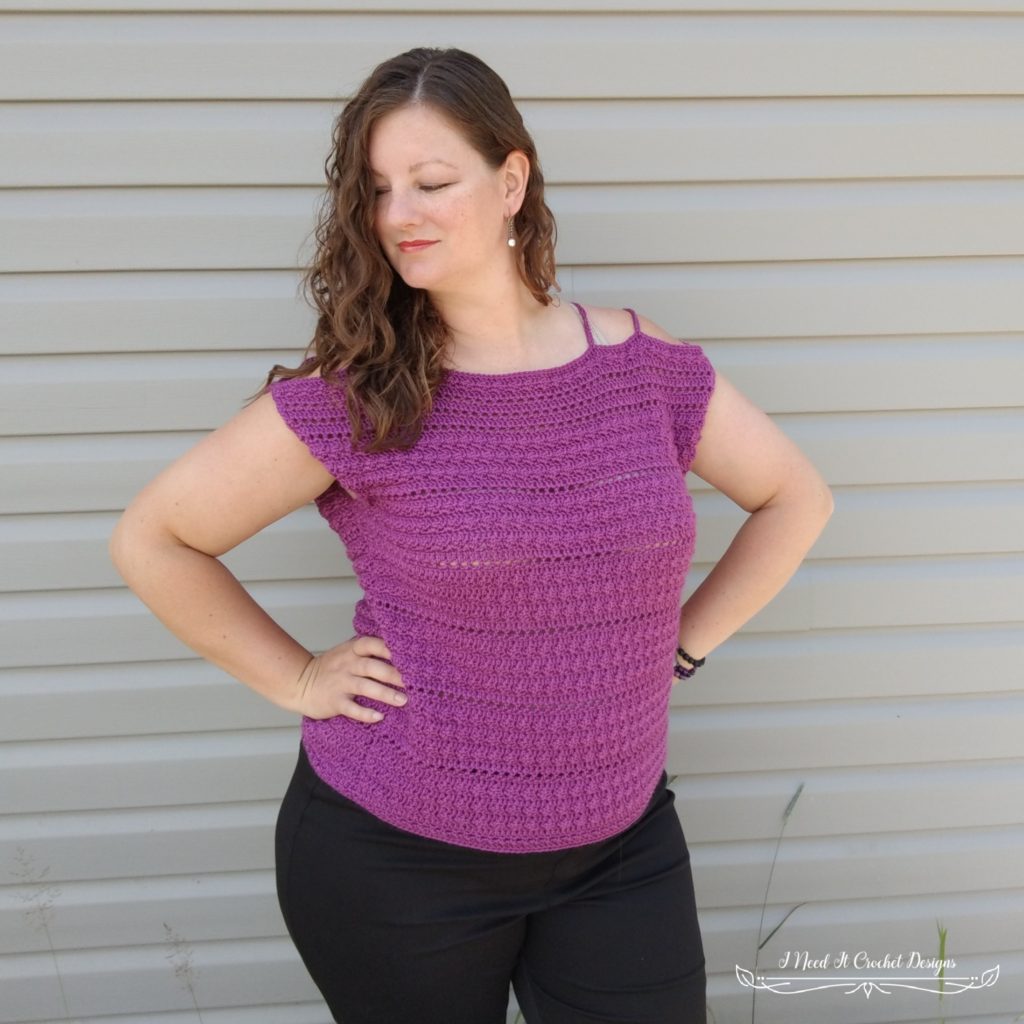
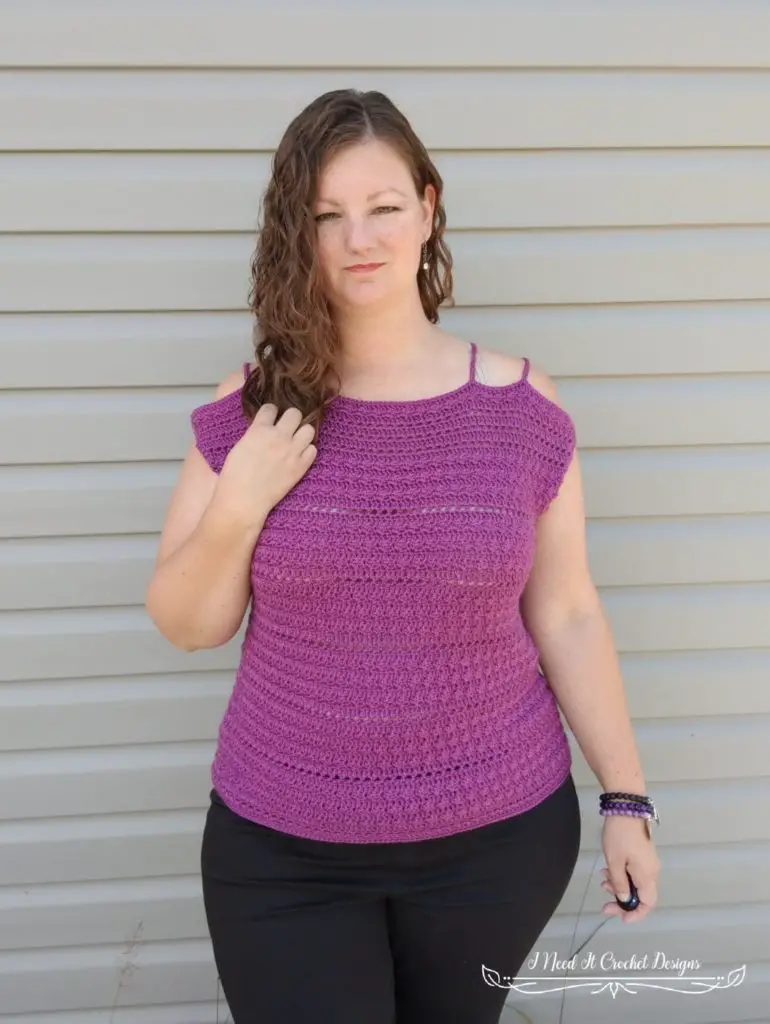
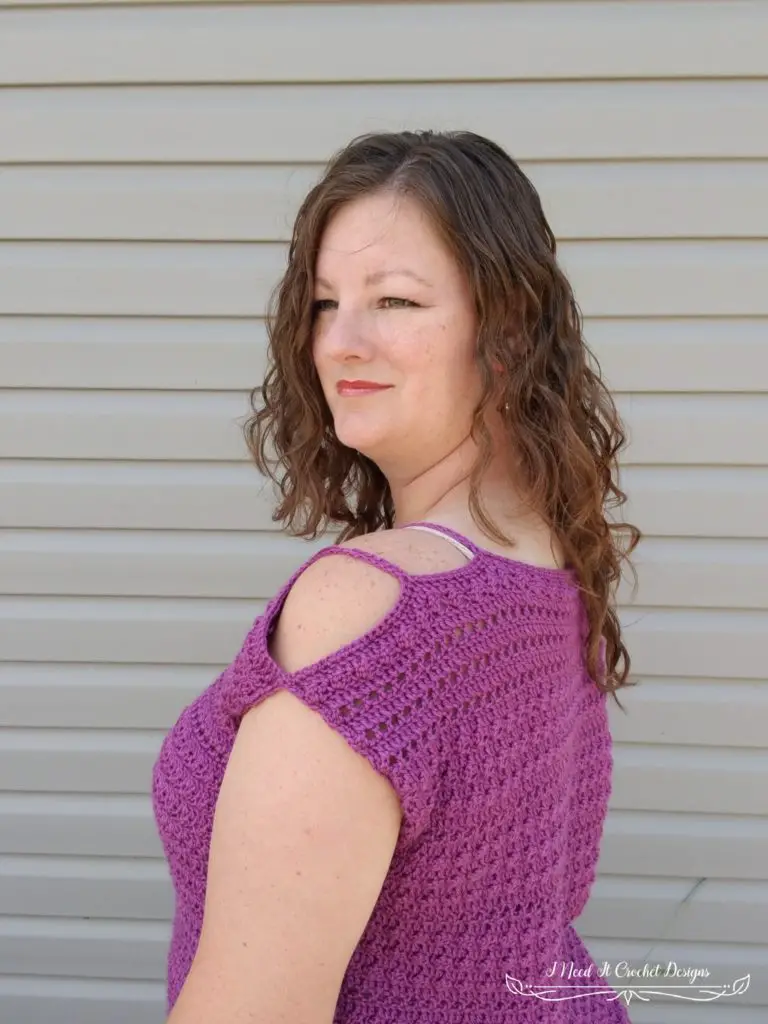
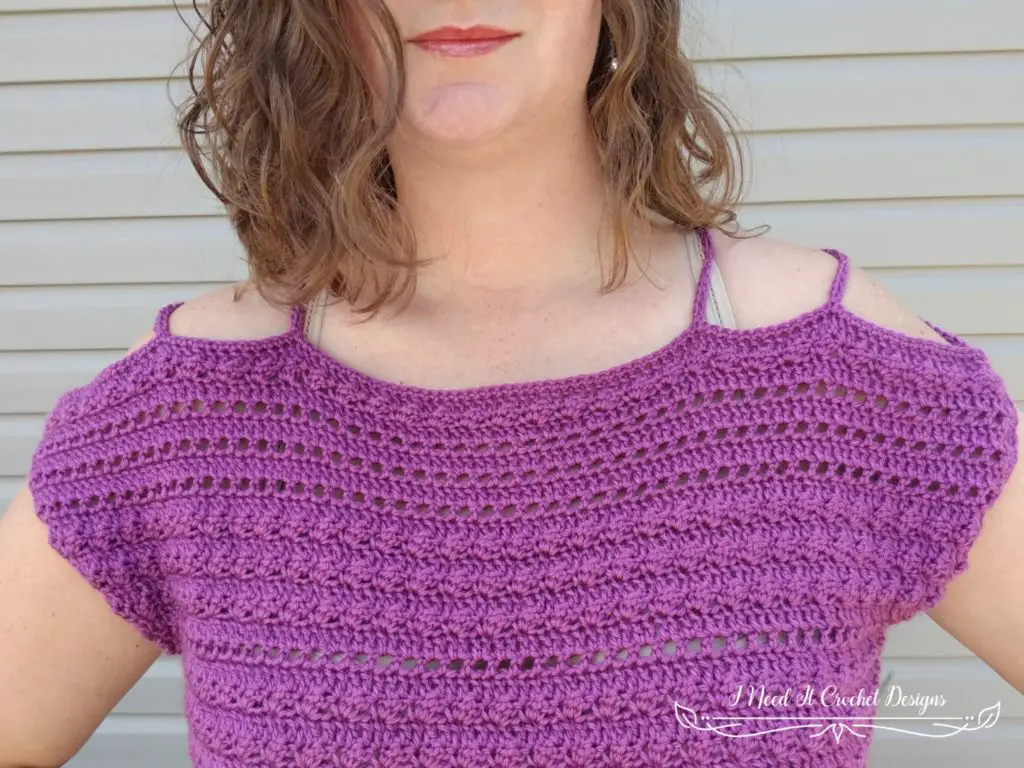
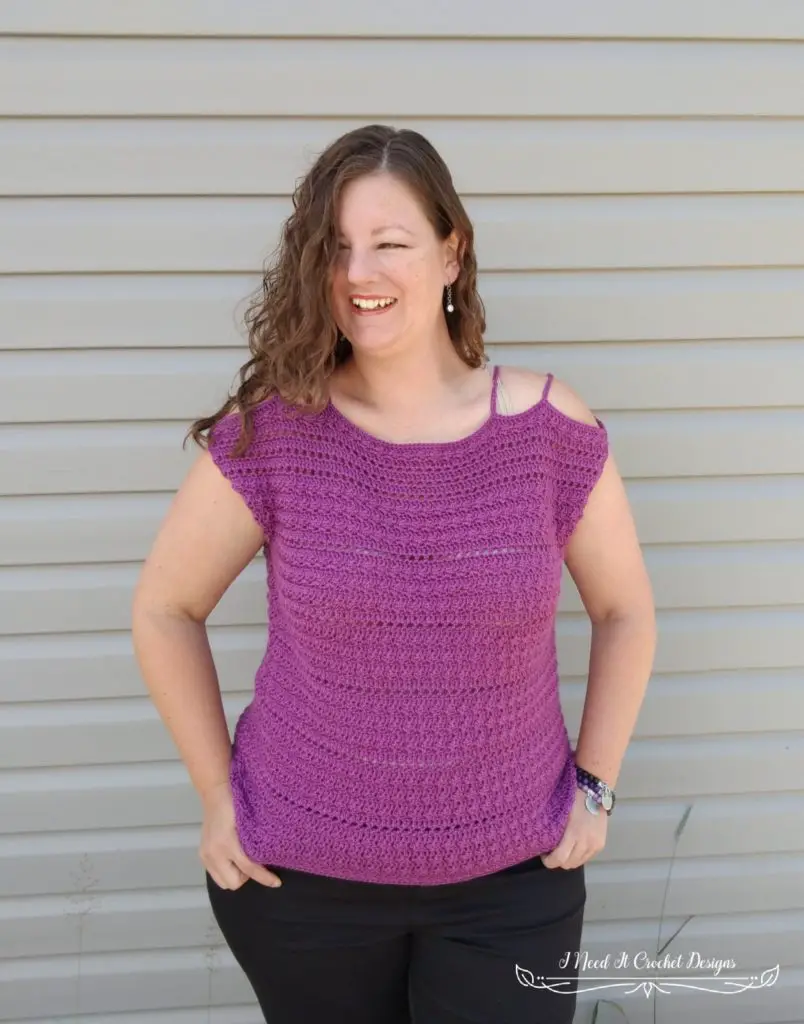
I love it when a pattern just falls out of my head as I crochet it. That was the case with this pattern. I started with a lovely yarn and pretty stitch, and this top just sort of materialized in front of me. The combination of Silt Stitch (sc, 2dc), double crochet, and half double crochet gives this piece an attractive texture, while the light yarn makes it quite wearable for the spring and summer months. And the strappy cold shoulder makes this top trendy and just a little flirty.
I first glanced the Silt stitch in Sarah Hazell’s Crochet Stitch Dictionary. It’s a fantastic book that I’d recommend to any avid crocheter. It is very well written and illustrated with tons of step-by-step photos. I loved the look of the silt stitch. I really does look like the silt deposits found along rivers and streams. The latin name for silt is alluvium, which I thought would be a fitting name for this beautiful top.
Finished Sizes:
Instructions given to fit size X-small; changes for small, medium, large, X-large, 2X-large, 3X-large, 4X-large, and 5X-large are in ()
XS (S, M, L, XL, 2XL, 3XL, 4XL, 5XL)
Finished Bust: 34” (36”, 38”, 40”, 44”, 48”, 52”, 56”, 60”)
Finished Length: Customizable. Length on model shown is 25”.
Materials:
I used Bebe Luv Baby, which is 100% Acrylic, #3 Dk weight yarn.
Any yarn of similar weight would work.
Approximately 900 (1000, 1100, 1200, 1300, 1400, 1500, 1600) yds to make the length shown.
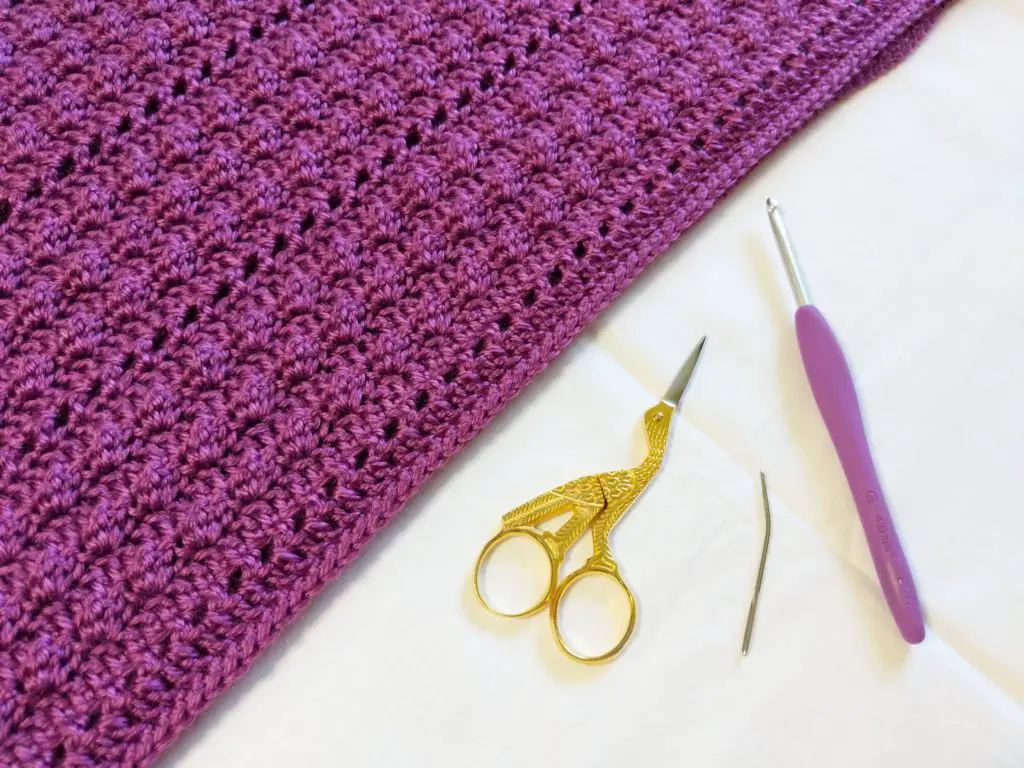
G/4mm Hook
Stitch Markers
Yarn Needle
Scissors
Do you have a favourite brand of hook? My favourite crochet hooks are definitely Clover Amour! As soon as I started using them, I noticed a huge decrease in the strain in my hands, giving me a lot more time to crochet! And if you use this link to buy a set, I’ll get a small commission. 😉
Subscribe to get acces
Read more of this content when you subscribe today.
Gauge:
See gauge swatch pattern below.
Always be sure to make a gauge swatch before you begin. It will save you a lot of time and heartache.
Abbreviations:
Sk = Skip
Sp = Space
St = Stitch
Ss = Slip Stitch
Ch = Chain
Sc = Single Crochet
Hdc = Half Double Crochet
Dc= Double Crochet
Fdc = Foundation Double Crochet
Notes:
Ch1 at the beginning of a row is never considered a stitch.
Ch3 at the beginning of a row is always considered a Dc.
Ch1 between Hdc stitches is always considered a stitch.
I have added many pictures to help you along the way.
The model above has a 40” bust and is wearing a size Large.
Choose your size according to the finished measurements noted above and your preferences.
Gauge Swatch (4 ¼” x 4 ¼”)
Ch 24.
Or Fdc 22 and proceed to row 2.
1. Dc in 4th ch from hook and each ch across. Turn. – 22 dc
2. Ch 1. (Sc, 2dc) in 1st st. Sk 2 sts. *(Sc, 2dc) in next st. Sk 2 sts. ** Repeat from * to ** until there are only 3 sts left unworked. Sc in last st. Turn. – 7 (sc, 2dc) groups + 1 sc
3. Ch 3. Dc in next st and each st across. Turn. – 22 dc
Repeat rows 2 & 3 until you have 12 rows total. Your square should be 4 ¼” X 4 ¼”. Adjust your hook size and swatch again if your square is not the right size.
Instructions
This top is made of two identical rectangular panels. You will begin by making the first panel from the bottom up. Then the second, but at the very end of making the second you will join the two panels together with chains and single crochet. Then you will seam up the sides, finish off the bottom hem, and finish off the arm holes.
Panel 1
Ch 87 (93, 99, 105, 117, 123, 135, 147, 153)
Or Fdc 85 (91, 97, 103, 115, 121, 133, 145, 151) and proceed to row 2.
1. Dc in 4th ch from hook and each ch across. Turn. – 85 (91, 97, 103, 115, 121, 133, 145, 151) dc
2. Ch 1. Hdc in 1st st. *Ch 1 , sk 1 st, hdc in next st. ** Repeat from * to ** across. Turn. – 42 (45, 48, 51, 57, 60, 66, 72, 76) hdc, ch1 groups + 1 hdc
3. Ch 3. Dc in next st and each st across. Turn. – 85 (91, 97, 103, 115, 121, 133, 145, 151) dc
4. Ch 1. (Sc, 2dc) in 1st st. Sk 2 sts. *(Sc, 2dc) in next st. Sk 2 sts. ** Repeat from * to ** until there are only 3 sts left unworked. Sc in last st. Turn. – 28 (30, 32, 34, 38, 40, 44, 48, 50) (sc, 2dc) groups + 1 sc
5. Repeat row 3.
6. Repeat Row 4.
7. Repeat Row 3.
8. Repeat Row 4.
9. Repeat row 3.
10. Repeat row 2.
It would be a good idea to measure the width if your piece at this point. It should be half the bust measurement noted with the sizing above. Tension can be tricky, and it is not uncommon for our tension to change when making a large project as opposed to a small gauge swatch. If your work is more than an inch off, I would suggest starting over with a different hook size.
Repeat rows 3 – 10 five more times. You will now have 50 rows. Note: This will result in a top that is 25” long, from shoulder to bottom hem. If you would like your top to be a different length, simply add or subtract pattern row repeats. Each repeat of rows 3 – 10 measures approximately 3”.
51. Ch 3. Dc in next st and each st across. Turn. – 85 (91, 97, 103, 115, 121, 133, 145, 151) dc
52. Ch 1. Hdc in 1st st. *Ch 1 , sk 1 st, hdc in next st. ** Repeat from * to ** across. Turn. – 42 (45, 48, 51, 57, 60, 66, 72, 76) hdc, ch1 groups + 1 hdc
53. Repeat Row 51.
54. Repeat Row 52.
55. Repeat Row 51.
56. Ch 1. (Sc, 2dc) in 1st st. Sk 2 sts. *(Sc, 2dc) in next st. Sk 2 sts. ** Repeat from * to ** until there are only 3 sts left unworked. Sc in last st. Turn. – 28 (30, 32, 34, 38, 40, 44, 48, 50) (sc, 2dc) groups + 1 sc
57. Repeat Row 51.


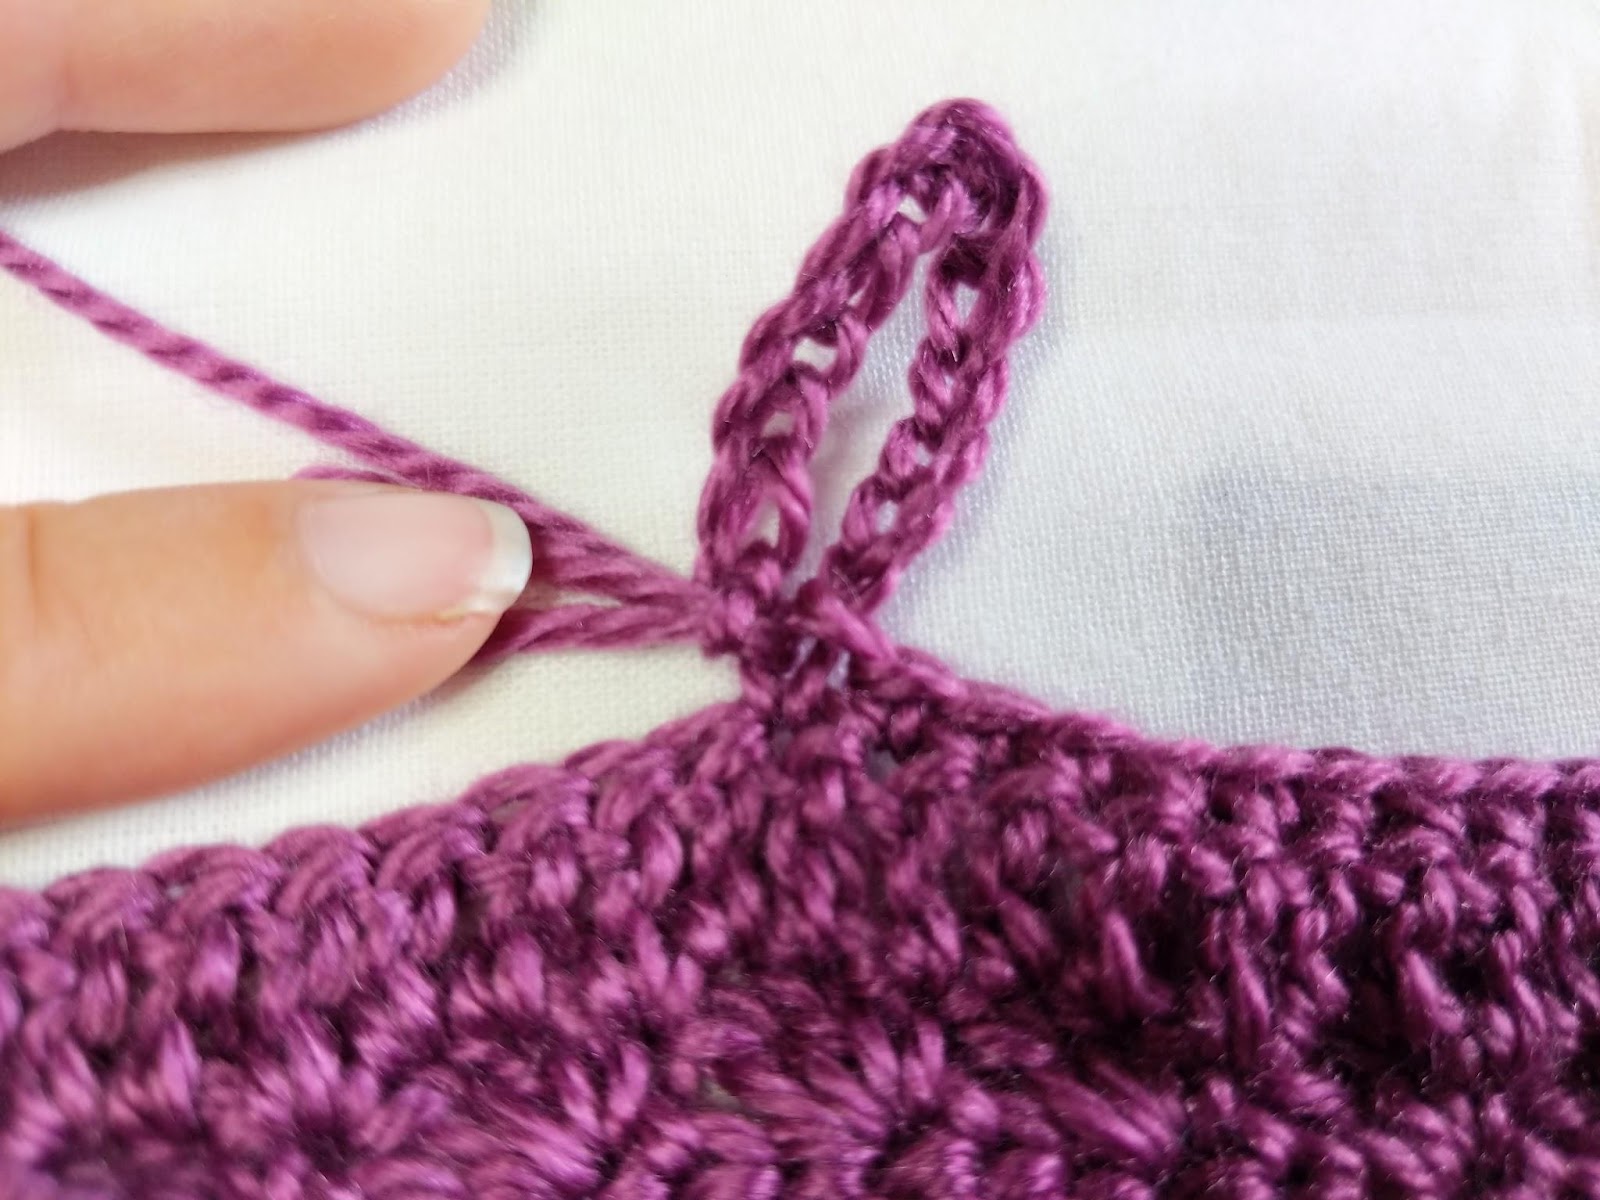
58. Ch 1. Sc in 1st st and next 18 (19, 19, 19, 20, 21, 27, 30, 33) sts.
Ch 13, ss into side of last sc made. (See Figures 1-3 above.)
Sc in next 12 (12, 12, 12, 14, 14, 14, 15, 15) sts.
Ch 15, ss into side of last sc made.
Sc in next 23 (27, 33, 39, 45, 49, 49, 53, 53) sts.
Ch 15, ss into side of last sc made.
Sc in next 12 (12, 12, 12, 14, 14, 14, 15, 15) sts.
Ch 13, ss into side of last sc made.
Sc in each st to the end. Bind off. – 85 (91, 97, 103, 115, 121, 133, 145, 151) sc, 4 ch loops
Note: The last row is the wrong side of your work.
You are finished making your first panel. Now continue on to the second panel.
Panel 2
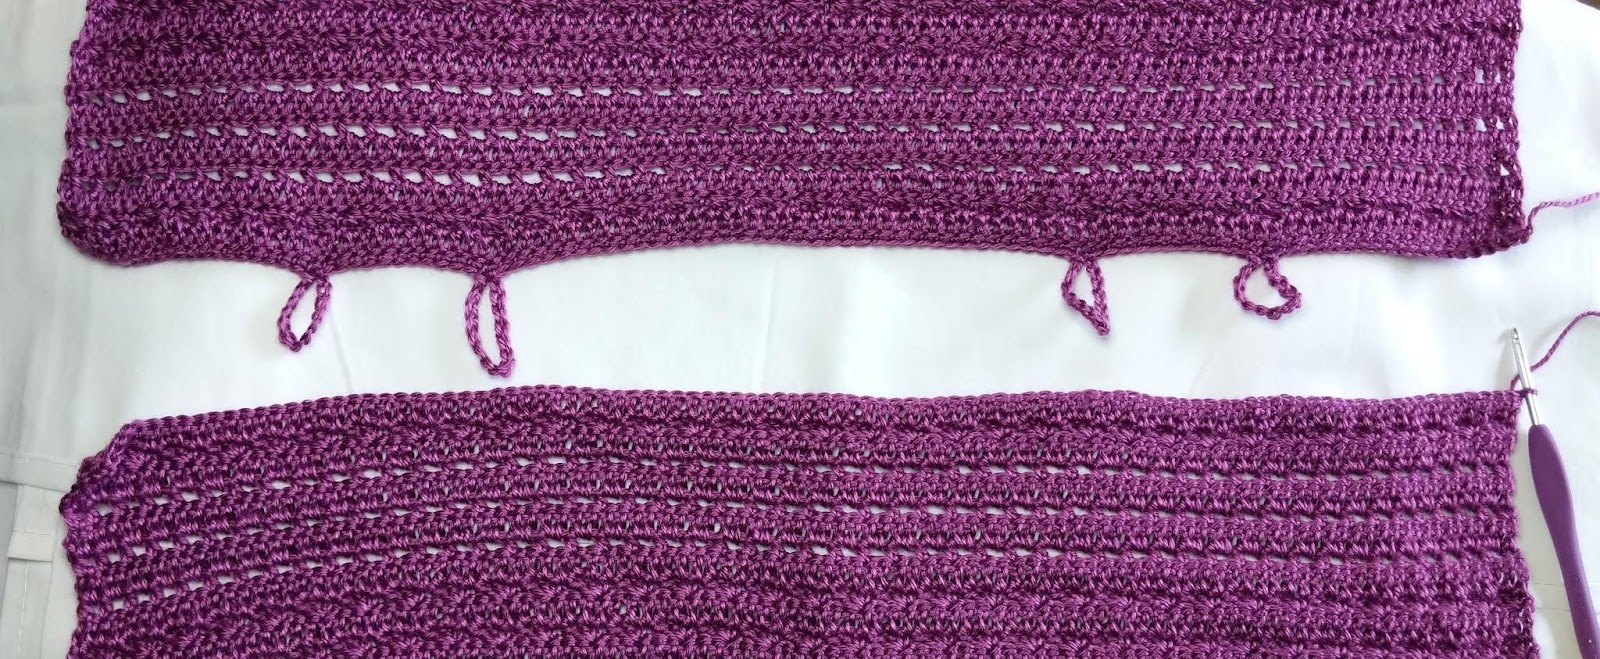
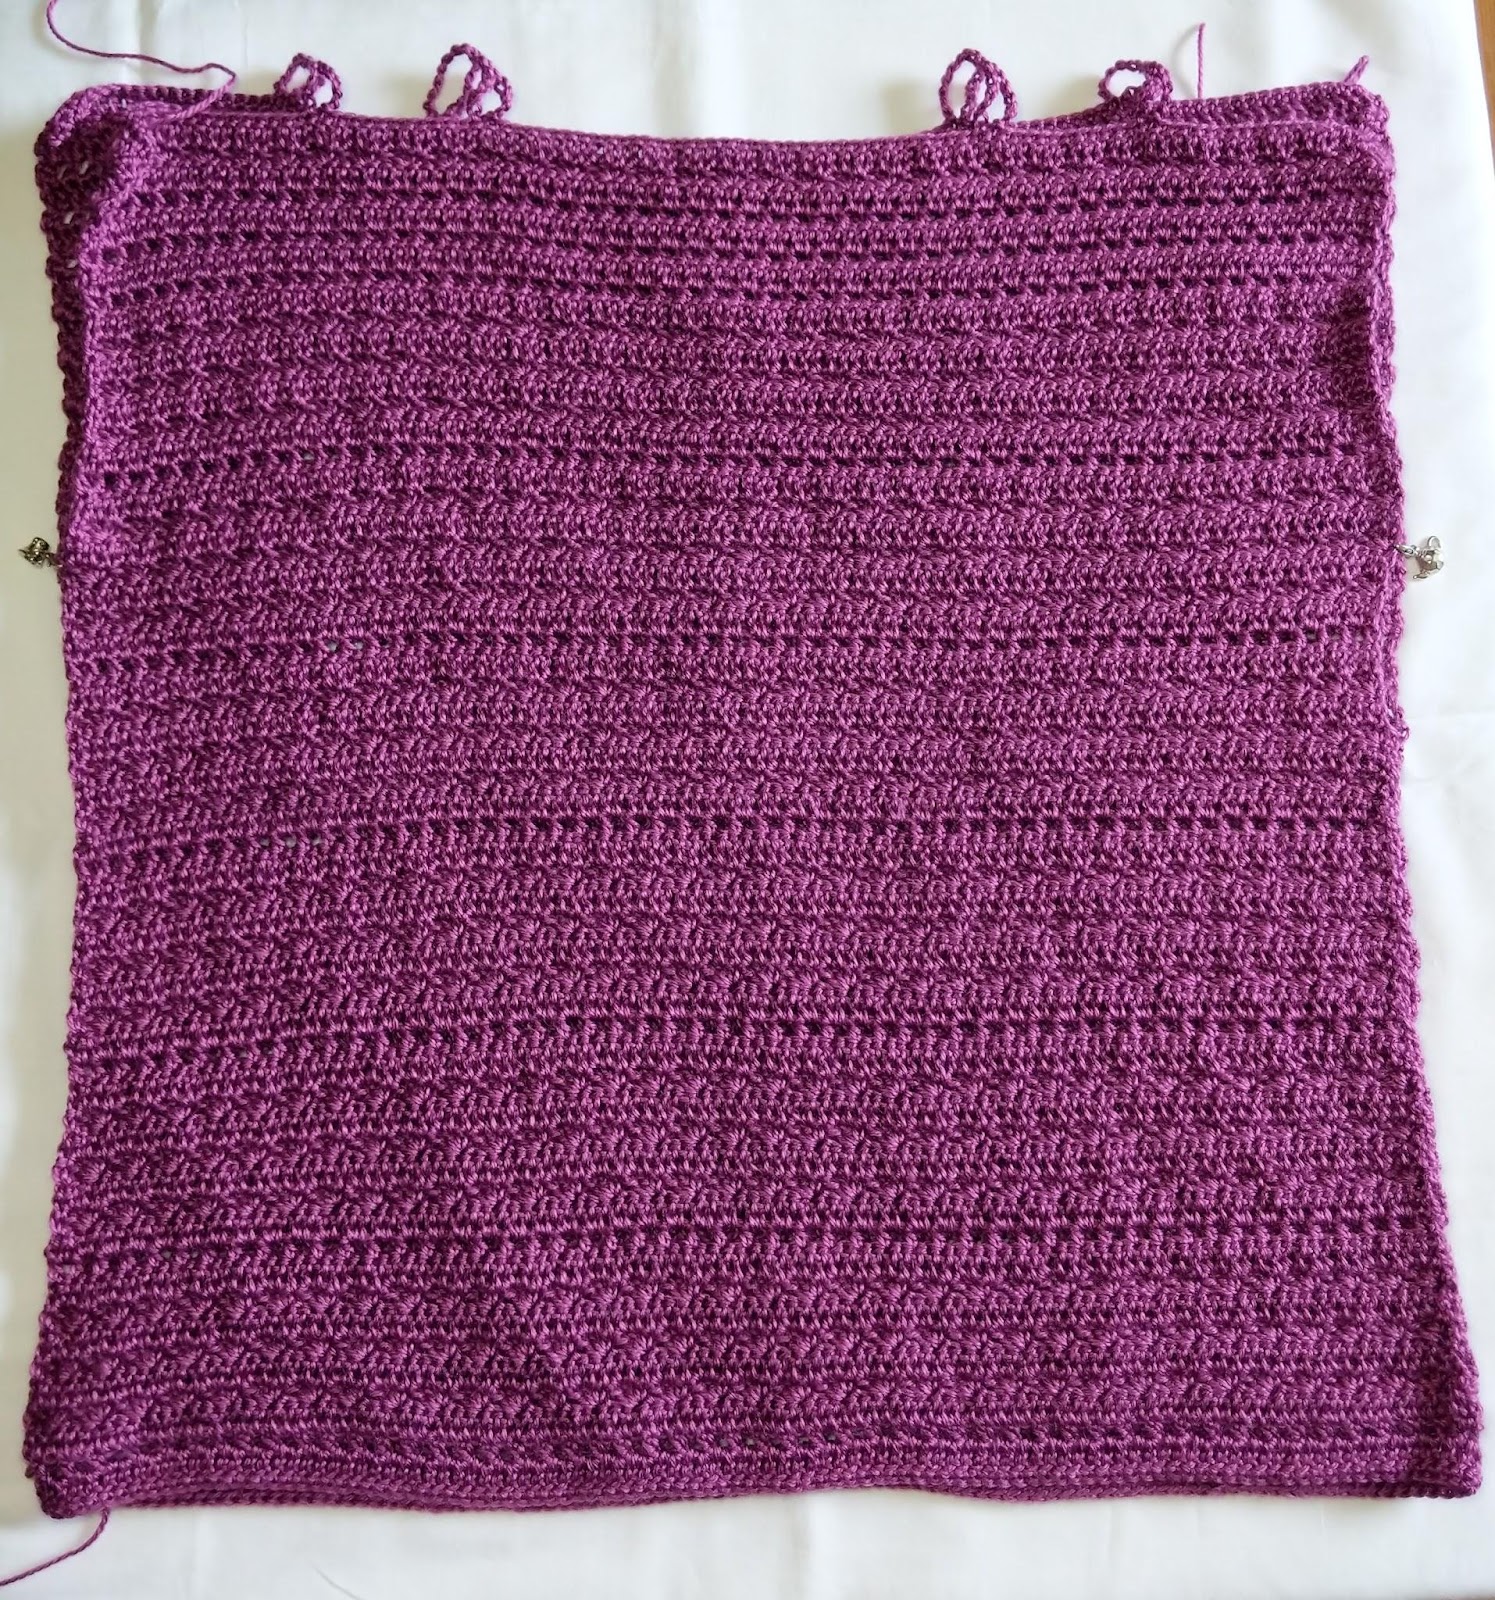
Work rows 1 – 57 just as you did for the first panel. Your last row will be joining your second panel to your first, so arrange your first panel so that the wrong side is facing you, but the panel is upside down, with the loops pointing in your direction. (See Figure 4 below.)
Work row 58 as follows:
58. Ch 1. Sc in 1st st and next 18 (19, 19, 19, 20, 21, 27, 30, 33) sts.
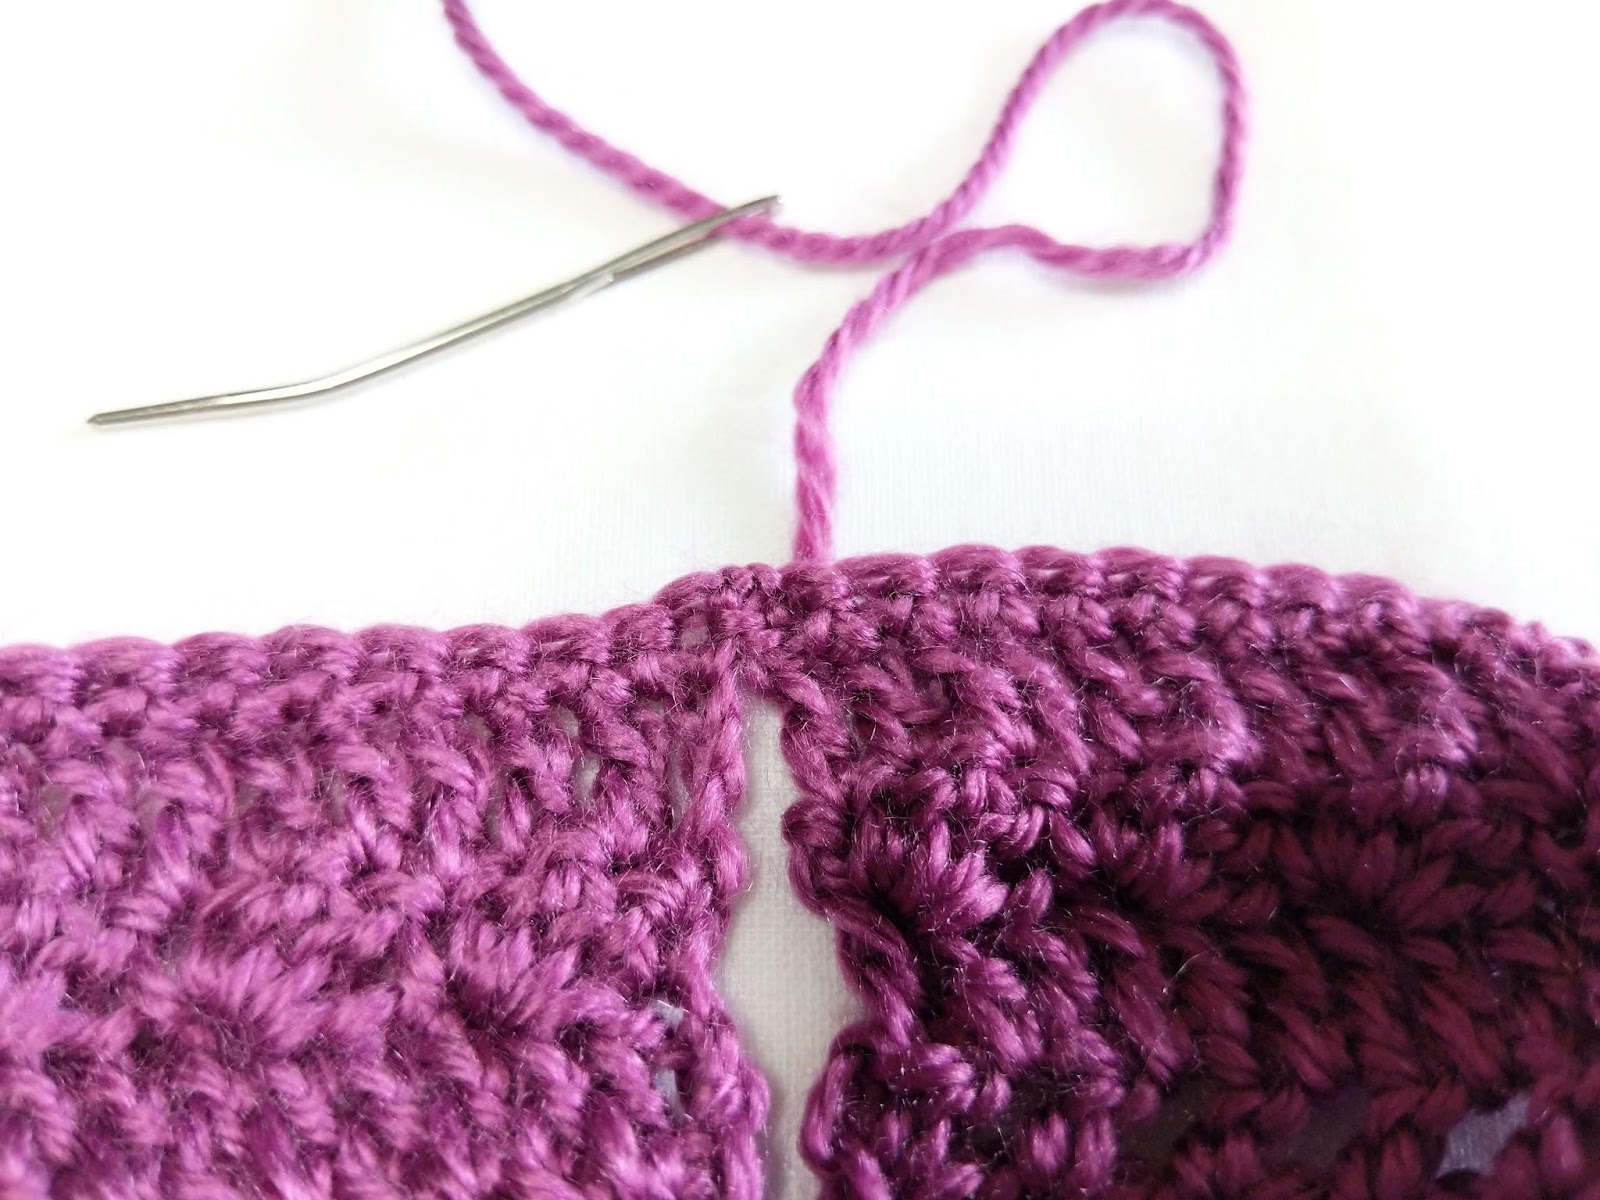
Ch 6, sc into the corresponding loop on your first panel, ch 6, ss into side of last sc made. (See Figure 5 below.)
Sc in next 12 (12, 12, 12, 14, 14, 14, 15, 15) sts.
Ch 7, sc into the corresponding loop on your first panel, ch 7, ss into side of last sc made.
Sc in next 23 (27, 33, 39, 45, 49, 49, 53, 53) sts.
Ch 7, sc into the corresponding loop on your first panel, ch 7, ss into side of last sc made.
Sc in next 12 (12, 12, 12, 14, 14, 14, 15, 15) sts.
Ch 6, sc into the corresponding loop on your first panel, ch 6, ss into side of last sc made.
Sc in each st to the end. Bind off. – 85 (91, 97, 103, 115, 121, 133, 145, 151) sc, 4 ch & sc loops

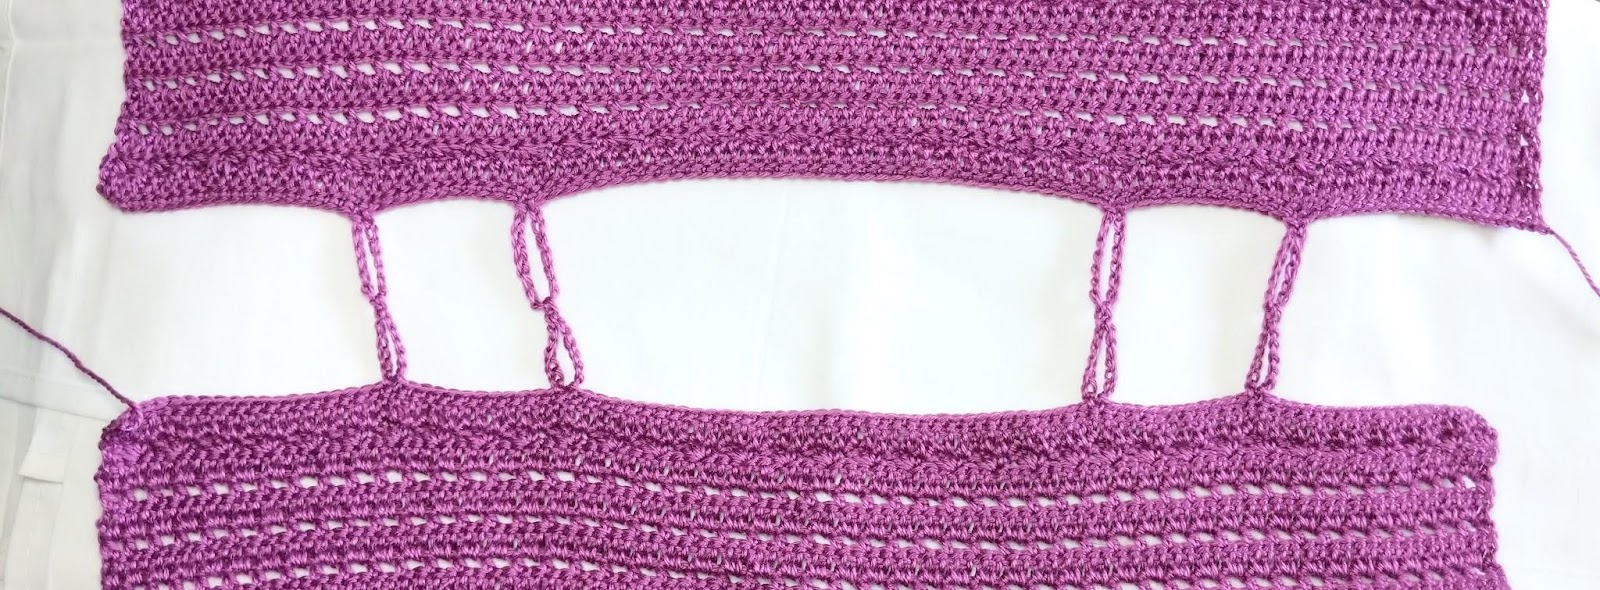
You should now have two panels joined at the top by loops of ch and sc stitches. (See figure 6 above.) Now would be a good time to try on your garment to check the fit of the straps. We all have different body shapes. Some have wide shoulders, some have narrow shoulders. If you are not happy with where your straps sit, you can adjust them by frogging them and redoing them with more or less sc in between each loop. Be sure to adjust them the same way for both sides. We will now seam up the sides.
Side Seaming
First, you have to decide how big you would like your armholes. The easiest way to do this is to try the garment on and place a stitch marker where you would like the armpit to be. Then, lay out your piece so that the right side of the panels are facing each other. Find the stitch marker you placed for your armpit and replace it with a locking stitch marker. Find the corresponding row on the other panel and use your locking stitch marker to hold the two rows together. (See figures 7 and 8 below.) Then find the same rows on the other side and place a locking stitch marker in the other armpit. For my top, I ended up placing my armpit in row 38.
Starting at the bottom, whip stitch up the sides. After you have seamed the sides, you may want to try on your top again to make sure you’re happy with the armholes. It is easiest to fix it now, before we move on.

Armhole and Bottom Hem Finishing
Next we will finish off the armholes of your Alluvium Top. I find it easier to do this if you join the top corners together first. To do this, simply thread the yarn end from one of the panels onto a needle and tie the two corners together (see figure 9). Then, with the right side of your garment facing you, join your yarn in the armpit and sc evenly up the side of the armhole. Place 1 sc in the end of each (sc, 2dc) row, 2 sc in the end of each hdc row, and 2 sc in the end of each dc row. Work this way until you come to the top row. After you have placed a sc in the side of the top row of your panel, place a sc in the top row of the other panel (see figure 10), then sc evenly down the side of the armhole in the same manner as before. Join to your first sc with a ss, then bind off. Repeat for the other armhole.

Now we will finish off the bottom hem. With the right side of your garment facing you, join your yarn near either seam. Sc in each st around. Ss to the 1st sc. Bind off. You should have – 170 (182, 194, 206, 230, 242, 266, 290, 302) sc.
I hope you enjoyed making your Alluvium Top. It is a great summer piece, but you can also wear it into fall just by throwing on a cardigan or blazer.
I had to include this image in here. When I was in the middle of a photo shoot and trying my best to look good my kids made me laugh and this is what that looks like. They are crazy and hilarious and I love them fiercely. I’m so lucky to have them. <3
I look forward to seeing all your beautiful pictures on Ravelry!
If you’d like to know when I post new patterns and tutorials, head on over to my Facebook and Instagram and give me a like and a follow!
If you enjoyed this free pattern for The Alluvium Top, you may want to check out my other designs!