
Breezy Batwing Tee – Free Crochet Top Pattern
The Breezy Batwing Tee – Free Crochet Top Pattern is copyrighted by I Need It Crochet. You may not copy, share, change, or sell the pattern itself. Also, you may not claim this pattern as your own. All pictures contained in this pattern fall under the copyright and may not be used.
Finished items made from the Breezy Batwing Tee – Free Crochet Top Pattern belong to you, and you may do what you wish with them. If you choose to sell them on Etsy, I would very much appreciate it if you credited me as the pattern designer.


Or… Just scroll down to see it for free!
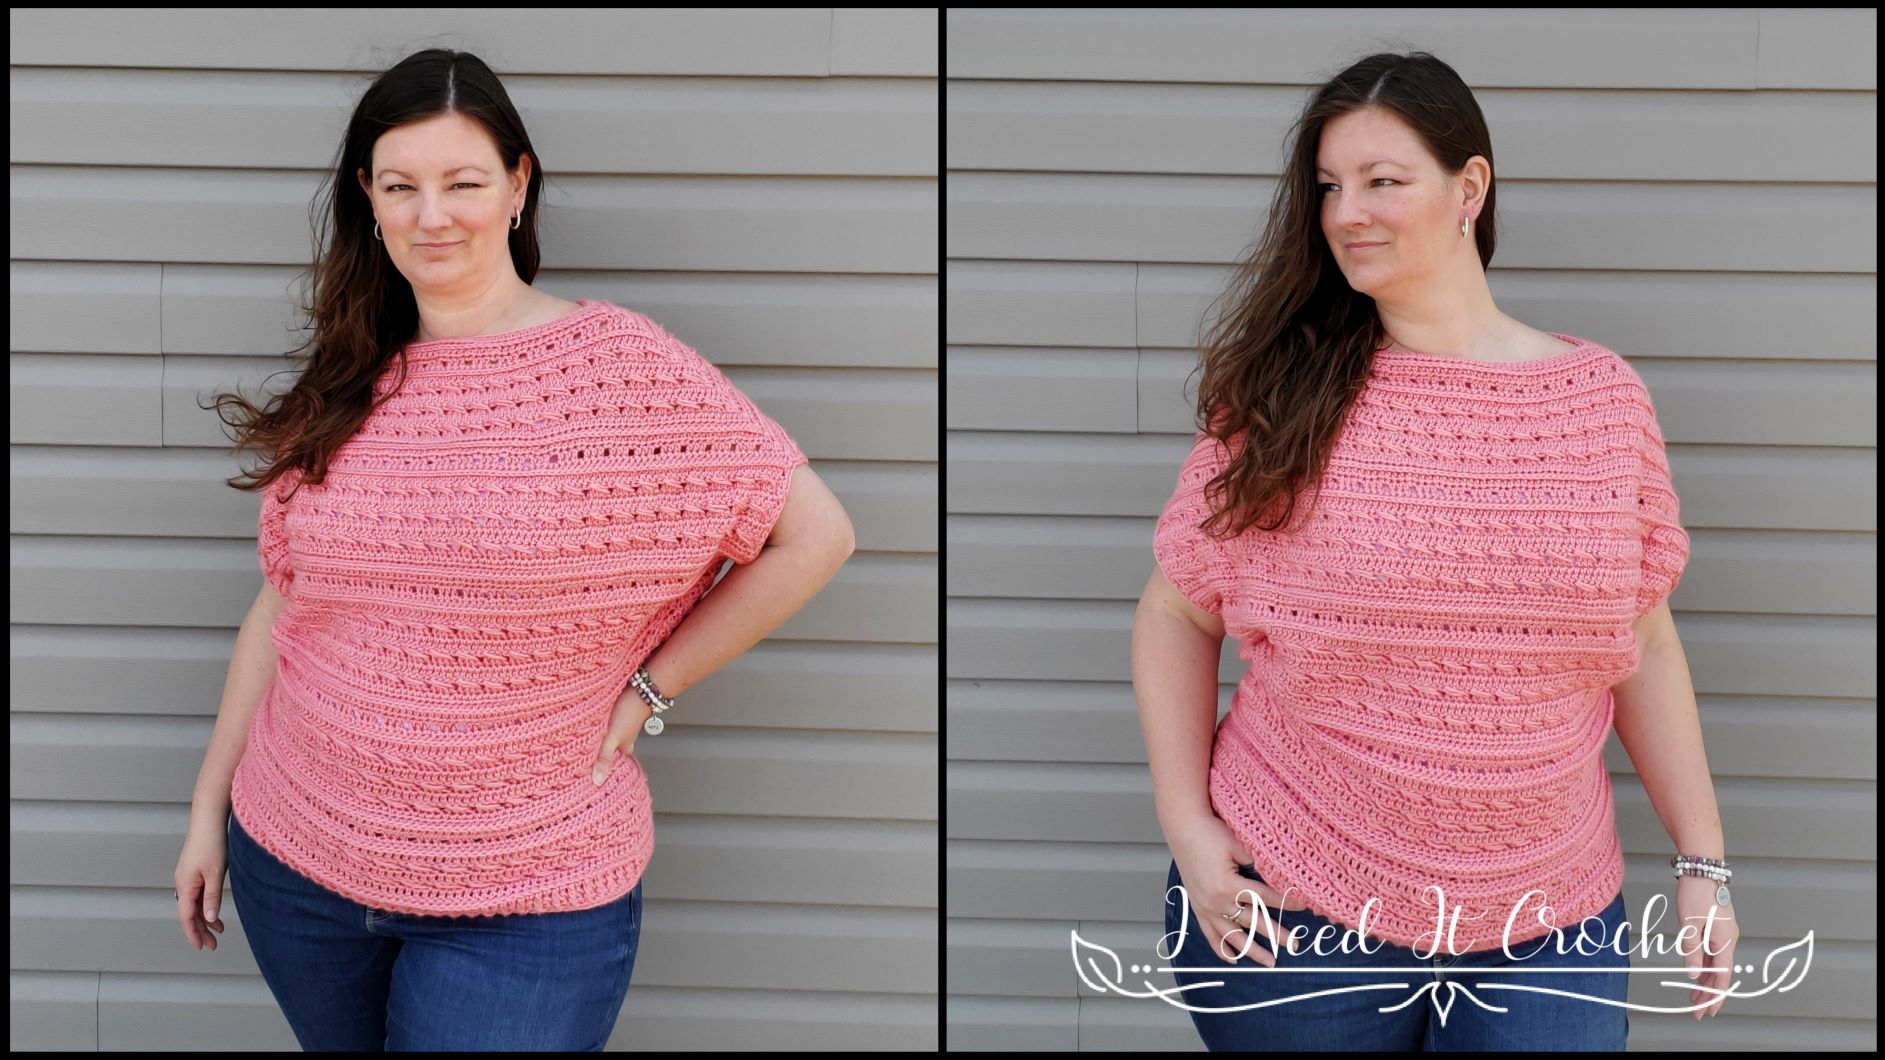
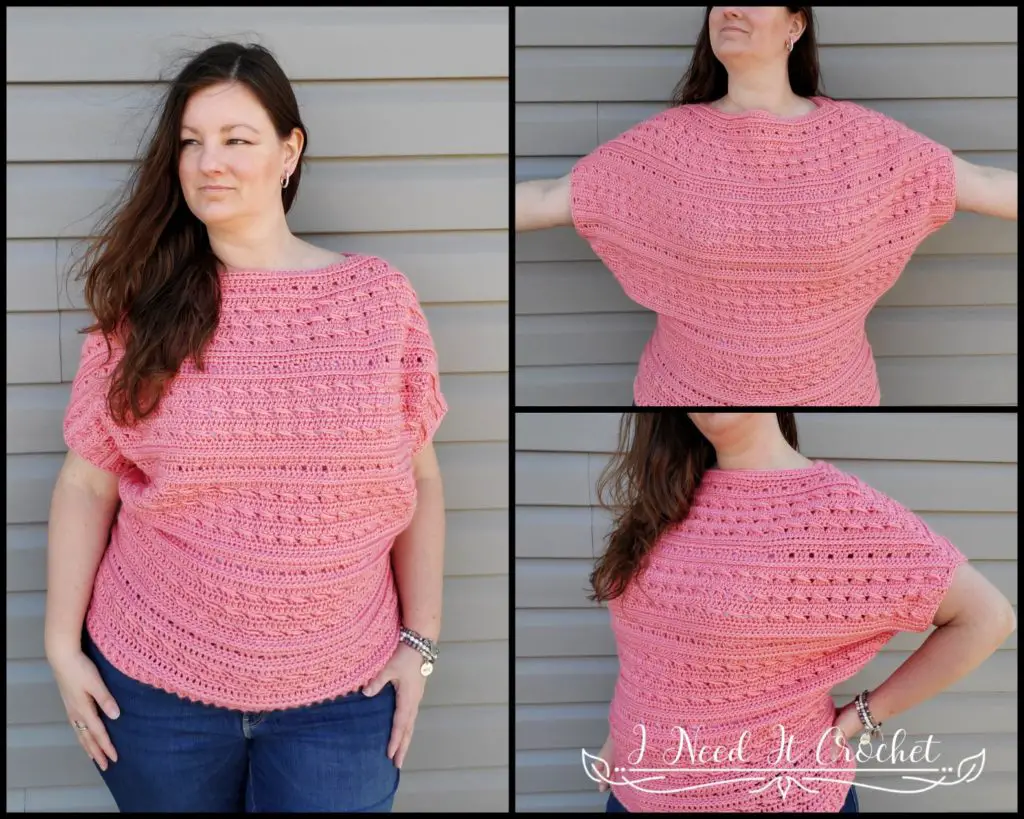
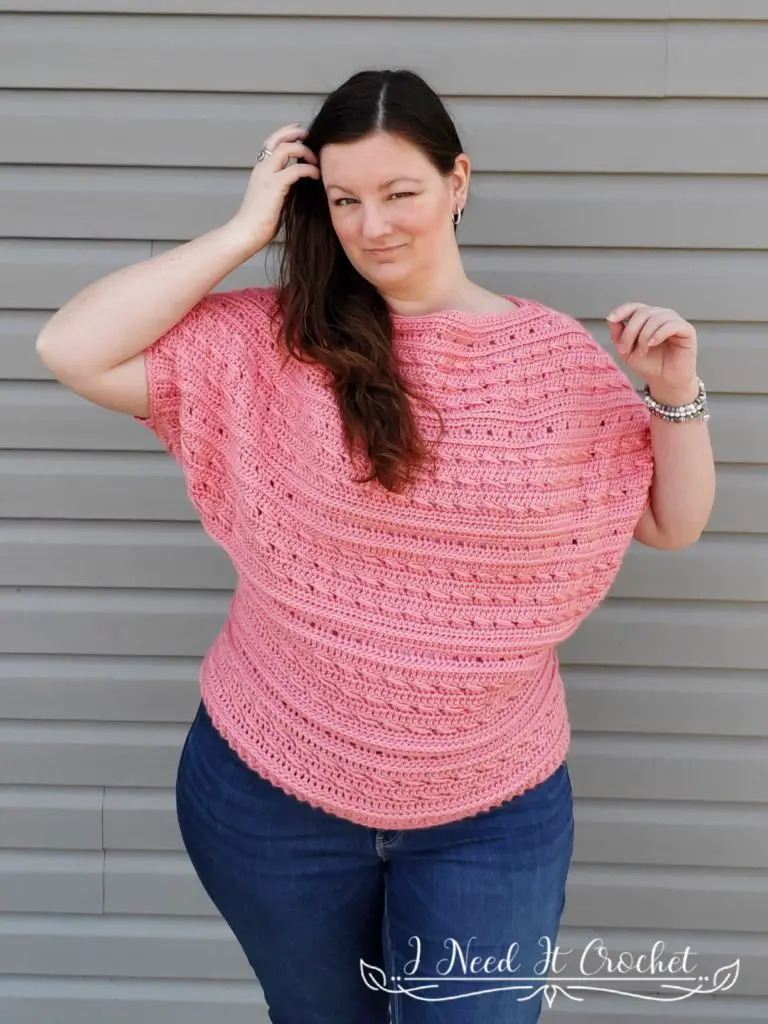
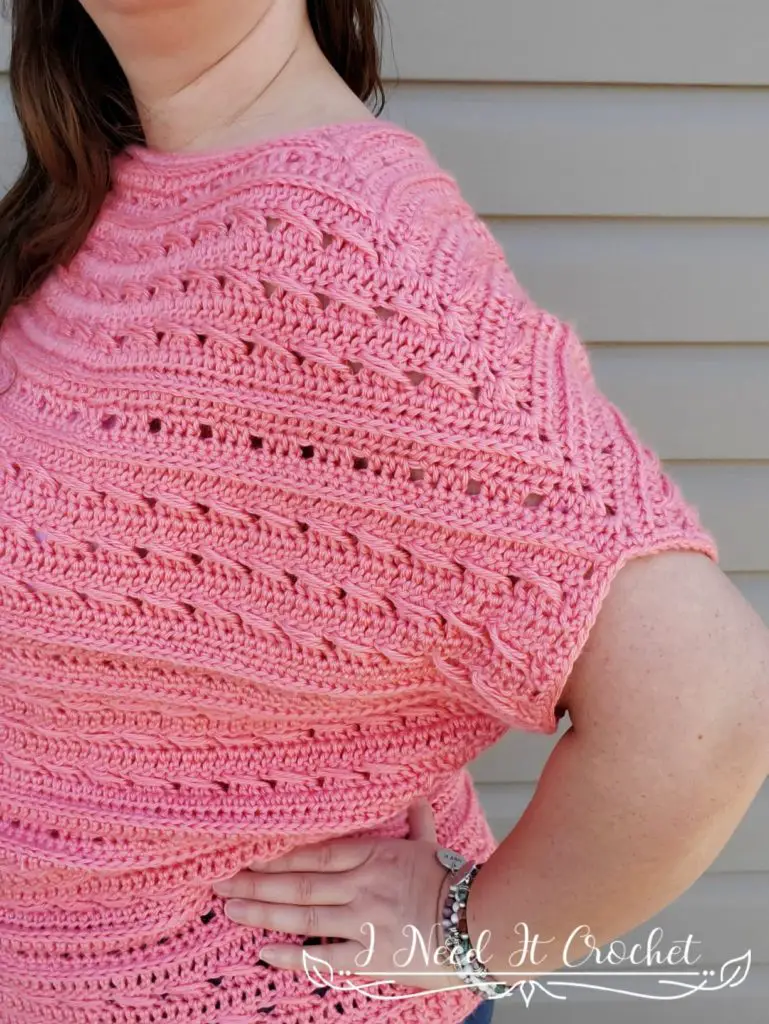
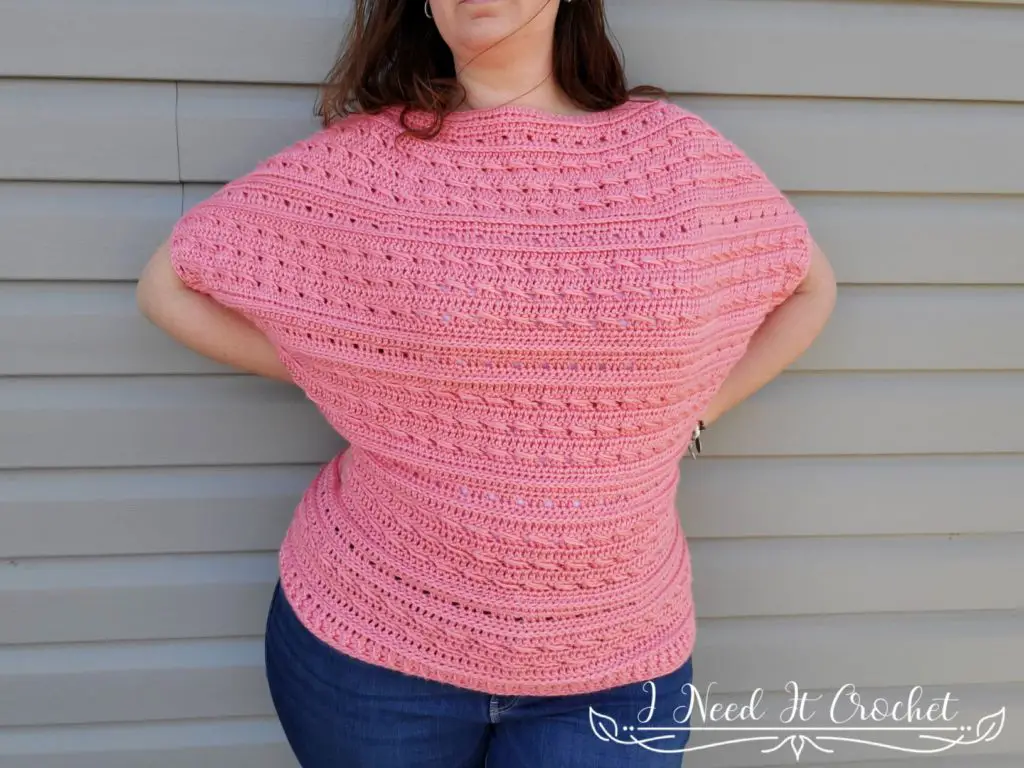
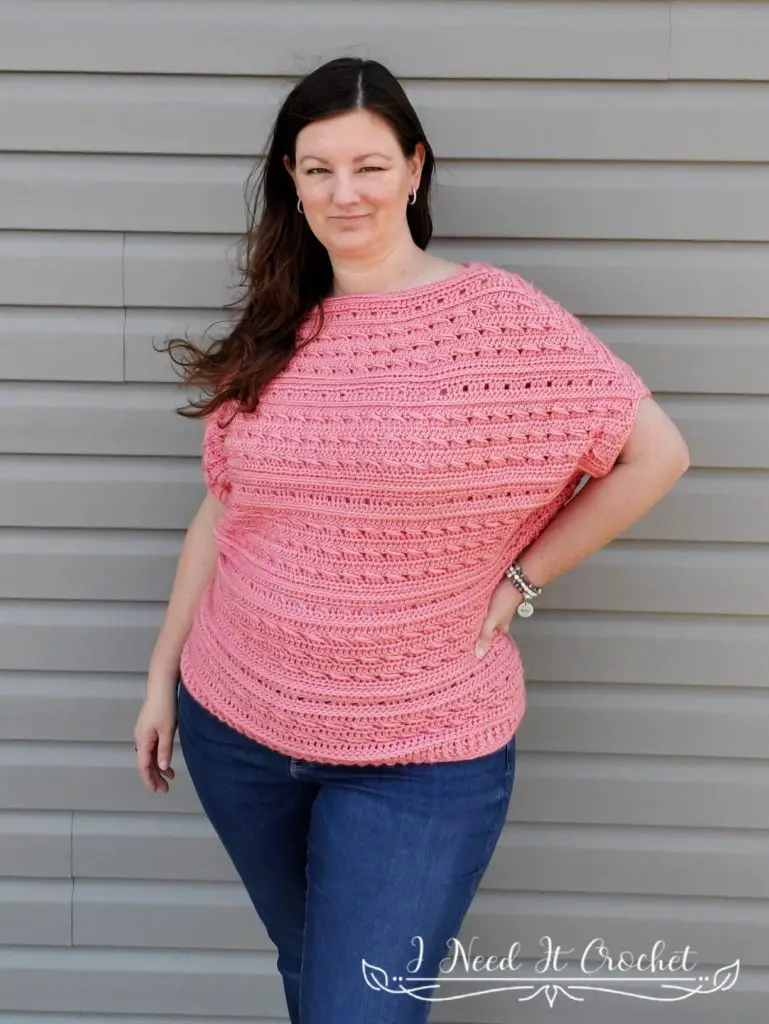
I enjoy winter, but by the time spring rolls around, I am more than ready to ditch the layers and add some brighter colours to my life. This tee is my welcome sign to spring. The subtle venting and the short batwing sleeves make this top light and cool without being completely see-through. I designed it with a #4 worsted yarn, but you can easily switch to a #3 DK for an even lighter feel.
The design features the Cable Stitch. Not to be confused with crochet cables, this stitch is similar to the crossed double crochet. It is very easy to do and coordinates well with the other stitches in this project.
Breezy Batwing Tee – Free Crochet Top Pattern
Finished Sizes:
Instructions given to fit size X-small; changes for small, medium, large, X-large, 2X-large, 3X-large, 4X-large and 5X-large are in ()
XS (S, M, L, XL, 2XL, 3XL, 4XL, 5XL)
To Fit Bust Size: 28” (32”, 36”, 40”, 44”, 48”, 52”, 56”, 60”)
Bottom Band Circumference: 28” (32”, 36”, 40”, 44”, 48”, 52”, 56”, 60”)
Finished Length: Customizable.
Materials:
I used Caron Simply Soft, which is 100% Acrylic.
Any yarn of similar weight would work.
Approximately 1100 (1100, 1200, 1300, 1400, 1500, 1600, 1800, 1800) yds.
5.5 mm Hook
Stitch Markers
Yarn Needle
Scissors
Measuring Tape
Abbreviations:
Rs = Right Side
Ws = Wrong Side
Sk = Skip
Sp = Space
St = Stitch
Yo = Yarn Over
Ss = Slip Stitch
Ch = Chain
Sc = Single Crochet
Hdc = Half Double Crochet
Dc = Double Crochet
Hdc2tog = Half Double Crochet 2 Together
Dc2tog = Double Crochet 2 Together
Fpdc = Front Post Double Crochet
Bpdc = Back Post Double Crochet
Gauge:
See gauge swatch instructions below.
Notes:
Ch1 and ch2 at the beginning of a row is never considered a stitch.
Ch3 at the beginning of a row is considered a dc.
A ch1 between sts is always considered a stitch.
The 1st stitch is always the stitch that contains the starting chain (unless otherwise noted).
A Cable Stitch counts as 4 sts.
The model above (that’s me) has a 42” bust and is wearing a size L.
Gauge Swatch
Using a 5.5 mm hook:
- Ch20. Dc in the 4th ch from hook and each ch across. Turn. – 18 st
- Ch3. Cbl across until there is only 1 st left unworked. Dc in last st. Turn. – 18 st
- Ch3. Dc in next st and each st across. Turn. – 18 st
Repeat rows 2 & 3 until you have a total of 7 rows. Your swatch should measure 4 ½” wide x 4” tall.

Breezy Batwing Tee – Free Crochet Top Pattern
Instructions
This crochet top is worked seamlessly from the top down. In Section 1, we will work the neck, shoulders, and tops of the sleeves in the round, forming a large pinched oval shape. Then in Section 2, we will work the sleeves in rows matching the working stitch pattern. Next in Section 3, we will join the bottom corners of the sleeves and begin working in the round once again, making decreases with each round. Once we have reached the desired bottom circumference, we will move on to Section 4, working evenly until we have the desired length. Lastly, we will add the bottom band and a simple finishing edge to the neck and arm holes. Figure 1 below illustrates the different Sections.
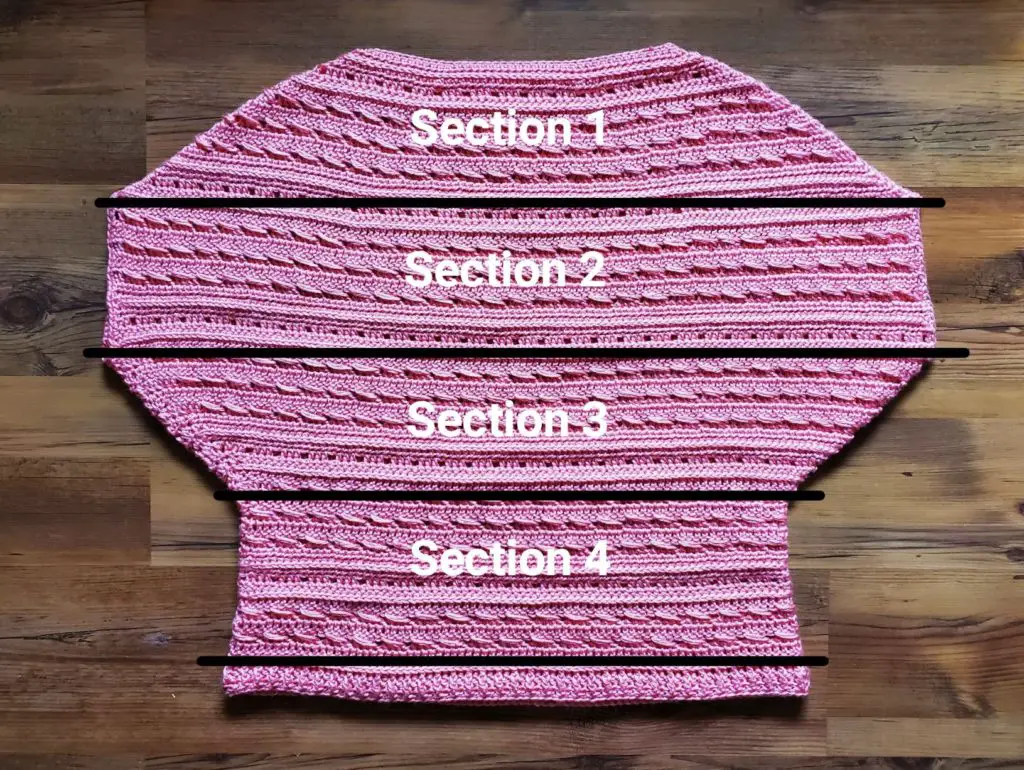
Figure 1
Section 1 – Increase Rounds
In this section, we will make a large chain and join the ends to form a loop. Then, we will work from the neck down, making large increases. This section forms the neck, the shoulders, and the tops of the sleeves.
With 5.5 mm hook (or the hook used to achieve gauge), ch88. Ss to 1st ch to form a ring.
- (Wrong Side) Ch1. 2hdc in 1st ch. *Hdc in next 13 ch. 2hdc in next ch. Hdc in next 14 ch. 2hdc in next ch. Hdc in next 13 ch. 2hdc in next ch. Ch1. ** 2hdc in next ch. Repeat from * to **. Ss to join to 1st st. Turn. – 96 st + 2 ch1 corners
- (Right Side) Ss loosely into the next ch1 sp. Ch1. Work 2hdc in ch1 sp. Hdc in next st and each st across to the next ch1. (2hdc, ch1, 2hdc) in ch1 sp. Hdc in next st and each st across to the next ch1. 2hdc in ch1 sp. Ch1. Ss to join to 1st st. Turn. – 104 st + 2 ch1 corners
- Ss loosely into the next ch1 sp. Ch1. Work 2 hdc in ch1 sp. * Working in 3rd LO: Hdc in next 16 sts. 2hdc in next st. Hdc in next 18 sts. 2hdc in next st. Hdc in next 16 sts. ** (2hdc, ch1, 2hdc in next ch1 sp. Repeat from * to **. 2hdc in next ch1 sp. Ch1. Ss to join to 1st st. Turn. – 116 st + 2 ch1 corners
- Ss loosely into next ch1 sp. Ch1. Work 2 hdc in ch1 sp. [Hdc in next 2 sts. *Ch1, sk 1 st, hdc in next 3 sts. ** Repeat from * to ** across to next ch1. ] (2hdc, ch1, 2hdc) in next ch1 sp. Repeat from [ to ]. 2hdc in next ch1 sp. Ch1. Ss to join to 1st st. Turn. – 124 st + 2 ch1 corners
- Ss loosely into next ch1 sp. Ch1. Work 2 sc in ch1 sp. *Sc in next 19 sts (. 2sc in next st. Sc in next 22 sts. 2sc in next st. Sc in next 19 sts. ** (2sc, ch1, 2sc) in next ch1 sp. Repeat from * to **. 2sc in next ch1 sp. Ch1. Ss to join to 1st st. Turn. – 136 st + 2 ch1 corners
- Ss loosely into the next ch1 sp. Ch1. Work 2hdc in ch1 sp. Hdc in next st and each st across to the next ch1. (2hdc, ch1, 2hdc) in ch1 sp. Hdc in next st and each st across to the next ch1. 2hdc in ch1 sp. Ch1. Ss to join to 1st st. Turn. – 144 st + 2 ch1 corners
- Ss loosely into the next ch1 sp. Ch3. Dc in ch1 sp. *Working into 3rd LO: Dc in next 22 sts. 2dc in next st. Dc in next 26 sts. 2dc in next st. Dc in next 22 sts. (2dc, ch1, 2dc) in next ch1 sp. Repeat from * to **. 2dc in next ch1 sp. Ch1. Ss to join to 1st st. Turn. – 156 st + 2 ch1 corners
- Ss loosely into next ch1 sp. Ch3. Dc in ch1 sp. *Dc in next st. Cbl across until there is only 1 st left before the next ch1. Dc in next st. ** (2dc, ch1, 2dc) in next ch1 sp. Repeat from * to **. 2dc in next ch1 sp. Ch1. Ss to join to 1st st. Turn. – 164 st + 2 ch1 corners
- Ss loosely into next ch1 sp. Ch3. Dc into ch1 sp. *Dc in next 25 sts. 2dc in next st. Dc in next 30 sts. 2dc in next st. Dc in next 25 sts. ** (2dc, ch1, 2dc) in next ch1 sp. Repeat from * to **. 2dc in next ch1 sp. Ch1. Ss to join to 1st st. Turn. – 176 st + 2 ch1 corners
- Ss loosely into next ch1 sp. Ch3. Dc in ch1 sp. *Cbl across to next ch1. ** (2dc, ch1, 2dc) in next ch1 sp. Repeat from * to **. 2dc in next ch1 sp. Ch1. Ss to join to 1st st. Turn. – 184 st + 2 ch1 corners
- Ss loosely into next ch1 sp. Ch3. Dc into ch1 sp. *Dc in next 28 sts. 2dc in next st. Dc in next 34 sts. 2dc in next st. Dc in next 28 sts. ** (2dc, ch1, 2dc) in next ch1 sp. Repeat from * to **. 2dc in next ch1 sp. Ch1. Ss to join to 1st st. Turn. – 196 st + 2 ch1 corners
- Ss loosely into next ch1 sp. Ch3. Dc in ch1 sp. *Dc in next st. Cbl across until there is only 1 st left before the next ch1. Dc in next st. ** (2dc, ch1, 2dc) in next ch1 sp. Repeat from * to **. 2dc in next ch1 sp. Ch1. Ss to join to 1st st. Turn. – 204 st + 2 ch1 corners
- Ss loosely into next ch1 sp. Ch1. 2hdc in ch1 sp. *Hdc in next 31 sts. 2hdc in next st. Hdc in next 38 sts. 2hdc in next st. Hdc in next 31 sts. ** (2hdc, ch1, 2hdc) in next ch1 sp. Repeat from * to **. 2hdc in next ch1 sp. Ch1. Ss to join to 1st st. Turn. – 216 st + 2 ch1 corners
- Ss loosely into the next ch1 sp. Ch1. Work 2hdc in ch1 sp. Hdc in next st and each st across to the next ch1. (2hdc, ch1, 2hdc) in ch1 sp. Hdc in next st and each st across to the next ch1. 2hdc in ch1 sp. Ch1. Ss to join to 1st st. Turn. – 224 st + 2 ch1 corners
- Ss loosely into the next ch1 sp. Ch1. Work 2 hdc in ch1 sp. * Working in 3rd LO: Hdc in next 34 sts. 2hdc in next st. Hdc in next 42 sts. 2hdc in next st. Hdc in next 34 sts. ** (2hdc, ch1, 2hdc in next ch1 sp. Repeat from * to **. 2hdc in next ch1 sp. Ch1. Ss to join to 1st st. Turn. – 236 st + 2 ch1 corners
Sizes XS and S only: Skip rounds 16 – 21, and carry on to Section 2. - Ss loosely into next ch1 sp. Ch1. Work 2 hdc in ch1 sp. [Hdc in next 2 sts. *Ch1, sk 1 st, hdc in next 3 sts. ** Repeat from * to ** across to next ch1. ] (2hdc, ch1, 2hdc) in next ch1 sp. Repeat from [ to ]. 2hdc in next ch1 sp. Ch1. Ss to join to 1st st. Turn. – 244 st + 2 ch1 corners
Size M only: Skip rounds 17 – 21, and carry on to Section 2. - Ss loosely into next ch1 sp. Ch1. Work 2 sc in ch1 sp. *Sc in next 37 sts. 2sc in next st. Sc in next 46 sts. 2sc in next st. Sc in next 37 sts. ** (2sc, ch1, 2sc) in next ch1 sp. Repeat from * to **. 2sc in next ch1 sp. Ch1. Ss to join to 1st st. Turn. – 256 st + 2 ch1 corners
Size L only: Skip rounds 18 – 21, and carry on to Section 2. - Ss loosely into the next ch1 sp. Ch1. Work 2hdc in ch1 sp. Hdc in next st and each st across to the next ch1. (2hdc, ch1, 2hdc) in ch1 sp. Hdc in next st and each st across to the next ch1. 2hdc in ch1 sp. Ch1. Ss to join to 1st st. Turn. – 264 st + 2 ch1 corners
Size XL only: Skip rounds 19 – 21, and carry on to Section 2. - Ss loosely into the next ch1 sp. Ch3. Dc in ch1 sp. *Working into 3rd LO: Dc in next 40 sts. 2dc in next st. Dc in next 50 sts. 2dc in next st. Dc in next 40 sts. (2dc, ch1, 2dc) in next ch1 sp. Repeat from * to **. 2dc in next ch1 sp. Ch1. Ss to join to 1st st. Turn. – 276 st + 2 ch1 corners
Size 2X only: Skip rounds 20 – 21, and carry on to Section 2. - Ss loosely into next ch1 sp. Ch3. Dc in ch1 sp. *Dc in next st. Cbl across until there is only 1 st left before the next ch1. Dc in next st. ** (2dc, ch1, 2dc) in next ch1 sp. Repeat from * to **. 2dc in next ch1 sp. Ch1. Ss to join to 1st st. Turn. – 284 st + 2 ch1 corners
Size 3X only: Skip round 21, and carry on to Section 2.
- Ss loosely into next ch1 sp. Ch3. Dc into ch1 sp. *Dc in next 43 sts. 2dc in next st. Dc in next 54 sts. 2dc in next st. Dc in next 43 sts. ** (2dc, ch1, 2dc) in next ch1 sp. Repeat from * to **. 2dc in next ch1 sp. Ch1. Ss to join to 1st st. Turn. – 296 st + 2 ch1 corners
Your project should be the same shape as Figure 2. The number of rows in your project may be different depending on what size you made. Do not bind off.
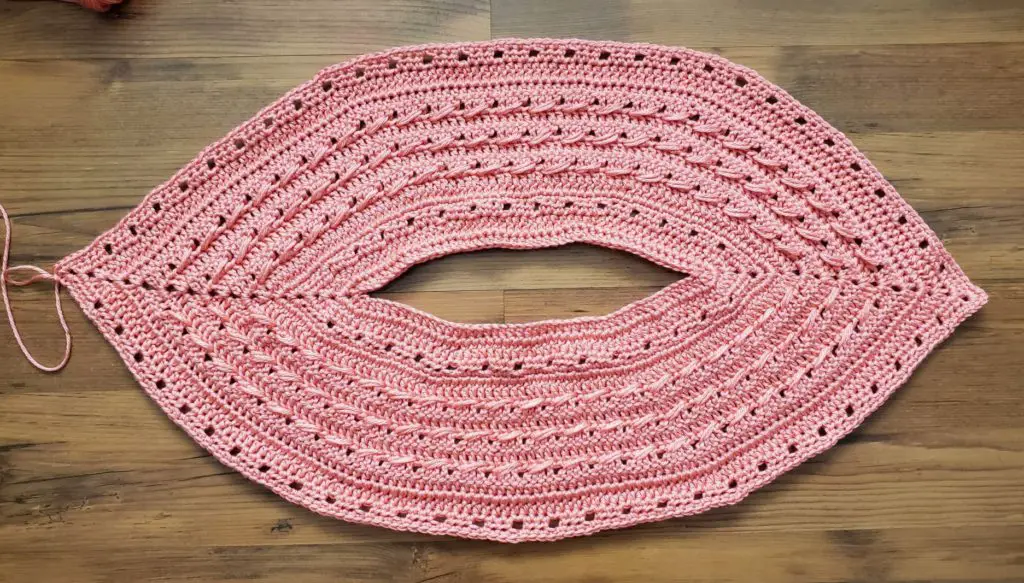
Figure 2
Breezy Batwing Tee – Free Crochet Top Pattern
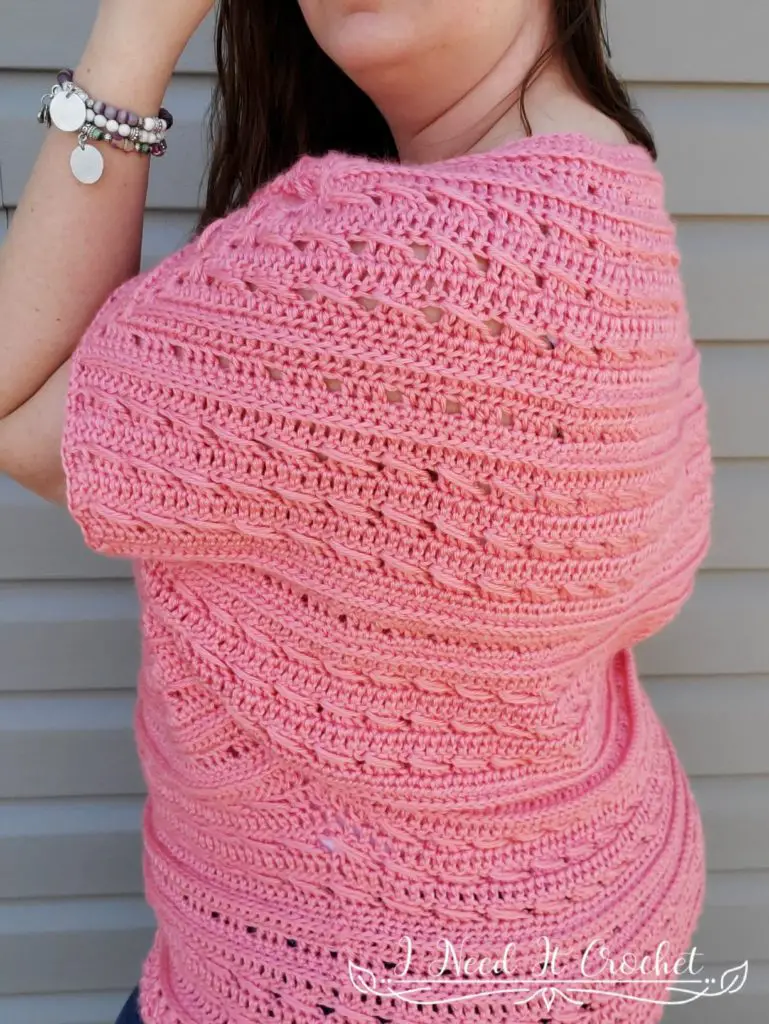
Section 2 – Arm Rows
In this section, we will continue to work downward but now in rows, first working one side of the tee, then the other. This section will add depth to the sleeves as well as form the sleeve openings. Make sure you turned your work at the end of your last round in Section 1. The following rows are numbered to coincide with the round you just finished. If you finished Section 1 on round 15, you will begin with row 16 below. If you finished Section 1 on round 21, you will begin with row 22 below.
Before you begin this section, it would be a good idea to figure out what sleeve size you want. To measure for my sleeves, I used a soft tape measure to find the circumference of my upper arm. I wanted close-fitting sleeves, so I chose the sleeve size that was closest to my measurement (12”).
Each row below will add 1 inch to your sleeve circumference. For example, if you want 8” sleeves, you will work 8 rows. If you want 10” sleeves, you will work 10 rows. And so on. Once you have worked your first row, you will continue until you have reached your desired amount of rows. If you get to row 27 and you haven’t worked enough rows yet, you will start repeating from row 16 until you have the right number of rows.
Ss loosely into the next ch1 sp. Ss into next st.
- Ch1. Hdc in 1st 3 (3, 3, 2, 2, 3, 3, 2, 2) sts. *Ch1, sk 1, hdc in next 3 sts. ** Repeat from * to ** over next 112 (112, 116, 124, 128, 132, 136, 144, 144) sts. Ch1, sk 1 st, hdc in next 2 (2, 2, 1, 1, 2, 2, 1, 1) sts. Turn. – 118 (118, 122, 128, 132, 138, 142, 148, 148) st
- Ch1. Sc in 1st st and next 117 (117, 121, 127, 131, 137, 141, 147, 147) sts. Turn. – 118 (118, 122, 128, 132, 138, 142, 148, 148) st
- Ch1. Hdc in 1st st and next 117 (117, 121, 127, 131, 137, 141, 147, 147) sts. Turn. – 118 (118, 122, 128, 132, 138, 142, 148, 148) st
- Ch3. Working in 3rd LO: Dc in next 116 (116, 120, 126, 130, 136, 140, 146, 146) sts. Dc through both loops of next st. Turn. – 118 (118, 122, 128, 132, 138, 142, 148, 148) st
- Ch3. Dc in next 2 (2, 2, 1, 1, 2, 2, 1, 1) sts. Cbl across next 112 (112, 116, 124, 128, 132, 136, 144, 144) sts. Dc in next 3 (3, 3, 2, 2, 3, 3, 2, 2) sts. Turn. – 118 (118, 122, 128, 132, 138, 142, 148, 148) st
- Ch3. Dc in next 117 (117, 121, 127, 131, 137, 141, 147, 147) sts. Turn. – 118 (118, 122, 128, 132, 138, 142, 148, 148) st
- Ch3. Dc in next 2 (2, 2, 1, 1, 2, 2, 1, 1) sts. Cbl across next 112 (112, 116, 124, 128, 132, 136, 144, 144) sts. Dc in next 3 (3, 3, 2, 2, 3, 3, 2, 2) sts. Turn. – 118 (118, 122, 128, 132, 138, 142, 148, 148) st
- Ch1. Hdc in 1st st and next 117 (117, 121, 127, 131, 137, 141, 147, 147) sts. Turn. – 118 (118, 122, 128, 132, 138, 142, 148, 148) st
- Ch1. Hdc in 1st st and next 117 (117, 121, 127, 131, 137, 141, 147, 147) sts. Turn. – 118 (118, 122, 128, 132, 138, 142, 148, 148) st
- Ch1. Hdc in 1st st. Working in 3rd LO: Hdc in next 116 (116, 120, 126, 130, 136, 140, 146, 146) sts. Hdc through both loops of next st. Turn. – 118 (118, 122, 128, 132, 138, 142, 148, 148) st
Once you have worked your desired amount of rows, bind off. Your project should now look similar to Figure 3 below. The number of rows in your project may be different depending on what size you made.
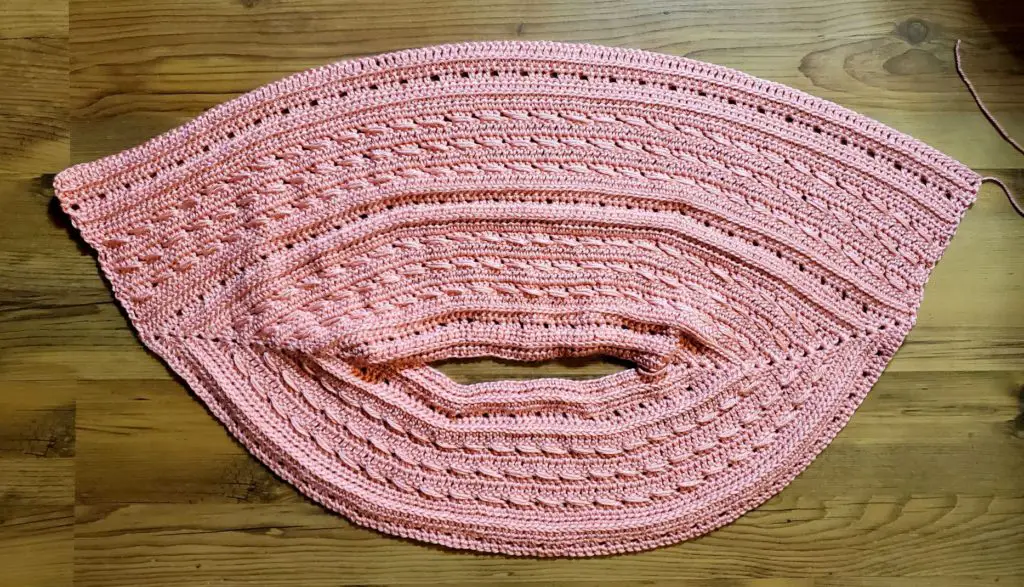
Figure 3
Next, you will repeat Section 2 on the unworked side of your project. Make sure your work has the RS (RS, WS, RS, WS, RS, WS, RS, RS) facing you. (Your work should be facing the same way as it was when you began Section 2 for the first side.) Also, make sure to work the same amount of rows as you did in the first side of Section 2. Do not bind off. Your work should now look similar to Figure 4 below. The number of rows in your project may be different depending on what size you made.
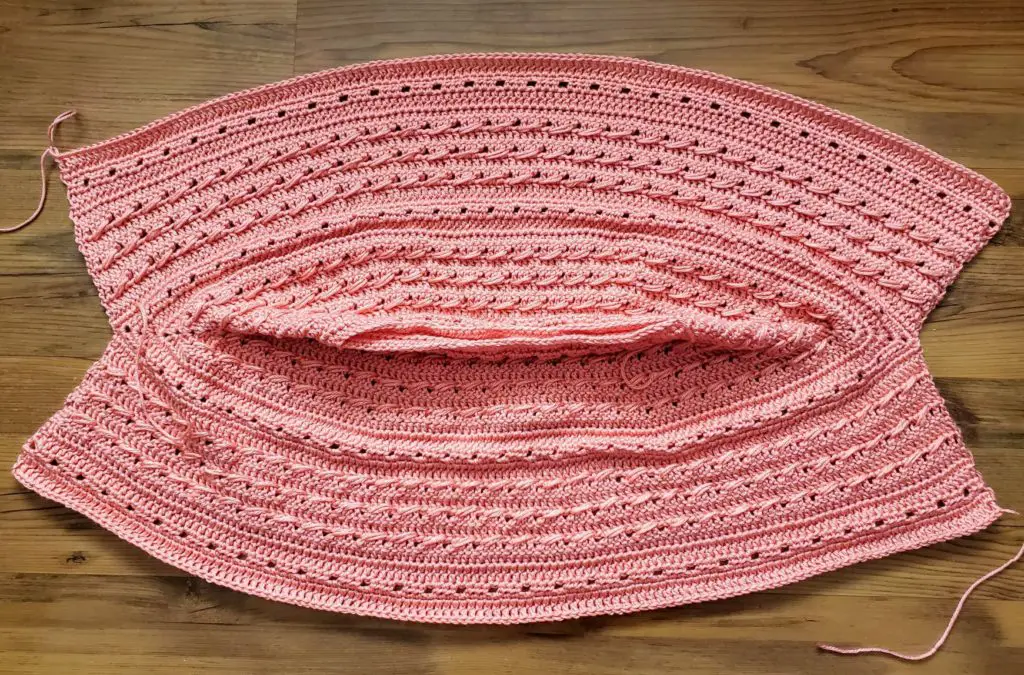
Figure 4
Breezy Batwing Tee – Free Crochet Top Pattern
Section 3 – Decrease Rounds
In this section, we will be working in the round, decreasing until we have achieved the desired bottom circumference. We will begin by joining the bottom corners of the arm holes. Fold your project so that it lays flat as in Figure 5. Use the cut yarn end (pictured on the right in Figure 5) to tie the corners together. I just ran the yarn through the first st and made a knot. Next, place your hook into the working loop (pictured on the left in Figure 5) and slip stitch into the 1st st on the other side. Both corners should now be joined. Turn.
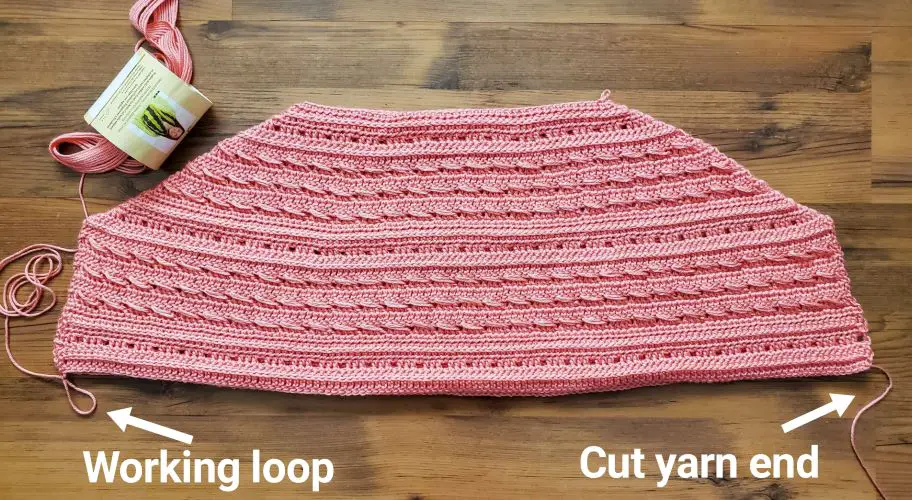
Figure 5
To make Section 3 easier to work, you will be starting each round in the 2nd stitch. This is the stitch immediately to the left of where you placed your slip stitch in the previous row. If you look at Figure 6 below, you will see that I have ch1 and worked my 1st hdc into the next st. When you do this, you must remember that the stitch where you chained from is where you will finish your last stitch. (See Figure 7) This rule will only apply to Section 3.
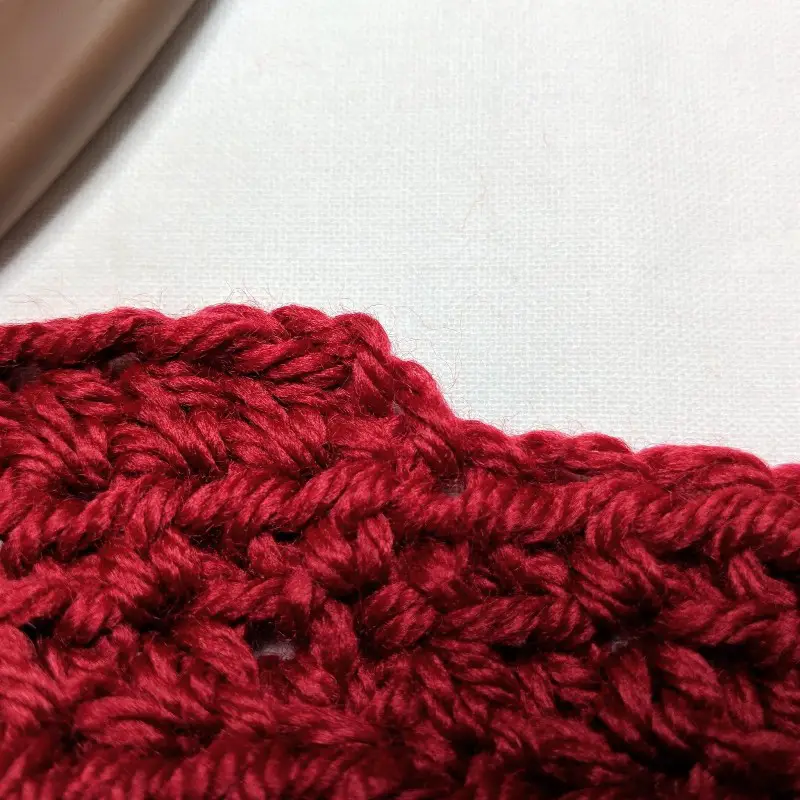
Figure 6

Figure 7
In these rounds, I will instruct you to work a stitch or pattern until there are X number of sts left before the join. This is referring to the knot you formed at the beginning of Section 3.
Set Up Round
The following rounds are numbered to coincide with the row numbers in Section 2. If you finished Section 2 on row 16, work round 17 below. If you finished Section 2 on row 27, begin back at the top of this section and work round 16 below. You will only work 1 of the Set Up Rounds. Then, you will move on to the Decrease Rounds below.
- Work only the instructions marked with your size.
Sizes XS, S, M, 2X, & 3X:
Ch1. Beginning in next st. Hdc2tog 2 times. Hdc in next 3 sts. *Ch1. Sk 1 st. Hdc in next 3 sts. ** Repeat from * to ** until there are 7 sts left before the join. Ch1. Sk 1 st. Hdc in next 2 sts. Hdc2tog 2 times. Place stitch marker in top of last hdc2tog. Hdc2tog 2 more times. Hdc in next 3 sts. Repeat from * to ** until there are only 6 sts left unworked. Ch1. Sk 1 st. Hdc in next 2 sts. Hdc2tog 2 times. Ss to join to 1st st. Turn. – 228 (228, 236, 248, 256, 268, 276, 288, 288) st
Sizes L, XL, 4X, & 5X:
Ch1. Beginning in next st. Hdc2tog 2 times. Hdc in next 2 sts. *Ch1. Sk 1 st. Hdc in next 3 sts. ** Repeat from * to ** until there are 6 sts left before the join. Ch1. Sk 1 st. Hdc in next st. Hdc2tog 2 times. Place stitch marker in top of last hdc2tog. Hdc2tog 2 more times. Hdc in next 2 sts. Repeat from * to ** until there are only 5 sts left unworked. Ch1. Sk 1 st. Hdc in next st. Hdc2tog 2 times. Ss to join to 1st st. Turn. – 228 (228, 236, 248, 256, 268, 276, 288, 288) st
- Ch1. Beginning in next st. Sc2tog 2 times. Sc across until there are 4 sts left before the join. Sc2tog 2 times. Place stitch marker in top of last sc2tog. Sc2tog 2 more times. Sc across until there are only 3 sts left unworked. Sc2tog 2 times. Ss to join to 1st st. Turn. – 228 (228, 236, 248, 256, 268, 276, 288, 288) st
- Ch1. Beginning in next st. Hdc2tog 2 times. Hdc across until there are 4 sts left before the join. Hdc2tog 2 times. Place stitch marker in top of last hdc2tog. Hdc2tog 2 more times. Hdc across until there are only 3 sts left unworked. Hdc2tog 2 times. Ss to join to 1st st. Turn. – 228 (228, 236, 248, 256, 268, 276, 288, 288) st
- Working in 3rd LO: Ch2. Beginning in next st. Dc2tog 2 times. Dc across until there are 4 sts left before the join. Dc2tog 2 times. Place stitch marker in top of last dc2tog. Dc2tog 2 more times. Dc across until there are only 3 sts left unworked. Dc2tog 2 times. Ss to join to 1st st. Turn. – 228 (228, 236, 248, 256, 268, 276, 288, 288) st
- Work only the instructions marked with your size.
Sizes XS, S, M, 2X, & 3X:
Ch2. Beginning in next st. Dc2tog 2 times. Dc in next st. Cbl across until there are 5 sts left before the join. Dc in next st. Dc2tog 2 times. Place stitch marker in top of last dc2tog. Dc2tog 2 more times. Dc in next st. Cbl across until there are only 4 sts left unworked. Dc in next st. Dc2tog 2 times. Ss to join to 1st st. Turn. – 228 (228, 236, 248, 256, 268, 276, 288, 288) st
Sizes L, XL, 4X, & 5X:
Ch2. Beginning in next st. Dc2tog 2 times. Cbl across until there are 4 sts left before the join. Dc2tog 2 times. Place stitch marker in top of last dc2tog. Dc2tog 2 more times. Cbl across until there are only 3 sts left unworked. Dc2tog 2 times. Ss to join to 1st st. Turn. – 228 (228, 236, 248, 256, 268, 276, 288, 288) st
- Ch2. Beginning in next st. Dc2tog 2 times. Dc across until there are 4 sts left before the join. Dc2tog 2 times. Place stitch marker in top of last dc2tog. Dc2tog 2 more times. Dc across until there are only 3 sts left unworked. Dc2tog 2 times. Ss to join to 1st st. Turn. – 228 (228, 236, 248, 256, 268, 276, 288, 288) st
- Work only the instructions marked with your size.
Sizes XS, S, M, 2X, & 3X:
Ch2. Beginning in next st. Dc2tog 2 times. Dc in next st. Cbl across until there are 5 sts left before the join. Dc in next st. Dc2tog 2 times. Place stitch marker in top of last dc2tog. Dc2tog 2 more times. Dc in next st. Cbl across until there are only 4 sts left unworked. Dc in next st. Dc2tog 2 times. Ss to join to 1st st. Turn. – 228 (228, 236, 248, 256, 268, 276, 288, 288) st
Sizes L, XL, 4X, & 5X:
Ch2. Beginning in next st. Dc2tog 2 times. Cbl across until there are 4 sts left before the join. Dc2tog 2 times. Place stitch marker in top of last dc2tog. Dc2tog 2 more times. Cbl across until there are only 3 sts left unworked. Dc2tog 2 times. Ss to join to 1st st. Turn. – 228 (228, 236, 248, 256, 268, 276, 288, 288) st
- Ch1. Beginning in next st. Hdc2tog 2 times. Hdc across until there are 4 sts left before the join. Hdc2tog 2 times. Place stitch marker in top of last hdc2tog. Hdc2tog 2 more times. Hdc across until there are only 3 sts left unworked. Hdc2tog 2 times. Ss to join to 1st st. Turn. – 228 (228, 236, 248, 256, 268, 276, 288, 288) st
- Ch1. Beginning in next st. Hdc2tog 2 times. Hdc across until there are 4 sts left before the join. Hdc2tog 2 times. Place stitch marker in top of last hdc2tog. Hdc2tog 2 more times. Hdc across until there are only 3 sts left unworked. Hdc2tog 2 times. Ss to join to 1st st. Turn. – 228 (228, 236, 248, 256, 268, 276, 288, 288) st
- Working in 3rd LO: Ch1. Beginning in next st. Hdc2tog 2 times. Hdc across until there are 4 sts left before the join. Hdc2tog 2 times. Place stitch marker in top of last hdc2tog. Hdc2tog 2 more times. Hdc across until there are only 3 sts left unworked. Hdc2tog 2 times. Ss to join to 1st st. Turn. – 228 (228, 236, 248, 256, 268, 276, 288, 288) st
Decrease Rounds
As it was with the Set Up Round, the following rounds are numbered to coincide with the round numbers in the Set Up Round. If you worked Set Up Round 16, begin with round 17 below. If you worked Set Up Row 27, begin back at the top of this section with round 16 below. Continue working rounds until you have finished round 27. Then, repeat rounds 16 – 27, working until you have a total of 16 (14, 13, 12, 11, 11, 10, 9, 7), which includes your Set Up Round. . Each round will decrease your stitch count by 8 sts. Once you have completed Section 3, you should have a stitch count of 108 (124, 140, 160, 176, 188, 204, 224, 240) sts.
- Work only the instructions marked with your size.
Sizes XS, S, M, 2X, & 3X:
Ch1. Beginning in next st. Hdc2tog 2 times. Hdc in next 3 sts. *Ch1. Sk 1 st. Hdc in next 3 sts. ** Repeat from * to ** until there are 7 sts left before the stitch marker. Ch1. Sk 1 st. Hdc in next 2 sts. Hdc2tog 2 times. Place stitch marker in top of last hdc2tog. Hdc2tog 2 more times. Hdc in next 3 sts. Repeat from * to ** until there are only 6 sts left unworked. Ch1. Sk 1 st. Hdc in next 2 sts. Hdc2tog 2 times. Ss to join to 1st st. Turn.
Sizes L, XL, 4X, & 5X:
Ch1. Beginning in next st. Hdc2tog 2 times. Hdc in next 2 sts. *Ch1. Sk 1 st. Hdc in next 3 sts. ** Repeat from * to ** until there are 6 sts left before the stitch marker. Ch1. Sk 1 st. Hdc in next st. Hdc2tog 2 times. Place stitch marker in top of last hdc2tog. Hdc2tog 2 more times. Hdc in next 2 sts. Repeat from * to ** until there are only 5 sts left unworked. Ch1. Sk 1 st. Hdc in next st. Hdc2tog 2 times. Ss to join to 1st st. Turn.
- Ch1. Beginning in next st. Sc2tog 2 times. Sc across until there are 4 sts left before the stitch marker. Sc2tog 2 times. Place stitch marker in top of last sc2tog. Sc2tog 2 more times. Sc across until there are only 3 sts left unworked. Sc2tog 2 times. Ss to join to 1st st. Turn.
- Ch1. Beginning in next st. Hdc2tog 2 times. Hdc across until there are 4 sts left before the stitch marker. Hdc2tog 2 times. Place stitch marker in top of last hdc2tog. Hdc2tog 2 more times. Hdc across until there are only 3 sts left unworked. Hdc2tog 2 times. Ss to join to 1st st. Turn.
- Working in 3rd LO: Ch2. Beginning in next st. Dc2tog 2 times. Dc across until there are 4 sts left before the stitch marker. Dc2tog 2 times. Place stitch marker in top of last dc2tog. Dc2tog 2 more times. Dc across until there are only 3 sts left unworked. Dc2tog 2 times. Ss to join to 1st st. Turn.
- Work only the instructions marked with your size.
Sizes XS, S, M, 2X, & 3X:
Ch2. Beginning in next st. Dc2tog 2 times. Dc in next st. Cbl across until there are 5 sts left before the stitch marker. Dc in next st. Dc2tog 2 times. Place stitch marker in top of last dc2tog. Dc2tog 2 more times. Dc in next st. Cbl across until there are only 4 sts left unworked. Dc in next st. Dc2tog 2 times. Ss to join to 1st st. Turn.
Sizes L, XL, 4X, & 5X:
Ch2. Beginning in next st. Dc2tog 2 times. Cbl across until there are 4 sts left before the stitch marker. Dc2tog 2 times. Place stitch marker in top of last dc2tog. Dc2tog 2 more times. Cbl across until there are only 3 sts left unworked. Dc2tog 2 times. Ss to join to 1st st. Turn.
- Ch2. Beginning in next st. Dc2tog 2 times. Dc across until there are 4 sts left before the stitch marker. Dc2tog 2 times. Place stitch marker in top of last dc2tog. Dc2tog 2 more times. Dc across until there are only 3 sts left unworked. Dc2tog 2 times. Ss to join to 1st st. Turn.
- Work only the instructions marked with your size.
Sizes XS, S, M, 2X, & 3X:
Ch2. Beginning in next st. Dc2tog 2 times. Dc in next st. Cbl across until there are 5 sts left before the stitch marker. Dc in next st. Dc2tog 2 times. Place stitch marker in top of last dc2tog. Dc2tog 2 more times. Dc in next st. Cbl across until there are only 4 sts left unworked. Dc in next st. Dc2tog 2 times. Ss to join to 1st st. Turn.
Sizes L, XL, 4X, & 5X:
Ch2. Beginning in next st. Dc2tog 2 times. Cbl across until there are 4 sts left before the stitch marker. Dc2tog 2 times. Place stitch marker in top of last dc2tog. Dc2tog 2 more times. Cbl across until there are only 3 sts left unworked. Dc2tog 2 times. Ss to join to 1st st. Turn.
- Ch1. Beginning in next st. Hdc2tog 2 times. Hdc across until there are 4 sts left before the stitch marker. Hdc2tog 2 times. Place stitch marker in top of last hdc2tog. Hdc2tog 2 more times. Hdc across until there are only 3 sts left unworked. Hdc2tog 2 times. Ss to join to 1st st. Turn.
- Ch1. Beginning in next st. Hdc2tog 2 times. Hdc across until there are 4 sts left before the stitch marker. Hdc2tog 2 times. Place stitch marker in top of last hdc2tog. Hdc2tog 2 more times. Hdc across until there are only 3 sts left unworked. Hdc2tog 2 times. Ss to join to 1st st. Turn.
- Working in 3rd LO: Ch1. Beginning in next st. Hdc2tog 2 times. Hdc across until there are 4 sts left before the stitch marker. Hdc2tog 2 times. Place stitch marker in top of last hdc2tog. Hdc2tog 2 more times. Hdc across until there are only 3 sts left unworked. Hdc2tog 2 times. Ss to join to 1st st. Turn. Once you have worked the proper amount of decrease rounds (as outlined in the instructions under the Decrease Rounds heading), continue on to Section 4. Make sure you remember to turn at the end of your last round. Do not bind off.
Breezy Batwing Tee – Free Crochet Top Pattern
Section 4 – Work Even To Length
In this section, we will work the stitch pattern evenly until we have achieved the desired length minus 1 ½”. To measure myself for desired length, I measure from the top of my shoulder, down to where I would like the bottom hem to sit. The length of my top is 26”.
As it was with Section 3, the following rounds are numbered to coincide with the round numbers in the Section 3. If you finished Section 3 with round 16, begin with round 17 below. If you finished Section 3 with round 27, begin back at the top of this section with round 16 below.
- Ch1. Hdc in first 3 sts. Ch1. Sk1 st. *Hdc in next 3 sts. Ch1. Sk 1 st. ** Repeat from * to ** around. Ss to join to 1st st. Turn. – 108 (124, 140, 160, 176, 188, 204, 224, 240) st
- Ch1. Sc in 1st st and each st around. Ss to join to 1st st. Turn. – 108 (124, 140, 160, 176, 188, 204, 224, 240) st
- Ch1. Hdc in 1st st and each st around. Ss to join to 1st st. Turn. – 108 (124, 140, 160, 176, 188, 204, 224, 240) st
- Working in 3rd LO: Ch3. Dc in next st and each st around. Ss to join to 1st st. Turn. – 108 (124, 140, 160, 176, 188, 204, 224, 240) st
- Ch3. Dc in next 2 sts. Dc in st before your starting ch3 (1st cbl made). Cbl across next 4 sts and around. Ss to join to 1st st. Turn. – 108 (124, 140, 160, 176, 188, 204, 224, 240) st
- Ch3. Dc in next st and each st around. Ss to join to 1st st. Turn. – 108 (124, 140, 160, 176, 188, 204, 224, 240) st
- Ch3. Dc in next 2 sts. Dc in st before your starting ch3 (1st cbl made). Cbl across next 4 sts and around. Ss to join to 1st st. Turn. – 108 (124, 140, 160, 176, 188, 204, 224, 240) st
- Ch1. Hdc in 1st st and each st around. Ss to join to 1st st. Turn. – 108 (124, 140, 160, 176, 188, 204, 224, 240) st
- Ch1. Hdc in 1st st and each st around. Ss to join to 1st st. Turn. – 108 (124, 140, 160, 176, 188, 204, 224, 240) st
- Working in 3rd LO: Ch1. Ch1. Hdc in 1st st and each st around. Ss to join to 1st st. Turn. – 108 (124, 140, 160, 176, 188, 204, 224, 240) st
Once you have the desired length (minus 1 ½”), move on to the instructions for the Bottom Band.
Bottom Band Of Crochet Summer Top
The bottom band is worked in alternating fpdc and bpdc. Turn your work so that the right side is facing you.
- Ch1. Hdc in 1st st and each st around. Ss to join to 1st st. Turn. – 108 (124, 140, 160, 176, 188, 204, 224, 240) st
- Working in 3rd LO: Ch3. Dc in next st and each st around. Ss to join to 1st st. Turn. – 108 (124, 140, 160, 176, 188, 204, 224, 240) st
- Ch2. Fpdc around 1st st. Bpdc around next st. *Fpdc around next st. Bpdc around next st. ** Repeat from * to ** around. Ss to join to 1st st. Turn. – 108 (124, 140, 160, 176, 188, 204, 224, 240) st
- Ch2. Bpdc around 1st st. Fpdc around next st. *Bpdc around next st. Fpdc around next st. ** Repeat from * to ** around. Ss to join to 1st st. Turn. – 108 (124, 140, 160, 176, 188, 204, 224, 240) st
- Ch1. Sc in 1st st and each st around. Ss to join to 1st st. Bind off. – 108 (124, 140, 160, 176, 188, 204, 224, 240) st
Neck Edge Of Crochet Top
With the right side facing you, join your yarn anywhere on the neck. I find it less noticeable if you join at one of the sides.
- Ch1. Sc in 1st st and each st around. Ss to join to 1st st. Bind off. – 88 st
Sleeve Edges Of Batwing Sleeve Top
With the right side facing you, join your yarn anywhere on the sleeve edge. I find it less noticeable to join at the bottom.
- Ch1. Place 2 sc in the end of each row, working all the way around. Ss to join to 1st st. Bind off. – St count will be your row count x 2.
Weave in your ends, and you’re done!
I hope you love your new crochet top, and I look forward to seeing all of your beautiful pictures on Ravelry!
If you’d like to know when I post new patterns and tutorials, head on over to my Facebook and Instagram and give me a like and a follow!
If you enjoyed The Breezy Batwing Tee – Free Crochet Top Pattern, you may want to check out my other designs!
Breezy Batwing Tee – Free Crochet Top Pattern
And until next time… Happy Hooking! 😉